

 Thanks: 0
 Likes: 0
 Needs Pictures: 0
 Picture(s) thanks: 0
Results 1 to 15 of 34
Thread: Burl cap side table
-
14th December 2009, 10:32 PM #1
 Senior Member


- Join Date
- Jan 2006
- Location
- sydney
- Posts
- 345
 Burl cap side table
So the annual Christmas family pull a name out of the hat and get them a $50 gift came round and I got the mother-in-law.
I was going to get her a t-shift with a photo of me on it with some fitting phrase like "my favourite son in law" but seeing as that's been done before I thought I'd make her the burl cap side table she'd been nagging me for for the past few years. I also saw it as an opportunity to end the whining of the residents from downstairs who want a huge Doug Fir beam laying in the back yard gone.
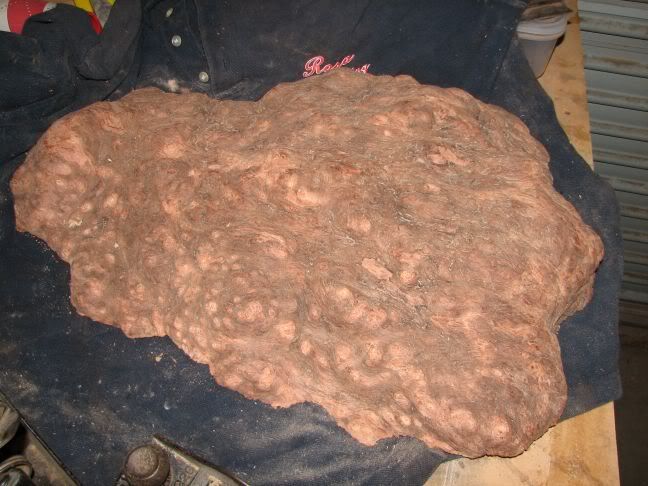
with a budget of $50 I'm pretty limited but I was able to find a pretty nice Coolibah burl at Trend Timber for $48. That left me $2 for a cheeseburger deluxe on the way home.
I've seen lots of natural edge and burl furniture and I find in most cases other than the burl itself the rest looks crap, I'm hoping to break that tradition and make the whole thing look nice.
I've spent quite some time on sketchup tweaking the design, 4 legs at first but that looked clumsy, then 3 legs which looked better, it still looked awkward and I found a few mm difference in the thickness of the legs made the world of difference, then I spent hours - no days adjusting the curves on the legs. I want to achieve the look of the legs wrapping around the burl and encasing it.
Here is a rough representation of the final layout I've come up with:
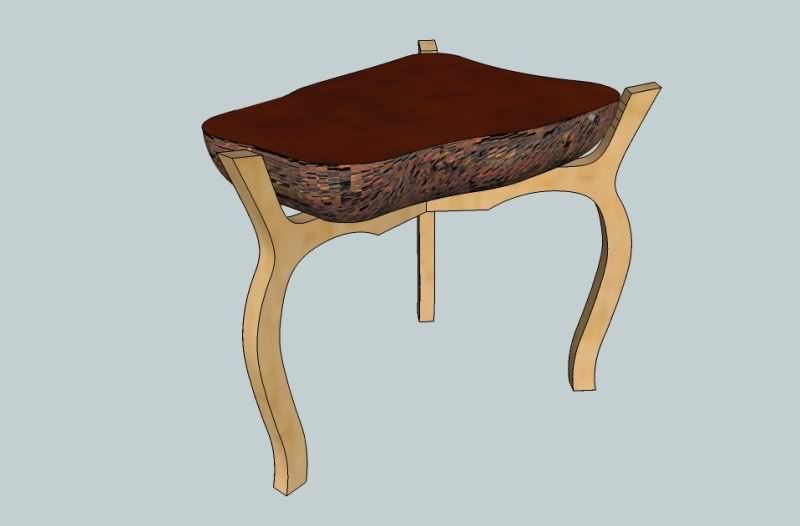
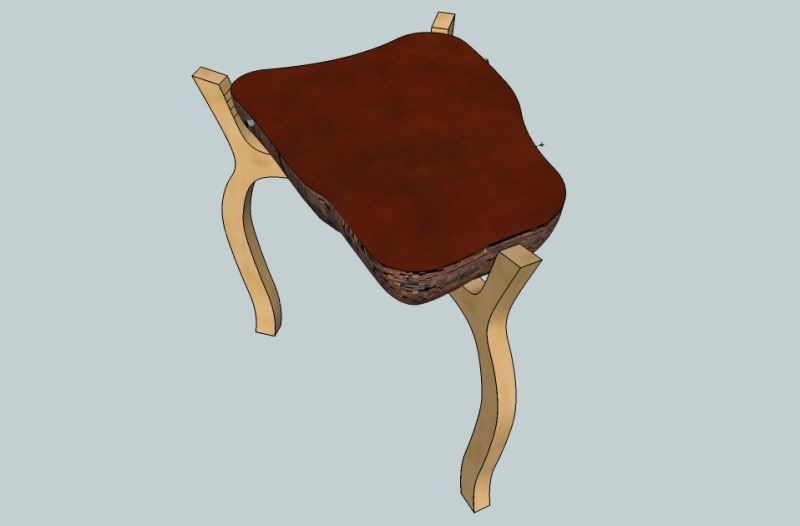
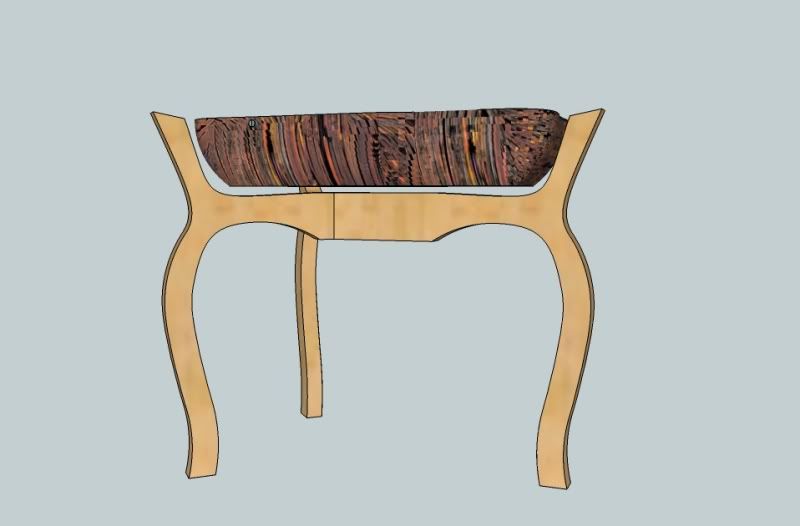
I don't think I've quite nailed it, I think the legs might still be a bit chunky or some shaping with a rasp might help to give curvature but it's a $50 gift so I think she's more than getting her money's worth.
-
14th December 2009 10:32 PM # ADSGoogle Adsense Advertisement
- Join Date
- Always
- Location
- Advertising world
- Posts
- Many
-
14th December 2009, 10:39 PM #2
Woodworker Wannabe
- Join Date
- Jun 2007
- Location
- Brisbane
- Age
- 63
- Posts
- 332
I know what you mean about crappy legs. I'm getting ready for my first side table and have deliberated for some time. I like ideas inspired by George Nakashima - George Nakashima Woodworker, S.A.
Can't wait to see pics of it in progress.
cheers
Derek
-
14th December 2009, 10:46 PM #3
SENIOR MEMBER
- Join Date
- Feb 2007
- Location
- Adelaide
- Posts
- 595
I think it is a quite striking design. One worry I have about you curving the legs some more, or about thinning them some more, is the likelihood of short grain and snapping under that kind of weight. I think the 3 leg design could be very handy for tucking into a corner space. $48 worth of slab and $200 worth of thoughtfulness, I think you are going to make someone happy.
-
14th December 2009, 10:53 PM #4
Senior Member
- Join Date
- Jan 2006
- Location
- sydney
- Posts
- 345
FP & Derek, thanks for the affirmation - I agree in that I don't want to fettle with it any more than that. Derek - I actually got my inspiration for the leg design from the Wood Whisperer, he made a similar style lamp table.
I intend on attaching the legs to the burl with 1/2" stainless steel pins about 12mm below the line of the surface.
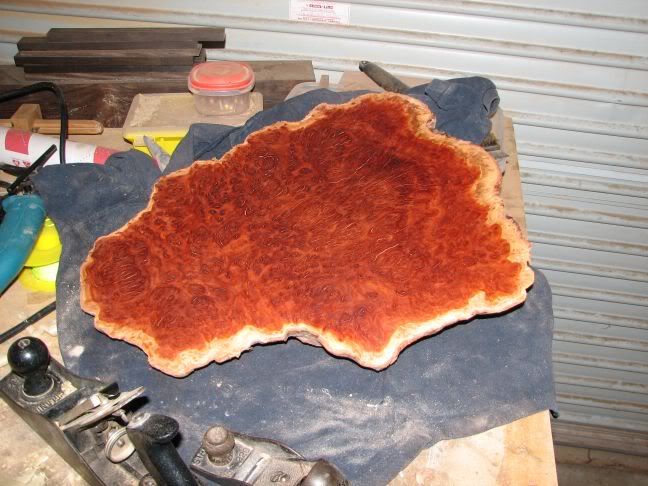
Here are some shots of the prepared burl, again I could have been more diligent with the debarking but it's a $50 gift.
Levelling the chainsawn top and removing the bark is not woodwork it's warfare!
-
14th December 2009, 11:12 PM #5
Senior Member
- Join Date
- Jan 2006
- Location
- sydney
- Posts
- 345
Legs
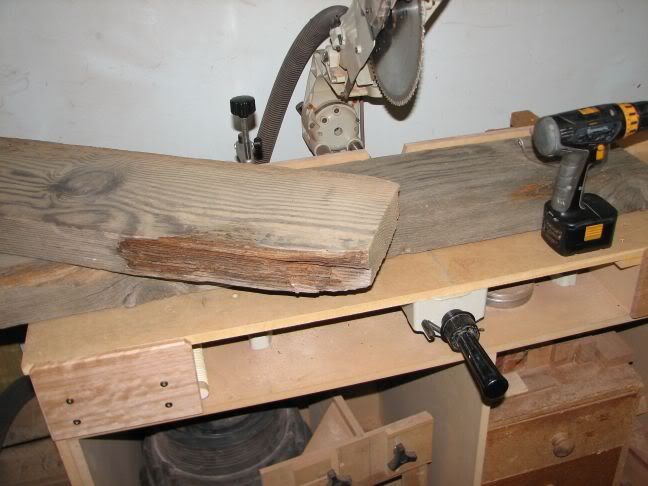
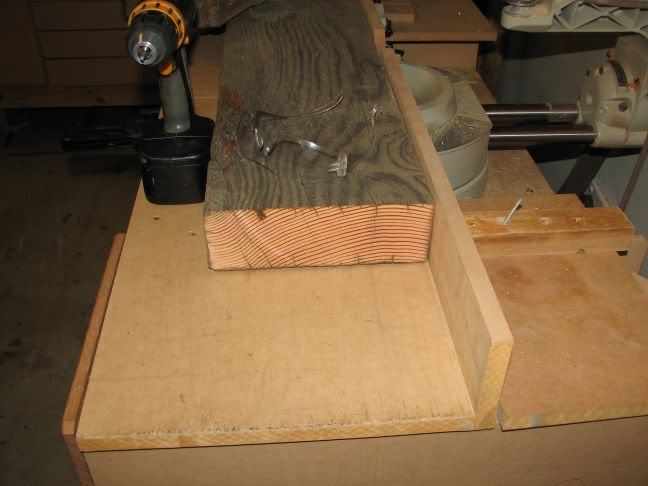
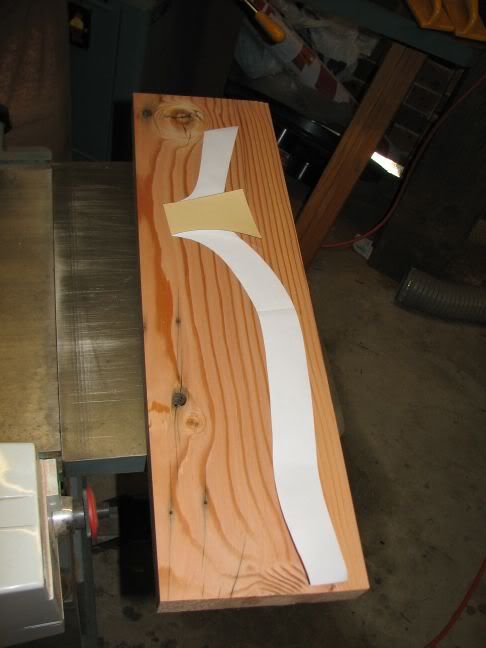
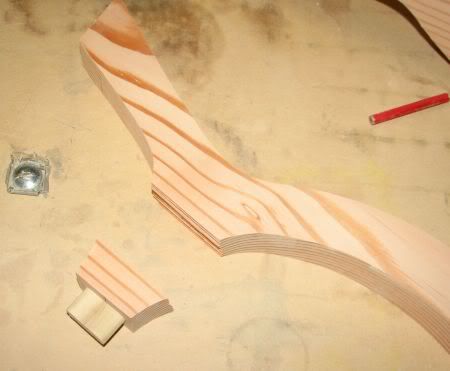
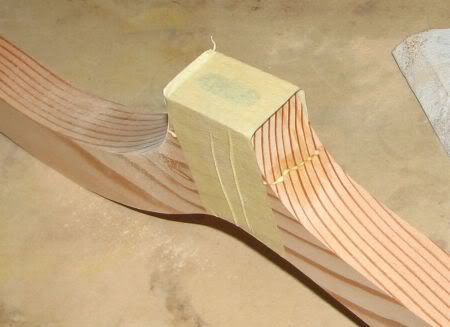
For an inexperienced amateur like me to get those legs right I need something simple and repeatable, when I have more time I can rely on developing skill so the method I have employed is to print my design out on a 1:1 scale then double stick tape it to 4mm mdf and cope it close to the line by hand then sand it to the line and use it as a template on the router table.
Here are some pics of the paper template and some of the Oregon pre & post machining:
-
15th December 2009, 05:44 AM #6
Skwair2rownd
- Join Date
- Nov 2007
- Location
- Dundowran Beach
- Age
- 76
- Posts
- 19,922

I like the design and I think the chunkier legs suit the weight of the top.
Good ideas on the stainless steel pins and the repeatablity problem.
-
18th December 2009, 10:46 PM #7
Senior Member
- Join Date
- Jan 2006
- Location
- sydney
- Posts
- 345
Today is my first day of holidays (I guess it was after I finished work anyway...) so I got home and unpacked my new spiral upcut flush trim bit from Mcjing set it up in the router ready for the first leg.
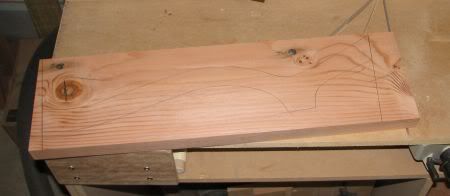
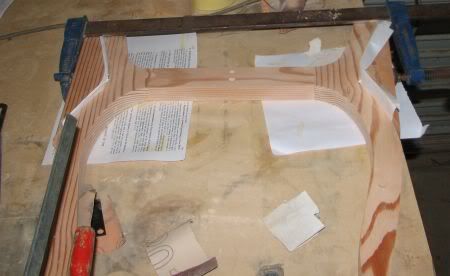
Then I went on with making the template from 16mm MDF. This is harder than I thought especially without a bandsaw. I used a jigsaw then the round end of the belt sander then by hand to smooth out any bumps. Here is the template:
I used the template to mark out the shape on the work-piece and cut as close to the line as I could with the jigsaw:
I then double sided taped the template on and began on the router table:
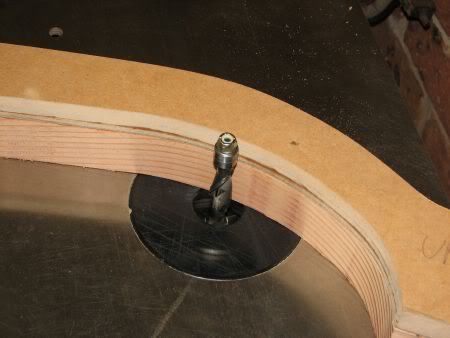
I was getting a satisfactory result but expected better, I made a stupid mistake in that I didn't pay attention to grain direction and I'm working with Oregon so I was getting a pretty substandard finish.
Then I got complacent...
Forgot you should never let end grain hit the router bit when removing 30mm of material at once and working unguarded...
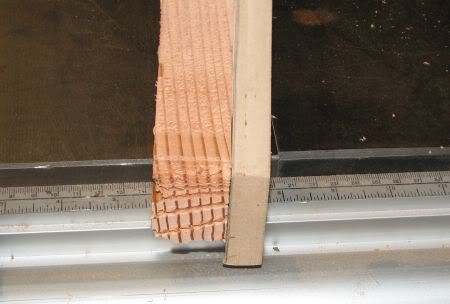
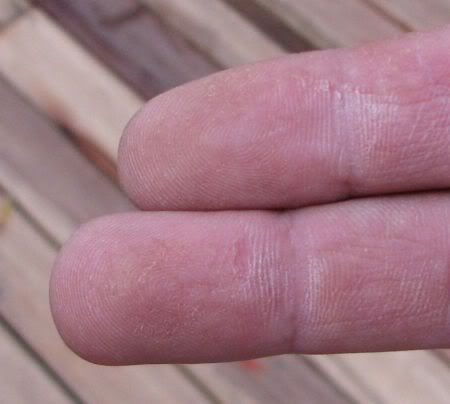
after the workpiece was flung into oblivion my fingers went straight into the spinning unguarded router bit...
And came off almost completely unscathed!
Christmas miracle perhaps?
Glad I still have my fingers, I'll start again tomorrow and be more careful.
-
19th December 2009, 12:02 AM #8
GOLD MEMBER
- Join Date
- Dec 2006
- Location
- Virginia, USA
- Age
- 63
- Posts
- 1,904
Beautiful piece of burl you've got there.
Glad your mishap wasn't worse than it was.  When all is said and done, there is usually a whole lot more said than done.
-
19th December 2009, 04:08 AM #9
Skwair2rownd
- Join Date
- Nov 2007
- Location
- Dundowran Beach
- Age
- 76
- Posts
- 19,922

Ouch!!! Lesson learnt!!!
-
19th December 2009, 06:03 AM #10
 Senior Member
- Join Date
- May 2009
- Location
- tasmania
- Posts
- 116
Ouch indeed!! I try to avoid getting complacent around power tools, but it happens ...
Still, you still have all 10 fingers so no excuse not to get back to work, lol.
Your MIL will be a very happy woman come Christmas morning - That is one very striking piece of furniture you are making for her.
-
20th December 2009, 07:22 PM #11
Senior Member
- Join Date
- Jan 2006
- Location
- sydney
- Posts
- 345
Legs
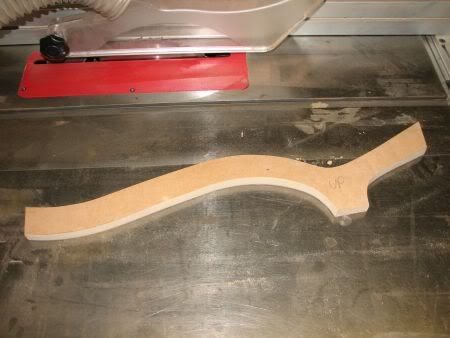
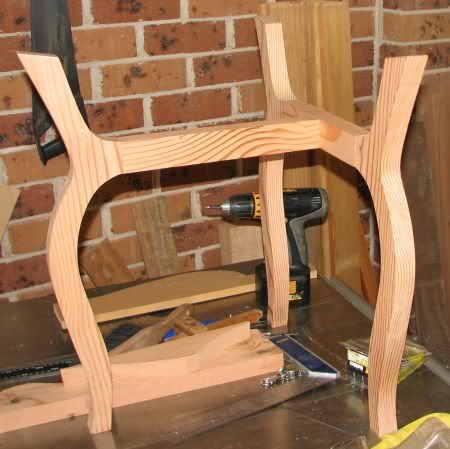
I got back into it and started out on the legs again, I could not salvage the one I damaged so I had to make 3 new ones.
This time I cut much closer to the line with the jigsaw and took far smaller bites at it with the router. I also did the most important thing and left overhang at the ends so the router has no chance of biting into the end grain.
Here are the three finished legs:
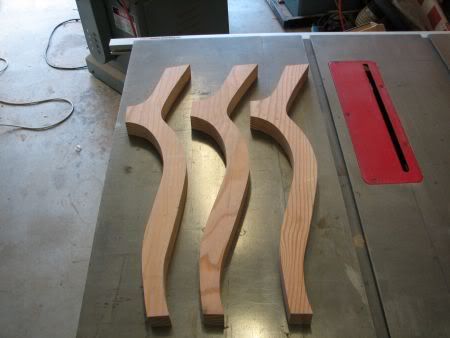
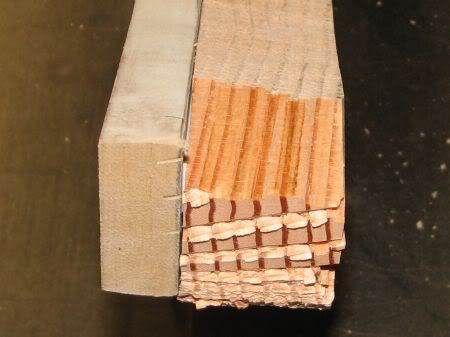
Notice how they taper down at the bottom differently to my template? That's because Oregon is satanwood on the router table and right at the last few cm the bit ripped the bottom section in 2, my fingers were out of the way this time.
I switched everything off and was about to take a picture of the entire inside of the workshop and list it on eBay for $1 but I took a look at the damage and thought to myself "this actually looks better". Cleaned it up and here is the result.
M&T joints cut for the back two legs:
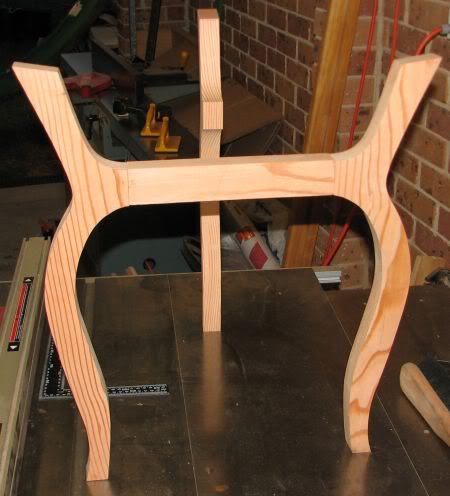
M&T front leg to rail and butt screw to the rear rail:
I will pull the screws out one at a time and replace with a dowel, glue & dry overnight then do the same with the other screw and flush cut them. I don't mind exposed dowels, I think they will do for a $50 project.
-
20th December 2009, 08:02 PM #12
Skwair2rownd
- Join Date
- Nov 2007
- Location
- Dundowran Beach
- Age
- 76
- Posts
- 19,922
-
20th December 2009, 09:04 PM #13
Retro Phrenologist
- Join Date
- Oct 2009
- Location
- Springfield NSW
- Age
- 70
- Posts
- 1,007
Wow! the shapes look great, all really well proportioned.
-
21st December 2009, 07:28 AM #14
Senior Member
- Join Date
- May 2009
- Location
- tasmania
- Posts
- 116
Only four more sleeps - but looking good!!
-
22nd December 2009, 10:42 AM #15
Senior Member
- Join Date
- Jan 2006
- Location
- sydney
- Posts
- 345
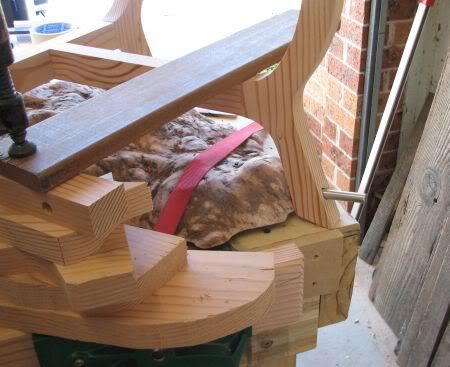
Made a fair bit of progress, but hit a snag on the way - they joys of working with recycled Oregon!
I'll let the pictures do the talking:
SNAP!
Using the Beadlock as a drilling guide:
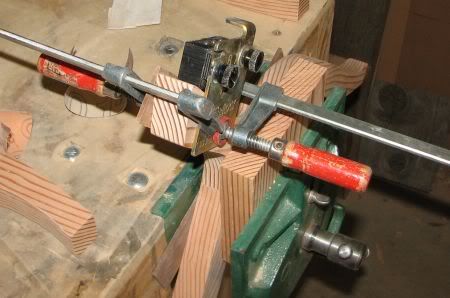
I should just buy some bench hold downs...

 Reply With Quote

Similar Threads
-
An Oak side table.
By Woodwould in forum WOODWORK - GENERALReplies: 78Last Post: 7th December 2011, 01:21 PM -
Not so big side table
By Claw Hama in forum FURNITURE, JOINERY, CABINETMAKING - formerly BIG STUFFReplies: 33Last Post: 2nd October 2009, 11:42 PM -
Side table
By Trace in forum WOODWORK PICSReplies: 2Last Post: 17th February 2006, 11:50 AM -
Side table
By Gumby in forum WOODWORK PICSReplies: 17Last Post: 15th August 2005, 08:21 PM -
Removing blutak from rough side of burl?
By rsser in forum WOODTURNING - GENERALReplies: 8Last Post: 15th March 2005, 08:05 AM
