

 Thanks:
  Likes:
  Needs Pictures:
  Picture(s) thanks:
Results 1 to 15 of 22
-
21st January 2014, 03:35 PM #1
 GOLD MEMBER


- Join Date
- Dec 2007
- Location
- Melbourne
- Posts
- 3,277
 He designing a hanging wall cabinet.
I'm wondering how best to construct the back on a Wall hanging cabinet utilising the french cleat to hang it.

Firstly on the french cleat is it better so have it sitting proud of the rear so the cabinet appears to float off the wall, or have the cleat recessed into the back and sit flush to the wall?
I think sitting flush to the wall looks better.
Sitting proud would allow for a sliding rail system�not sure how beneficial it would be.

My main question is once the cleat is attached to the back panel what is the best way to fit the back panel to the carcass? Considering the load will be directly transferred to this?
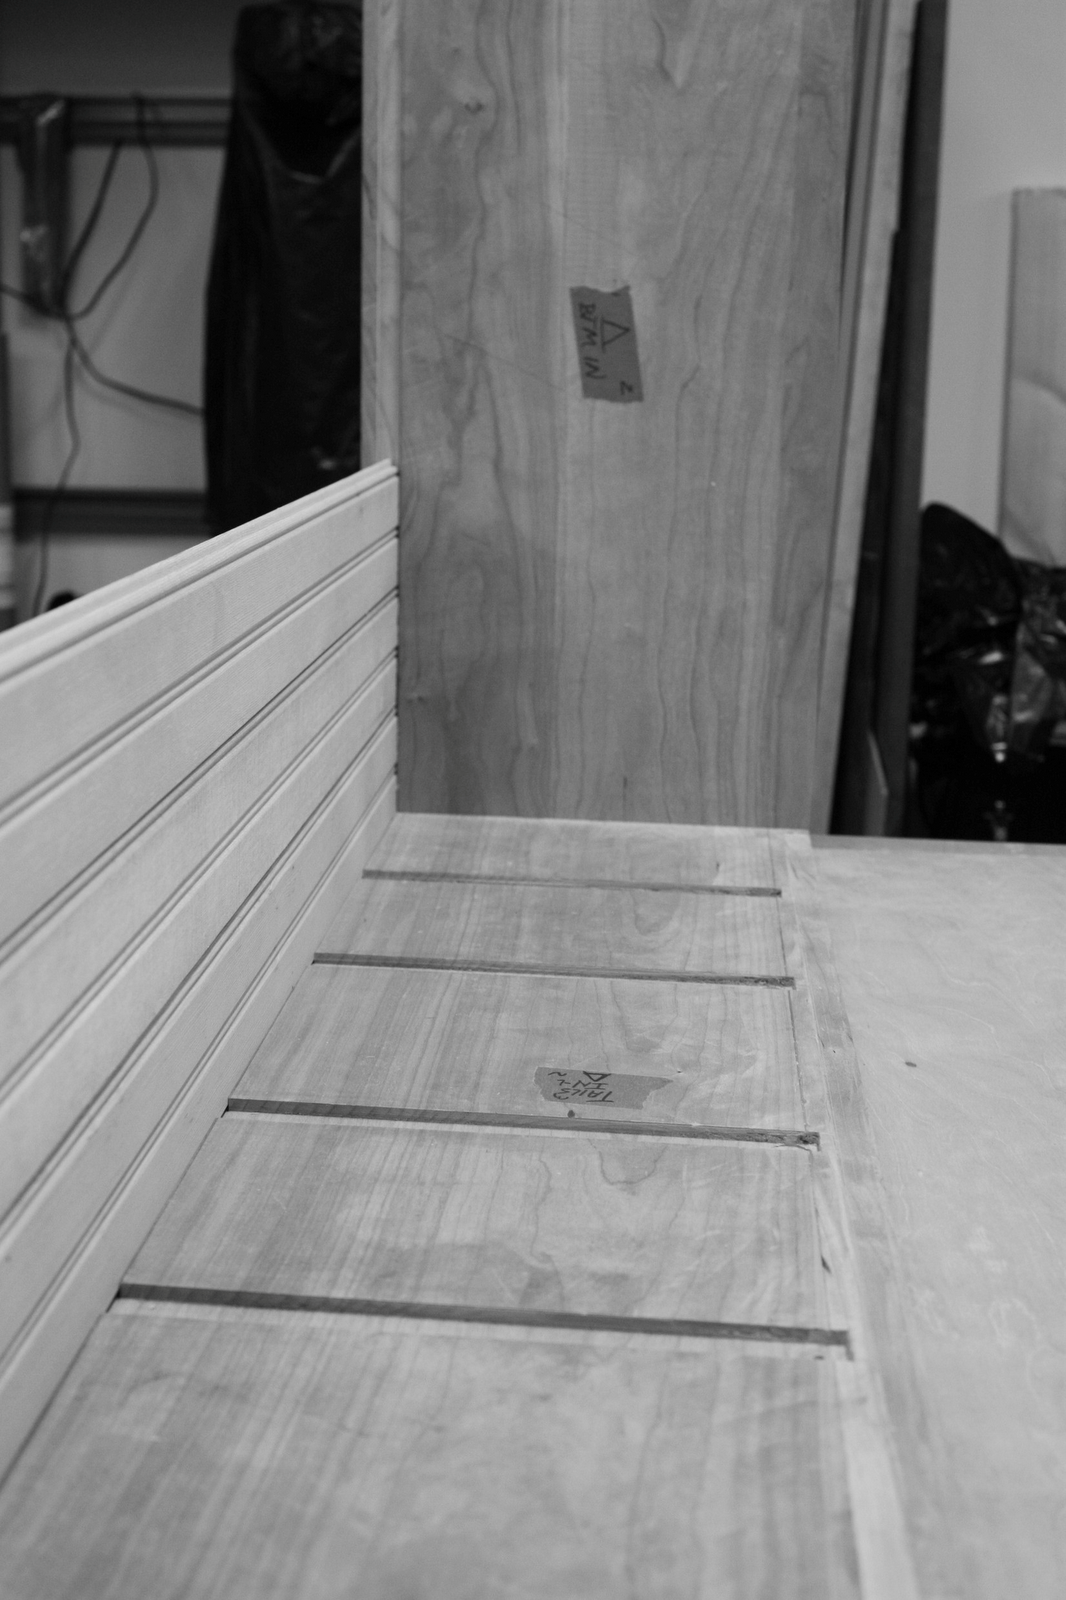
I believe my carcass will be made similar to this.

Should the entire back panel be screwed on?

So it should be something like this, but what holds those back slats to the carcass?????
 �..Live a Quiet Life & Work with your Hands
-
21st January 2014 03:35 PM # ADSGoogle Adsense Advertisement
- Join Date
- Always
- Location
- Advertising world
- Posts
- Many
-
21st January 2014, 03:46 PM #2
Senior Stinkologist
- Join Date
- Nov 2001
- Location
- Parkside - South Australia
- Age
- 45
- Posts
- 3,318
Good question ...... while the concept is easy enough to grasp it isn't often that you see the details of how to execute it on different cabinet types. I think I have even been guilty of telling somebody to use a french cleat arrangement but have never really considered the finer detail of how best to attach it.
Now proudly sponsored by Binford Tools. Be sure to check out the Binford 6100 - available now at any good tool retailer.
-
21st January 2014, 03:56 PM #3
GOLD MEMBER
- Join Date
- Dec 2007
- Location
- Melbourne
- Posts
- 3,277
Another Question, Would offset Knife hinges be strong enough to be able to support the load of the doors and tools hanging on the doors?
I plan to put rare earth magnets into the top face of the doors and in the bottom face of the carcass, the same on the bottom of the door. This should hopefully be enough holding force.�..Live a Quiet Life & Work with your Hands
-
21st January 2014, 04:05 PM #4
GOLD MEMBER
- Join Date
- Dec 2007
- Location
- Melbourne
- Posts
- 3,277
 Originally Posted by Sir Stinkalot

And you still haven't!!
You never seem to get any decent info or pictures of the back of the darn things.�..Live a Quiet Life & Work with your Hands
-
21st January 2014, 04:29 PM #5
 GOLD MEMBER
- Join Date
- May 2012
- Location
- Woodstock (Cowra)
- Age
- 74
- Posts
- 3,381
The short answer to either be proud of the wall or flush comes down to "what effect do you or your client want" is the definitive answer then you tackle the question of the practicalities and methodology of achieving the required effect.
The person who never made a mistake never made anything
Cheers
Ray
-
21st January 2014, 04:48 PM #6
GOLD MEMBER
- Join Date
- Oct 2004
- Location
- Melbourne, Australia.
- Posts
- 1,271
Having in the late fifties lived within a mobile family, all of our kitchen cabinets were hung using French cleats. These cabinets were in the main, made using fruit box timber; the thicker timber from the ends that is.
The usual practice with the types of houses we were staying in, was you had bare walls with feint pencil marks left by previous tenants of where the vertical wall timbers were positioned; otherwise one just used the old nail or screw holes to locate.
I myself use French cleats a bit, especially for heavier stuff, wonderful thing. The idea is to do as your pictures show, use wide flat timber, or man made stuff to make the actual cleats from.
The idea (to my mind anyway) is to spread the load across the wall and cupboard/cabinet to ease the possibility of ripping half the wall covering off if you are hanging a heavy piece.
With regard to the size of the cleats, my own saw till is hanging on a cleat that is approximately 100mm high on both the till and the wall and about 150mm narrower overall than the till. This allows one to use a strong pattern of screws to spread the load and of course secure it. The wall obviously has the mirror version of the till cleat, and within reason the screw pattern.
I would suggest you only use a single cleat near the top, along with an identical sized (thickness wise) spacer near the bottom of the cabinet/cupboard. There is always the possibility of sagging, even slight sagging which often means the bottom cleat ends up holding the whole cabinet, instead of equally. This I have seen happen on plastered walls, not a good long term outcome or look.
The wall cleat can have about 2mm sanded or planed off from the pointy end, not a necessity, but I found it helps to ensure the cleat on the cabinet seats correctly.
My own saw till is made using scrounged solid timber, no help to you there. I always use a very strong back whenever I�m making something I�m going to hang using a French cleat. Essentially, whatever you hang from a French cleat is holding the entire shebang; make it strong.
Mick.
-
21st January 2014, 09:42 PM #7
GOLD MEMBER

- Join Date
- Nov 2011
- Location
- Melbourne
- Posts
- 7,014
I would be attaching the cleat to the side carcass dale.
Near the top and have them sit flat to the wall.
Hinges I would use piano hinges
Not the pretest but they can carry quite a bit of load( think of piano top) .
Sent from my iPhone using Tapatalk 2
-
21st January 2014, 10:12 PM #8
GOLD MEMBER
- Join Date
- Dec 2007
- Location
- Melbourne
- Posts
- 3,277
Originally Posted by rwbuild
I like the flush to the wall look but I was also wondering if flush to the wall could increase the chances of moisture transfer through either rising damp on a brick wall or condensation on a tin shed wall? Or other issues.�..Live a Quiet Life & Work with your Hands
-
21st January 2014, 10:17 PM #9
GOLD MEMBER
- Join Date
- Dec 2007
- Location
- Melbourne
- Posts
- 3,277
Originally Posted by Optimark
Mine is being made with scrounged timber also. I have been given enough 80mm offcuts of Blue Gum and Karri floor boards to do the carcass, so the sides will be Karri and the top and base Blue gum, their will be some offcuts I can use for tool holders. I still need to find something for the back and doors.
I am thinking to use some MDF for the cleats. The single cleat and a spacer at the bottom makes sense.
Optimark how did you attach the back to your cabinets?? Did you just fix the cleat to the back or did you also fix the top and sides?�..Live a Quiet Life & Work with your Hands
-
21st January 2014, 10:20 PM #10
GOLD MEMBER
- Join Date
- Dec 2007
- Location
- Melbourne
- Posts
- 3,277
Originally Posted by Simplicity
I'd rather have 3-4 hinges than a piano hinge. Piano hinges always cheaper the look IMHO.�..Live a Quiet Life & Work with your Hands
-
21st January 2014, 10:21 PM #11
GOLD MEMBER
- Join Date
- May 2012
- Location
- Woodstock (Cowra)
- Age
- 74
- Posts
- 3,381
If you seal the back of it properly, shouldn't be an issue. Originally Posted by DSEL74
I'm with the flush look as well, much more professional and definitely asthetically pleasing.
If your really worried about moister from rising damp on a flush fit, use those small anti slam noise pads they use on cupboard doors, about 6mm-8mm dia and 2mm to 3mm thick, self adhesive, will allow the cabinet to breath but to all intents and purpose, is flush to the wall.The person who never made a mistake never made anything
Cheers
Ray
-
21st January 2014, 10:56 PM #12
GOLD MEMBER
- Join Date
- Nov 2006
- Location
- Rockhampton
- Age
- 62
- Posts
- 2,236
I prefer the flush mount to the wall, looks better I think but for a workshop wall either way especially if you made them sliding it would look like it's meant to be.
As has been said the single cleat at top and spacer at btm, that way you know all the wieght is on the top cleat and the top of the cab will be held firmly against the wall, if however the btm cleat is taking the some or all the load the top can float out from the wall and seem like it's about to fall off. The fixing of the top cleat to side of the cabinet is doing all the work so needs to be a strong joint, a mortice and tenon or something similliar, if you made a through mortice you could wedge the the tenon from the outside.
For the back as individual boards could be set into a rebate around the back edge of cab or some attached moulding run around the inside of the cabinet for the boards to butt up to from the back or it could be made up as a complete frame and panel and inset into the back, however, for ease of glue up I'd have the side on it's flat, put the top, btm and the cleats into that side, then the other side onto the top, btm and cleats, there's a few joints to line up but should be doable, then the back boards could go in from the front with a spot of glue/nail/screw just in the center and then a moulding to cover.
Pete
-
21st January 2014, 11:36 PM #13
GOLD MEMBER
- Join Date
- Dec 2007
- Location
- Melbourne
- Posts
- 3,277
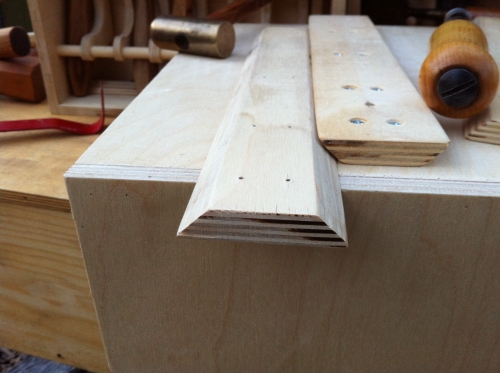
So a nice rebate like this for fixing the back in place is the best way to go, huh?
My main concern is the cleat and back sitting on the wall and the rest of the cabinet smashed on the floor. I want to be confident the back is firmly attached and won't flex or bow and pull out.�..Live a Quiet Life & Work with your Hands
-
22nd January 2014, 07:37 AM #14
SENIOR MEMBER
- Join Date
- Jan 2010
- Location
- Range View, Australia
- Posts
- 656
Glued & screwed to the back. This cupboard has been hanging and defying gravity for 30+ year.
I didn't dust as well as I thought.Cheers, Bill
-
22nd January 2014, 08:48 AM #15
Senior Member
- Join Date
- Aug 2006
- Location
- sunshinecoast
- Age
- 59
- Posts
- 415
Bill I thought you got Steve around to do your dusting

In trying to learn a little about everything,
you become masters of nothing.


 Reply With Quote


Similar Threads
-
Wall storage shelves hanging from french-cleat wall slats
By WandrinAndy in forum THE SHEDReplies: 6Last Post: 9th June 2012, 01:01 AM -
Wall covering for hanging tools etc
By Charles Castle in forum THE SHEDReplies: 12Last Post: 25th June 2011, 04:21 PM -
hanging wall murals temporarily on masonite wall
By jazzah in forum WOODWORK - GENERALReplies: 6Last Post: 21st July 2010, 12:02 AM -
Hanging Project on Wall
By antonylord in forum WOODWORK - GENERALReplies: 5Last Post: 20th July 2009, 01:14 AM -
Hanging a Wall Cabinet
By Slavo in forum WOODWORK - GENERALReplies: 10Last Post: 31st May 2005, 03:11 PM
