

 Thanks: 0
 Likes: 0
 Needs Pictures: 0
 Picture(s) thanks: 0
Results 16 to 30 of 36
-
6th November 2012, 08:51 AM #16
 Deceased 18/12/2020


- Join Date
- Aug 2007
- Location
- Melbourne
- Posts
- 2,178

Hi all,
I was at G Brown Antiques yesterday. I'm pretty certain they don't have any 90o stop hinges or strap hinges as I was after some myself.
Michael Moggy at Veneer Inlay Australia has strap and 90o stop hinges available.
If you want good quality Quadrant hinges, then either Michael or Anton Gerner have them. Anton has Brass and Silver plated ones.
Regards,
Rob
-
6th November 2012 08:51 AM # ADSGoogle Adsense Advertisement
- Join Date
- Always
- Location
- Advertising world
- Posts
- Many
-
6th November 2012, 06:38 PM #17
SENIOR MEMBER
- Join Date
- Oct 2012
- Location
- Australia
- Posts
- 765
 Originally Posted by derekcohen

Also big fan of sheoak and too much thought and effort for that matter :P
PIc of some sheoak destined to become a set of tansu some day......
-
6th November 2012, 07:07 PM #18
Be inspired. Be creative. Be bold.
- Join Date
- Apr 2001
- Location
- Perth
- Posts
- 10,820
I may have to use brass butt hinges as the Jarrah sides are 3/4" thick. However I prefer a strap hinge on the She-oak sides as this would be a better aesthetic, however it is only 1/2" thick. That was not well thought through! I have reduced the She-oak to save weight. Originally Posted by Mr Brush
Regards from Perth
DerekVisit www.inthewoodshop.com for tutorials on constructing handtools, handtool reviews, and my trials and tribulations with furniture builds.
-
6th November 2012, 07:28 PM #19
Class Clown
- Join Date
- Nov 2005
- Location
- Darkest NSW
- Posts
- 3,206
AlexS - thanks for the suggestion re. strap hinges. According to his cattledog, Graeme Brown Antiques has heavy duty strap hinges (13mm wide x various lengths, Item 761, Pg 56), but also some lighter duty ones that are 9mm wide (Item 762). Might be a bit too flimsy for your box though Derek?
LGS - I'd forgotten about Gerner hinges, but will have a look at what he can provide.
The problem with a 13mm wide strap hinge is that you really need a minimum 2mm of timber on each side, taking the wall thickness of a box up to 17mm minimum. A bit heavier than I'd like, but those are nice looking strap hinges.......
-
7th November 2012, 12:16 PM #20
 GOLD MEMBER
- Join Date
- Aug 2011
- Location
- bilpin
- Posts
- 3,559
Derek,
As apprentices we used to get the job of making cases for instruments. Often these cases were of very thin timber, 6mm was not unusual. The cases were often angle sided lids, usually cut in a single plane but sometimes they had square front and back for locks and hinging purposes. In this case, the square edges were cut first, being carefull not to cut any further than the thickness of the timber and the angle cuts were cut last by toeing the saw in at mid point along the sloping line and cutting back each way towards the corners. These cuts were stopped just short of the corners to leave the box intact until all sides had been done. The box was then set in a soft vice and the two uppermost corners cut through to the square cut. Then rotate the box and cut the other two corners in the same way. A dust mould was then fitted to the inside edge of the box, with a rounded top edge to help guide the lid over on closing. The dust mould makes for a very stable piece of kit when the lid is closed and also adds a bit of class. Strap hinges? We would have been shot!
-
11th November 2012, 02:20 AM #21
Be inspired. Be creative. Be bold.
- Join Date
- Apr 2001
- Location
- Perth
- Posts
- 10,820
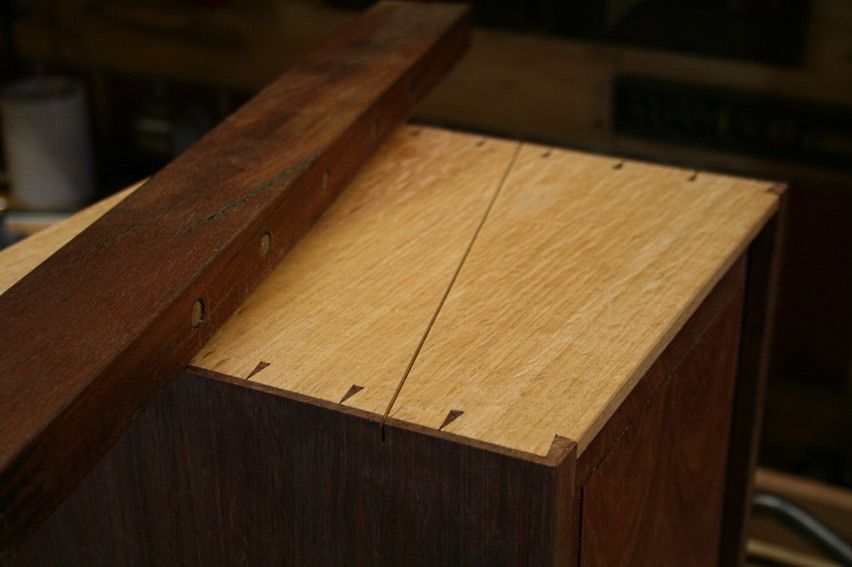
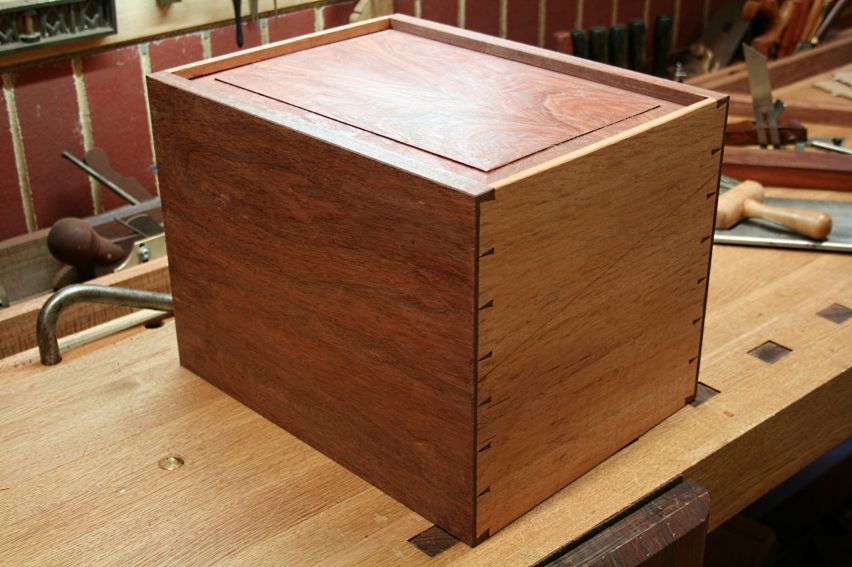
The box needed to be cleaved in two. It always looks straightforward when looking back, but this was a reasonably complex task.
As mentioned ealier, the inspiration for the design came from a campaign writing desk ...
I've been wanting to build one of these writing desks for a few years. Perhaps you have been as well. If so, my experience may help you a little.
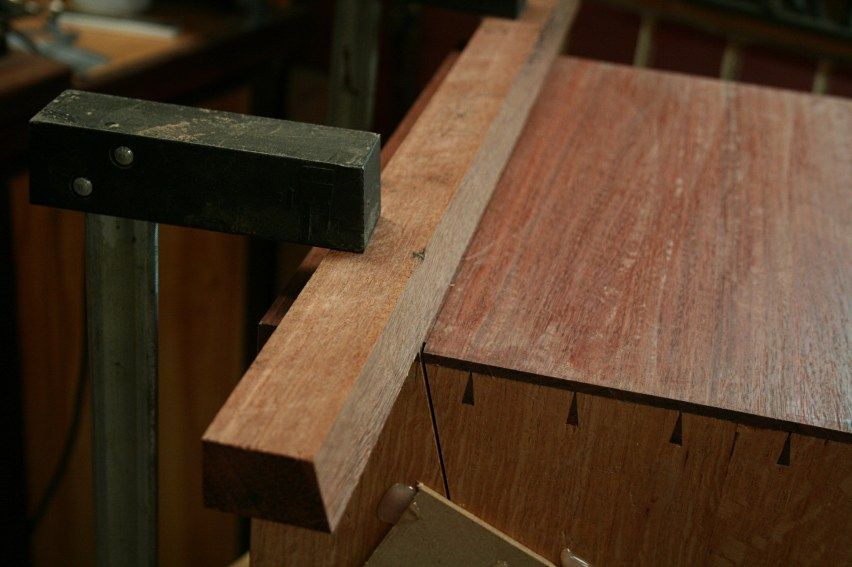
The box had been glued up at the last post to ensure that the sides remained coplanar after sawing off the lid. Now it was time to do this. A template for marking the sides was made out of thin MDF ..
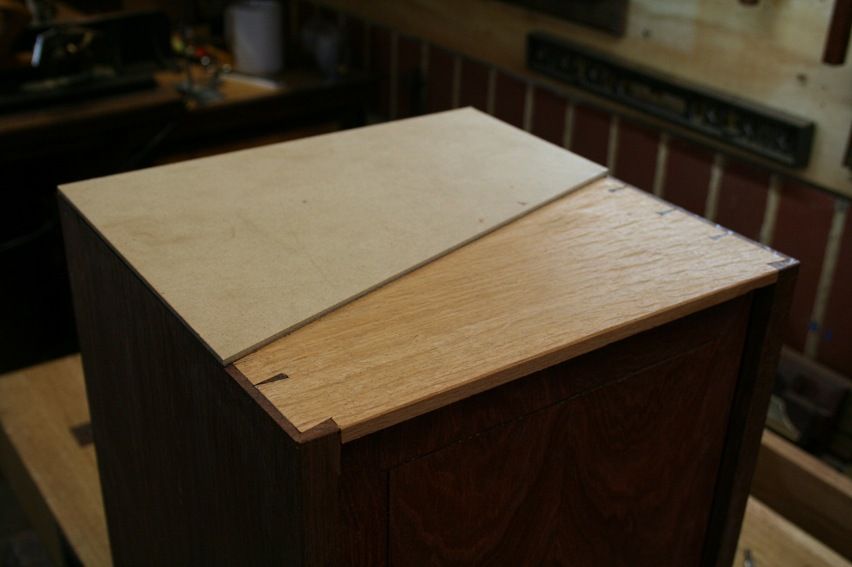
Sawing on the bench was difficult owing to the extra height created. I could have done with a platform, or platform shoes!
I have a guide that does triple duty: one side is angled for siding dovetails, the other is at right angles for a dado plane. I added a few rare earth magnets to the latter for a saw ...
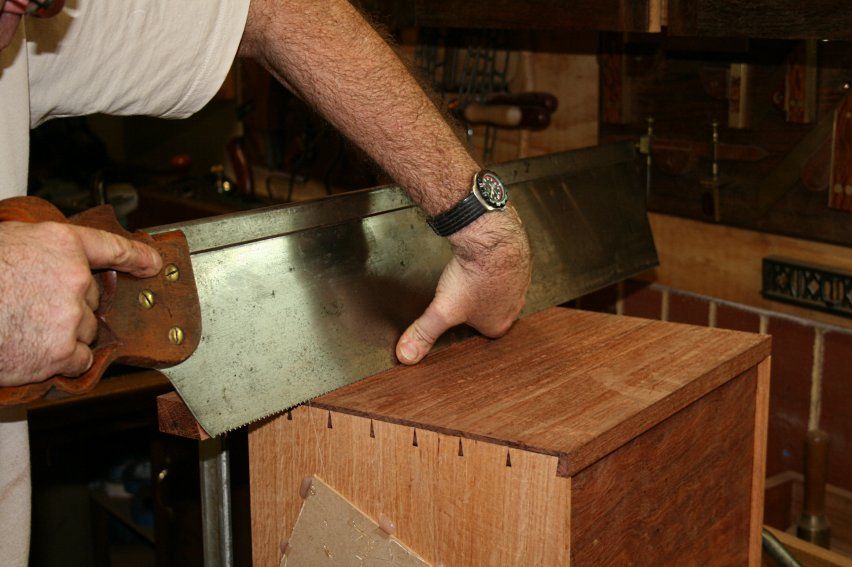
... and brought out "The Beast", a 28" x 5" Disston mitre saw.
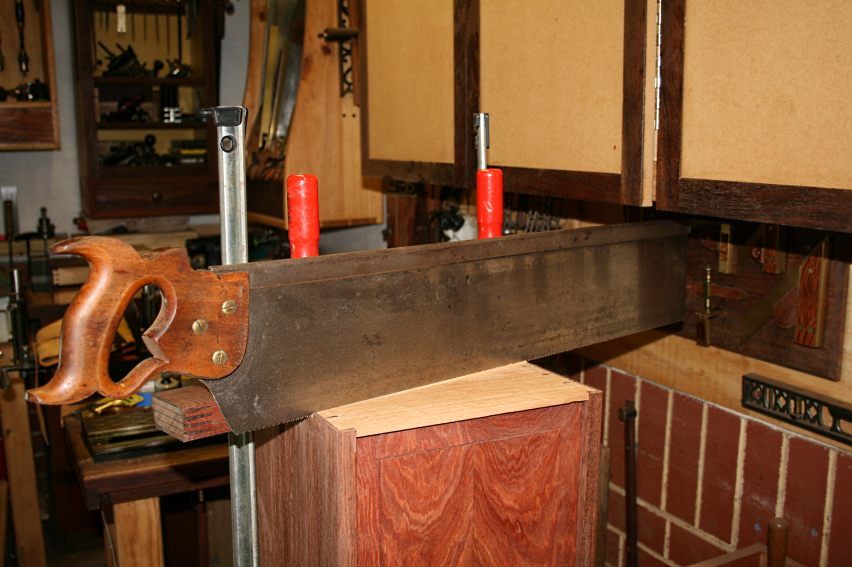
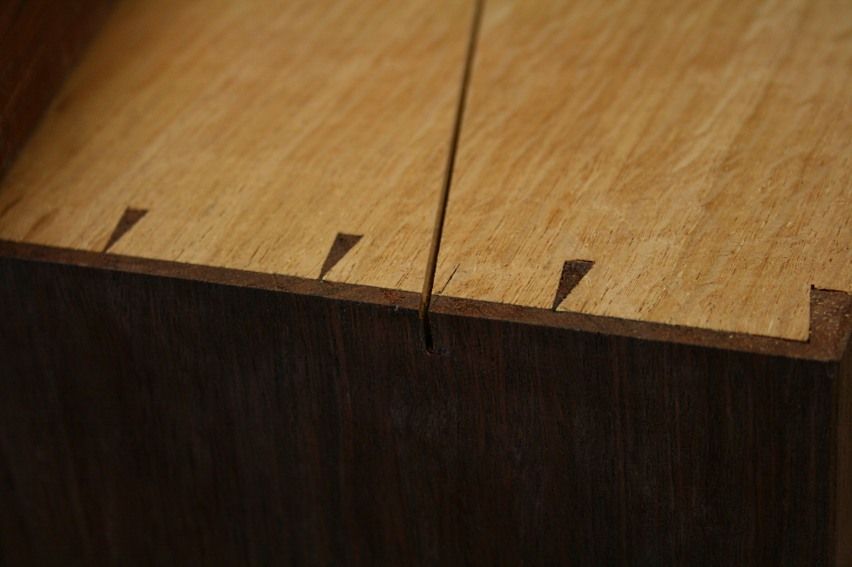
The sides of the box were sawn until just through the side thickness.
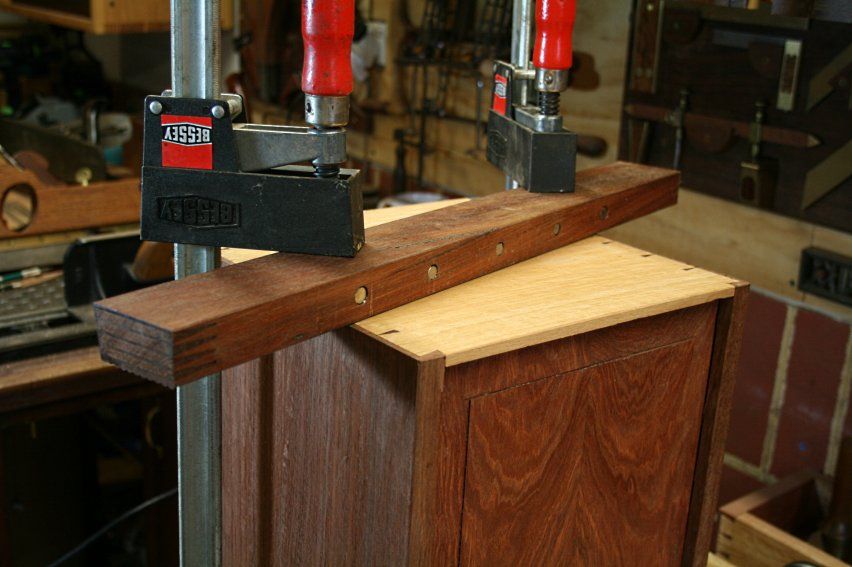
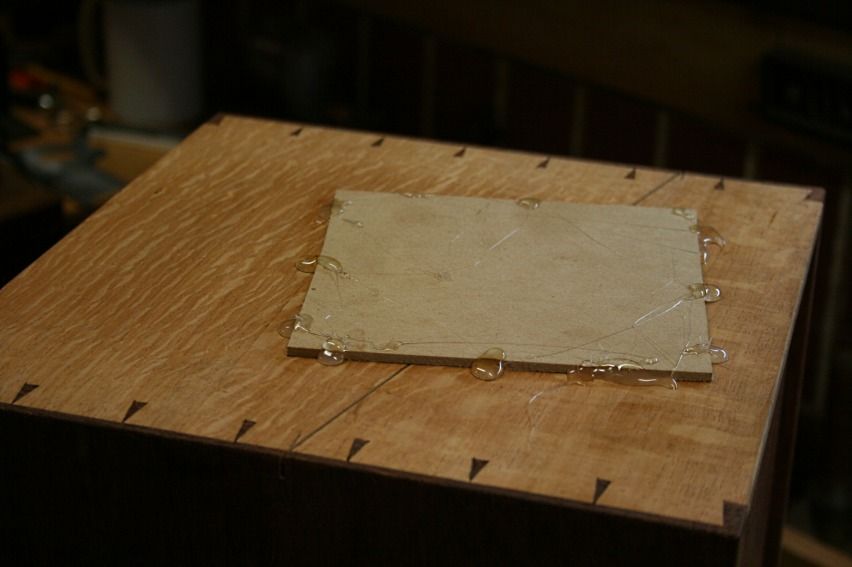
Before sawing the front and back I hot glued scrap MDF over the sides to hold them in place ...
A new guide for the front and rear sides was quickly made up on the tablesaw. This was to maintain the angle of the side saw cuts.
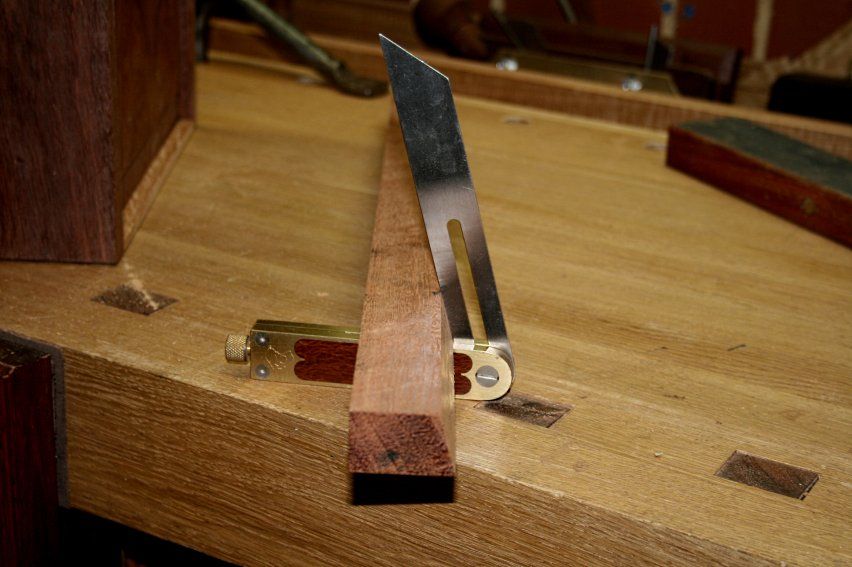
No magnets, so you just need to hold the saw against the fence.
I did not saw all the way through on the first end, stopping just short. Then completely sawed the second end, before returning to finish off the first end.
The result was pretty good. There is a tiny amount that will benefit from being lapped smooth. That is for tomorrow.Visit www.inthewoodshop.com for tutorials on constructing handtools, handtool reviews, and my trials and tribulations with furniture builds.
-
11th November 2012, 02:21 AM #22
Be inspired. Be creative. Be bold.
- Join Date
- Apr 2001
- Location
- Perth
- Posts
- 10,820
A side ...
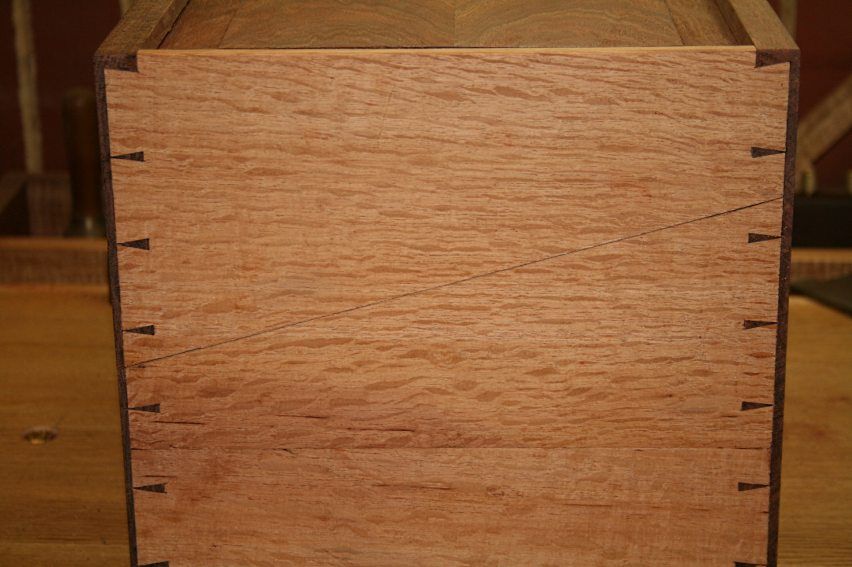
Rear ..
Front ..
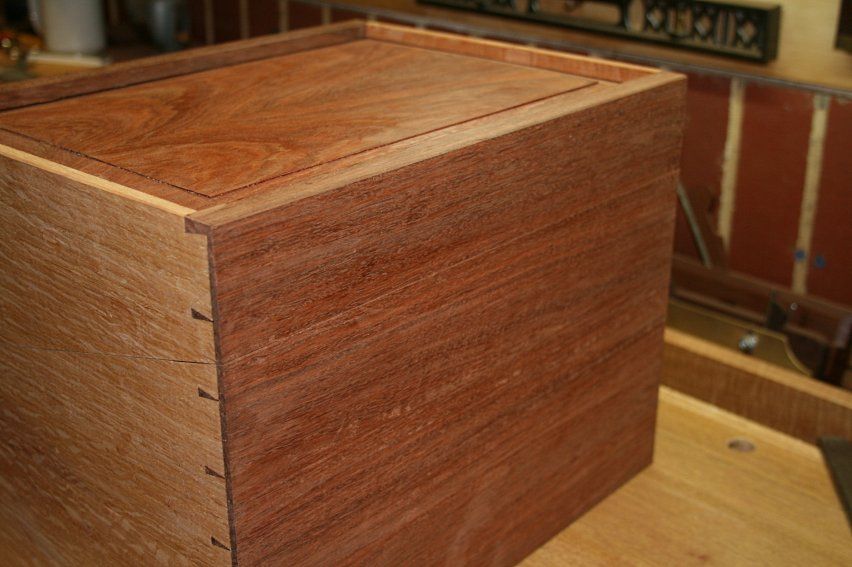
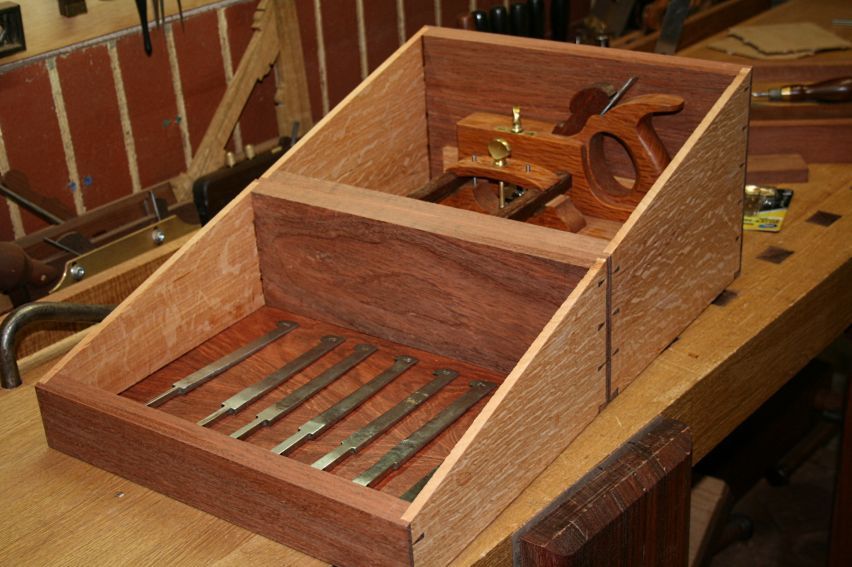
Sides together ...

And a preview of what I am after ..
Regards from Perth
DerekVisit www.inthewoodshop.com for tutorials on constructing handtools, handtool reviews, and my trials and tribulations with furniture builds.
-
11th November 2012, 08:15 AM #23
GOLD MEMBER
- Join Date
- Feb 2009
- Location
- Bristol, UK
- Age
- 66
- Posts
- 1,540
Well that certainly made a nice neat job of it.
And that's one big Back-Saw you've got there!Dragonfly
No-one suspects the dragonfly!
-
11th November 2012, 08:26 AM #24
Dehydrated Hydrographer
- Join Date
- Jun 1999
- Location
- Westleigh, Sydney
- Age
- 77
- Posts
- 9,549
-
11th November 2012, 11:13 AM #25
SENIOR MEMBER
- Join Date
- Oct 2012
- Location
- Australia
- Posts
- 765
Beautiful job and with such a tricky cut..... well done.
The MDF stabilizer are a great idea.
I really like the way the half blinds reflect each other in the open box. I have not seen that effect on the period writing desks (I think either because they were mostly full blind dovetails and or then covered with brass straps.) I like yours betters; It has little bow ties .
.
-
11th November 2012, 05:53 PM #26
GOLD MEMBER
- Join Date
- Jun 2007
- Location
- North Of The Boarder
- Age
- 68
- Posts
- 16,794
Just stumbled upon this one.
My dad used to work for HMV way back in the 60's making portable and home recorder player boxes the cut similar to what you have done except it was stepped. When they made the boxes then they used to use piano wire to cut the angle cut, two men keeping in unison straight cuts every time. I still have the test box dad had to make and show how it was done.
-
12th November 2012, 12:28 AM #27
Be inspired. Be creative. Be bold.
- Join Date
- Apr 2001
- Location
- Perth
- Posts
- 10,820
Hinges!
I do have decent brass butt hinges, on a par with Brusso, but I am not happy with this style.
The problem with butt hinges is that they will be very apparent from the front of the box. I really want as little to show as possible.
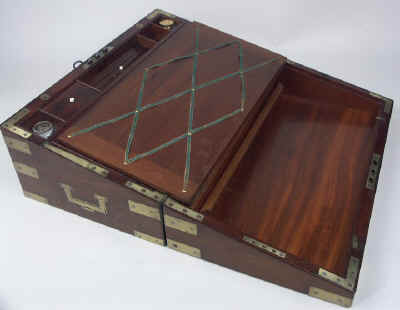
The ideal type of hinge would be an internal strap hinge, such as the one here ..
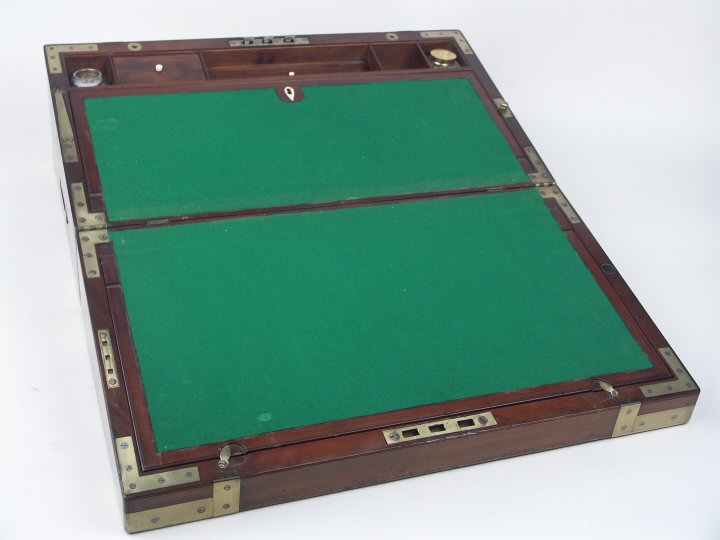
The problem is that the sides are about 3/8" wide (the front and back are 3/4"), and so I need to find something with a strap around 1/4" wide, in brass. Anyone have a contact? I've looked at several sites.
Or an alternate idea?
Regards from Perth
DerekVisit www.inthewoodshop.com for tutorials on constructing handtools, handtool reviews, and my trials and tribulations with furniture builds.
-
12th November 2012, 12:42 AM #28
Novice
- Join Date
- Nov 2012
- Location
- Newcastle
- Posts
- 18
I would cut it on a table saw as already mentioned after it has been constructed.
-
12th November 2012, 01:41 AM #29
GOLD MEMBER
- Join Date
- Feb 2003
- Location
- back in Alberta for a while
- Age
- 68
- Posts
- 12,006
Hi Derek
I like how your box has turned out, and especially the precision achieved when cutting the lid off.
I don't think I could have come close.
Glueing MDF to the sides to keep them orientated after sawing is a great technique but why use hot melt glue ?
I was expecting that you'd use hide glue and then a warm iron to remove the scrap pieces.
For others reading this thread, you could saw all the way through the front of the box (cleaving 3 sides) and stick on another MDF scrap to support the box whilst the back is cut. But there's nothing wrong with Derek's method.
to the hinge
my design asethetic is a little different to yours when it comes to workshop accessories.
Whilst very well executed and a testament to your skill, it's not a period specific writing desk, and thus it doesn't need strap hinges unless you want the practice of installing them.
A pianio hinge should be sufficient as the opening, although on a slant, is only 180°.
SOSS hinges would also work for the same reason, as will butt hinges.regards from Alberta, Canada
ian
-
12th November 2012, 08:17 AM #30
Dehydrated Hydrographer
- Join Date
- Jun 1999
- Location
- Westleigh, Sydney
- Age
- 77
- Posts
- 9,549
I agree that the only hinge to use for that box is the internal strap or 'L' hinge. You could try the Furniture History Society. There are a number of members who have stocks of old fittings. I can't see those hinges in the catalogues of any of the usual suppliers.


 Reply With Quote


