

 Thanks: 0
 Likes: 0
 Needs Pictures: 0
 Picture(s) thanks: 0
Results 1 to 15 of 36
-
4th November 2012, 04:08 AM #1
 Be inspired. Be creative. Be bold.


- Join Date
- Apr 2001
- Location
- Perth
- Posts
- 10,820
 How would you saw the lid for this box?
I am building a storage/presentation box for the bridle plough plane I build several months ago. Its going to get damaged if I leave it lying on a shelf. The box is 11" high and wide, and 12" long. Construction is half blind dovetailed sides and floating panels for the base and top.
The aim is to be able to open the lid to access the plane from the front (i.e. not have to lift it out). Irons will be stored vertically in slots at the rear.
Because of the height of the box, the lid needs to be sawn at an angle (rather than square). This is where the difficulty comes in.
This is a loose dry fit. The tape represents the angle of the lid/base.
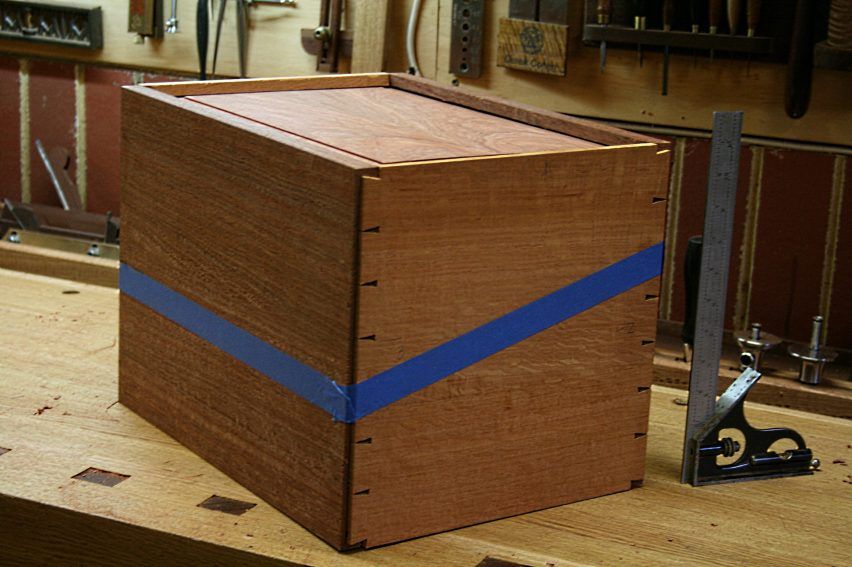
Do I assemble and glue the sides/top, and then saw the box apart (which I have done with many smaller boxes? If so, how would you do this? It is not a simple task.
Alternately, would you saw the pieces before assembly? This would, I assume, require the box to be fitted without glue, marked, disassembled and sawn. Yes?
The easiest cut is a coplanar one, that is, a straight line. My preferred cut would be at right angles at the front and back, with a the diagonal linking them. That is only possible, I imagine, if the pieces are cut in disassembled form? Frankly, I'm not sure how I could do that.
Ideas folks?
Regards from Perth
DerekVisit www.inthewoodshop.com for tutorials on constructing handtools, handtool reviews, and my trials and tribulations with furniture builds.
-
4th November 2012 04:08 AM # ADSGoogle Adsense Advertisement
- Join Date
- Always
- Location
- Advertising world
- Posts
- Many
-
4th November 2012, 05:32 AM #2
New Member
- Join Date
- Feb 2010
- Location
- Scotland
- Posts
- 6
Hi mate, if you have a big enough band saw with a tilting table you could run it through at an angle.
Jiroma
-
4th November 2012, 08:32 AM #3
Dehydrated Hydrographer
- Join Date
- Jun 1999
- Location
- Westleigh, Sydney
- Age
- 77
- Posts
- 9,549
That's an interesting challenge, Derek! I'd approach it as I would a normal box with hinged lid.
First, set the tablesaw blade at the angle of the side cuts, raised slightly below the thickness of the walls, and make the cuts on the front and back.
Then, with the blade set square, adjust the mitre guide to the appropriate angle. The best way to do this would be trial and error (successive approximations, if you like), by locating the box on the guide with clamped blocks and making the front and back cuts line up with the blade. Once this is done, make the cut on one side, again not quite all the way through. Repeat for the other side. You can then finish the cuts with a hand saw and tidy up with a plane. As with all boxes, the essence will be in the accuracy, but knowing your work, I'm sure you won't have a problem.
I'm sure there are other ways. I did a similar one once by hand sawing all round. It came out OK, but needed a lot of concentration to maintain the correct angle on the front & back. I think this would be easier. I look forward to the final result.
-
4th November 2012, 08:48 AM #4
GOLD MEMBER
- Join Date
- Aug 2004
- Location
- Brisbane
- Posts
- 4,956
The simplest way is to cut it on a well tuned bandsaw. If you want to do it your preferred way there are a number of considerations. By cutting square front and back you have to either do a zig-zag cut in the side so all the edges line up (very difficult I would say) or do a straight diagonal cut on the sides which meets the top edge of the front and back at the blind shoulder of the dovetail and accept that part of the sides and front/back don't line up (only visible when the box is open of course). Then of course you have to consider the blade kerf. Geometry dictates that there is a difference between the gap created on the front and back and the gap created on the diagonal cut (when it is in the formed box). That is to say if you were to do your cuts disassembled and then remove an equal amount from all edges in the tidy up with a plane, and then reassemble the box, although there will be no gap front or back between lid and base, there will be on the sides. You must take this into account by planing more from the front and back panels. And then of course there is the problem of the discontinuity of the grain across the side caused by the removal of the saw kerf...
-
4th November 2012, 08:59 AM #5
FIG Woodworks, Gentleman Woodworker
- Join Date
- Feb 2005
- Location
- 37 Deg, 52. 697' South 145 deg, 15.627' East. Elevation 78M
- Age
- 71
- Posts
- 1,410
I did a box similar a few years back, I cut it on the table saw, I didn't cut all the way through left about 1mm to keep the kerf open and finished off with a hand saw, I made up a jig to keep the angles on the sides I cut these first and then rolled the blade over to match the angle on the sides
Two things are infinite: the universe and human stupidity; and I´m not so sure about the universe.
-
4th November 2012, 09:43 AM #6
GOLD MEMBER
- Join Date
- Aug 2004
- Location
- Brisbane
- Posts
- 4,956
A graphical representation of my previous words. pic 1 shows the zig-zag cut required if you want to keep the edges in line(difficult). pic2 shows the straight cut sides and the edges which don't line up which you must accept if you do it this way. pic3 shows what I meant about the geometry. When you do the cuts disassembled the kerf removed by the blade is represented by the red ribbon. You can see the kerf is perpendicular to both the cut on front and back and the diagonal cut, but when reassembled, the gap created by the kerf on the diagonal cut is wider, it is the length of the little line to the side of the red ribbon which is I think (saw kerf)/cos(lid angle). You will have to take more off the front and back by plane to close this gap.
option1.jpgoption2.jpgoption3.jpg
-
4th November 2012, 09:47 AM #7
GOLD MEMBER
- Join Date
- Feb 2003
- Location
- back in Alberta for a while
- Age
- 68
- Posts
- 12,006
use a router
Hi Derek
perhaps the easiest way is to cut part way through each piece before assembly along the planned cut-lines using using a powered router
done on both the inside and outside of the pieces and off set you will create a dust sealwhen you finally separate the box using a knife in the routered rebate
by hand
tack some scrap on the outside face of each piece, saw right through each cut line assemble the box
take off the scrap voila one box with its lid separated.regards from Alberta, Canada
ian
-
4th November 2012, 10:28 PM #8
GOLD MEMBER
- Join Date
- Aug 2011
- Location
- bilpin
- Posts
- 3,559
I'd knock the brass back off a tennon or dovetail saw and cut by hand. Do the two square edges first, then the angle cuts which would have to be mid line started and then cut each way. The finer the saw the neater the job.
-
4th November 2012, 10:32 PM #9
GOLD MEMBER
- Join Date
- Aug 2011
- Location
- bilpin
- Posts
- 3,559
Sorry, forgot to mention, this can be done with the box glued up. Best to score the cutting line with a marking knife for a good sharp line to follow.
-
5th November 2012, 05:21 PM #10
Be inspired. Be creative. Be bold.
- Join Date
- Apr 2001
- Location
- Perth
- Posts
- 10,820
Many thanks all for the advice. It has been very helpful.
The first decision was that the lid had to be cut by hand. No choice really. I have a big bandsaw (Hammer 4400) but it is not big enough (clears a little over 11", however I need about 13"). So handsaw it is.
The second decision was that the parts had to be glued up beforehand to keep the sides lined up.
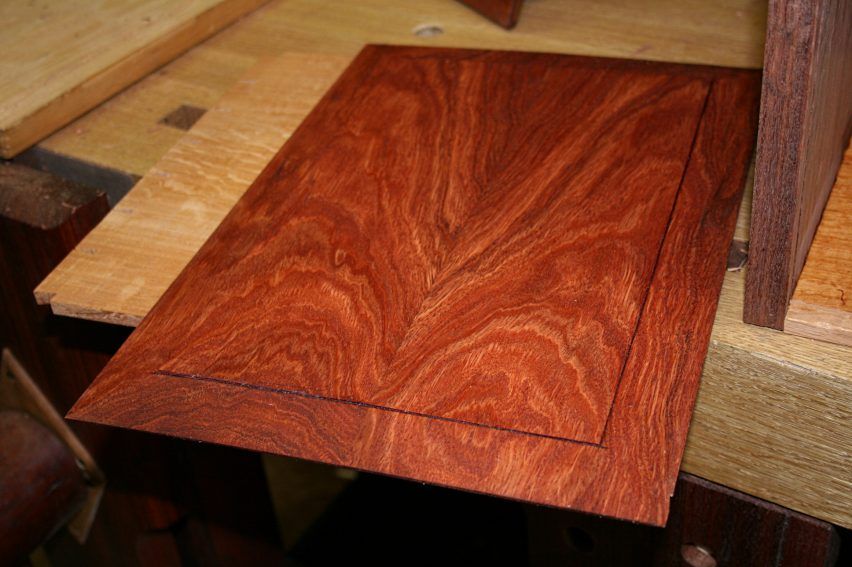
The floating panels were given a finish of Danish Oil, and then the box was glued up ...
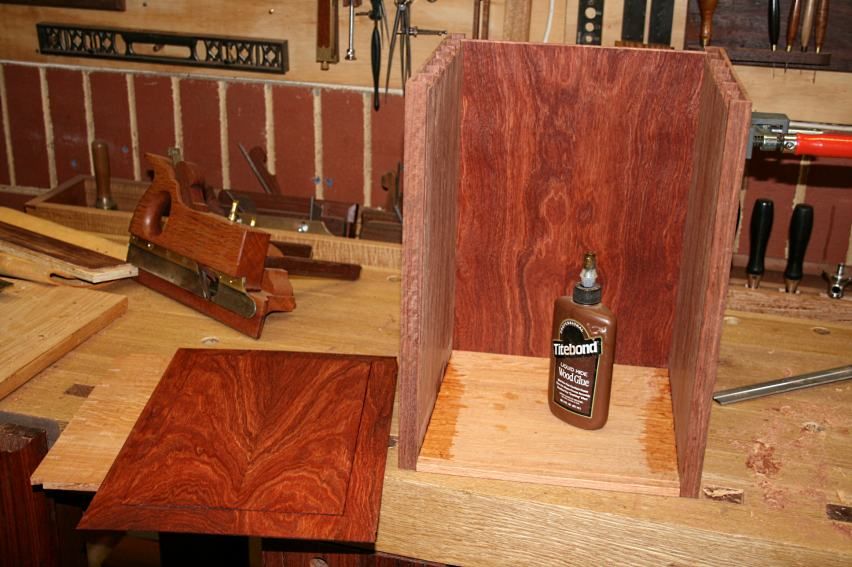
All sides are made up of two boards. The top was bookmatched. I thought it came out nicely.
A picture of the glued carcase - no finish yet.
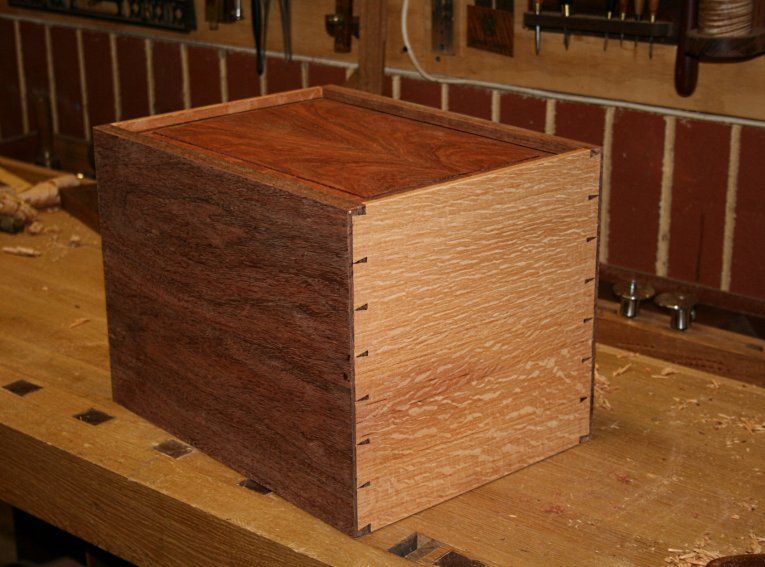
I realised that the key to sawing the box was to saw the sides (She-oak) first. The front and rear (Jarrah) must not be sawn first as it would be difficult to get the angles needed to then saw the sides. The sides first also creates a guide to saw the front and rear.
I can only get back to the cutting this coming weekend. In the meantime I have begun to view the side cut in the shape of an ogee, rather than straight. I have used ogees on the plough plane, and since this is a box for the plane, there needs to be a physical link. An ogee join would do that. I will make up a pattern to rout it. Not done this in years so I may need a new bit.
Regards from Perth
DerekVisit www.inthewoodshop.com for tutorials on constructing handtools, handtool reviews, and my trials and tribulations with furniture builds.
-
5th November 2012, 08:18 PM #11
Class Clown
- Join Date
- Nov 2005
- Location
- Darkest NSW
- Posts
- 3,206
I've done this using a variation of the method suggested by AlexS. My bandsaw wasn't big enough either......

Mark the angle line you want on one end of the box, set the tablesaw to this angle, then it is easy to align by eye to do the saw cuts on the front and back faces. In my case I had the blade at full height, and each cut went about one third of the way through the side of the box. This leaves plenty of 'meat' to hold everything together while you make the second cut.
The remainder can easily be cut through using a (spineless) Japanese saw, one box end at a time. Since your handsaw kerf is so much smaller than the tablesaw kerf there is plenty of room for error (it helps to draw a guideline though). The other benefit of this method is that the finished box edges just have a high portion where the handsaw went - easily block-planed down to the smooth reference surfaces on either side left by the tablesaw.
Finish with a quick shimmy on a sheet of sandpaper attached to flat surface - glass or tablesaw top.
-
5th November 2012, 10:34 PM #12
SENIOR MEMBER
- Join Date
- Oct 2012
- Location
- Australia
- Posts
- 765
Derek,
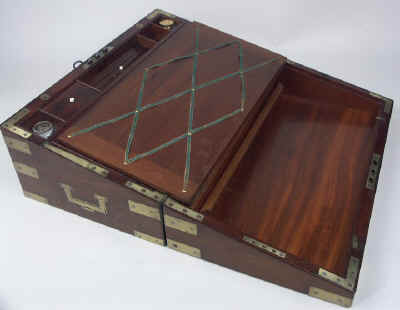
I have long been a fan of the campaign writing desks such as these Hygra Antique boxes: Writing Box thumbnail index (especially the triples). To me it appears that most have been cut in a coplaner fashion with the mid point of outside of the hinge side forming the cut line so that the box when opens it forms a contiguous wedge. This has a couple of advantages first it mean the box holding your beautiful plane will not topple off your bench, second you can use the lid as a perfect spot for all the plane irons. If you are still keen on the ogee idea, you might be able to incorporate an ogee it into a design like this Back to other pictures with the high point of the ogee forming the natural place to put the blades. I look forward to seeing what you do with it.
-
6th November 2012, 01:03 AM #13
Be inspired. Be creative. Be bold.
- Join Date
- Apr 2001
- Location
- Perth
- Posts
- 10,820
Hi B Originally Posted by Brobdingnagian

Thank you for that. The military writing desk was one of the inspirations that led to wanting an angled lid (I have long enjoyed military furniture - it is not that long ago that I completed a pair of military chests). The dimensions I have in this box are different of course, and this has been a cause for much thought about how to balance the aesthetic with the practical - far, far too much thought and effort for what is really just a simple box for a tool. Gotta keep a perspective here. Still, it is more fun to do interesting things, no matter what the eventual use of the work piece.
It's a good thing I cannot get back into the workshop until the weekend as I waver between an ogee and a straight line. On balance I think the straight line is better. I shall make up a few cardboard cutouts and see how they look.
This is what inspired me - however I needed to include She-oak in the box to link with the the plough.
Regards from Perth
DerekVisit www.inthewoodshop.com for tutorials on constructing handtools, handtool reviews, and my trials and tribulations with furniture builds.
-
6th November 2012, 07:59 AM #14
Class Clown
- Join Date
- Nov 2005
- Location
- Darkest NSW
- Posts
- 3,206
Any suggestions on the best style of hinge for this kind of box, and sources of high quality ones??
Cheers
-
6th November 2012, 08:42 AM #15
Dehydrated Hydrographer
- Join Date
- Jun 1999
- Location
- Westleigh, Sydney
- Age
- 77
- Posts
- 9,549
Mr. B, try Graeme Brown Antiques, look for strap hinges. Derek, I like the ogee idea, how would it look when open?
I guess this thread has shown that there are a number of methods that would work. It seems that the best is the one that you feel comfortable with.


 Reply With Quote


