

 Thanks:
  Likes:
  Needs Pictures:
  Picture(s) thanks:
Results 1 to 2 of 2
Thread: Cutting gauge from a pig's ear.
-
28th May 2013, 01:21 AM #1
 Be inspired. Be creative. Be bold.


- Join Date
- Apr 2001
- Location
- Perth
- Posts
- 10,824
 Cutting gauge from a pig's ear.
About a year ago I posted a couple of cutting gauges that were based on the Kinshiro cutting mortice gauge: http://www.inthewoodshop.com/ShopMad...ingGauges.html

These cutting gauges were the Western version - a pseudo Japanese cutting gauge - as the knife was made from a HSS drill rather than a bent steel blade. This has a significant disadvantage, in that the cutting edge lies in board and, as a result, visibility is reduced. There is another advantage to the bent steel blade, which I shall demonstrate later.
Note that the Kinshiro is a mortice gauge but may be used as a single knife gauge for tenons and dovetails. There are a number of other uses for this type of gauge, such as slicing banding.
The Kinshiro are no longer available. I got to thinking that I could upgrade a cheap version of a Kinshiro-type gauge into a decent alternative to be used specifically as a single cutter, ala dovetail gauge.
Tools from Japan sell the Large Ryuma for $17. This comes with 2 blades for mortices ...
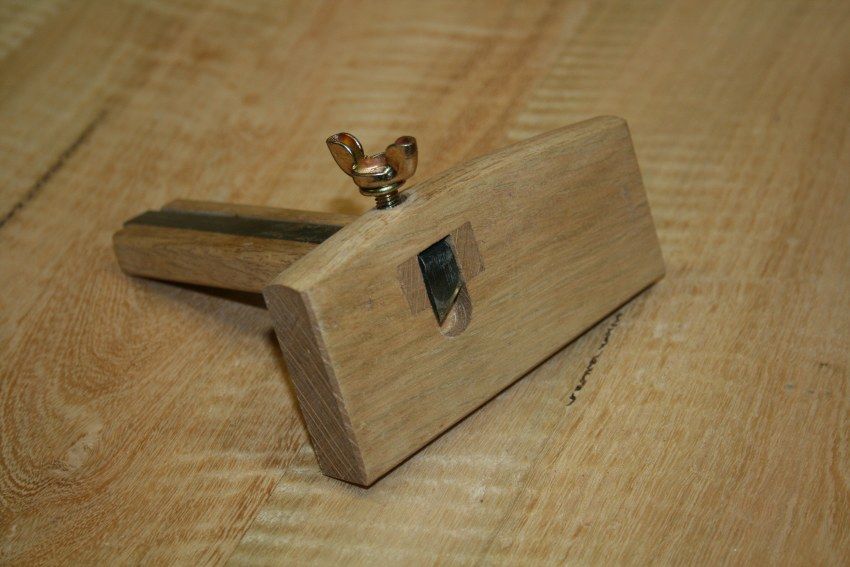
The bones are decent but need work. The body is about 3/4 the thickness of the Kinshiro. The blades are a little rough but have potential. The wing nut is a disaster - too difficult to adjust with one hand. And how to adjust one blade with one hand?
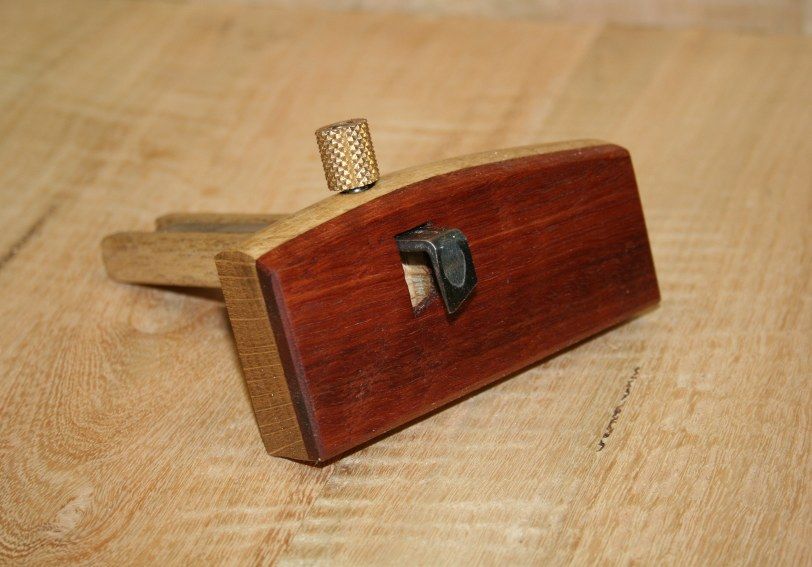
Here is the completed modification (a stage beyond a recent post on these gauges) ..
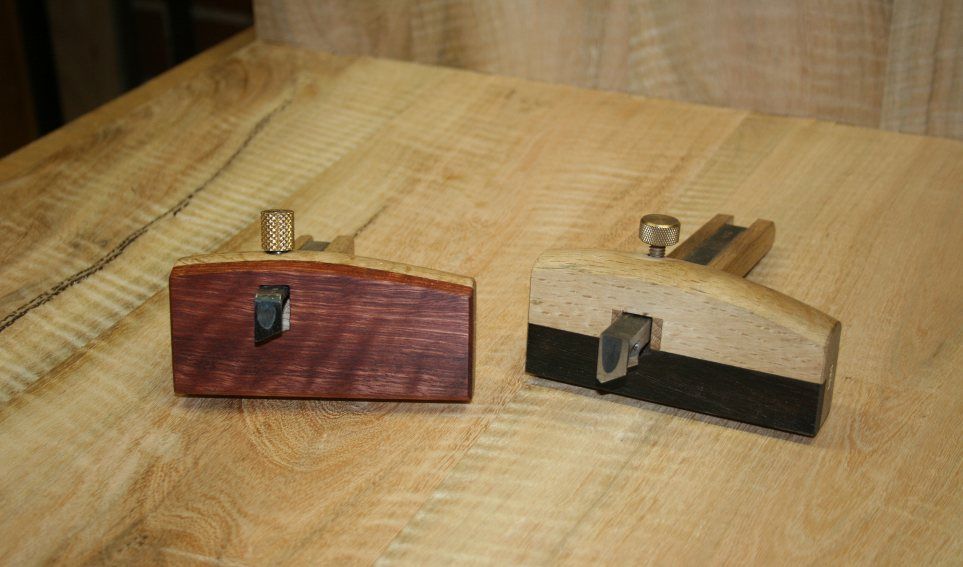
Alongside the Kinshiro ...

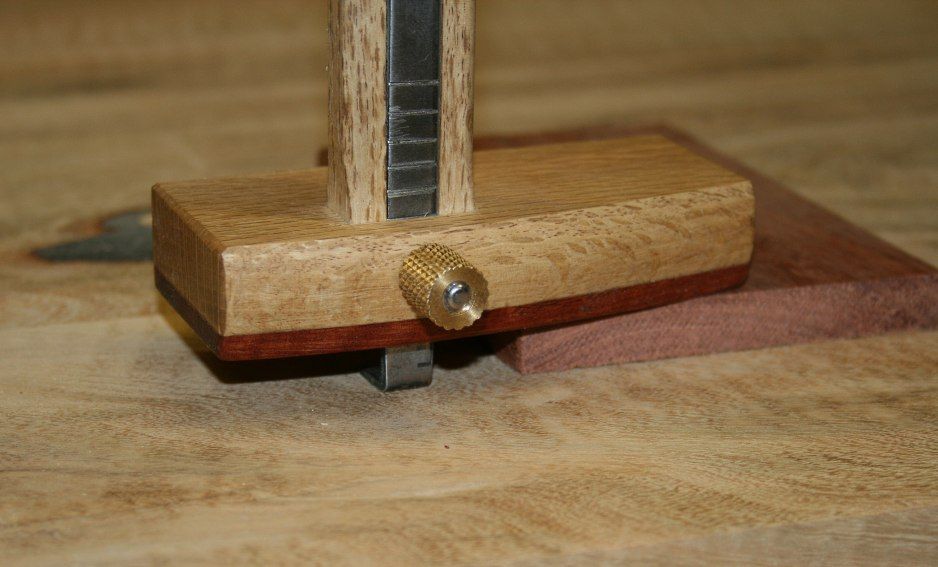
There is more registration depth than in the original ..
In addition to the lamination at the front (I used Jarrah - what else?!), another lamination was added to the blade carrier to replace one blade and raise the remaining blade flush with the top.
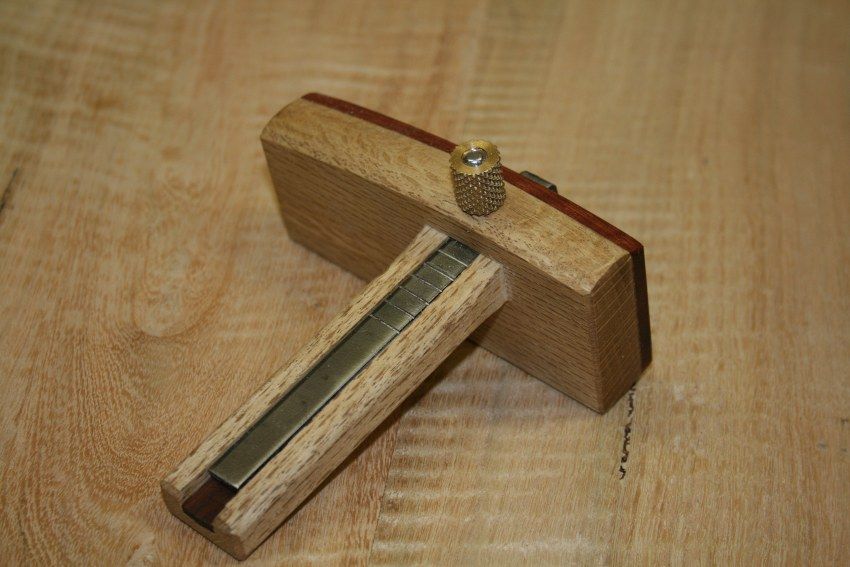
The back of the blade shaft was serrated to create resistance and enable it to be pushed with the thumb.
A brass knurled knob was added.
The blades need to be ground and polished on both sides. Two blades enable one to score lines in either direction, that is, with the knife's bevel either towards or from the gauge. The finished blades are on the right side ..

What I particularly like about this style of knife is that setting the gauge for dovetailing is so much easier. To set for an depth that is exactly that of one side, simply place the gauge on top of the board, and drop the knife to the table. Tighten. Done.
Regards from Perth
DerekVisit www.inthewoodshop.com for tutorials on constructing handtools, handtool reviews, and my trials and tribulations with furniture builds.
-
28th May 2013 01:21 AM # ADSGoogle Adsense Advertisement
- Join Date
- Always
- Location
- Advertising world
- Posts
- Many
-
28th May 2013, 12:00 PM #2
Member
- Join Date
- Aug 2012
- Location
- Auckland, New Zealand
- Posts
- 80
Thanks for the ideas Derek,
Purchased one of the Ryuma gauges recently and find I prefer it to my "normal" style pin type gauges - believe it is a combination of the shape that fits nicer in the hand with a bigger registration surface and I like the cutters.
I will now have to go and make mine as purdy as yours.
Robin


 Reply With Quote
Similar Threads
-
Cutting gauge blade shape?
By kman-oz in forum HAND TOOLS - UNPOWEREDReplies: 13Last Post: 17th September 2009, 08:00 PM -
And another marking/Cutting gauge
By BobL in forum HOMEMADE TOOLS AND JIGS ETC.Replies: 4Last Post: 30th October 2006, 09:01 PM -
Yet another marking/Cutting gauge
By BobL in forum HOMEMADE TOOLS AND JIGS ETC.Replies: 26Last Post: 29th September 2006, 11:16 AM -
Marking/cutting gauge
By derekcohen in forum HOMEMADE TOOLS AND JIGS ETC.Replies: 20Last Post: 20th September 2006, 11:47 PM
