

 Thanks:
  Likes:
  Needs Pictures:
  Picture(s) thanks:
Results 1 to 15 of 20
Thread: End of a saw-making obsession?
-
8th June 2009, 07:30 PM #1
 GOLD MEMBER


- Join Date
- Mar 2004
- Location
- Brisbane (western suburbs)
- Age
- 77
- Posts
- 12,136
 End of a saw-making obsession?
Well, I've said it before, but this time I really have to stick to my word, or my better half really will disown me.....
Here are the weekend's efforts - a 220mm dovetail saw (15tpi x-cut). She-ok handle. This one is destined to leave the country shortly, to go to a very good woody friend.
The other is for me, a 320mm carcase saw styled after the Disston D9, with a few liberties. I decided to lose the weird thumb groove of the original - let's call it a D8 1/2 . The handle is possibly a temporary one - I wanted to put a She-oak handle on this one, too, but have run out for the moment, so tried some American Cherry - nice colour at the moment, but that will dull quickly in the light. I mucked about with the teeth on this one - the first 25mm from the toe are filed to 15 tpi, the remainder 12. It does make the saw very smooth to start on soft wood.
Am slowly getting better at tooth filing & sharpening - a long way from expert, but both these saws cut quite well. Now, definitely back to USING tools.........
Cheers,IW
-
8th June 2009 07:30 PM # ADSGoogle Adsense Advertisement
- Join Date
- Always
- Location
- Advertising world
- Age
- 2010
- Posts
- Many
-
8th June 2009, 07:41 PM #2
GOLD MEMBER
- Join Date
- Apr 2006
- Location
- near Mackay
- Age
- 59
- Posts
- 4,635
Youll be back

Nice job on those 2 saws, I like the handle on the small one.
I know what you mean about getting some "real jobs" done, I hear it all the time.
Its over 2 years since I finished a piece of furniture.
-
8th June 2009, 07:51 PM #3
Luban White
- Join Date
- Jan 2006
- Location
- Victoria
- Posts
- 999
D8 1/2

Lovely saws.. very lovely!
I don't mind the cherry, infact I think it may be even nicer when it darkens up.Best regards, Luban
-
9th June 2009, 08:55 PM #4
GOLD MEMBER
- Join Date
- Jun 2008
- Location
- Victoria, Australia
- Age
- 74
- Posts
- 6,132
I can send some she-oak if you like, I am somewhat overstocked on she-oak and marri at present, not to mention some nice quarter-sawn jarrah bridge timbers..
I think a she-oak D9 handle with thumb and finger grooves would just suit that saw right down to the ground.
That DT saw is beautiful, I don't think you can just stop after making such magnificent saws....
Now, how much saw-handle she-oak would you like?
Regards
Ray
-
9th June 2009, 10:05 PM #5
GOLD MEMBER
- Join Date
- Mar 2004
- Location
- Brisbane (western suburbs)
- Age
- 77
- Posts
- 12,136
Ray - I was going to send YOU some She-oak! Looks like I won't need to do that for a while. Originally Posted by RayG

Thankyou for the kind offer, but I have access to about 100 hectares of the stuff - my folks use it for firewood, & there is always a good stock of it when I can get 'home'. Mind you, they don't cut it in a way that is always conducive to the best & most attractive yield, but I can always go & cut some for myself, which I will be doing at the end of the month. So it looks like I will have to do a she-oak handle soon. Still not sure about that thumb groove, though!
And thanks for the kind words - I am rather pleased with myself over these last couple of saws - my sharpening is just so much better than when I started.
I've got a small article on my brief journey through saw-making land almost prepared for you - will PM a copy in a day or so for you to see if it's any use to your web site.
Cheers,IW
-
9th June 2009, 10:59 PM #6
GOLD MEMBER
- Join Date
- Jun 2008
- Location
- Victoria, Australia
- Age
- 74
- Posts
- 6,132
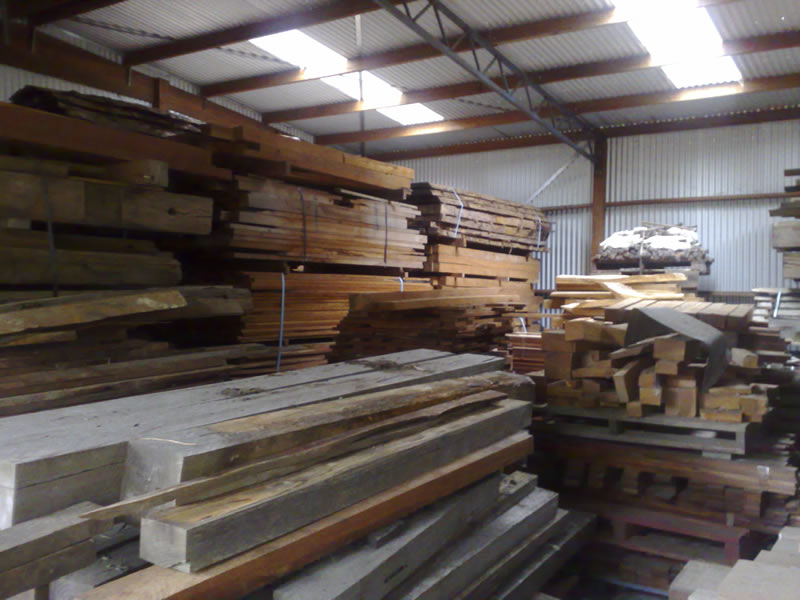
Hi Ian,
Actually that picture is from the place in Gembrook where my son and I have been buying she-oak..
But, we did manage to pickup a nice ute-load of she-oak and marri, never used marri before, and it's very dense and hard, might be good for handles.
I do like that D9 (D8.5) looks good.
Regards
Ray
-
11th June 2009, 10:33 PM #7
Lignum Vexator
- Join Date
- May 2007
- Location
- North of the coathanger, Sydney
- Age
- 68
- Posts
- 9,417
What, they burn it Originally Posted by IanW
 that is sooo sad
Oh
btw, nice looking saws regards
Nick
veni, vidi, tornavi
Without wood it's just ...
-
11th June 2009, 11:02 PM #8
Senior Member
- Join Date
- Jan 2008
- Location
- qld
- Posts
- 159
Ray/ Ian
This is a bit of a thread detour, but I would like to know how you lay out your tooth spacing. I am trying a "BunnyBob" saw and am struggling to get a 12 TPI saw filed evenly. I have glued a paper template onto the saw, with 12 TPI spacing, but the file doesn't want to play nicely.
Should I just file it as best I can and then treat it as a resharpen job?
Any pointers or advice much appreciated. Thanks for keeping us inspired. BTW I enjoyed browsing your website Ray.
regards,
James
-
11th June 2009, 11:40 PM #9
GOLD MEMBER
- Join Date
- Jun 2008
- Location
- Victoria, Australia
- Age
- 74
- Posts
- 6,132
Hi James,
There are a lot of different ways to mark out and cut teeth, If you can get a hacksaw blade with the right pitch, that works well, I have also just marked out spacing with a marker pen, (not suitable for really fine pitch). The paper template works well also.
With all these techniques, the idea is to just file a tiny nick at each gullet location, I do this with the file edge I am using vertical, so I can make sure I'm filing the nick right on the line. Whatever technique works best for you.
A good light and magnifier can help, (the eyes ain't getting any younger these days)
Once you have the starting points marked, you can then switch to an angle block to get the rake angle correct, just a few passes on each point with the angle block and you should start to see the flats getting smaller. Move along the saw just a few passes each time.
If it is getting a bit uneven (the flats are different sizes) you can push the teeth back and forward by applying pressure on the front or back of the tooth, note, once the flat has gone, you can't do that anymore (unless you re-joint)...
If, like me you get lost part way down the saw, just get a marker pen and mark the teeth, so you can see where you are up to.
Hope that helps to get started..
Regards
Ray
PS Thanks for the comments on the website, much appreciated.
-
11th June 2009, 11:41 PM #10
What... you mean it's not 1792?
- Join Date
- Oct 2006
- Location
- Melbourne
- Posts
- 5,271
Beautiful saws Ian.
 I particularly like the bullnose shape of the carcase saw.
.
I particularly like the bullnose shape of the carcase saw.
.
I know you believe you understand what you think I wrote, but I'm not sure you realize that what you just read is not what I meant.
Regards, Woodwould.
-
11th June 2009, 11:53 PM #11
gentleman woodworker
- Join Date
- Mar 2005
- Location
- Camden, NSW
- Age
- 74
- Posts
- 3,576
Ian,
... just thinking aloud here, would your better half accept more saw making if you were actually filling a paid commission?
I'd love one of those variable tooth carcase saws AND I have 2 pieces of lace sheoak that would probably cut 4 handles,
please PM if interested,
Fletty
-
12th June 2009, 02:43 AM #12
GOLD MEMBER
- Join Date
- Jun 2008
- Location
- Victoria, Australia
- Age
- 74
- Posts
- 6,132
IanW has written a great article on saw design and kindly permitted me to put it up on the web site, I generally agreed with most of what Ian is saying, some very interesting observations on tooth profiles and hang angles.
The article is here...
http://www.backsaw.net/index.php?opt...=59&Itemid=103
Regards
Ray
-
12th June 2009, 09:57 AM #13
GOLD MEMBER
- Join Date
- Mar 2004
- Location
- Brisbane (western suburbs)
- Age
- 77
- Posts
- 12,136
Fletty - I think SWMBO would freak right out if she heard I was going commercial! I do have a couple of 'spares', one with a birdseye Maple handle, the other Walnut, but both have straight 12 tpi - one is rip, t'other crosscut. I could possibly do you a saw, but I certainly do not want to go into competition with the Wenzloff clan, and it may take some time before I can finish it. The variable pitch is a great sales pitch, but it is a bit of a gimmick - it does make the saw just a little easier to start, but you can do the same job by reducing the set slightly on the first inch or so, & making sure it's always nice & sharp. I'll PM you tonight with some details, & we'll see..... Originally Posted by fletty
James - Ray has pretty well answered your question. I've had the same problem with marking out, particularly with the 20 thou plate, because the file skates & grabs in the wrong spot. Make sure the saw is firmly held in the vise, with just enough protruding to make it comfortable to work on - this minimises vibration of the saw plate. I have found that a medium diamond needle file from here:
http://www.precisiondiamondtools.com.au/index.htm
is handy - it doesn't seem to skate the way a toothed file does, so it's easier to make the nick in the right spot.
Using a good set of teeth you already have as a template helps, but you can do a good job with lines on paper, too - it's all a matter of getting evenly-spaced nicks, then careful 'filling in' as you deepen the gullets. On another thread, I posted a picture of how to stick the file into a short piece of wood to hold it at a consistent angle to keep the rake constant (got that from the 'saw filing treatise', I think). I find working back & forth, just a couple of strokes at a time is the go. The tooth-forming stage is all done from one side, of course, you only need to change sides when sharpening (after setting). As Ray says, watch the size of the flats, and put more pressure on the side you want to move the gullet towards. I also use a head band magnifier, because of ageing eyes. After each pass, look at the profile in silhouette to make sure you are creating an even set of fangs. If you are making a crosscut, don't try to cut any fleam at this stage, just form the teeth. You will add the fleam after setting, during the sharpening stage.
Don't be discouraged - I made a right dog's breakfast of my first attempt. The good news is, you only have to file off about 1/3rd to 1/2 of the tops of the ragged set & you can usually fix it. Practice makes perfect - by the time you are on your third or fourth go, it will fall into place. Just concentrate on developing the right amount of pressure on the file to make it cut nicely, and be consistent with each stroke.
And Ray - that was quick! Please, everybody, don't think I'm putting myself up as any sort of expert! I've now made about a dozen or more saws, and they are getting easier - I've learnt a lot, and my sharpening technique is now a heck of a lot better than it's ever been. But past experience has taught me that just as you think you are getting to know something, you discover how much you really DON'T know - so this is just one person's ideas & I'm more than open to other ideas, discussions, or corrections!
Cheers,IW
-
12th June 2009, 02:25 PM #14
GOLD MEMBER
- Join Date
- Oct 2002
- Location
- NSW
- Posts
- 1,610
Where did "BunnyBob" start?
I've searched here, and the 3 threads returned all seemed to assume a great deal.
Google was no help.
What was the starting point?
Cheers,
Andrew
-
12th June 2009, 02:32 PM #15
GOLD MEMBER
- Join Date
- Mar 2004
- Location
- Brisbane (western suburbs)
- Age
- 77
- Posts
- 12,136
Originally Posted by arose62
,
Hi Andrew - as one of the people responsible, I should enlighten your 'mystification'
A member who has a bit of a gift for manufacturing all kinds of good things from sometimes unlikely sources alerted us to the fact that Bunnings sell builders' scraper blades that are 0.75.. (.030") thick and of a hardness admirably suited to sawmaking. That member is BobL.
I made one and put it up on the BB as my "Bob&Bunnies" saw, and another member later put up a bettter version: "Bunnybob" saw.
So problem solvered, eh? These 'in" jokes take on a bit of a life of their own.
Cheers,
IW


 Reply With Quote


Similar Threads
-
Box making wip
By powderpost in forum BOX MAKINGReplies: 23Last Post: 10th December 2008, 10:08 PM -
Need help on making a box..
By smiling_sherry in forum BOX MAKINGReplies: 3Last Post: 9th December 2008, 10:19 PM -
Anyone making anything big out there??
By Claw Hama in forum FURNITURE, JOINERY, CABINETMAKING - formerly BIG STUFFReplies: 79Last Post: 11th November 2008, 02:03 PM -
Hobby or obsession?
By Scribbly Gum in forum WOODWORK - GENERALReplies: 2Last Post: 13th May 2007, 11:50 AM -
Bow making
By Brody in forum WOODWORK - GENERALReplies: 42Last Post: 24th August 2006, 07:11 PM
