

 Thanks: 0
 Likes:
  Needs Pictures: 0
 Picture(s) thanks: 0
Results 1 to 12 of 12
Thread: Sharpening router plane blades
-
10th September 2013, 12:24 AM #1
 Be inspired. Be creative. Be bold.


- Join Date
- Apr 2001
- Location
- Perth
- Posts
- 10,826
 Sharpening router plane blades
A recent post on a router plane reminded me to post the method I use for sharpening router plane blades. This topic comes up regularly. I am not sure if anyone else prepares their blades this way, but I swear by it.
As with the preparation of any plane blade, the method consists of two parts - grinding and honing.
Grinding
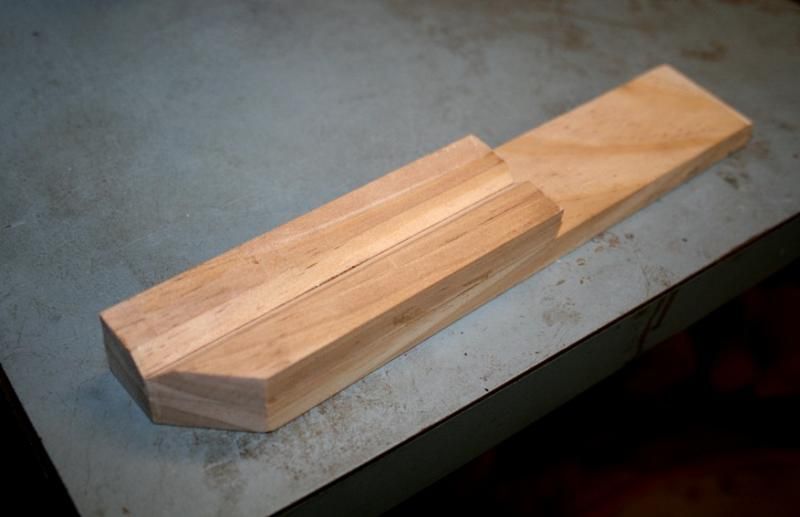
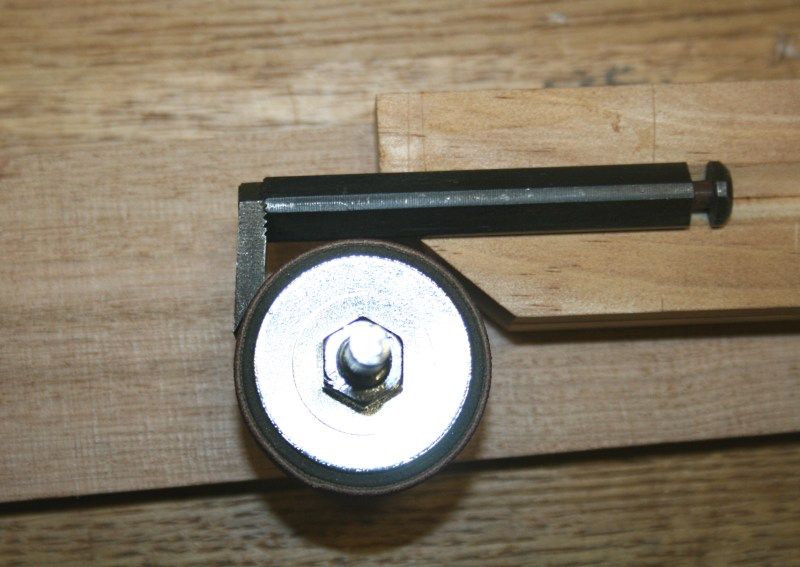
I hollow grind all my blades - including the router plane blades - as this reduced the amount of steel to remove and enables the bevel angle to be repeated each time. To do this I built a very simple jig. This is good for Lee Valley and Stanley blades, with their angled sides. Grinding Lie-Nielsen does not require a jig, but follows the same principle.
The jig is a simple V-grooved section with one corner bevelled ...
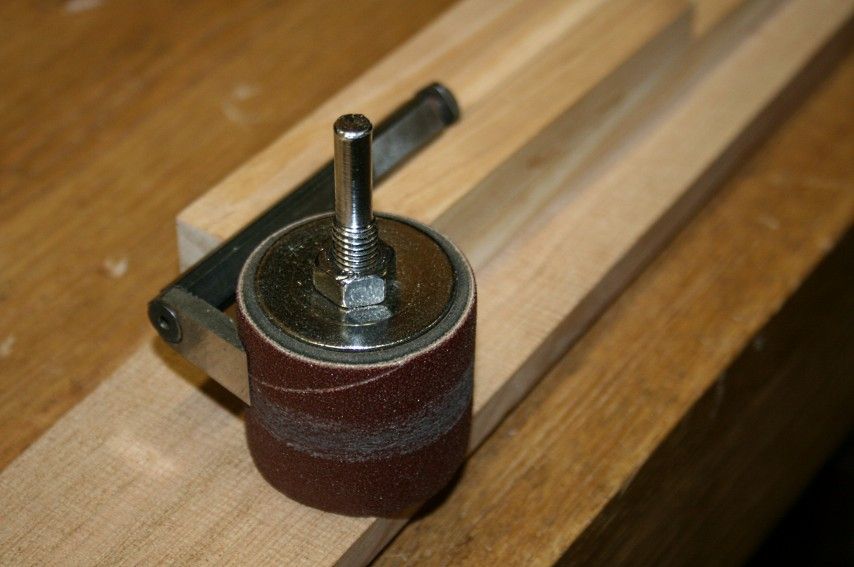
This is used in conjunction with a sanding wheel on a drill press. Use a coarse grit, around 80 - 100 maximum.
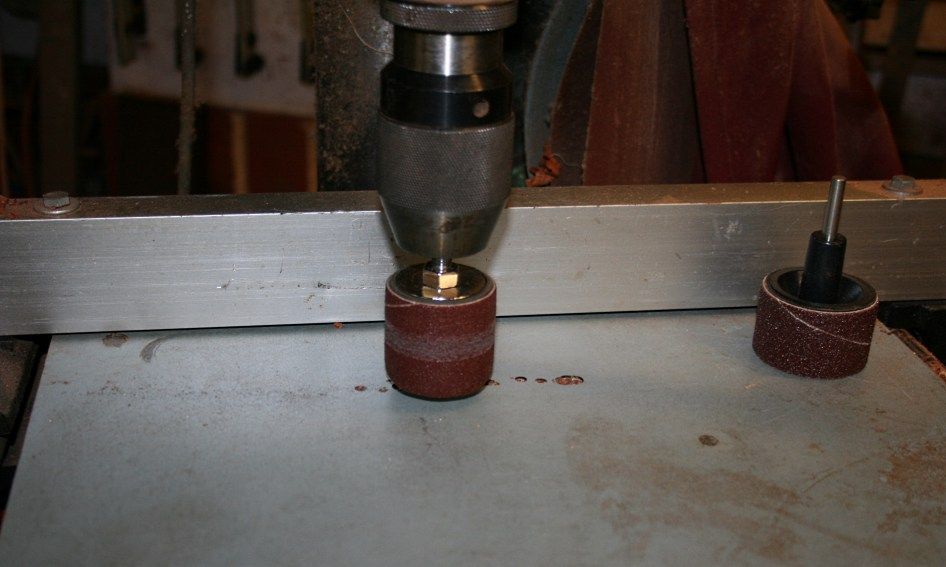
The size of the wheels depends on the depth of the hollow you wish to create. The Lee Valley/Stanley blade heads are longer than those on the Lie-Nielsen, and the latter must use a narrower diameter wheel.
The aim is to use the V-groove to keep the bevel square to the wheel. Ensure that the direction of the turn is into the bevel. This is a LV 1/4" blade.
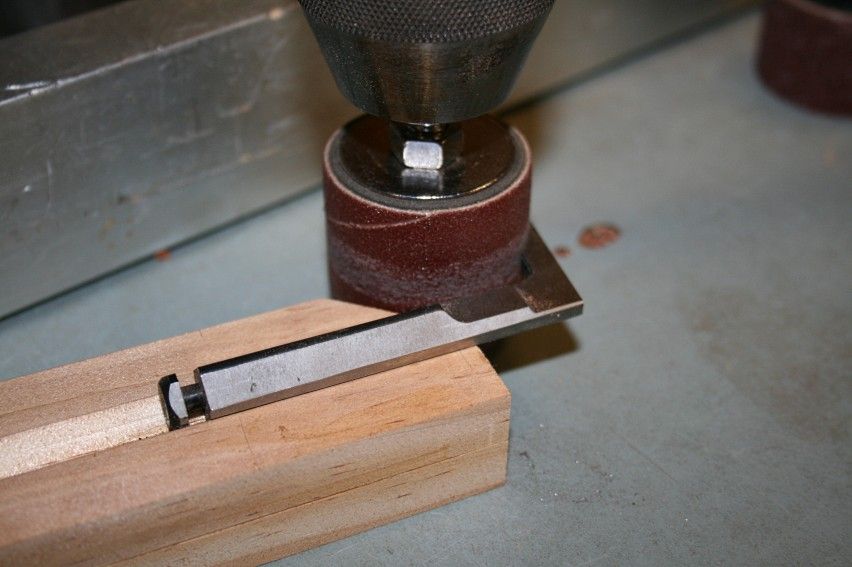
It is easy to maneuver the jig and blade into the ideal position. Use light pressure and keep the blade cool. Here are a few overhead shots ..
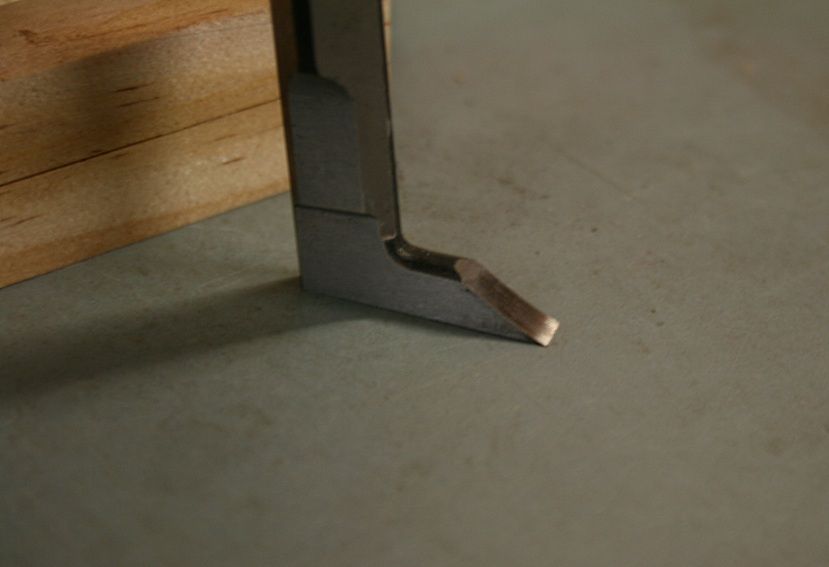
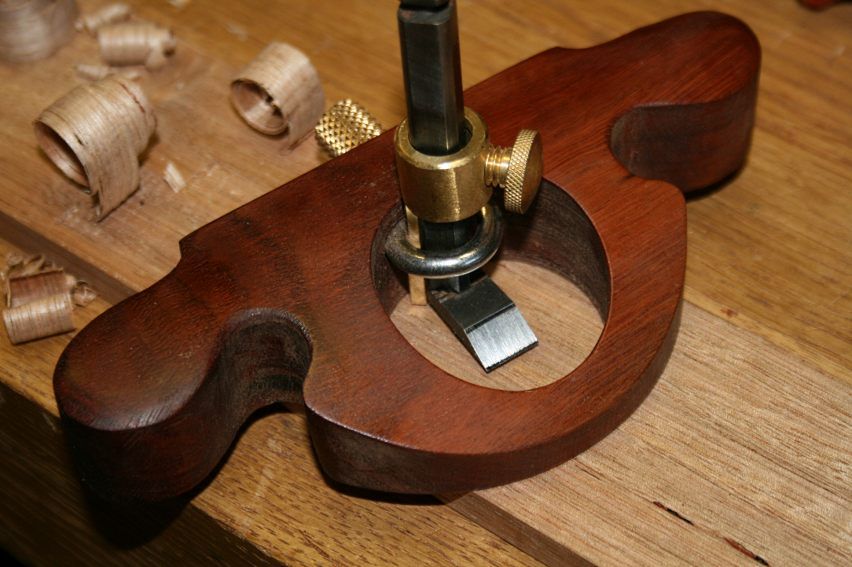
The 1/2" LV blade has a removable head, and this enables a different technique for grinding.
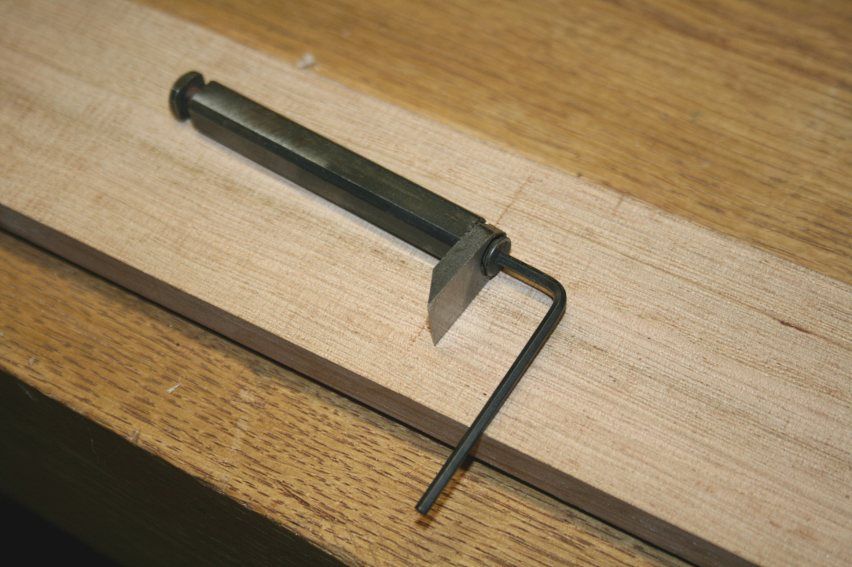
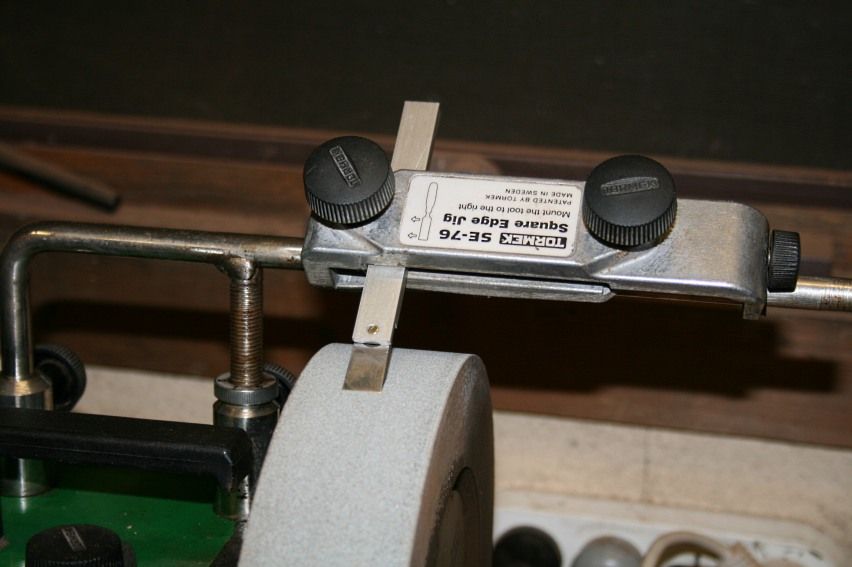
The blade head is attached to a holder. This enables it to be treated as a common plane blade. Here it is set up in a Tormek. It could as easily be ground on a high speed dry grinder.
Honing
While the 1/2" head may be honed in a guide, all other blades need to be freehanded. That is my preferred method anyway.
Freehanding the 1/2" blade (using the holder). Pull the blade sideways on the sharpening medium. Honing on a hollow is quick work ...
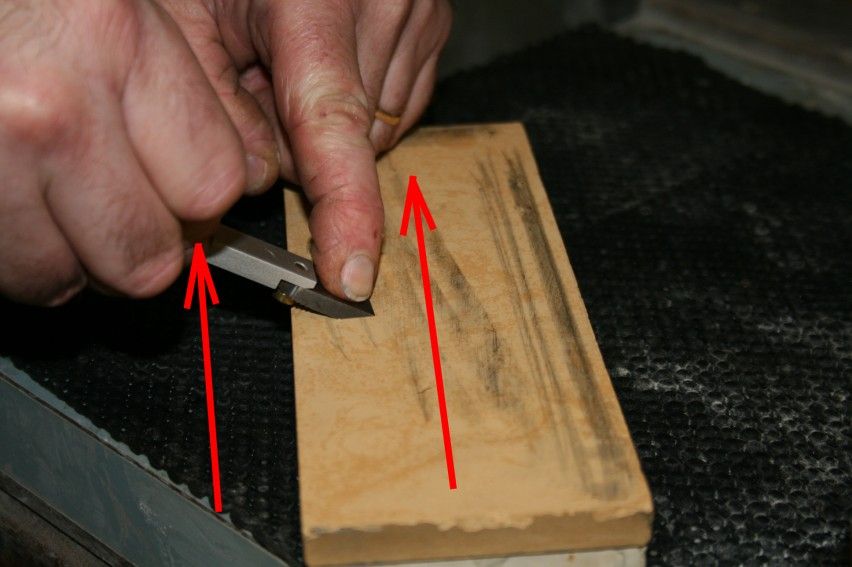
Honing the other blades simply requires balancing on the hollow, which is considerably easier than attempting to hone on a flat bevel. The hollow acts as a jig.
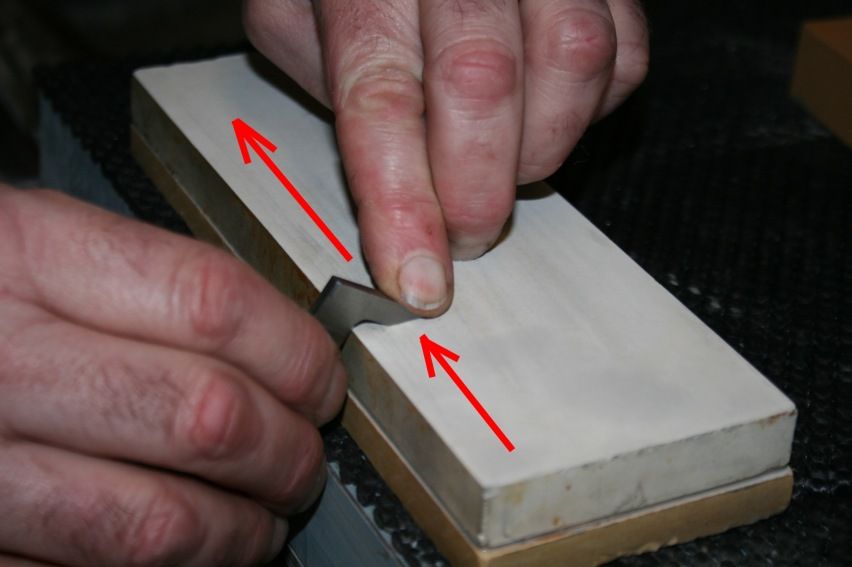
The result is a really sharp edge that is easy to renew many times before any re-grinding is indicated.
Regards from Perth
DerekVisit www.inthewoodshop.com for tutorials on constructing handtools, handtool reviews, and my trials and tribulations with furniture builds.
-
10th September 2013 12:24 AM # ADSGoogle Adsense Advertisement
- Join Date
- Always
- Location
- Advertising world
- Posts
- Many
-
10th September 2013, 03:24 AM #2
Senior Member
- Join Date
- Dec 2007
- Location
- Gravesend NSW
- Age
- 57
- Posts
- 269
Thanks Derek
Very insiteful I might give it a try , I like the idea of the hollow Grind
GlennCheers
Glenn
-
10th September 2013, 11:09 AM #3
Luddite Lite
- Join Date
- Jan 2009
- Location
- Brisbane
- Posts
- 800
Thanks Derek, great post.
I can't actually do any of that because I have no tails on anything in the current place we're in but I'll bank the concept.
On the topic of router planes; I'm interested to know what people do with theirs. I find my OWT is good for cleaning up the bottoms of housings or flattening tenons working across the grain but it is very hard to get a clean floor working with the grain. I can't imagine trying to use my old school jobbie like a plough or grooving plane the way I see the iron bodied versions being used in some pictures, do they excel at those jobs, or is their primary use still levelling trench floors and tenon cheeks?
Cheers
Matt...I'll just make the other bits smaller.
-
10th September 2013, 09:10 PM #4
Bloke
- Join Date
- Jan 2008
- Location
- Central Coast NSW Australia
- Posts
- 1,136
Thanks for posting this Derek. I love the wayy you come up with simple solutions to problems.
Couple of questions though
How would you sharpen this type of blade?
IMG_0295.JPG
and where did you source the sanding sanding wheels and sand paper sheets from?
TTLearning to make big bits of wood smaller......
-
10th September 2013, 10:43 PM #5
GOLD MEMBER
- Join Date
- Apr 2012
- Location
- Sydney
- Posts
- 1,503
An alternative here:
Sharpen a Router Plane - YouTube
Parts here (no affiliation). Can't vouch for quality:
20 Piece Sanding Drum Set : CARBA-TEC
McJING Tools Online
-
10th September 2013, 10:50 PM #6
Bloke
- Join Date
- Jan 2008
- Location
- Central Coast NSW Australia
- Posts
- 1,136
Thanks Hiroller Originally Posted by hiroller

TTLearning to make big bits of wood smaller......
-
10th September 2013, 11:13 PM #7
Be inspired. Be creative. Be bold.
- Join Date
- Apr 2001
- Location
- Perth
- Posts
- 10,826
Hi Hiroller
Chris' method is interesting and inventive - I watched the video when he first posted it on his blog, and I commented at the time that it was likely forced on him as the LN router plane blades have a shorter head than the LV/Stanley blades. That makes it more difficult to grind a hollow. It can be done but, as I mentioned earlier (for this reason), it will need a smaller diameter wheel. I have not tried out Chris' method but I assume it will work. My reluctance to use it is that it also requires honing both sides of the blade, so in this regard is not a time saver. My concern is that the backbevel will increase in size over time and that this will increase the cutting angle. Chris says that the clearance angle is not affected - probably so. With the hollow grind, essentially you are following the original bevel angle, and honing on top of this retains the angle. It is also possible to lower the cutting angle, if you wish, by moving the hollow closer to the bevel end.
Regards from Perth
DerekVisit www.inthewoodshop.com for tutorials on constructing handtools, handtool reviews, and my trials and tribulations with furniture builds.
-
10th September 2013, 11:34 PM #8
Be inspired. Be creative. Be bold.
- Join Date
- Apr 2001
- Location
- Perth
- Posts
- 10,826
Hi TT Originally Posted by Twisted Tenon
There are three ways to do this - and you probably thought there was one!
Firstly, there is the good old freehand method - the blade head is removable and may be attached to the sharpening handle, as per the straight blade.
Secondly, you can also use this handle to fit the blade into a honing guide. I demoed this several years ago when I reviewed the LV Router plane ...

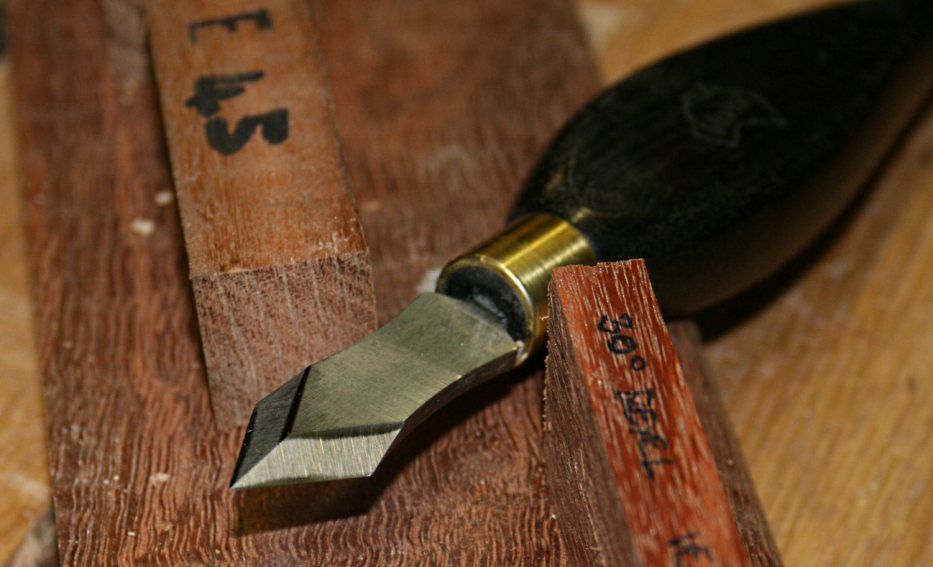
Thirdly, hollow grinding! OK, I have not done this yet on the LV V-blade, but I have done so on my Vesper marking knife, which is the same shape. The V-blade on the handle should be easier.
Here is the sharpened knife with the honed hollows on each side ...
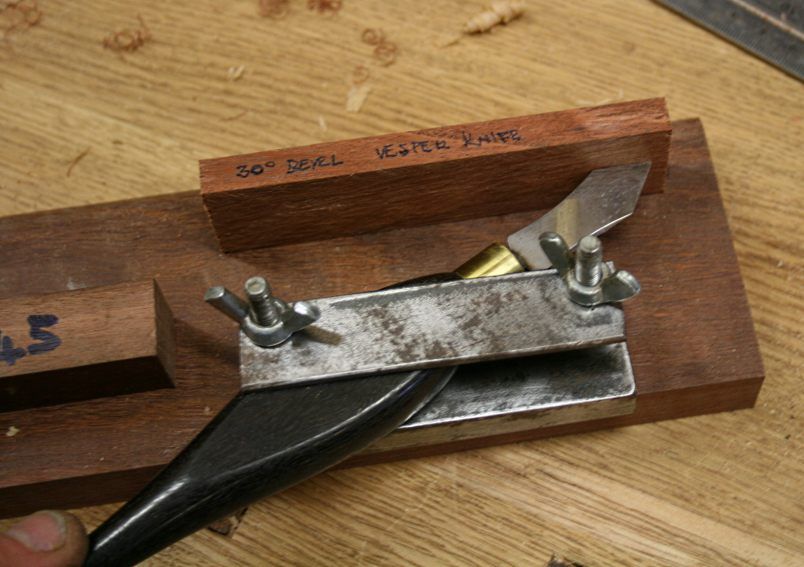
I built the follow jig - which allows me to simultaneously set the bevel angle and skew angle (do this on each side) ...
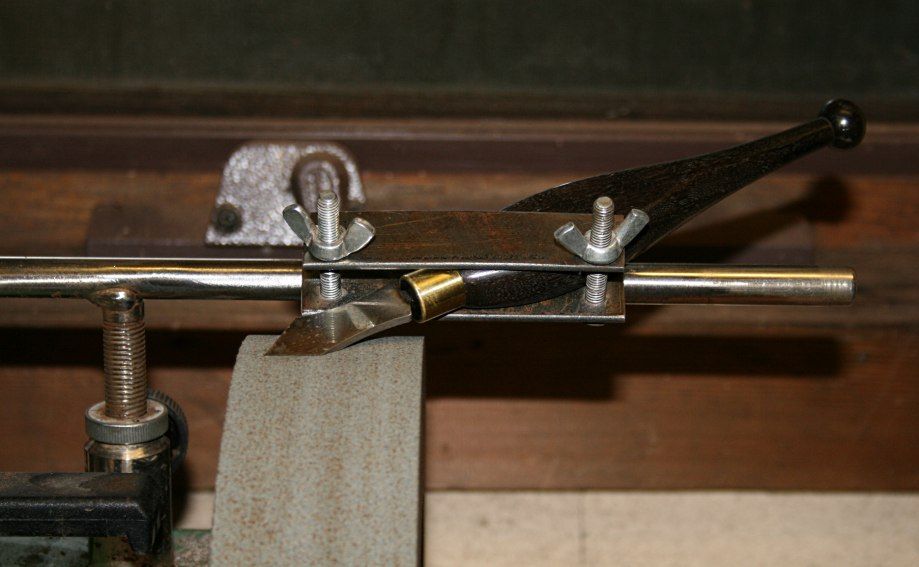
Then it goes onto the Tormek ...
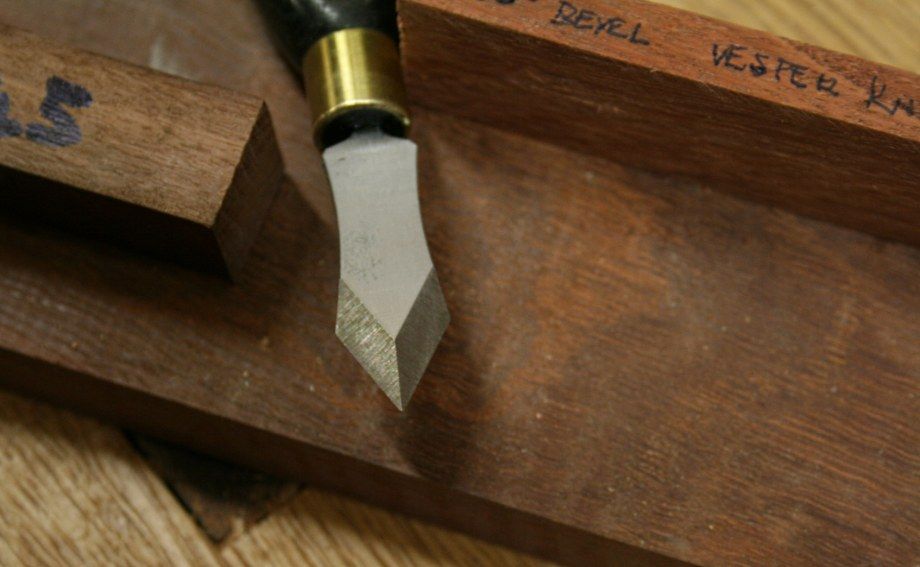
... and comes out looking like this ...
Regards from Perth
DerekVisit www.inthewoodshop.com for tutorials on constructing handtools, handtool reviews, and my trials and tribulations with furniture builds.
-
10th September 2013, 11:54 PM #9
GOLD MEMBER
- Join Date
- Apr 2012
- Location
- Sydney
- Posts
- 1,503
Hi Derek,
I haven't tried Chris' method either and just sharpen by hand but it is an interesting alternative.
I do like Dave Jeske's method for sharpening marking knives.
Makes a very sharp knife easier to use.
BLOG.BLUESPRUCETOOLWORKS.COM: How to Sharpen a Marking Knife
-
11th September 2013, 12:57 AM #10
Bloke
- Join Date
- Jan 2008
- Location
- Central Coast NSW Australia
- Posts
- 1,136
Thanks Derek
More than one way to skin a cat
I agree, the hollow ground method is simpler.
TTLearning to make big bits of wood smaller......
-
11th September 2013, 07:38 AM #11
SENIOR MEMBER
- Join Date
- Jan 2010
- Location
- Range View, Australia
- Posts
- 656
Another way to remove a cats skin re: honing. I use broken stones or the side of a large stone for small cutting edges and scrapers so I don't
deform my big stones.Cheers, Bill
-
13th September 2013, 12:32 AM #12
Member
- Join Date
- Apr 2011
- Location
- Melbourne
- Posts
- 75
Hi Derek,
Thank you for the tutorial. I skimmed through your main review before buying this plane. I never read the sharpening part carefully.
I sharpened the 1/2" flat blade on 8/9/2013 -- just to discover that the router blade jig does not work with the Mk. II honing kit.
I read your review on sharpening carefully. And filed down the screw. But I ended up doing 30 degree, instead of 27.
Thank you for all you have done Mr. Cohen. I appreciate your reviews and tutorials.
Best regards,
...behai.


 Reply With Quote


Similar Threads
-
Differences in plane blades when sharpening
By Mychael in forum SHARPENINGReplies: 8Last Post: 2nd June 2011, 07:28 PM -
Sharpening router plane blades?
By wsal in forum SHARPENINGReplies: 2Last Post: 19th January 2009, 12:47 PM -
Sharpening plane and chisel blades
By Shedhand in forum HAND TOOLS - POWEREDReplies: 17Last Post: 17th March 2006, 02:59 AM -
Sharpening Jig Plane blades
By Woody1 in forum HOMEMADE TOOLS AND JIGS ETC.Replies: 18Last Post: 2nd November 2005, 03:38 PM -
Sharpening Power Plane Blades
By bitingmidge in forum HAND TOOLS - POWEREDReplies: 11Last Post: 31st October 2004, 05:59 PM
