

 Thanks:
  Likes:
  Needs Pictures:
  Picture(s) thanks:
Results 16 to 28 of 28
Thread: Toothing Plane Problem...
-
13th March 2018, 09:17 PM #16
 Intermediate Member


- Join Date
- Mar 2018
- Location
- Ireland
- Posts
- 46

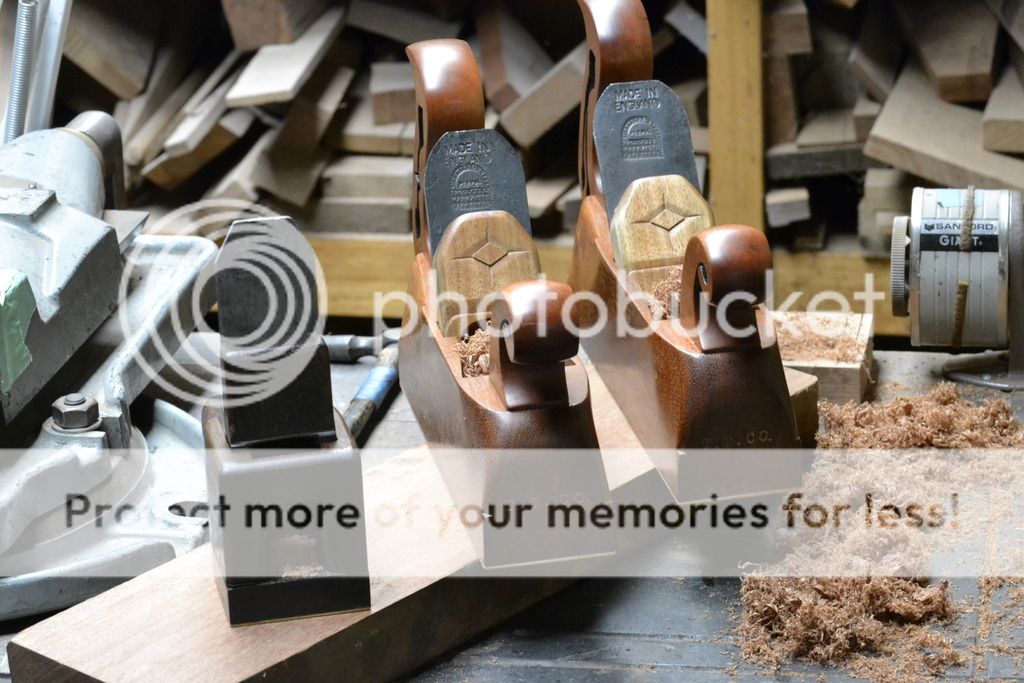
Ah yes, I can see that you are getting a nice collection of fine crumbs there although your plane has a lovely patina which has probably smoothed the wood over time. My Buck London plane has had little use, as you say some smoothing with wax may help the passage of the offending little crumbs....
Regarding what some are saying re: the toothed v smooth surface, I have actually tried hammer veneering on to a smooth pine surface.......glue strength consideration aside, I found the veneer was sliding around on the hide glue whilst applying the hammer and was not conducive to quick and precise placement. The other thing for me is I like to stay true where possible to the original methods from the period. I just get much more satisfaction with the process.
-
13th March 2018 09:17 PM # ADSGoogle Adsense Advertisement
- Join Date
- Always
- Location
- Advertising world
- Posts
- Many
-
14th March 2018, 02:43 AM #17
GOLD MEMBER
- Join Date
- Feb 2003
- Location
- back in Alberta for a while
- Age
- 68
- Posts
- 12,006
two comments Originally Posted by Anotherplane

I'm not sure that hammer veneering can be successfully used with period specific (thick) veneers.
Also, I'm not sure that hammer veneering is compatible with "quick and precise" placement of veneer. Perhaps ask Rob (auscab)regards from Alberta, Canada
ian
-
14th March 2018, 08:05 AM #18
Intermediate Member
- Join Date
- Mar 2018
- Location
- Ireland
- Posts
- 46
Toothing Plane
I have to be honest and admit that although I'd love to use period thickness veneers exclusively, I also use the not very period thinner stuff ! I have though used 2mm thick veneer with hammer veneering and had no problems..... Originally Posted by ian
As far as the application of veneers, I'm not quite sure what you mean by not compatible with precise work, I have found my ( although not extensive ) experience of hammer veneering to allow intricate application of veneer pieces to build up a piece. Saying that I have experience of hammer veneering only. Others methods may well be more suitable for this ?
-
14th March 2018, 09:11 AM #19
 GOLD MEMBER
- Join Date
- Mar 2004
- Location
- Brisbane (western suburbs)
- Age
- 77
- Posts
- 12,117
Aha, Anotherplane, - thanks to you & Rob a light switched on! I've long known that 'keying' surfaces to improve glue-holding is a waste of time & that joints so produced are usually weaker than you'll get with two cleanly-opposed surfaces. Someone already mentioned this above in relation to laminated airscrews. A bloke by the name of J. E. Gordon discusses the whys, I think it was in "The New Science of Strong Materials or Why You Don't Fall through the Floor". He was part of a team working out the best way to stick the (all wood) Mosquito bombers together, & the strength of their glue-joints was a fairly important consideration.. Originally Posted by Anotherplane
So why did toothing for veneer-laying persist? I guess many customs & traditions have lasted centuries & more, despite being useless (or downright harmful in the case of removing large quantities of blood from sick people in order to 'cure' them!), so tradition can be a self-justifying reason. And you obviously get plenty enough glue strength from toothed surfaces, the existence of many sound old veneered pieces attest to that, so the 'weaker' adhesion was probably not a practical concern. But cabinetmakers must have known for a very long time that clean glue joints hold well (I've never seen a toothed mortise & tenon), so why was it almost universal when laying veneers? It adds another step & another tool that has to be purchased & maintained, so why bother if there is no real advantage? But if it makes the laying process so much easier, then suddenly, it all makes sense to me!

Cheers,IW
-
14th March 2018, 02:04 PM #20
GOLD MEMBER
- Join Date
- May 2007
- Location
- Sth Gippsland Vic
- Posts
- 4,370
As to the placement being precise . A lot of the time the veneer is larger and overlaps , and then is trimmed off when dry around the edges. Hammer veneering is just a fast way of covering fronts and sides of things when you cant press . You can join up two or more pieces to get width as well with care, doing the overlapping then cutting through both layers and taking the bottom one out with a knife. You can lay cross banding and string inlays as well with the hammer . What you cant do easily is lay Parquetry or Marquetry . It can be done with the pattern being held together with paper if its not to large probably but If it was getting up in size you'd be mad to risk it . Much safer to press it .
Ive seen pictures and a little bit of writing about hammer laying before sliced veneers came to be around 1840.
Ive also worked on a lot of 1689 to 1720 English walnut veneered furniture. We used to get restoration / repair jobs coming into the shop and we bought and sold a bit . And at the auctions we saw good stuff you may not be buying . All that Queen Anne George the 1 and 2 and 3rd stuff was pre sliced . Although its not in books like a lot of the secrets of trades , most of this ordinary veneering must have been laid with the hammer . Id love to actually try it . Any sawn veneer Ive made I have pressed. Its too thick anyway to try hammering .
Any sliced veneer I laid with hammer, I always toothed the ground as I was shown by the older guys at the workshop . When you do enough of it and it doesn't take long , to see whats going on . It all makes sense. To read on the internet all the time and to see in magazines even about toothing to give things a better hold , keying in . And all that BS got me a bit fed up !! I replied a few times explaing what I believed but you give up after a while .
Toothing is a way of getting the ground flat as possible by hand.
You can also tooth sawn veneers before they are sawn off the board or log . Or as a loose sawn veneer probably .
When you prepare the side of a box say with hand planes and get it as flat as you think you can , the toothing plane when applied right with small set shows you how wrong you got it . It points out your low spots by leaving scratches as its also removing the high spots. so you can watch it getting better .
And the reason its so important is . Your veneer will fall off if you leave even very thin pools between the veneer and ground. Same as it makes a weak joint that will fail if you hide glue a table joint together with a gap rather than a tight joint . Hide glue fails when its done in gappy joints . We saw so much of this working in an Antique shop .
This reminds me of a post I did here a while back on sawn veneers . I had a repair job and the veneer I repaird the job with was from our stash of old boards that had some thick sawn polished Mahogany falling off it because of bad Hide glue technique . Check it out if you like . Its missing some pictures that I may be able to get again .
Sawn Veneer, something interesting I saw today.
Rob
-
14th March 2018, 08:37 PM #21
Intermediate Member
- Join Date
- Mar 2018
- Location
- Ireland
- Posts
- 46
Toothing plane
Great info there, thanks. I wish I had intimate access to examine original period furniture and the way it was built, surely that's the best way to determine working methods of the past.
So it's becoming clearer for me now why my new old toothing plane doesn't like to take more than a very fine pass. I have another older tatty one that does clear shavings if I use a heavier cut and that's what I have been using up to now, perhaps I needn't have grooved the groundwork as much although it's still only a finely grooved surface but certainly not just a barely grooved one which you believe is all that is required if the purpose is to prove the flatness of the work.
-
14th March 2018, 10:13 PM #22
GOLD MEMBER
- Join Date
- May 2007
- Location
- Sth Gippsland Vic
- Posts
- 4,370
Yes its the best way. I had access my whole life . I came home from hospital new born and lived amongst it from that day on . I didn't pay much attention until about the age of 21 though . Originally Posted by Anotherplane
You don't need to be born into it to learn though . It always amazed me how much knowledge some of the clients had. They studied it as a hobby . Auction houses is the way to see the lot . And shops as well but in an auction house you have the right to take out the drawers and turn the piece upside down . You have to know how to do that and be careful .
The depth of the grooves dont have much importance at all . Originally Posted by Anotherplane
Once a piece was flat I used to carefully remove the rough surface left by the toothing blade with a sharp scraper. Or a cork with 80 or 60 grit paper .
I in the old days they had sand paper like we now have the job could be done with that . A longer flat board with handles and 60 grit paper glued to its bottom will do the same thing a toothing plane will do . Traverse the ground flat and it will flatten it . If the ground is a board taken straight from the thicknesser and not hand planed . A sanding board or toothing plane will do the same thing to that.
Rob
-
14th March 2018, 10:36 PM #23
Deceased
- Join Date
- May 2008
- Location
- Australia
- Posts
- 2,357


-
14th March 2018, 11:05 PM #24
Deceased
- Join Date
- May 2008
- Location
- Australia
- Posts
- 2,357
With these early type bevel down toothing irons, the depth of cut should not exceed the gullet height.
-
15th March 2018, 10:48 AM #25
GOLD MEMBER
- Join Date
- Feb 2003
- Location
- back in Alberta for a while
- Age
- 68
- Posts
- 12,006
I think Rob may have covered this, but for the veneering that I have done, I've assembled the pattern using veneer tape and then applied the completed pattern to the ground. So any intricate positioning was done before glue was applied. Originally Posted by Anotherplane
regards from Alberta, Canada
ian
-
15th March 2018, 11:36 AM #26
Intermediate Member
- Join Date
- Mar 2018
- Location
- Ireland
- Posts
- 46
Veneering
Ian, Although I haven't used this technique as yet, it certainly makes a lot of sense for intricate pattern build ups and is one I hope to use in the future if I need to.
I have found hammer veneering straightforward and quick to get to task on things like crossbanding etc, I can just go along and apply each piece quickly and easily. I built a small table just building up the pieces including the tapered legs with hammer veneering and I really enjoyed the process and was able to achieve quite a intricate result ( sharp learning curve however, I'm glad animal glue is reversible ! )
But yes, as Rob mentioned earlier for something like parquetry and marquetry it would be quite a challenge if not impossible.
-
15th March 2018, 02:19 PM #27
GOLD MEMBER
- Join Date
- May 2007
- Location
- Sth Gippsland Vic
- Posts
- 4,370
One great trick I learned to do with hammer veneering was to glue size the veneer and and ground then let it dry, do the veneering the next day. Mix hide glue in a mug with hot water and paint it on both sides of veneer. It can make a big difference as to how well the veneer grabs . If your laying flame or crotch you can find it very hard for it to grab. Part of the grain is not running the length of the sheet but across the thin distance . It breathes or lets air through it ,as well as wanting to expand and bubble up . Sizing slows down the air going through I think . It just grabs a lot better.
Rob
-
16th March 2018, 03:22 AM #28
Intermediate Member
- Join Date
- Mar 2018
- Location
- Ireland
- Posts
- 46
Glue Size
Nice tip ! Originally Posted by auscab
I've actually stumbled across this accidently.......in a way
I was attempting to hammer veneer a piece of awkward veneer and had to give up after a few attempts , I put the piece aside after giving a quick wipe down with hot water. The next day I said I will try once more to get the piece down and it was much easier. The veneer had what I suppose would be "accidental" glue size from the previous day....

 Reply With Quote


Similar Threads
-
Mathieson & Son Toothing Plane
By Tccp123 in forum ANTIQUE AND COLLECTABLE TOOLSReplies: 3Last Post: 11th November 2017, 03:27 PM -
toothing plane blade advice needed
By coffeefro in forum HAND TOOLS - UNPOWEREDReplies: 17Last Post: 13th August 2017, 08:45 PM -
Moulson Brothers Toothing Plane...any good?
By fudo133 in forum HAND TOOLS - UNPOWEREDReplies: 3Last Post: 10th August 2014, 09:00 PM -
Bevel up Toothing Plane.
By planemaker in forum HAND TOOLS - UNPOWEREDReplies: 20Last Post: 31st July 2014, 01:56 PM
