

 Thanks:
  Likes:
  Needs Pictures:
  Picture(s) thanks:
Results 31 to 45 of 70
Thread: Build Thread: A Goat in New York
-
25th January 2015, 02:07 PM #31
 Member


- Join Date
- Oct 2014
- Location
- United States
- Posts
- 86

Gluing up the bulkheads:
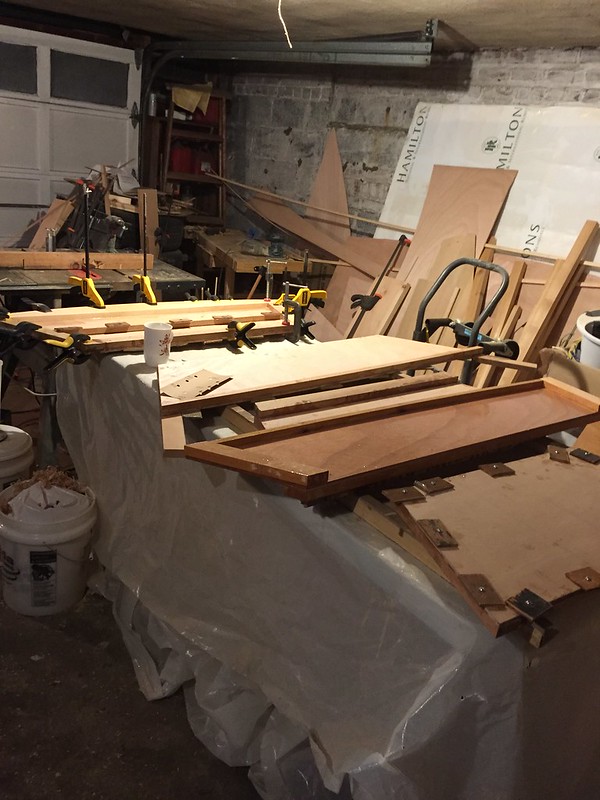
Behold the glory of my messy garage too.
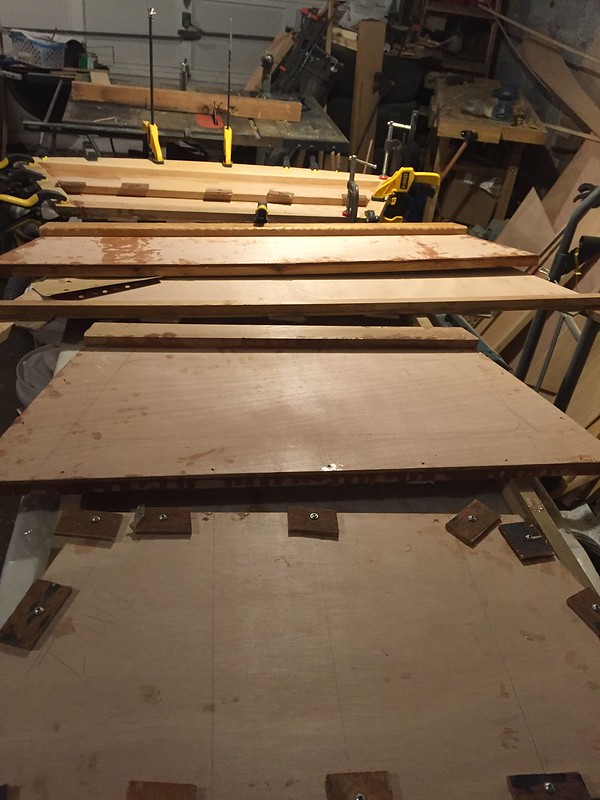
Next, just for fun, I lined up the bulkheads in order. Very boatlike, don't you think?
Lastly, the foils. Sort of. I'm not 100% happy with the shape or smoothness of them, but I had to stop.
The holes in the bottom of the daggerboard are because I screwed it down to my workbench in a spot I _thought_ I was going to cut off later. But then realized (I think?) that I'd mis-measured, and the board had to be longer than I had thought. Oh, well.
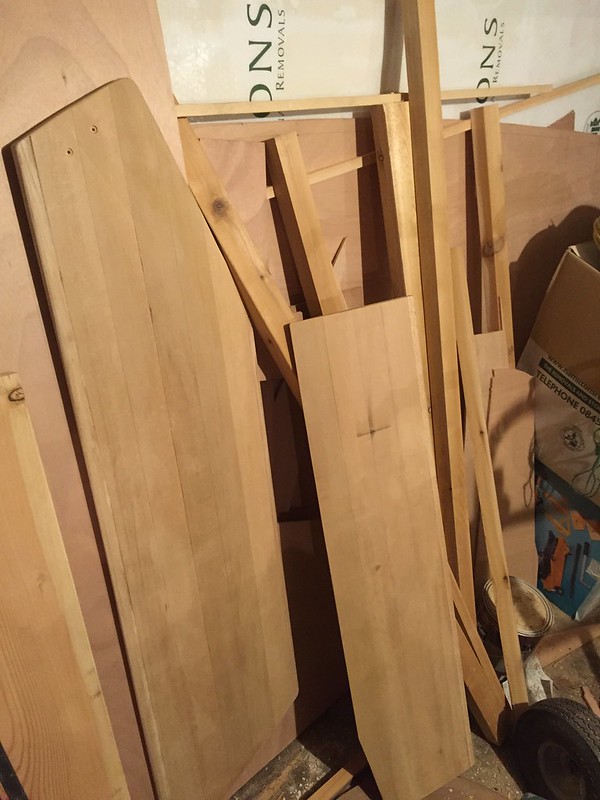
Also not sure what that black line is on the rudder. Hmm.
-
25th January 2015 02:07 PM # ADSGoogle Adsense Advertisement
- Join Date
- Always
- Location
- Advertising world
- Posts
- Many
-
26th January 2015, 03:45 AM #32
Member
- Join Date
- Oct 2014
- Location
- United States
- Posts
- 86
I forgot to add: I had just put several screws into the bottom of the transom to hold the frame down when I remembered Mik's suggestion to try to avoid fasteners through the transom. I figured it was too late for those four, but I used clamps the rest of the way around, as you can see in one of the pics above.
That left the problem of the seat cleat, which couldn't readily be clamped. So I grabbed my 1 1/4" dry wall screws (mostly what I use are 1" kreg screws), fashioned up some more pads for screw-clamping, and screwed the seat cleat down to the line on the transom from the inside. The cleat split some on the starboard end (I didn't pre drill), but it seemed to more or less work otherwise.
How did others attach the seat cleat to the stern?
In other misadventures, I've got some side frames that don't exactly line up with the ply, which I will plane or rout down later. And of course I still have to bevel the frames down.
I glued up the transom on the side with all my markings too, so I'll have to remark bevels on the back of the transom before I start in. Woohoo. Another opportunity for error.
-
26th January 2015, 06:00 PM #33
Senior Member
- Join Date
- Dec 2011
- Location
- Brisbane
- Posts
- 104
You probably could use weights to hold the seat cleat down. I still haven't figured out the best method to make the framing stick to the right spot on the ply. A few nails with tips used as locating pins works, but you need to use more than enough glue and let the clamps squeeze out the excess for that. To avoid nail holes, I've taken to painting both faces with straight epoxy, then mixing in glue powder and applying a modest amount to one face, rubbing the faces together to remove air pockets, then carefully watching what each clamp does as pressure is applied, because any non-perpendicular pressure makes the pieces slide off the mark. Then checking that things haven't moved 4 or 5 times before I finally walk away. Easy!
")
-
27th January 2015, 02:15 AM #34
Member
- Join Date
- Oct 2014
- Location
- United States
- Posts
- 86
Thanks Poit. Using epoxy has definitely been a learning curve for me. I just hope I'm learning fast enough that the boat will float by the time I'm done... I've got a big puddle of epoxy on the outside of one of the frame arms of bhd3. Do I need to sand that off or is a mechanical bond good enough in that location, given that the force of the sides are pulling in against that location, and there's bare wood above and below the puddle? Sorry--I know a pic would help but I'm out of town.
-
27th January 2015, 10:05 AM #35
Senior Member
- Join Date
- Dec 2011
- Location
- Brisbane
- Posts
- 104
Hi Brian. Yes I have a few puddles like that. The epoxy sinks into the wood, so even if you wanted to you can't remove all of it without removing wood from the frame. As long as the puddle is shallow, just a light sand to remove the gloss should be all that's needed. (Others, who unlike me actually know what they're talking about, may wish to chime in!)
-
27th January 2015, 12:25 PM #36
Member
- Join Date
- Oct 2014
- Location
- United States
- Posts
- 86
Thanks Poit. Will save me some sanding...
-
29th January 2015, 07:04 PM #37
Happily receives emails.
- Join Date
- Jul 2005
- Location
- 'Delaide, Australia
- Age
- 65
- Posts
- 8,138
As long as there is not a significant bump at the transition it will be fine.
Strangely enough, if there is a little bump then varnish will hide it better than paint will. Pain shows any bumps.
MIK
-
31st January 2015, 03:51 PM #38
Member
- Join Date
- Oct 2014
- Location
- United States
- Posts
- 86
Today I beveled. I'm not convinced I did it particularly well, but I think I got it done more or less.
I also started to glass the foils, and think I already made a hash of that too. But I'll come back to that.
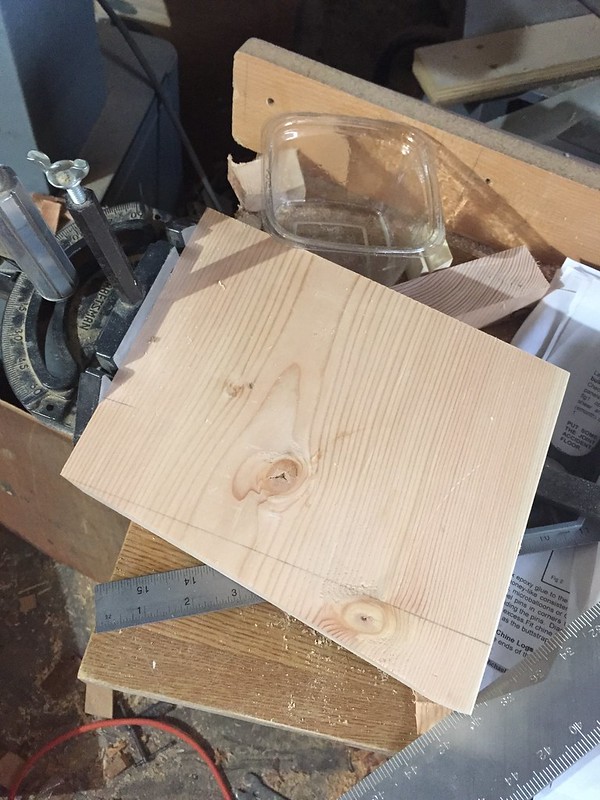
My minor victory of the day (we hope) was a little birds mouth test piece:

I cut out the birds mouth with the goal of getting the corners aligned, per PAR's preference:

That actually went pretty well:

That done I glued up a 3" section and clamped it all up. Clamping isn't really a sustainable way to clamp a 16' mast but it seemed ok for the test piece. We'll see tomorrow whether it holds together, but it left me feeling that this was a task that I might be able to get done.
As for the foils, laying on the bias-cut cloth on the ends went ok. But I then impulsively started rolling epoxy onto the rest of the centerboard. I put on two layers wet-on-wet before I remembered I'm supposed to be glassing it, not just epoxying it. I suppose I could have tried to lay glass over it right then, but I decided not to do anything else stupid for now. I left everything to cure.
My plan is to scuff up the epoxy with sandpaper then just glass over that. Thoughts about that plan? Warnings? Let me know. Thanks.
-
2nd February 2015, 07:40 AM #39
Member
- Join Date
- Oct 2014
- Location
- United States
- Posts
- 86
First of all, I've been re-reading davlafont's and callsign's build blogs and threads, and have been amused (if also slightly frustrated with myself) to note that I've been recreating some of their same mistakes and learning curves. If only I paid better attention in the first place...
Anyway, another one in the dumb question department: is there a good trick for getting epoxy into screw holes? Feels like I try to fill them, and they dry empty, with the "bonus" of a puddle of epoxy to sand around the still-empty hole. I've tried using 4- and 8-penny nails to work epoxy into the holes, to use a scraper to push it in. Nothing seems to work very well. So thoughts welcome on that score.
I've been on the road a lot, and am a little laid up today. But yesterday I glued up half the staves for my birdsmouth mast. I examined the clear "select pine" at my local Home Depot more closely, and decided that most of it was in fact Doug fir.
So I picked out 16 of the best looking ones (they only came in 6' and 8' lengths). They weren't cheap, but half the price of buying CVG doug fir from the fancy lumberyard near me.
Last night I cut scarfs in all 16. I made them 8:1 scarfs in 3/4" thick wood. I chose 8:1 because it allowed me to make 15'6" staves out of two pieces of wood. Scarfing jig:
My jig was too short front-to-back, and so I chewed up one of my bar clamps on the bottom.
Definitely an appropriate warning in my case here:

For those unfamiliar, new drivers in the UK are required to wear an L badge on their car while studying for their licences. Does Oz have a similar requirement?
I glued up half of the scarfs last night. I did half because I could only find so many clamps, because I only had so much room for gluing on the folding table that is my glue station, and also because I figured if I screwed something up, I would have a chance to improve my method on the other staves, and wouldn't have wasted _all_ my wood.
They don't look too bad this morning:

Note high-tech system for ensuring the straightness of the joins.
Close up of scarfs themselves:
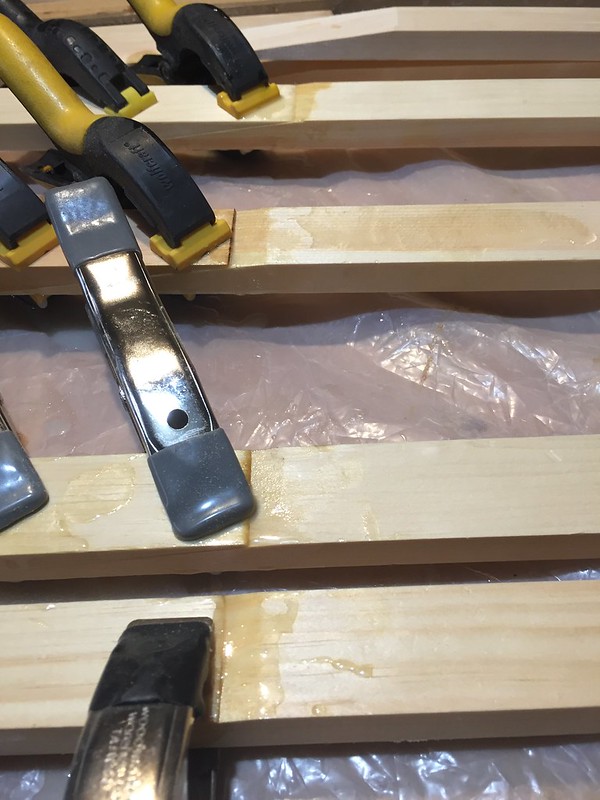
I just used two spring clamps on each scarf and lined them up laterally by hand.
The staves are 1x2s, so in practice they are 3/4"x1.5", or about 20x40. This is bigger than what is called for in the birdsmouth plans, so my plan is to plane them down in both dimensions after scarfing, and then cut the birdsmouths, then taper.
Except I was intrigued by the suggestion, read somewhere, that you could achieve some additional weight savings by tapering partially on the staves, then achieving the rest of the taper by thinning the walls as you go up the mast. This way, you maintain a wall thickness closer to the target 20% of mast diameter as the mast tapers, rather than ending up with wall thickness of 50% or more near the top.
Trouble is, I don't really know the formula for achieving this. Maybe I shouldn't try. My first approximation thought was to taper the backs of the staves about half as much as in the plans, and take the balance off the outside after glue up.
-
5th February 2015, 12:10 AM #40
Member
- Join Date
- Oct 2014
- Location
- United States
- Posts
- 86
Foils! They don't look too bad if you keep an appropriate distance...
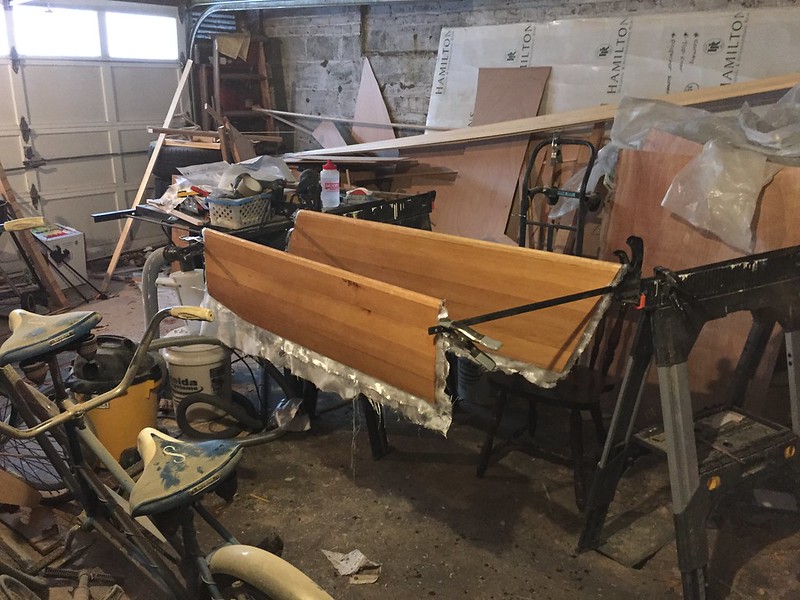
Note my setup for hanging the foils for glassing and epoxying. I put a screw in each end, hung the screws on the ends of two bar clamps clamped to sawhorses, and spring-clamped the screws to the clamps because they kept slipping around otherwise.
-
11th February 2015, 07:52 AM #41
SENIOR MEMBER
- Join Date
- Aug 2010
- Location
- New Jersey, USA
- Posts
- 767
Hey Brian, I am SO sorry for not noticing your thread 'til now. I've been using my iPad more and more, and somehow I missed it using the Tapatalk app.
You're doing great. Make mistakes, fix mistakes, take on challenges (Birdsmouth), find nice wood; you're on it like doggone it.
I'm looking forward to sailing alongside later this year because you are clearly moving at a rapid pace. Also, I'm intrigued by your bicycle collection! Feel free to throw in a post about those if you have no woodworking updates!Dave
StorerBoat Builder, Sailor, Enthusiast
Dave's GIS Chronicles | Dave's Lugs'l Chronicles | Dave's StorerBoat Forum Thread
-
11th February 2015, 08:03 AM #42
Member
- Join Date
- Oct 2014
- Location
- United States
- Posts
- 86
Thanks Dave! I do admit, posting here sometimes feels a little lonely. Not that anyone on a message board owes me or anyone else anything, but it can be hard to keep posting if you start to feel like you're mostly talking to the crickets. Five years ago, it seems like a whole bunch of goats were being built at the same time, and the community feels like it was more active.
It's nice to get some encouragement. I definitely would love to join you in a greater NY tandem goat adventure. I love the pics of your goat in NY harbor.
I will put up some words on the bikes soon, since you asked. It's an eclectic but interesting (to me) set.
Since I posted last, I've assembled my center case and built my rudder stock twice. Plus epoxy-coated one side of each of the bulkheads.
But I'm on the road again at the moment so I'll put up some pics and a proper post on that stuff when I get home.
Thanks again Dave. I really appreciate the support.
-
11th February 2015, 10:55 AM #43
SENIOR MEMBER
- Join Date
- Aug 2010
- Location
- New Jersey, USA
- Posts
- 767
Build Thread: A Goat in New York
Not gonna lie: Facebook has sucked the air out of this forum. I still feel like this is the best place to chronicle your build and ask the detailed, esoteric questions that only GIS builders can answer. I've read your WBF thread of course, but even there you'll get input from non-GIS builders that may not be so useful. You'll also get lots that is, and at least you know the folks on WBF are salty.
Anyway, keep up the good work and don't feel pressured to HAVE a Goat at this year's gathering; we'll herd you in regardless.
This my recent acquisition/project, a 1972 Raleigh Sprite 27. It's not "restoration" worthy so I'm just freshening things, replacing stuff, upgrading what makes sense. I want to try commuting to work once the weather permits. Still to come are Big chrome headlight (LED) and possibly new racks front and rear. I'd love to install a leather Brooks saddle, but the new prices are !!!
 Dave
Dave
StorerBoat Builder, Sailor, Enthusiast
Dave's GIS Chronicles | Dave's Lugs'l Chronicles | Dave's StorerBoat Forum Thread
-
12th February 2015, 10:36 AM #44
Senior Member
- Join Date
- Nov 2011
- Location
- Riverina NSW
- Posts
- 211
I know what you mean Brian but don't feel too disheartened. Build threads provide so much for those like me that intend on building but haven't got round to it yet and simply don't post because I don't have the experience nor the answers. I agree with davalfront too. I don't Facebook and did notice a drop in activity from a while back. And I too think that this place provides the best avenue for build threads. For not only advice but a valuable reference for the rest of us now and in the future. Your efforts in documenting a build is appreciated. After three years of owning plans I swear this will be the year of my Goat. I hope Originally Posted by BrianMCarney


Though I'm happy to say I've got one answer for you. Yes to your question about "L" plates. In my state we have yellow background with black L. Then there's a red P on white background then a green P on white background. My 16yo son's currently going through the process and it's a stark contrast to the way things were done pre photo licences in the 80s.
-
12th February 2015, 03:42 PM #45
Senior Member
- Join Date
- Dec 2011
- Location
- Brisbane
- Posts
- 104
I'm the same - I'd comment more, except I feel a bit funny offering advice when I haven't ever built a goat before.

You're a braver man than me taking on the birdsmouth mast. All I had to hear was that the BM mast wasn't hugely better in performance terms than the square box mast to make me choose the latter. Though it's definitely the more stylish choice and it would be quite satisfying to build one.
One tip with screw holes is to use a large hypodermic needle. I haven't tried it with epoxy yet, but I've already discovered that it isn't so easy to get epoxy into holes and gaps by other methods. You'd want to collect up a bunch of holes and do them all in one hit. One thing I've discovered, a vet clinic was the place to go for cheap syringes.

 Reply With Quote


Similar Threads
-
Goat - new build in Seattle - and a bottom panel question
By SEA_JWC in forum Michael Storer Wooden Boat PlansReplies: 59Last Post: 25th January 2021, 04:36 PM -
New box boom build for lugsail - Goat Island Skiff
By paulie in forum Michael Storer Wooden Boat PlansReplies: 43Last Post: 6th May 2013, 07:31 PM -
Goat Island Skiff - New Build - Walnut Creek CA
By jboats in forum Michael Storer Wooden Boat PlansReplies: 111Last Post: 9th March 2010, 09:45 PM -
Helping Build the Goat Island Skiff Part III
By Joost in forum Michael Storer Wooden Boat PlansReplies: 8Last Post: 12th December 2008, 07:20 PM -
helping build the Goat part two
By keyhavenpotter in forum Michael Storer Wooden Boat PlansReplies: 1Last Post: 8th November 2008, 09:53 AM
