

 Thanks:
  Likes:
  Needs Pictures:
  Picture(s) thanks:
Results 1 to 15 of 21
Thread: GIS Yawl Conversion/variation
-
30th December 2012, 03:10 PM #1
 Senior Member


- Join Date
- Mar 2010
- Location
- Queenstown New Zealand
- Posts
- 382
 GIS Yawl Conversion/variation
I finally finished my yawl conversion a couple of weeks ago. (OK, it's still work in progress, but I've had a couple of chances to try it out) I've been reluctant to post too much till I've had a chance to see what works or not, but I'm now ready to share what I've done.
I got a good chance to test it before Christmas - gale blowing from the northwest, I went about 18 km west on the arm of the lake that runs east-west before launching. Wind blowing diagonally/along the arm of the lake so calmer with occasional gusts on my side of the lake, full gale with whitecaps and the occasional willywaw coming through in the middle and on the far side. Rowing then sailing with one reef to get out to the main lake, then I quickly needed to go to third reef as I got into the stronger wind. Lots of fun going fast/surfing downwind with mizzen and third reefed main, then I got hit by a squall line/almost a willywaw. I was doing alright till I got picked up by a bigger wave, didn't anticipate which way it was trying to broach me quickly enough, and over I went. Cold water (12 degrees celsius or so), but I had a shortie wetsuit on. Self rescue went nicely, I climbed on the centerboard, as the boat came up it turned nicely into the wind with the mizzen and sat about three quarters into the wind, main sail on the other side to me so it was easy to climb in. My big centre buoyancy compartment proved it's worth, the boat had some water in it, but wasn't in danger of going over again from the water sloshing around, the boat was sitting plenty high enough so no more was coming in. I dropped the rig, bailed it out, sailed backwards under mizzen alone for half an hour or so till the wind had dropped/I was more on the calmer side of the lake and could get the mainsail up again. More fun surfing along under third reef, spray flying everywhere. Once I got into the more sheltered Frankton Arm of the lake, I could shake out the reefs and have a good sail around under full sail.
All in all a good experience, I was really happy with the options the mizzen gave me, holding the boat head to wind while reefing/hauling up the sail again, holding the boat in a good position for re-boarding in strong wind and waves and having the option to sail backwards under mizzen alone when it was too windy to get the main up. I'm really happy with the extra center buoyancy, I suspect I would have been in some trouble in a standard Goat with the amount of water it can hold. It's given me a lot of confidence in my ability to self rescue on my own, I had a waterproof 5W VHF plus waterproofed cellphone plus flares with me, but was still very much in the mode of "I hope no one saw me go over out here, it'd be really embarrassing if the coastguard or someone else turned up"
Sorry, no pictures, I had my (also waterproof) camera with me, but had my hands full...
Next some pictures (taken in the front garden) of my Yawl set-up.
Ian
-
30th December 2012 03:10 PM # ADSGoogle Adsense Advertisement
- Join Date
- Always
- Location
- Advertising world
- Posts
- Many
-
30th December 2012, 03:34 PM #2
Senior Member
- Join Date
- Mar 2010
- Location
- Queenstown New Zealand
- Posts
- 382
My Yawl conversion:
When I started building, I didn't plan on doing the yawl version, but was convinced by Mik's comments after he completed the Texas 500 with John Goodman.
I'd already done the hatch in the front buoyancy compartment in a way the precluded putting in a second forward mat step. I was also reluctant to do anything that could compromise the front and rear buoyancy compartments, so I decided to leave the main mast where it was and adjust the underwater COE by making my daggerboard more adjustable fore and aft. I kept the bottom of the slot at original length and position, but make it wider at the top, I extended the top of the slot about 2 1/2 inches both front and back. You can see my ability to adjust daggerboard angle in these two pictures:
This shows my centerboard nearly upright, held in place with a bungee from the rear, this is how I have it when I'm not using the mizzen, and on the left, angled back about 45 degrees, held in place with a bungee from the front. This is how I have it when I'm using the mizzen:
Adjustable daggerboard.jpg
This has worked well, the boat balances well under mainsail alone, balance was also good with the mizzen up and the centerboard angled back, though I didn't try going to weather triple reefed. (Though it did go well enough to weather in conditions that required a second reef plus mizzen on a previous outing)
More when I get a chance, pictures of the mizzen setup on the transom are attached, I'll put some more description of how I mounted the mizzen on top of the rear buoyancy compartment, hopefully soon.
Ian
-
31st December 2012, 08:08 AM #3
Senior Member
- Join Date
- Mar 2010
- Location
- Queenstown New Zealand
- Posts
- 382
More on my mizzen setup:
GIS Yawl1.jpg
Mizzen.jpg
My mizzen mast is fiberglass, wound on a tapered mandrel with a sleeve in the middle so it comes apart into two short pieces and weighs just on 2 kg. Boomkin and mizzen boom are also tapered fiberglass tubes, they were wound on oar shaft mandrels.
I did my mizzen with a boom jawed boom rather than a sprit boom as I wanted to be able to reef it and couldn't figure out how to do so easily with a sprit boom. A 3mm sprectra line goes from the clew reef point down to a loop on the boom, forward to the tack end of the boom, through a hole from bottom to top in the boom jaws, up to the tack reef point then back down and though a hole on the other side of the boom jaws where there is a wooden cleat. I have downhaul and vang on the boom made with tape and friction buckles. My halyard attaches to a wooden cleat on the front side of the mizzen mast. Sounds complicated, but with everything on the mast, setup is just putting the mizzen mast and boomkin in place, doing up the partner lashing and pulling the two friction buckles tight and it's ready to go. My halyard is only long enough to let the mizzen down to it's reef point, and has a stopper knot on it's end. Reefing the mizzen is very quick - just release the halyard, bring down the tack and clew by pulling on the reefing line and cleating it off on the side of the boom jaws, then retighten the two friction buckles.
I figure if I want to take the mizzen down, I take the whole mizzen rig down, my mizzen mast is fibreglass and sleeved in two pieces so it can go right up the front if I don't want it.
These pictures show the boom jaws, downhaul and vang and reefing line at the tack end of the boom:
Mizzen downhaul and vang.jpg
Mizzen Boom Jaws.jpg
My mizzen sheet goes through inside the hollow fiberglass boomkin. There are hardwood plugs at both ends of the boomkin where the sheet enters and exits the boomkin. The boomkin is in two pieces with a sleeve just behind where it exits the transom so I don't have to undo the lashing when I take it off, the rear part just slides out and stows in the boat, leaving a short stub sticking out of the transom.
Boomkin-Mizzen Sheet.jpg
This shows my mizzen mast step and partner, and boomkin arrangement from the inside. I'm happy with how this has worked out without compromising the rear buoyancy chamber. I did some engineering on how strong this all is, I'm confident my transom is strong enough to take this. I couldn't see any undue flexing under sailing loads, and it all survived a crash capsize while surfing fast downwind.
Mizzen Step and Boomkin.jpg
You can also see my wooden flush hatch in the top of the rear buoyancy compartment. These have worked well, the middle buoyancy compartment on the in-water side when I last capsized had a third of a cup of water in it when I got home, the others were dry and dusty. I'll experiment with a little more bungee tension and some glue where the rubber sealing strip joins, but I guess I'll still be putting the down sleeping bag in a dry bag if I'm out on the salt water.
By the way, this is my original build thread with more info on the variations I've put into this boat:
https://www.woodworkforums.com/f169/g...ealand-115452/
For completeness, the innovation that didn't work was the drainage tubes from the front of the rear buoyancy compartment through to the transom. The rocker meant they had to enter the the front of the rear buoyancy compartment at too great a height to let much water out in a capsize. I've got them taped up, but they would probably prove useful if I came through surf and ended up with the boat full of water on the beach.

Ian
-
1st January 2013, 12:10 PM #4
Happily receives emails.
- Join Date
- Jul 2005
- Location
- 'Delaide, Australia
- Age
- 65
- Posts
- 8,138
Very useful Info Ian!
What were the final dimensions of the centre seat buoyancy? Did bulkhead #3 stay in the same position?
Quite apart from the interesting technical details - a great story of a nice sail.
One thing with Mizzens ... one thing I understood from reading was that if you sheet the mizzen in really tight the boat will sit head to wind. This is true but it is a bad idea.
The downside of pointing directly into the wind is that you will get the wind on one side of the mainsail and then the other making the stability hard to predict. Lurches one way then the other
However just a little bit of slack in the mizzen sheet will keep the boat with one side more predominantly toward the wind - much more comfortable and predictable.
Sounds like you had it set up just right.
MIK
-
1st January 2013, 04:33 PM #5
Senior Member
- Join Date
- Mar 2010
- Location
- Queenstown New Zealand
- Posts
- 382
My comments in blue, Mik's in black:
 Originally Posted by Boatmik

I am very impressed with how hard it is to invert the GIS with the sealed buoyant masts and yard. My previous capsize was with a crew, post capsize he was standing on the submerged gunwale and hanging on to the mast to keep himself as much out of the water as possible (we didn't have wetsuits on and water was about 11 celsius). I of course couldn't right the boat till he got off there and into the water, but the boat refused to invert as he stayed there as I went around to get on the daggerboard. A huge improvement in that regard on the Sunbursts I used to sail on Otago Harbor with alu mast and holes for the halyards.
I may try a big block of styrofoam covered in PVC or canvas tied down forward of the daggerboard case, nearly filling that space to further limit the water in the boat in a capsize. I'm also thinking about a tether from me to the boat if I'm out on my own, the main danger in a capsize would be getting separated from the boat. Not sure how long to make it, reading Frank Dye, he seems to believe in having a lifeline quite long to cut chances of getting caught up in the sail/rigging, though thats less of an issue with no stays. I'm thinking nylon so it sinks out of the way, long enough so I can go around the back of the boat, get on the daggerboard, then back in the boat from that side without the line restricting that.
Ian.
-
2nd January 2013, 06:31 AM #6
Senior Member
- Join Date
- Dec 2009
- Location
- Texas
- Posts
- 319
From one GIS yawl owner to another, congratulations on a great looking GIS yawl.
In one of your pictures of the daggerboard I see an oar in the background with an attached oar lock that seem to drop down into the gunnels between the spacer blocks.
Can you comment on how they are built and how well this system works?
-
2nd January 2013, 11:28 AM #7
Happily receives emails.
- Join Date
- Jul 2005
- Location
- 'Delaide, Australia
- Age
- 65
- Posts
- 8,138
If experimenting with a tether or lifeline, I would look at surfboard tethers/legropes ... not necessarily on your leg.
They might be able to be bought in a range of lengths. But maybe or maybe not long enough for moving around the boat.
The advantage I can see (unless the tech has changed) is that they have a shorter surgical rubber outer that would keep things compact but it is quite stretchable. But a cord up the middle that limits the length to a longer preset length.
It also keeps the leash thicker, stiffer and less likely to get tangled as a rope one would tend to do
In the old days people used to make their own from surgical rubber tube and VB cord. A custom length would be possible.
I might be wrong but my feeling is that lots of rope hanging around in the cockpit is a recipe for inconvenience at the least.
MIK
-
2nd January 2013, 11:28 AM #8
Senior Member
- Join Date
- Mar 2010
- Location
- Queenstown New Zealand
- Posts
- 382
It works, but the oar lock set-up isn't complete. Yes, they do drop down into the spaces between the gunwales. I'll post more on them when I've got them sorted properly, plan is to 3D print some swivels and use with sleeves and collars off the competition style oars so that the blade angle and feather angle on the return are set as they are for a competition set-up. It'll be interesting to see if it's a good plan or not. Originally Posted by john goodman
Ian


-
2nd January 2013, 11:35 AM #9
Senior Member
- Join Date
- Mar 2010
- Location
- Queenstown New Zealand
- Posts
- 382
Yes, I'll play with a few ideas. More ropes floating around in the cockpit would be a pain, but it seems to me the biggest danger that it would be hard to recover from out there would be getting separated from the boat either falling out or having it blow away as you go around to get to the daggerboard after capsize. Originally Posted by Boatmik
Ian
-
2nd January 2013, 08:24 PM #10
Happily receives emails.
- Join Date
- Jul 2005
- Location
- 'Delaide, Australia
- Age
- 65
- Posts
- 8,138
It is the old balance.
If you have a boat that will come up dry after capsize it will blow relatively quickly on its side
if you have a boat that won't blow away easily it will scoop up a lot of water as it comes upright.
MIK
-
3rd January 2013, 09:41 AM #11
Senior Member
- Join Date
- Mar 2010
- Location
- Queenstown New Zealand
- Posts
- 382
Some things I want to try next:
A really small lugsail - perhaps yard and boom only 1.5 m long, area 3 square metres or so, reefable down to 2 square metres. I could then then run with 2 square metre main and 1 square metre mizzen if I need to.
Fiddle with the halyard and downhaul arrangement so that I can let the mainsheet go and let the mainsail stream over the bow if I am getting overpowered running downwind. I tried bringing the boom right around to the bow with the boat rigged in the front garden, it was binding and wouldn't go that far when the downhaul was tight, so I need to experiment with this a bit more, both reefed and unreefed so that becomes an option.
Make up some sandbags I can tie down in the bottom of those middle buoyancy compartments. I'd be curious to see what effect say 60 kg in the bottom of the boat has on handling in windier conditions. I'm about 70 kg, the boat rigged and all wouldn't be much more, so total displacement on the water is a fraction of any other 16 ft boat anyone is sailing.
I'm keen to do some cruising on some of the big lakes south of here; Lakes Te Anau and Manapouri, but they're like spiders with long arms extending in several directions, so conditions can get quite extreme at times, so I really have to get the boat sorted.
Ian

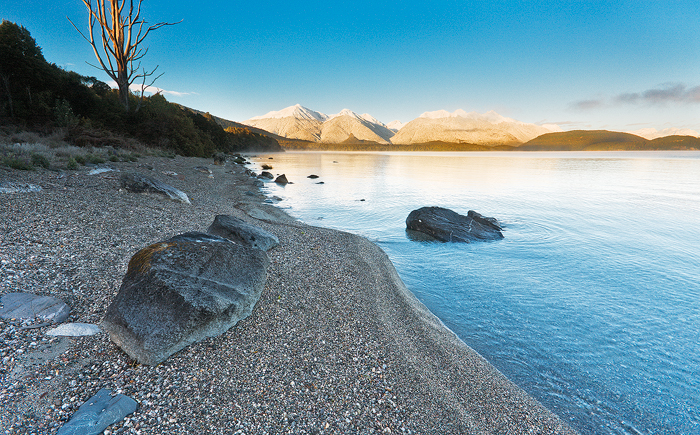
This is one of my favorite images from this area:

-
3rd January 2013, 12:15 PM #12
Happily receives emails.
- Join Date
- Jul 2005
- Location
- 'Delaide, Australia
- Age
- 65
- Posts
- 8,138
Howdy Ian, Originally Posted by IanHowick
If you do allow the sail over the bow one thing to know is the right way to retrim the sail when you want to get going again.
I've seen some spectacular capsizes on BETH when lending her to other people before I started to tie in a stopper knot in the mainsheet to prevent the boom going out further than 90 degrees plus a bit.
The trick - when the sail is blowing out in front of the boat is - DON'T touch the mainsheet to start with. Wear the boat around so it is beam on to the wind. Then trim in the mainsail.
The problem is the heeling forces are large and counter intuitive so the boat blows over very easily. But if the boat is on a beam reach or towards a beam reach ... then it become quite predictable in comparison.
This might be necessary also if the mizzen is released in the same way. Though if you want to stow the mizzen from the blowing forward position you can release the snotter and roll the sail up from the leach around the sprit boom. Then a single lashing holds it tight against the mast.
MIK
-
3rd January 2013, 12:19 PM #13
Happily receives emails.
- Join Date
- Jul 2005
- Location
- 'Delaide, Australia
- Age
- 65
- Posts
- 8,138
You will need fastenings through the inwale through the spacer block and into the gunwale on both sides of the selected inwale space. Originally Posted by IanHowick
I can't find the right photo ... so you have probably thought about this already
MIK
-
3rd January 2013, 04:58 PM #14
Senior Member
- Join Date
- Jul 2011
- Location
- Finland
- Posts
- 131
While it would be a lot of work to make, I think a heavy metal center board would be more nice than having sand bags. Actually, I got a better idea: a board made out of concrete, filled with a lot of iron and then wrapped with a cloth and epoxy would be quite easy to make. Originally Posted by IanHowick
-
3rd January 2013, 08:41 PM #15
Senior Member
- Join Date
- Mar 2010
- Location
- Queenstown New Zealand
- Posts
- 382
I'm not convinced. I think a heavy centerboard (i.e. remaining in place and pivoting up into a slot) could be an option in boats this size, but if you make a daggerboard heavy enough to help with stability it will be really difficult to pick up and drop into place, you'll likely embarrass yourself at the dock on most occasions either dropping it so it puts a hole in the bottom of the boat, falling over as you try to balance in the boat as you lift it up to drop it into place, or capsizing the boat and ending up in the water hanging on to that heavy thing. I get the impression that people who have tried a heavy daggerboard have quickly gone back to their conventional one. It would be good if someone can point to some first hand accounts of trying a heavy daggerboard on a boat of similar size, I'm not sure I'm prepared to go to all the trouble of making a heavy daggerboard without having heard of a positive experience from someone, it must have been tried. Originally Posted by engblom
Sandbags at least will be quick and easy to make and try, and throw overboard if I find they're not helpful.
Ian

 Reply With Quote
Similar Threads
-
GIS Yawl
By CCBB in forum Michael Storer Wooden Boat PlansReplies: 512Last Post: 8th February 2015, 12:30 PM -
Asa-no-ha variation for daughter
By Des.K. in forum WOODWORK PICSReplies: 17Last Post: 14th January 2010, 09:13 PM -
Another variation of the documents box
By detfall in forum BOX MAKINGReplies: 17Last Post: 28th November 2009, 08:44 AM -
Bullet pen variation
By corbs in forum WOODTURNING - PEN TURNINGReplies: 15Last Post: 23rd November 2009, 11:51 AM -
Slimline Variation
By Froggie40 in forum WOODTURNING - PEN TURNINGReplies: 10Last Post: 17th November 2006, 07:43 AM
