

 Thanks: 0
 Likes: 0
 Needs Pictures: 0
 Picture(s) thanks: 0
Results 46 to 60 of 147
-
2nd August 2010, 10:09 PM #46
 Happily receives emails.


- Join Date
- Jul 2005
- Location
- 'Delaide, Australia
- Age
- 65
- Posts
- 8,138

Hi Al,
You might have to keep an eye on those lovely brass fittings. The salt water will tend to form the brass into a battery with the zinc being eaten up. Once the zinc is gone the brass will tear under load.
Should be OK for a bit ... but the best non ferrous choice is bronze of one of the varieties.
Can last longer in fresh water ... DAvid Graybeal had his rudder fittings screwed on with brass screws and in his preferred freshwater mountain lakes in Oregon (oh to have such choices) the rudder fittings were OK for around 3 or 4 years.
MIK
-
2nd August 2010 10:09 PM # ADSGoogle Adsense Advertisement
- Join Date
- Always
- Location
- Advertising world
- Age
- 2010
- Posts
- Many
-
2nd August 2010, 11:34 PM #47
Better Recognize
- Join Date
- Jun 2009
- Location
- New Hampshire
- Posts
- 960
Oops.
I used brass screws to hold in my oarlock sockets. They are bronze.
What would be a better choice, Mik?
-
3rd August 2010, 01:25 PM #48
Happily receives emails.
- Join Date
- Jul 2005
- Location
- 'Delaide, Australia
- Age
- 65
- Posts
- 8,138
Get some bronze screws for your bronze oarlocks. You could use stainless in that application as well as the electrical disparities are not too great - but track down some silicon bronze screws. Even in overpriced Australia we only pay a couple of dollars per bronze screw and you only need four.
Sure it will be much cheaper in New Hampshire or through mail order.
MIK
-
16th August 2010, 03:51 PM #49
Senior Member
- Join Date
- Nov 2008
- Location
- Toronto, Canada
- Age
- 44
- Posts
- 131
Hi MIK,
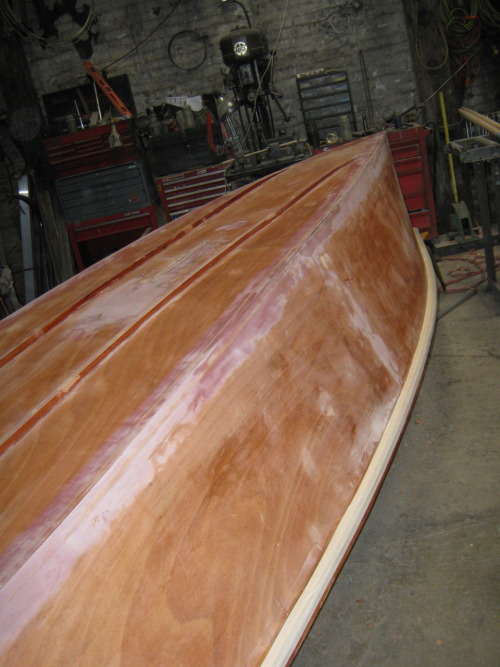
Been out of town for a bit, but I'm back and I made some more progress. Thanks for the info on the brass/bronze stuff. I didn't realize how big a difference it would make. Although upon reflection, it makes perfect sense, that's why aluminum outboards have a block of zinc bolted to them right? zinc is easier to eat than aluminum so the lower unit is protected. From no on I'll use silicon bronze only for the hardware. It's a pity though, I made some nice brass oarlocks before reading your post. I guess I'll use them till they snap off and remake them later. I glued the runners on this weekend and got my first coat of primer on today.It's a 2 part automotive polyurethane. It went well, but i still have some fill to do with epoxy and microbaloons, especially along the joint where the runner is glued down. It is very exciting to be so close to floating though. Christophe, Keep the pics coming, every time I see them I can taste a salty breeze and I want to work on my boat!
Now for some wet sanding . . .

 Visit My GIS Blog at. . .
http://goatislandskifftoronto.tumblr.com/
-
16th August 2010, 11:48 PM #50
Happily receives emails.
- Join Date
- Jul 2005
- Location
- 'Delaide, Australia
- Age
- 65
- Posts
- 8,138
It is looking great. I am always amazed the boats look so similar each time ... maybe it is because they are quite different from everything else.
It's big steps!
MIK
-
18th August 2010, 12:40 PM #51
Senior Member
- Join Date
- Nov 2008
- Location
- Toronto, Canada
- Age
- 44
- Posts
- 131
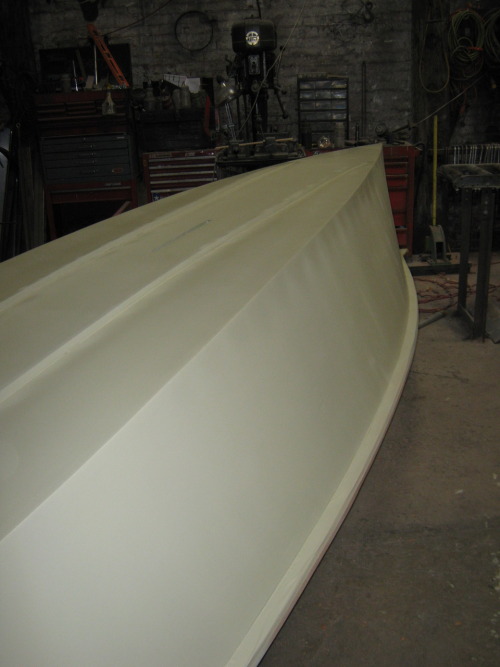
Still working away! I put some micro-balloon/epoxy filler where it need it and spent some quality time with the sander, I'm hoping to seal the whole thing with a coat of epoxy primer tomorrow and be painted, hopefully by end of the weekend. (i hope)
Now to read up on scribing the waterline here on the forums, I want to go wit a 2 tone paint job. . .Visit My GIS Blog at. . .
http://goatislandskifftoronto.tumblr.com/
-
18th August 2010, 12:44 PM #52
Senior Member
- Join Date
- Nov 2008
- Location
- Toronto, Canada
- Age
- 44
- Posts
- 131
-
19th August 2010, 01:43 AM #53
Happily receives emails.
- Join Date
- Jul 2005
- Location
- 'Delaide, Australia
- Age
- 65
- Posts
- 8,138
Did you see the waterline measurement and fettling the actual line post I did some time ago? Originally Posted by alzuger

MIK
-
20th August 2010, 05:31 AM #54
Better Recognize
- Join Date
- Jun 2009
- Location
- New Hampshire
- Posts
- 960
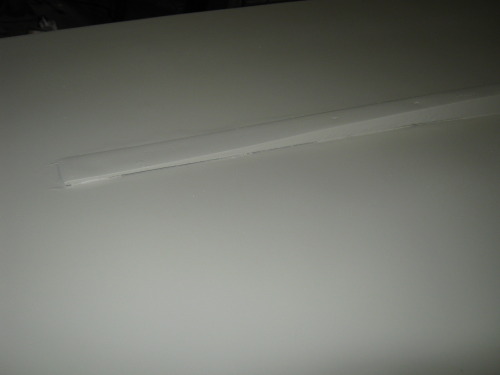
I notice that your skids go almost to the chine up in the bow?
I saw this on the RAID41 too, is this in some new edition of the plans?
-
20th August 2010, 05:27 PM #55
Happily receives emails.
- Join Date
- Jul 2005
- Location
- 'Delaide, Australia
- Age
- 65
- Posts
- 8,138
Howdy ... the skids are a mix of conflicting requirements. Ideally I want them to cross a bulkhead and terminate just beyond. But also I want to keep them away from the chine so the water flow doesn't get to complicated by trying to follow two diverging lines. Sometimes it it tricky to achieve both at the same time. MIK
-
21st August 2010, 12:37 AM #56
Senior Member
- Join Date
- Nov 2008
- Location
- Toronto, Canada
- Age
- 44
- Posts
- 131
I believe I messed up here. I had rough cut the skids months ago to the 3900mm or so length thet is show in the materials list at the front of the book, but then I didn't check that they are actually shown a bit shorter (3450mm or something like that) in the part of the plans at the end where it shows how to position them. Sadly, it's a little late to change them now. Good eye though Christophe.
Now I just need to get enough of a break from real work to get the paint on and finish my sail!
So Close!
-AlVisit My GIS Blog at. . .
http://goatislandskifftoronto.tumblr.com/
-
21st August 2010, 12:45 AM #57
Better Recognize
- Join Date
- Jun 2009
- Location
- New Hampshire
- Posts
- 960
I wouldn't sweat it, the RAID41's skids look almost like yours, I'll look for a picture.
Here:
20-03-09-004 | Flickr - Photo Sharing!
That's what made me think of it.
I have a 3rd skid running from the bow back until it overlaps the two other skids. One of the better decisions on my boat, that thing has taken a lot more abuse than I thought it would!
Don't sweat the small mistakes, I'm still trying to come to grips with all the mistakes I made on mine...
-
21st August 2010, 12:47 AM #58
Better Recognize
- Join Date
- Jun 2009
- Location
- New Hampshire
- Posts
- 960
-
21st August 2010, 01:42 PM #59
SENIOR MEMBER
- Join Date
- May 2008
- Location
- Portland, ME USA
- Posts
- 837
ANother way to go is to just get a little fiberglass on the bow section of bottom panel (as MIK squirms) or perhaps some Kevlar if you can find it (as I squirm thinking of cost of even that small bit). Timber is cheaper. But...it is your boat...
-
21st August 2010, 01:55 PM #60
Senior Member
- Join Date
- Nov 2008
- Location
- Toronto, Canada
- Age
- 44
- Posts
- 131
I was actually planning on running a 1/2" strip of 1/16" or 1/8" silicon bronze sheet all the way down the bow and letting it fold under the bottom of the boat and run back for a few inches along the underside. I was going to set it in some thickened epoxy after I paint with a few screws into the stem for good measure. just a little bit of something to keep the bow from wearing away if beaching on hard surfaces. I figured I'd put little bronze straps around the stern corners too to keep the end grain of the gunwales from splintering. I'm mostly doing it cause i think it will look nice though.
Visit My GIS Blog at. . .
http://goatislandskifftoronto.tumblr.com/


 Reply With Quote
Similar Threads
-
Goat Island Skiff vs Green Island 15
By ausie in forum BOAT DESIGNS / PLANSReplies: 26Last Post: 15th July 2021, 05:19 PM -
Goat Island Skiff
By bitingmidge in forum Michael Storer Wooden Boat PlansReplies: 513Last Post: 31st October 2019, 04:03 PM -
Goat Island Skiff questions...
By warf in forum Michael Storer Wooden Boat PlansReplies: 11Last Post: 14th July 2009, 11:21 AM -
Goat Island Skiff - Transom
By Joost in forum Michael Storer Wooden Boat PlansReplies: 2Last Post: 14th April 2008, 05:26 PM -
Alright Mik... goat island skiff?
By Wild Dingo in forum BOAT BUILDING / REPAIRINGReplies: 7Last Post: 29th January 2007, 12:24 PM
