

 Thanks:
  Likes:
  Needs Pictures: 0
 Picture(s) thanks:
Results 1,906 to 1,920 of 3347
-
20th July 2010, 11:35 PM #1906
 GOLD MEMBER


- Join Date
- Jan 2009
- Location
- Blaxland, Australia
- Age
- 65
- Posts
- 2,551
 Hi MIK,
 Originally Posted by Boatmik

Thanks for the advice. The resin that I was using was suspect - which is why I'm getting rid of it. In fact, I cut to the chase - as it were - today and used 60-grit paper on the resin to cut right down through it and into the cloth, having decided to lose the glass as well. I'll replace it with new stuff bought straight off the roll - I'll make a special trip out to Fibreglass Material Services (which is relatively close :) for it - and rolled in cardboard for transport. Thus the glass won't have been folded into a tight pad for posting and have nasty creases in it (which the piece that I'm removing from the foils has all over it - I should never have used it on the foils).
I've also sanded off the resin between the wood and the glass, so I'll have a nice clean surface to work with again. Interestingly, the resin in and under the glass wasn't sticky at all. It's possible that I switched batches after setting the cloth in place, but I can't really remember. A check back though the thread (if I can pluck up the courage to do so) should answer that question.
If I remember I'll sand off the painted chip patch region tomorrow - if I forget, it won't hurt the paint to sit another day. And hopefully the computer will have finished defragmenting the disk that the photos are on, so I will be able to get back to a more "normal" state of things, thread-wise.
Cheers,
Alex.
-
20th July 2010 11:35 PM # ADSGoogle Adsense Advertisement
- Join Date
- Always
- Location
- Advertising world
- Age
- 2010
- Posts
- Many
-
22nd July 2010, 12:33 AM #1907
GOLD MEMBER
- Join Date
- Jan 2009
- Location
- Blaxland, Australia
- Age
- 65
- Posts
- 2,551
Here are some snaps summarising what I've been up to the last few days or so:
1. Sanding the foils back to the glass: scrub, scrub, scrub...
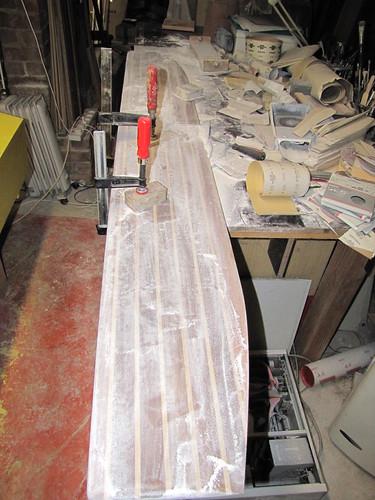
2. Lots more scrubbing...
3. ...Back to the glass. This is the really messy side, in terms of both timber hacks and resin coating. The glass is the same on both sides: rippled and creased. I had to hoover up the piles of dust fairly frequently; here, the bench has just been vacuumed for the umpteenth time
4. Closer-up view of the sanded foil. A couple of patches are a bit low and the glass hasn't been exposed yet
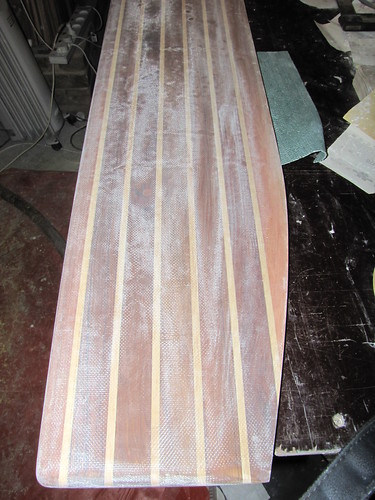
5. Unsanded side of foils, prior to being attacked with 60- and 120-grit "Sahara" sand-paper
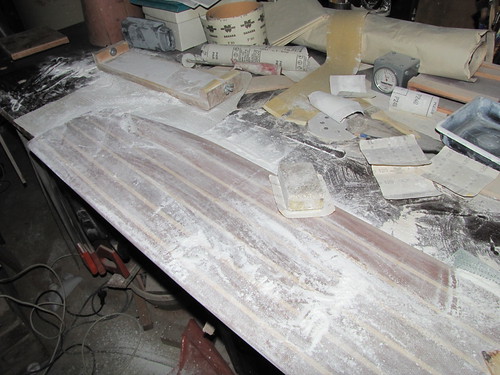
6. Bottom half of board with glass sanded off (on this side only so far). Dark patches are remaining resin-timber complexes; light blob is the effect of condensation from the Heavy Duty Snout Protector on the WRC
7. Four-fifths of the glass removed from one side of the foils, and the remaining resin sanded off, Note the highly regular scalloping of the TE, as indicated by remaining "pools" of resin. I'm unable to account for the regular nature of the scallops, so am merely drawing people's attention to them
8. The painted - but still as-yet-unsanded - pathced chip area. Didn't get around to sanding it today: too busy getting fibreglass cloth, etc.
Follow this link to my Flickr account, where you can see these photos and many others - in much larger sizes if you so desire...
The trip over to the fibreglass suppliers (FMS) in Seven Hills went remarkably quickly, and resulted in 5 metres of 6-ounce glass cloth rolled onto a cardboard tube, 4 litres of acetone, some syringes and 1 " brushes, and a pair of dust pre-filters for the Heavy Duty Snout Protector. The only work done on the boat itself today was about ten minutes-worth of gouging off the resin over the remaining glass on the side of the foils board that has been sanded back to the wood, and I'll deal with the glass and final sanding tomorrow. Then it will be on to removing the glass on the other side of the board...
-
22nd July 2010, 11:19 AM #1908
Happily receives emails.
- Join Date
- Jul 2005
- Location
- 'Delaide, Australia
- Age
- 65
- Posts
- 8,138
Howdy, There will probably be some patchy appearance with light and dark timber because the resin has soaked in a bit in places. Don't be too tempted to make everything perfectly even. It will fix up over time - become more even. Going to far means you start losing the shape. What a job! But you are getting there! MIK
-
22nd July 2010, 12:56 PM #1909
GOLD MEMBER
- Join Date
- Jan 2009
- Location
- Blaxland, Australia
- Age
- 65
- Posts
- 2,551
Howdy MIK,
Point noted! I have been keeping a diligent eye on the shape of the board, but will quite the resin removal while I'm ahead! I'll check with the templates again, once I've found what where I've put them ;).
Although, with words like "diligent" being bandied about (by me), you'd expect that I would be using the templates from the word go...
Cheers,
Alex.
-
23rd July 2010, 12:37 AM #1910
GOLD MEMBER
- Join Date
- Jan 2009
- Location
- Blaxland, Australia
- Age
- 65
- Posts
- 2,551
A brief update. The glass has been almost entirely removed from the foils with the exception of the TE on one side, a couple of small areas on the same side and the tips. One of the spots where there is remaining glass is where I filled in a trench caused by some heavy-handed machine sanding early on in the production of the foils blank.
I just need to smooth off the side most recently cleaned of the glass and do the tips, and the board will then be ready for covering with new, clean, crease-free glass cloth. I probably won't do the glassing (and further painting) until the weather warms up a bit, which means that I'll be switching to maintenance mode and starting to get to grips with the workshop. There is of course the sail to stitch...
With respect to sanding off the residual resin, I've been using the paulownia strips as indicators, since the absorption of resin by this timber is very even, and once I get a length of strip to an even colour I know that I'm pretty close to the same level along that length (assuming that the strip was evenly shaped to begin with ;). Extrapolating into the WRC regions takes a little more care - and I am being careful :).
-
23rd July 2010, 10:46 PM #1911
GOLD MEMBER
- Join Date
- Jan 2009
- Location
- Blaxland, Australia
- Age
- 65
- Posts
- 2,551
A briefer update. I've now finished with the foils board for the time being, and will now await warmer and drier weather before putting its new glass coat on. I'll wrap the thing up in bubble-wrap before squirrelling it away in a safe spot, as it is now in a highly vulnerable state. Limited handling with exposed skin would be a good idea, too.
-
24th July 2010, 04:37 AM #1912
 Deceased
- Join Date
- Nov 2008
- Location
- Maylands, Perth, Western Australia
- Age
- 58
- Posts
- 218
 Perfectionism is overrated !! I just do the best that's realistic !
Hi Alex,
You are definitely not the only one who has tried to get a perfect finish to any surface, this was my learning experience, fortunately it occurred with a model, not a PDRacer, I hope you can see the message, and the problem with this !.
I am a also a perfectionist, but I try to temper this with a dose of reality, I once spent the better part of 18 months painting the deck of a 3'6" R/C model yacht I made, after 2 coats of undercoat and 10 coats of enamel heated to about 60 degrees c before application ( sanding back between each coat ) I ended up with an close as humanly possible flawless mirror finish, which looks as good today as it did over 15 years ago when I painted it with 100ml tins of "Dulux" exterior grade household paint !,
That was the example of perfectionism personified !, it was only later that I realised that to repair the tiniest imperfection ( which would have shown up like a sore thumb on a dog ! ), I would need to sand it back extensively and repaint the entire surface with at least another 5 coats of paint to even have it look close to as good as it was before that I decided never to go to such extremes again !!!.
Fortunately I never damaged the paintwork at any time, or you can imagine how upset I would have been !!!.
Although my PDRacer may look almost as good in the photograph, it is never going to have the same level of finish as the deck of that model yacht which probably varied about 1 micron over the entire length from the absolute painters idea of perfect smoothness, a sheet of glass or a glass mirror, which is just as well because full size boat hulls are far more likely to need repairs etc, and at least I will have the satisfaction that the repair won't take forever to do, but will still be able to look like it was never damaged !!!.
-
24th July 2010, 07:28 PM #1913
GOLD MEMBER
- Join Date
- Jan 2009
- Location
- Blaxland, Australia
- Age
- 65
- Posts
- 2,551
Hi David, Originally Posted by dhgomm
I have to be reminded repeatedly - because I forget - that the Big Bad World(TM) out there is sharpening its teef, to sink 'em savagely into my beautiful new boat.
Funnily enough - strangely even - I checked the BoM's long-range forecast (LRF) just after posting to your thread the other day. At that stage I had a reasonable window of opportunity of several days from tomorrow (Sunday) where it was supposedly going to be both relatively warm and relatively dry. That has since change quite a bit - now the window has shut somewhat - a lot - and it is now supposedly going to be relatively colder and relatively wetter. Of course, I did the delousing of the hull surface, and evicted the dust-chucking spiders and their webs (again), before checking the LRF this evening.
Then again, "chance of a shower", "a shower or two" and "showers developing" seems to be BoM-speak for "we've got to say this even though it's not going to rain at all, in case someone sues us for not forecasting rain when in fact it does".
I'll stick my snout in the morning and see what it thinks about the weather, and proceed from there...
Cheers,
Alex.
-
24th July 2010, 07:49 PM #1914
GOLD MEMBER
- Join Date
- Jan 2009
- Location
- Blaxland, Australia
- Age
- 65
- Posts
- 2,551
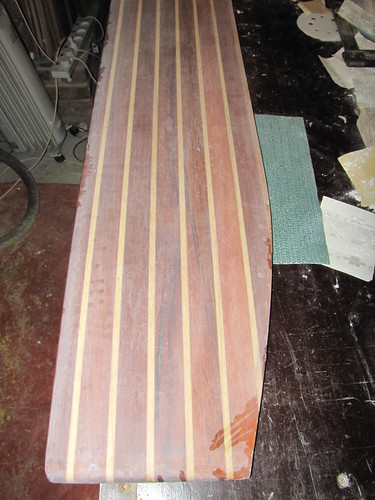
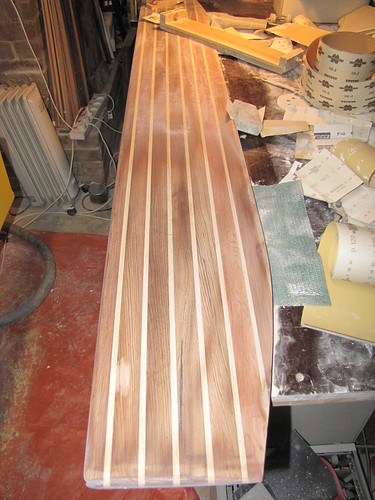
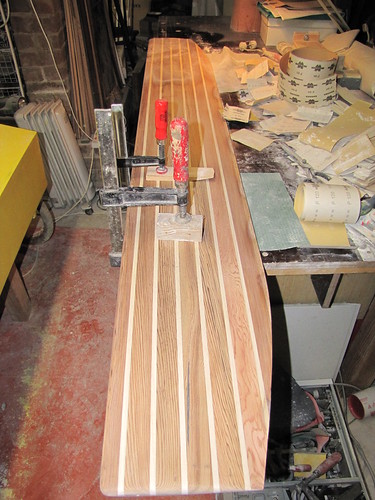
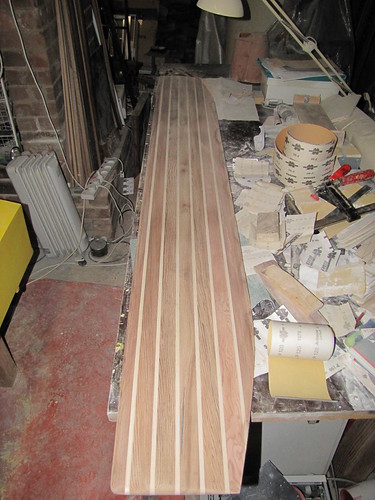
Whether or not I go ahead with further hull-painting tomorrow or within the next few days, the brakes are well and truly on as far as applying resin to various things such as the foils, spars and centrecase elements, until the weather show signs such that the resin won't go white when I apply it. Some snaps of the sanded foils board follow:
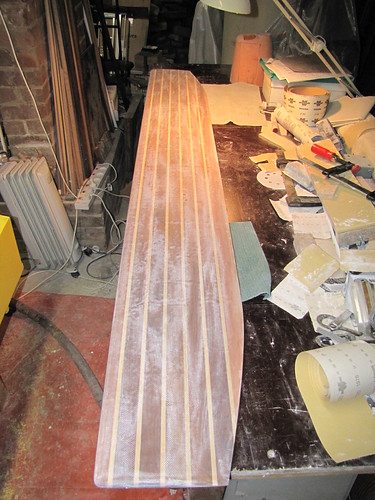
1. Foils board with glass removed and sanded back - mostly - to wood
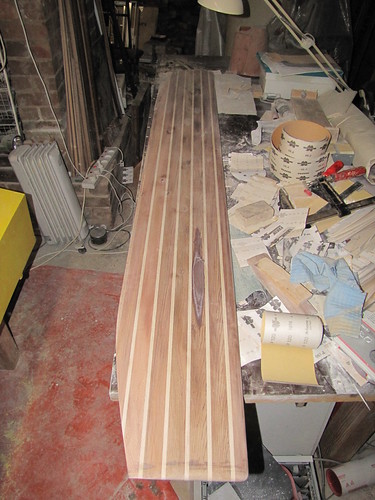
2. The other side of the foils board. Note the remaining resin pools/patches on this side, filling holes made by careless use of the belt when removing glue blobs from the newly-assembled blank by the ten-thumbed alex. Plus patches where I slipped with the router when creating the initial foil cross-section. A pair of cautionary tails...
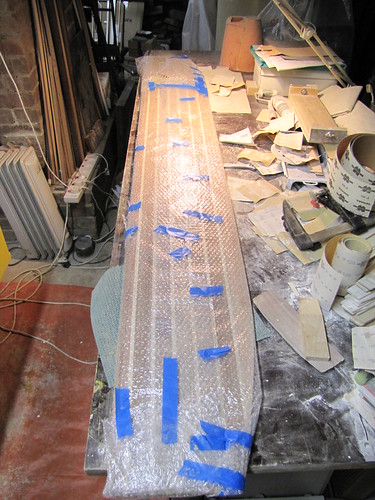
3. Bubble-wrapped foils board to ward off sharp and other damaging objects prior to the glass coat - whenever that gets added...
Follow this link the the Flickr Farm, where things are beautiful all day long - unless the server is down, in which case things are probably much better...
As "showers" and "17 degC" are forecast for tomorrow, I will have to wait and see what transpires as far as hull-painting goes. The maximum temperature for Monday, on the other hand, is said to be going to be "19 degC" near this neck of the woods ("showers clearing"), so maybe that will be a better bet. Temperature to be a couple of degrees C lower on Tuesday <shrugs>.
-
25th July 2010, 11:44 AM #1915
GOLD MEMBER
- Join Date
- Jan 2009
- Location
- Blaxland, Australia
- Age
- 65
- Posts
- 2,551
Snout says: "The rain is coming later this arvo". And the forecast says "A shower or two. Cloudy periods". It's currently sunny. Originally Posted by AlexN
Better get on with it...
-
25th July 2010, 05:49 PM #1916
GOLD MEMBER
- Join Date
- Jan 2009
- Location
- Blaxland, Australia
- Age
- 65
- Posts
- 2,551
Snout and BoM forecast were both right. I got a coat of paint on and drying before it started
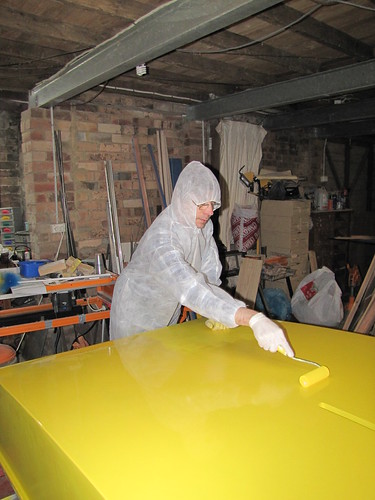
rainingdrizzling slightly. Put on the cheapie painting coveralls that I got fwom der Wabbit Wawwen and put on a mixture of about 200 mL paint + about 5 mL mineral turps using a white "UniPro" roller.
And I still got fluff and hairs in the paint job! The amount of rubbish wasn't quite as bad as last time, but I really was hoping for a lot less than I ended up with :(. In fact, the stern transom was worse! Maybe dirt and fluff got onto the roller surface... The turps helped reduce the roller stipple somewhat, but by I am going to try using a good paintbrush next time, tipping off as I go. Paint and time are not the limiting factors, although my patience may be. If I can find suitable bits of timber in my "stocks" to do so, I'll consider setting up a plastic tent around the boat.
On a more positive note, the filled and sanded chip has totally vanished :).
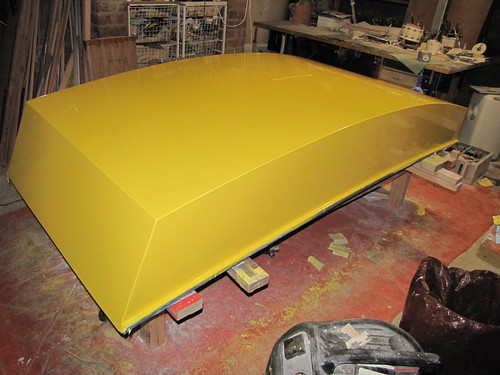
The Boss took some snaps of the painting process, and I followed up with some after finishing painting. Here's a selection for your enjoyment and edification...
1. Painting part of the bow transom. Note that the spare front paw is resting on an as-yet-unpainted portion of the hull bottom...
2. Finishing off the hull bottom. Note that the (long ;) sides have yet to be done...
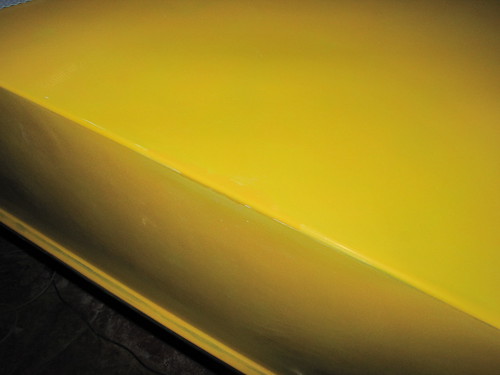
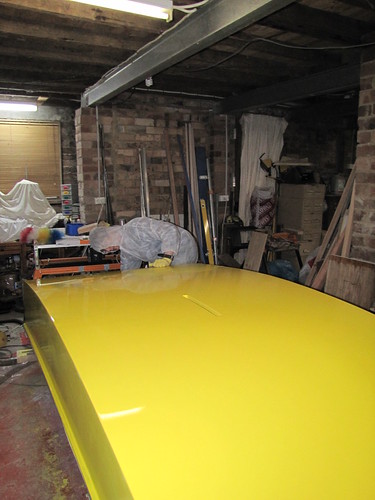
3. New paint coat complete, port side
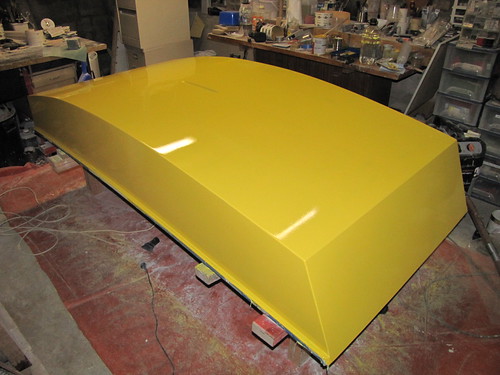
4. New paint coat complete, starboard side. The dark patches from the grey primer, although still showing through, are diminishing
5. New paint coat complete, stern transom
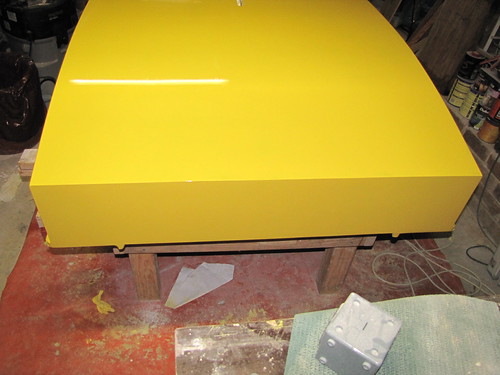
6. Stern transom and hull bottom. The glossy appearance is a bit more "real" than with the previous coat
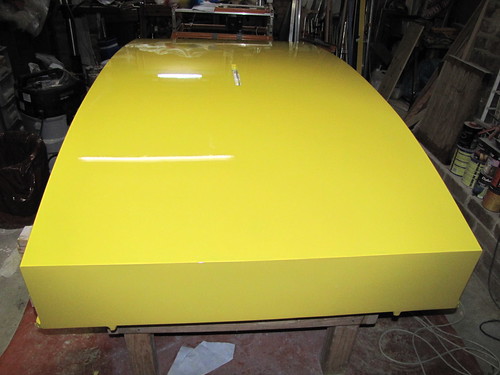
Follow this link to my Flickr account, where you can see these photos and oh so much more - you are advised to look at some of these snaps in "Large" and "Original" sizes to gauge what is really going on...
So, that's another coat of paint on. I'm now off to search through the bits and pieces of wood to see if I have anything that can be conscripted into making up a painting tent. And...I've found some lengths of stuff that can be whacked together with nails or similar to provide a simple four-sided frame that I can staple plastic 200 um sheeting to and hang from the ceiling I-beams. Excellent :).
-
26th July 2010, 12:59 PM #1917
GOLD MEMBER
- Join Date
- Jan 2009
- Location
- Blaxland, Australia
- Age
- 65
- Posts
- 2,551
As flagged by MIK previously, a check on the paint surface this morning showed that the roller stipple had collapsed somewhat as the paint cured. As the paint is still quite soft, this is likely to continue to some extent. If I don't look at it too closely, the paint job is actually starting to look reasonable. I won't be considering sanding off the hairs and fluff until tomorrow at least, so the stipple may subside still further. We shall see.
I still haven't come up with any sane reason why I didn't sand the grey primer back more originally: it was supposed to be the final fairing coat over the high-build fairing coat. It was probably impatience as usual - and I'm paying for it now with the grey still showing through a bit.
Of more concern than either of the above "problems" is the extraneous muck in the paint. To the end of keeping foreign objects out of said paint, I have got most of the bits together for lashing up a crude frame to hang/staple some sturdy polyethylene sheet from to create a hopefully dust-resistant - I hesitate to use the term "dust-proof" - tent. I've allowed for ample room around the boat to prevent the clumsy oaf doing the painting (me) from bumping into newly-painted surfaces. Well, that's the theory, anyway.
-
26th July 2010, 10:35 PM #1918
GOLD MEMBER
- Join Date
- Jan 2009
- Location
- Blaxland, Australia
- Age
- 65
- Posts
- 2,551
The paint surface continues to consolidate - and show up my execrable job of keeping the coat even across the length and breadth. There are patches where I missed joining up entirely, and one side looks thinner than the other. Appalling. If I were employing me, I'd sack me.
The tent frame is more or less done: screwed together with all four corners braced, plus butt-straps over the joins along the long sides where I had to stitch two pieces together to make up the lengths. And I've stuck in an eye-bolt on each corner to hold the thing up. I might add one in the middle of each long side for good measure. Remarkably, I really slapped this one together - no fussing or measuring. Bang, bang, bang, finished. Rough as guts but it will do the trick. At least, I hope it will...
Photos for everyone's amusement when I've finished it.
-
28th July 2010, 07:02 PM #1919
GOLD MEMBER
- Join Date
- Jan 2009
- Location
- Blaxland, Australia
- Age
- 65
- Posts
- 2,551
Having, as I expected would happen, run out of clean, un-torn plastic sheet, I've come to a halt with the painting tent. I got half way around the perimeter before that though, as well as covering the frame. Some lengths of wood were selected to weigh the curtains down, but am pondering getting some bits of the right lengths, which would make things a bit easier rolling them up out the way when not in use.
More on this little subject tomorrow, possibly...
-
31st July 2010, 10:27 PM #1920
GOLD MEMBER
- Join Date
- Jan 2009
- Location
- Blaxland, Australia
- Age
- 65
- Posts
- 2,551
Well, not quite "tomorrow", but I have a little more to add - the tent almost finished, with a bit of work needed to get the corners to seal up a bit better. The side can be secured after rolling up, so that they are not in the way of general work and movement in the workshop. And I've given the floor and other dust-collecting surfaces a going-over with the vacuum, to be followed up by another session to get what I missed and generally make sure that the dust is a low as possible. It was no wonder that the paint was as messy as it has been - it is surprising (in hindsight) that it wasn't worse!
I have a large number of photos to sort through, but as at least half of them are substandard that shouldn't take too long, and I will probably put them up tomorrow or the day after. The cold weather has been hard on the camera's batteries (I don't warm them up beforehand as I should) but a run of somewhat elevated temperatures this last week has helped that a bit. It would have been better weather for all the painting that I haven't been doing, and we are now heading into a period of cooler weather. Oh well, them's the breaks.


 Reply With Quote
Similar Threads
-
New Queensland PDRacer Build
By duncang in forum Michael Storer Wooden Boat PlansReplies: 71Last Post: 26th April 2012, 08:30 AM -
Oz PDR build in Adelaide - sexy black PDRacer
By m2c1Iw in forum Michael Storer Wooden Boat PlansReplies: 39Last Post: 27th April 2009, 06:30 PM -
OZ PDRacer - Dylan's build in the Philippines
By Boatmik in forum Michael Storer Wooden Boat PlansReplies: 16Last Post: 23rd February 2009, 05:50 PM -
Brisbane Timber and Working with Wood. Boatmik/PDRacer
By Boatmik in forum Michael Storer Wooden Boat PlansReplies: 1Last Post: 11th April 2007, 08:06 PM -
Flawed wood on the TS --DUCK!
By Robert WA in forum WOODWORK - GENERALReplies: 7Last Post: 19th February 2004, 11:42 AM
Tags for this Thread
balanced lug,
boatmik,
build,
dacron(tm),
douglas fir,
duck,
enamel,
epoxy resin,
fibreglass,
hoop pine,
interminable,
lug,
machinery,
materials,
michael,
oregon,
oz racer mk 2,
ozracer,
paint,
paulownia,
paulownia/glass mast,
pdracer,
plywood,
polytarp,
primers,
really simple sails,
sail-making,
sailmakers thread,
sanding,
storer,
sydney,
timber,
tools,
varnish,
verbose,
western red cedar,
wood,
wood duck,
wrc
