

 Thanks:
  Likes:
  Needs Pictures: 0
 Picture(s) thanks:
Results 3,076 to 3,090 of 3347
-
1st March 2013, 07:02 PM #3076
 GOLD MEMBER


- Join Date
- Jan 2009
- Location
- Blaxland, Australia
- Age
- 65
- Posts
- 2,551

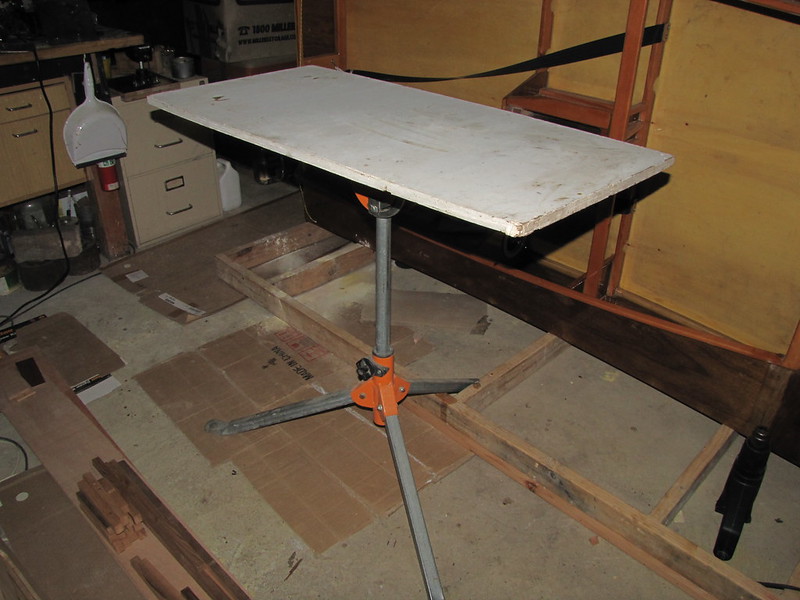
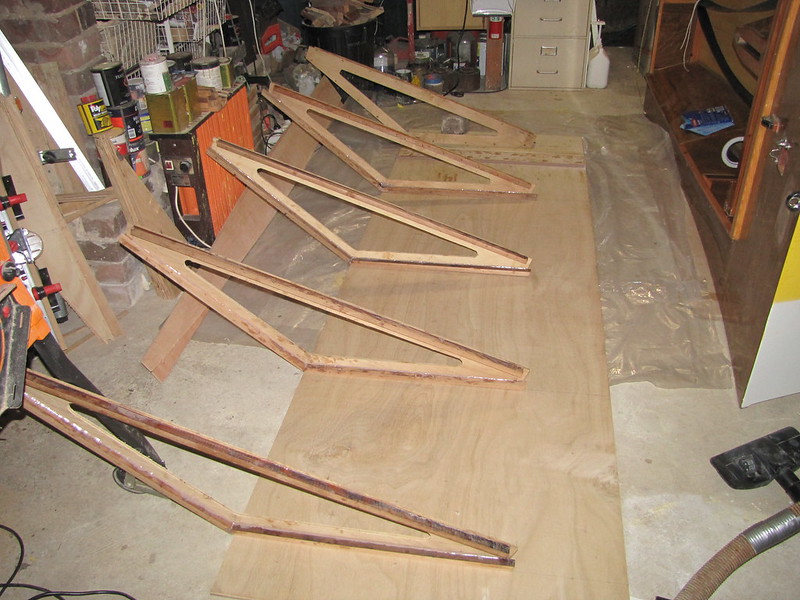
I finally got fed up with grubbing about on the floor trying to do things, so I made myself some "bench-space":
1. Temporary worktable: a piece of plywood with a piece of 2 x 2 screwed to the middle of the underside, and clamped into a Triton Multi-Stand. I got fed up with having nowhere to work! This little unit has been very useful on previous occasions, so I dug out the top and re-assembled it. This has may have already appeared in this thread - albeit four years ago or so...
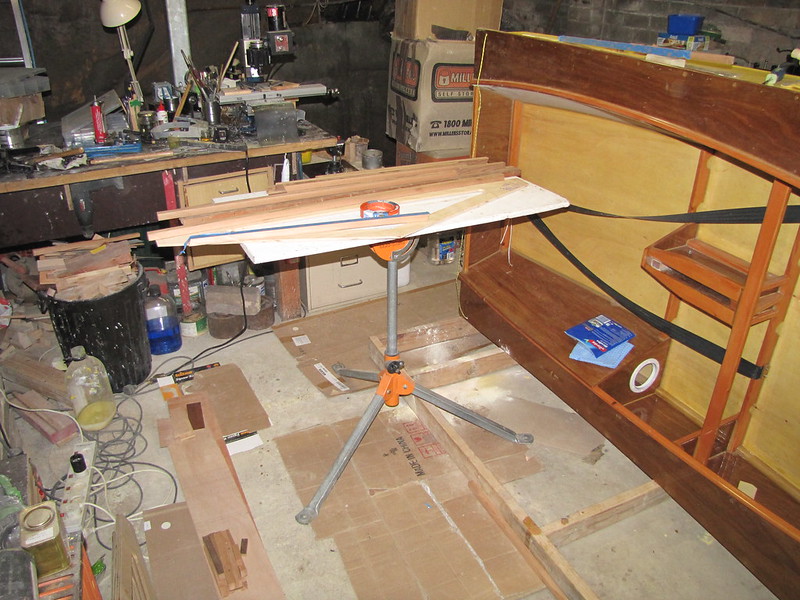
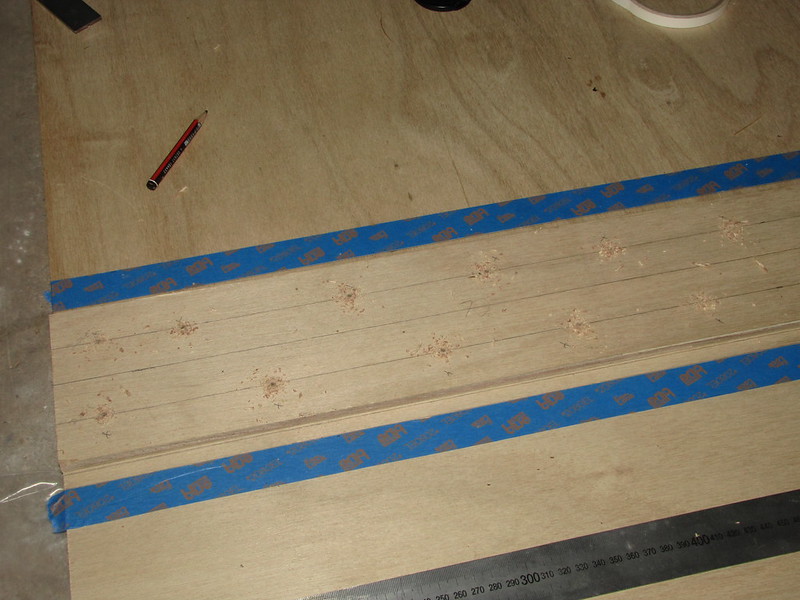
2. Worktable with roof former parts: getting tready to mask the upper faces of the glueing faces of the "stiffening sticks"
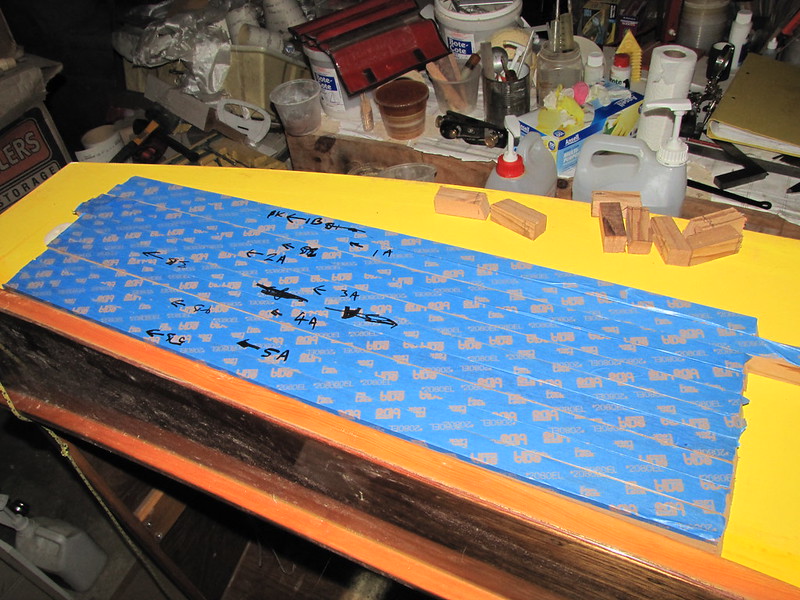
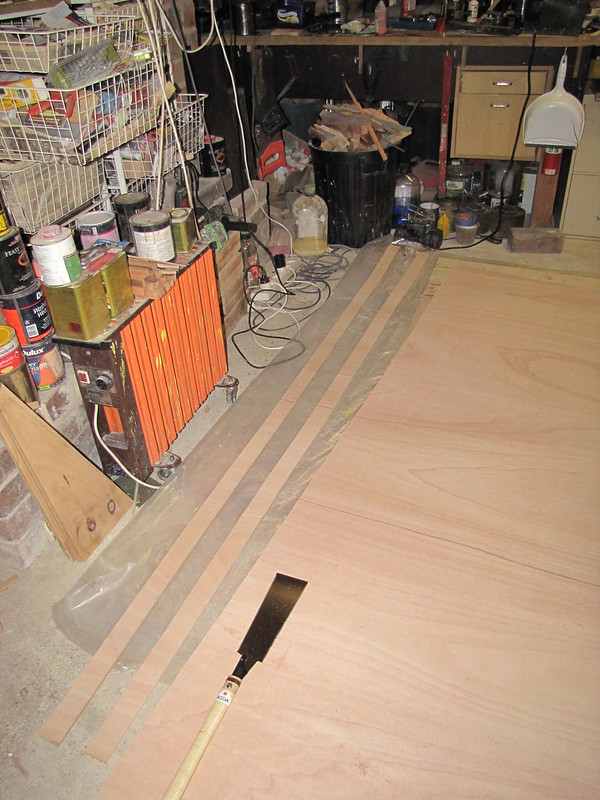
3. Upper faces of all roof-glueing sticks for the roof-formers: I don't have to mask the lower set or end-supports. Arrows point towards the peak-ends of the sticks
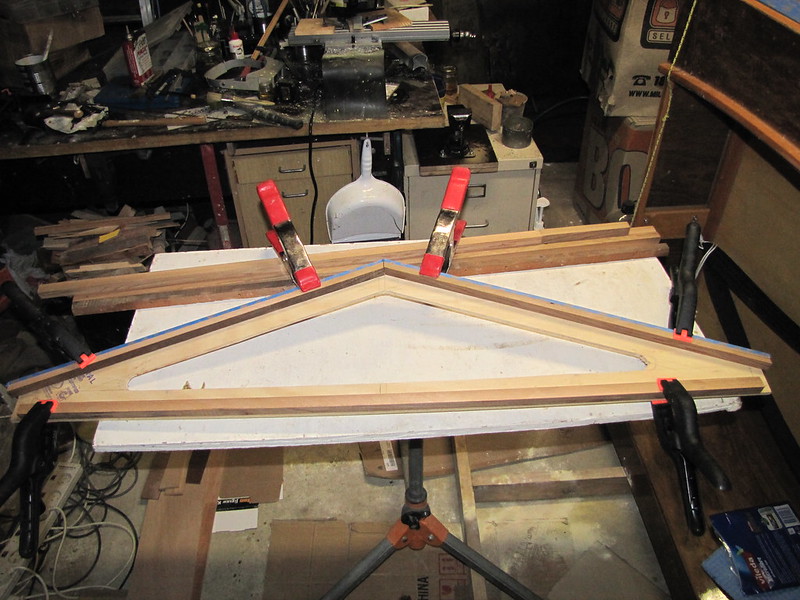
4. Top and bottom sticks temporarily clamped in place, prior to drilling screw holes for glue-clamping. The end-supports will be glued to the side-frames first - and to the roof formers when the frame is being assembled
Follow this link to my Flickr account
More when I've recovered from a 'flu-like bug...
-
1st March 2013 07:02 PM # ADSGoogle Adsense Advertisement
- Join Date
- Always
- Location
- Advertising world
- Age
- 2010
- Posts
- Many
-
1st March 2013, 07:09 PM #3077
GOLD MEMBER
- Join Date
- Jan 2009
- Location
- Blaxland, Australia
- Age
- 65
- Posts
- 2,551
I found that I hadn't finished my previous post from a few days go when I went to do this one, and decided to put the old one up then do this one - if only to show that I can limit myself to a couple of snaps per post. Well, in fact, I'd only taken two photos anyway ;).
A 'flu-like bug knocked me out for all of yesterday and a good deal of today. I found enough energy this arvo to drag myself down to the workshop and finish off the pre-glueing treatment of the roof formers:
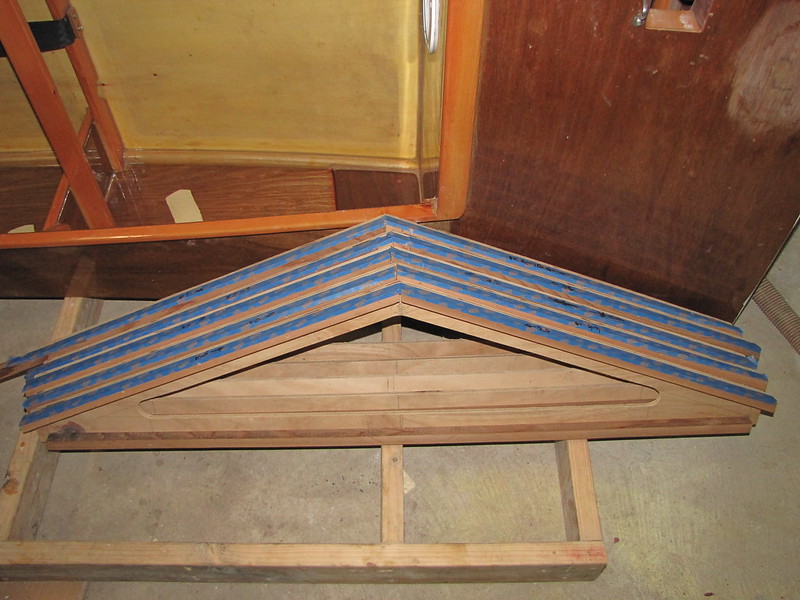
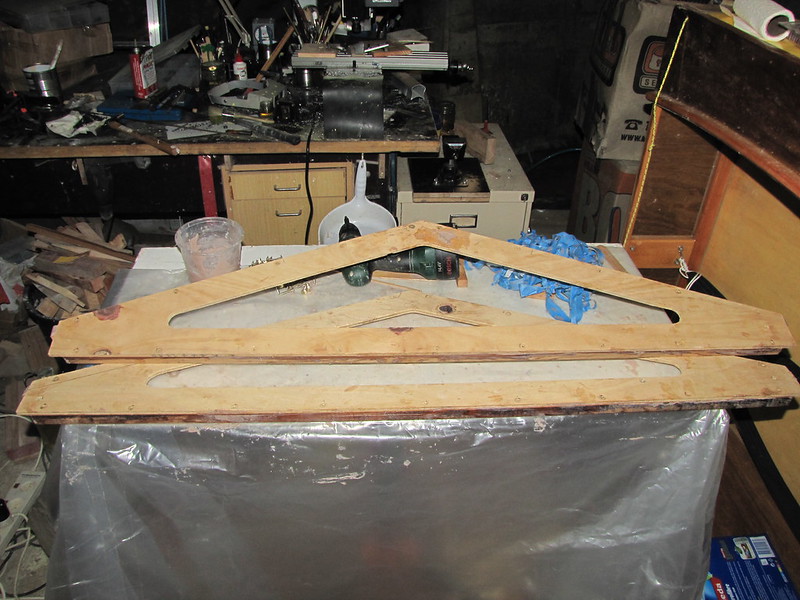
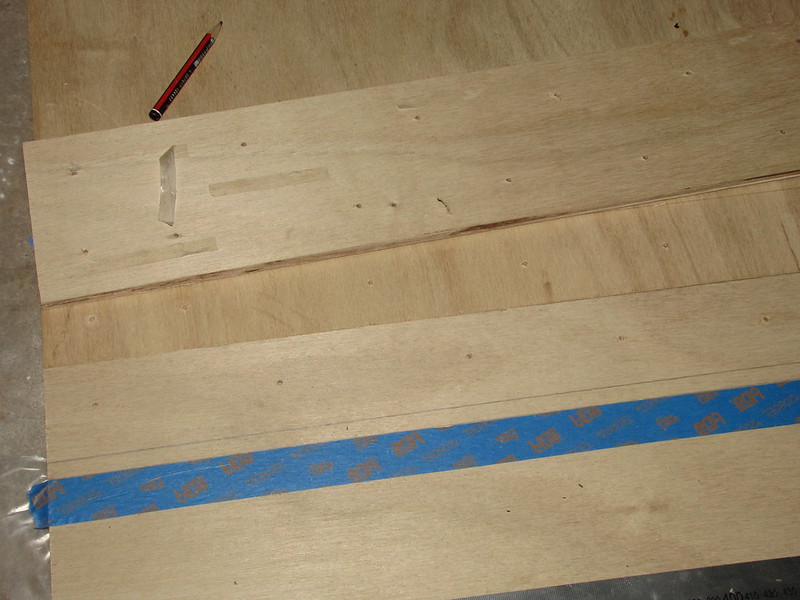
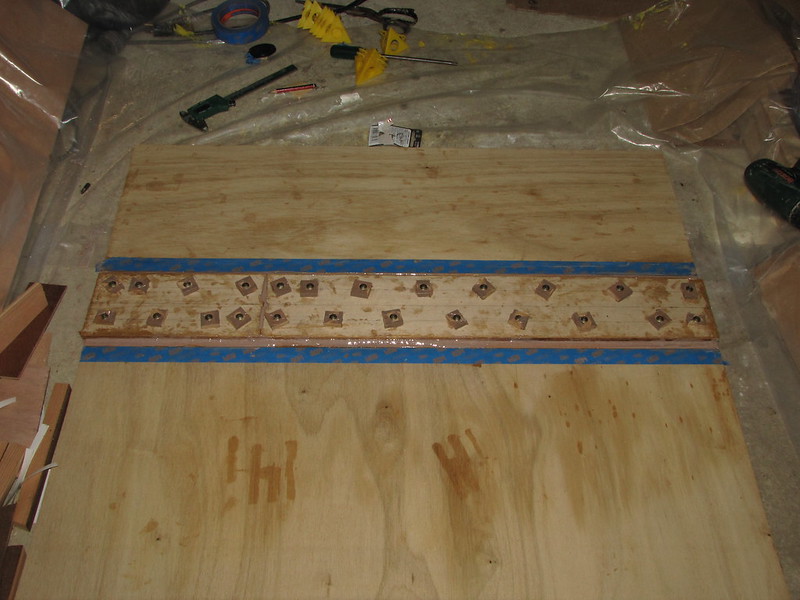
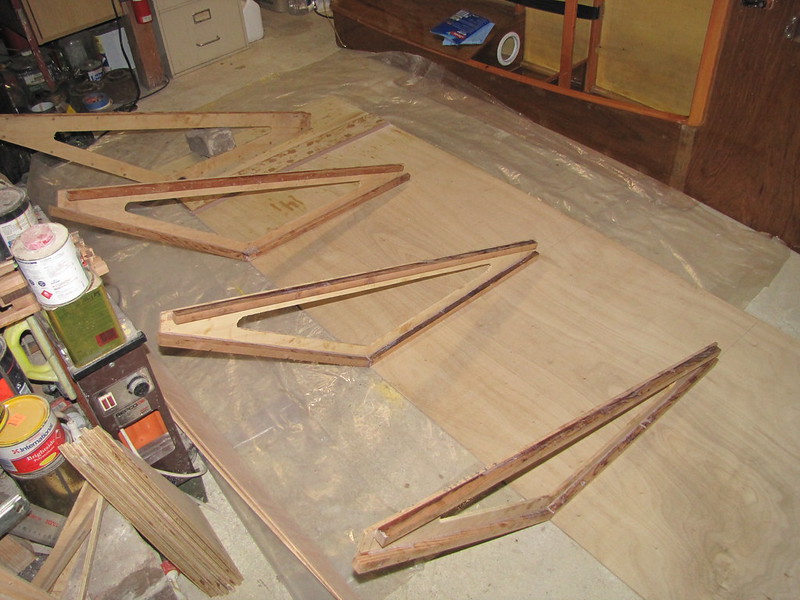
1. Pre-glue roof former treatment - screw locations for five formers. The Scotch "Blue" painter's tape is to keep the glueing surfaces of the roof clean when glueing the formers up. I don't want unnecessary sanding to clean 'em up. Which reminds me, I need to mask the top edges of the actual formers, too...

2. Pre-glue former treatment: the other side. Note the excess top members protruding beyond the formers: these will sit on the support frame's sides after suitable relief of the latter, then trimmed back flush with the outer surfaces of the sides. Or that's the idea: things have been known to change here, sometimes inexplicably...
Follow this link to my Flickr account
I'd already done one frame and clamped up the second before I got sick; the work-time today was spent screwing up the second former and polishing off the other three. Next step: glueing up the roof formers and the glueing of the "former locators" onto the sides. And maybe some more varnishing of the boat, if I can get enthused over that. Or even if I can't ;). Got some lovely sanding to do first there, though.
-
2nd March 2013, 04:58 PM #3078
GOLD MEMBER
- Join Date
- Jan 2009
- Location
- Blaxland, Australia
- Age
- 65
- Posts
- 2,551
A bit more work on the roof today: the frames are all now glued up. I'd forgotten the procedure for screw-and-glue, having used mostly small, thick filleting mixes in recent times: not relatively long elaborate sequences as in today's efforts. It's just as well I wasn't glueing up a boat! Getting the "battens" on the wrong side of a frame to kick off with didn't help matters either, as they were pre-drilled and things therefore didn't match up. It all got sorted out in the end, though.
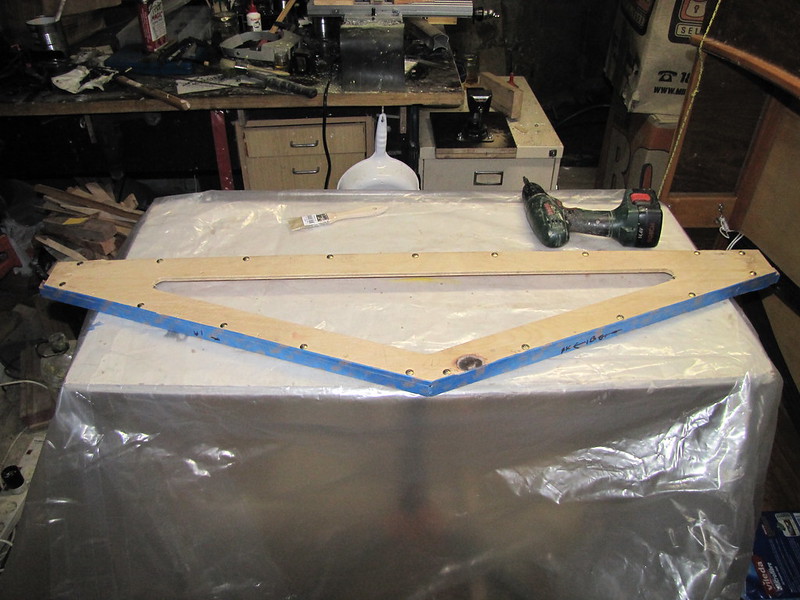
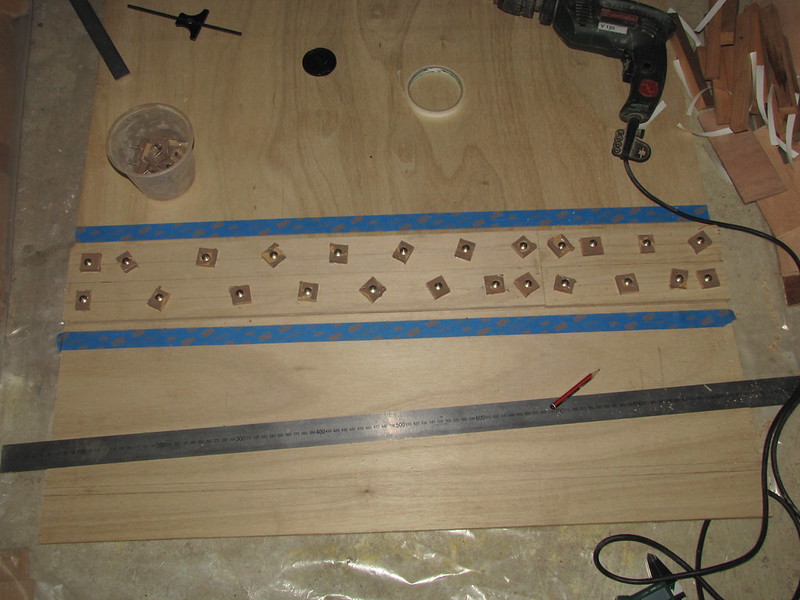
1. Former ply roof edge masked. Table is ready for glueing. I was going to prime the bare wood with neat resin, hence the brush, but since the glue was so runny relative to my usual mixtures I dropped that idea - so the brush lives unsullied, to be used another day. Not so the plastic bench covering...
2. Much runnier mix than is usual for me: I thought I'd try it out - and not in fact because I'm running low on glue powder ;). There may be less hidden air-pockets as a result. The table's covering is covered in glue here at the end of the second and final session. It'll just crack off once set. Speaking of cracks, the bottom "batten" had quite a few going from one side of the stick to the other, so I force so glue into them and cranked them up tight with the screw driver - then slapped some more resin over the top for good measure
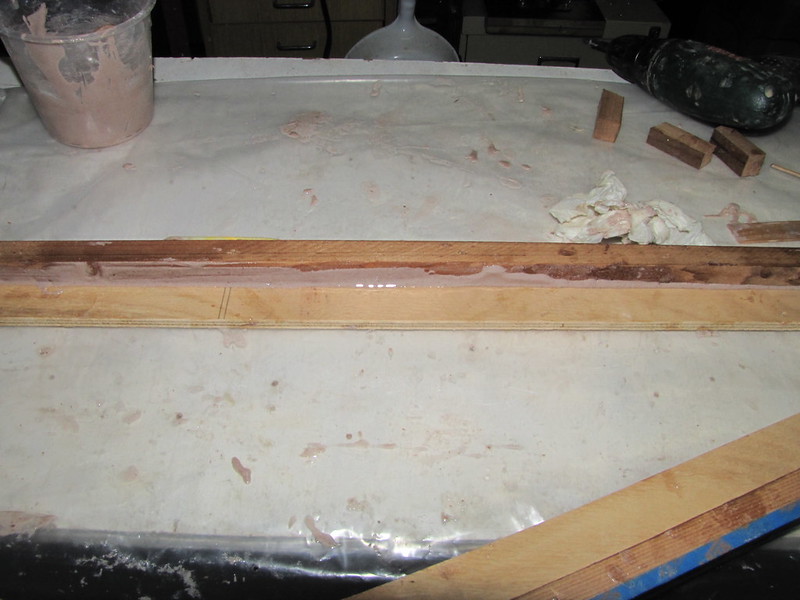
3. More runny glue - it gelled up pretty quickly from the runny state, though. The temperature in the workswamp must be relatively high at the moment
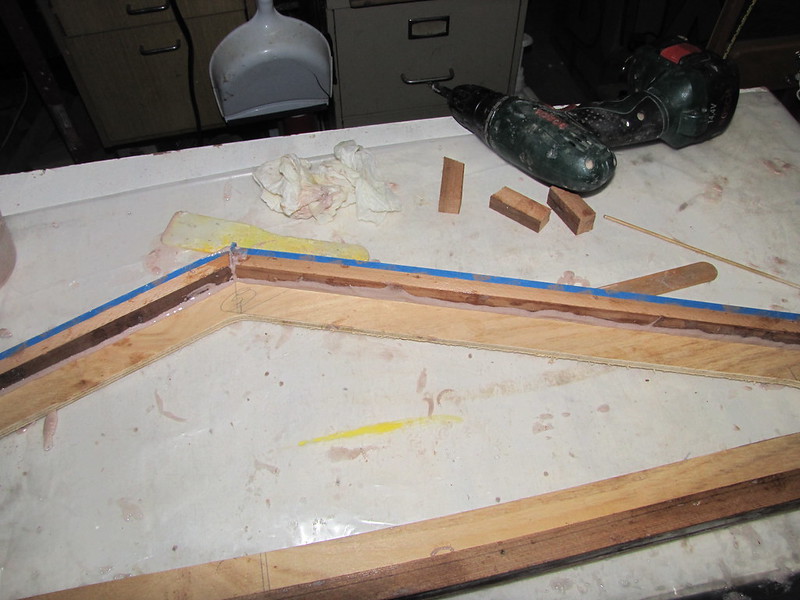
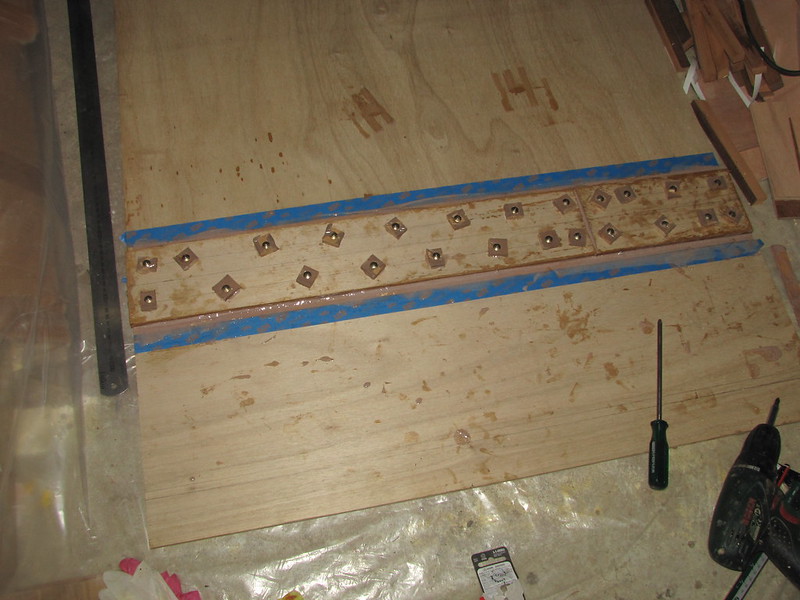
4. Five glued-up roof formers. I'll take the tape off in a few hours. Note the old orange plastic underlay used in the boat-making process: this will be spread out on the floor again (or such floor as I can get at) when I go to glue the roof pieces together. Hopefully I won't go back and find that the stack of frames has become welded together...

Follow this link, mind the pools of glue
The former-glueing didn't go without hitches - this is, however, a timely warning for the glueing of the roof parts and also for the frame assembly and roof installation. Better to have a bit of solvable trouble with relatively simple things early on than something really undoable and much more costly later. I shall do a bit more planning for those events so that I am hopefully not caught napping again (unlikely, but at least I can try ;).
-
2nd March 2013, 08:10 PM #3079
GOLD MEMBER
- Join Date
- Jan 2009
- Location
- Blaxland, Australia
- Age
- 65
- Posts
- 2,551
One of the things that I forgot when commenting on the snaps above was the removal of the screws before they became permanent fixtures:
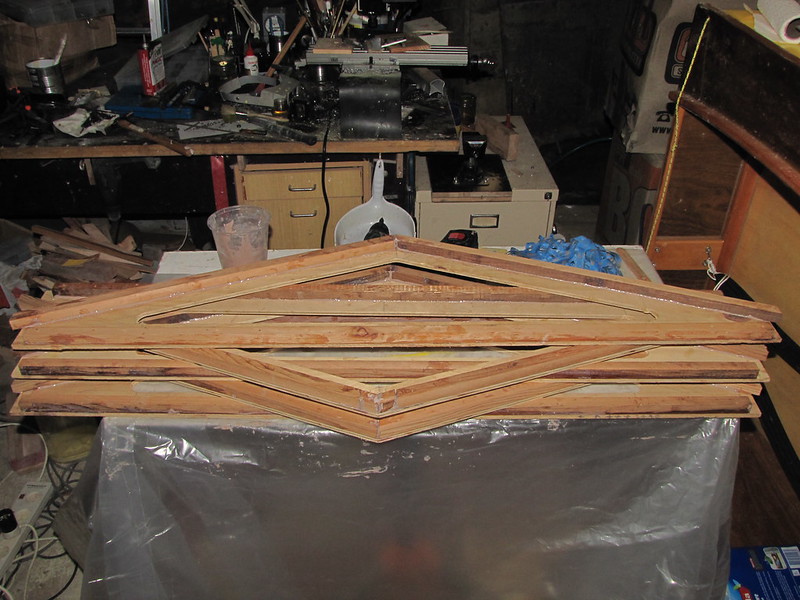
1. A handful of screws: 19 per former...
2. A couple of roof frames, minus tape and screws. Bundle of used tape in the background
3. Stack of five roof frames: no screws, no tape, and arranged so that they won't stick together overnight. Look, no fillets! I did try running the paddle-pop stick along one glue-join, but decided to give the rest a miss ;)
Follow this link to my Flickr account, kindly provided to you byFlickrmy paying $20 a year to Flickr...
They all look a bit rough, but they will be more-or-less staying that way - maybe a small amount of sanding or filing to clean up some furry edges where the hole-saws didn't cut cleanly, but other than that, not very much. The bulk of the work is going to be in the assembly of the frame and the addition of the roof panels, once they're lengthened. Actually, the roof panel lengthening may happen next. There are several ways of putting the roof on, and I'll choose the one that requires the least effort, i.e., no heavy lifting. Which reminds me, I'll need to cut the "feet"/"runners" from the bendy ply (two strips 50 mm wide by the length of the sheet) very shortly - and that will be a very amusing task.
-
3rd March 2013, 06:54 PM #3080
GOLD MEMBER
- Join Date
- Jan 2009
- Location
- Blaxland, Australia
- Age
- 65
- Posts
- 2,551
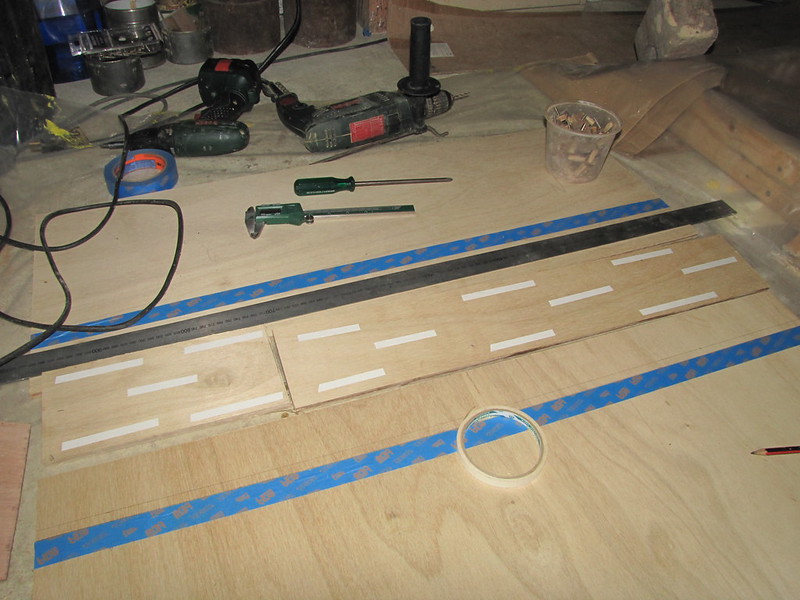
Not much done today - the seemed to be a bit of a resurgence of my recent cold. I did, however, clear a tiny but sufficient bit of space for the roof panels lain full-length, hoovered said space a bit clean, put down the clear plastic sheet that was formerly on the temporary workable, and set up to do the butt-strap on the first panel:
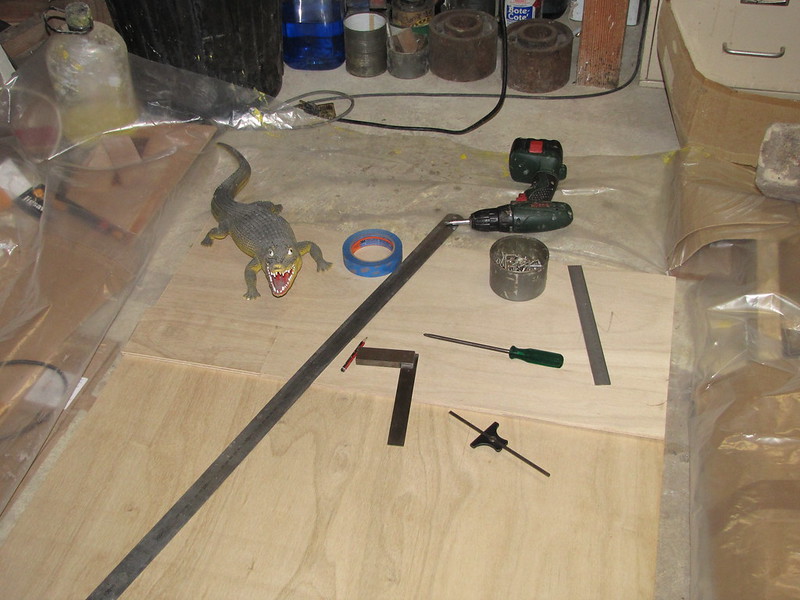
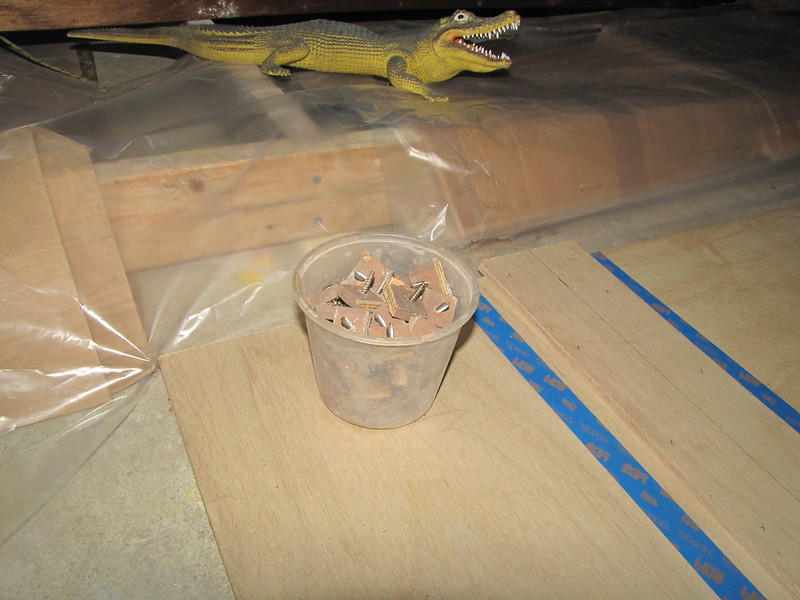
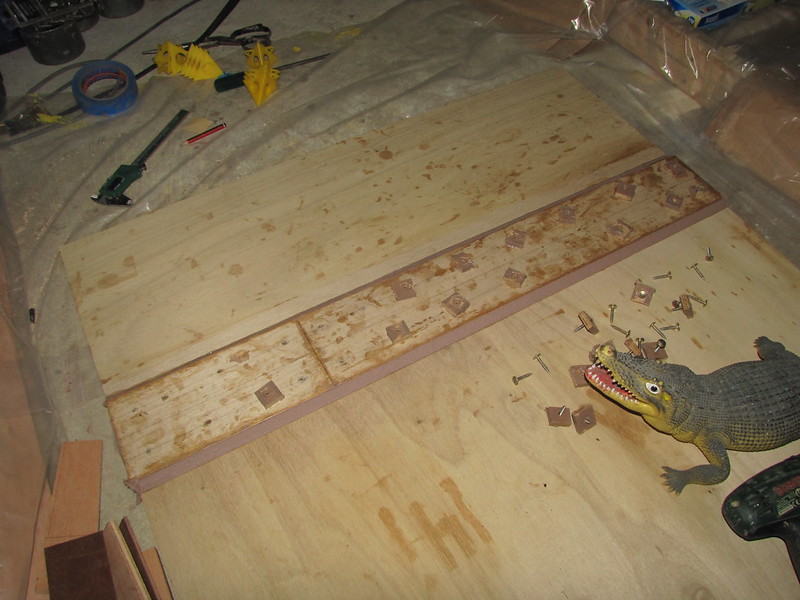
1. Squeezed in - just: the first pair of roof panel and butt-strap parts. Mr Snappy assisting, of course. The roof formers weathered the night without permanently sticking together - or at all :). They were light and strong this morning
2. Various tools used in the next few steps. "Bite yer leg orf", says Mr Snappy. Charming. Note the plastic sheeting. Note the tape, Mr Snappy - similar stuff is often used for controlling crocs...
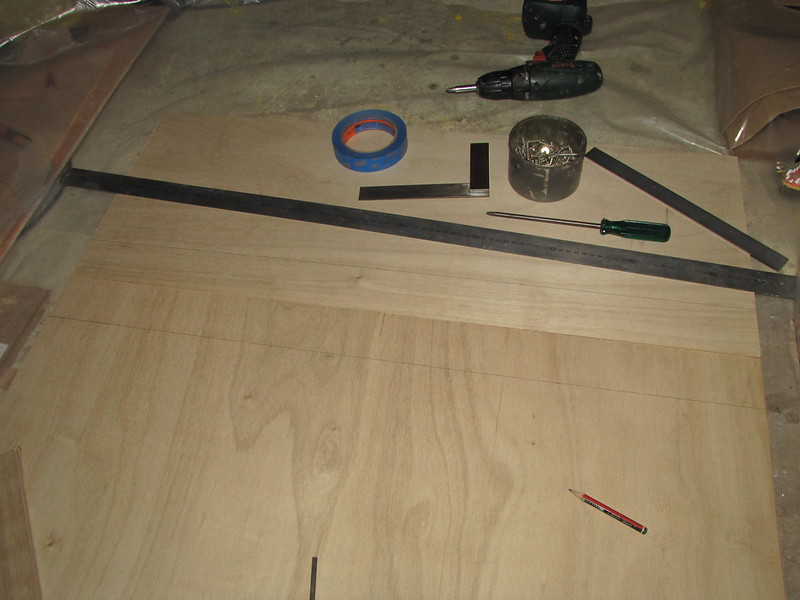
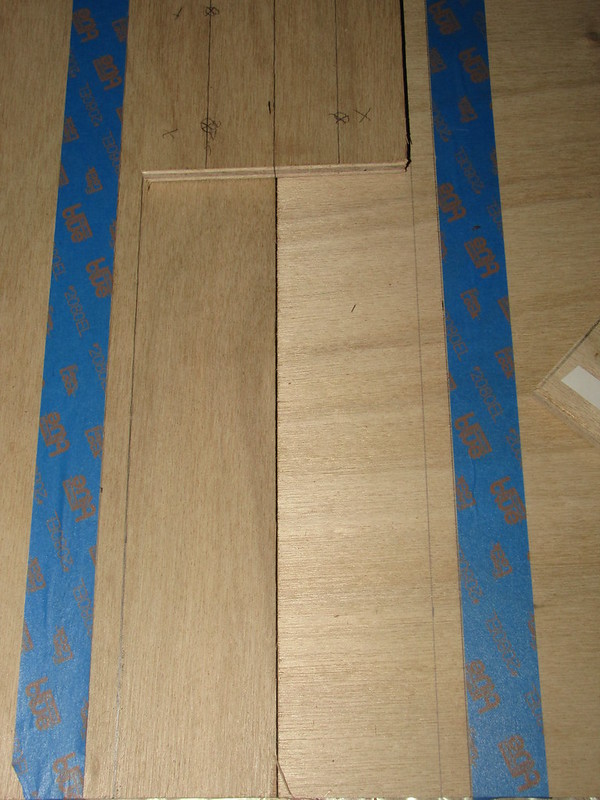
3. Masking lines drawn in on the roof panels
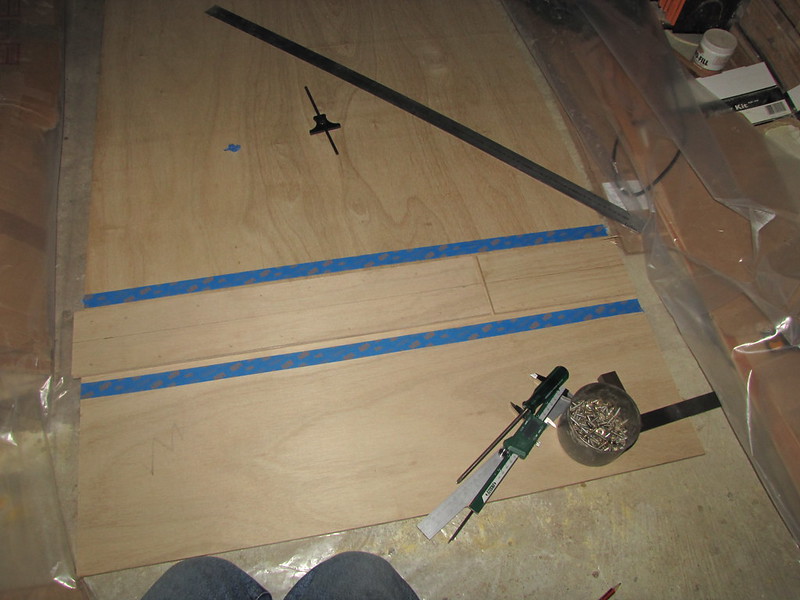
4. Fillet outer-edge tapes in place. Yes - in spite of not filletting the "A-frames", I'm going to fillet the edges of the butt-straps. The centrelines of the butt-straps have been marked in here, too; straps roughly in place
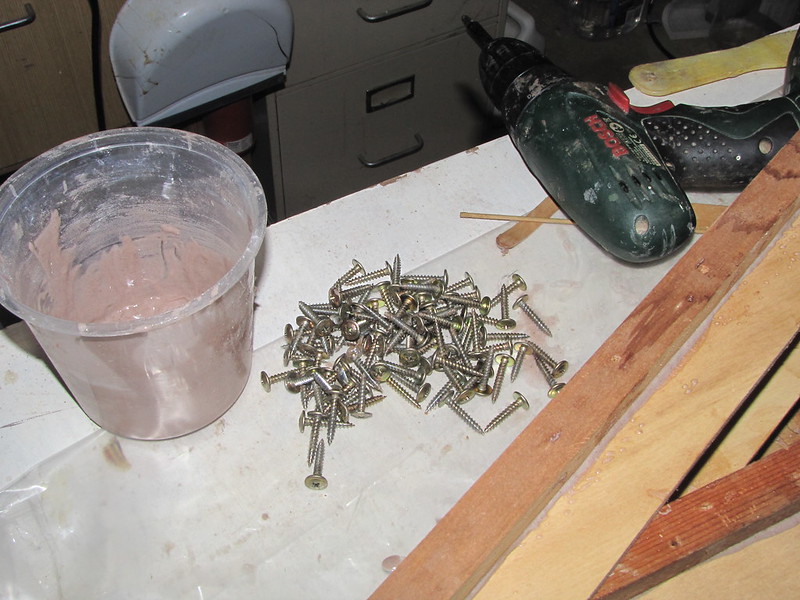
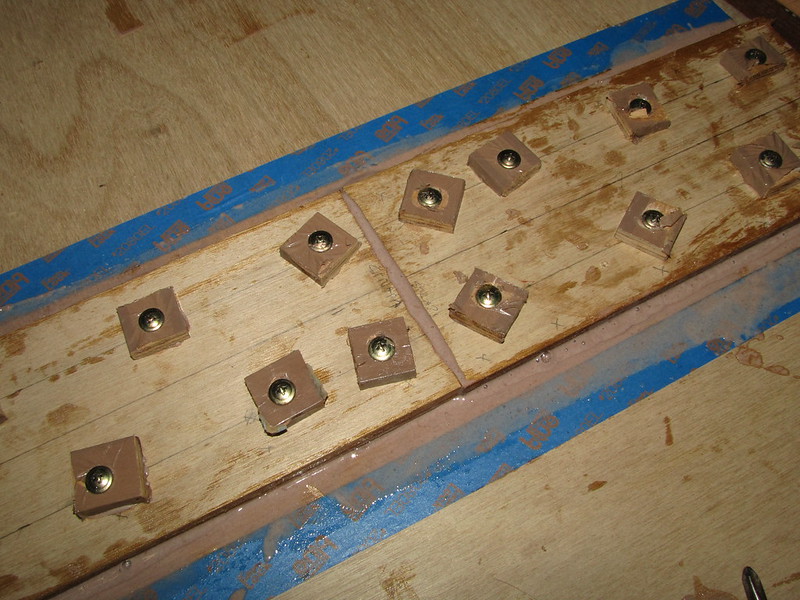
5. "General Purpose Button Head Needle Point Screws". In spite of my previous assertions, these <i>aren't</I> the "bugle-headed dry-wall screws" that I have been claiming they are - nand that the designer stipulates. I think they're probaly better for the intended purpose ("stitching" "stitch-and-glue" boats together), however
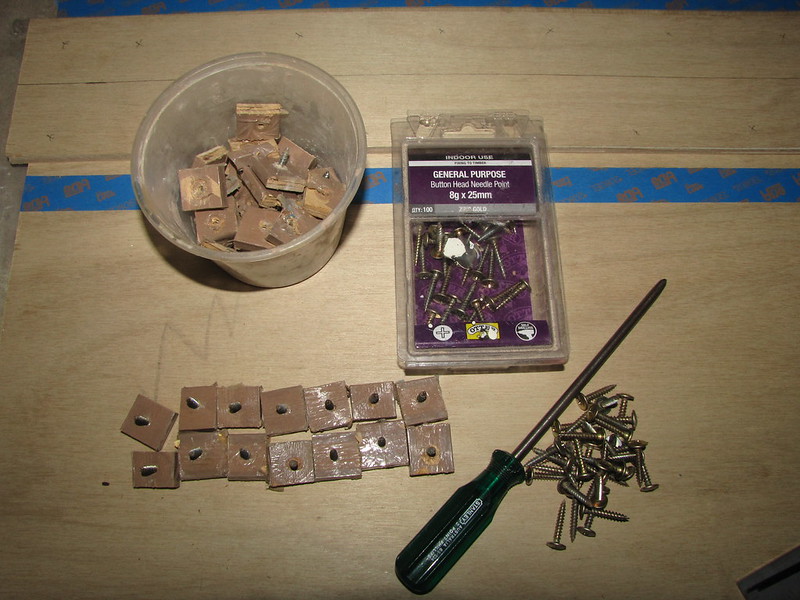
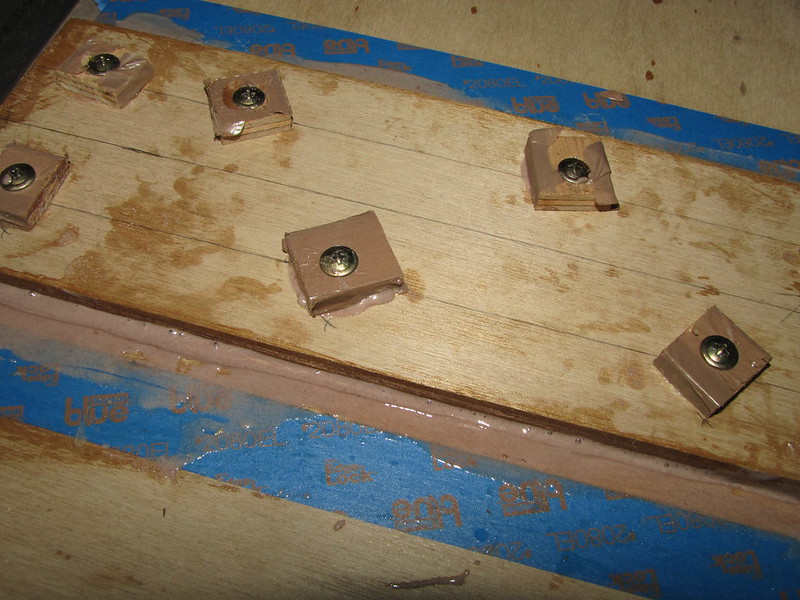
6. I decided to replace all the short (19 mm long) button-head GP screws with 25 mm items in my "buffered screw" collection. They will have more bite into items >= 15 mm thick - particularly in this case into the two 9 mm thicknesses at the butt-strap areas of the roof panels. Rough locations for the screws marked in in pencil crosses. Or I could use six or so bricks. Strangely, no comment from Mr Snappy...
Follow this link to my boring and overstuffed Flickr account
I hope to get the first of the roof panels glued up tomorrow - health and taking the car to get its six-month service permitting. I won't do the glueing unless I'm 100 % on the ball. Also, I really am almost out of BoteCote high-strength glue powder, and must order some more now - before I forget again.
-
4th March 2013, 09:57 PM #3081
GOLD MEMBER
- Join Date
- Jan 2009
- Location
- Blaxland, Australia
- Age
- 65
- Posts
- 2,551
Today's efforts:
1. Getting ready for pre-drilling the hold-down screws: pieces of double-sided sail-making tape (with their covers on)
2. Slight but deliberate gap for glue on/between the abutting faces of the plywood sheets
3. Depth stop set for the drill: I didn't want to go right through the bottom sheets
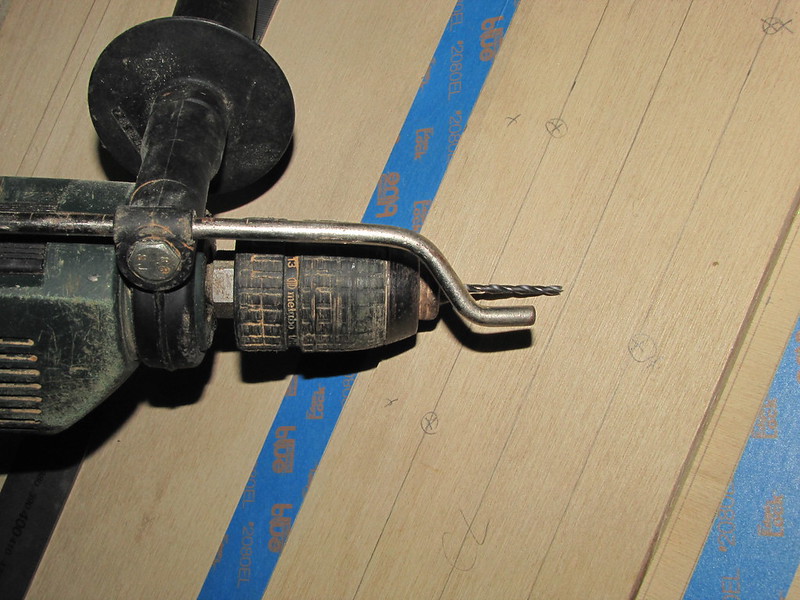
4. Alignment/hold-down holes drilled
5. Parts separated for tape removal, clean-up, screw installation and glueing
6. Screws in position in both pieces of butt-strap - and underlying sheets too, of course
7. Glue applied - hence the mess
8. Close-up of the join between the two butt-strap pieces
9. Close-up of glue-ooze forcing its way up through the screw holes. This means taking the screws out sooner rather than later - which in turn means staying up late this evening. Better that than the alternative of not being able to get the screws out in the morning, however...
10. Overview of the glued-up roof extension after swabbing and scrubbing the area with a meths-soaked piece of paper towel. The painter's pyramids were used to prop up the long sheet while I primed its abutting edge
Follow this link to my Flickr account
Well, I did get around to doing the first roof panel (I even made a bit more room by moving the frame sides on edge and out of the way - a bit). Next time I'll arrange things so that I do the glueing earlier in the day. I ordered another 4-litre bucket of high strength glueing powder last night: it's something of a toss-up whether I glue the roof former locators to the frame sides now, or do them after the next roof panel. I probably don't have enough powder to do the second panel until the new stuff gets here later in the week.
-
5th March 2013, 11:07 AM #3082
GOLD MEMBER
- Join Date
- Jan 2009
- Location
- Blaxland, Australia
- Age
- 65
- Posts
- 2,551
Last night's efforts:
1. Just over half (13 out of 24) buffers remained stuck to the butt-straps after removing the screws, but they were persuaded off gently with a hammer and a really cheap general purpose not-for-woodworking chisel
2. All buffers removed, and the majority of the glue scraped off as well. "Not bad," says Mr Snappy, "not bad at all". Why, thank you, Mr S, you are most kind and generous, but you haven't seen the other side yet...

3. I checked the other side of the job this morning: there was surprisingly little glue seepage under pressure. I was worried - and fully expecting - that most of the glue in the joint had escaped through this very wide avenue. This seems not to have been the case

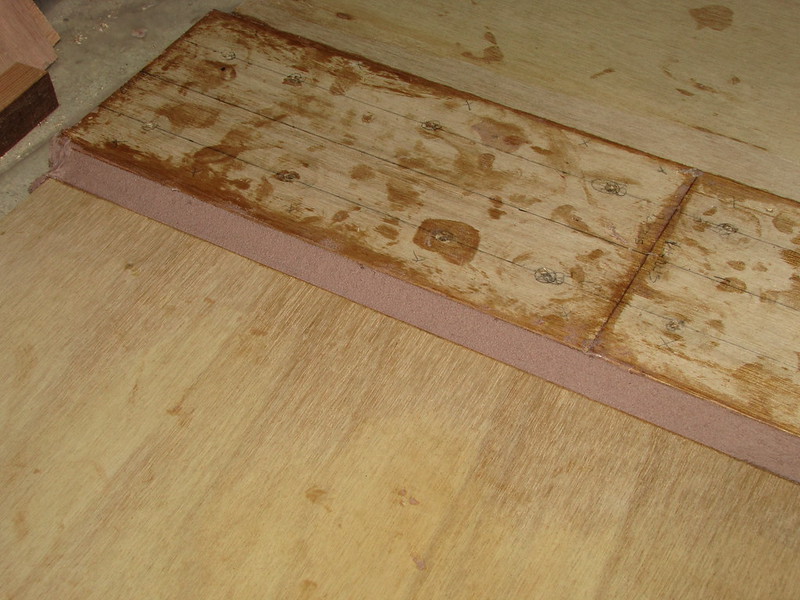
4. The two panels, tape removed from the "underside". Well, they're now one panel. This is the upper, weather side of one half of the roof
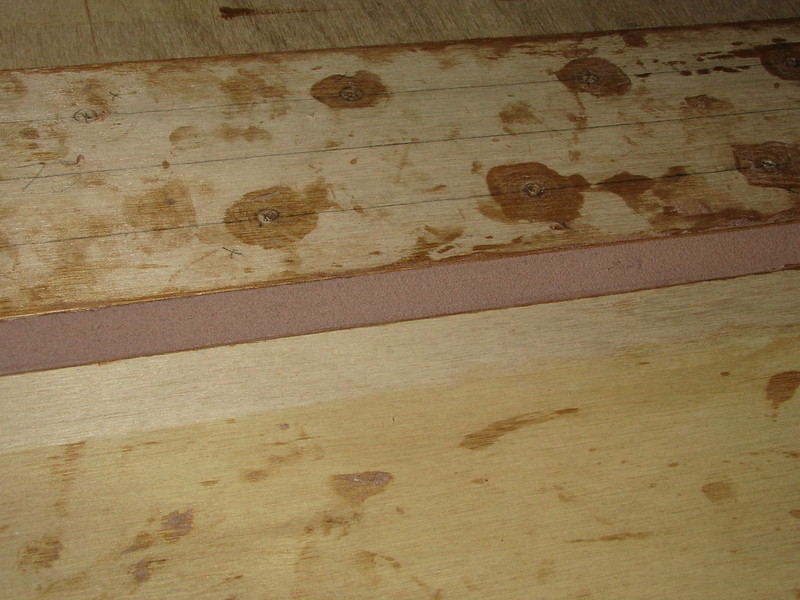
5. Closer view of the underside of the butt-joint. The ridge of glue over the (glue-filled) join-void was the distance between the inside edges of the two strips of masking tape
6. The Fillet Fiend strikes again! I used up all the high strength glueing powder on this and the fillet on the other side of the strap
7. Fillet on the other side of the strap, tape removed. I did the fillets including the shaping in one sitting, as it was getting late. Now to mark out the roof former positions...
Follow this link
Having run out of glue powder, I thought that I would have to wait until the new bucket arrives, but then I remembered that I have an almost full 4-litre bucket of BoteCote sanding filler powder which I can use :). Bewdy :). That won't take long, so I won't have too many more excuses for not doing the sanding and next varnish coat in the repaired section of the cockpit - other than that I don't want to, of course.
The total length of the extended sheet is now 2745 mm, and the nominal length of the boat is 2428 mm, giving a little "porch" of around 155 mm +/- (just over 6 inches) at each end of the boat.
-
5th March 2013, 10:11 PM #3083
GOLD MEMBER
- Join Date
- Jan 2009
- Location
- Blaxland, Australia
- Age
- 65
- Posts
- 2,551
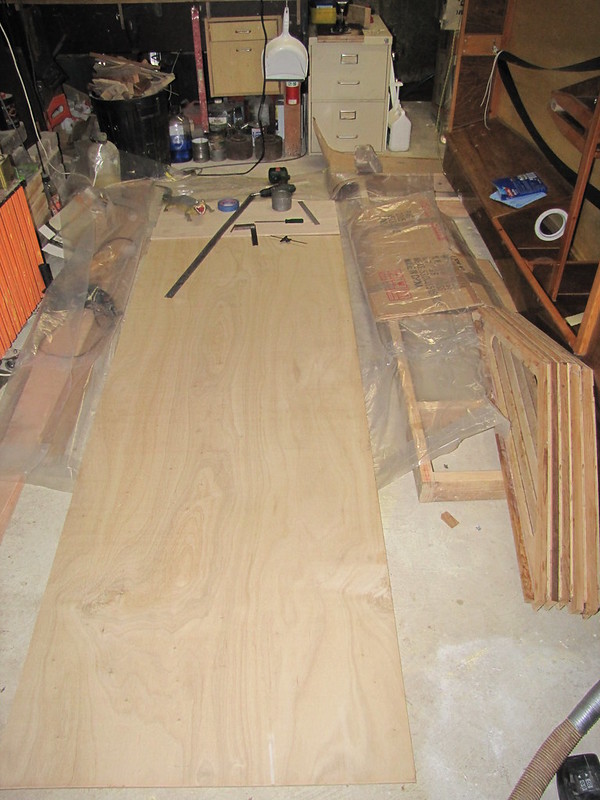
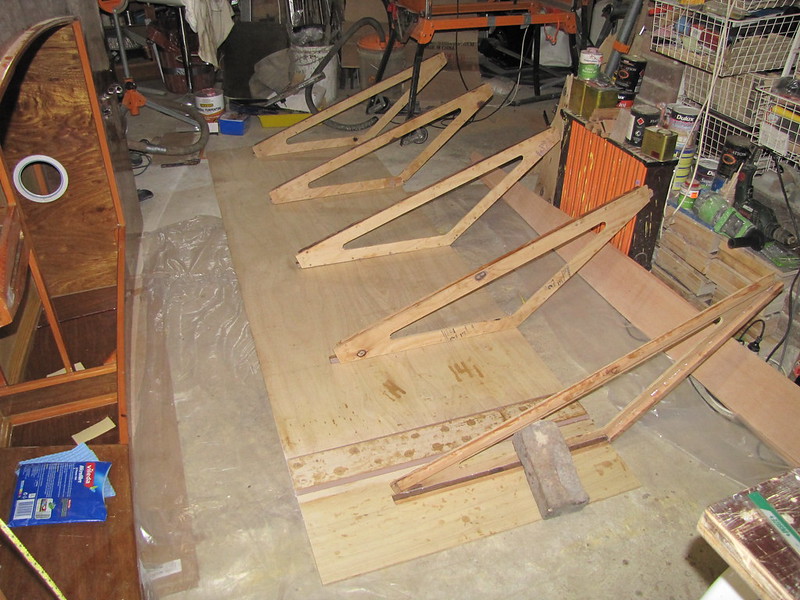
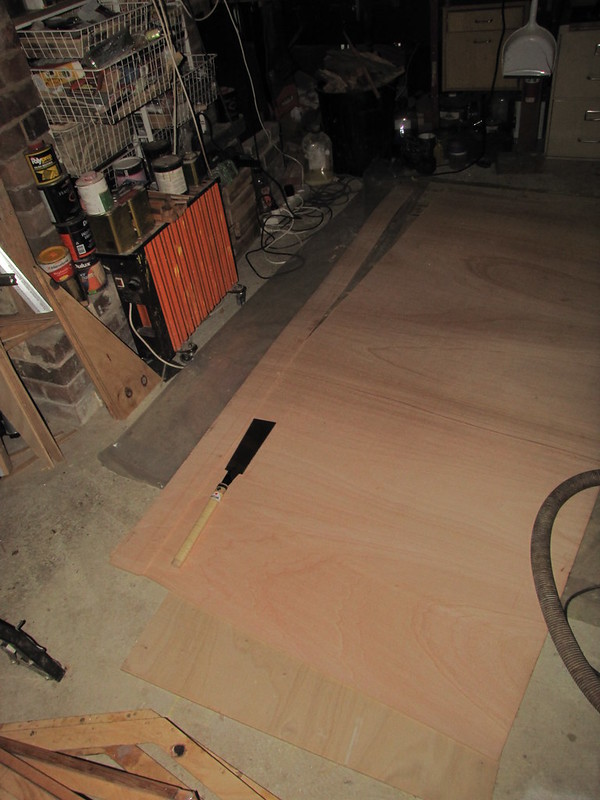
1. Roof formers lined up on the roof panel. Four of them stood up on their own; the one at the end needed a brick. This plywood is very good - I have only seen one small void which was on a sheet edge, and no further ones since I chopped up the sheets
2. The pencil lines marking the former positions on the roof panel can be seen if you squint really hard. Hmm...I could make a boat out of the roof - but it wouldn't be very stable ;)
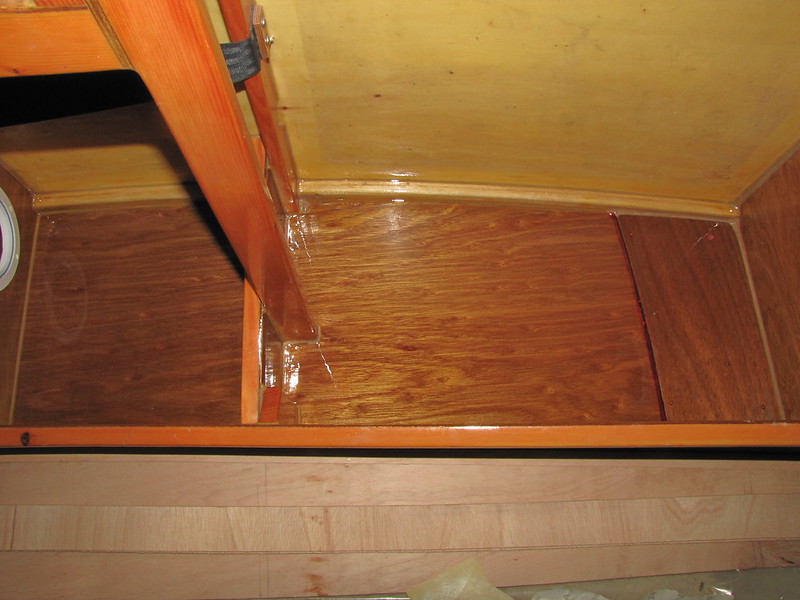
3. Roof formers and panel seen from the other end. Nice view of the 'Duck's cockpit bulkhead. It doesn't tempt me to do another bright-finished boat, though! Packet in the foreground belongs to the (new-ish) micro fibre cloth underneath it. Ready and waiting for when I sand the cockpit side again...
Follow this link
It can be seen in the above snaps that I have done some slight rearranging in order to get a bit more floor space back - necessary for assembling the roof, as you can no doubt see (note that the boat is actually sitting on plywood and cardboard, and is not resting directly on the abrasive concrete floor). Apart from that and ferretting out the bucket of sanding filler powder, I haven't done anything else on the boat or its roof today. The high-strength glueing powder was posted today, so it should be here towards the end of the week. More anon.
-
6th March 2013, 11:49 AM #3084
SENIOR MEMBER
- Join Date
- Mar 2004
- Location
- Brisbane
- Age
- 49
- Posts
- 113
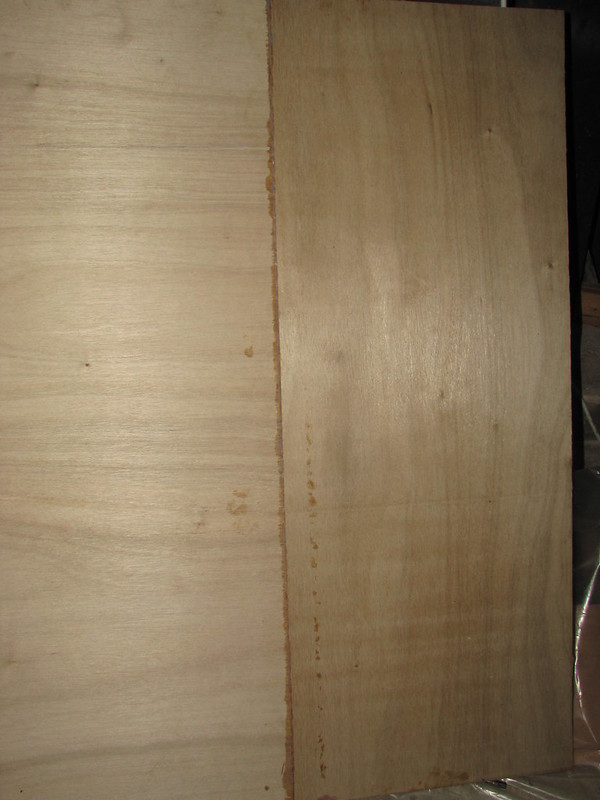
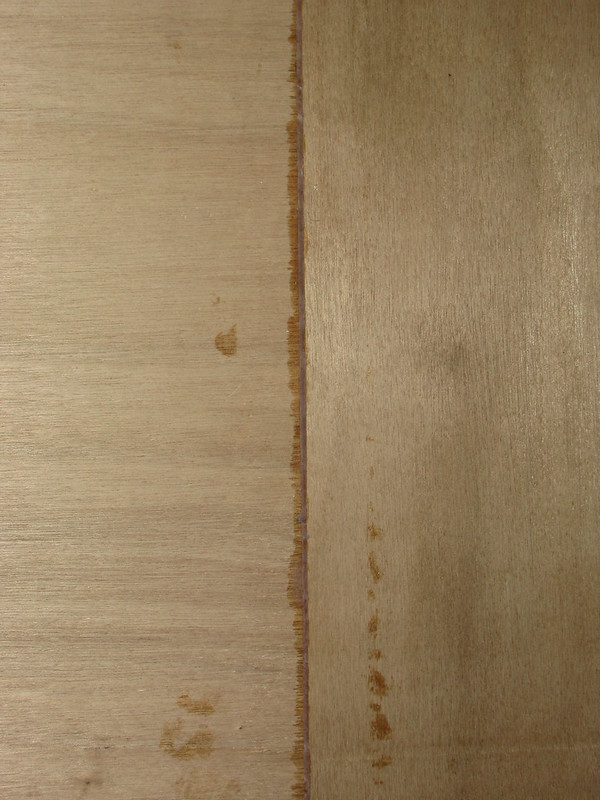
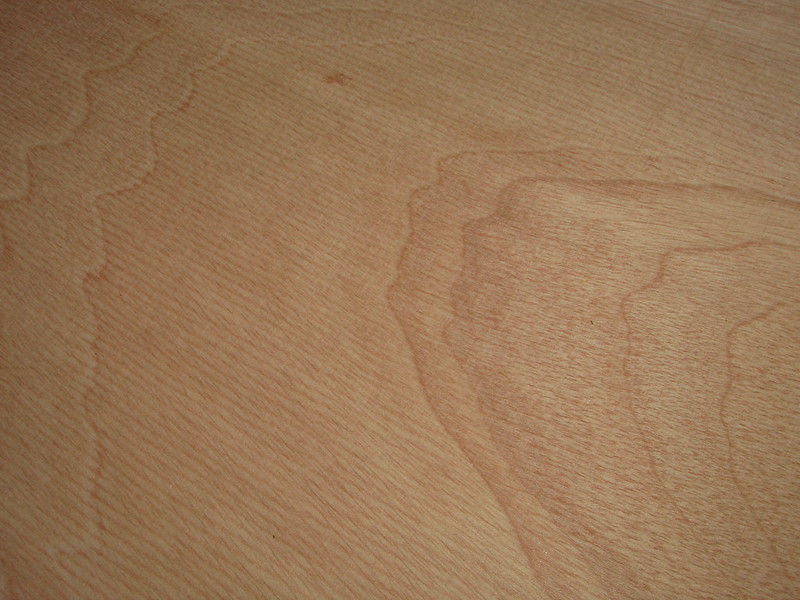
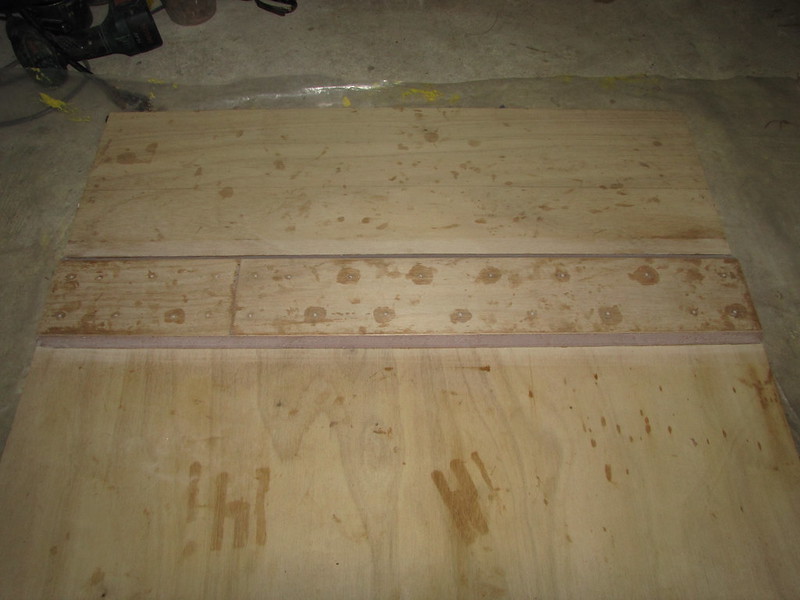
Hi... a quick question.... looking at the two photos below.... it is clear that the wood grain orientation of the 2 pieces of ply is different. Is this deliberate? if not, is this going to potentially cause an issue because of different bending tendencies of the two pieces?
greg
ps. long time viewer, love your detailed posts. saving money to build my own toys....
4. The two panels, tape removed from the "underside". Well, they're now one panel. This is the upper, weather side of one half of the roof
5. Closer view of the underside of the butt-joint. The ridge of glue over the (glue-filled) join-void was the distance between the inside edges of the two strips of masking tape
-
6th March 2013, 03:46 PM #3085
GOLD MEMBER
- Join Date
- Jan 2009
- Location
- Blaxland, Australia
- Age
- 65
- Posts
- 2,551
Hello Greg,
Thank you for your kind words, and welcome to the thread - and for putting up with my on-occasions-rather-waspish comments ;).
The grain orientation was the result of way that thing fell out when I chopped up the plywood sheets. I needed to extend the roof and that's all that I had to hand (there are a few long thin wedge-shaped pieces and a square about 100 mm on a side left over). Since the roof isn't going to be subject to any significant loads or strains and given the over-done butt-strap, I'm I'm not anticipating any problems with the grain orientation. The high-strength glue-powder binds so fast to the wood that it is usually the wood that gives way before the timber (as in my boat) and there is a large area of glue involved since the overlap is > 50 mm in each sheet. Added to which those two large fillets are going to confer some support as well, and after all the ply is 9 mm thick(!). That join is going to be tough enough to carry my weight, and probably a few other bods as well.
You'll hear about it soon enough if I'm wrong!
Cheers,
Alex.
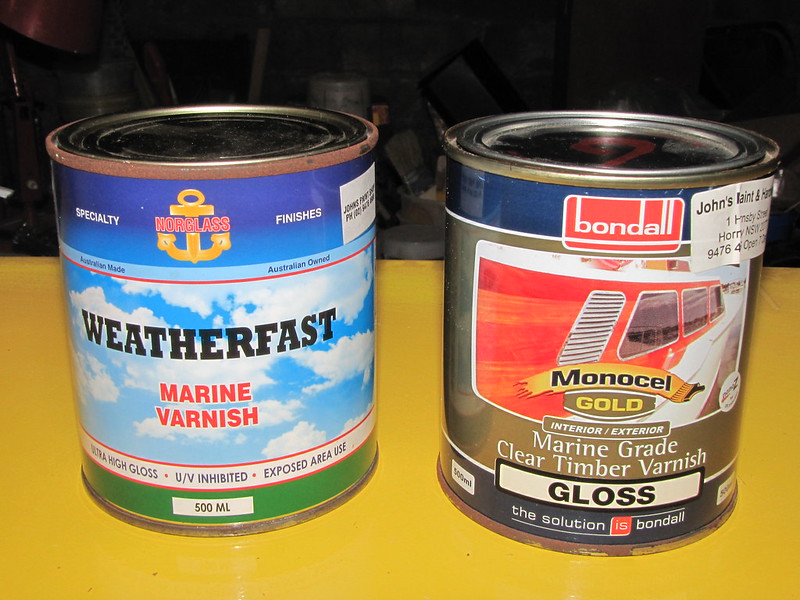
Since I'm posting (without doing anything on the boat today) I finally found a supply of Norglass Marine Varnish close to home, so I bought a 500 ml tin to try it out on top of the Polyclear on top of Le Tonkinois on top of Polyclear on top of International Spar Varnish...
I also spotted some tins of Bondall "Monocel Gold Marine Grade Clear Timber Varnish", so I grabbed a 500 ml tin of that too, just to add to the varnish party. I have heard good reports of this - but I have also heard good reports of all the other marine varnishes that I've used. Interestingly, the Norglass tin has the following warning on it:
"DO NOT VARNISH in damp conditions or below 10 degC." (quoted verbatim apart from the degrees symbol) ...
Hmm. I wonder whether the workswamp could ever be described as "not damp".
Still, two new samples to try out. Got to do the sanding first, though.
BoatCraft Pacific are terrific :). The glue powder order arrived this morning at 7:15! Thanks, chaps :). That puts me back in the roof game again (and I can still avoid doing the varnishing!).
-
6th March 2013, 07:47 PM #3086
GOLD MEMBER
- Join Date
- Jan 2009
- Location
- Blaxland, Australia
- Age
- 65
- Posts
- 2,551
Some snaps from late-arvo today:
1. Two varnishes: Norglass (left) and Bondall (right). I've actually used a lot of Bondall's concrete additives in my attempts to "waterproof" (ha ha) the workswamp - "Silasec" (concrete additive) particularly, and "Bondcrete" (a glue for fixing wet concrete to dried) to a lesser extent. This isn't at all a criticism of either product - the workswamp would be a lot swampier and even lake-like without them! Speaking of moisture, ironically in the Bondall case, the ends of the tins look a wee bit rusty...
2. BoteCote powders: the high-strength powder is a bit more than twice the density of the sanding filler... The high-strength glue powder is the very expeditiously-sent and newly-arrived batch - as you can see from the intact seal on the lid
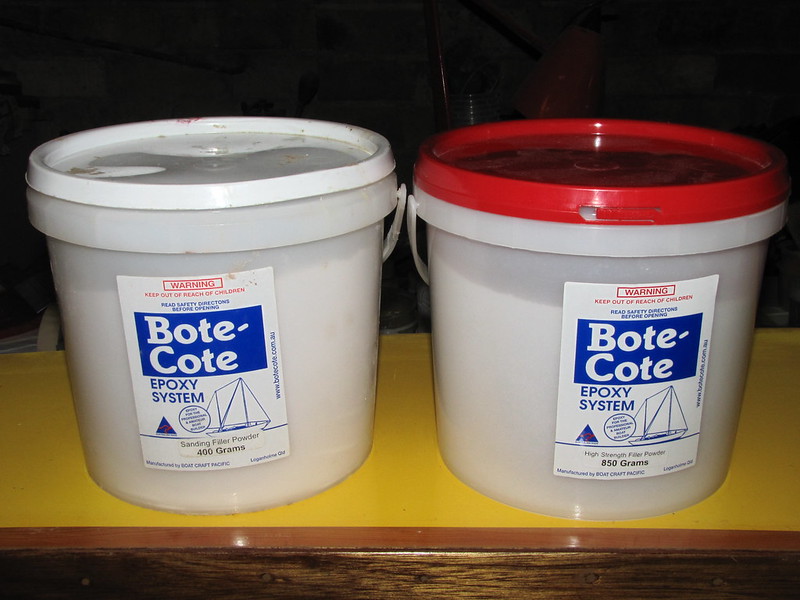
3. Sanding filler mixed into about 4 ml of WEST resin which I had lying about in a couple of syringes. The filler powder is a lot lighter and it is also a lot easier to use as a filler than the high-strength glue powder; the latter because it isn't as sticky ;)
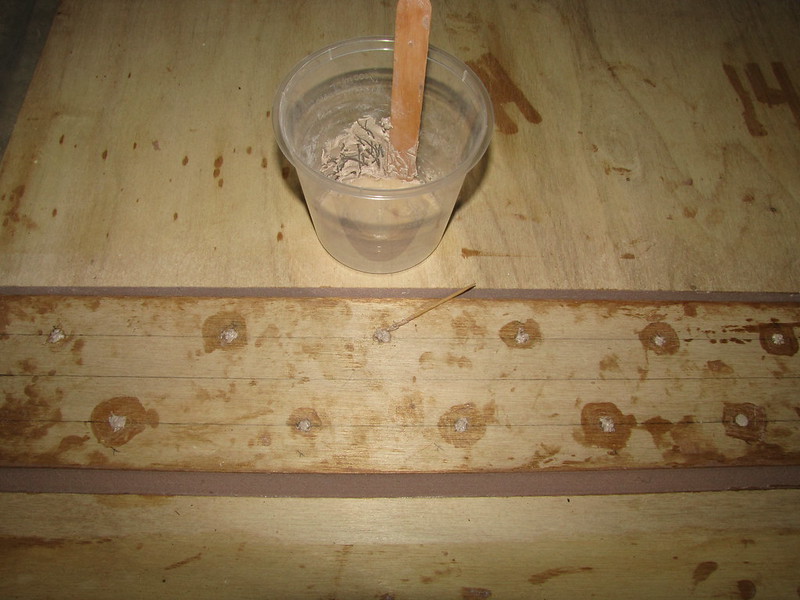
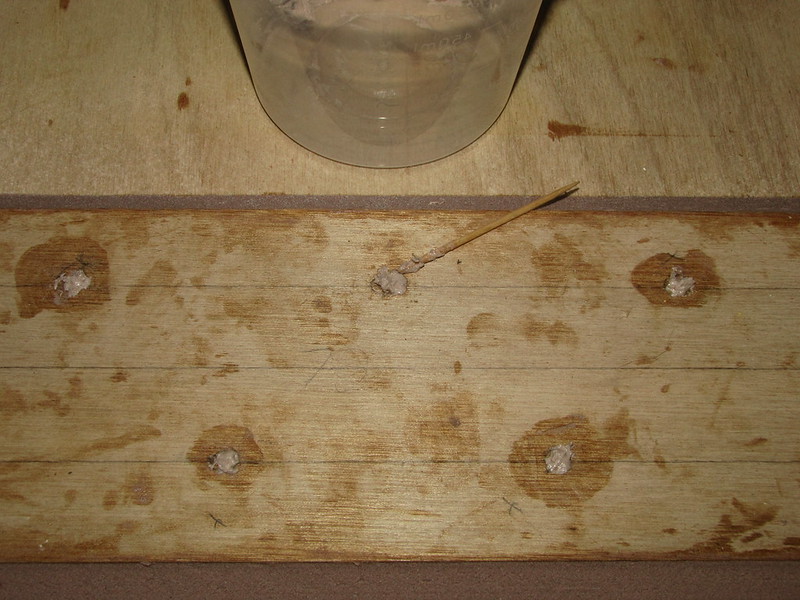
4. Close-up of the filled butt-strap screw holes. I think I last used this filler on the sheer-clamps on the 'Duck - around four years ago (help!). It took a while to break up the solid mass that the powder had consolidated into. It was also easier to clean up than the hs glue - because it isn't as sticky :)
Follow this link to the Flickr account that I seem determined to keep stuffing full o' snaps
I've given Boatcraft Pacific another plug since they went to quite a bit of trouble to get the powder to me.
I think I'm going to take advantage of forecast warm and sunny weather tomorrow and get the next coat of varnish on (tomorrow!), and try and beat some forecast damper conditions at the end of the week. You never know - I might even be able to get two coats on.
Right. OK. A little extra note: I've decided to stop mucking about (finally ;) and will only put two more varnish coats on thefuselagecockpit sides; and two more on top of them on the gaboon butt-strap aft of the cockpit bulkhead. No more - and maybe less. I made up my mind while sanding the area after dinner this evening. Life's too short!
-
7th March 2013, 01:24 PM #3087
Sawing hack
- Join Date
- Oct 2007
- Location
- Sydney
- Posts
- 178
Due to some unforeseen circumstances, my family and I have returned to Sydney (hopefully only for this month). Yesterday I had the opportunity to catch up quickly with Alex in his shed. Although it was a very brief visit, we had an excellent time checking out his boat and talking about his setup. I found it so helpful, that I was able to head down to a local chandlery store today and picked up some blocks (hopefully the last of them).
Alex's repair work on his OzRacer is amazing. Once the paint and varnish is complete, I doubt you'd realise that most of the side had been severely damaged. I ran my hand over the primer/undercoat where I thought the panel had been replaced, but I could not detect a single lump or bump. It was seriously well done.
I was thinking overnight, and I know this may be extremely dangerous to mention, but I thought Alex might like to toss a replica panel of plywood on the left side behind the front bulkhead. The panel on the right side is the only visible evidence is the tragedy. So if a mirror piece was added to the other side, people would be even less likely to notice the odd panel. Of course the panel is hidden away under the sides anyway, so I think it'd be one of those conversational pieces you'd have to point out to someone before they'd notice it.
Alex's trailer roof also looks like a seriously nice piece of work. Since Alex doesn't have a garage for a car, or any real driveway for that matter, I understand his need to keep the boat on the trailer. I wouldn't want to try and carry the boat up his front steps either! I trust the roof once it is treated and painted doesn't end up being too heavy to lift off the boat. Furthermore, Alex, I wouldn't worry about the strength of the difference pieces which make up the roof - its all plywood (i.e. numerous layers of multi-directional wood slices), so grain direction is of no importance.
I look forward to seeing the boat painted and varnished again. Hopefully he's relaunch it soon!
-
7th March 2013, 05:34 PM #3088
GOLD MEMBER
- Join Date
- Jan 2009
- Location
- Blaxland, Australia
- Age
- 65
- Posts
- 2,551
Hello Theodor,
Thanks for your kind words - it was a pleasure showing you around, and as a bonus, you got to meet Mr snappy ;). I find praise embarrassing, so I'll add that Mr Storer had more than a hand in it - so I can't take full credit for it in any case. But your comments are appreciated :). I think your visit spurred me on to get the varnishing out of the way!
I pondered putting a balancing dummy panel on the other side of the cockpit, but decided against it as I'd used up the usable bits from the gaboon offcut, and didn't want to raid that sheet again. Or not yet, at least. Also, the thought of varnishing that as well really brought the hammer down on the idea!
Cheers,
Alex.
I had some fun with the bendy ply today, and what with Theodor's visit yesterday, it's a good time to trot out the "drawing" of the roof that I mocked up in Rhino when trying to cobble together a shape for the roof (roof slope, frame intervals, etc.). I have to confess that none of it was mathematically derived (by me) - it was purely a matter of "that looks about right", based on existing example of roofs and so on.
1. Boat roof: a rough sketch in one of the Rhino 3D for Macintosh "Work-In-Progress" versions (Robert McNeel and Associates). The side frames were drawn in using the designer's co-ordinates, so they are going to be more accurate than my real version of the boat ;). Various extraneous lines are dimensions used to get actual numbers for the roof construction: scale is 1:1 in mm in the Rhino drawing. The only objects that are in actual "3D" are the two roof panels: all the rest are 2D (the "plywood" effect in the "closer" of the two panels is by complete accident - totally unintentional ;). The roof panels are at the roof former height plus 20 mm - the gap is for air circulation and the heights of the rectangular parts of the formers (i.e., in contact with the frame sides) were increased from 45 mm to 65 mm accordingly

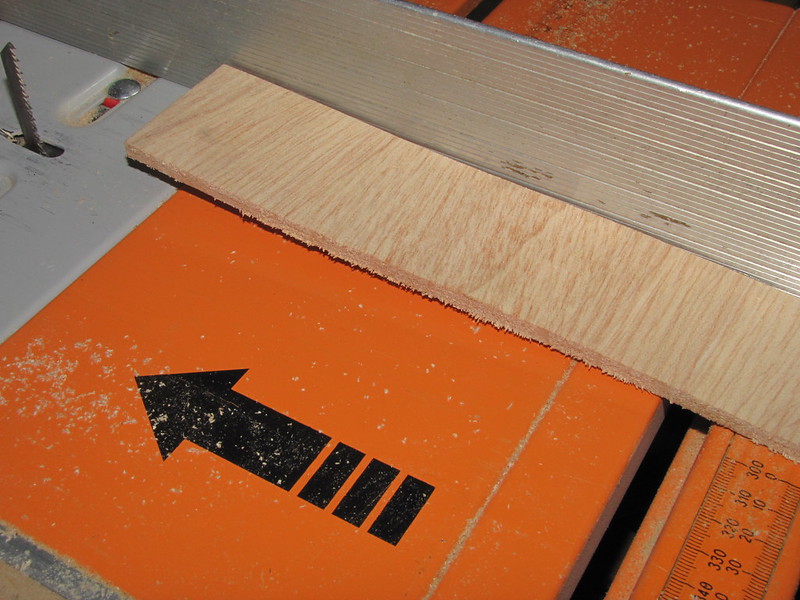
2. Bendy ply time! Rather than handle one whole rather floppy sheet on the table saw, I decided to cut off a strip using the Japanese cross-cut saw, and run the offcut through the tablesaw - or table-jigsaw in this case (thinner kerf, jigsaw already installed in the table, etc.). Straight-edge used to mark out a 100-odd mm-side strip on the plywood sheet

3. Close-up of the bendy ply sheet, showing its unusual texture - which - I think - is a symptom of the structure of the plywood that allows it to bend
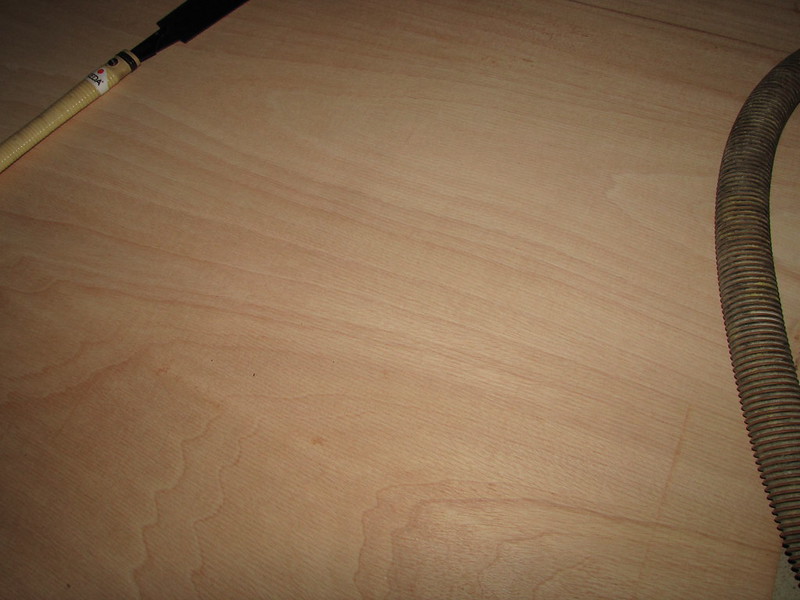
4. Slightly closer view of the bendy ply
5. 100-ish mm strip cut off the main sheet. The Japanese saw made short work of it, although the person operating the saw allowed it to wander a bit from the line here and there...
6. Bendy ply strip draped over a Multi-Stand, ready to go through the table-"scroll-saw". The box under the strip with the ropes and things is my "tackle box" for the 'Duck - reminding me of the purpose of the boat. I had got it out to show my visitors the mainsheet block yesterday
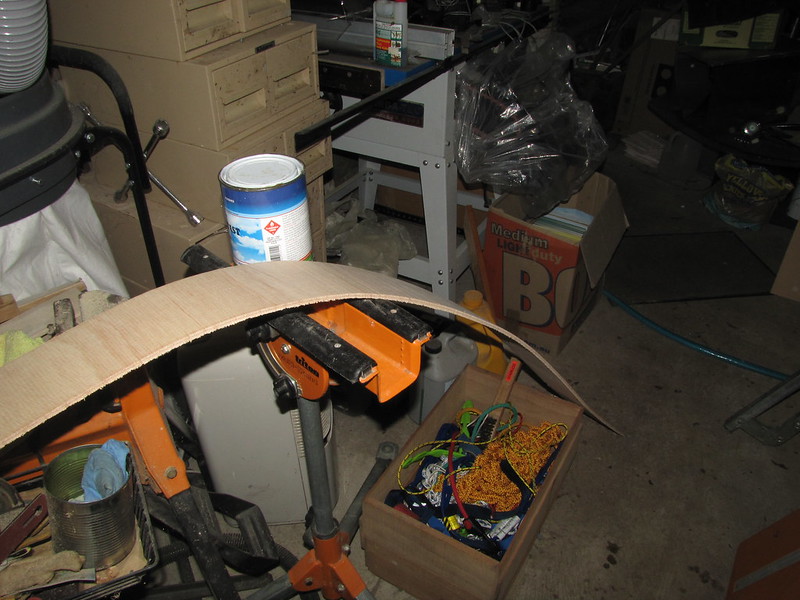
7. Ready to go. As can be imagined, this stuff was almost as easy to cut as balsa. Note that while connected at the cutting end, that dust hose isn't connected to any form of suction at the moment: size-incompatibility of the jigsaw's dust port soaking up the available adaptor...
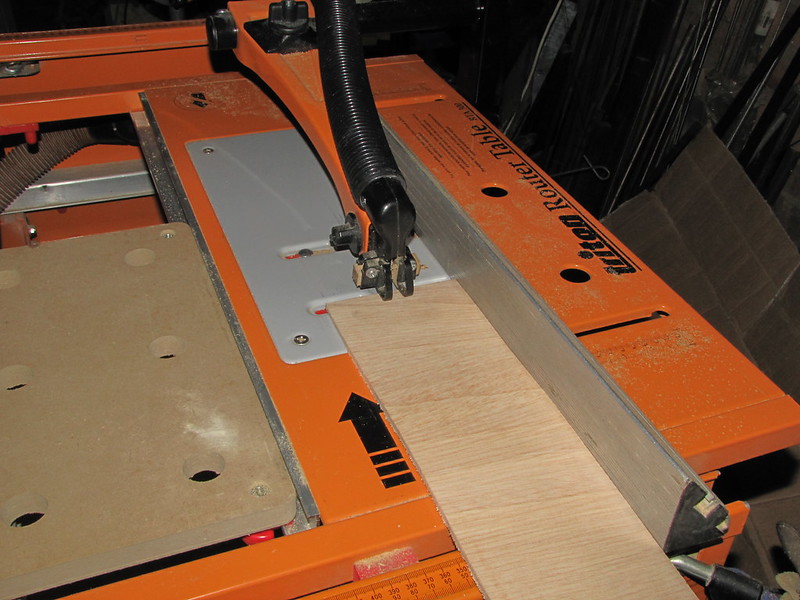
8. One of the 50-ish mm wide strips cut. The open texture of the ply though out the sheet is visible here. Happily, the sheet was 2440 long (which suggests that it was imported), so I probably won't have to worry about "footing" the overhang(s) of the frame sides
9. One smaller sheet of bendy ply, two 50 mm-wide strips of bendy ply for the roof frame sides...
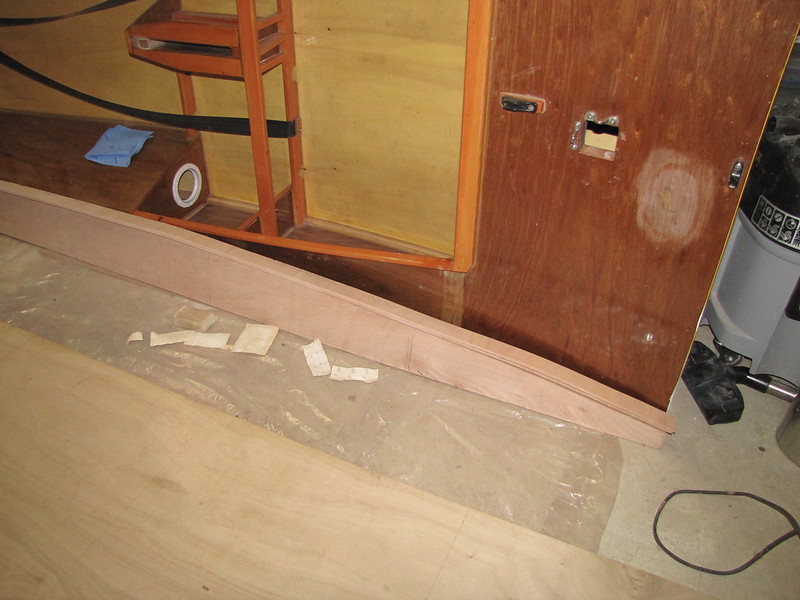
10. Roof frame "feet". I've been going on a bit about the use of the bendy ply in the roof structure: here is exactly what it's going to be used for: seen here posing in place on the curved edge of the side members. The easiest way of installing them is going to be to put the strips on the side-decks of the boat (plastic sheet between the ply and the decks), glue up the bottom eges of the sides (frame assembled but without the roof panels installed) and lower the frame onto its feet, this pressing the ply into its final boat-matching shape. I think...
11. More varnishing. Coat # 3, this one is the Norglass "Weatherfast Marine Varnish", actually coat #12 or so, given the 9-odd(?) coats underneath the repair-coats. On the other hand, for the panel aft of the bulkhead, it's still only coat # 3...
Follow this link to my soggy Flickr account
The day has been nice and dry, moderately warm, with a good breeze; the tin says "touch dry in 3 hours at 20 degC and 50 % RH". Workshop climate is (at 4 pm, 7 March '13) 21 degC, 80 % RH, so we'll see*. At least it isn't 100 % RH. One of the cheering things about the current coat's immediate predecessor was that it didn't split. I had become habituated to thinking that varnish did that, after the fun with Le Tonkinois Mk 2. Le Tonk Mk 1 was perfect but the EU Chemical Police made the manufacturer change the formula, presumably so the stuff could be drunk, used in cooking, etc., and the result was a diabolical mess. Maybe it contained lead (although more likely one or more of the nastier, cancer-inducing VOCs).
So, things are ticking away nicely - some heat from the "flame-thrower" was needed to finish off the cure on the "sanding filler"/resin fills in the roof panel butt-strap, which I was expecting to have to do. That will get sanded back once the varnish has dried - however long that is going to take. Once I've got the existing roof panel sanded (and the butt-strap mitred off on the peak-side of the board), I'll get onto the second roof panel. I think that The Boss and I are going to be getting quite a bit of exercise in the form of weightlifting, shortly ;).
*ThreeFive hours later and the paint was still wet - as in my fingertip came away covered in wet varnish when testing an out-of-the-way spot. This is to be expected with the high RH and no air movement to speak of, and I should allow for another 48 hours-to-dry-condition with this lot, too. The Monocel will probably be the same, but as hope springs eternal, maybe I'm jumping the gun...
-
8th March 2013, 10:06 PM #3089
GOLD MEMBER
- Join Date
- Jan 2009
- Location
- Blaxland, Australia
- Age
- 65
- Posts
- 2,551
Amazing! I checked the varnish around 8 this morning - and it was dry! Well, almost all of it - one small protected corner was still wet, but it dried off pretty quickly when I applied a marvelous modern miracle device - a domestic table fan. I'm extremely pleased with this, as I seem to have found a marine varnish that will tolerate my swamp-like conditions. But as I said in the previous post, it was a significantly drier day yesterday than it was when I put the previous coat on! It's likely that the varnish will go off quicker if I have the fan running nearby, although there is the issue of raised dust.
Speaking of dust and surface coatings, the rubber gloves that I use are powdered, and it's possible that some of the problems that I was having with dust in top-coats was a result of the powder sprinkling out of the gloves. Just a thought.
Only two snaps today:
1. Air movement - a domestic table-top fan. The fan is actually running at medium speed, but the relatively fast camera shutter speed has "frozen" it
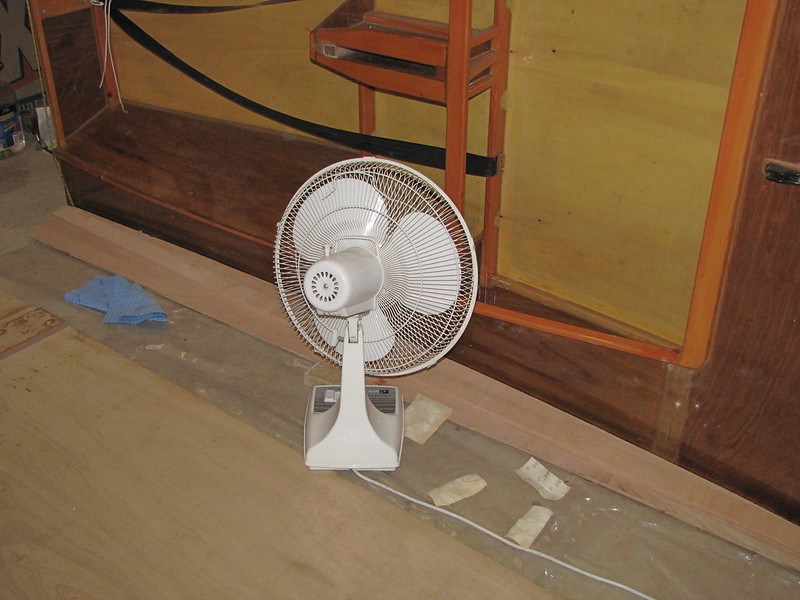
2. Roof panel butt-strap sanded clean - once the varnish (on the boat) had dried!
Follow this link to my Flickr account
I sanded down the dried varnish this evening, swabbed it with meths (as directed by the instructions on the tin :), and wiped the area over with the microfibre cloth a few minutes ago. The next coat (Bondall "Monocel") - going on tomorrow morning - will be the final coat for the sides, having replaced the approximately three coats that I sanded off while cleaning up after the repairs. That still means a few more coats on the panel aft of the cockpit bulkhead - but I won't be pitting on too many (possibly only two), as I want to wrap this up as soon as possible - there is still the much-more-exposed foredeck patch to do yet (I haven't forgotten it - it stares me in the face every day ;).
As I have said before, the boat is going to be mostly undercover under its roof, and that panel will not be in the sun for long on average, being under the (starboard) side-deck. If I want I can alway s add the extra coats later, with a mosquito net draped over the boat to prevent access to the sticky paint by the various creatures that love to end their days swimming in the stuff.
All in all, I am feeling more positive about the boat now - but will feel even more positive when a. it's out of the workshop, and b. it's back in the water! I'm really happy that I've reached this stage, though :).
-
10th March 2013, 08:32 PM #3090
GOLD MEMBER
- Join Date
- Jan 2009
- Location
- Blaxland, Australia
- Age
- 65
- Posts
- 2,551
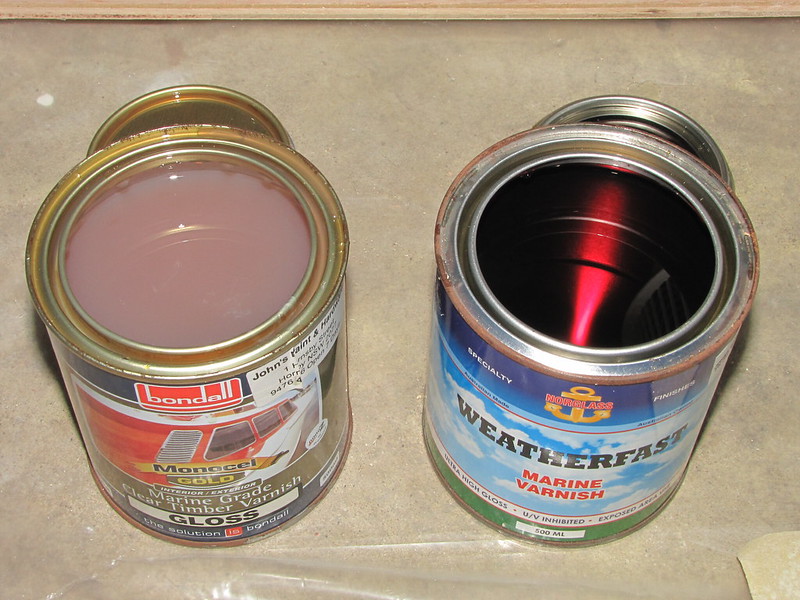
One image only today - which reflects the amount of work that I haven't done on the boat ;). The snap is a visual comparison "in the tin" of the latest two varnish candidates:
1. Bondall "Monocel" on the left; Norglass "Weatherfast Marine" on the right. The milky appearance of the "Monocel" is no doubt the finely-divided zinc compound ("NanoZ(TM)") used as a UV filter in this varnish. It isn't visible on the thin-film painted-on layer. The Monocel also needs stirring before use, as the zinc settles out in storage
Follow this link to my Flickr account
I put the "Monocel" coat on on Saturday morning, and it was pretty nearly dry by evening. I think I like the surface finish and reaction to the brush of the "Weatherfast" over the "Monocel", but it's a bit hard to tell with only one coat of either. I can play about with them on the cockpit strap over the next few coats.
Getting closer to finishing the boat - and getting ready to glue up the second roof panel.


 Reply With Quote

Similar Threads
-
New Queensland PDRacer Build
By duncang in forum Michael Storer Wooden Boat PlansReplies: 71Last Post: 26th April 2012, 08:30 AM -
Oz PDR build in Adelaide - sexy black PDRacer
By m2c1Iw in forum Michael Storer Wooden Boat PlansReplies: 39Last Post: 27th April 2009, 06:30 PM -
OZ PDRacer - Dylan's build in the Philippines
By Boatmik in forum Michael Storer Wooden Boat PlansReplies: 16Last Post: 23rd February 2009, 05:50 PM -
Brisbane Timber and Working with Wood. Boatmik/PDRacer
By Boatmik in forum Michael Storer Wooden Boat PlansReplies: 1Last Post: 11th April 2007, 08:06 PM -
Flawed wood on the TS --DUCK!
By Robert WA in forum WOODWORK - GENERALReplies: 7Last Post: 19th February 2004, 11:42 AM
Tags for this Thread
balanced lug,
boatmik,
build,
dacron(tm),
douglas fir,
duck,
enamel,
epoxy resin,
fibreglass,
hoop pine,
interminable,
lug,
machinery,
materials,
michael,
oregon,
oz racer mk 2,
ozracer,
paint,
paulownia,
paulownia/glass mast,
pdracer,
plywood,
polytarp,
primers,
really simple sails,
sail-making,
sailmakers thread,
sanding,
storer,
sydney,
timber,
tools,
varnish,
verbose,
western red cedar,
wood,
wood duck,
wrc
