

 Thanks: 0
 Likes: 0
 Needs Pictures: 0
 Picture(s) thanks: 0
Results 31 to 45 of 65
Thread: New PDR build - Boston, MA USA
-
30th June 2009, 11:43 PM #31
 GOLD MEMBER


- Join Date
- Mar 2007
- Location
- Adelaide
- Posts
- 2,139

 Originally Posted by dpeter

 you need to shape a hole the same profile as the foil so a hacksaw blade and patience is alls ya need.
-
30th June 2009 11:43 PM # ADSGoogle Adsense Advertisement
- Join Date
- Always
- Location
- Advertising world
- Posts
- Many
-
1st July 2009, 01:36 AM #32
SENIOR MEMBER
- Join Date
- Sep 2007
- Location
- Savannah GA USA
- Posts
- 583
Be sure to buy the flush trim bit with a roller guide-bearing. There are less expensive trim bits that have rub bearings that spin along with the router bit. They will work but can also burn their way into the wood (when you hesitate or go too slow) and will muck things up in a hurry, especially in novice hands.
The "Cosmos Mariner,"My Goat Island Skiff
http://s176.photobucket.com/albums/w168/MiddleAgesMan/
Starting the Simmons Sea Skiff 18
http://www.flickr.com/photos/37973275@N03/
-
1st July 2009, 10:49 PM #33
Intermediate Member
- Join Date
- Dec 2008
- Location
- manchester, MA USA
- Posts
- 48
Yeah, I think these novice hands will stick with the hand tools this time.
Thanks for the info, gents.
Peter
-
18th July 2009, 02:27 PM #34
Intermediate Member
- Join Date
- Dec 2008
- Location
- manchester, MA USA
- Posts
- 48
Time for another one of my brief updates - I'll put up some pics in a day or
3 ...
- Buoyancy tanks and side-decks installed this week and
mast partner just glued up tonight. Probably install that
tomorrow.
- 1 foil glassed, other one in a day or so.
- This probably goes against the low cost PD Racer philosophy,
but I purchased the spritsail from Duckflat a few days ago. Duckworks, my
"local" dealer here in the states has an 8-10 week lead time and I
just want to get this duck out on the water! I will probably make up
the lugsail myself in the off season ...
- Been checking out MIK's PDR rigging slideshow - Getting set to
purchase the rigging bits this week.
I think that's all for now.
Cheers,
Peter
-
19th July 2009, 09:22 AM #35
Happily receives emails.
- Join Date
- Jul 2005
- Location
- 'Delaide, Australia
- Age
- 65
- Posts
- 8,138
Howdy Peter,
I think the Ducks are a broad church. I think the low cost aspect is important, along with fast and messy building. But also it is important to show the alternative of using nice materials and making the boats pretty.
The boats over the past couple of years have been becoming better and better. Very different from the 9mm or 12mm ply boats with tiny baggy sails of three years ago. That is a generalisation by the way, there were some other boats that were very good at the time as well- but the OZ put the whole thing together in a package.
It sort of defined another way and most have followed. Many still following the cheap philosophy at the same time, but also a significant number of people moving to something that looks nice to other boatbuilders and woodworkers.
Best wishes
Michael
-
21st July 2009, 02:48 PM #36
Intermediate Member
- Join Date
- Dec 2008
- Location
- manchester, MA USA
- Posts
- 48
MIK,
My building style is not fast but definitely messy
While I still am a few weeks away from sailing the Duck
I have begun to appreciate more and more the amount of thought
that must have gone into the development of the OZ version.
I can't wait to get out there!
I don't know if I mentioned this in the thread regarding your USA
tour but if you make it to the Northeast, mi casa es su casa.
I am about 2 hours south of Clint up in Portland, ME.
Cheers,
Peter
-
22nd July 2009, 09:17 AM #37
Happily receives emails.
- Join Date
- Jul 2005
- Location
- 'Delaide, Australia
- Age
- 65
- Posts
- 8,138
Cheers Peter,
I might take you up on that!
Hey ... I did forget about the not so cheap but messy builders! I am sortof one of them too.
MIK
-
31st July 2009, 03:19 AM #38
Intermediate Member
- Join Date
- Dec 2008
- Location
- manchester, MA USA
- Posts
- 48
Latest update from North America:
Foils glassed, sanding begun - getting tired of all that epoxy dust,
even with a mask it is getting old ... MIK, any problem with me wetsanding
the foils?
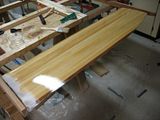
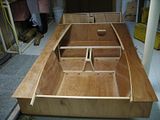
Hull nearly complete (still needs her chines taped ...):
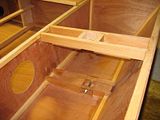
Mast Partner. Had to move the spacer blocks aft
about 5mm in order to keep the same mast angle.
The mast fits nicely though ...:
By the way, my apologies for the tiny photos - they uploaded
to Photobucket at 800x600 but when I insert them here
they come in as thumbnails - resizing them in this interface
makes them too choppy. I'm too lazy to try and figure it out
just yet.
Anyway, things are moving along - still waiting on the sail
from Duckflat.
Now it's mostly sand sand sand ...
Cheers for now,
Peter
-
31st July 2009, 11:40 AM #39
Happily receives emails.
- Join Date
- Jul 2005
- Location
- 'Delaide, Australia
- Age
- 65
- Posts
- 8,138
Hi Peter,
Yes you can wet sand providing bare wood doesn't get wet - it will stain if it does.
Another way is lots of sanders have a pesky little bag that collects dust. If you can pick up a cheap vacuum cleaner or shop vac hook it up to the same outlet. I like the fancy ones made by Festo and others and they cost a bomb. But I've known plenty of folks who just pick up a second hand vacuum cleaner.
Your sandpaper will last longer too.
MIK
-
1st August 2009, 08:05 AM #40
Intermediate Member
- Join Date
- Dec 2008
- Location
- manchester, MA USA
- Posts
- 48
"... a pesky little bag ..."
Sounds like my last girlfriend ...
Yeah, thanks for that MIK, I've been doing it manually so the dust factor
hasn't really been that bad. I decided to quit being a whining girlie-man
and just get it done. I probably should pick up a good sander though.
-
2nd August 2009, 09:10 AM #41
Intermediate Member
- Join Date
- Dec 2008
- Location
- manchester, MA USA
- Posts
- 48
By the way, I apologize if this is answered somewhere but I
am assembling the rudderbox and the plans state that the
19x45 framing can be reduced in width in addition to being
thicknessed to accomodate the rudder fittings.
Is 16 mm thick, 25 wide adequate?
My fittings have integral pins on the pintles, not the one-peice pin.
Peter
-
2nd August 2009, 11:18 AM #42
Happily receives emails.
- Join Date
- Jul 2005
- Location
- 'Delaide, Australia
- Age
- 65
- Posts
- 8,138
That will be absolutely fine.
Most of the strength is from the rudder fittings and their bolts through the spacer. The side stiffeners are just to transfer that strength to the back edge of the box.
MIK
-
7th August 2009, 04:17 PM #43
Intermediate Member
- Join Date
- Dec 2008
- Location
- manchester, MA USA
- Posts
- 48
Okay, so I broke down and bought a sander, the Festool ETS 150/5.
No excuses now! Needless to say I was able to get the entire hull
(sans bottom - haven't glassed the chines yet ) sanded in almost
the amount of time it took me to sand one side panel by hand.
I must say there's nothing like a quality tool.
So that's more or less what I'm doing at the moment - sanding.
Still need to coat the bottom and glass the chines and put a finish
on the foils, sand and varnish the spars, finish the rudderbox -
I really just want to go sailing! Patience is a virtue they say ..
I'll post a few pics soon.
Cheers,
Peter
-
7th August 2009, 11:37 PM #44
Happily receives emails.
- Join Date
- Jul 2005
- Location
- 'Delaide, Australia
- Age
- 65
- Posts
- 8,138
Cool Peter,
The Festos have really good reputation and a good rep for service backup too, in Oz at least. It will last a long time even with heavy use.
Digging up a second hand vacuum cleaner to suck the dust is really worthwhile too.
MIK
-
29th September 2009, 09:40 AM #45
Intermediate Member
- Join Date
- Dec 2008
- Location
- manchester, MA USA
- Posts
- 48
A few more bits and it'll be time to get wet:
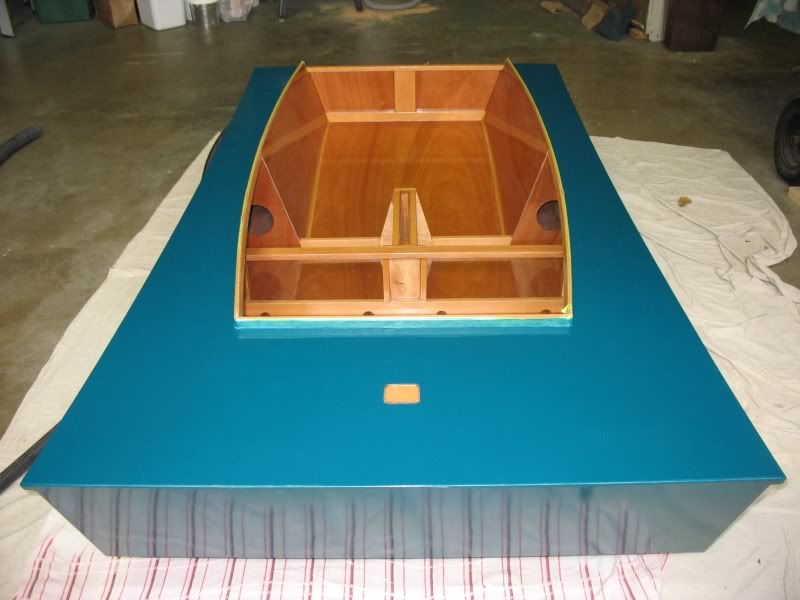
I am hoping to launch her this weekend; if so, photos will certainly follow!
Cheers,
Peter


 Reply With Quote
Similar Threads
-
CNC TTU Build
By John H in forum CNC MachinesReplies: 143Last Post: 30th January 2011, 07:32 PM -
Another first build
By Misterwippy in forum MUSICAL INSTRUMENTSReplies: 24Last Post: 6th January 2009, 12:01 PM -
How do they build them
By bark-hut in forum FURNITURE, JOINERY, CABINETMAKING - formerly BIG STUFFReplies: 27Last Post: 5th December 2008, 12:25 PM -
Another first build
By chrisb691 in forum CNC MachinesReplies: 56Last Post: 27th November 2008, 09:35 PM -
First build
By mickyp in forum MUSICAL INSTRUMENTSReplies: 10Last Post: 8th January 2008, 05:05 PM
