

 Thanks:
  Likes:
  Needs Pictures: 0
 Picture(s) thanks:
Results 16 to 30 of 38
Thread: Cabover Semi Truck
-
16th June 2017, 11:30 PM #16
 Hotrod


- Join Date
- Jun 2010
- Location
- Leander, TX Central Texas Area
- Age
- 45
- Posts
- 1,061
 Thanks Keith
 Originally Posted by Keith_1

Yes Derek even the poor lathe got some attention with this build. I did get the hose to relax a bit. But I think it just needs to be replace with better hose. I bought some Carba-tec brand from Amazon and it is much better. Just need to buy another 20ft. Originally Posted by Dalboy
My hobby lobby use to sell headlights but this time they didn't have them and even the brand of the wooden parts they have has changed since I bought all my stock which was 6 years ago now. Originally Posted by htl
Bret
-
16th June 2017 11:30 PM # ADSGoogle Adsense Advertisement
- Join Date
- Always
- Location
- Advertising world
- Age
- 2010
- Posts
- Many
-
16th June 2017, 11:38 PM #17
Hotrod
- Join Date
- Jun 2010
- Location
- Leander, TX Central Texas Area
- Age
- 45
- Posts
- 1,061
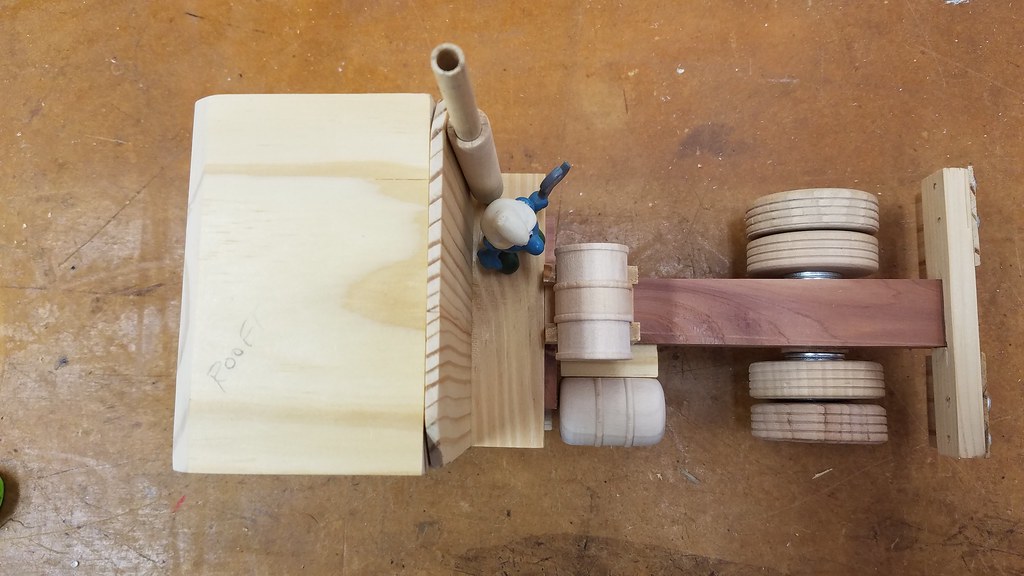
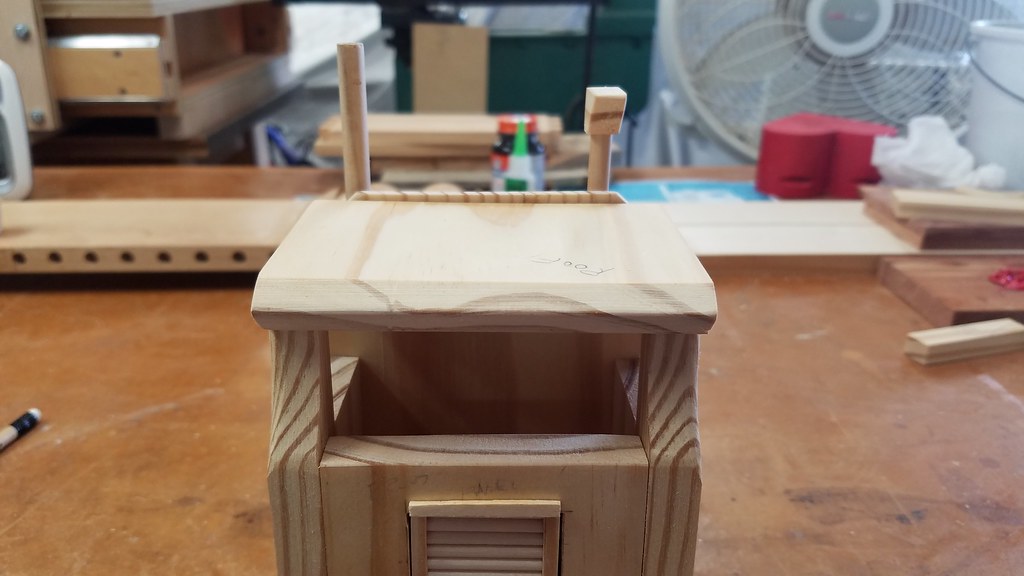
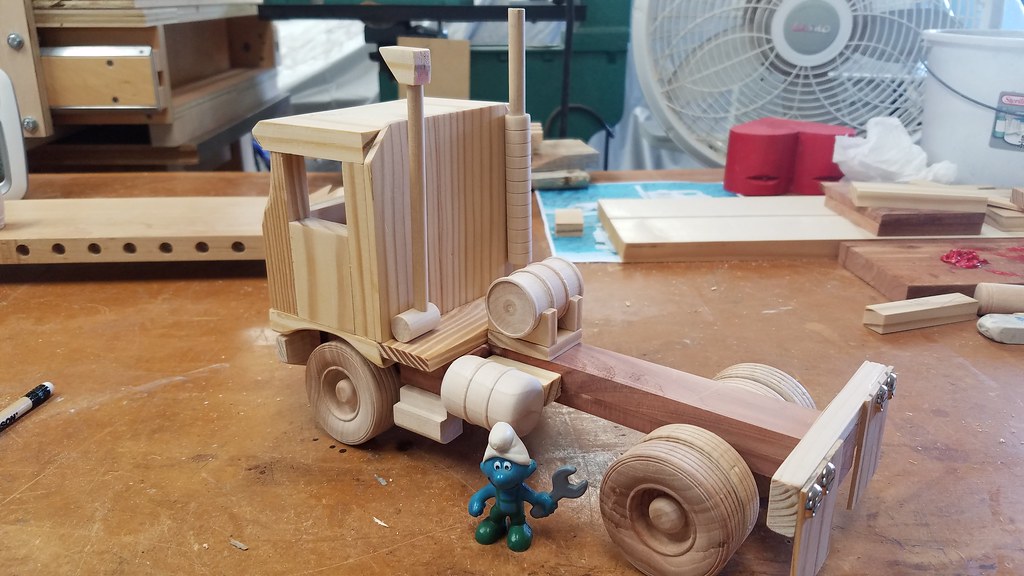
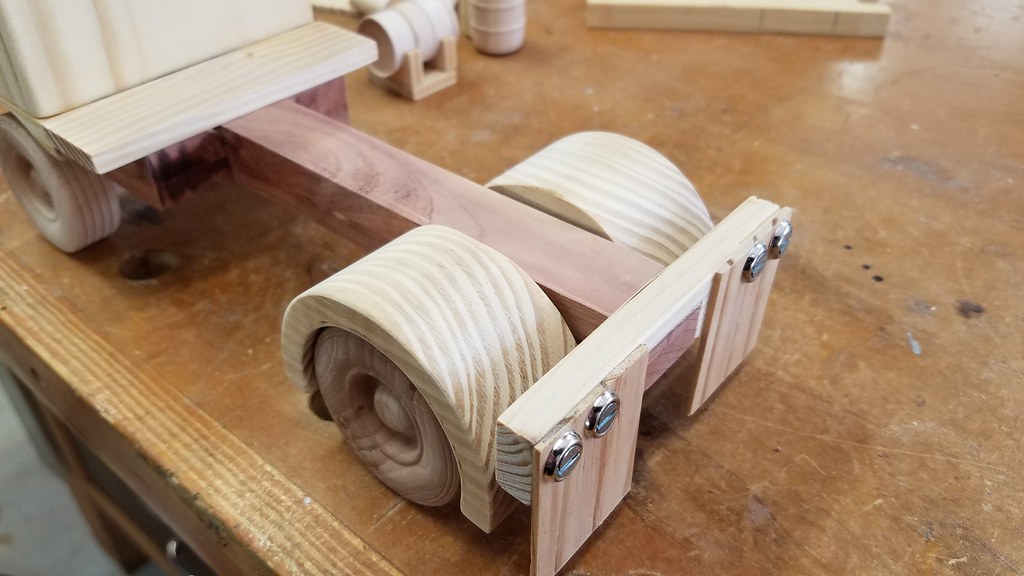
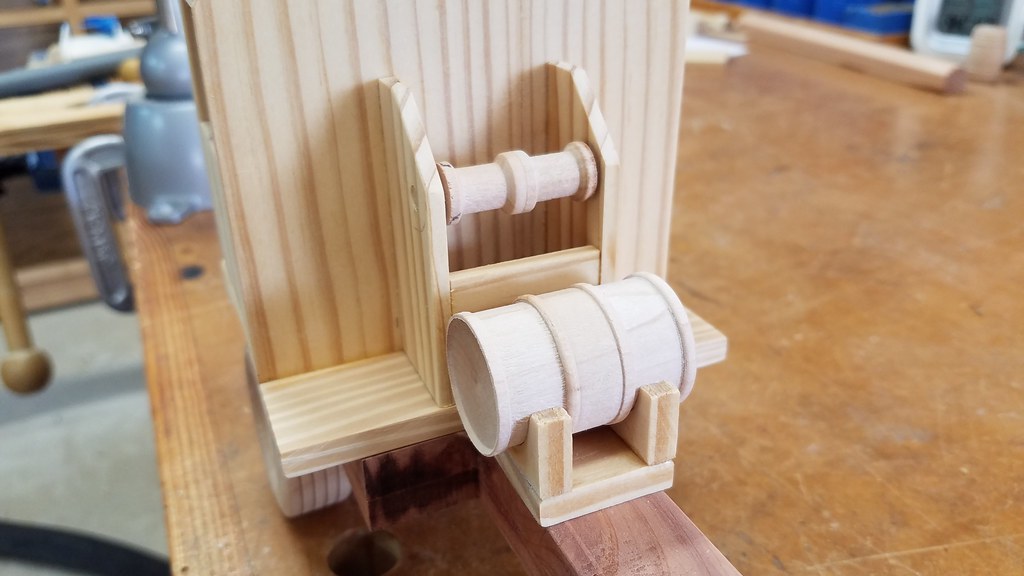
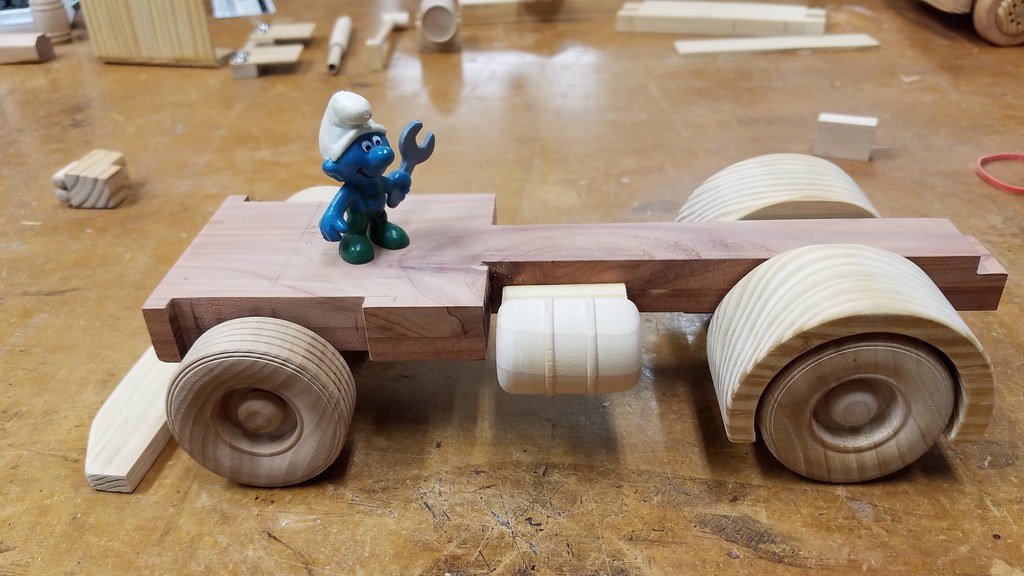
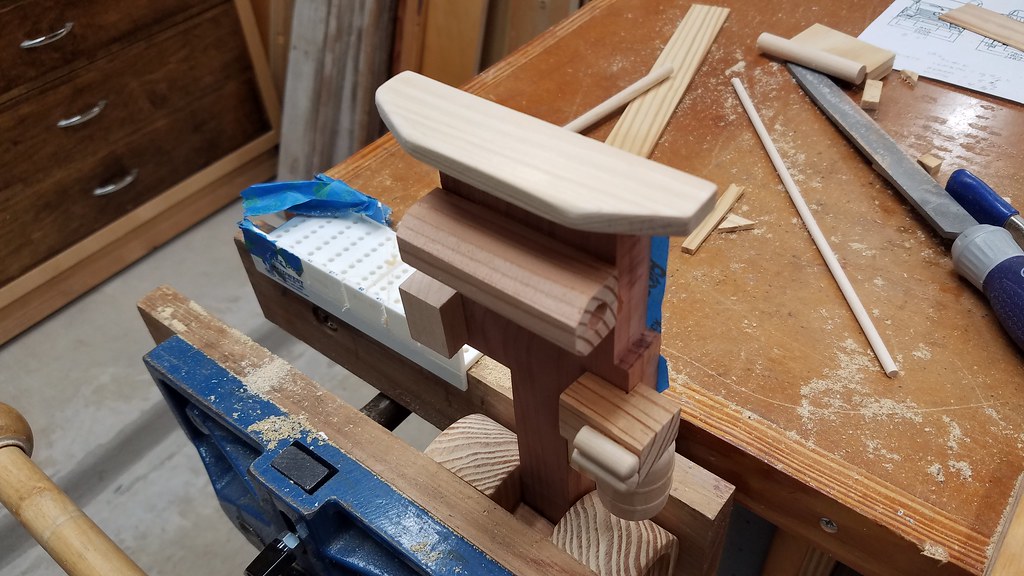
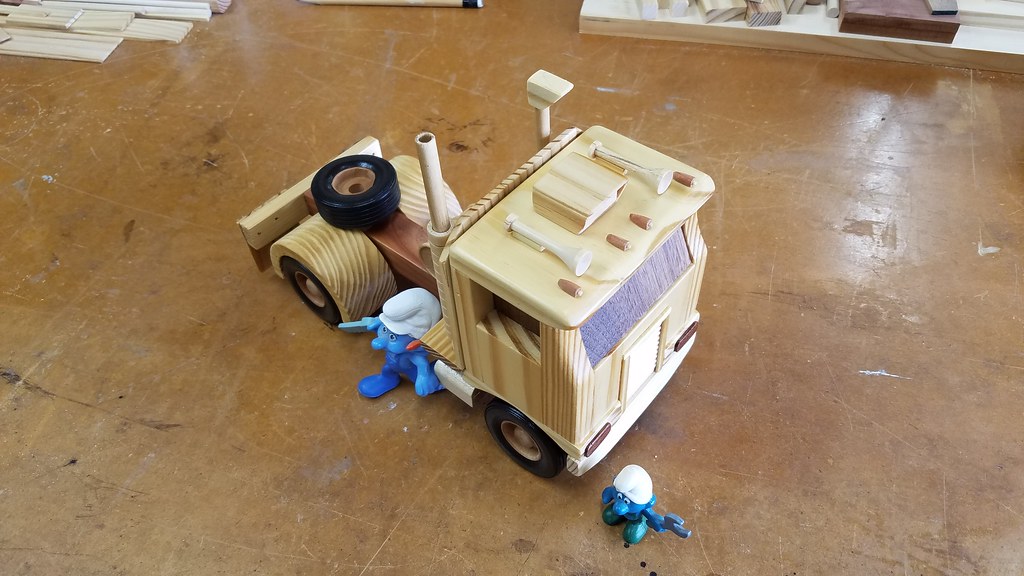
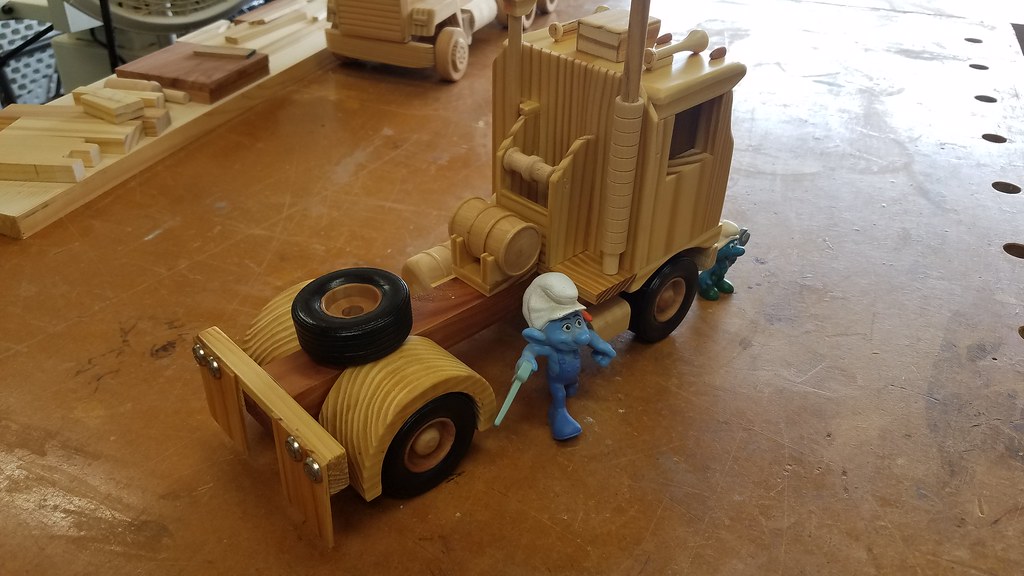
A few more bits made for the truck yesterday. I wasn't near as productive as I planned. Seems to happen every time when I get near the end of my staycation I start to lose focus and become a little lazy. Plus the fact that the heat index was 98* yesterday didn't help.
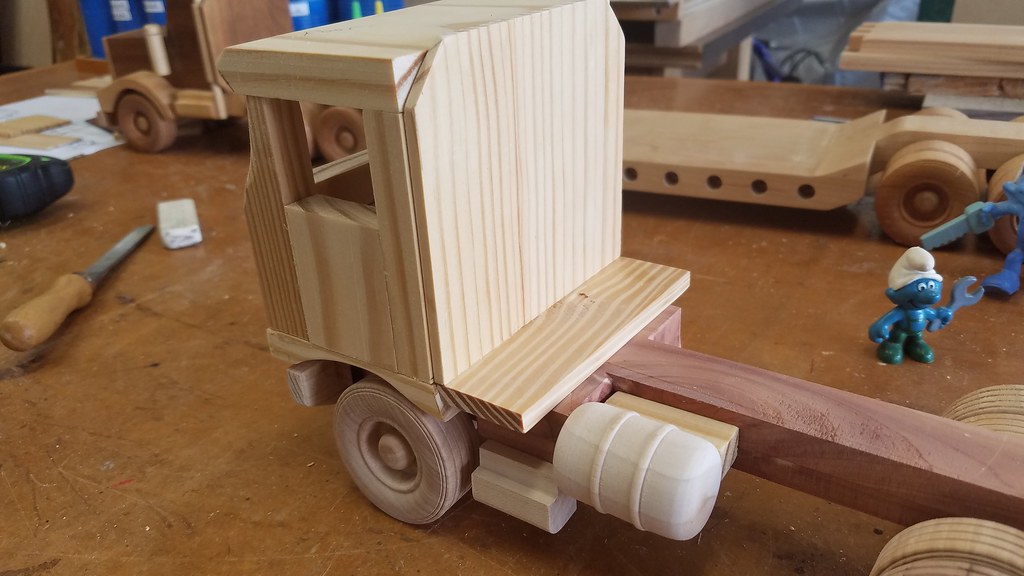
Back panel and step installed.
 20170615_112225 by bjohnson388, on Flickr
 20170615_112232 by bjohnson388, on Flickr
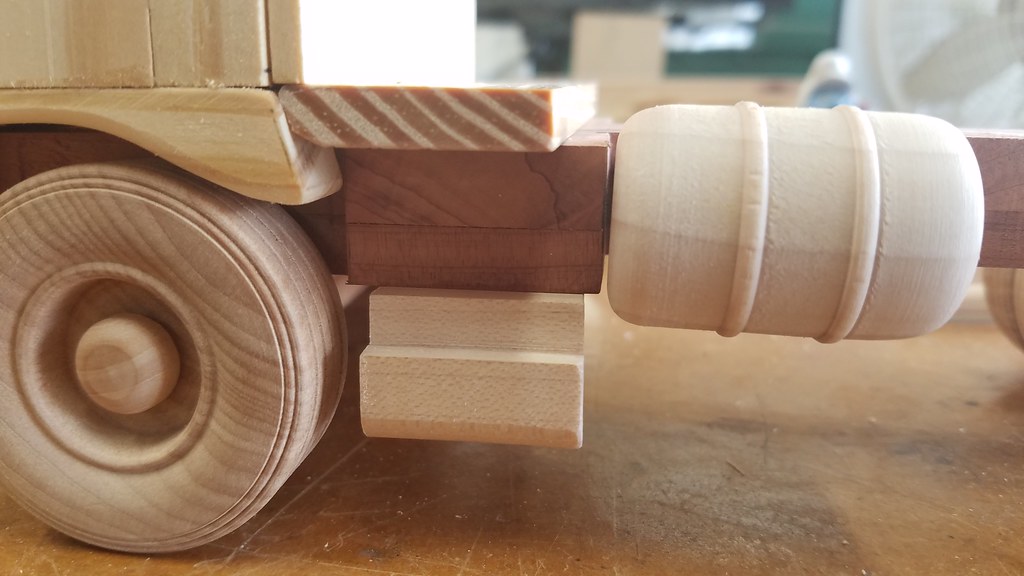
Also put a bracket behind the gas tank to move it further out from the frame rail. I think it looks better.
 20170615_112229 by bjohnson388, on Flickr
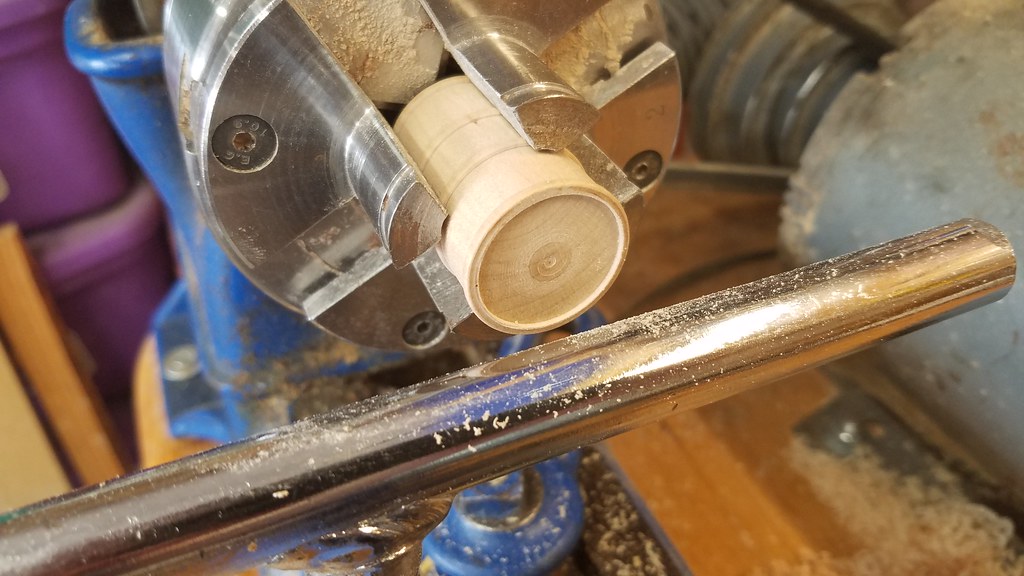
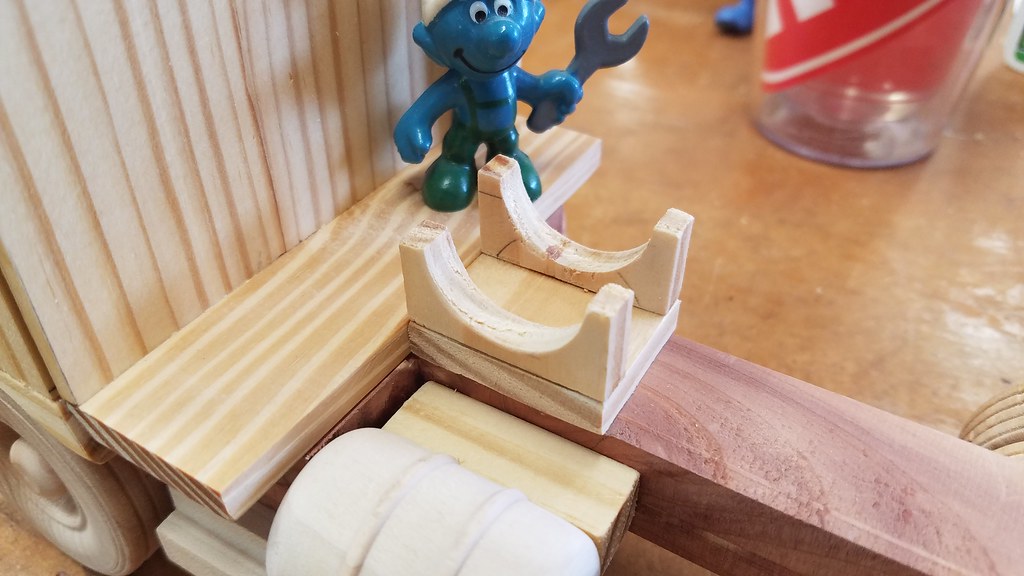
Modified another barrel to sit on the back deck as an aux tank.
 20170615_112237 by bjohnson388, on Flickr
Made some brackets for it to sit in by drilling a 1" whole and then slicing the piece in half.
 20170615_122625 by bjohnson388, on Flickr
 20170615_150637 by bjohnson388, on Flickr
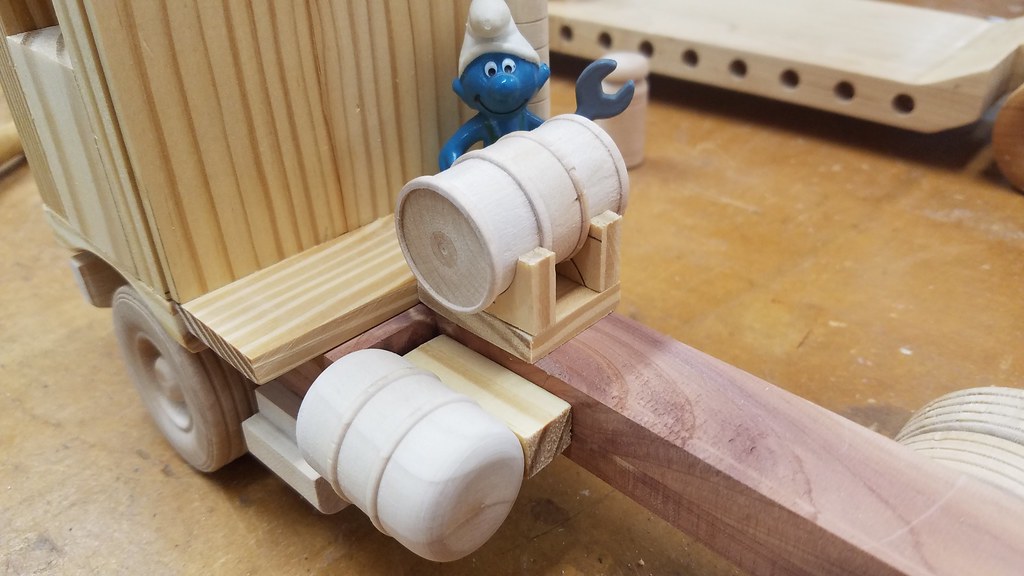 20170615_124238 by bjohnson388, on Flickr
 20170615_124245 by bjohnson388, on Flickr
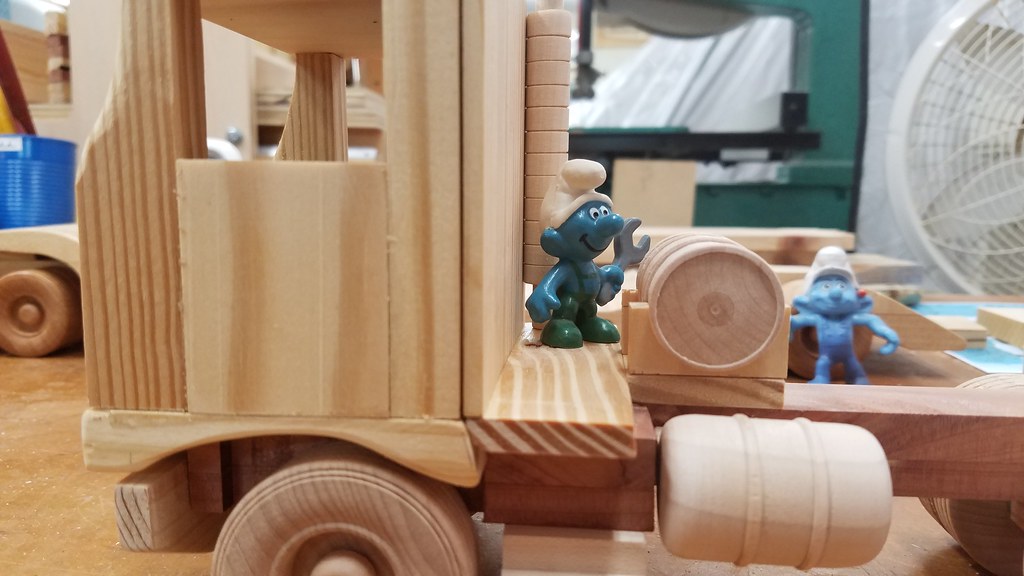
Drilled out the exhaust stack to make it look more authentic.
 20170615_124257 by bjohnson388, on Flickr
Aussie style air cleaner installed.
 20170615_154733 by bjohnson388, on Flickr
 20170615_154749 by bjohnson388, on Flickr
Thanks for stopping in.
Bret
-
17th June 2017, 10:25 AM #18
GOLD MEMBER
- Join Date
- Apr 2013
- Location
- Torquay
- Posts
- 4,422
Looks tops Bret
Regards
Keith
-
20th June 2017, 10:48 AM #19
Hotrod
- Join Date
- Jun 2010
- Location
- Leander, TX Central Texas Area
- Age
- 45
- Posts
- 1,061
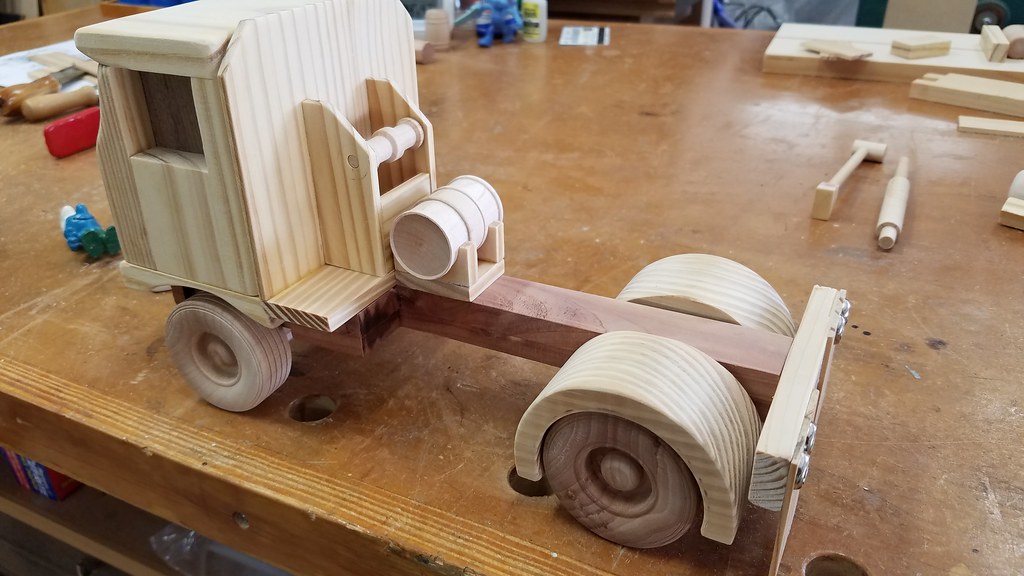
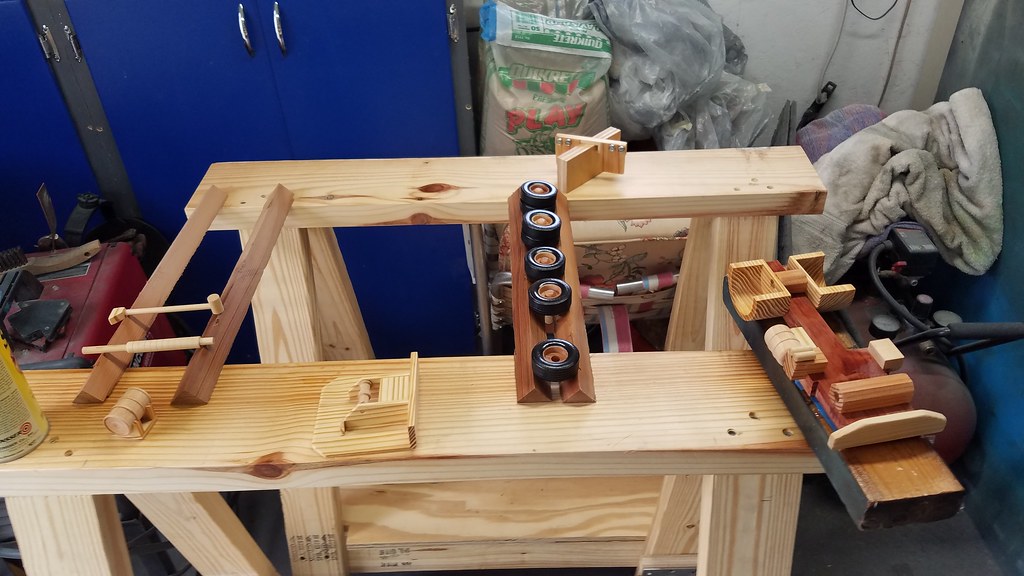
I have 3 days worth of updates as I have been to lazy to post at the end of the day so here goes.
Made another tank to go on the rear deck.
20170615_124238 by bjohnson388, on Flickr
To make the brackets for the tank first drilled a hole and then cut the piece in half.
20170615_122625 by bjohnson388, on Flickr
Drilled out the exhaust pipe so it looks more realistic.
20170615_124257 by bjohnson388, on Flickr
Also got the air cleaner and (Aussie style) snorkel made.
 20170615_154736 by bjohnson388, on Flickr
20170615_154749 by bjohnson388, on Flickr
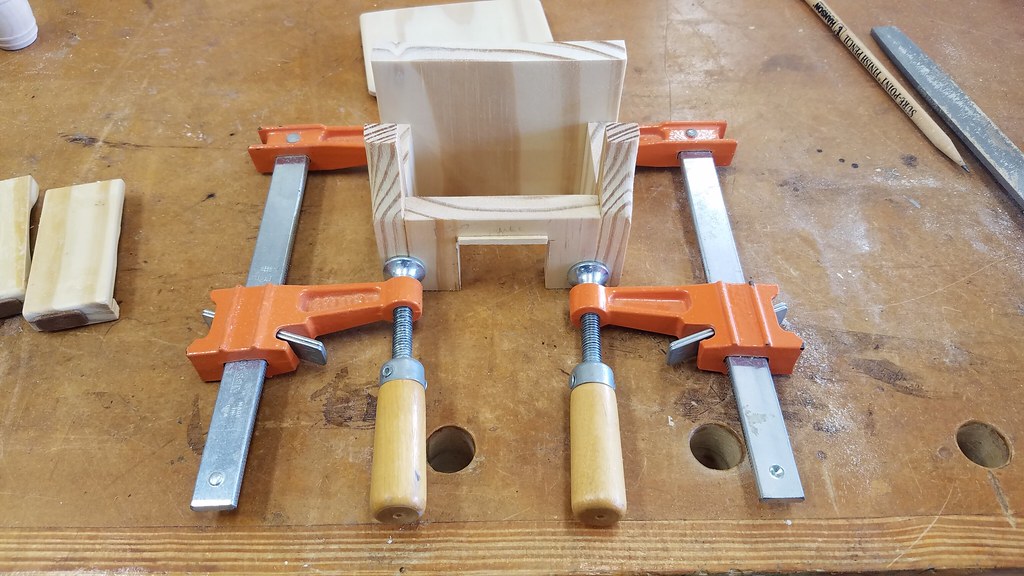
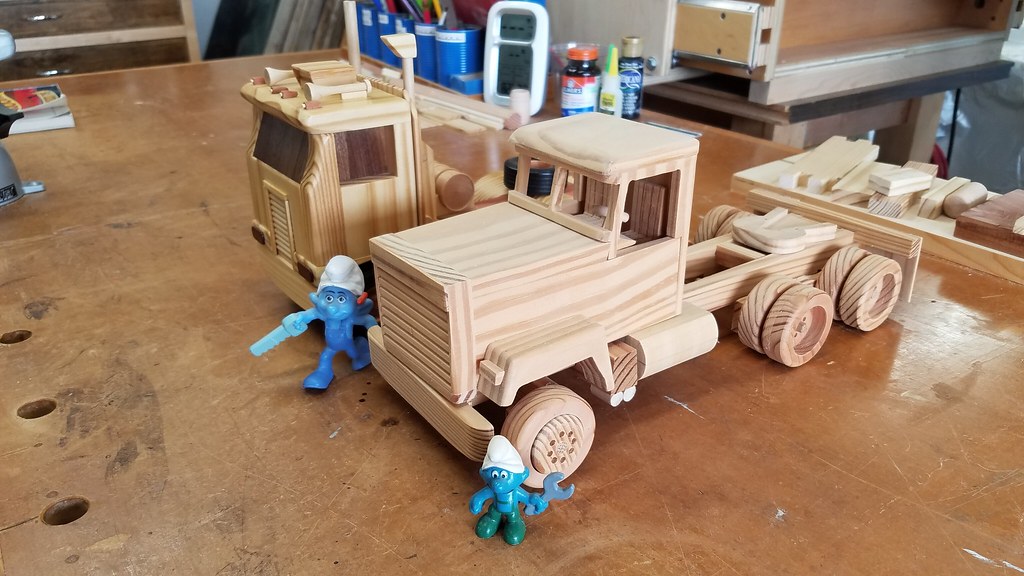
Next up was gluing up the cab.
 20170617_094727 by bjohnson388, on Flickr
 20170617_101550 by bjohnson388, on Flickr
In the middle of gluing up the cab I came up with the idea to put windows in that were to act as tinted windows since it would have no interior detail. I used Walnut.
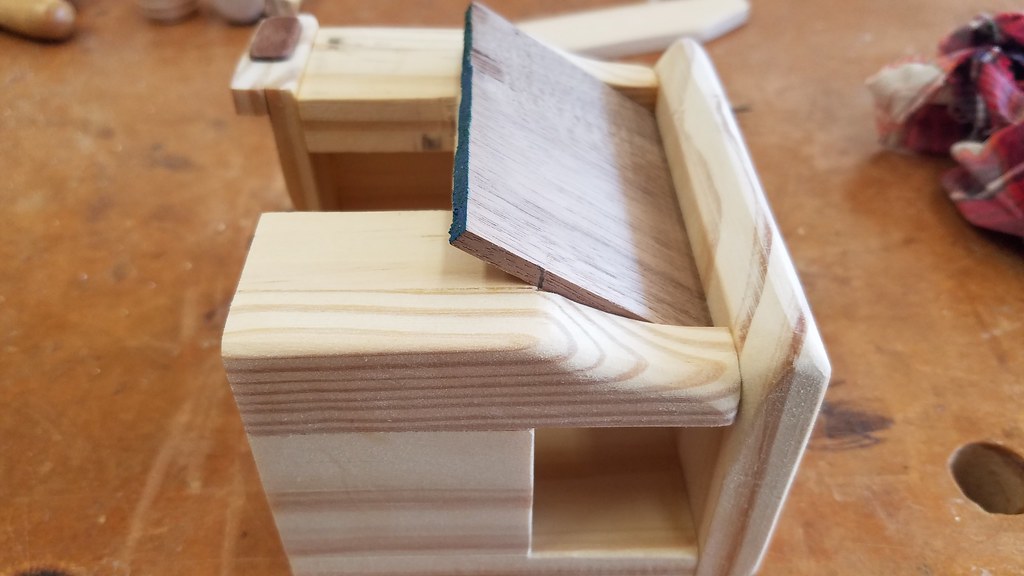 20170617_110029 by bjohnson388, on Flickr
Cab all glued up.
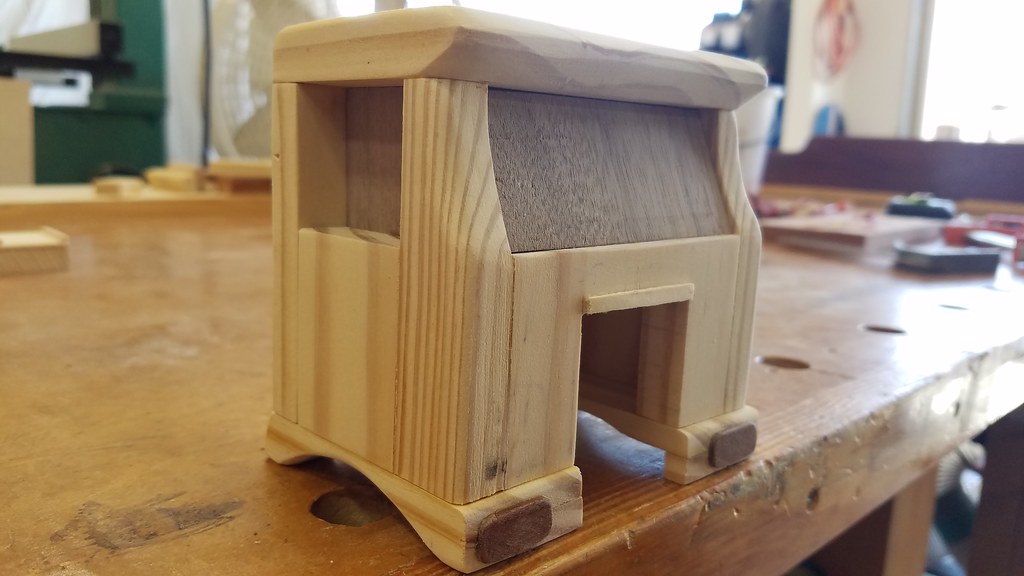 20170617_112550 by bjohnson388, on Flickr
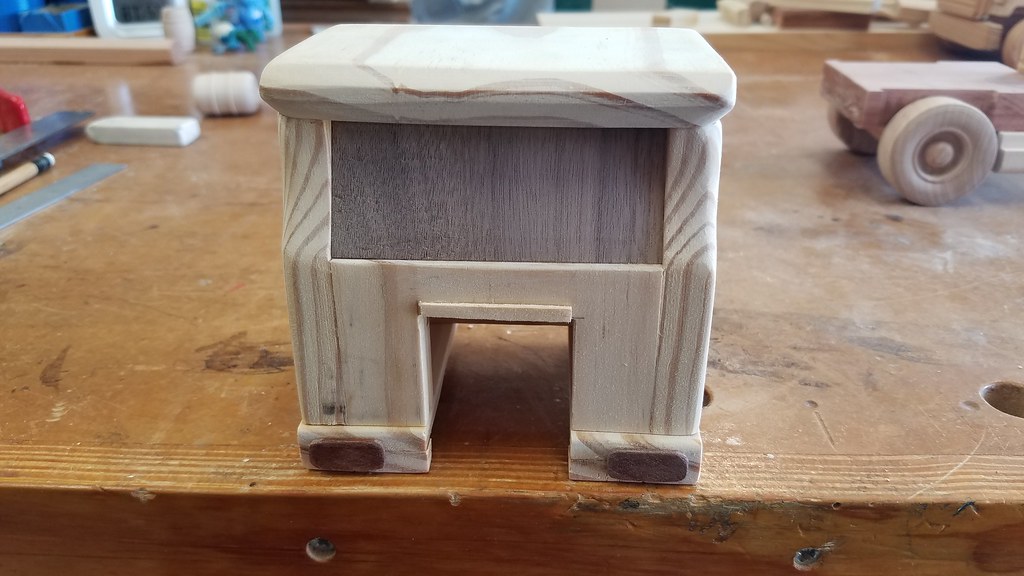 20170617_112555 by bjohnson388, on Flickr
Found the Walnut scraps in my hardwood scrap drawer. Most of this is leftover from by train build and Scania truck.
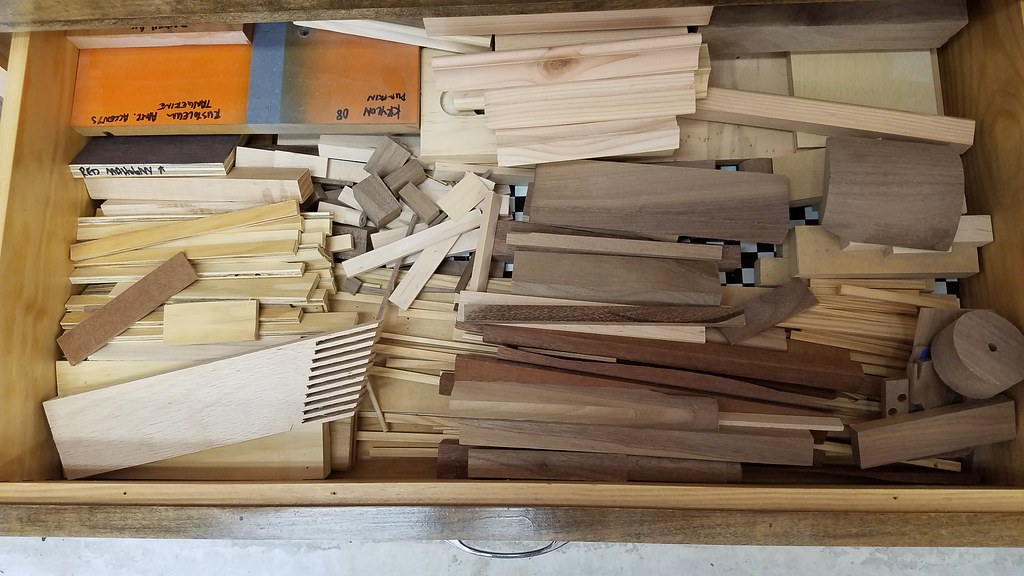 20170617_113014 by bjohnson388, on Flickr
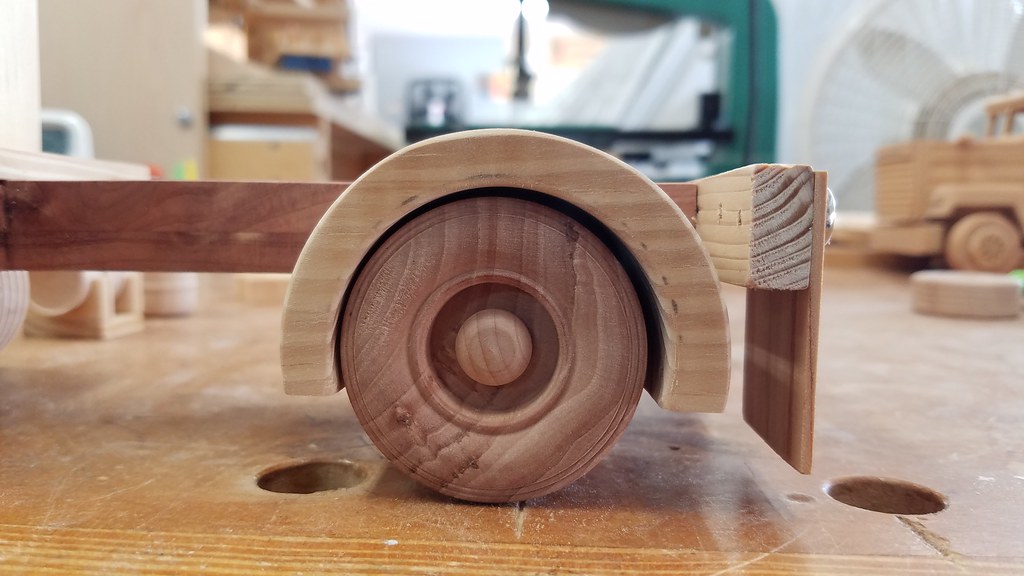
Making some rear fenders. Like the one you see on the "show" trucks.
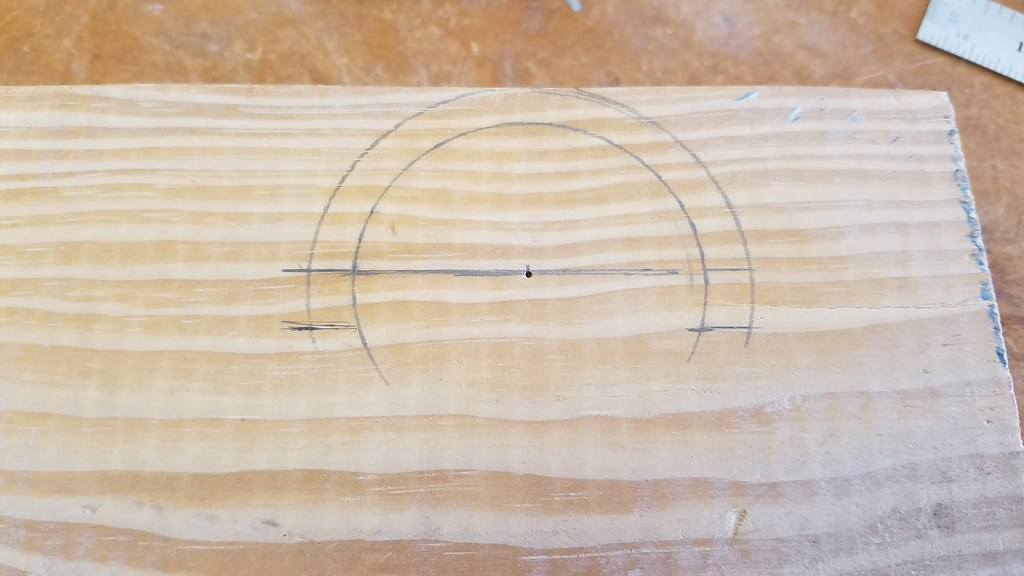 20170617_113840 by bjohnson388, on Flickr
I left an 1/8" space around the wheel.
 20170617_113852 by bjohnson388, on Flickr
Drilling out the wheel part with a 2 1/8" forstner bit. I had an epiphany while drilling. The drill stopped an 1/8" from drilling all the way through and I thought if I leave it like that I will have more area to glue to and the axles and can pass through it and use the fender as a spacer for the wheels instead of metal washers.
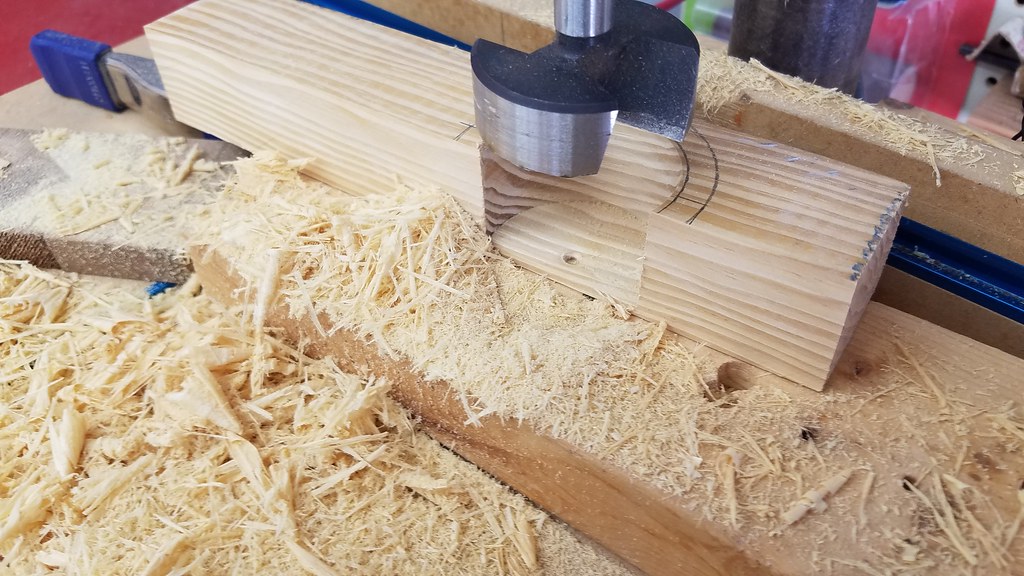 20170617_135908 by bjohnson388, on Flickr
Now for some sanding.
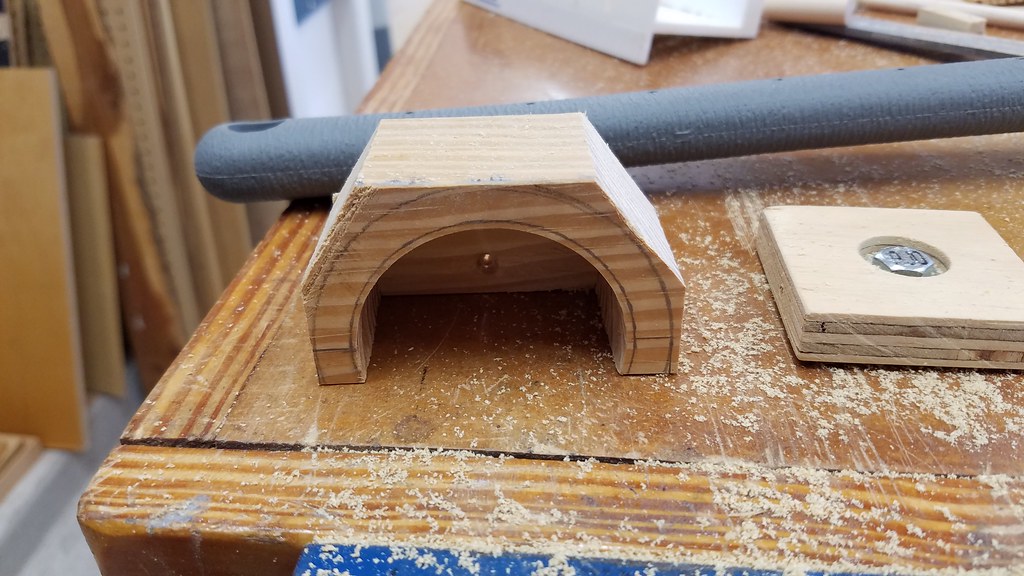 20170617_141041 by bjohnson388, on Flickr
One down one to go.
 20170617_141520 by bjohnson388, on Flickr
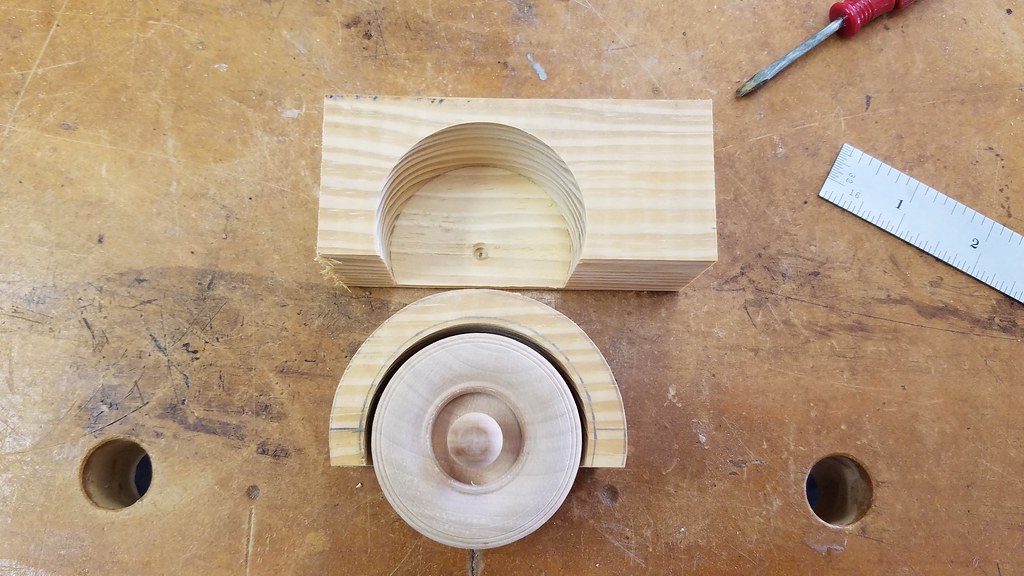
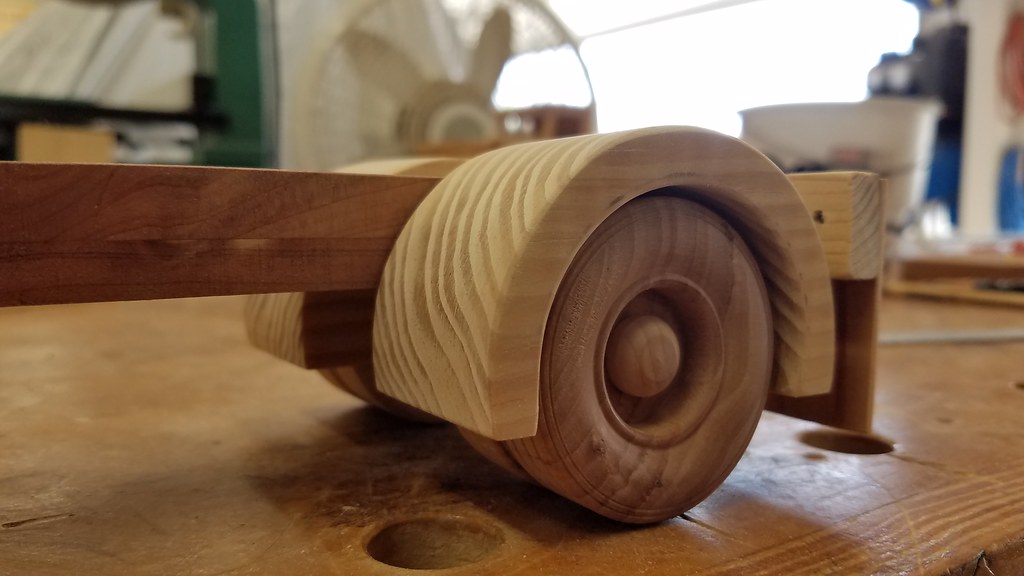
Both fenders done and mocked up.
 20170617_145055 by bjohnson388, on Flickr
 20170617_145101 by bjohnson388, on Flickr
 20170617_145109 by bjohnson388, on Flickr
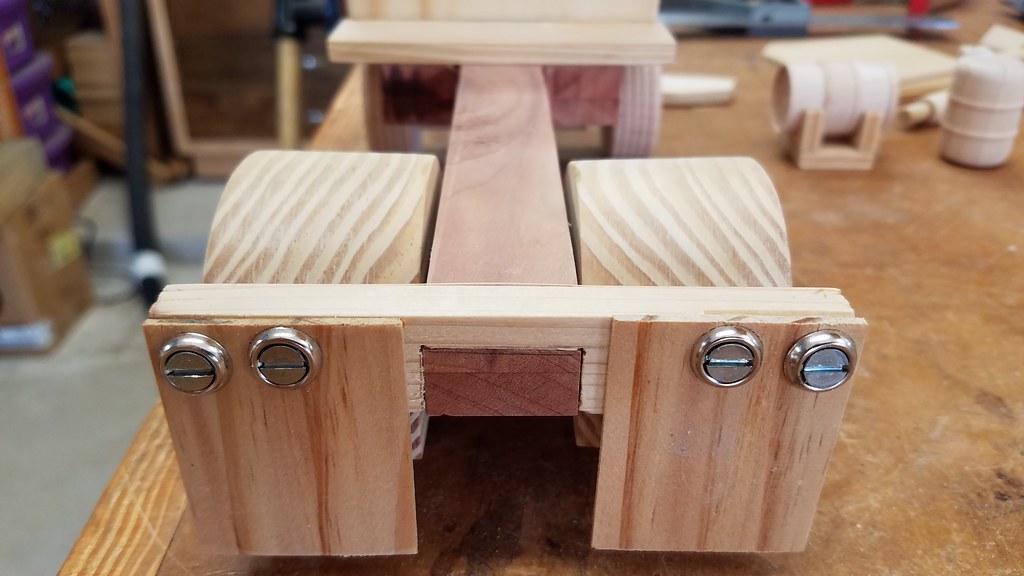
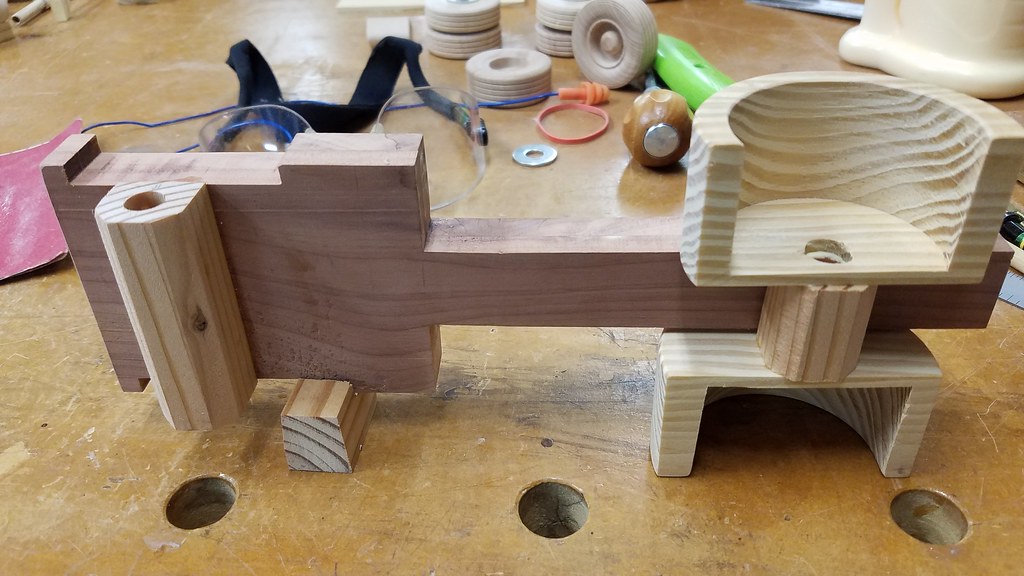
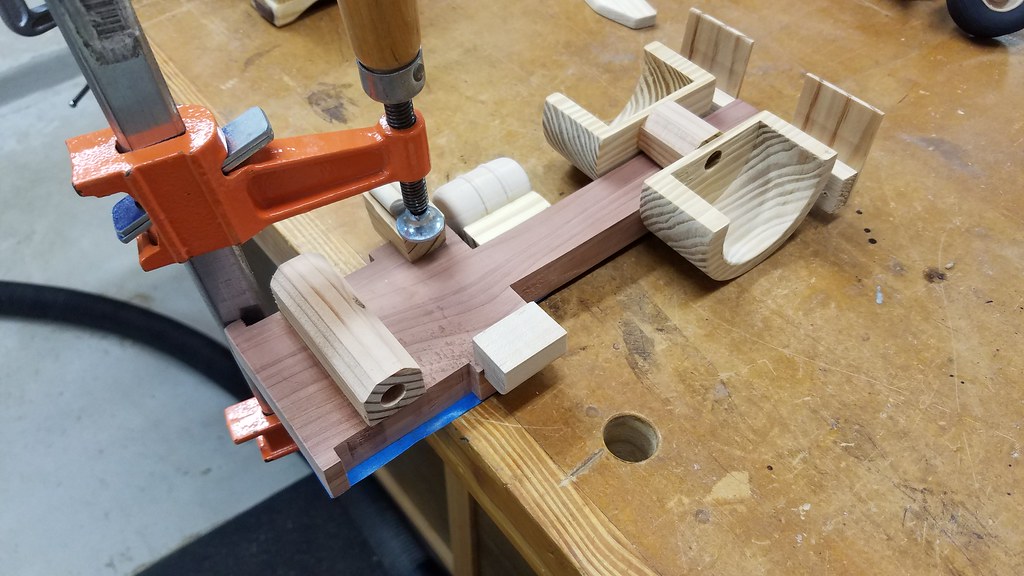
I also notched the frame so the bumper would sit flush.
 20170617_145117 by bjohnson388, on Flickr
Winch and the frame to hold it.
 20170617_153236 by bjohnson388, on Flickr
 20170617_153242 by bjohnson388, on Flickr
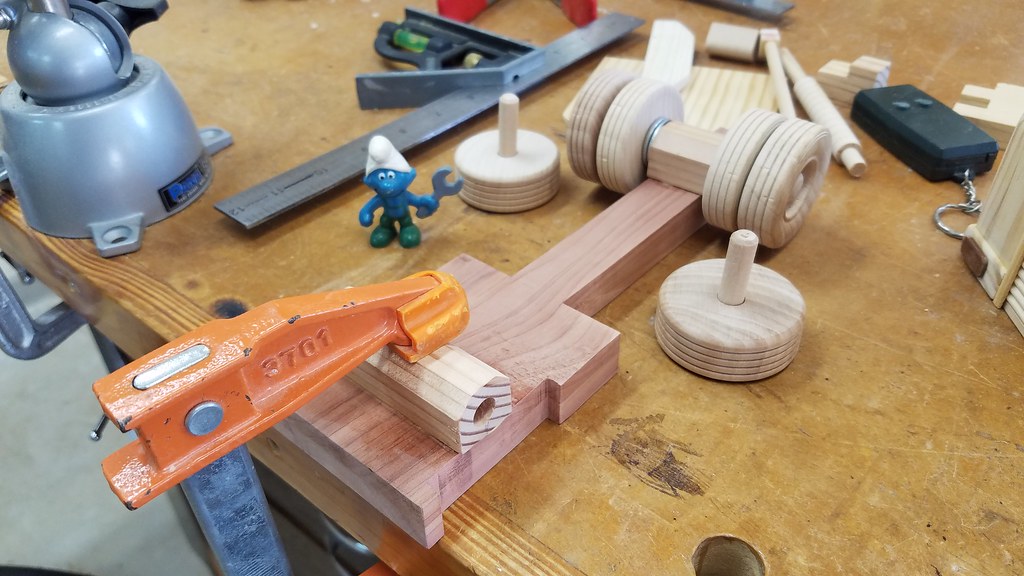
Time to glue both axles and fenders on for good.
 20170617_135150 by bjohnson388, on Flickr
 20170617_182345 by bjohnson388, on Flickr
 20170617_184944 by bjohnson388, on Flickr
Next up some finishing...
-
20th June 2017, 11:10 AM #20
Hotrod
- Join Date
- Jun 2010
- Location
- Leander, TX Central Texas Area
- Age
- 45
- Posts
- 1,061
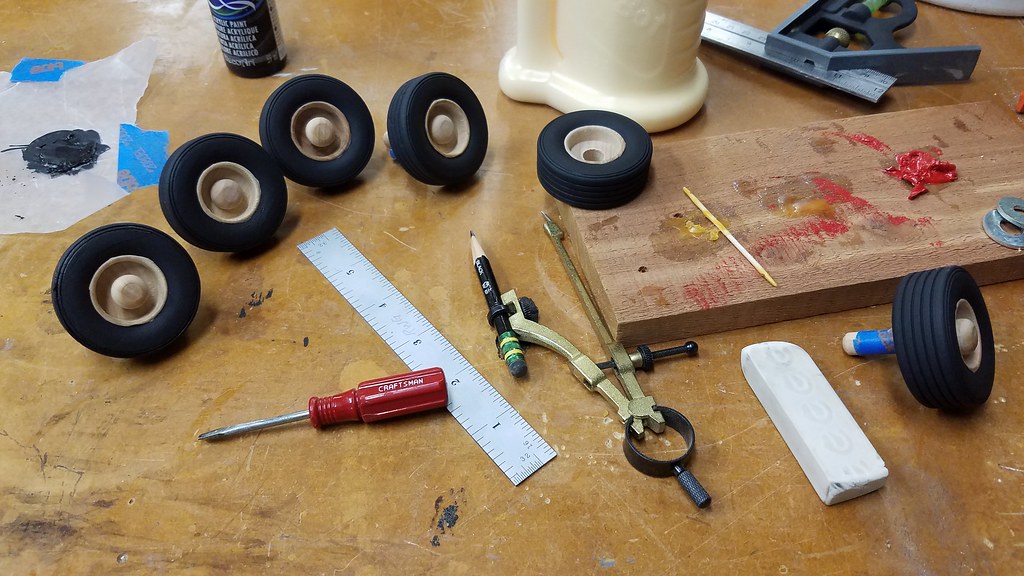
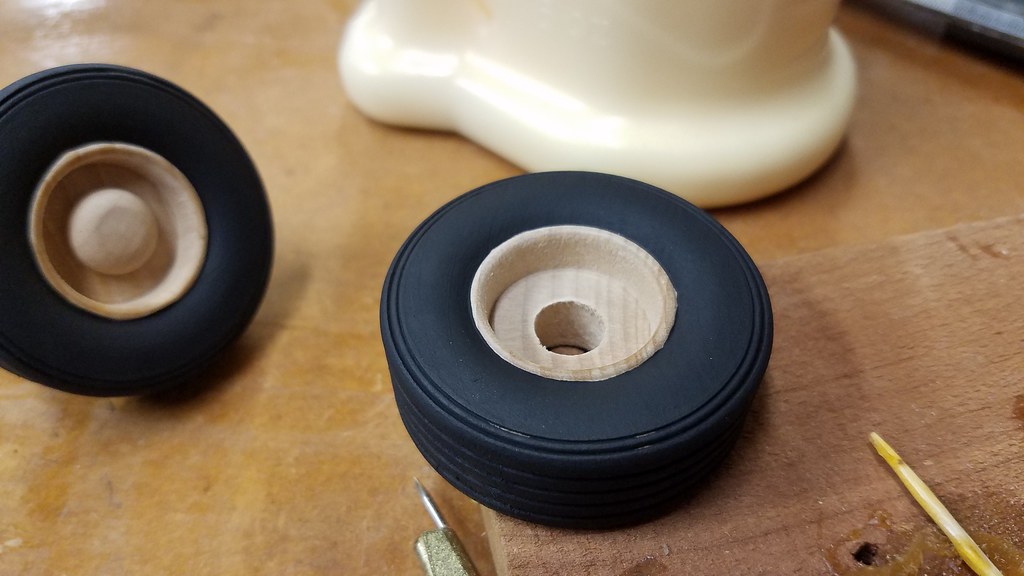
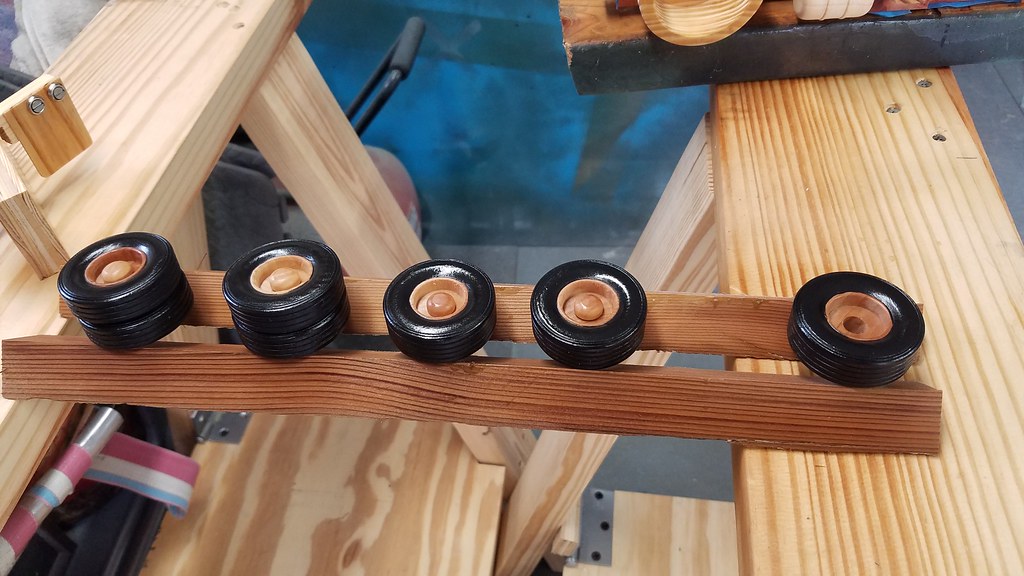
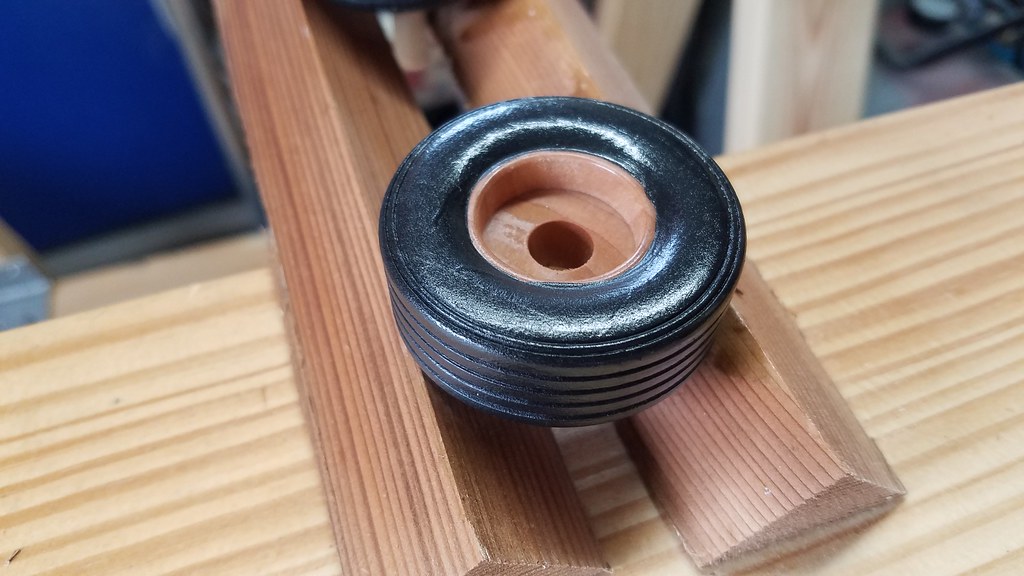
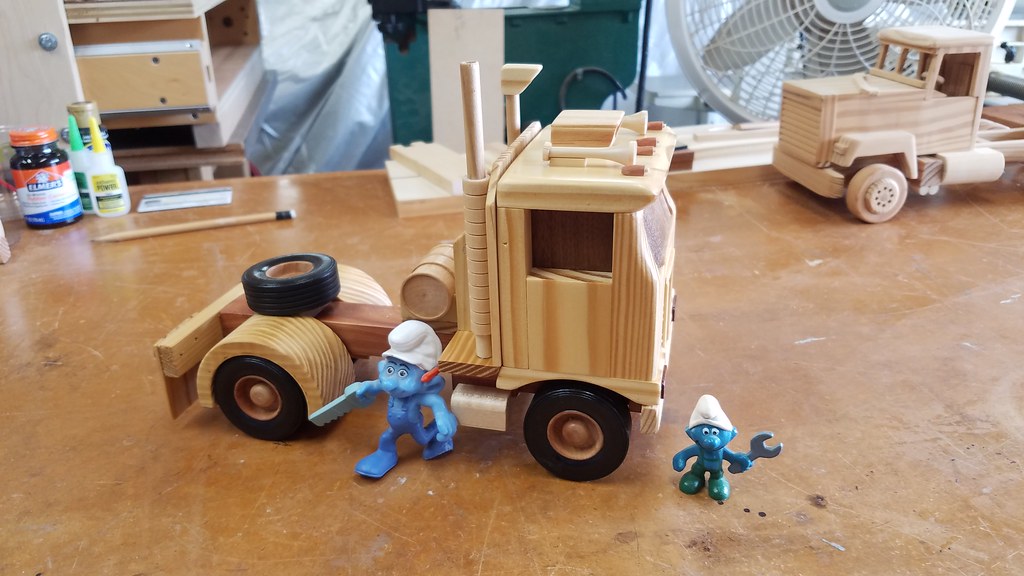
I decided to paint the wheels black to make it look more like a model.
 20170617_194401 by bjohnson388, on Flickr
Not a perfect paint job but good enough for this toy.
 20170617_194405 by bjohnson388, on Flickr
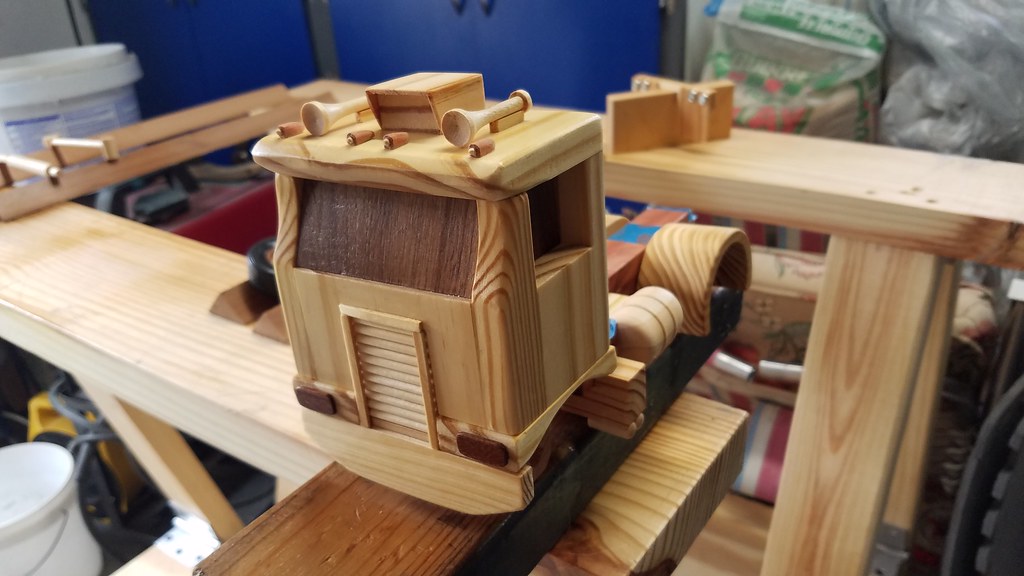
So more stuff getting glued to the chassis before it heads to the paint shop.
 20170619_082302 by bjohnson388, on Flickr
 20170619_083000 by bjohnson388, on Flickr
Everything but the cab in the paint shop. I put 3 coats of lacquer on it Saturday but forgot to take pictures. I sealed all these parts with shellac first. Then they will get a satin Poly topcoat.
 20170619_085813 by bjohnson388, on Flickr
 20170619_085820 by bjohnson388, on Flickr
 20170619_085817 by bjohnson388, on Flickr
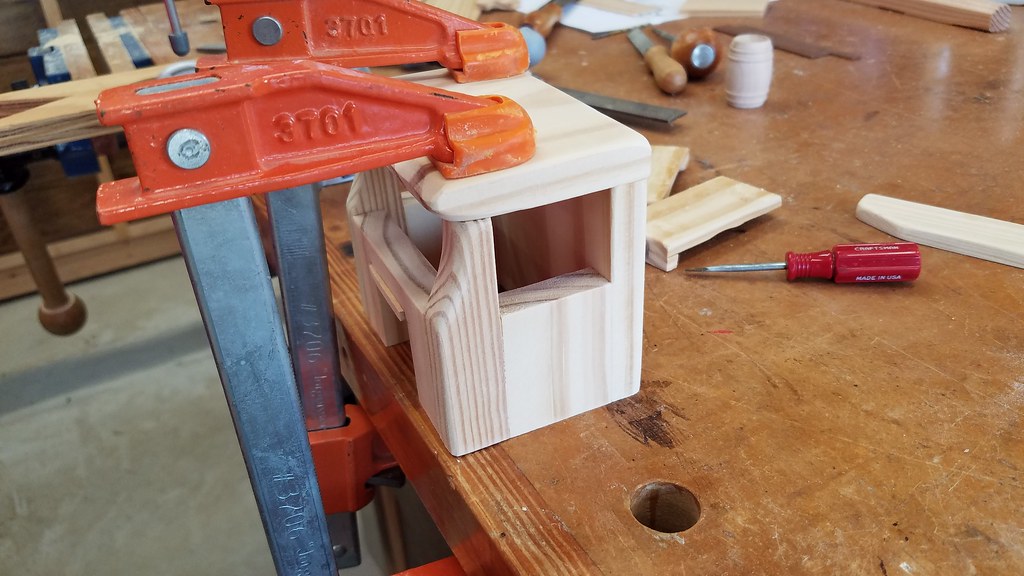
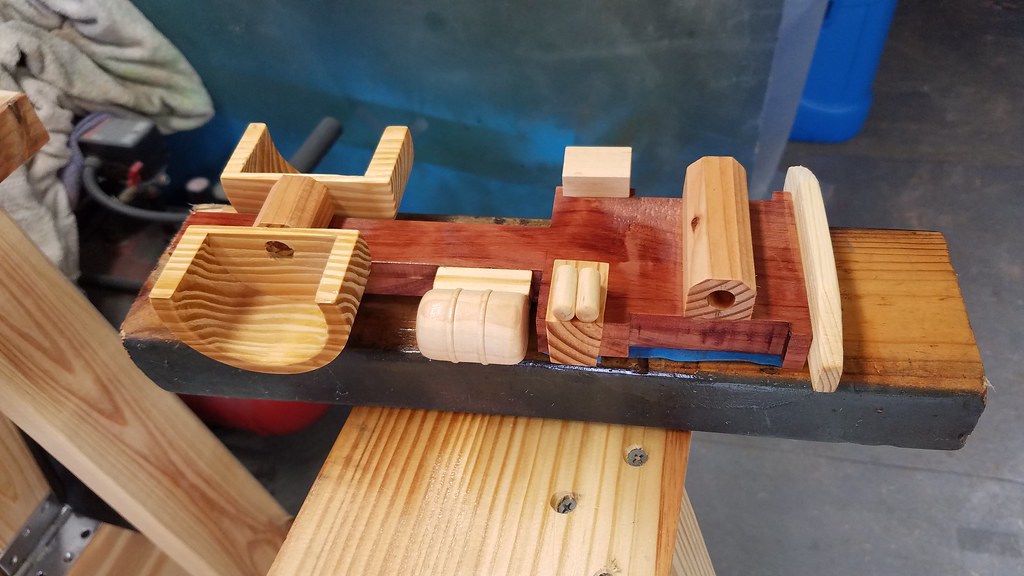
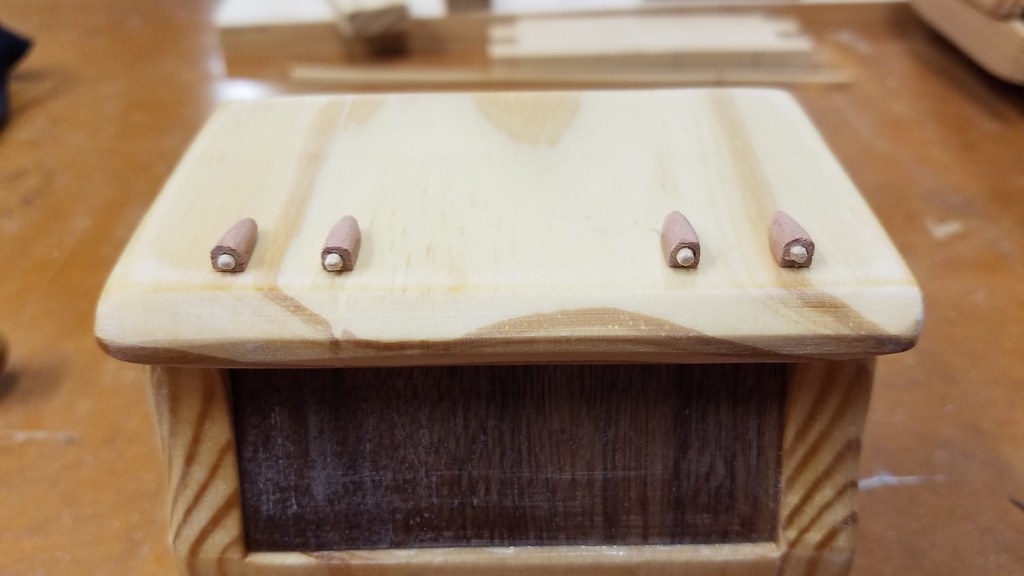
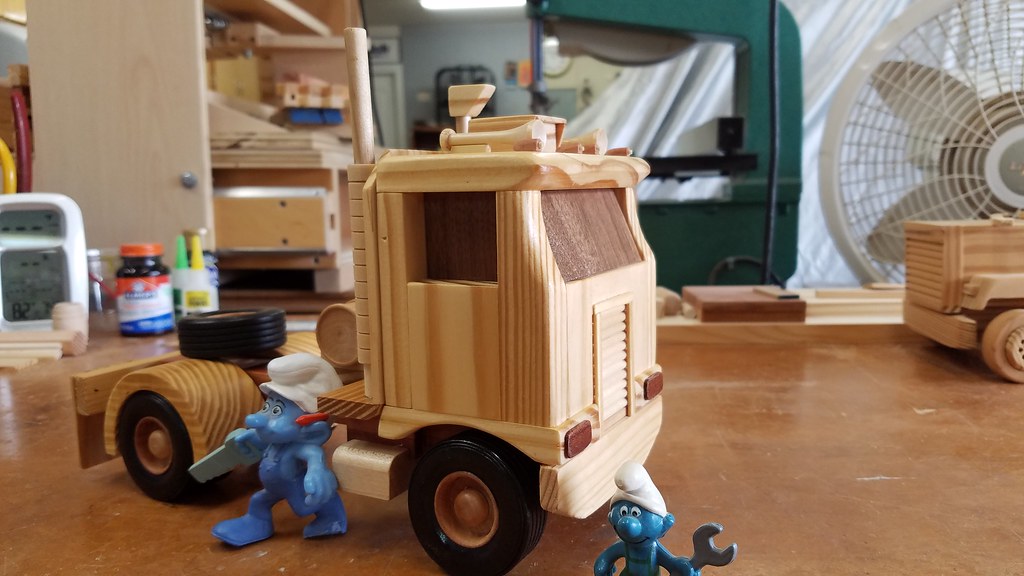
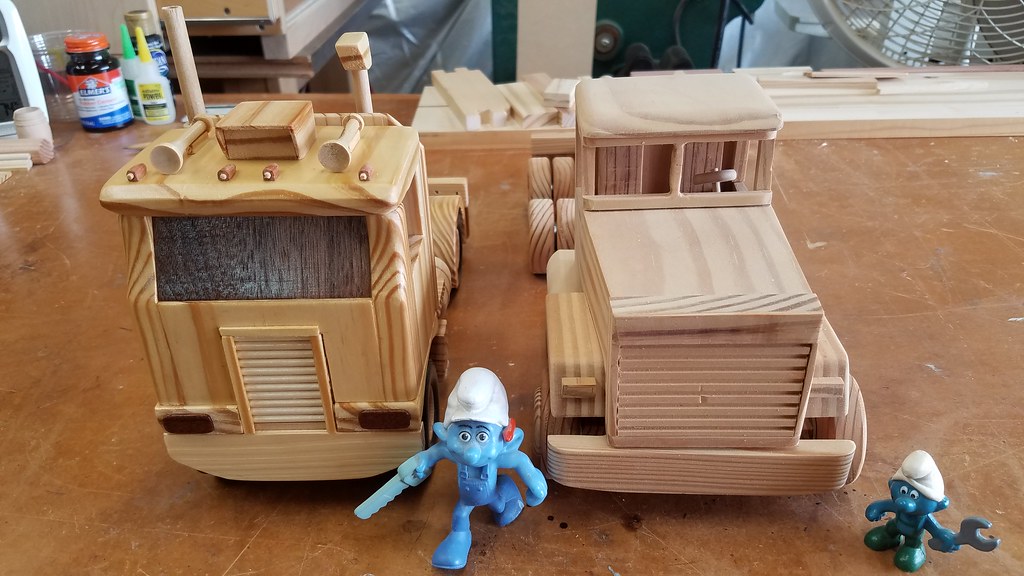
I took the cab to the paint shop to early and forgot I was going to add some roof accessories. Here are the cab lights being made.
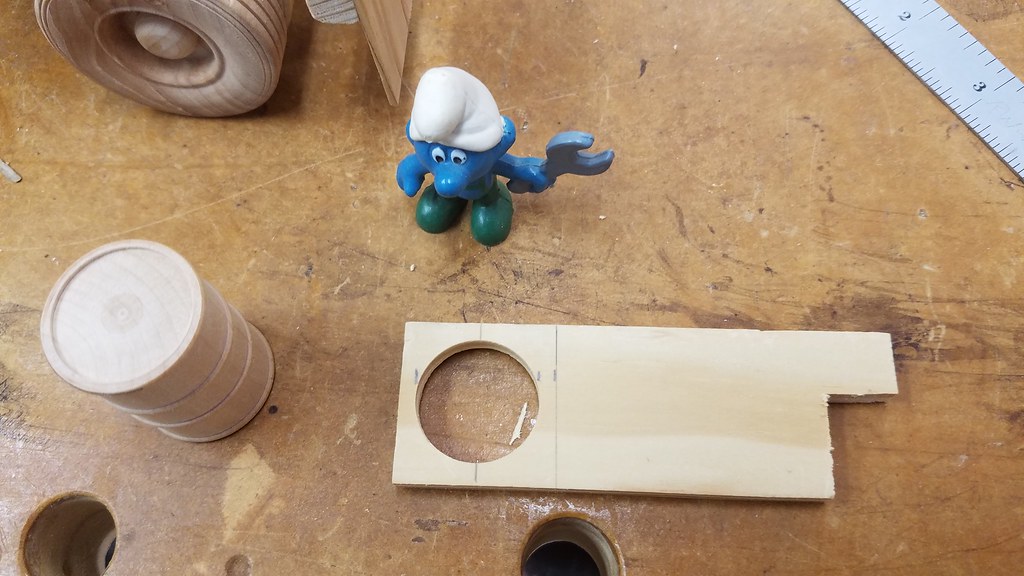
Cab light housing.
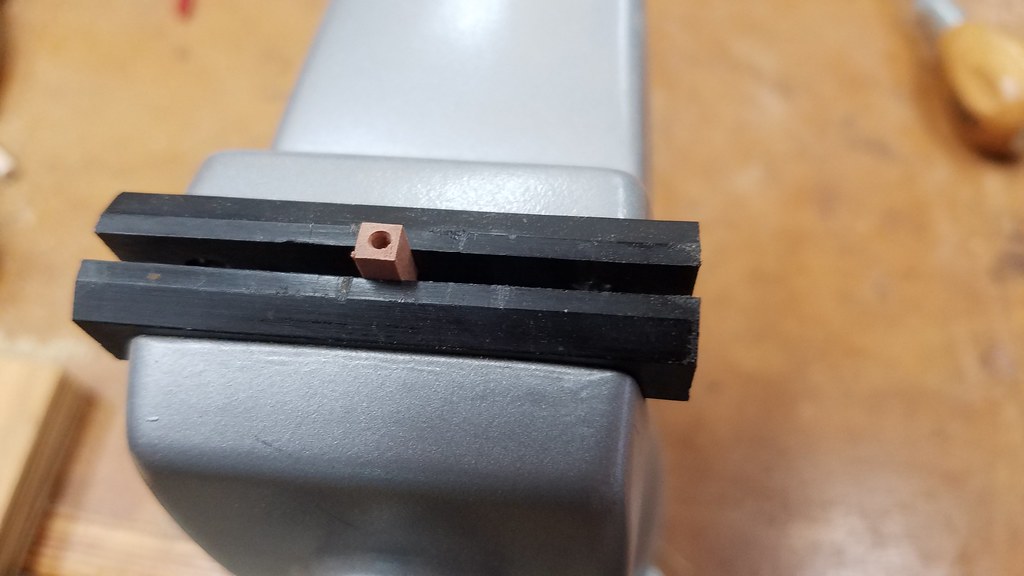 20170619_094308 by bjohnson388, on Flickr
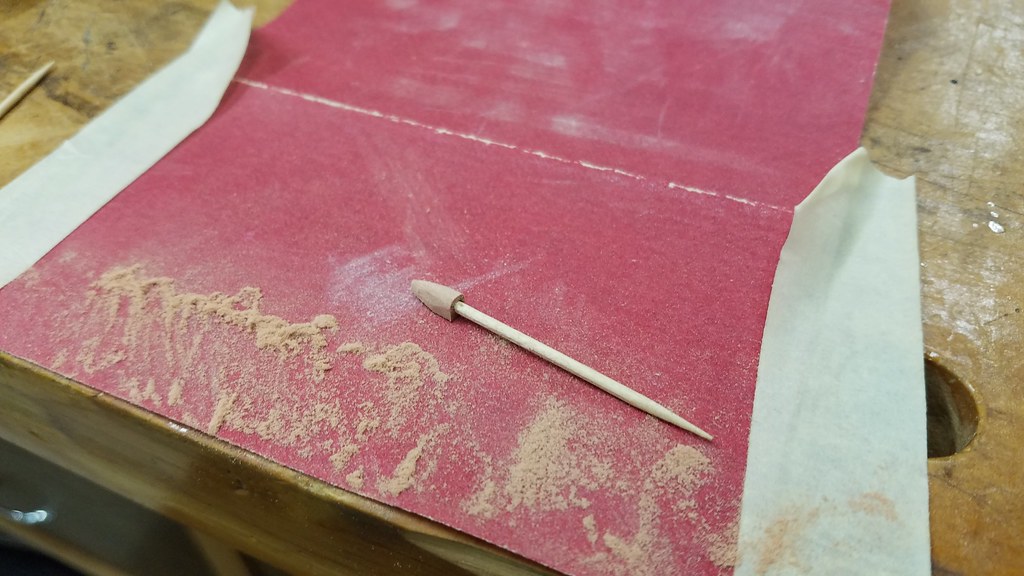
Toothpick glued in to become the light.
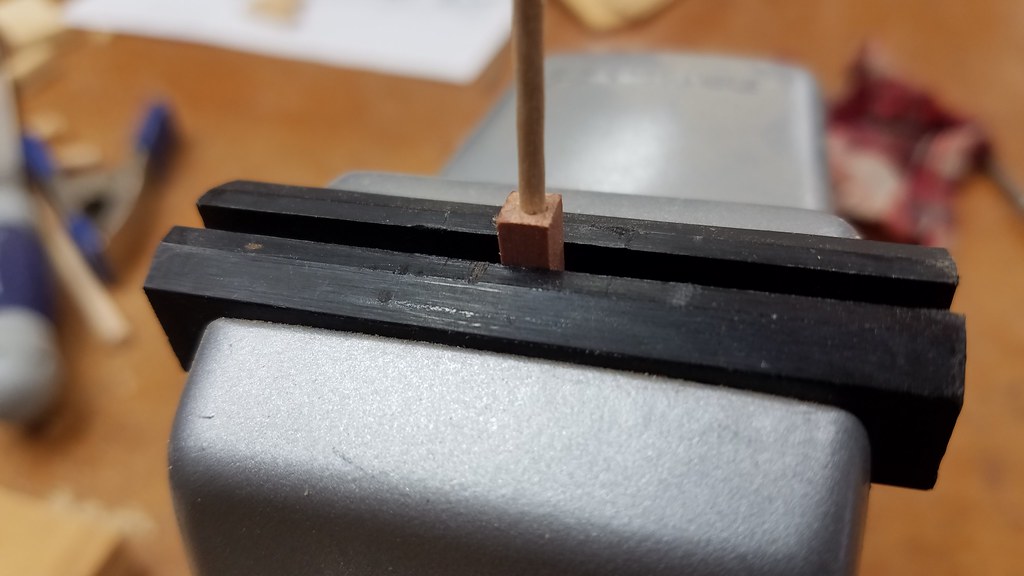 20170619_094349 by bjohnson388, on Flickr
Here are all four. I had to drill the holes with my dremel so they aren't perfectly straight.
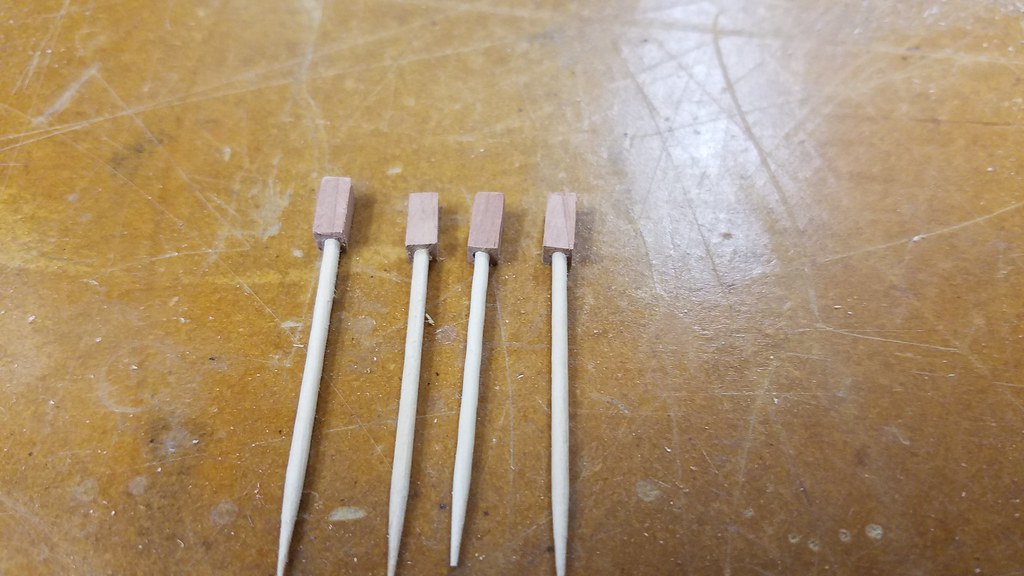 20170619_094405 by bjohnson388, on Flickr
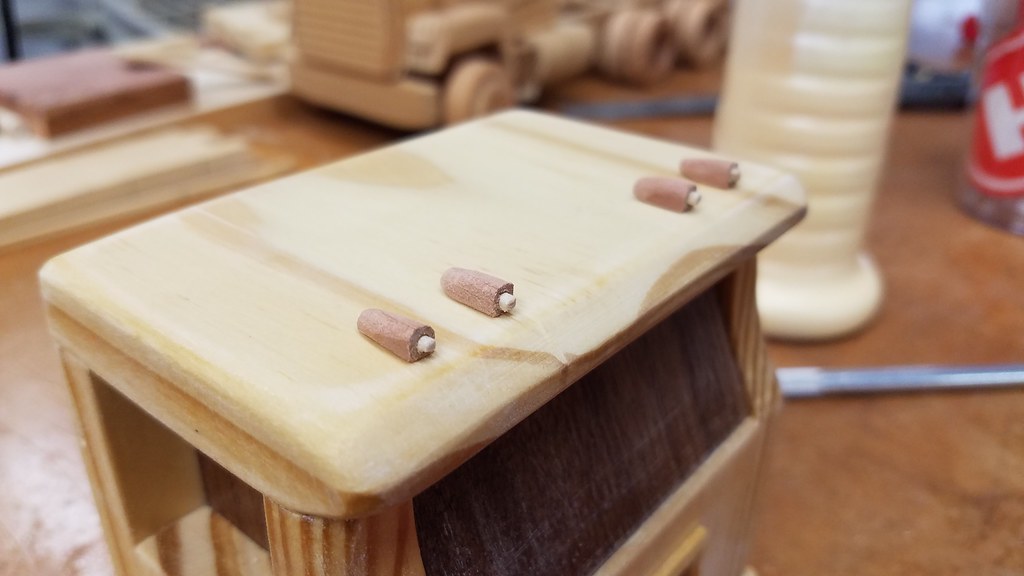
Shaping the housing. Just a whole lot of patience. I really enjoy this part of model/toy building.
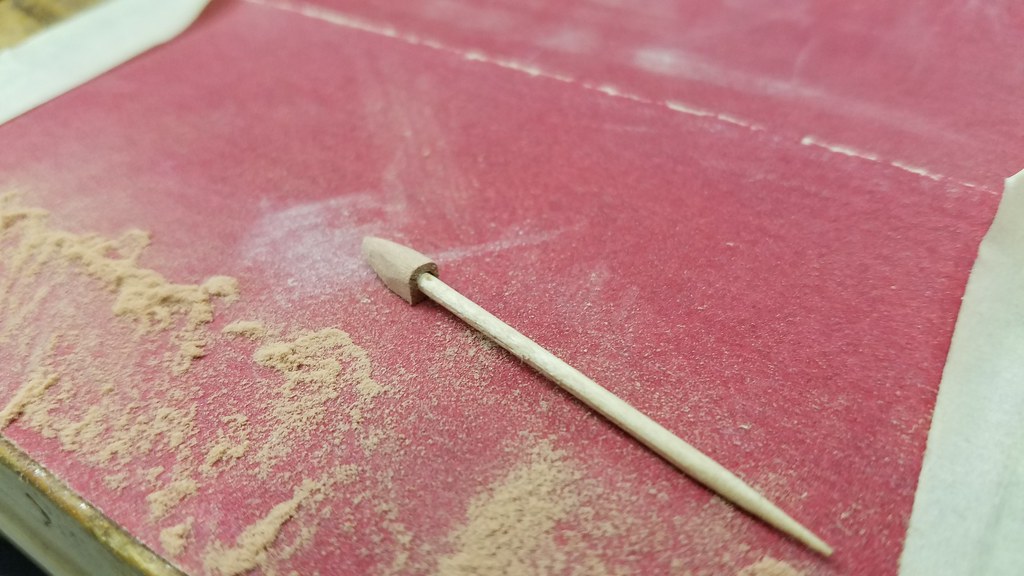 20170619_102438 by bjohnson388, on Flickr
 20170619_102440 by bjohnson388, on Flickr
Mocked up lights. You will notice the cab has been sanded. The lacquered dried to fast so it had a very rough finish. So it will get another top coat of Satin Poly.
 20170619_102613 by bjohnson388, on Flickr
They came out pretty good.
 20170619_102617 by bjohnson388, on Flickr
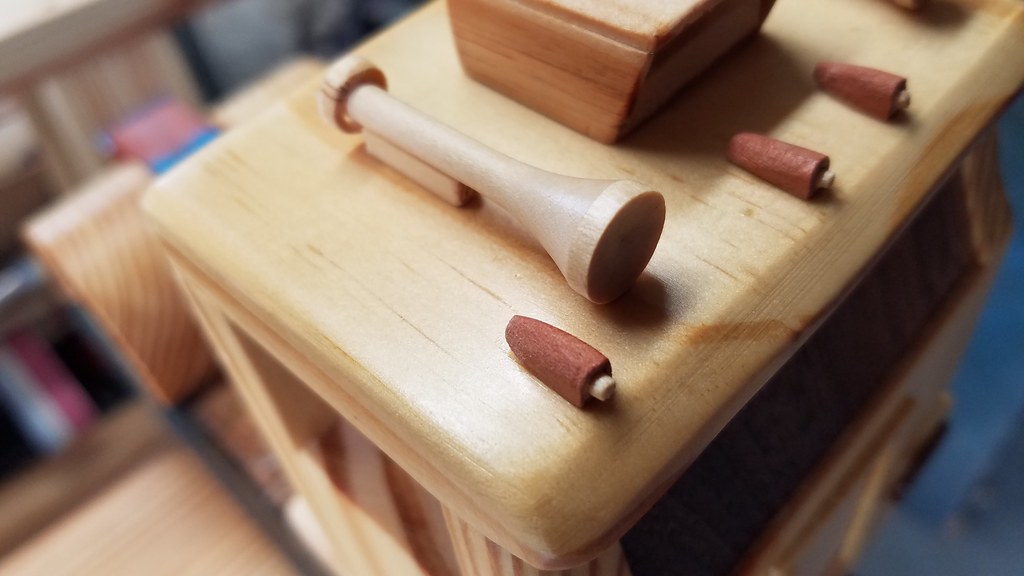
Some air horns(made from golf tees) and roor mounted Air conditioner which were very popular on these cab overs in their day.
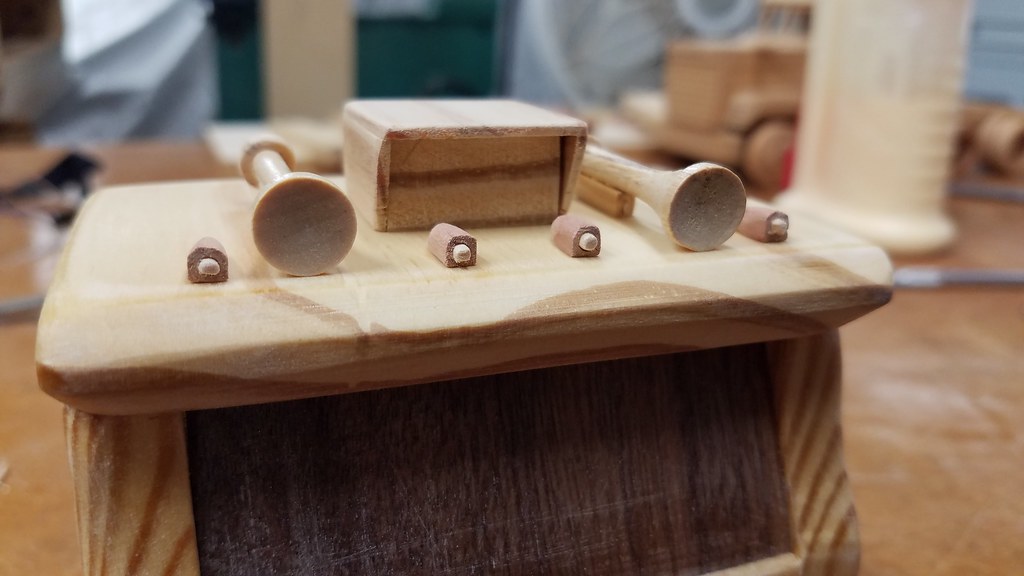 20170619_104454 by bjohnson388, on Flickr
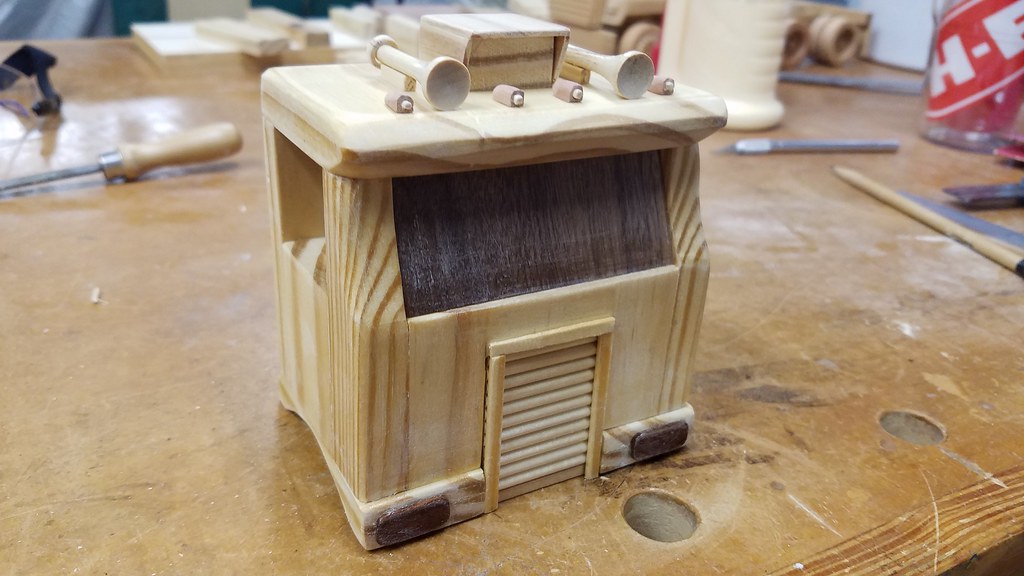 20170619_104456 by bjohnson388, on Flickr
I made the A/C by making the square block and then layering it with some 1/16" pieces on the side and top that were longer than the inside part. Then when the glue dried I cut the angle to make it look like the real thing.
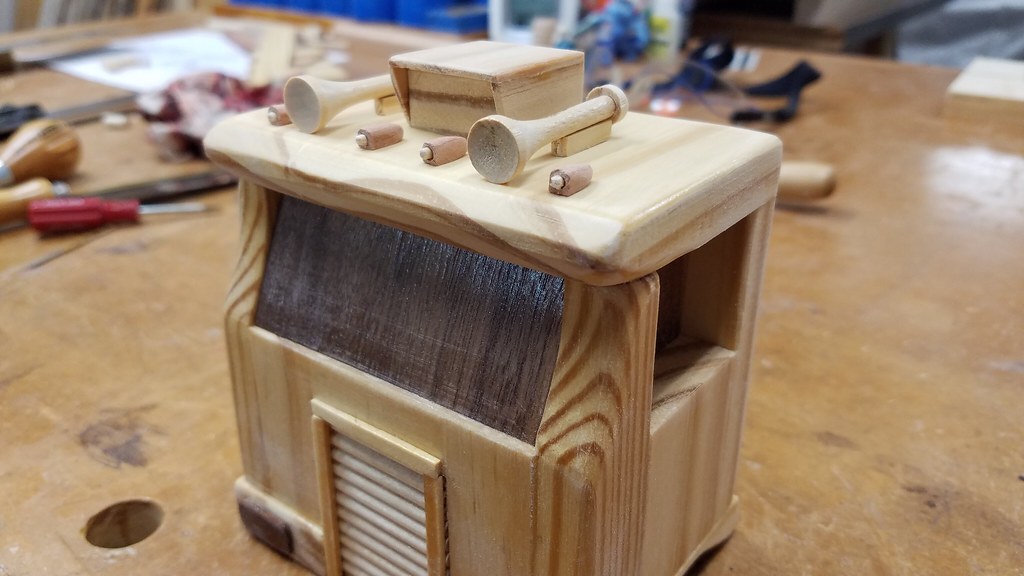 20170619_104500 by bjohnson388, on Flickr
Cab back in the paint shop to get another topcoat.
 20170619_121416 by bjohnson388, on Flickr
This finish came out much smoother. Although since it was the first coat on all of the roof accessories I will either have to shoot it again or maybe use a small brush to put a second coat on the accs.
 20170619_121428 by bjohnson388, on Flickr
The tires came out too shiny with the shellac. So they will need a topcoat of Satin Poly but I ran out so will have to grab some this week after work one day.
 20170619_121437 by bjohnson388, on Flickr
And that gets everything caught up.
Thanks for stopping in.
Bret
-
20th June 2017, 12:21 PM #21
GOLD MEMBER
- Join Date
- Apr 2013
- Location
- Torquay
- Posts
- 4,422
It looks magnificent Bret
TOP STUFF mate
Regards
Keith
-
20th June 2017, 07:47 PM #22
Life's Good, Enjoy each new day & try to encourage
- Join Date
- Dec 2009
- Location
- Faulconbridge, Lower Blue Mountains
- Age
- 68
- Posts
- 11,186
Looking great Bret..
Like the rear mudguard process, thank you...
Plus the roof lights process, thank you..
Cheers, Peter
-
21st June 2017, 02:09 PM #23
SENIOR MEMBER
- Join Date
- Dec 2015
- Location
- Alabama usa
- Posts
- 951
 Great job!
Love the tips as crowie said!!!
-
22nd June 2017, 08:41 PM #24
GOLD MEMBER
- Join Date
- Nov 2008
- Location
- Canterbury UK
- Age
- 67
- Posts
- 3,996
-
25th June 2017, 12:47 PM #25
Hotrod
- Join Date
- Jun 2010
- Location
- Leander, TX Central Texas Area
- Age
- 45
- Posts
- 1,061
Thank You Keith Originally Posted by Keith_1
No problem Peter. Thank You. Originally Posted by crowie
Thank You. Originally Posted by htl
After 5 grueling days at work after vacation my mind and body are wiped out. We hit 102* yesterday so hopefully I will get some work done on the truck tomorrow after I deal with this thing that followed me home this week.
 20170621_191926 by bjohnson388, on Flickr
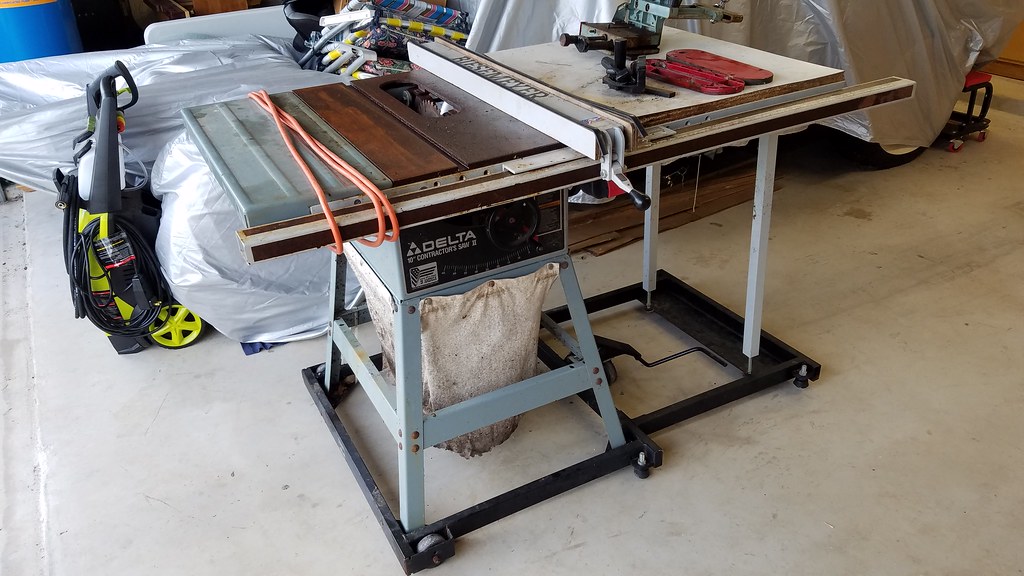
The cast iron is in pretty rough shape as it was sitting outside. If it hadn't been in the weather this thing would be cherry. I will see if I can bring it back to life. If it doesn't turn out to be worth the trouble I will definately use the 1.5hp motor to make a 16" wide drum sander.
Bret
-
25th June 2017, 12:48 PM #26
Hotrod
- Join Date
- Jun 2010
- Location
- Leander, TX Central Texas Area
- Age
- 45
- Posts
- 1,061
Thank You Derek. Can't wait to see how your half track comes out. Originally Posted by Dalboy
Bret
-
25th June 2017, 01:28 PM #27
Life's Good, Enjoy each new day & try to encourage
- Join Date
- Dec 2009
- Location
- Faulconbridge, Lower Blue Mountains
- Age
- 68
- Posts
- 11,186
My goodness me Bret, I wish goodies like that would follow me home...great score!! Originally Posted by bj383ss
-
26th June 2017, 05:29 AM #28
GOLD MEMBER
- Join Date
- Nov 2008
- Location
- Canterbury UK
- Age
- 67
- Posts
- 3,996
-
26th June 2017, 10:45 AM #29
Hotrod
- Join Date
- Jun 2010
- Location
- Leander, TX Central Texas Area
- Age
- 45
- Posts
- 1,061
Thank You Peter. Believe me stuff hardly ever follows me home. Originally Posted by crowie
As far as I can tell there is not pitting. It only sat outside for a year. But I have to tell you it is going to be alot of work to get it where it is useable. Right now plan of attack is to completely remove the cast iron top and the trunnion and soak them in vinegar to remove as much rust chemically. Originally Posted by Dalboy
Bret
-
26th June 2017, 10:51 AM #30
Hotrod
- Join Date
- Jun 2010
- Location
- Leander, TX Central Texas Area
- Age
- 45
- Posts
- 1,061
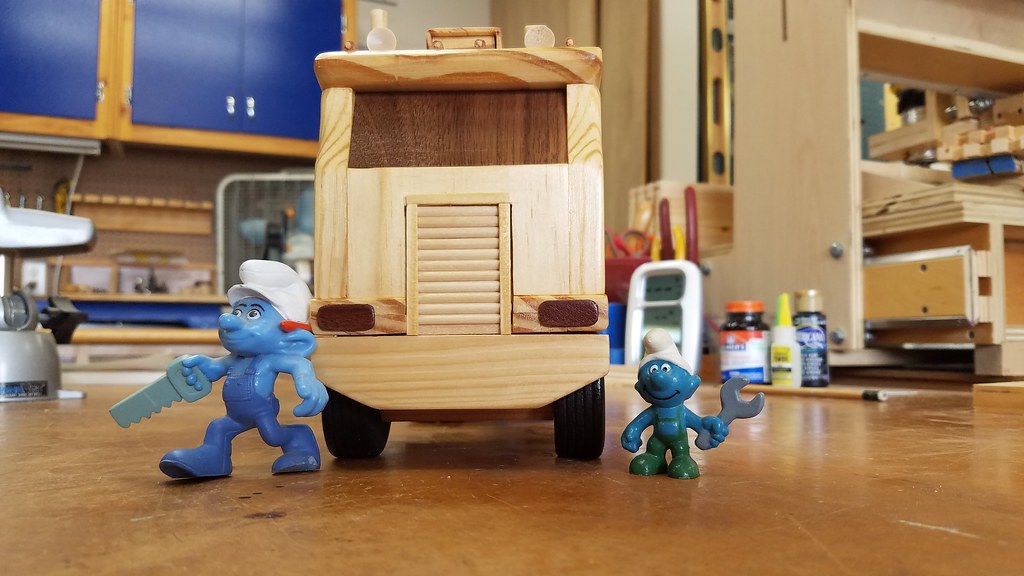
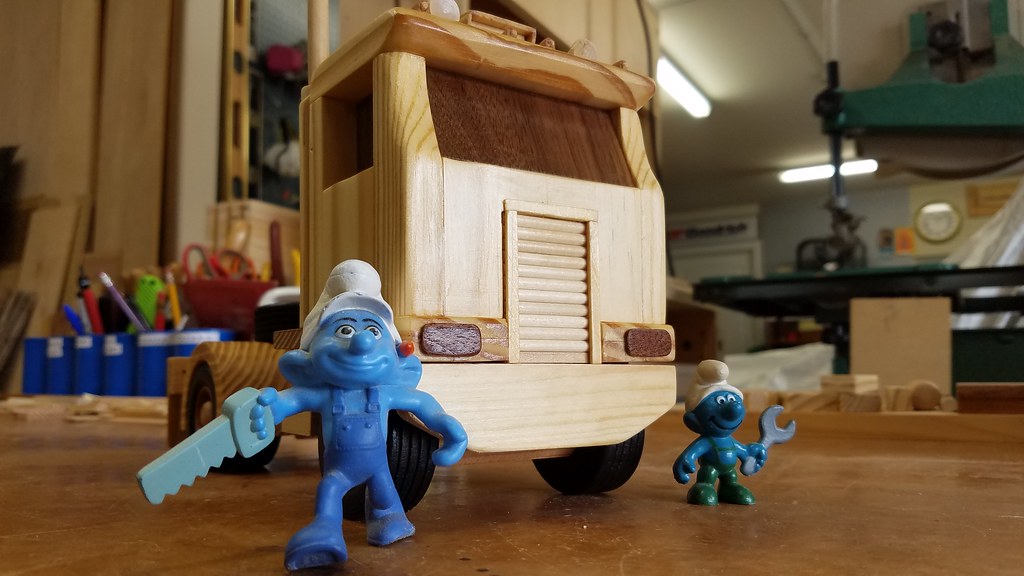
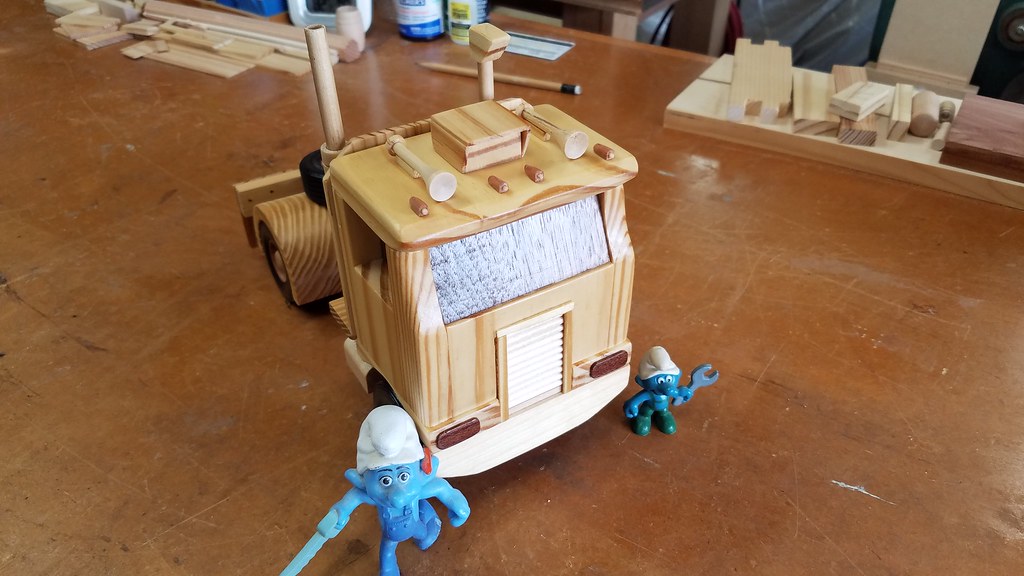
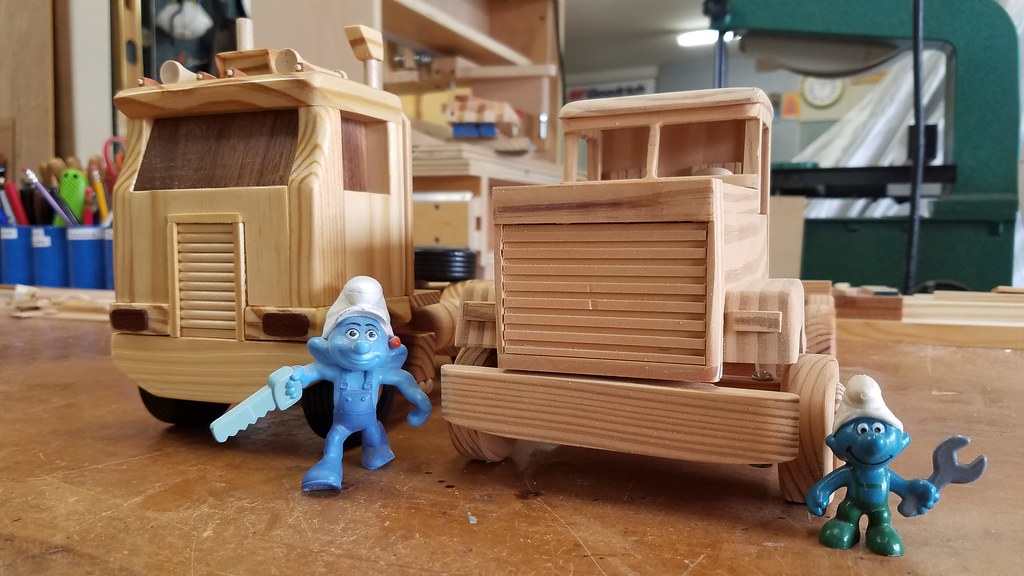
Finished
Well thank you everyone for following along on this build. It is "officially" finished Andy says.
 20170625_145042 by bjohnson388, on Flickr
He seems very proud in this photo.
 20170625_145047 by bjohnson388, on Flickr
 20170625_145053 by bjohnson388, on Flickr
 20170625_145108 by bjohnson388, on Flickr
 20170625_145116 by bjohnson388, on Flickr
 20170625_145120 by bjohnson388, on Flickr
 20170625_145126 by bjohnson388, on Flickr
So the next project is I am going to finish the 2 Mack Superliner's I started 6 years ago when I first joined this amazing forum. Man how the time flies. Shouldn't take that long only have a few pieces left to make and then put a finish on it. After that I am planning on starting another new scale model.
 20170625_145239 by bjohnson388, on Flickr
 20170625_145159 by bjohnson388, on Flickr
 20170625_145221 by bjohnson388, on Flickr
Bret


")


 Reply With Quote


Similar Threads
-
Fire Truck based on the Aschi's Workshop "My Red Fire Truck" plan
By crowie in forum TOY MAKINGReplies: 24Last Post: 26th October 2016, 08:56 PM -
Another semi
By fozzy767 in forum TOY MAKINGReplies: 17Last Post: 28th January 2014, 04:40 AM -
Another semi
By fozzy767 in forum TOY MAKINGReplies: 51Last Post: 12th October 2011, 11:01 AM -
Semi cheap DRO
By neksmerj in forum METALWORK FORUMReplies: 3Last Post: 11th April 2011, 08:33 PM -
SEMI OT - how NOT to cut branches down.
By Andraax in forum WOODTURNING - PEN TURNINGReplies: 10Last Post: 3rd October 2006, 06:38 PM
