

 Thanks: 0
 Likes: 0
 Needs Pictures: 0
 Picture(s) thanks: 0
Results 1 to 15 of 127
Thread: Custom fg XR6 Turbo Ute Tray
-
16th March 2011, 01:04 PM #1
 Member


- Join Date
- Mar 2011
- Location
- Carrum
- Age
- 46
- Posts
- 61
 Custom fg XR6 Turbo Ute Tray
Hi guys. Im BRAND NEW to the forum. Thought i'd post about my ute tray build and see what comments, good or bad, I could take on board.
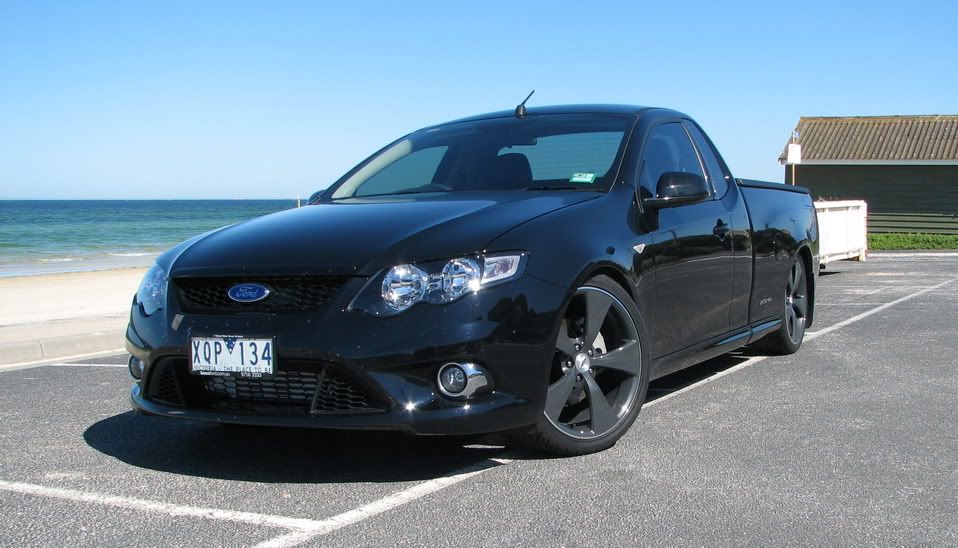
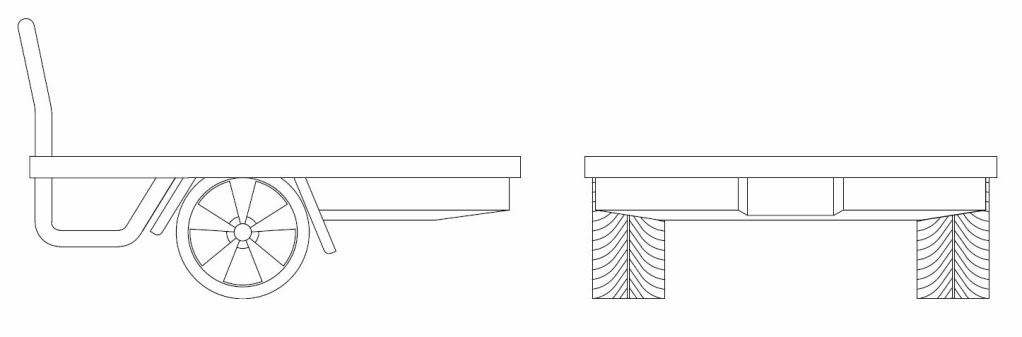
Start with a pic of the car and AutoCAD sketch of the concept:
Car (excuse the squashed bugs)
Concept
First afternoon spent actually fabricating...
Here's the tray frame upside down.

Shiny 5mm checkerplate for the floor

How the pro's do it haha


Instruments of the trade


-
16th March 2011 01:04 PM # ADSGoogle Adsense Advertisement
- Join Date
- Always
- Location
- Advertising world
- Age
- 2010
- Posts
- Many
-
16th March 2011, 02:25 PM #2
Trailer Bloke & Mild Mannered Moderator
- Join Date
- May 2007
- Location
- Tooradin, Vic.
- Age
- 52
- Posts
- 1,885
Nice work Ben and Welcome aboard.
Too many projects, so little time, even less money! Are you a registered member? Why not? click here to register. It's free and only takes 37 seconds!
 Doing work around the home? Wander over to our sister site, Renovate Forum, for all your renovation queries.
-
16th March 2011, 02:32 PM #3
Senior Member
- Join Date
- Aug 2006
- Location
- Muswellbrook NSW
- Posts
- 375
Looking good,
Have you used stainless filler and if so, for what reason?
Has that transtig been reliable? Had a few issues with them myself - 3 died within warranty !
!
-
17th March 2011, 06:10 PM #4
Member
- Join Date
- Mar 2011
- Location
- Carrum
- Age
- 46
- Posts
- 61
Thanks mate... Good to be here Originally Posted by Yonnee


Thanks. Originally Posted by Stringy
Yer well spotted, I used stainless filler just because it seems to weld better.
Have had perosity issues with mild steel welding. Ive been TIG welding 8hrs a day for 15 years and 90% of that was stainless 9% aluminium and 1% mild steel.
The transtig is 2yrs old now and hasnt missed a beat, concerned now though, -3 dead within warranty? How dead? for $4k+ I will want a hell of a lot of years from it...
What did you do after 3rd? Go for another brand? Or you still on your 4th?
-
17th March 2011, 06:24 PM #5
Member
- Join Date
- Mar 2011
- Location
- Carrum
- Age
- 46
- Posts
- 61
Day two
Time for liftoff!!

No undies on

Undies on

Tray just sitting on... not leveled/centred yet...

Mounting brackets... yet to be drilled then welded once clamped in place and tray sitting at nice height..

Gettin a visual on the line...

Nice height.

Bit of cutting and shutting for some extra clearance...

-
20th March 2011, 02:38 PM #6
New Member
- Join Date
- Apr 2010
- Location
- Charleville
- Posts
- 7
Hi Ben,
Love the tig welds - they are looking very neet indeed. I had never really thought of using stainless filler. What type of stainless filler is it just for future reference?
I have been planning to build a steel tray for the Triton Dual Cab for a while now as well. I talked to a panel beater about it and he said to build it on the back of the car as not all chassis are square and level. My thoughts are that it would be much easier to build it on a flat surface and make it square then put it on the back of the car. What are your thoughts?
His reason was that you see a lot of cars with a tray and the gap between cabin and roll bar looks like the car is bent. I am thinking you could always fix this by adding a few washes/spacers between mounting brackets and chassis anyway.
Keep posting the pics it will be interesting to see the car before and after.
Daryl
-
21st March 2011, 10:31 PM #7
Member
- Join Date
- Mar 2011
- Location
- Carrum
- Age
- 46
- Posts
- 61
Hey diz...
The filler wire is just 1.2mm 316...
The way i planned mine was.
- built the frame (just the outside 100x50RHS and the 50x25RHS running across) to the size i wanted.
- removed tub to check mounting points.
- ran 2 lengths of 100x50RHS from back of cabin to rear of car so when the mounting brackets were welded on they could pick up on atleast 6 of the 8 threaded holes in the chassis that were used to bolt the tub on.
- sat the tray on top of the two lengths of 100x50 and centred and squared it all.
- clamped the 2 lengths to the underside of the 50x25's
- removed it all to the bench and tacked them in position.
- sat it back on the chassis and fabricated the mounting brackets in a way that will still give me up/down adjustment.
- drilled the mounting brackets and bolted them to the chassis.
- took car out onto flat area and stood back to get the level by eye that i was after. (oh i estimated the weight of tray when completed and weighed it down to get more accurate line)
- made necissary adjustments to hieght and level and clamped the two RHS to the mounting brackets.
- Unbolted the brackets from chassis, took it all to the bench once again and tacked the mounting brackets.
- retrofitted it once more before removing it and welding it all out.
I hope you can understand this mate With just a little bit of forward planning it really isnt too difficult. ie when to remove tub, what can be done before removing tub.
I have actually removed mine 3 times now and will do once more before it goes on for the final time. If i started it again i could now do it all with only removing it once.
-
22nd March 2011, 07:59 PM #8
Member
- Join Date
- Mar 2011
- Location
- Carrum
- Age
- 46
- Posts
- 61
i missread a bit of your post sorry Diz...
I will be fitting the roll bars myself. So i will run them parrallel to the cabin even if its not exactly 90 to the tray.
As for washers to pack it up, If you find you need to move the top of your roll bars forward 5-10mm you will probably need about 30-40mm of packing down and the rear mounting points.
Well thats on my tray atleast. yours being dualcab your tray will most likely be shorter and would require less packing up.
-
23rd March 2011, 12:51 AM #9
SENIOR MEMBER
- Join Date
- Jun 2010
- Location
- Canberra
- Posts
- 769
I noticed the neat cut and shut over the wheels, but I wonder if that's still enough clearance if you're carrying any kind of load? I have a Ford RTV cab chassis whch has about 250mm clearance above the rear tyres unladen, and she sinks down a fair bit once she's got a tonne on board, although I'm guessing an XR6 Turbo ute is built for other things than load-carrying
-
23rd March 2011, 08:43 AM #10
Senior Member
- Join Date
- Aug 2006
- Location
- Muswellbrook NSW
- Posts
- 375
Tray is looking good Originally Posted by ben@SS&A
.
I use Stainless filler on jobs that are non structural and porosity is an issue due to contamination in the parent metal-usually traces of cadmium or zinc plating!
Where I work initially purchased 6, 300amp machines, 3 of them blew, I was present for 2 of them, big bang, flash of light and smoke!!!! We have since purchased another 10 with no issues!
Have you figured out how to change arc force on your welder ?
?
-
24th March 2011, 06:07 PM #11
Member
- Join Date
- Mar 2011
- Location
- Carrum
- Age
- 46
- Posts
- 61
The wheels are actually slightly inside the 100x50 so they can travel right up to the underneath of the checkerplate flooring. So they have about 120mm of upward travel. Originally Posted by RustyArc
I doubt very much she will see a tonne on the back ever haha... Its all for looks and advertising.
Thanks Originally Posted by Stringy
Arc Force? cant say I have... Whats it for?
What material do you weld mostly? Im pretty much an expert with stainless but an ametuer with aluminium, dont enjoy it at all. Trying to teach myself probably isnt the best way either haha. With stainless i will weld anything to anything confidently, with aluminium, very different story. Like just welding a 1/2" hosetail to a piece of 4" ally tube, I got no idea. In stainless piece of cake.
But I guess all that is for another thread haha...
Thanks guys, got qoute back on laser cutting, just making some adjustments then its bout a ten day turn around, so ill post update asap
-
3rd April 2011, 08:47 PM #12
Member
- Join Date
- Mar 2011
- Location
- Carrum
- Age
- 46
- Posts
- 61
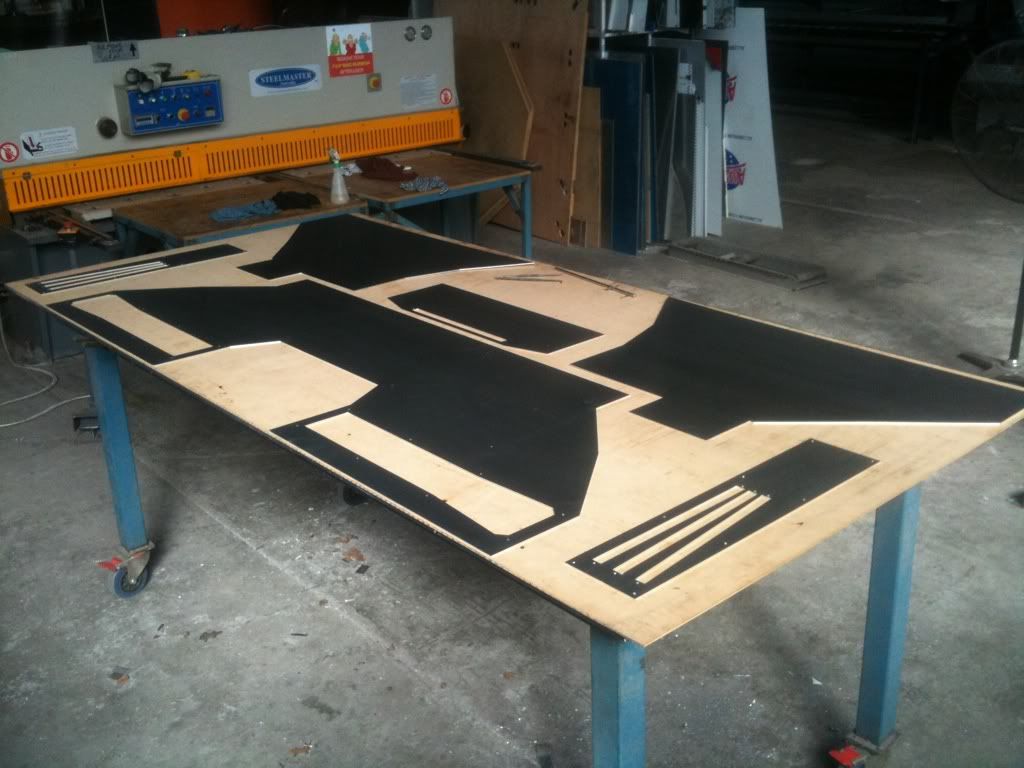
These are the patterns I went with, but can make more whenever I want.
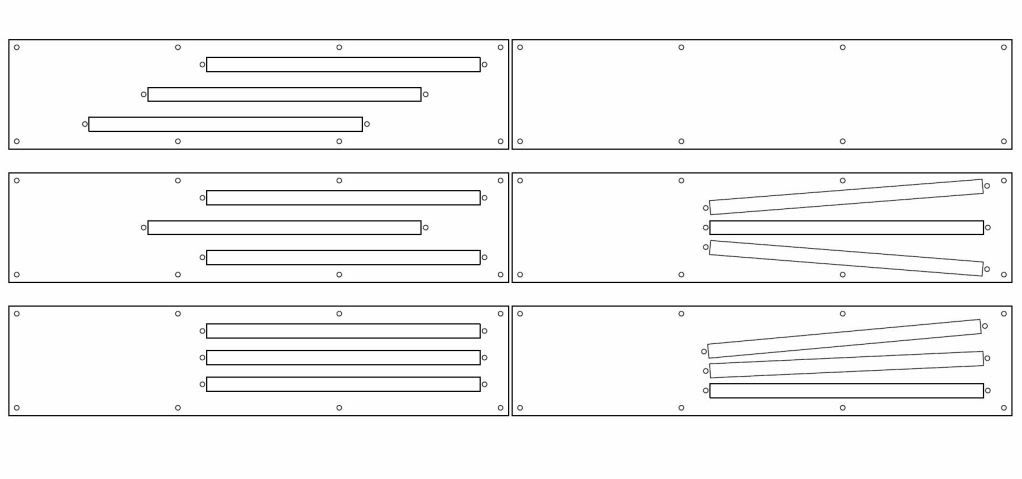
I can swap brakelights and indicators around wherever I like... Prob have indicator in middle on all of them anyway..
Heres what the rear looks like before folding and screwing on the lights.
-
9th April 2011, 11:16 PM #13
Member
- Join Date
- Mar 2011
- Location
- Carrum
- Age
- 46
- Posts
- 61
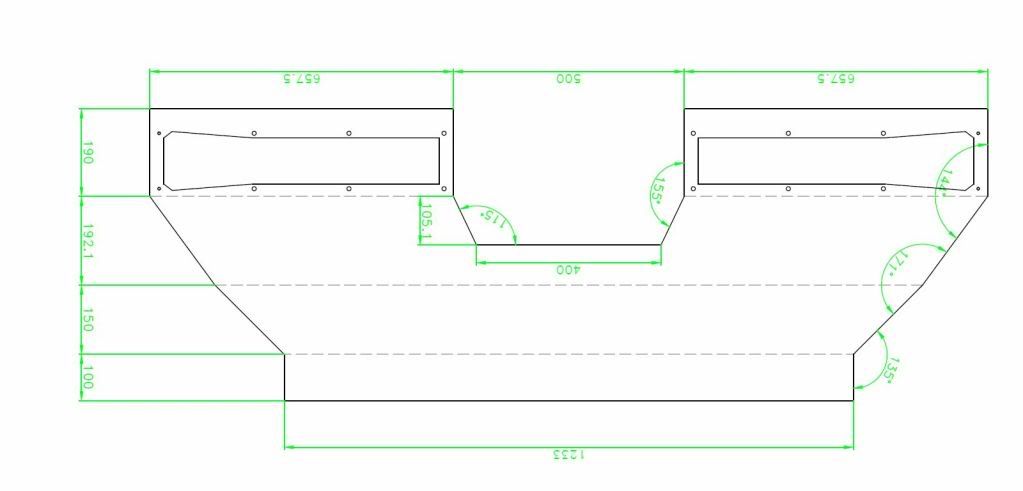
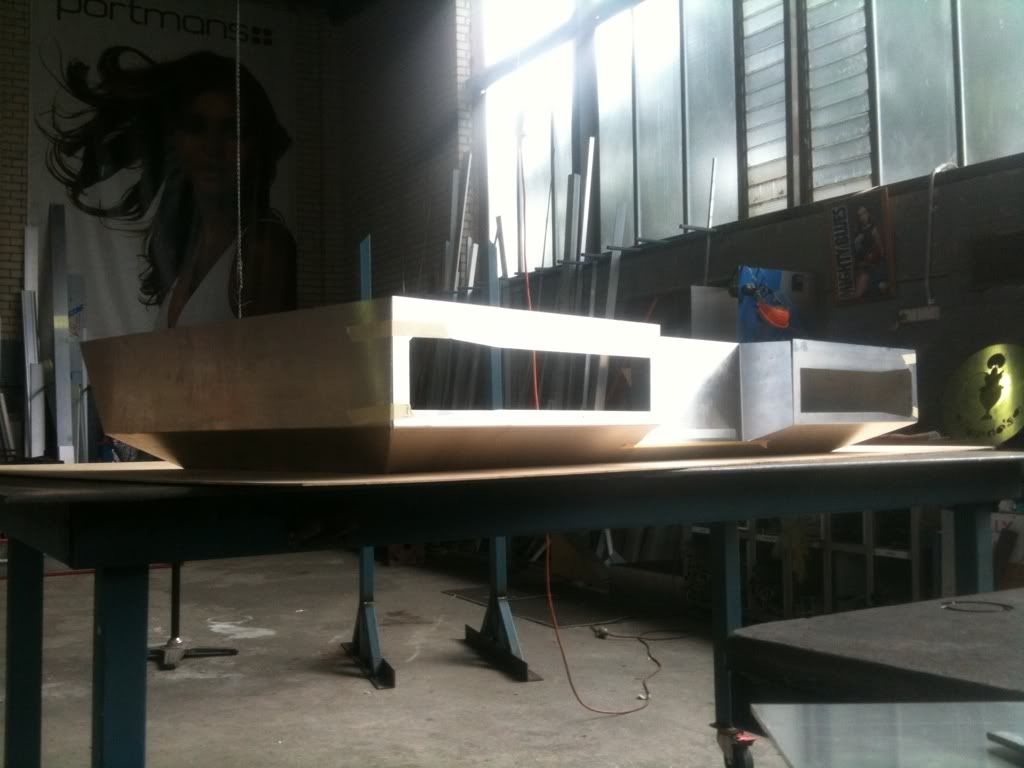
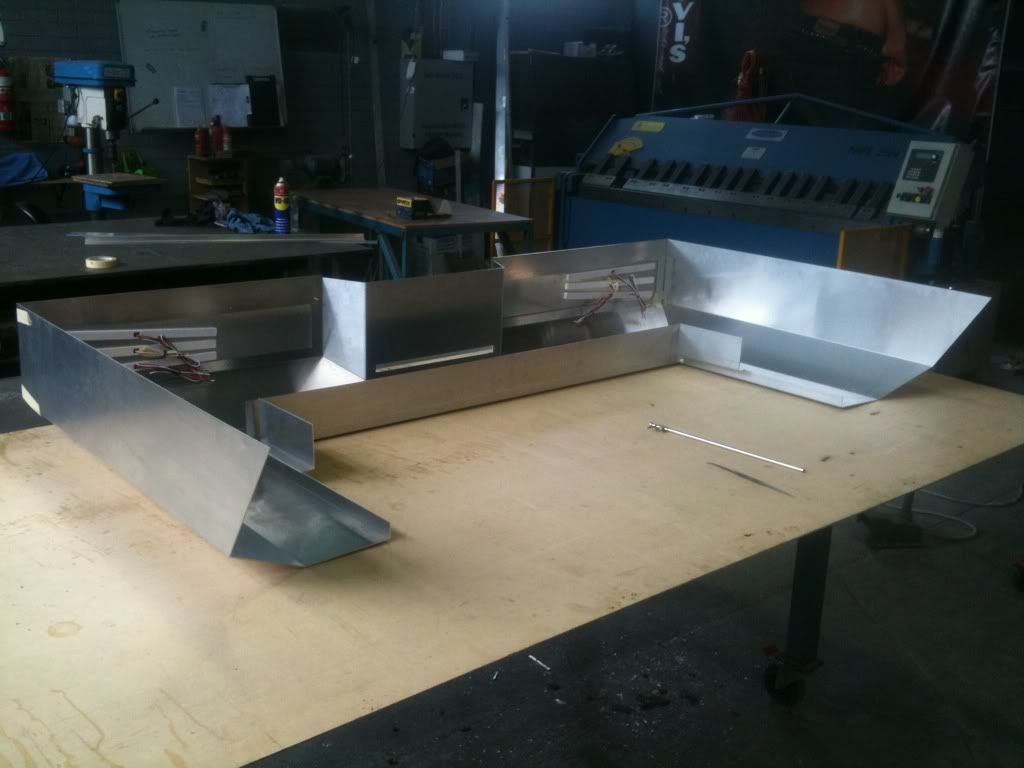
Well today went reasonably well... Got the underneath panels cut, folded and checked how they fit. The hours I spent in front of autocad and double/triple checking measurements paid off because it was a fantastic fit first try.
I was actually a lil worried it would take two or three goes before it fit spot on so yer :dance
Anyway you just wanna see some progress piccies :lol so here ya goes...
Couple vids also, if they work, of my cnc router and folder doin the good stuff...
CNC Router cutting out the panels
Vid
Tray Build :: adf1aff4.mp4 video by B3NJ1_1978 - Photobucket
Panels cut out
Panel being folded

Vid
Tray Build :: 93b3d2dd.mp4 video by B3NJ1_1978 - Photobucket
Panels folded and stuck together. I think i have set the numberplate too far back. :doh But this is just a trial piece... will be laser cutting the next one from stainless.
Vid
Tray Build :: 4f3a771f.mp4 video by B3NJ1_1978 - Photobucket
Just playin with lights arrangement...
More pics and vids tomorrow...
Still lots to do...
This was gunna be an epic update but cbf lol
too tired.... Tomorrow
-
10th April 2011, 12:14 AM #14
SENIOR MEMBER
- Join Date
- Nov 2004
- Location
- Port Pirie SA
- Age
- 52
- Posts
- 6,908
Lookin good Ben
....................................................................
")
-
10th April 2011, 09:50 AM #15
Trailer Bloke & Mild Mannered Moderator
- Join Date
- May 2007
- Location
- Tooradin, Vic.
- Age
- 52
- Posts
- 1,885
Love your work Benny.
Nice toys to have at your disposal too, CNC guillotine and pan brake... Mmmm.Too many projects, so little time, even less money!Are you a registered member? Why not? click here to register. It's free and only takes 37 seconds! Doing work around the home? Wander over to our sister site, Renovate Forum, for all your renovation queries.


Similar Threads
-
Newbie Cigweld Transmig 165 turbo settings help??
By Jonesy_SA in forum WELDINGReplies: 10Last Post: 16th December 2010, 07:57 AM -
BF XR6 Turbo Ute Feedback Required....
By joez in forum MOTOR VEHICLESReplies: 8Last Post: 24th March 2010, 04:01 PM -
SIP Topmig 170 turbo
By abitfishy in forum WELDINGReplies: 17Last Post: 3rd December 2008, 07:11 AM -
Weldskill 140 turbo manual arc welder
By Unit_01 in forum WELDINGReplies: 2Last Post: 14th September 2007, 09:33 PM
