

 Thanks:
  Likes:
  Needs Pictures: 0
 Picture(s) thanks:
Results 46 to 60 of 155
Thread: Apothecary chest
-
12th June 2018, 08:02 PM #46
 Novice


- Join Date
- Sep 2017
- Location
- Russia
- Age
- 45
- Posts
- 18

Очень красивый.
Mod edit
Translate : Very beautiful.
-
12th June 2018 08:02 PM # ADSGoogle Adsense Advertisement
- Join Date
- Always
- Location
- Advertising world
- Age
- 2010
- Posts
- Many
-
14th June 2018, 12:42 AM #47
Be inspired. Be creative. Be bold.
- Join Date
- Apr 2001
- Location
- Perth
- Posts
- 10,821
Dovetailing on an angle
I was in two minds whether to post this, but since the method is a practice, it would be great to get feedback, since the strategy I have come up with is complex. Can you do this another way?
Each row has 4 drawers, and these will be shaped to match the bow across the chest.
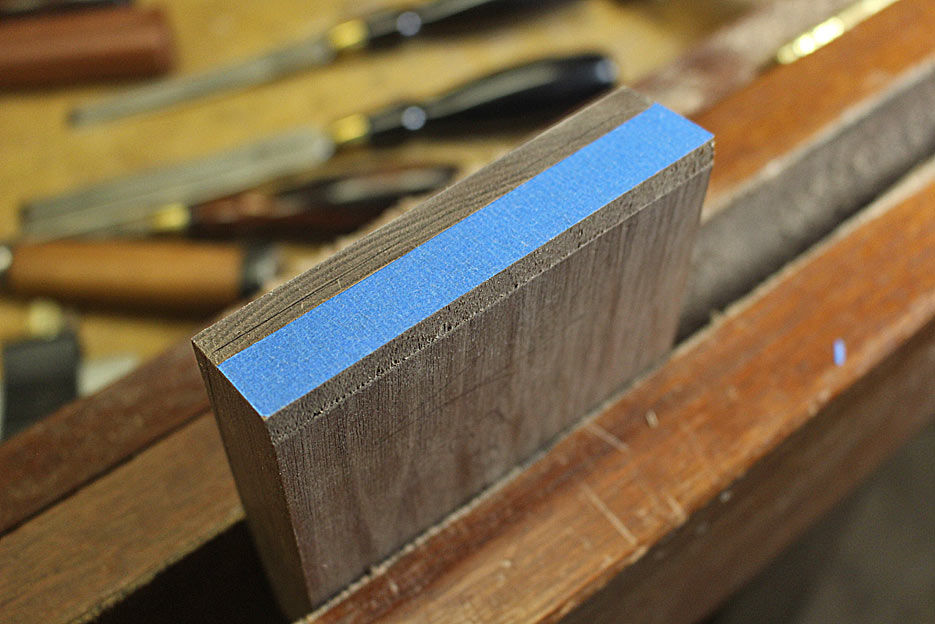
At the start, the drawer fronts are to be left straight. This maintains the reference sides. The ends of each drawer front have been bevelled to match fit the bow of each drawer blade.
This is a fitted (practice) drawer front (posted last time) ..
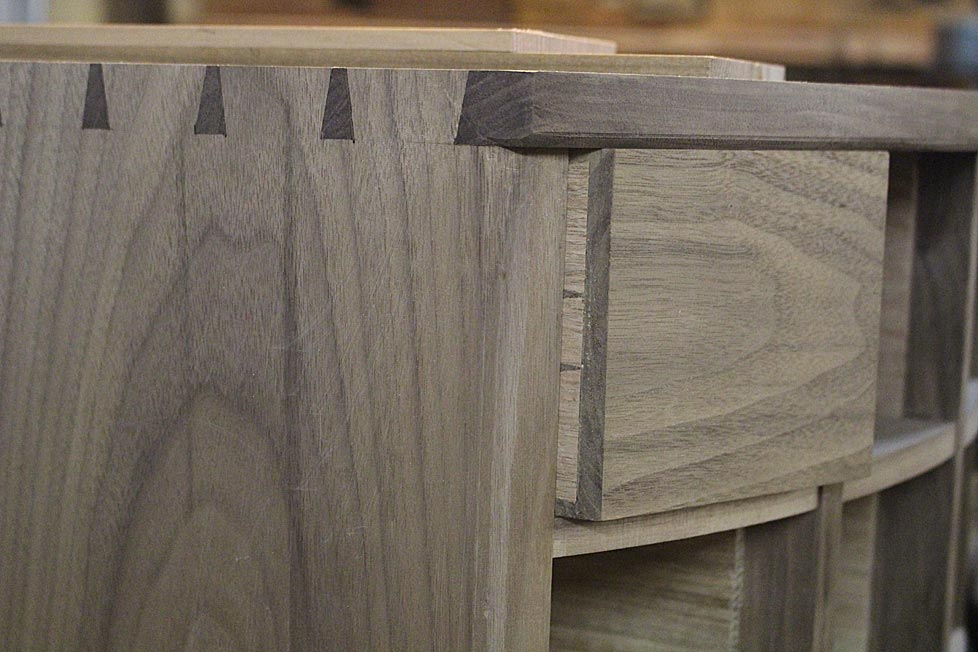
The drawer side has been dovetailed to the obtuse angled side (again, details in my previous post: http://www.inthewoodshop.com/Furnitu...tWeekend8.html) ...
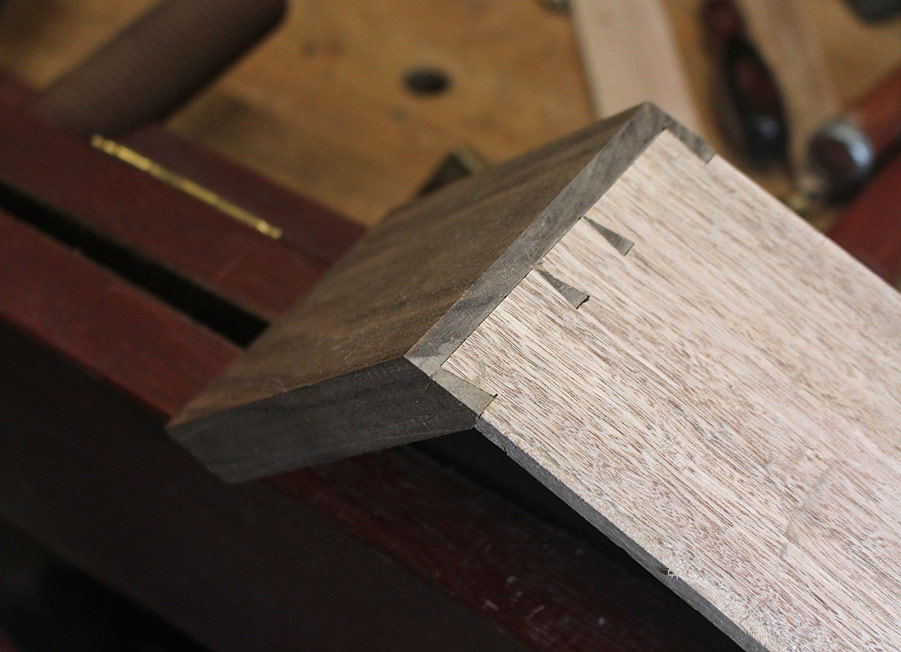
The need now is to dovetail the acute angle ...

This is where it gets interesting. It you look at the lines drawn on the drawer side, if made coplanar with the drawer front, the dovetails will need to me cut at an angle. That is much too complicated, and likely to be a poor fit.
Then, if the baseline is cut square (as usual), the dovetail will end up in the centre of the side (and not extending up from edge of the board).
The only way I could come up with for a fit that simplified the tail board was to rebate the pin board, so ....
The rebate needs to be as deep as the drawer side (for a flush fit), and square to the side (so the baseline of the tail board fits flush).
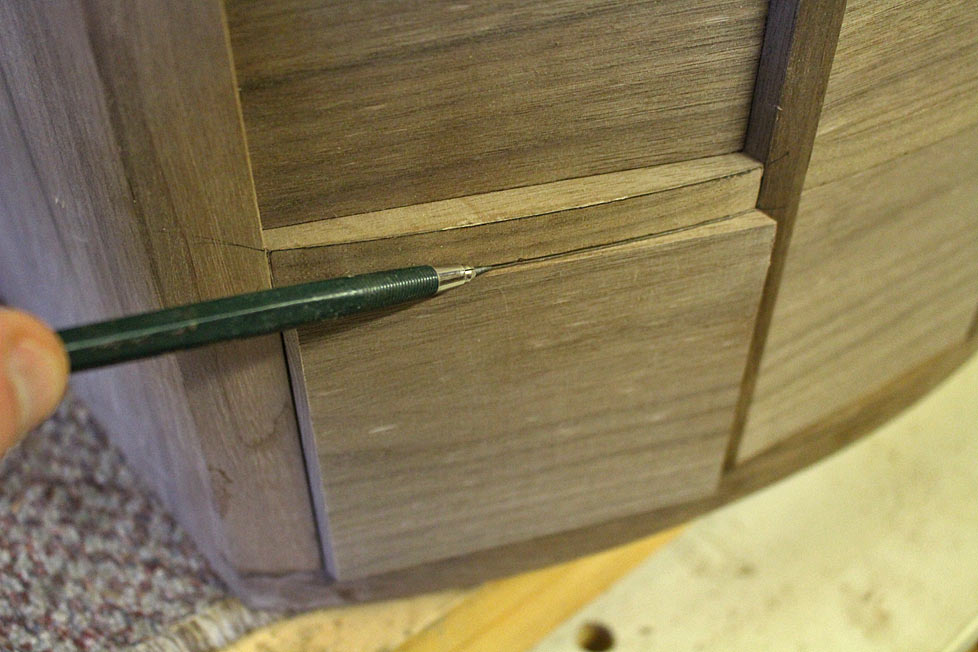
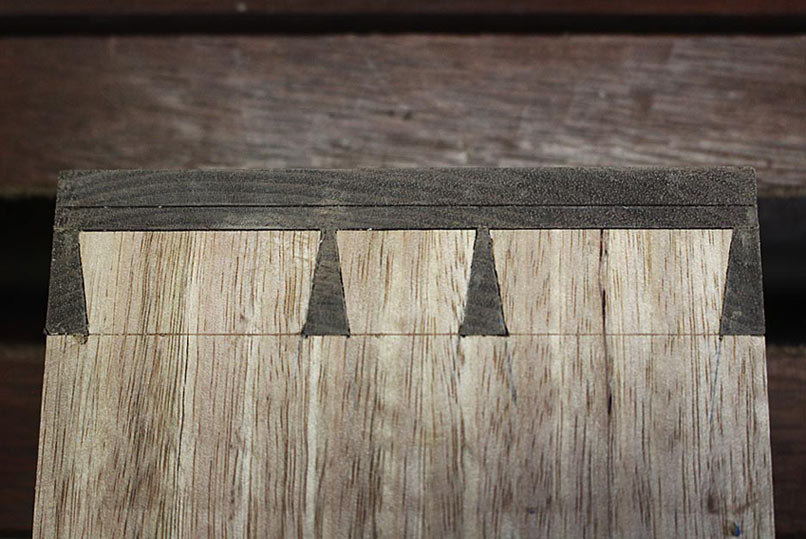
The first step is to mark the baseline ...
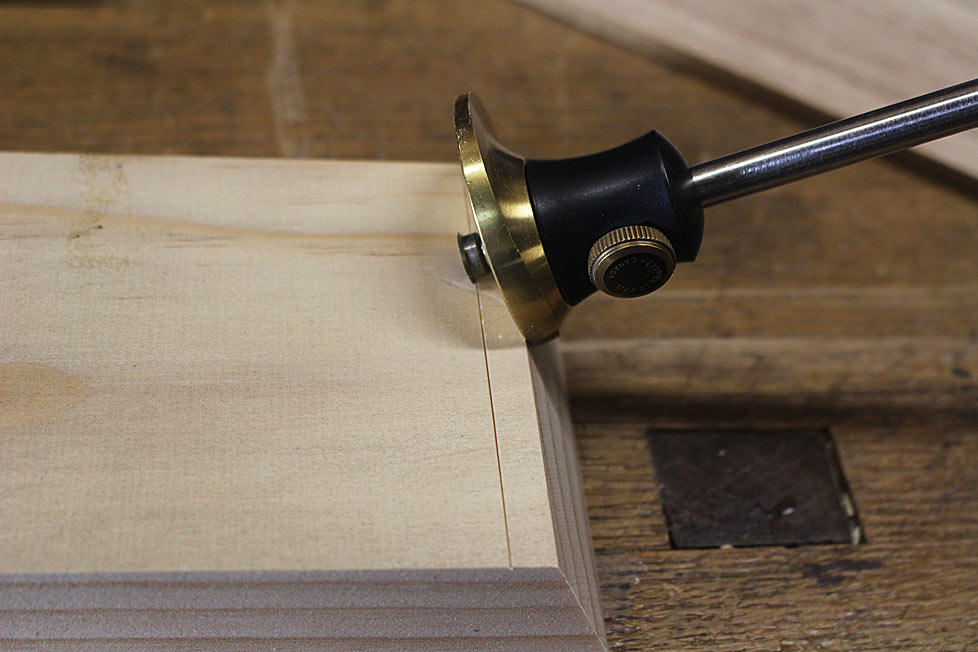
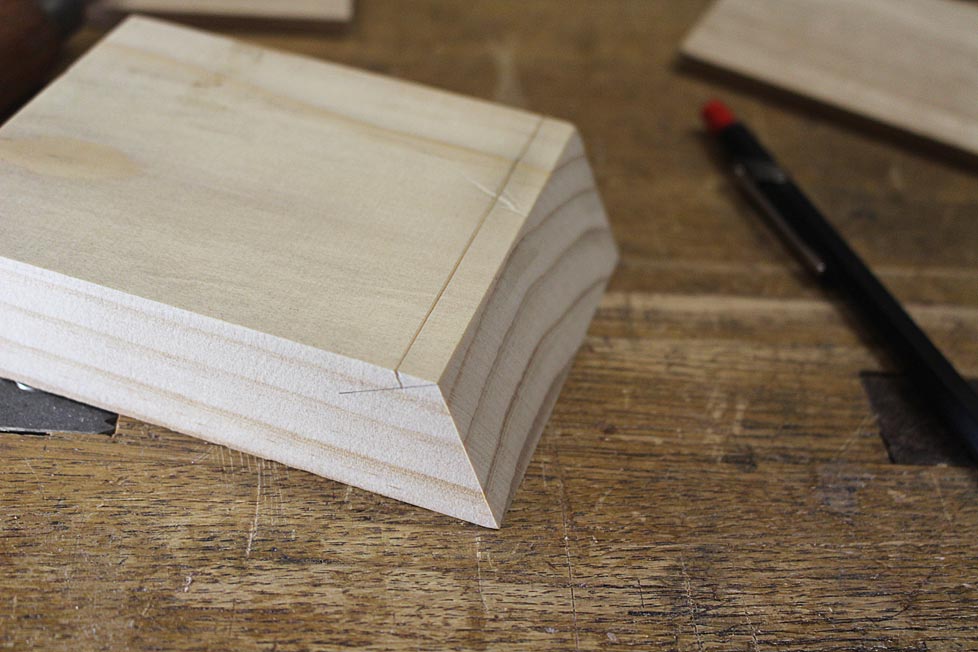
On the piece above, you can also see the rebate markings.
The rebate is now cut parallel to the side ...
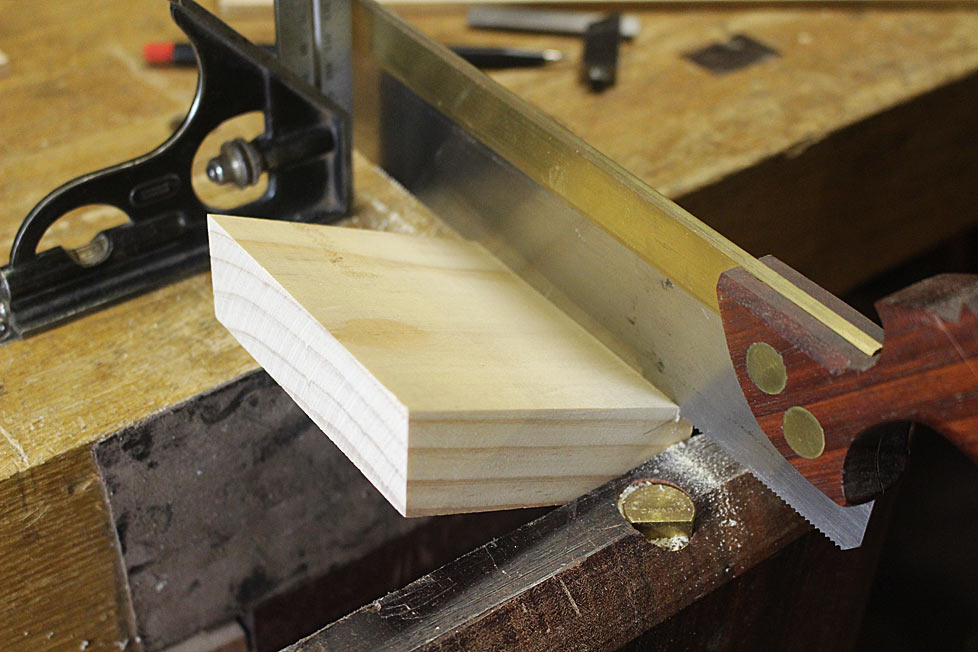
Remove some of the waste with a chisel ...
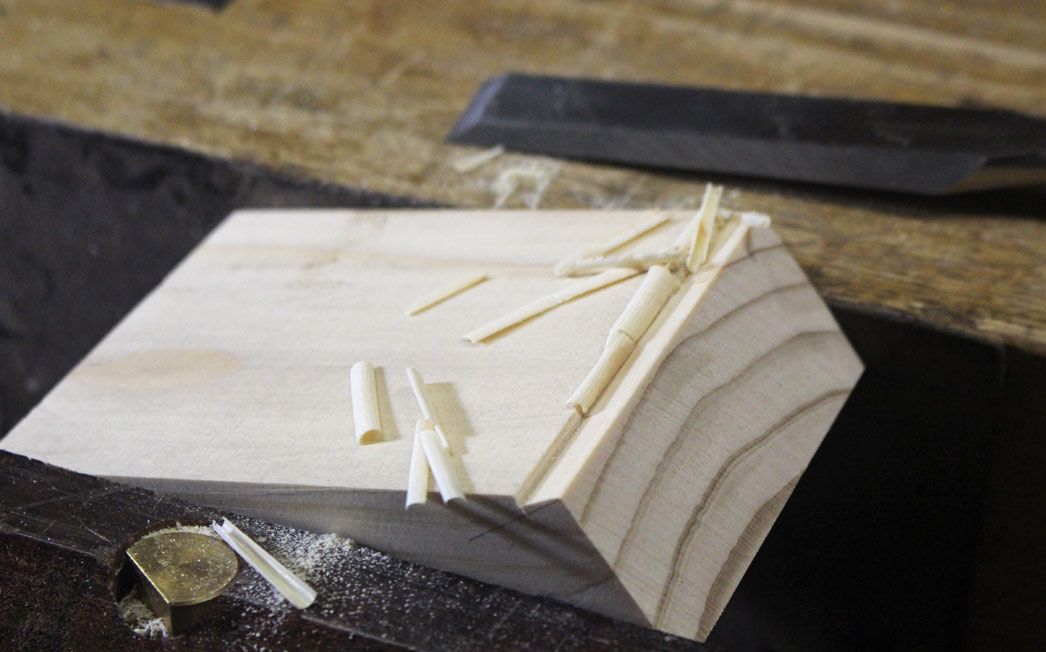
Now that rebate needed to be both straight and flat. It needs to be an equal depth along its length.
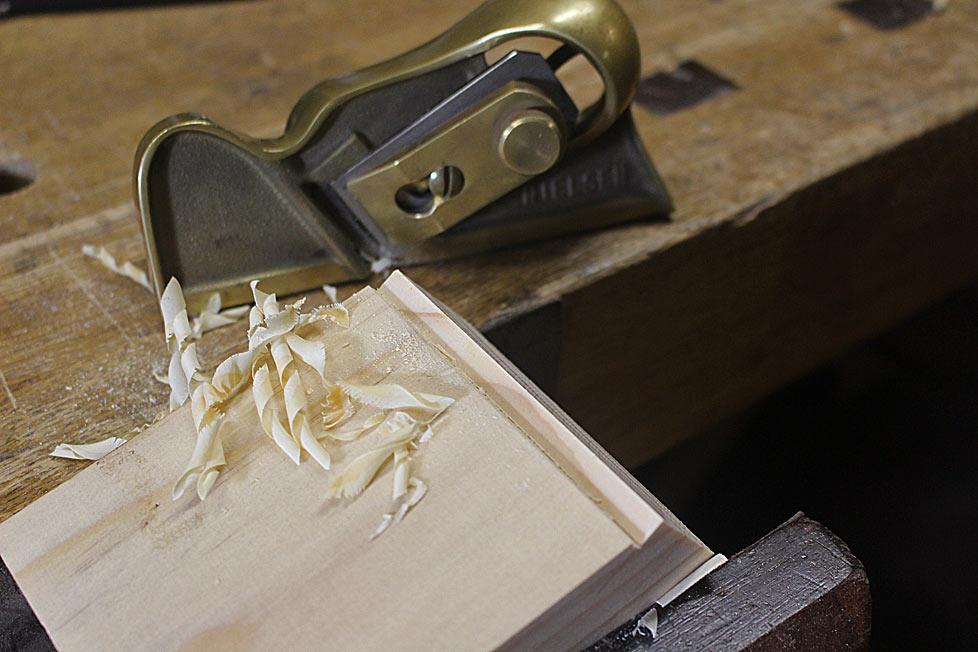
It could have been chiselled, but that is less efficient. A shoulder plane as this would not ensure a square shoulder without extra work to create an absolutely square edge for a tight fit. In the end I came up with this idea to plane it using a LN Edge Plane.
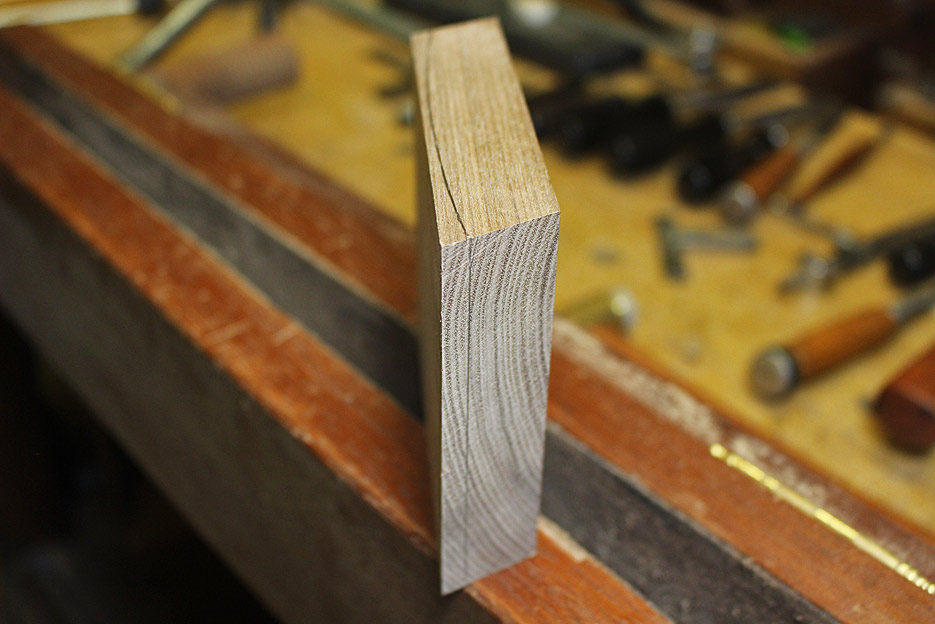
A spacer was attached to plane to the 1/4" depth ...
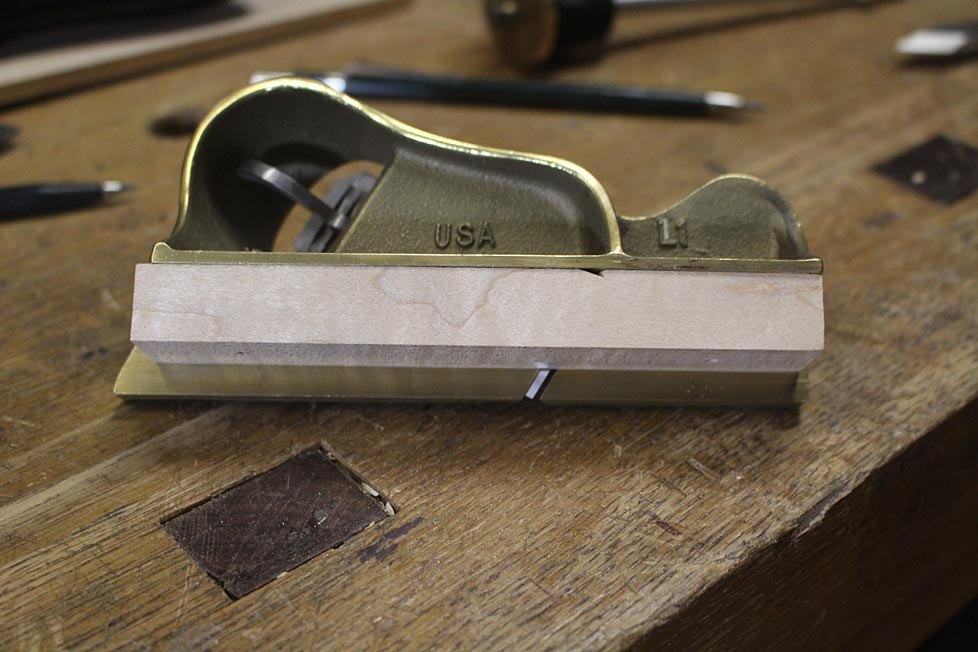
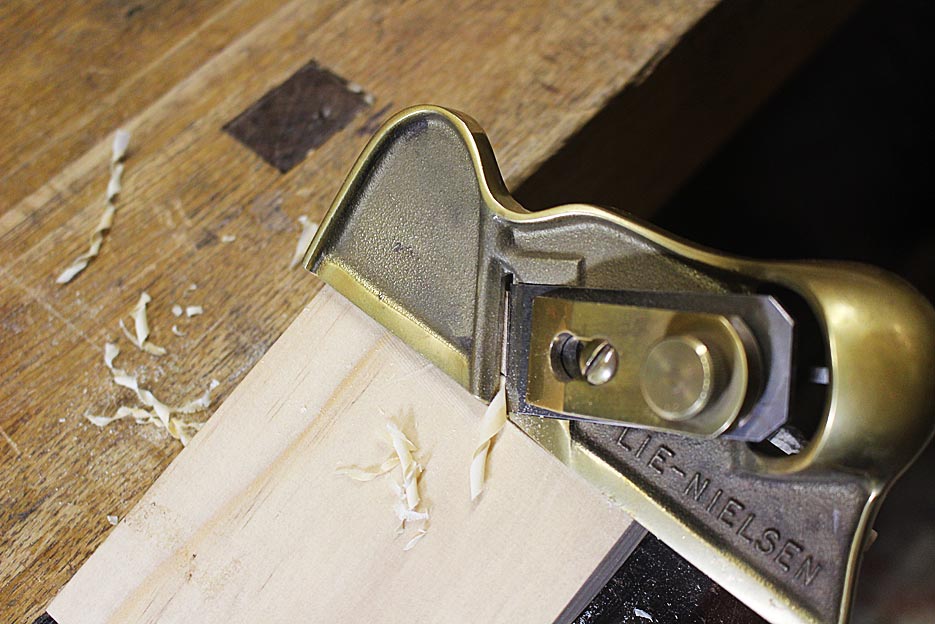
The finish was spot on ...
Transferring
The rear of the tail board, with blue tape used to create a fence ...
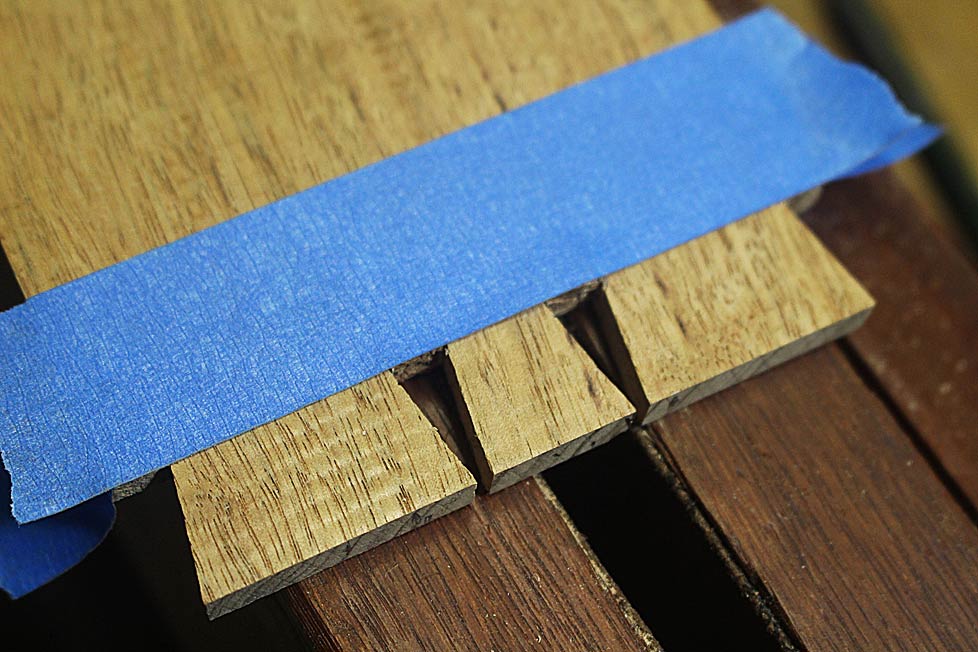
Tails on pins ...
The socket shoulders are deepened to create a socket that undercuts the baseline ..
Because the angle was so difficult to chisel, a trimmer router was used to remove most of the waste ...
... before the remainder was removed ...
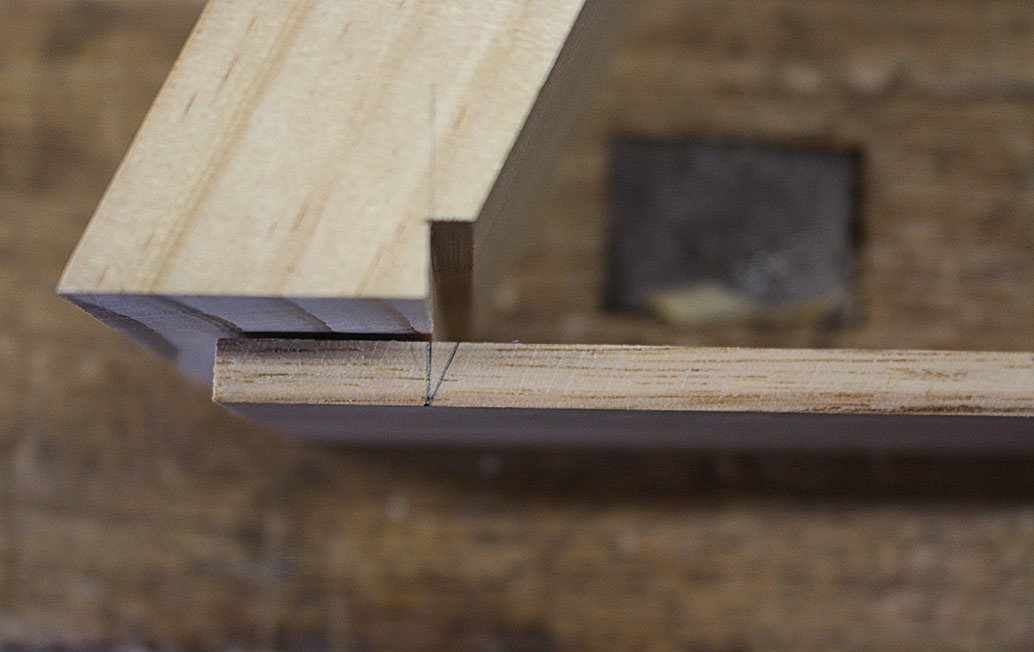
Coming together
The fit ...
The angle ...
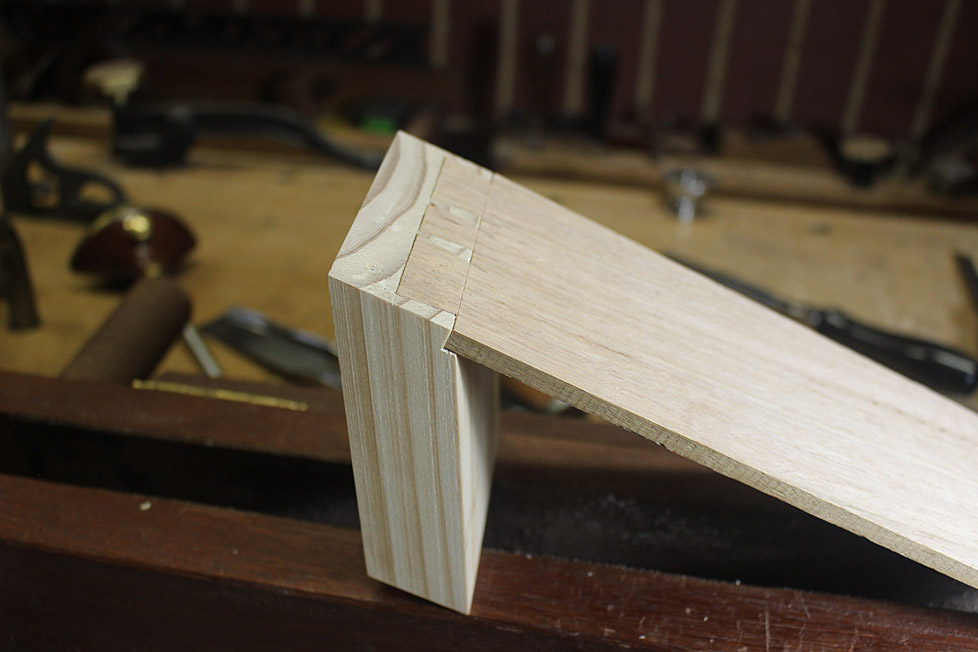
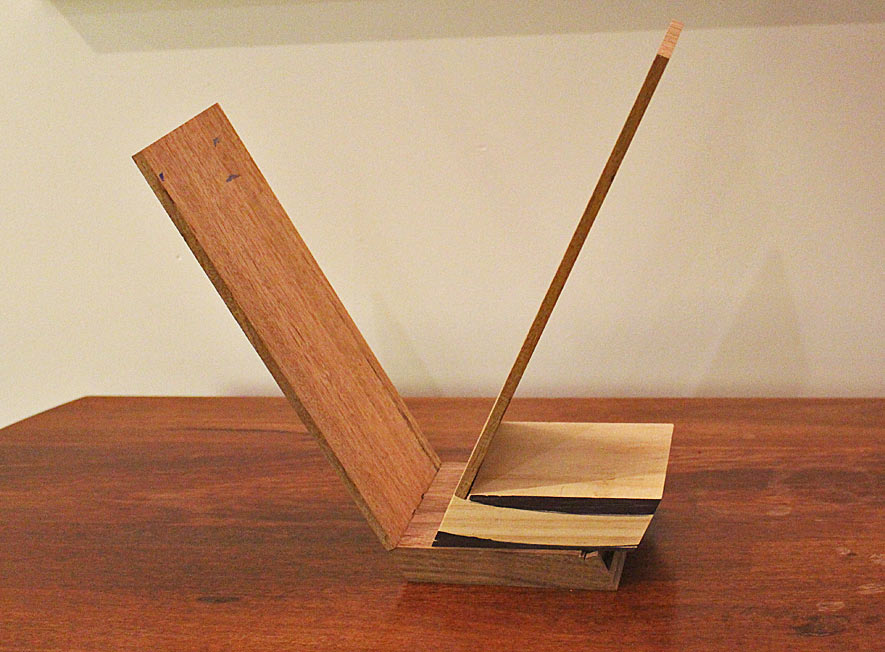
This is a rough idea of what it will look like once the drawer front is shaped ...
The two sides that must be made for all drawers ...
Regards from Perth
DerekVisit www.inthewoodshop.com for tutorials on constructing handtools, handtool reviews, and my trials and tribulations with furniture builds.
-
14th June 2018, 12:55 AM #48
 GOLD MEMBER
- Join Date
- May 2012
- Location
- Woodstock (Cowra)
- Age
- 74
- Posts
- 3,381
One cannot but admire you mindset and skill
The person who never made a mistake never made anything
Cheers
Ray
-
14th June 2018, 01:02 AM #49
Be inspired. Be creative. Be bold.
- Join Date
- Apr 2001
- Location
- Perth
- Posts
- 10,821
You're too kind, Ray.
Thanks
DerekVisit www.inthewoodshop.com for tutorials on constructing handtools, handtool reviews, and my trials and tribulations with furniture builds.
-
14th June 2018, 09:55 AM #50
GOLD MEMBER
- Join Date
- Mar 2004
- Location
- Brisbane (western suburbs)
- Age
- 77
- Posts
- 12,124
Derek, I guess the best way to do anything is the way that seems most intuitive, & as long as it works, that's the main thing. In this case, the choices are very limited! I've only ever made obtuse-angled D/Ts, which present only minor challenges, as you've already demonstrated, but the acute-angled side is a different matter altogether. I'd be wracking my brain to try & think of a way to do it without having to cut a deadly-accurate step on each of the fronts, but I can't see how it's possible to assemble the joint otherwise. You could mark out matching sloped shoulders on your tail boards as you did for the obtuse-angled side, but in this case you couldn't assemble them - they simply won't fit until they are fully in place, & you can't get them in place because the profiles of tails & pins won't match when first presented. Squashing the ends of the tails & hoping they re-form from the moisture in the glue once in place is about the only way it might be possible, but it would be a fraught exercise & bound to end in disaster for a proportion of them (at least in my hands!).
So as far as I can see, you're stuck with cutting that step on each drawer-front. At this stage, I'd be cursing myself roundly & wishing I'd just opted for a flat-fronted chest.......
Cheers,IW
-
14th June 2018, 11:00 AM #51
Dances with splinters
- Join Date
- Jul 2005
- Location
- Oberon, NSW
- Age
- 63
- Posts
- 13,360
Derek, I enjoy watching your WIPs primarily because I admire your sense of aesthetics but there's one thing that troubles me about this approach...
As I see it, the intersection between drawer side and the back of the front will be kept perpendicular to the drawer sides? So, as the joints move away from the centre blade the step will be visually more and more obvious on the top of the drawer front once it is shaped to curve?
That niggles me... there's something in my head that says the tops of the drawer fronts should form a nice, smooth, flowing line.
I understand the reasons you're going this way - heaven only knows I have enough problems with normal dovetails - but is there any way you can see to maintain the top line on the inside of the drawer fronts?
One workaround I can see would be to make the drawer sides a few mm shorter than the front, so you could stop the step and the extra height at the front would conceal the angle. But that's not really in line with what I think is your original concept. (Hmmm... maybe glue a laminate on top of the drawer sides to build them back up to height after assembly?)
Sorry to butt in like this, but I'm curious as to your thoughts on this? Given the care you put into your builds I know you must've considered it...
- Andy Mc
-
14th June 2018, 02:40 PM #52
Senior Member
- Join Date
- Jan 2017
- Location
- Sunshine Coast
- Age
- 64
- Posts
- 212
Derek, I had never considered you were going to concave-curve the insides of the drawer fronts as well.
No rest for the wicked.
-
15th June 2018, 12:56 AM #53
Be inspired. Be creative. Be bold.
- Join Date
- Apr 2001
- Location
- Perth
- Posts
- 10,821
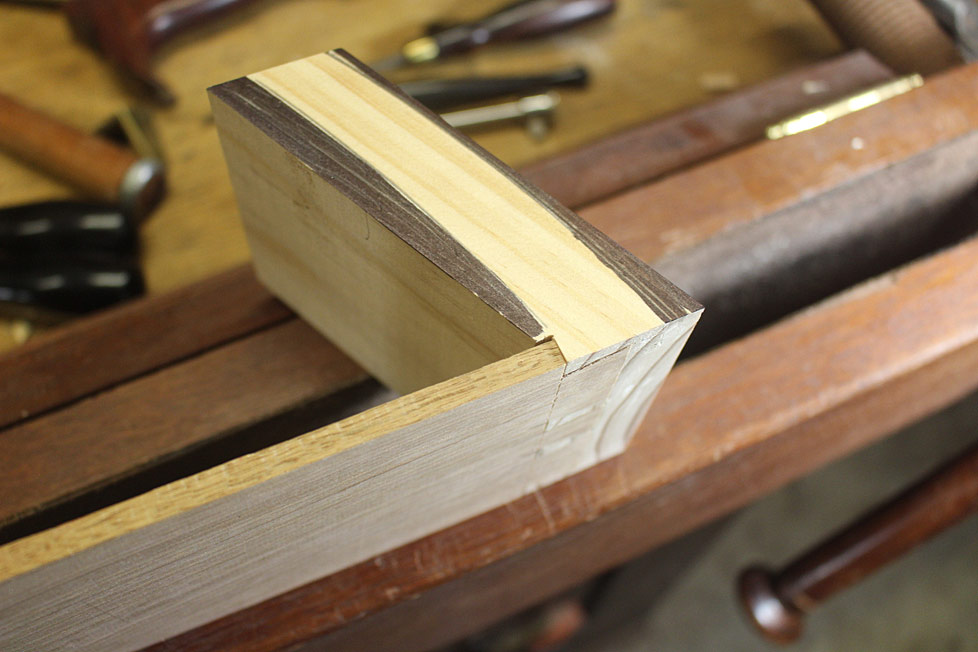
Skew, the inside curve should be step-less. Originally Posted by Skew ChiDAMN!!

See the picture I posted earlier. Here the inside is to be curved all the way through to the drawer side (the colouring in was not well done at the intersection and may have confused) ...
Well, that is the plan anyway ...
Regards from Perth
DerekVisit www.inthewoodshop.com for tutorials on constructing handtools, handtool reviews, and my trials and tribulations with furniture builds.
-
15th June 2018, 01:00 AM #54
Be inspired. Be creative. Be bold.
- Join Date
- Apr 2001
- Location
- Perth
- Posts
- 10,821
Graham Originally Posted by graham.murfett
I am trying to be wicked.
Always waiting for it to bite me at some stage.
Regards from Perth
DerekVisit www.inthewoodshop.com for tutorials on constructing handtools, handtool reviews, and my trials and tribulations with furniture builds.
-
20th June 2018, 02:19 AM #55
Be inspired. Be creative. Be bold.
- Join Date
- Apr 2001
- Location
- Perth
- Posts
- 10,821
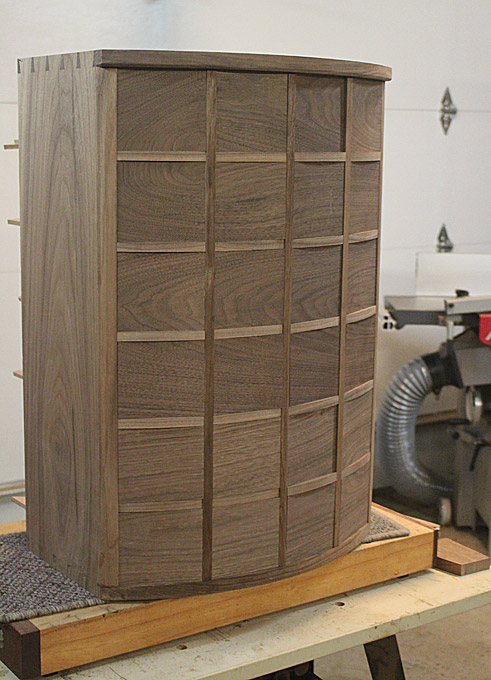
Beginning the drawers
This is just a taste of what I will be doing for a few more weekends.
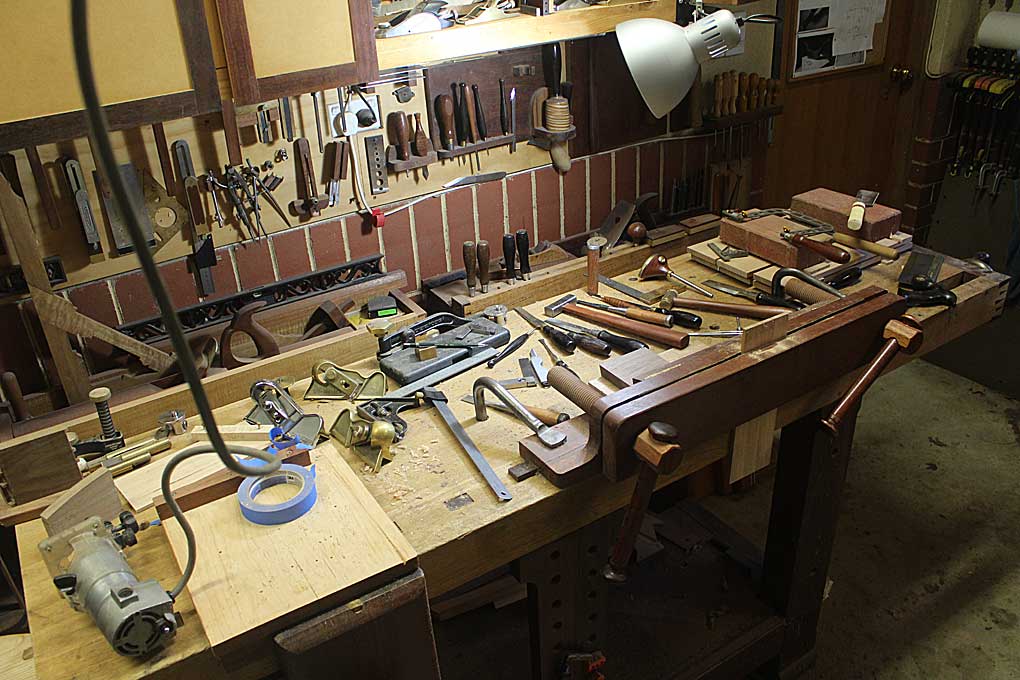
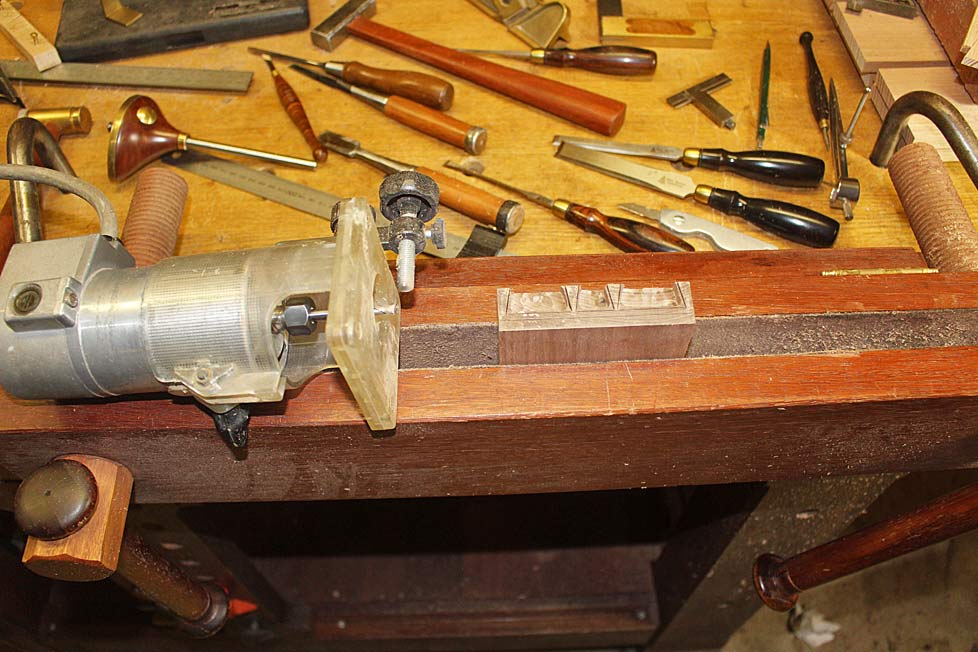
A bench shot for those that like to see how others work ...
Below I have a few shots of the dovetailing (again). These are more to show specific strategies used, rather than dovetailing as a procedure.
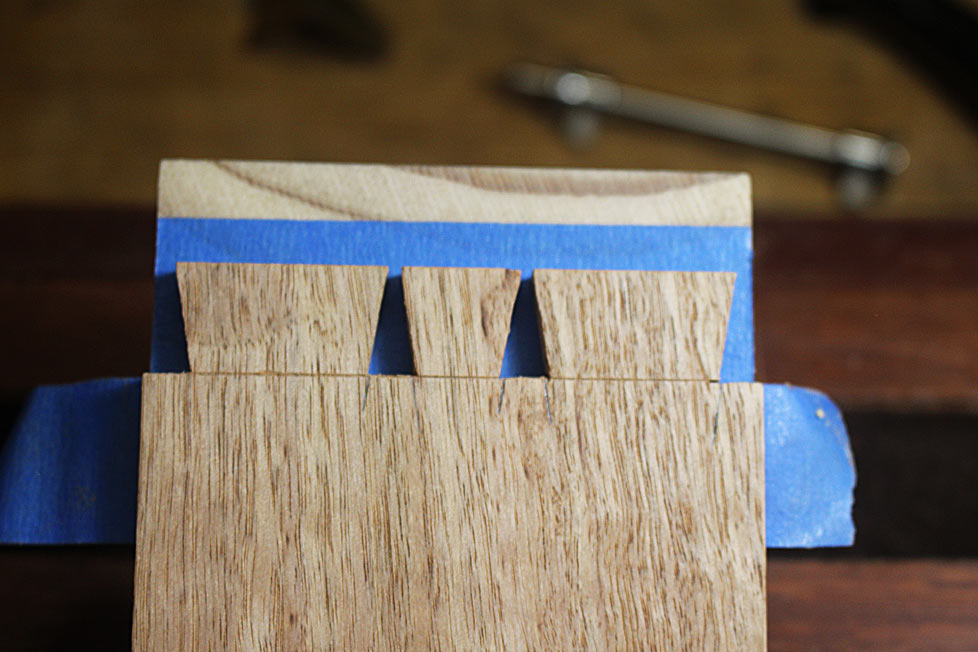
The drawer fronts are moved a couple of mm past the front of the drawer blades, and marked all round ...
In an early post I showed how a bevel was formed on the drawer front to create a square junction with the drawer side. The bevel is seen below the blue tape ...
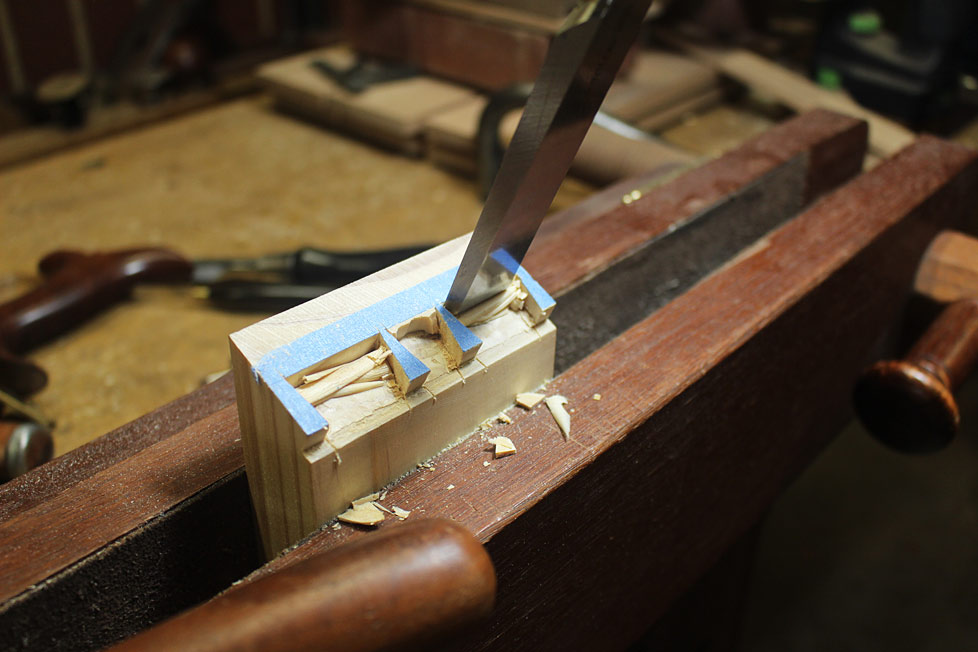
The ends of the drawer front angle, and it is not possible to use a jig to align it with a side. I never do this anyway, and simply use a wide chisel ...
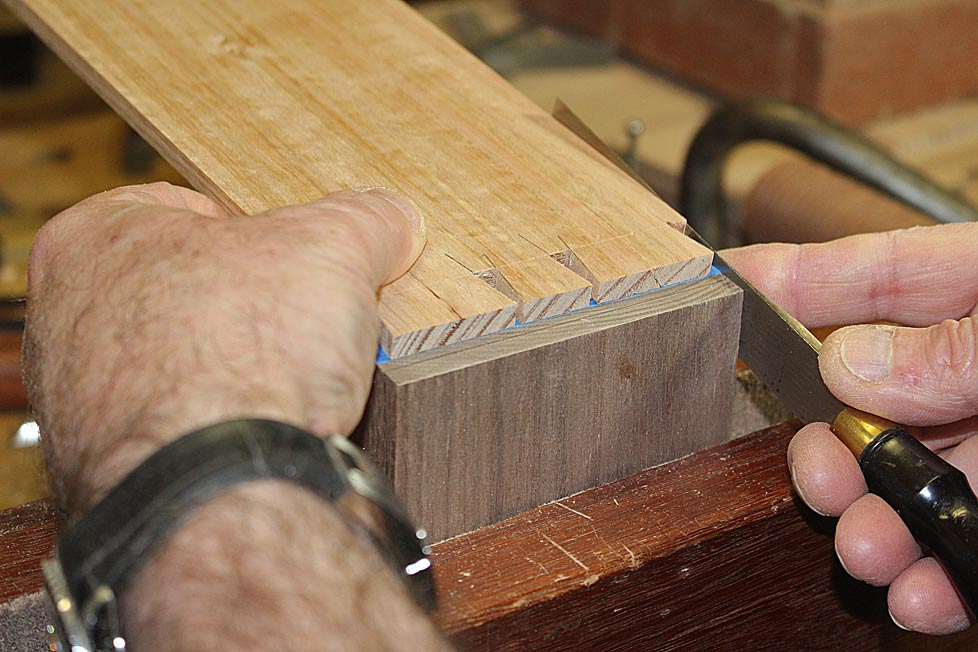
It's a bit of a balancing act, but the blue tape acts like a non slip, and the knife only has to make one cutting stroke to sever the layer of tape. This reduces the chance of movement and error ...
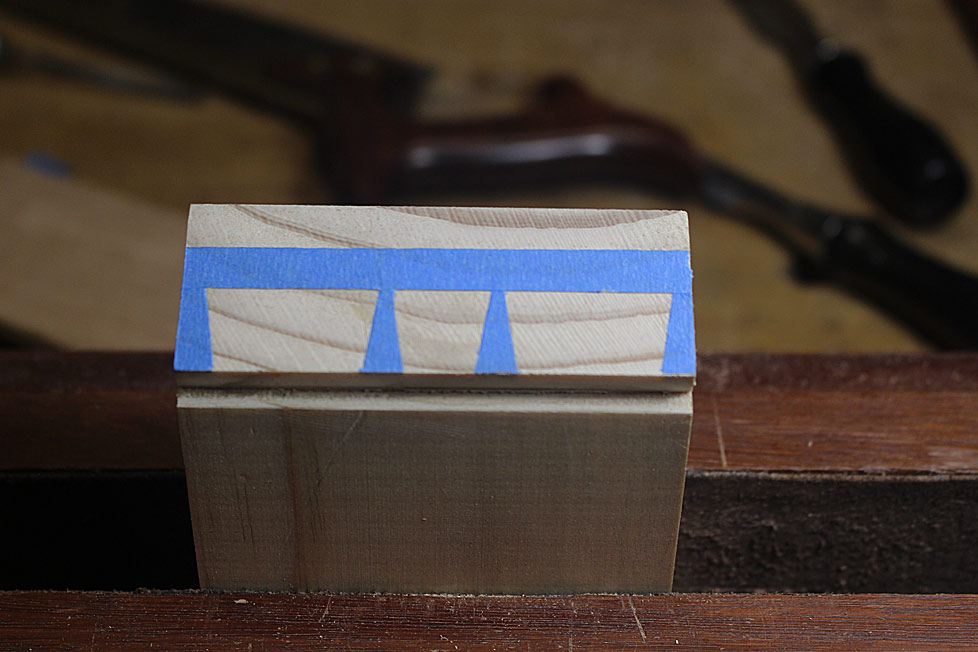
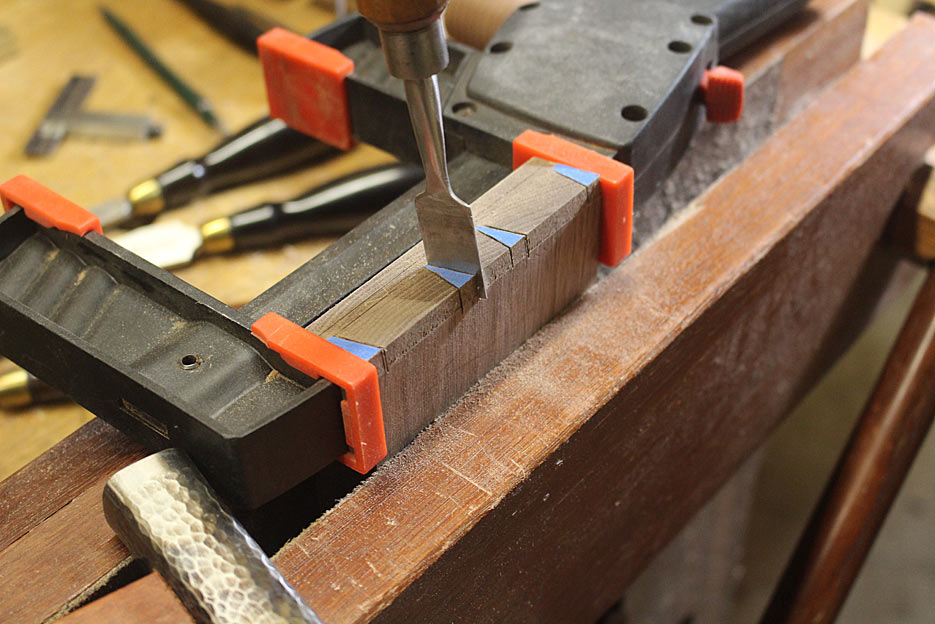
The kerfs are sawn, and then deepened with a kerfing chisel. Note that the ends of the board are supported by a clamp to prevent splitting ...
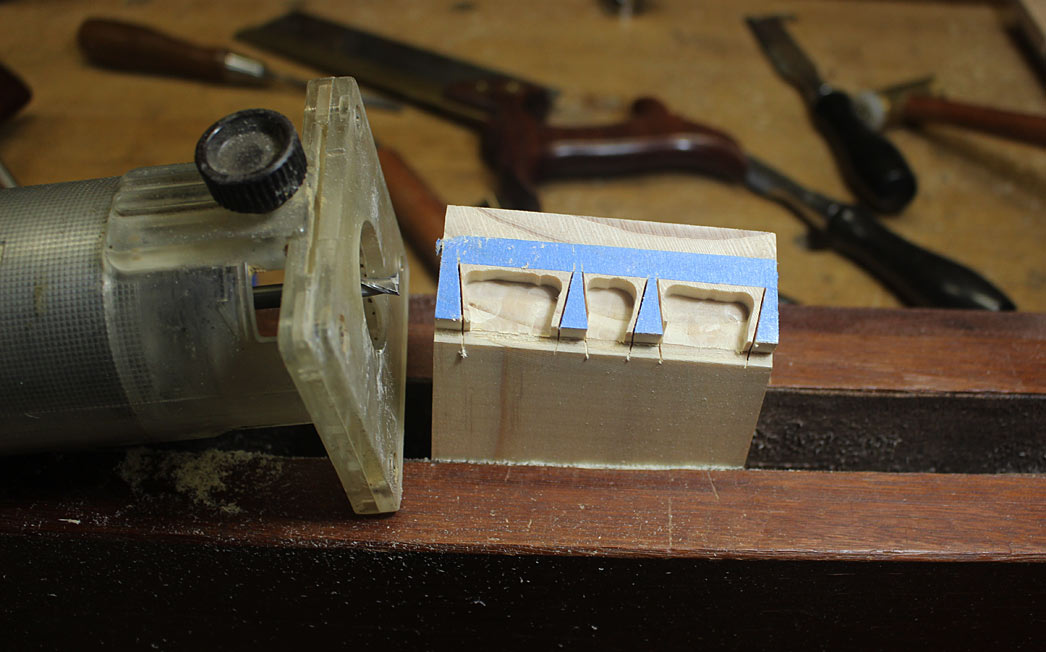
Rather than chop out the waste, I used a trim router to remove move of it. This saved a lot of time ...
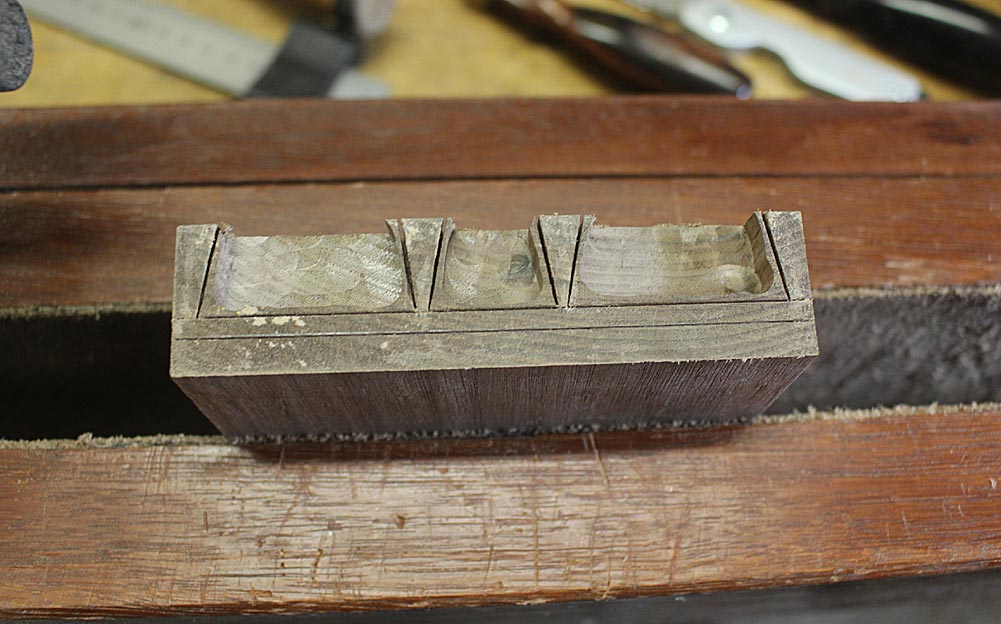
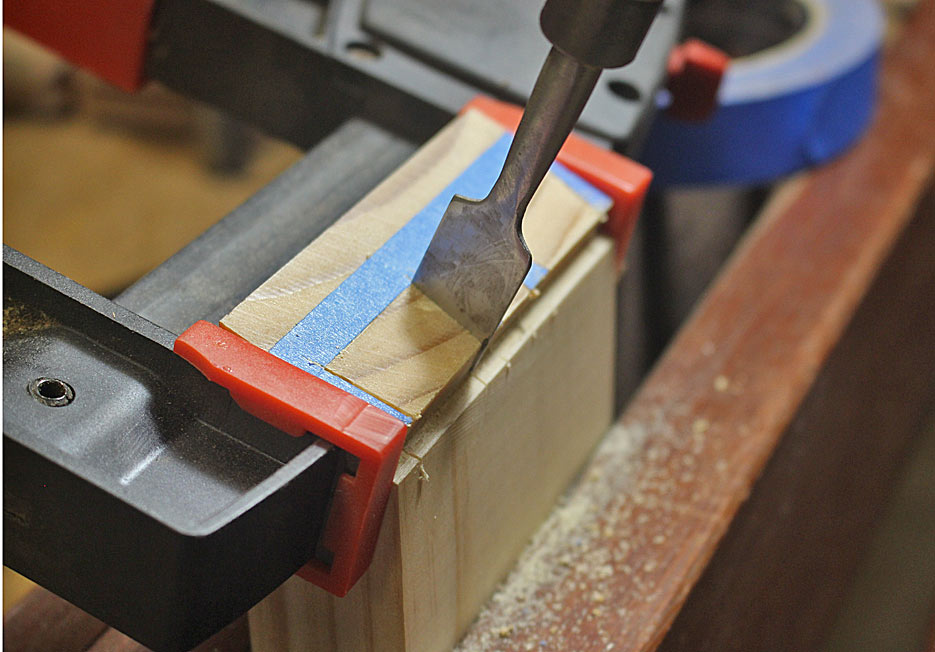
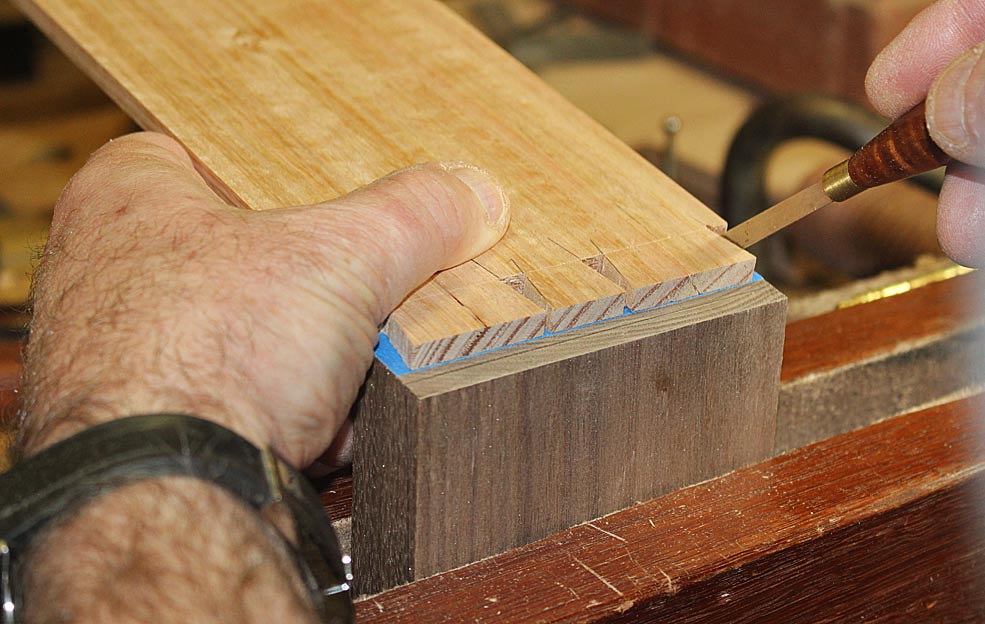
When removing the remaining waste, I found that the thinner blades of the Blue Spruce "dovetail" chisels worked best to pare away thin slices to the line..

The Blue Spruce fishtail chisel is my favourite for clearing the corners of sockets ...
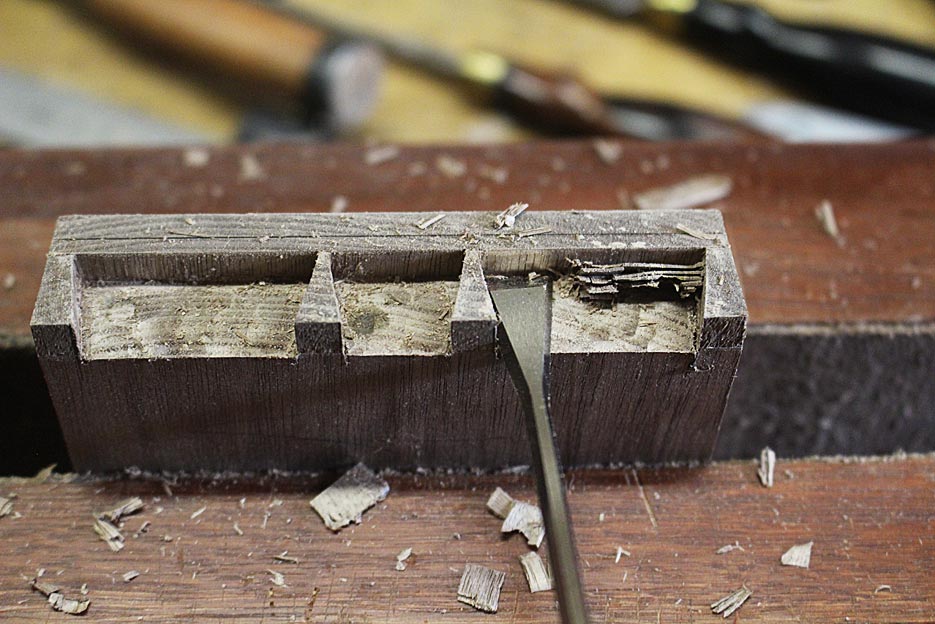
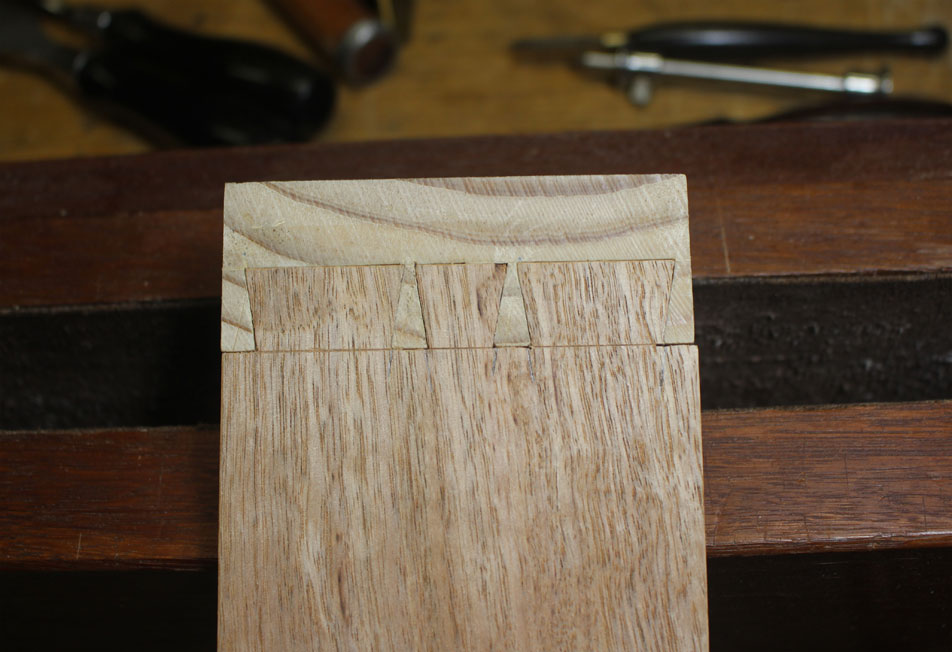
The completed socket ..
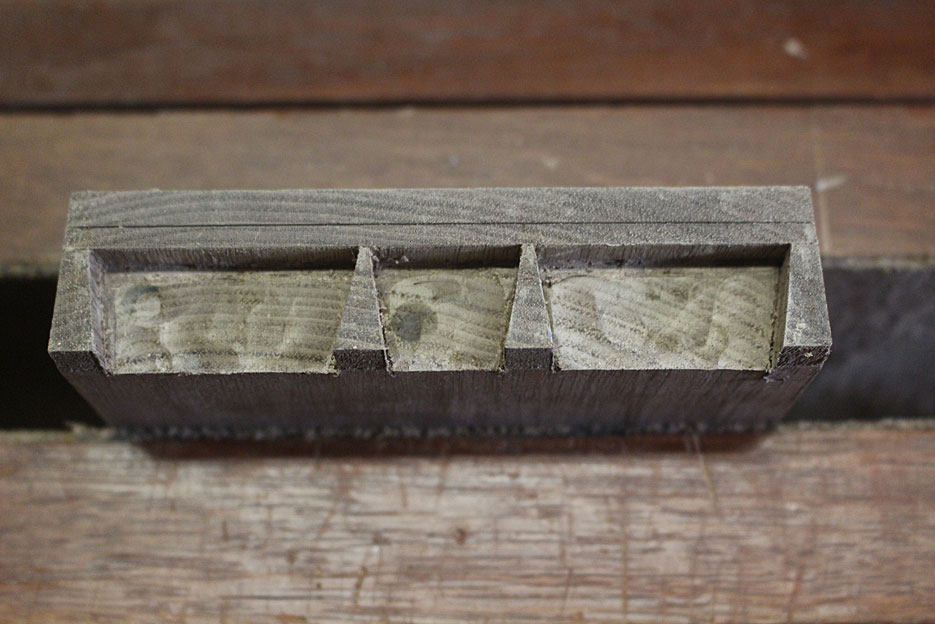
I counted on the parts going together off the saw, that is, no fine tuning for a fit. There is just not enough time for correcting the fit. This was the last drawer for the weekend. Much the same as the others. Just pushed together - no clean up ...
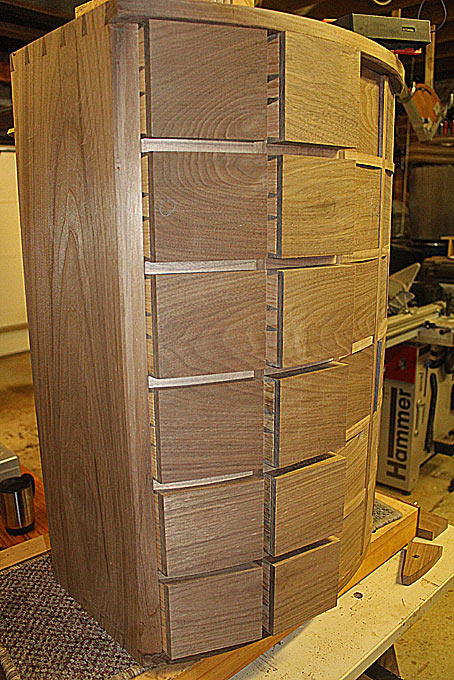
This was the first row, shown here to get a better view of the design ...
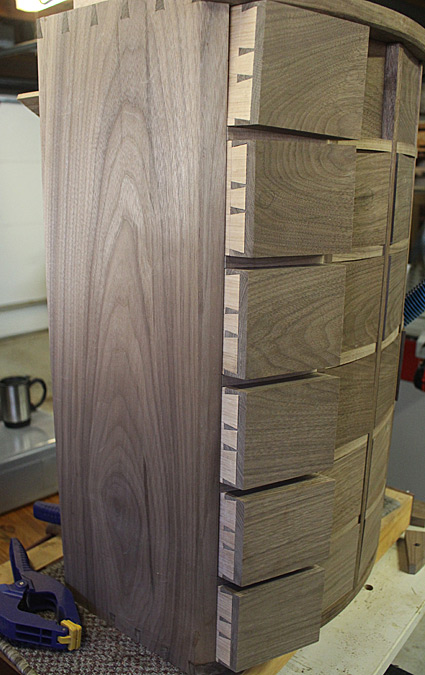
This is two rows - of drawers dovetailed on one corner only. And these twelve required an average of 1 hour each to complete ...
The next weekend should see the remaining drawers complete this dovetailed end. I am hoping that I shall find a way to speed the time taken for dovetailing, but I am estimating that it will require a further 3 weekends to complete the drawers.
Regards from Perth
DerekVisit www.inthewoodshop.com for tutorials on constructing handtools, handtool reviews, and my trials and tribulations with furniture builds.
-
20th June 2018, 09:59 AM #56
GOLD MEMBER
- Join Date
- Mar 2004
- Location
- Brisbane (western suburbs)
- Age
- 77
- Posts
- 12,124
Good to see I'm not the only one who gets their bench a bit cluttered when I'm in full cry.......
IW
-
20th June 2018, 12:30 PM #57
Senior Member
- Join Date
- Jan 2017
- Location
- Sunshine Coast
- Age
- 64
- Posts
- 212
More great work Derek. Are you keeping track of all your time? It will be interesting to know the total hours.
Shiploads I expect
-
20th June 2018, 01:58 PM #58
GOLD MEMBER
- Join Date
- Feb 2016
- Location
- Canberra
- Posts
- 5,125
These posts are simply incredible. Such talent.
-
20th June 2018, 04:59 PM #59
Be inspired. Be creative. Be bold.
- Join Date
- Apr 2001
- Location
- Perth
- Posts
- 10,821
Graham, it is not the amount of time that I have spent that would be a concern. Rather, it is the amount of time that I still need to spend to finish! I really want to be complete by the end of July. It is going to be very tight! Originally Posted by graham.murfett

Regards from Perth
DerekVisit www.inthewoodshop.com for tutorials on constructing handtools, handtool reviews, and my trials and tribulations with furniture builds.
-
20th June 2018, 05:28 PM #60
GOLD MEMBER
- Join Date
- Feb 2016
- Location
- Canberra
- Posts
- 5,125
Can I be greedy and ask that you shoot a video of you doing one of the drawers? No need for talk, just you working. It would be a pleasure to watch so skillful a person doing this....

 Reply With Quote


Similar Threads
-
Sea Chest
By LR09WA in forum WOODWORK - GENERALReplies: 14Last Post: 11th June 2011, 08:00 PM -
Ice Chest
By 2sharp in forum FINISHINGReplies: 6Last Post: 22nd January 2008, 04:30 AM -
Ice Chest
By rod1949 in forum Links to: TIMBER & HARDWARE SUPPPLIERSReplies: 1Last Post: 15th September 2004, 08:13 PM -
Chest
By GRS in forum WOODWORK PICSReplies: 8Last Post: 7th July 2004, 12:26 PM -
Apothecary Chest
By Paul O'H. Ingersoll Canad in forum WOODWORK PICSReplies: 4Last Post: 28th February 2004, 12:16 AM
