

 Thanks:
  Likes:
  Needs Pictures: 0
 Picture(s) thanks:
Results 31 to 45 of 67
Thread: Coffee table for my nephew
-
1st January 2019, 07:28 PM #31
 Be inspired. Be creative. Be bold.


- Join Date
- Apr 2001
- Location
- Perth
- Posts
- 10,820

Thanks Ian. If you look at that construction, you can see what the carcase looks like without mitred corners. What do you think?
Regards from Perth
DerekVisit www.inthewoodshop.com for tutorials on constructing handtools, handtool reviews, and my trials and tribulations with furniture builds.
-
1st January 2019 07:28 PM # ADSGoogle Adsense Advertisement
- Join Date
- Always
- Location
- Advertising world
- Posts
- Many
-
2nd January 2019, 05:10 AM #32
GOLD MEMBER
- Join Date
- Feb 2003
- Location
- back in Alberta for a while
- Age
- 68
- Posts
- 12,006
what do I think? Originally Posted by derekcohen

I quite like the way the vertical side is extended all the way to the top of the desk via the last DT pin. It sort of retains the crispness of the corner, while the rounding softens the overall feel of the piece. The scale of the piece is also important. The desk is tall enough to benefit from the vertical continuation of the sides so that the top appears to sit inside, rather than on top of, the sides. I also think that the use of maple is integral to the look and appeal of the piece. But then, a well executed joint is a pretty joint.
I meant the example to prompt you to reconsider the need to round the inside corners of your table.
While I'm generally reluctant to attempt a critique of pieces displayed on-line, the prototype table admired by your nephew and his fiance is a narrow sinuous band bent into an open ended form. The negative space so created contains a square sided drawer.
In your interpretation, the form is much more box like and while I think rounding the external corners will soften the piece, making it appear less angular and therefore formal, I also think that, because of the tight radius, rounding the internal corners would be largely superfluous. The corners would be obviously round, but they would not have the sinuous flow found on the prototype. Nor would they create the same sense of enclosed open space.
In answer to your "what do I think?"
I think that your table will look better if you round the outside of the corners, but leave the insides square.
I also think that the top and sides are a little on the heavy side. (sorry)regards from Alberta, Canada
ian
-
2nd January 2019, 12:24 PM #33
Be inspired. Be creative. Be bold.
- Join Date
- Apr 2001
- Location
- Perth
- Posts
- 10,820
Ian, my own preference is on the fence - I could do the corners either way. However, the choice made is following the preference of my nephew, which is for rounded ends.
I have found a way to make hollowed filets for the inside corners. They are restrained or, at least, the filet is small. This will appear like finding middle ground.
Regards from Perth
DerekVisit www.inthewoodshop.com for tutorials on constructing handtools, handtool reviews, and my trials and tribulations with furniture builds.
-
2nd January 2019, 12:54 PM #34
GOLD MEMBER
- Join Date
- Feb 2003
- Location
- back in Alberta for a while
- Age
- 68
- Posts
- 12,006
Derek, in my earlier reply I neglected to wish you and your family Happy New Year and all the best for 2019 -- very remiss and rude of me and I do apologise.
The nephew's table.
it's very difficult to discuss aesthetics over the net -- drawing curvy lines in the air and cupping hands just so, just doesn't translate that well in text form.
that said, I suggest you round the outside corners and live with the piece a few days -- perhaps even put it on it's base -- before embarking on molding the internal corners. I'm not sure how the right angles of the drawer box and drawer face will sit with sharply curved internal corners and would want the piece to sit with me for a couple of days before committing either way.
My own tastes are ever evolving and for this piece I'm starting to think about the possibility of incorporating a contrasting timber or texture for the drawer faces -- I assume the drawer will be double ended?
I know you are working to the preferences of your nephew and his finance, but unlike the Wenger chair, your build is an interpretation of the model, not a copy, and as such can be different in a number of subtle and not so subtle ways. In particular the corners are a major departure from the prototype that to my eye change the shape of the space inside the form. Further I don't know to what extent you have discussed the design with the customers. In my experience this discussion can reveal what are the key elements of a design that really attract the customer and what elements are "just there" but don't really add to the customer's expected enjoyment of the piece. I'm starting to think that rounded (or filleted) internal corners will demand a similar treatment for the drawer box.regards from Alberta, Canada
ian
-
2nd January 2019, 09:18 PM #35
Be inspired. Be creative. Be bold.
- Join Date
- Apr 2001
- Location
- Perth
- Posts
- 10,820
Hi Ian
No sweat about the design elements. This is all so subjective, although I have come to trust your judgement and instincts over the years.
I have chosen to go with the original plan ... just finishing up the corners as we speak. I'll post later. I like the effect, as does Lynndy. If the nephew and fiance do not, they can bloody send it back!
My very best wishes for 2019. Are you planning a trip back to Oz? The wedding is in Sydney at the start of February (going to be bigger than Ben Hur, knowing my brother and SIL).
Regards from Perth
DerekVisit www.inthewoodshop.com for tutorials on constructing handtools, handtool reviews, and my trials and tribulations with furniture builds.
-
3rd January 2019, 01:28 AM #36
Be inspired. Be creative. Be bold.
- Join Date
- Apr 2001
- Location
- Perth
- Posts
- 10,820
When we left off, it was with the carcase together ...

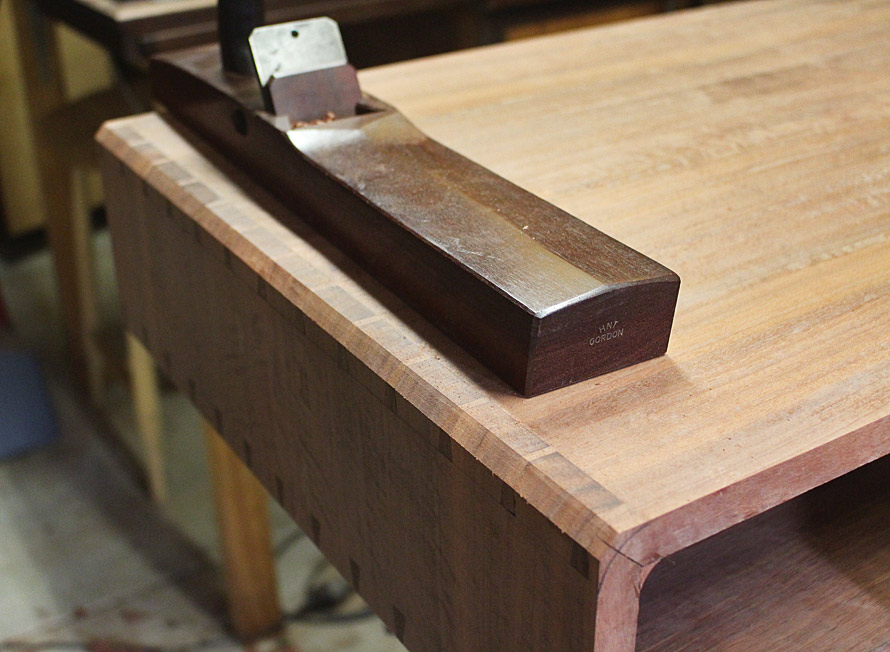
Step 1: clean up the carcase
Low angle plane for the end grain and cross grain ends ..
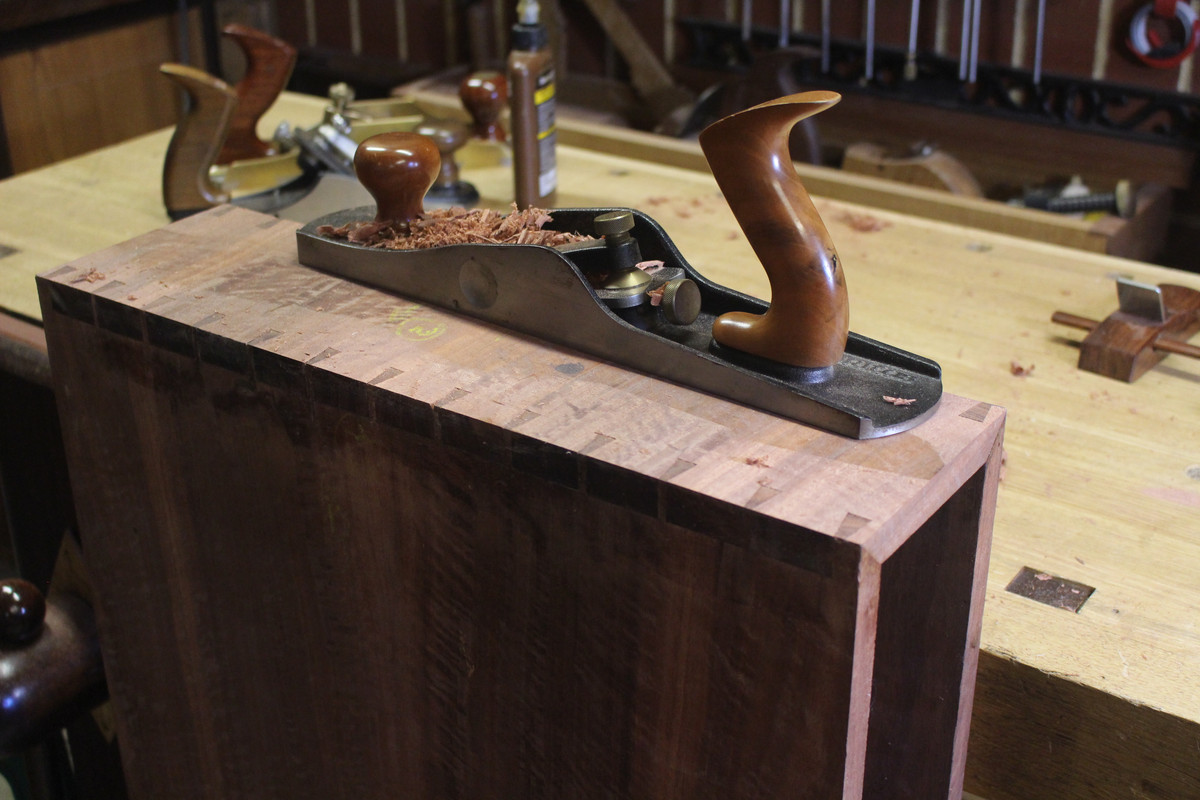
Then the face grain top and bottom ..
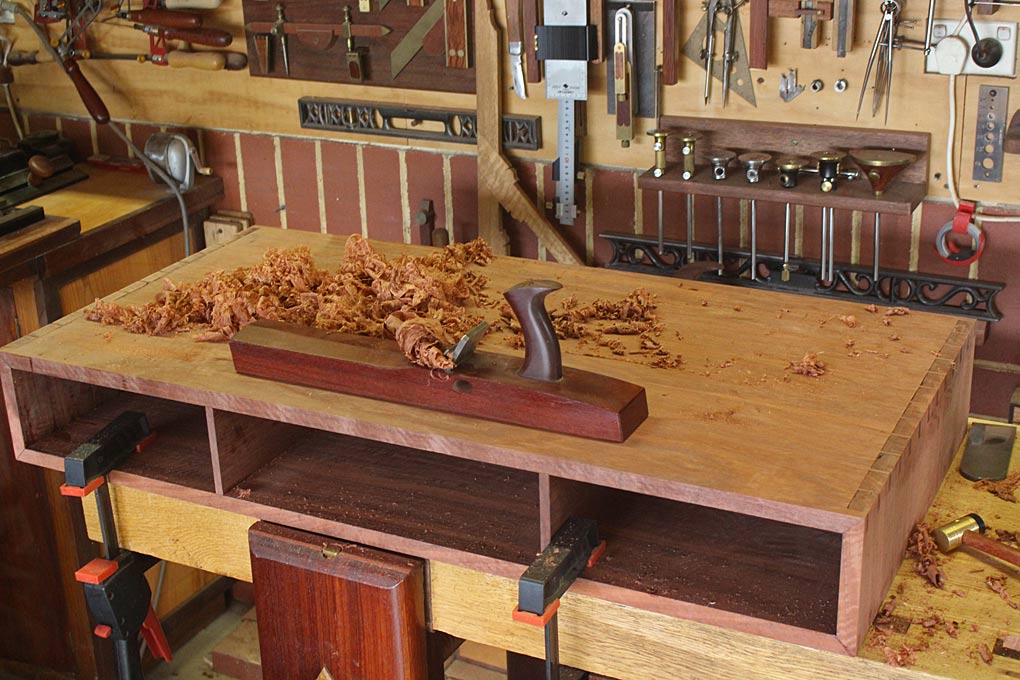
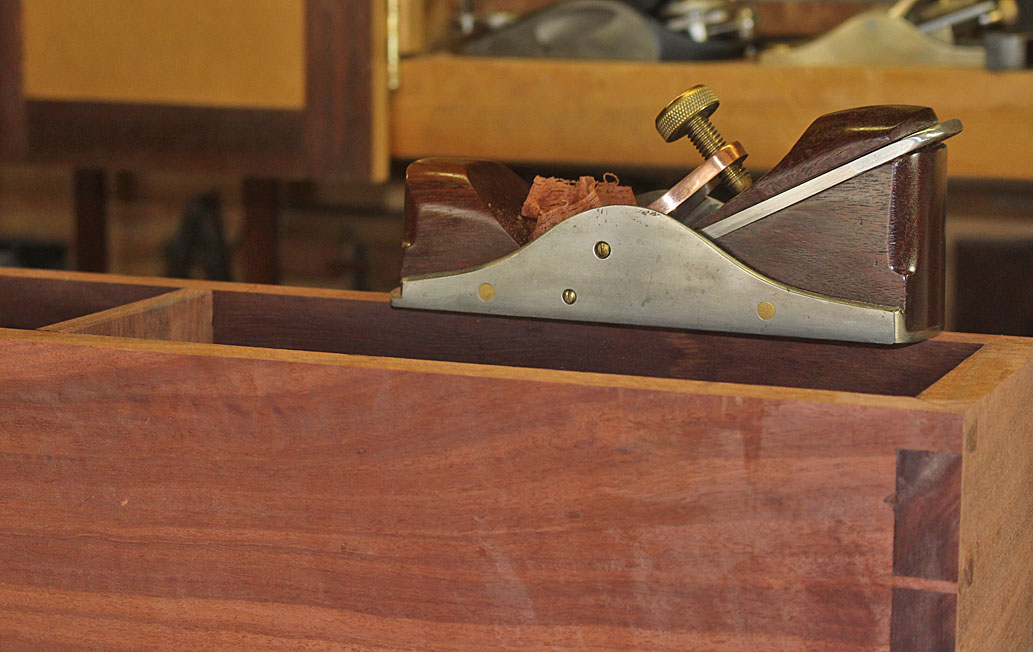
And I had a chance to use a small BU infill smoother I made several years ago on the edges. Perfect for one-handed smoothing ...
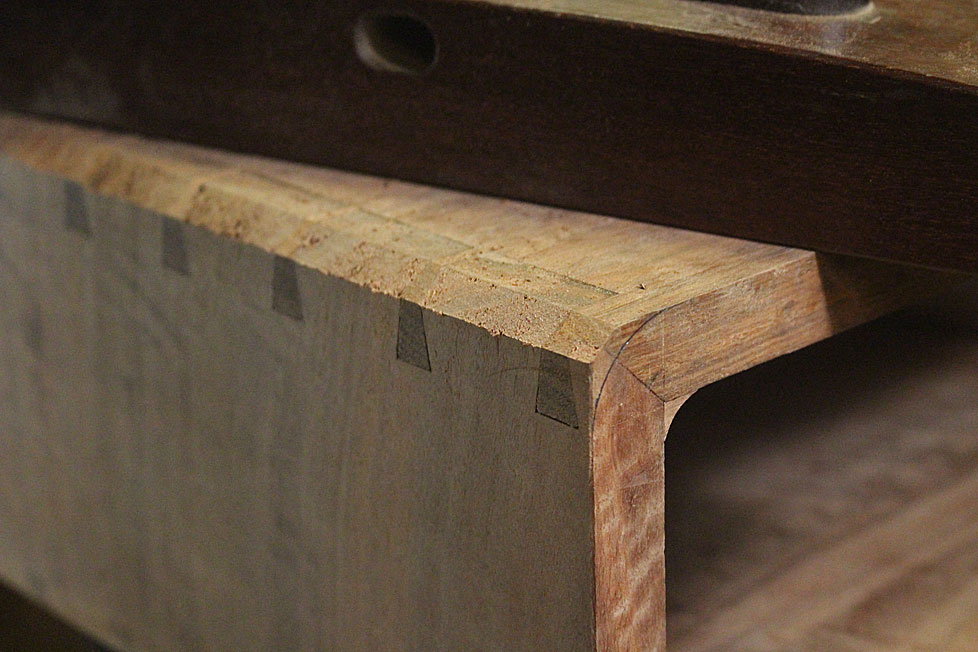
Step 2: Time to round the ends.
In the test piece, it looked like this ..
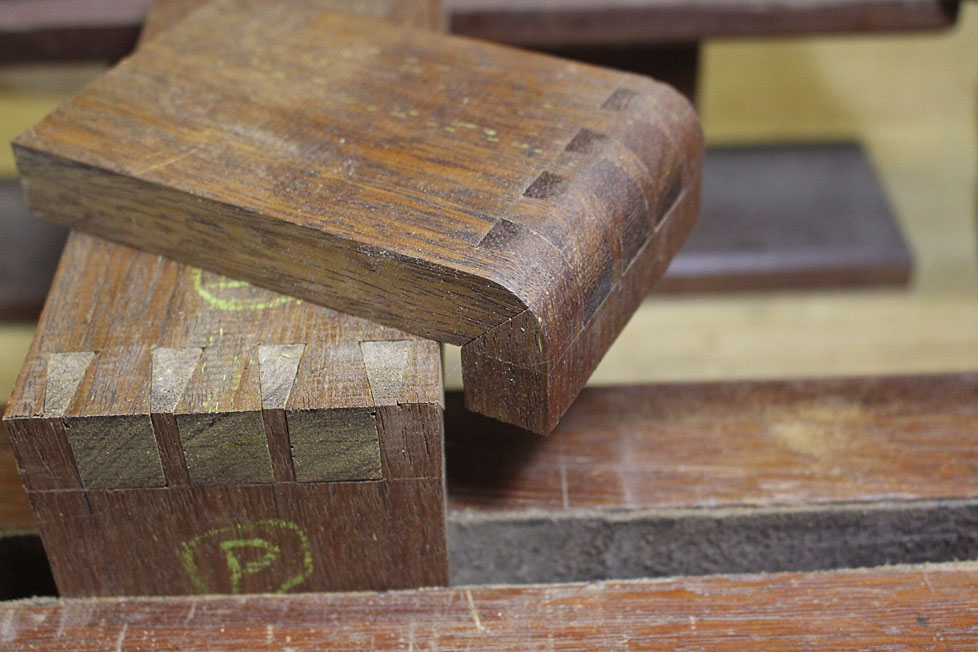
This lacked the inside hollowed filet. The build today starts with the making of the filet.
The first decision was that this had to be made of end grain. If it was made of side grain, the sides of the filet would be end grain, which would clash - darken - with the side grain of the carcase when a finish is applied. Fortunately, I had this one last offcut. Just enough ...
The filet is triangular with a hollow on the outside. I first tried shaping this with a hollow plane on a sticking board, having sliced off a triangular section on the table saw. It was impossible to do. No way to hold the wood and plane it. I tried a number of variations. I won't go there. They were all impossible. You do it, you're a better man - or woman - than me. You're probably better anyway
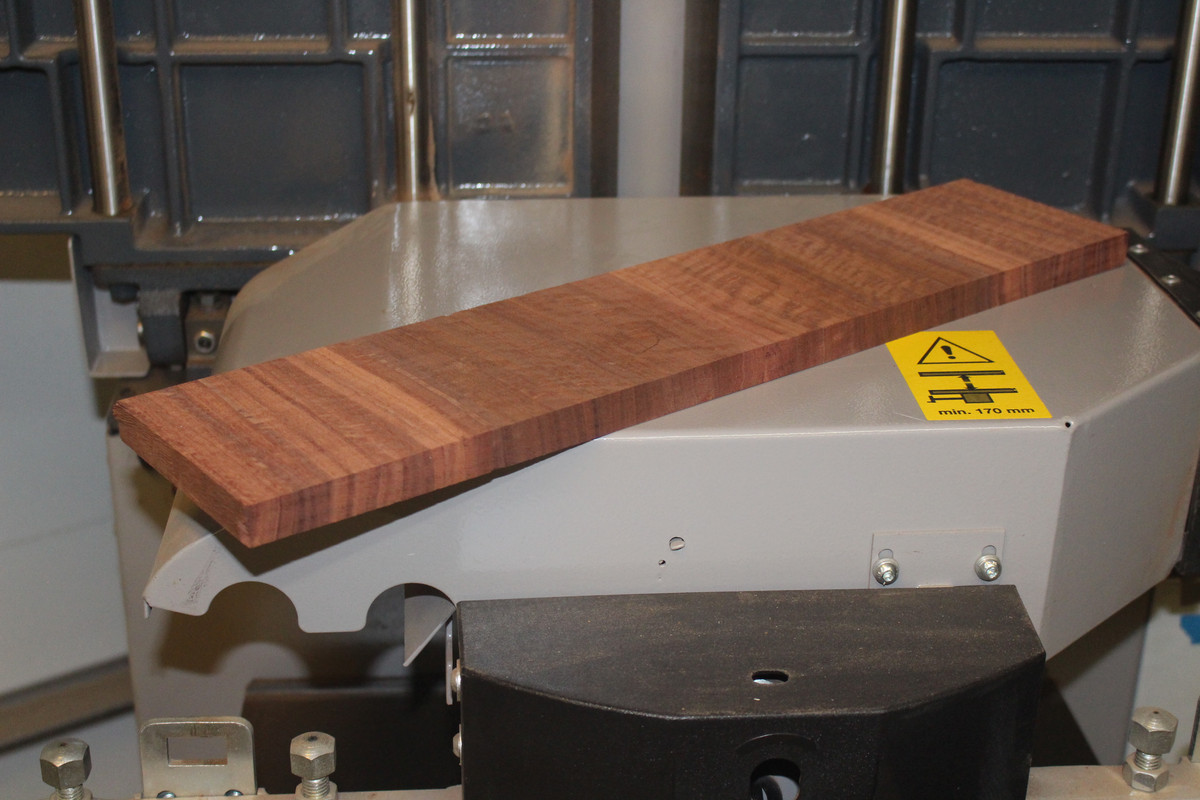
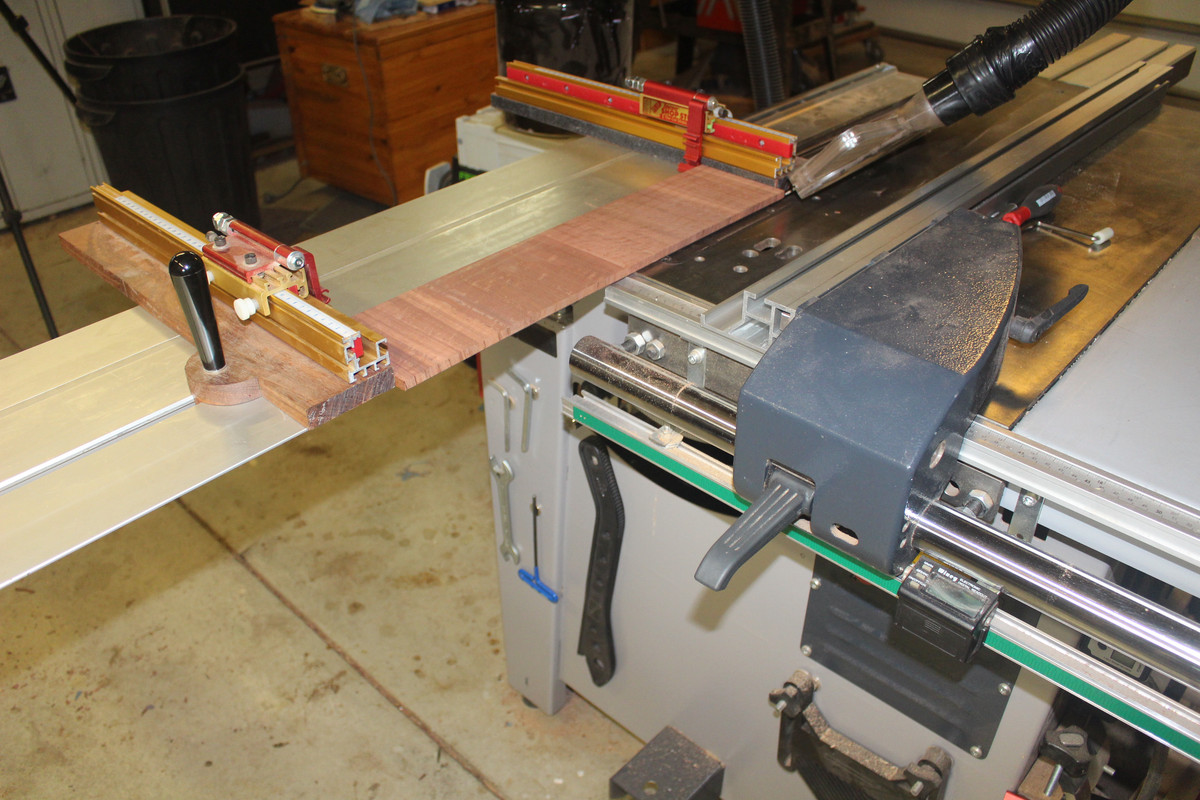
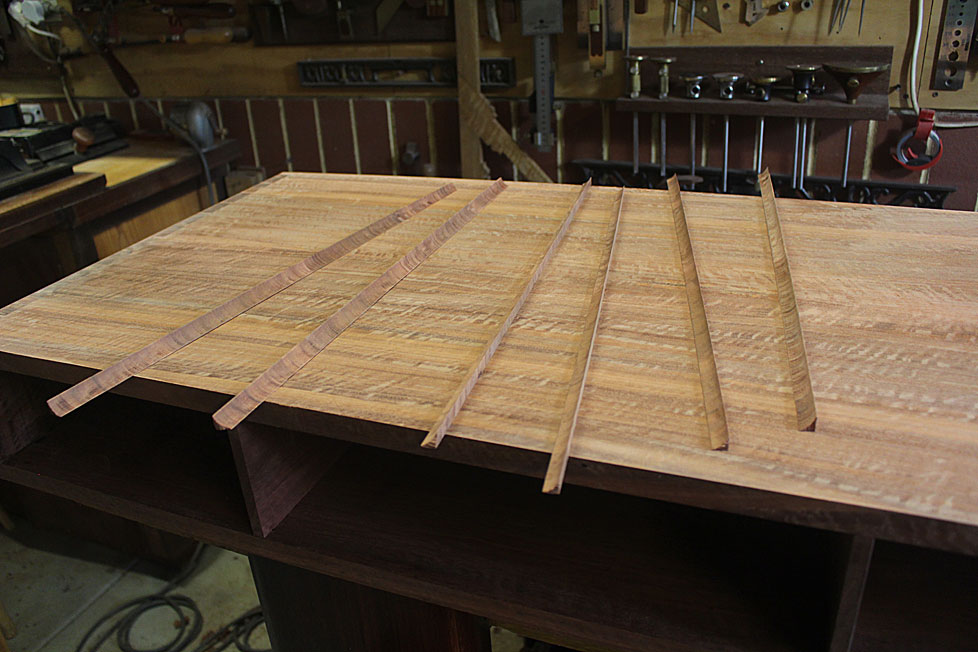
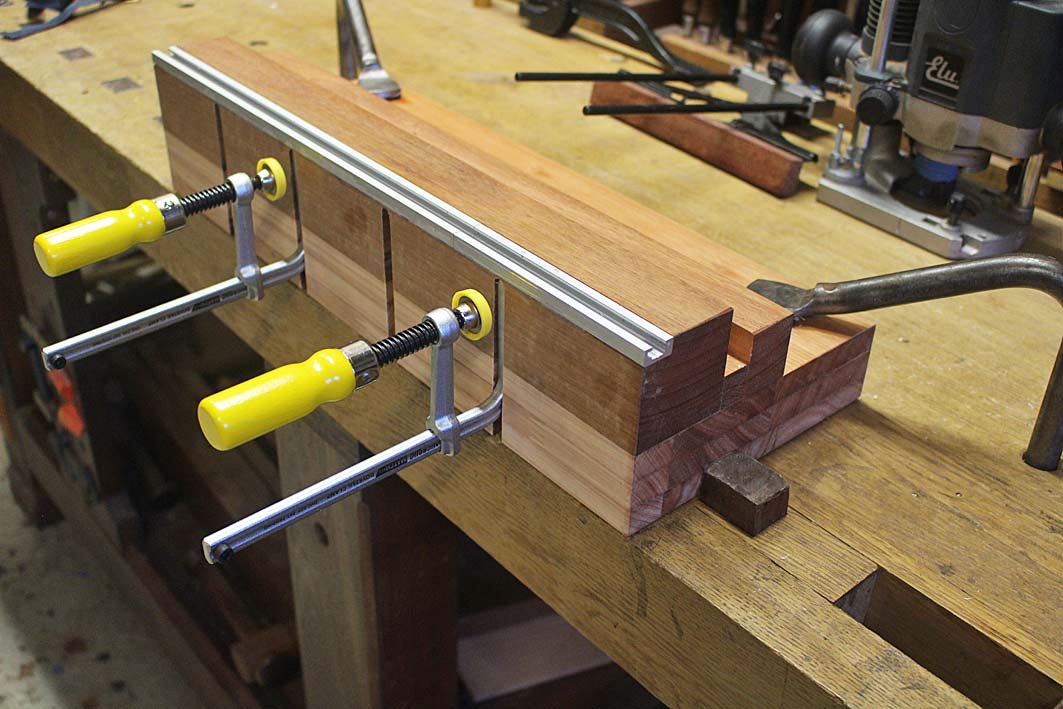
Finally I came up with this. Start with ripping a 45 degree bevel on the table saw (slider here, with board held in a Fritz and Franz jig) ...
The router table is set up with a round nose bit ...

The mitre can be run past this and the bit will shape a round hollow ..


Now saw this off on the table saw ...
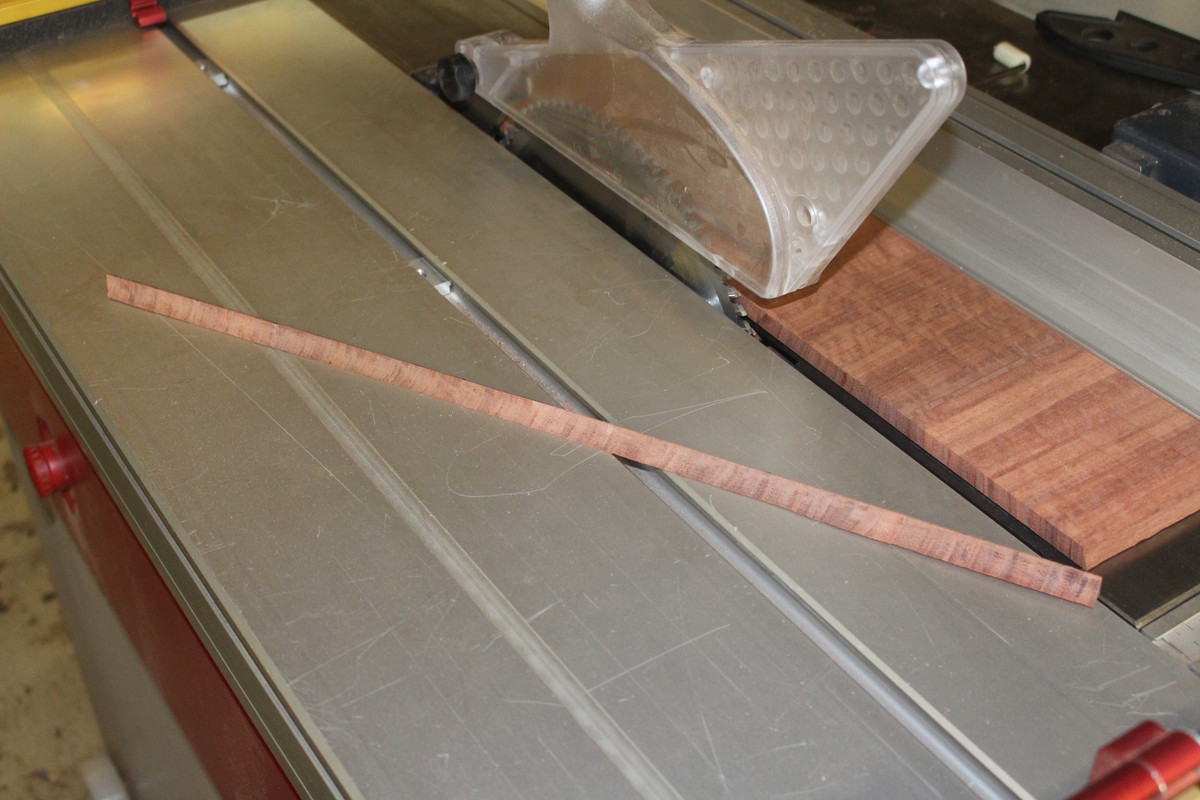
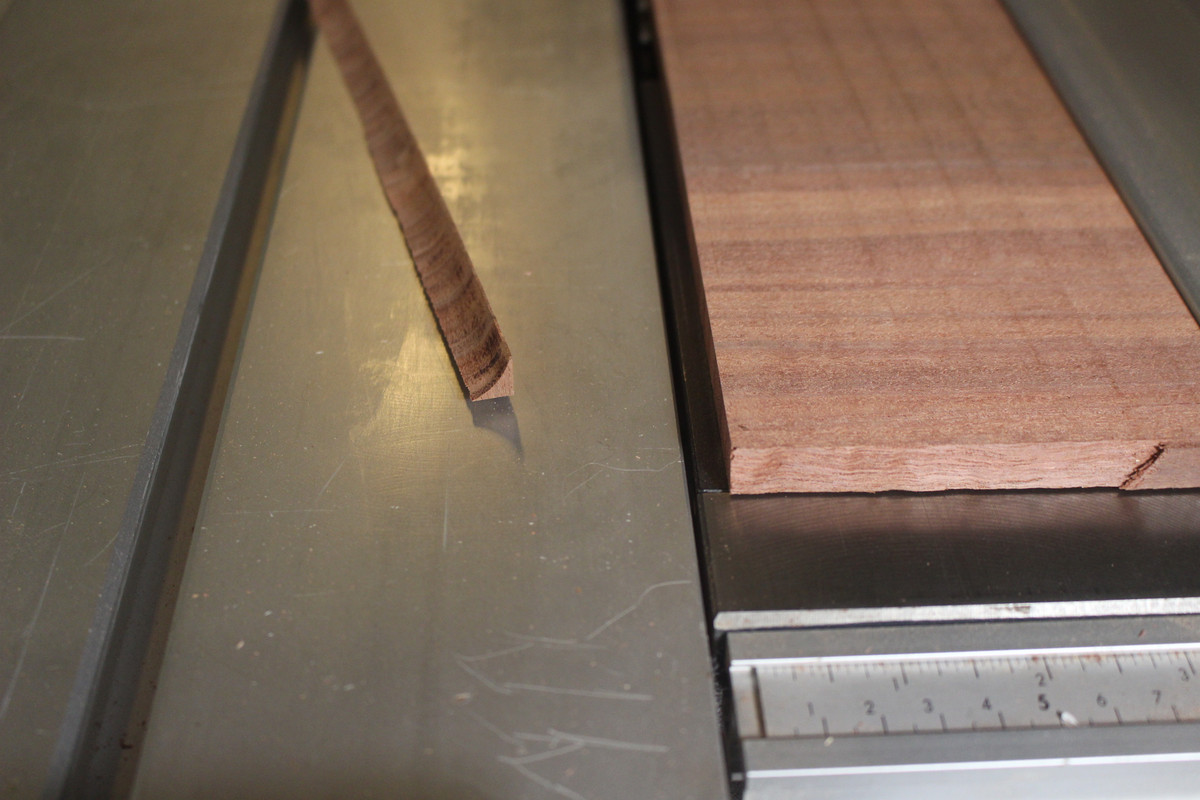
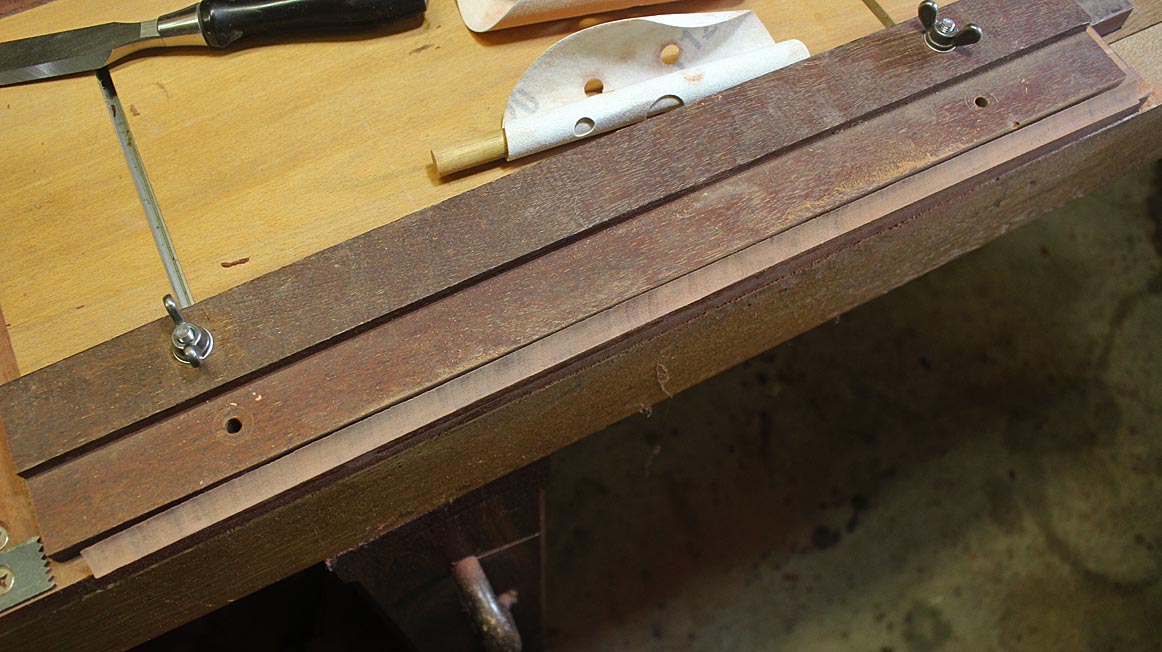
I made a bunch of them (as they are a little fragile) ...
Before glueing them in, each was sanded - 80/120/240 grit on a dowel, with the filet held on the sticking board ..
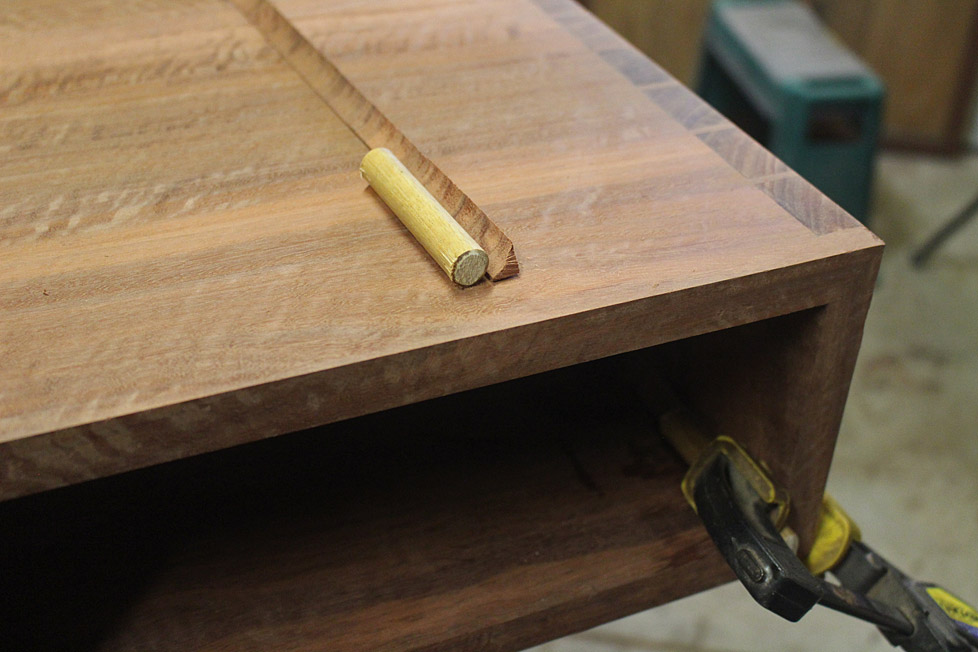
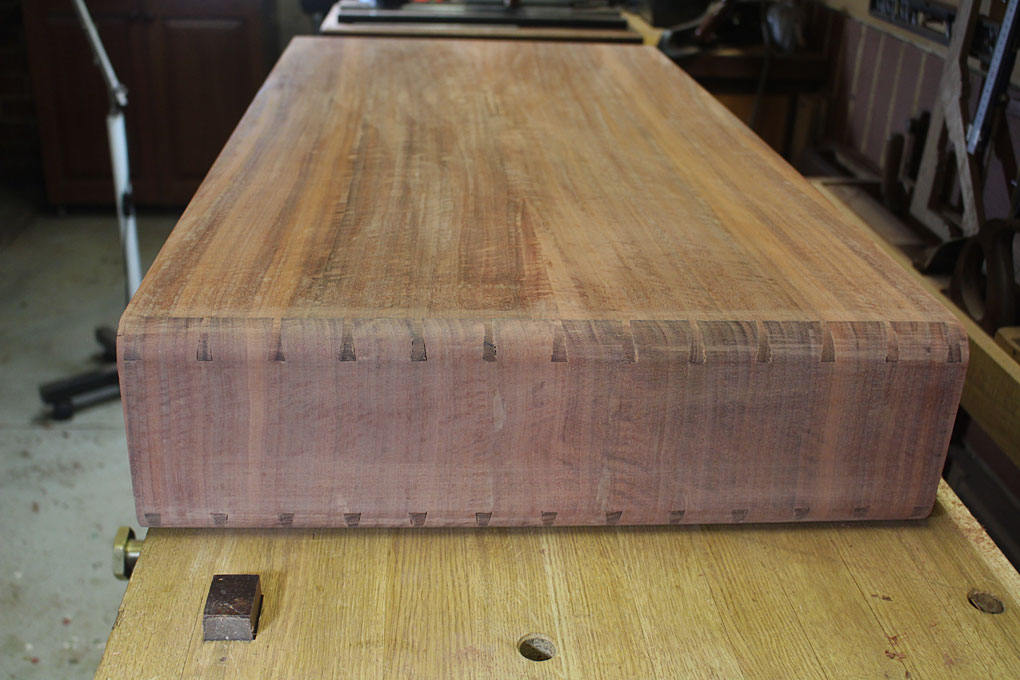
The filets were then glued in (Titebond hide glue for everything). A dowel was used to place pressure evenly on the corners ...
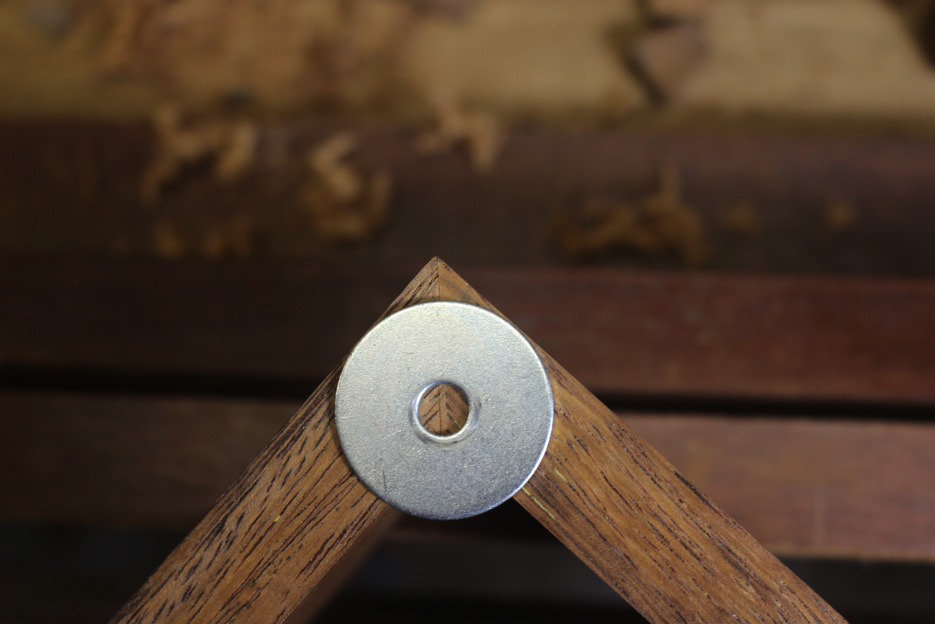
Step 3: shape the ends
I used a larger washer than this one this time to mark out the curve (as the radius needed to be reduced) ...
Then began planing ...
Refined with a block plane ...

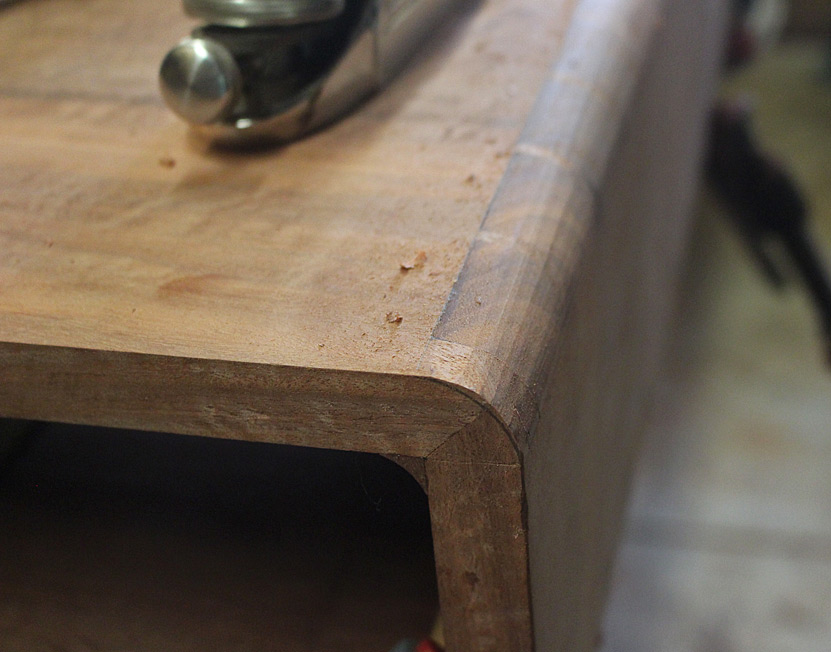
... and finished with sandpaper.


That's it for today. Next I begin the tapered and splayed legs.
Regards from Perth
DerekVisit www.inthewoodshop.com for tutorials on constructing handtools, handtool reviews, and my trials and tribulations with furniture builds.
-
3rd January 2019, 12:17 PM #37
Wood Planner
- Join Date
- Apr 2008
- Location
- Lalla, Tasmania
- Posts
- 1,350
Very nice work Derek as always.
SBPower corrupts, absolute power means we can run a hell of alot of power tools
-
3rd January 2019, 02:03 PM #38
GOLD MEMBER
- Join Date
- Feb 2003
- Location
- back in Alberta for a while
- Age
- 68
- Posts
- 12,006
good to see the porsche being taken for a drive
Originally Posted by derekcohen
regards from Alberta, Canada
ian
-
6th January 2019, 04:38 AM #39
Be inspired. Be creative. Be bold.
- Join Date
- Apr 2001
- Location
- Perth
- Posts
- 10,820
We are at the stage where the base - rail with tapered and splayed legs - is to be done next. This is the photo of the model ...
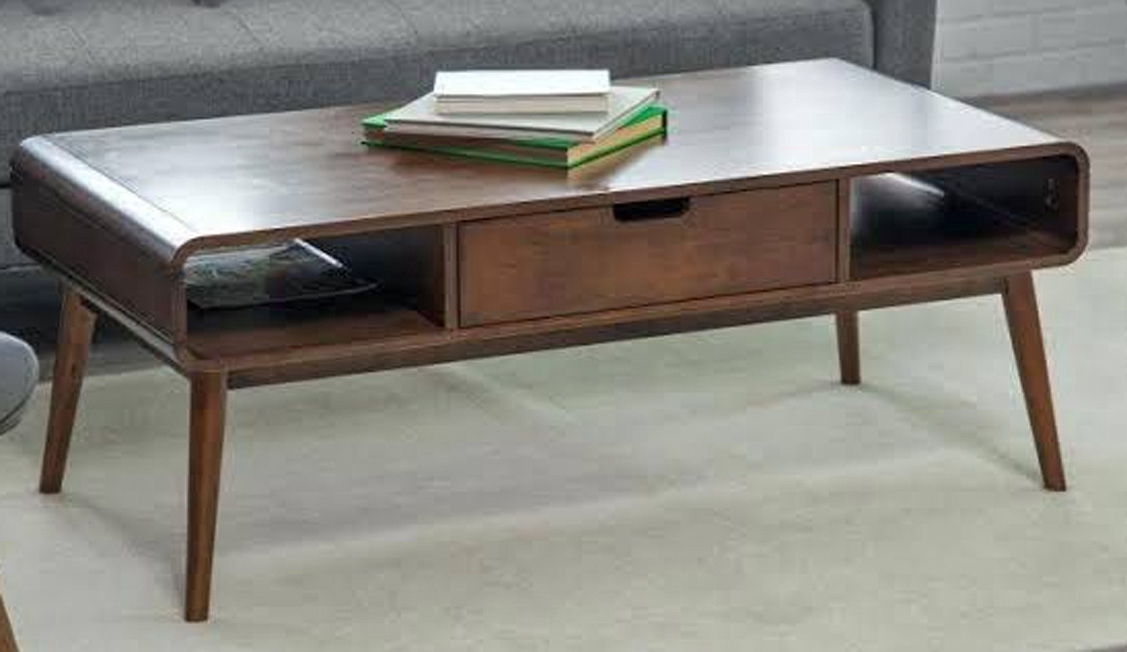
I like this base, and have chosen to replicate it. The two relevant items are the angle of the splay (which I estimated as 10 degrees), and the positioning of the ends of the legs (these appear to end in line with the carcase).
I get my Jarrah these days from an urban salvage yard, but some of it is ex-roofing beams, like this ...

It is a wonderful moment when it comes out the other end ...

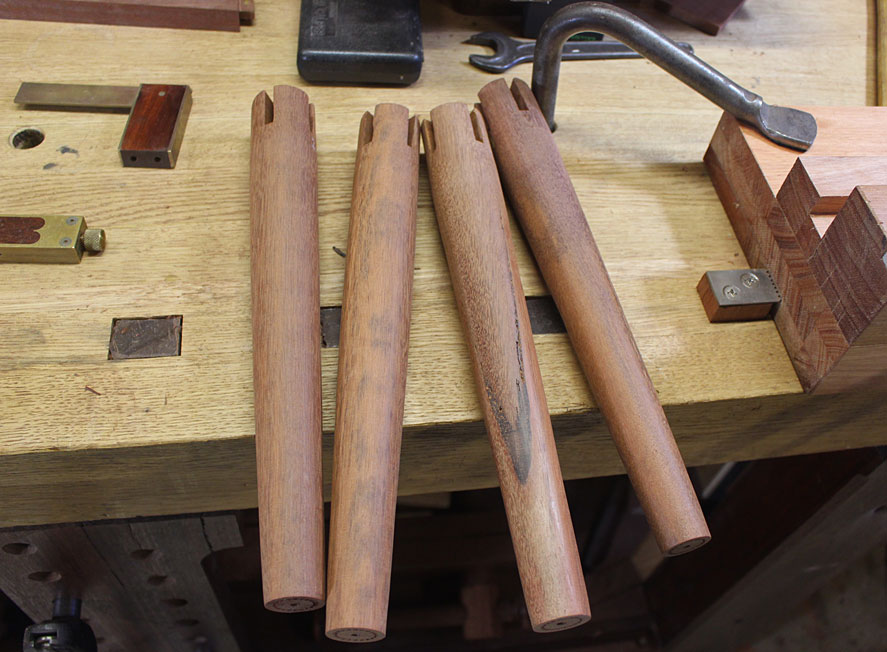
I planed up a couple of these to find 4 blanks that would make the legs. Each is 450mm long. The legs will taper in the round from 40mm at the top to 25mm at the bottom.
The mortices were marked out ...
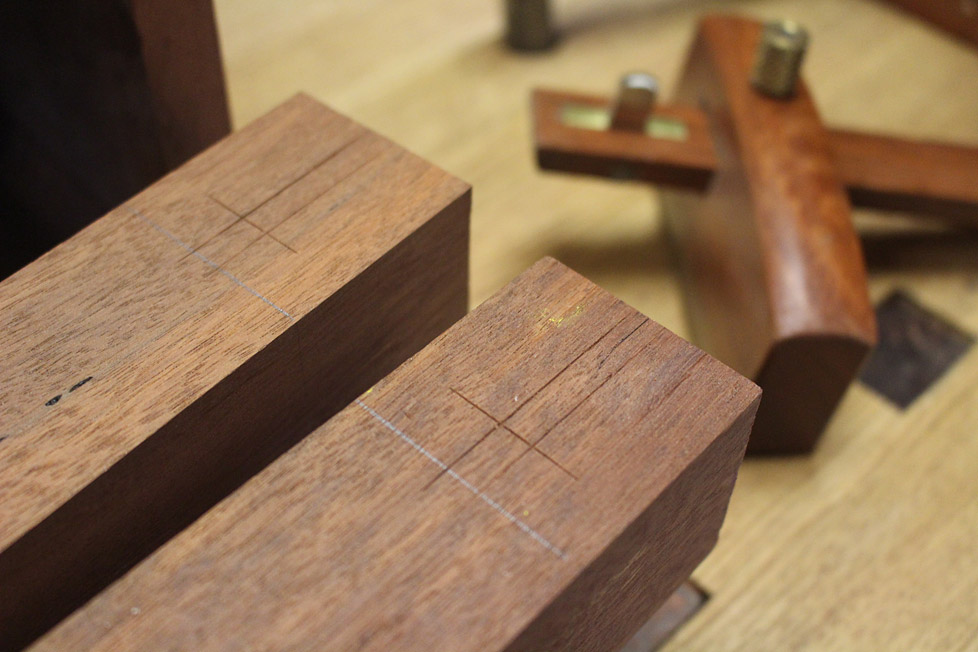
... and routed out (I have a great jig for this - just made for hard, hard woods) ..

.. leaving ...
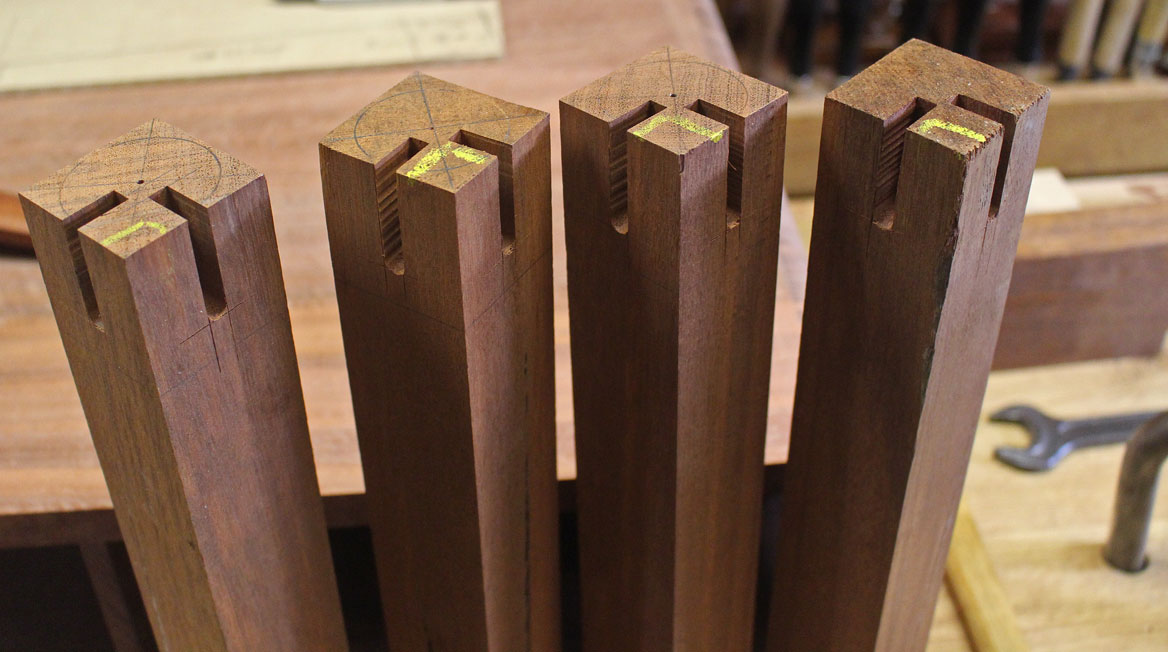
The ends of the mortices are squared up ...
.. and then onto the lathe ...
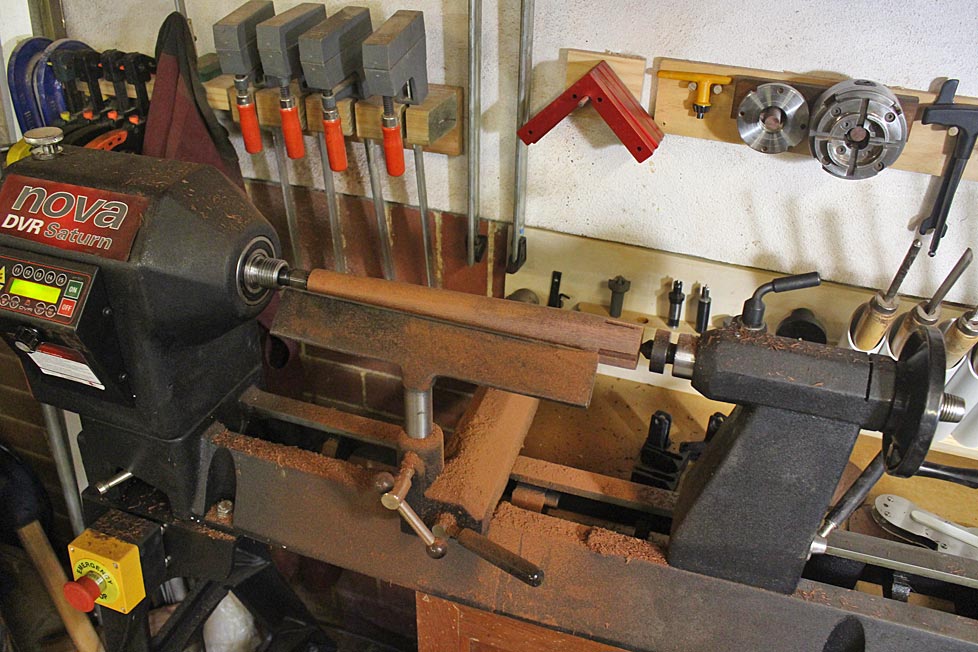
A little tinted epoxy is needed to repair some of the resin holes ...

Next step is to determine the length of the rails. This is a no-math process that simply involves laying out the parts, with the legs at 10 degrees ...

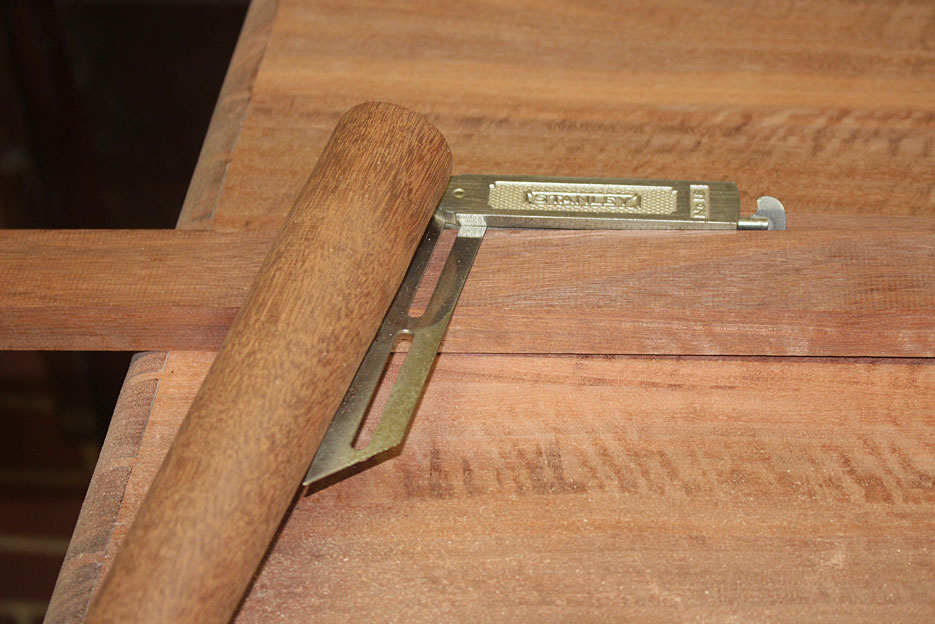
Sawing the tenons is easy enough. The rails are 19mm (3/4") and the tenon/mortice is 1/4" wide ..

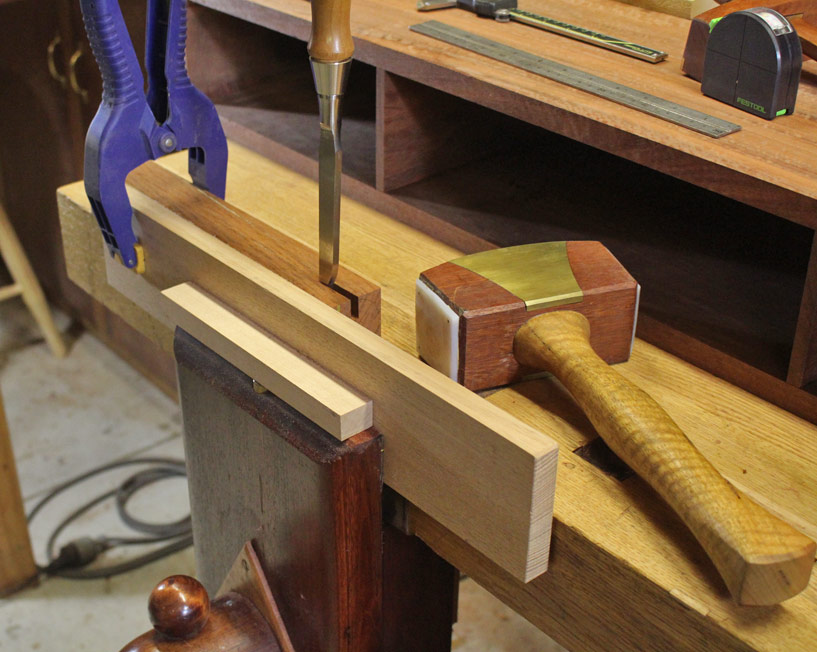
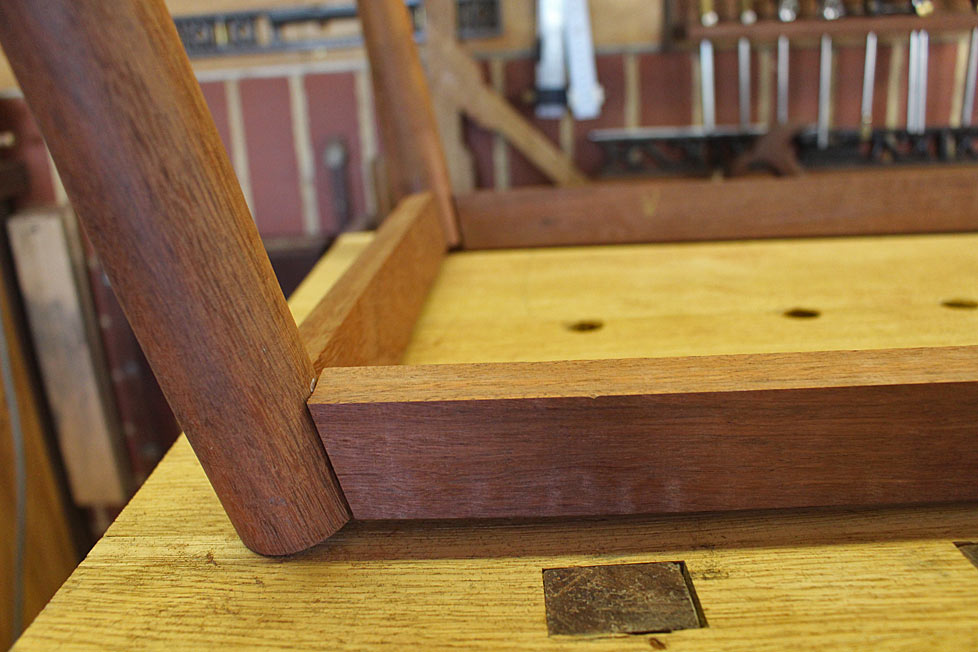
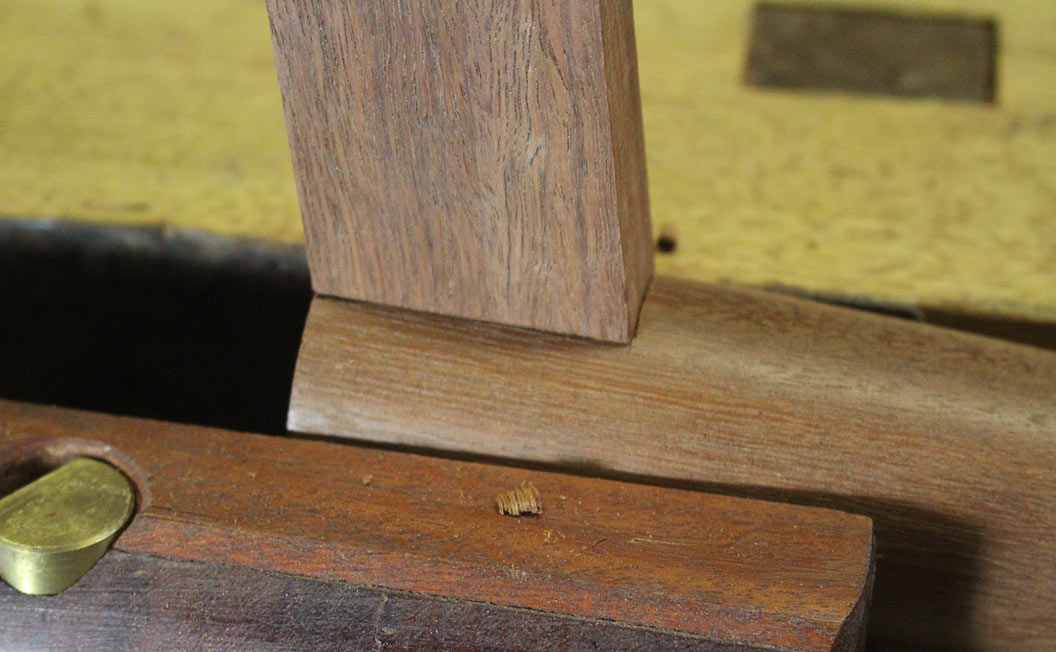
The tenon shoulder needs to be fitted flush with the leg ...
The easiest way is to use blue tape to mark the shoulders ...
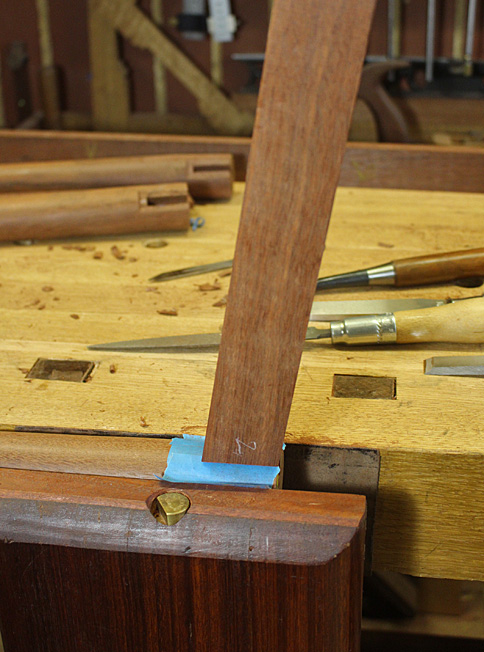
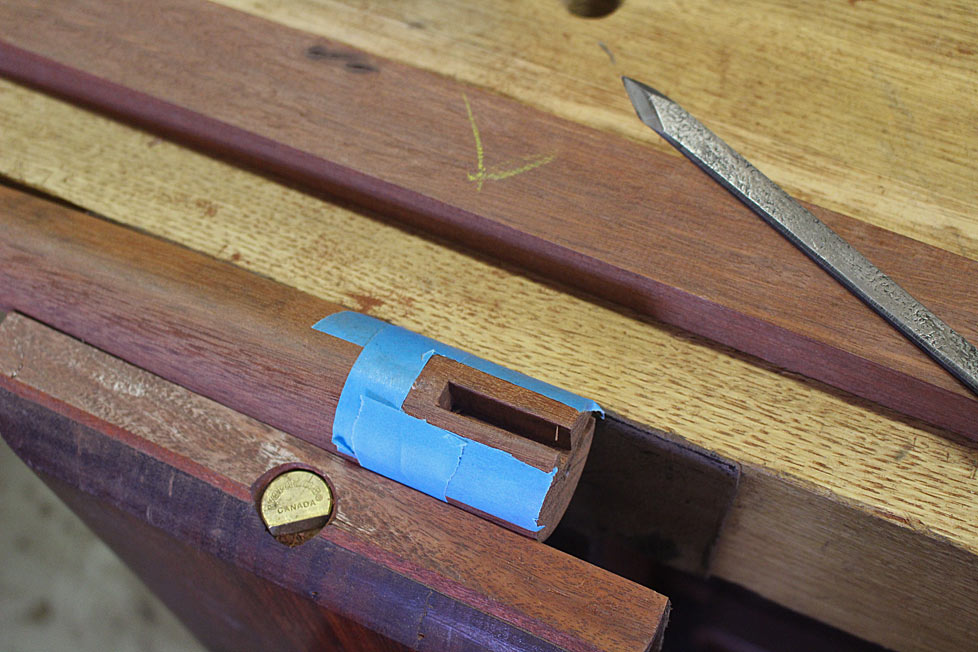
The shoulder of the mortice is levelled with a chisel and rasp ..

... until each is a good fit ..
Finally, the glue up begins ...
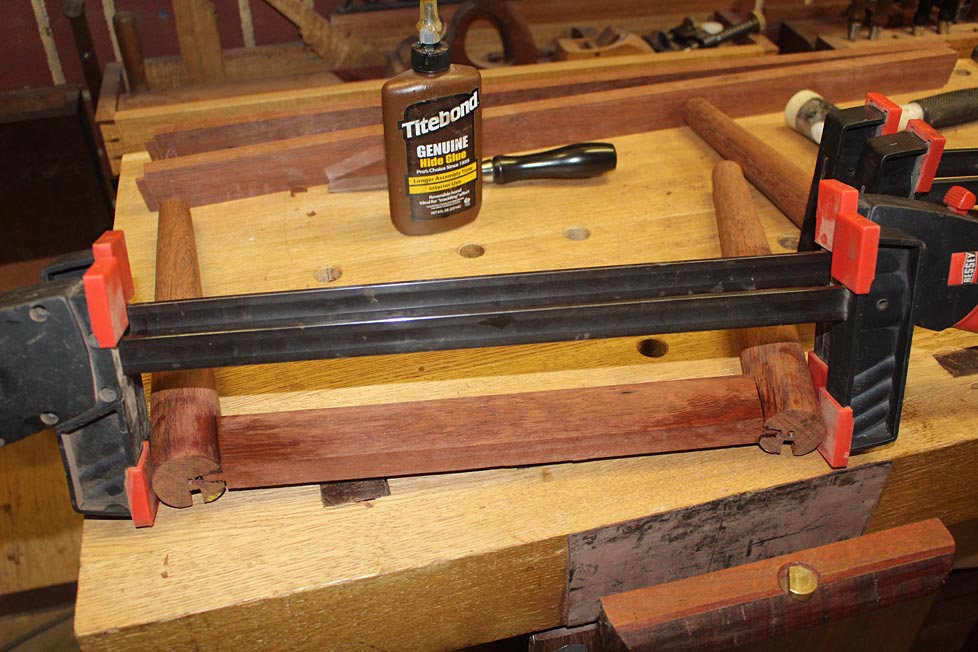
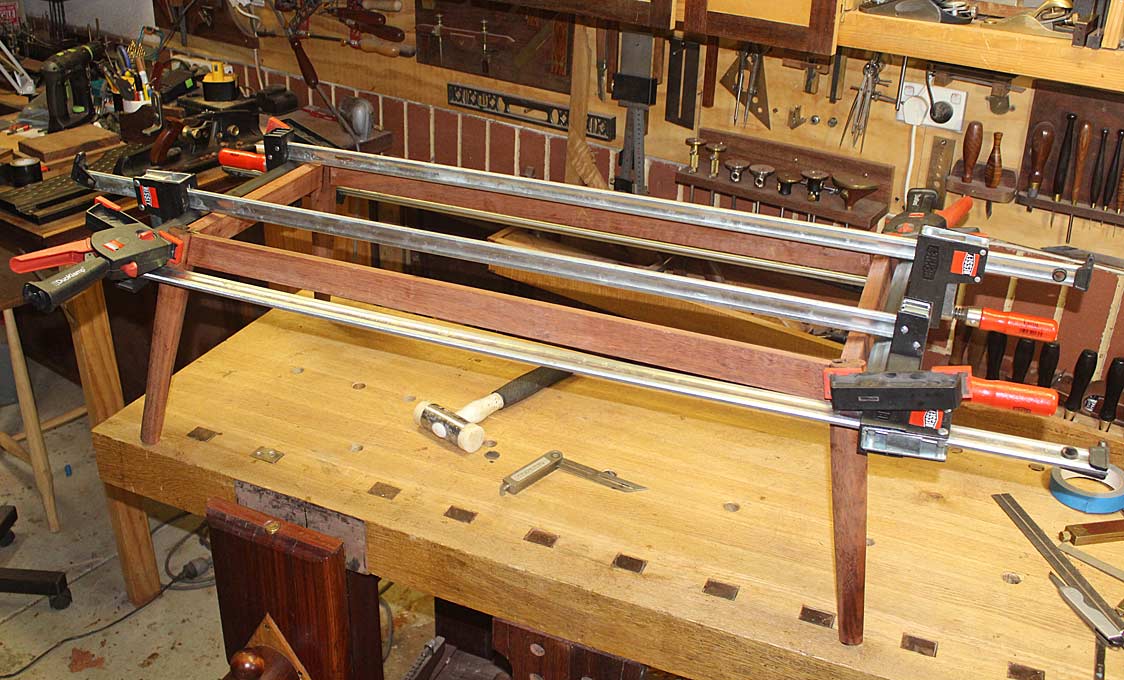
I pulled off the clamps a short while ago ...
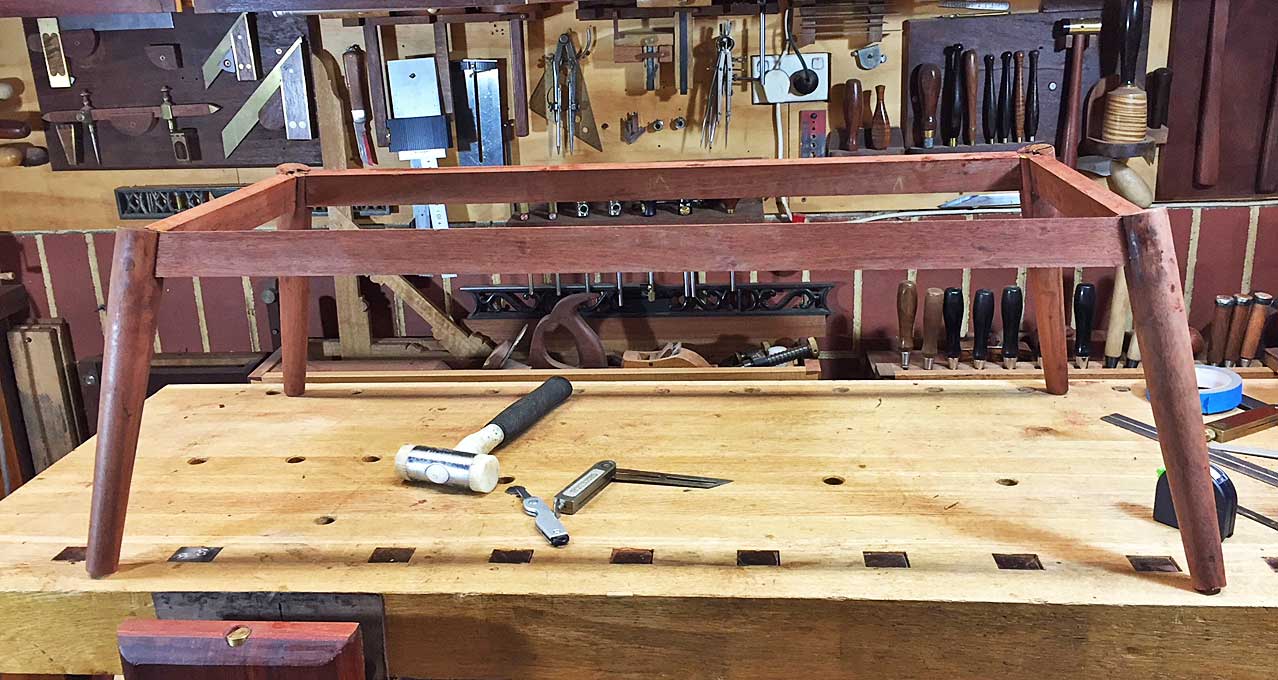
I'll clean it up in the morning.
Regards from Perth
DerekVisit www.inthewoodshop.com for tutorials on constructing handtools, handtool reviews, and my trials and tribulations with furniture builds.
-
6th January 2019, 07:24 AM #40
GOLD MEMBER
- Join Date
- May 2009
- Location
- melb
- Posts
- 1,125
Looks great derek! Can you tell us more about the router jig you have constructed?
-
6th January 2019, 07:35 AM #41
Senior Member
- Join Date
- Jun 2018
- Location
- Brisbane, QLD
- Posts
- 196
Thanks for the detailed photos and methods Derek, very valuable to a novice like me. I’ve really enjoyed watching the table come together. It may be a daft question, but how did you get your mortises to stay parallel with the legs splayed in 2 different directions? I’ve been trying to work it out from the pics and am sure there is a simple answer, but I have no idea. Thanks, Josh.
-
6th January 2019, 08:19 AM #42
GOLD MEMBER
- Join Date
- Feb 2003
- Location
- back in Alberta for a while
- Age
- 68
- Posts
- 12,006
Hi Josh Originally Posted by jw2373
If you look at this photo from Post #38
you should be able to see that the rails are splayed outwards.
I'll leave it to Derek to detail what he will do nextregards from Alberta, Canada
ian
-
6th January 2019, 11:54 AM #43
Woodworking mechanic
- Join Date
- Jan 2014
- Location
- Sydney Upper North Shore
- Posts
- 4,469
Very impressive work.
From a learning point of view, I’d be interested to know why the fillets where rip sawn rather than cross cut to match the top and side grain direction.
Cheers
-
6th January 2019, 01:40 PM #44
Be inspired. Be creative. Be bold.
- Join Date
- Apr 2001
- Location
- Perth
- Posts
- 10,820
Originally Posted by qwertyu

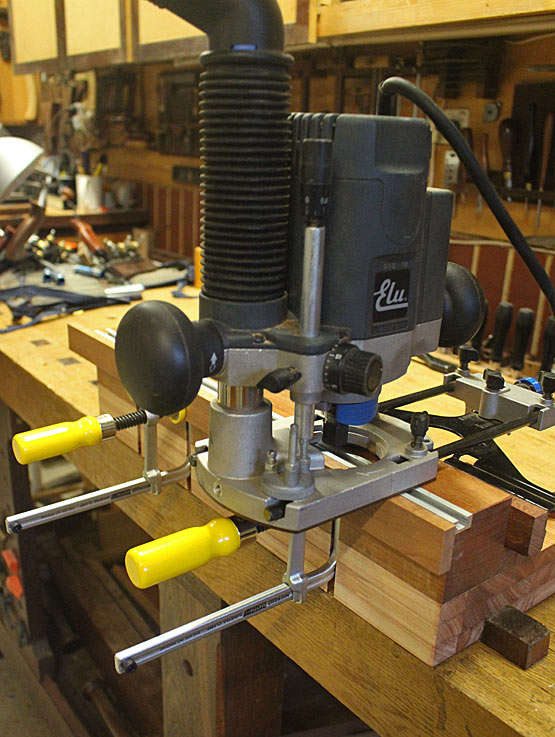
The jig essentially consists of a method of trapping the plunge router to travel in the direction desired, along with a set of clamps to hold the work piece. The advantage of this design is that it is set up very quickly and is very reliable. The track is to set up stops.
The idea came from Fine Woodworking magazine. My only modification was to change the clamping system. The clamps slide into dovetails. I purchased them from Timbecon.
Here is the link to FWW: https://www.finewoodworking.com/2015...-plunge-router
Regards from Perth
DerekVisit www.inthewoodshop.com for tutorials on constructing handtools, handtool reviews, and my trials and tribulations with furniture builds.
-
6th January 2019, 01:48 PM #45
Be inspired. Be creative. Be bold.
- Join Date
- Apr 2001
- Location
- Perth
- Posts
- 10,820
Hi Lappa Originally Posted by Lappa
The filets were not rip sawn. They were ripped off cross grain. I explained this as important, since the edges of the filets needed to match the edges of the carcase. If the filet had been ripped with the grain, the edges would have been end grain showing. This would darken and show up as being different when a finish is later added. It was necessary to avoid this occuring.
Regards from Perth
DerekVisit www.inthewoodshop.com for tutorials on constructing handtools, handtool reviews, and my trials and tribulations with furniture builds.


 Reply With Quote

Similar Threads
-
Little Something for my Nephew
By PLD in forum SCROLLERS FORUMReplies: 3Last Post: 21st August 2014, 05:04 PM -
A toy for my Nephew.
By Mr. Lara in forum TOY MAKINGReplies: 20Last Post: 12th February 2014, 02:55 AM -
New box for Nephew
By Evanism in forum BOX MAKINGReplies: 9Last Post: 17th February 2013, 03:12 AM -
Wanting to Buy - 2xTV unit, Coffee Table Dinnng room table
By Overboardkiller in forum WOODWORK - GENERALReplies: 6Last Post: 10th November 2010, 05:59 PM -
Tall Coffee Table/Desk/BookCase/Holdall of important bits/Sofa Table
By RufflyRustic in forum WOODWORK PICSReplies: 11Last Post: 3rd December 2009, 12:14 AM
