

 Thanks: 0
 Likes: 0
 Needs Pictures: 0
 Picture(s) thanks: 0
Results 46 to 60 of 111
-
24th July 2010, 01:37 PM #46
 Heavy Machinery


- Join Date
- Mar 2008
- Location
- Lambton, Newcastle, NSW, Australia
- Posts
- 4,957

Looking good Dan, blogs comming along nicely

-
24th July 2010 01:37 PM # ADSGoogle Adsense Advertisement
- Join Date
- Always
- Location
- Advertising world
- Posts
- Many
-
28th July 2010, 01:05 PM #47
Dan @ TheLoveOfWood
- Join Date
- Jan 2008
- Location
- Australia
- Posts
- 752
As a little indulgence I'm going to use ebony dowel (disopyros sp.) for the joinery in the Anniversary Table. I purchased this small piece from Trend Timbers at the Sydney Wood Show which today I started forming into dowel.

In the past I've used a small lathe to produce dowel for a similar purchase (see rosewood turnings.) Although you can purchase high quality dowel plates, it's actually not too hard to make your own. Today I'm going to use a shop made dowel plate from a tip from Hendrik Varju (from Passion for Wood.)

Simply take a spare metal bracket, a high quality drill bit, and drill the size you want. In this case ~10.5mm.
Being careful not to waste wood, I cut 11x11mm pieces. (The missing section was the test piece.)

Next you need to whittle or shave the piece to rough shape taking off the corners.

The dowel plate makes the final shape as you move the piece gently through with a big hammer.
Three down... seven to go. As always I'm happy to hear any comments or suggestions.
More pics at the blog http://theloveofwood.blogspot.com/20...ka-making.htmlMy blog: ~ for the love of wood ~ - http://theloveofwood.blogspot.com/
-
28th July 2010, 03:24 PM #48
Heavy Machinery
- Join Date
- Mar 2008
- Location
- Lambton, Newcastle, NSW, Australia
- Posts
- 4,957
Hey Dan looking good, as you said, I use the lathe to make Ebony dowel, unless you pear almost all the way down to your finished size I find Ebony is too brittle for a dowel plate and often shatters. No mater how you do them they look fantastic though.
-
28th July 2010, 07:11 PM #49
Skwair2rownd
- Join Date
- Nov 2007
- Location
- Dundowran Beach
- Age
- 76
- Posts
- 19,922

Those dowels will add a spot of class and interest!

-
1st August 2010, 04:41 PM #50
Dan @ TheLoveOfWood
- Join Date
- Jan 2008
- Location
- Australia
- Posts
- 752
Dowel Design
The long tenons received elongated slots formed by drill, coping saw, and rasp. The outside tenons including the slot are waxed. With the dowels glued to the top and bottom of the breadboard the dowels can slide in the slot uninhibited.


The Glue Up
Only the dowels and the mid section receive glue. I used rachet straps to ensure everything was tight before starting. The center dowel also acts as a drawbored joint.

The Joint Explained: Exploded View
For that wanted to see the inside of the outside mortise/tenon joint here's your chance. The dowel was not aligned with the bottom hole, a few firm wacks with the hammer, and there you go, the inside of the joint. Notice how there's space to allow for wood expansion. The repair is not too obvious.
 My blog: ~ for the love of wood ~ - http://theloveofwood.blogspot.com/
-
1st August 2010, 04:48 PM #51
Dan @ TheLoveOfWood
- Join Date
- Jan 2008
- Location
- Australia
- Posts
- 752
Curves
I'd like your comments on the curves. I used a 20c piece to round over the corners and my standard 1/8" round over for the edges.
I'm thinking that a greater radius round over my be better.
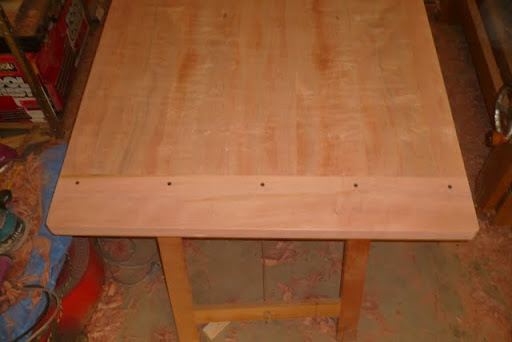

I'm not convinced the wide breadboards and the dowel placement are balanced.My blog: ~ for the love of wood ~ - http://theloveofwood.blogspot.com/
-
6th August 2010, 05:34 PM #52
Dan @ TheLoveOfWood
- Join Date
- Jan 2008
- Location
- Australia
- Posts
- 752


Flattening the top by hand with a Stanley no 7 resulted in some mild tear out. Switching to abrasives, I used a belt sander (120grit) and a random orbit sander (120 to 1200 grit.) At around 600 grit I coated the top with a diluted coat of U-Beaut Polishes - WHITE SHELLAC which acts as a pore sealer and allows the oil to penetrate more easily. The oil of choice for this job is Organoil which is a tung oil based product.) Only a thin coat is needed, the excess rubbed off at 30min, and then with "micromesh " Micro-Mesh | The Sandpaper Man wet dry sanded moist at 1500 grit. Another thin coat, and burnishing to 3200 is the plan.
Prior to this a trimmer router with a 1/8" CMT bit rounded the edges, and a saw/rasp/sand paper rounded the corners to 20c piece radius.
The timber is fiddleback Tasmanian Myrtle (Nothofagus cunninghamii) from Boutique Timbers with Ebony dowel (Diospyros sp.) from Trend Timbers » Front Page.My blog: ~ for the love of wood ~ - http://theloveofwood.blogspot.com/
-
6th August 2010, 06:15 PM #53
Heavy Machinery
- Join Date
- Mar 2008
- Location
- Lambton, Newcastle, NSW, Australia
- Posts
- 4,957
Its looking great Dan, the finish is looking very nice.
-
6th August 2010, 06:25 PM #54
GOLD MEMBER
- Join Date
- May 2004
- Location
- Epping.Vic
- Age
- 58
- Posts
- 1,094
Yep have to agree with CH it's coming up good, the finish is making the tassie myrtle look really nice
Regards
Al .
You don't know, what you don't know, until you know it.
-
6th August 2010, 11:00 PM #55
Mildly Moderate
- Join Date
- Nov 2007
- Location
- Albury Well Just Outside
- Posts
- 13,315
I like it. Very nicely done.
-
7th August 2010, 08:09 AM #56
Franklin Ferrier
- Join Date
- May 2007
- Location
- Gold Coast
- Age
- 70
- Posts
- 2,735
[ame="http://www.youtube.com/watch?v=7GL6LH6ufhM"]YouTube- ‪hannibal smith - i love it when a plan comes together‬‎[/ame]
-
7th August 2010, 09:41 PM #57
Dan @ TheLoveOfWood
- Join Date
- Jan 2008
- Location
- Australia
- Posts
- 752
Woe is me.
I can't decide on the legs. The ideal plan would be to steam bend, or laminate the legs.
If I laminate I don't think I could to the tight curve of the foot and would need to attach a foot... which would be obvious.
If I steam bent and then laminate I could make all the curves... but I can't think of a mould to do it...
It is possible to do all of this... but I only have 4 days to do it... no steaming gear.... and no success on the first mould...
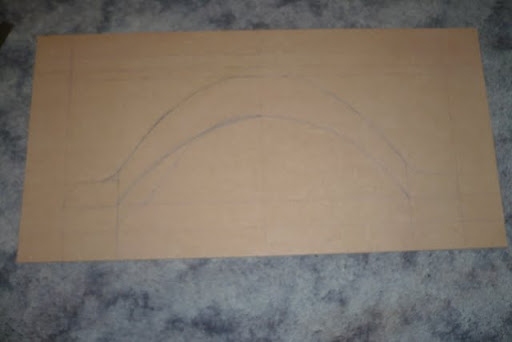

At this rate... I may end up cutting it from straight grain solid timber... drilling up the leg and inserted an unglued steel rod... that'll fix it... but it ain't classy.My blog: ~ for the love of wood ~ - http://theloveofwood.blogspot.com/
-
7th August 2010, 09:44 PM #58
Dan @ TheLoveOfWood
- Join Date
- Jan 2008
- Location
- Australia
- Posts
- 752
-
8th August 2010, 12:10 AM #59
Heavy Machinery
- Join Date
- Mar 2008
- Location
- Lambton, Newcastle, NSW, Australia
- Posts
- 4,957
They look good!! that was what you were after wasn't it?
After another look at your breadboard ends I think you are right they are a little too wide maybe compaired to the side edge piece of timber.
Only a minor detail though, not work a second look realy.
-
8th August 2010, 12:16 AM #60
Dan @ TheLoveOfWood
- Join Date
- Jan 2008
- Location
- Australia
- Posts
- 752
The sepia photos are of the 2008 blackbutt build which were cut on a band saw.
Tomorrow I will cut the new ones...
Yes. The breadboards are long. They hold 60mm tenons/mortises but are 150mm wide. The edge is 75mm. The table the same ratio of 2:1 being 2x1m.
I like this design of shaker table, and will make more in the future, so always refining.
Perhaps 75mm breadboards would have worked... or 100mm...
But at this stage I'm not going to trim the ends off my table... lol.My blog: ~ for the love of wood ~ - http://theloveofwood.blogspot.com/


 Reply With Quote


Similar Threads
-
A Shaker table for Mother's Day
By derekcohen in forum WOODWORK PICSReplies: 8Last Post: 9th May 2010, 06:54 PM -
Shaker Sewing Table
By Glennet in forum WOODWORK PICSReplies: 24Last Post: 26th November 2009, 10:40 AM -
Small shaker-ish table
By Poppa in forum WOODWORK PICSReplies: 8Last Post: 8th April 2008, 01:05 PM -
Shaker Table Shaking
By Buzza in forum FINISHINGReplies: 0Last Post: 2nd February 2006, 05:04 PM -
Shaker table
By Geoffexpat in forum WOODWORK PICSReplies: 17Last Post: 1st December 2005, 09:21 AM
