

 Thanks:
  Likes:
  Needs Pictures: 0
 Picture(s) thanks:
Results 1 to 15 of 57
-
28th January 2024, 04:42 AM #1
 Be inspired. Be creative. Be bold.


- Join Date
- Apr 2001
- Location
- Perth
- Posts
- 10,826
 Dining room carver chairs - Take 2
About a month ago I began a thread about designing and building two carver chairs to accompany the 6 bentwood chairs we have owned for the past 40 years. The chairs were purchased all those years ago along with a table, which is around 200 years old. We need a larger table, and time has come to replace it and add two more chairs.
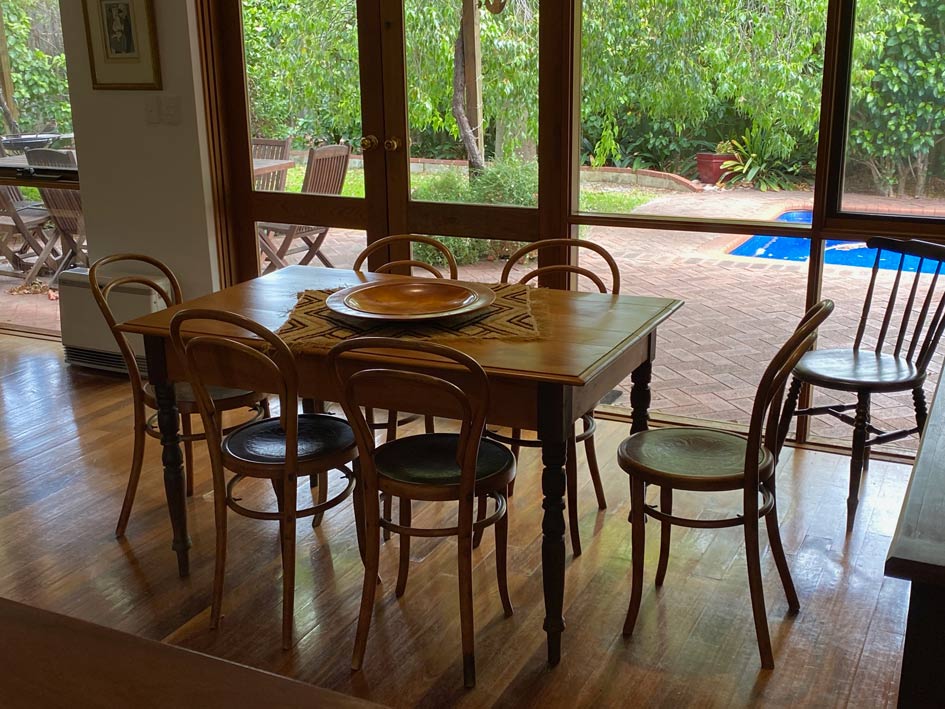
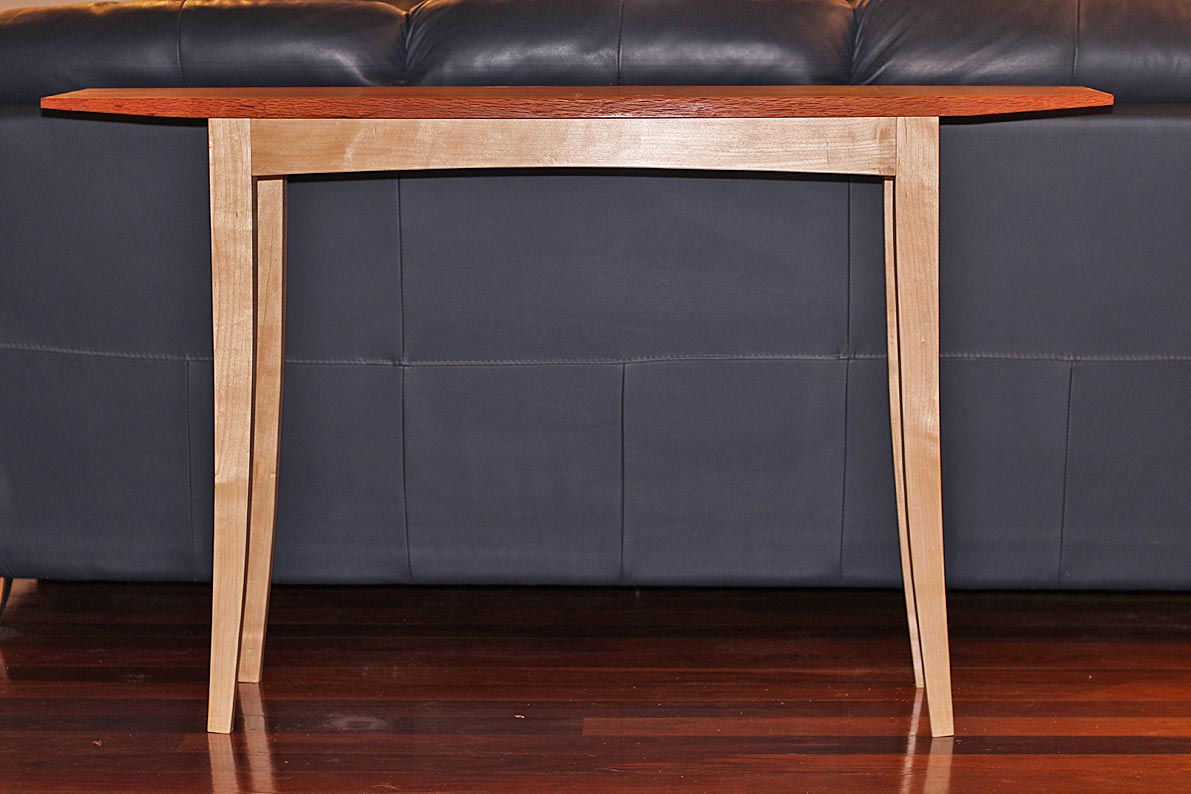
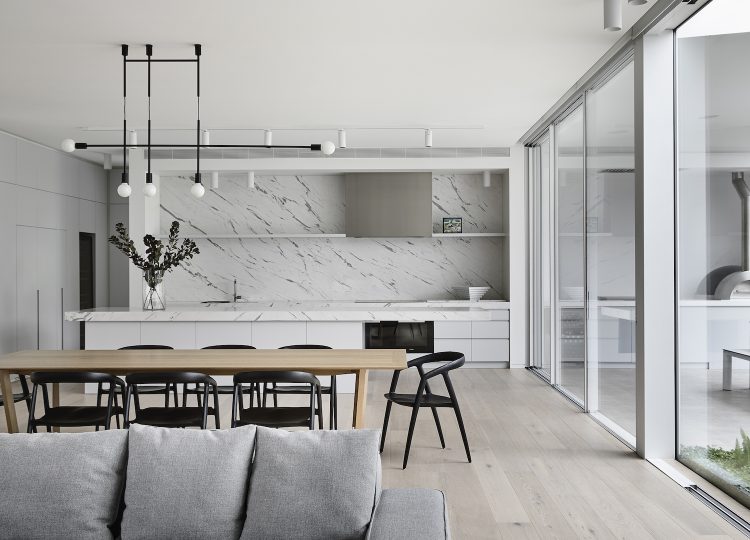
The table planned will be a modern version of this, in Hard Maple and round Jarrah legs. The carver chairs need to match the table and blend with these chairs. Our taste is minimalist, Mid Century Danish, modern. An example of the lines I seek is this sofa table I built several years ago ...
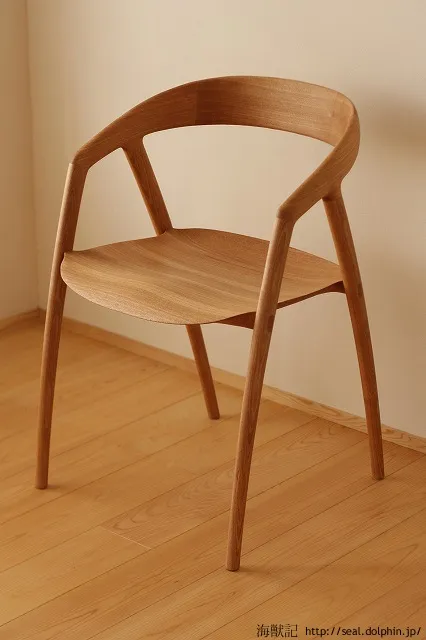
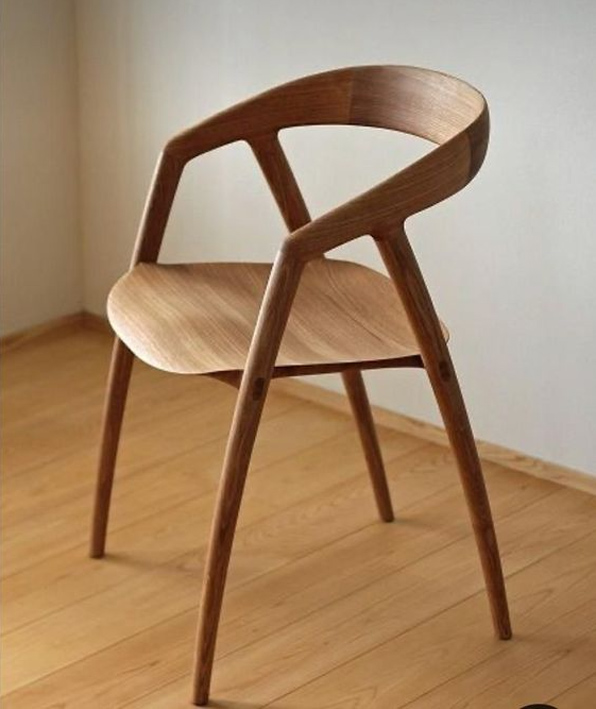
So I started thinking about the chairs I would build, and I took inspiration from this picture ...
... and began to evolve a design along similar lines. The 8 legs were started (just need rounding) and the seats carved, and then the tenons were cut. And that is where the problem arose. I had this idea for integrated tenons into through mortices in the legs. Very few chairs are built like this, and for a good reason - you cannot control for run out in the tenons, and run out make for weak tenons. And that is what I discovered. So I stopped the build, and decided to begin again from scratch.
I started looking more carefully at the chair I had come across and had treated rather casually. It has a name: DC 09, and it was designed by the Japanese- Scandinavian duo, Kyoko Inoda and Nils Sveje, in 2011. It is built by the Miyazaki factory in Japan.
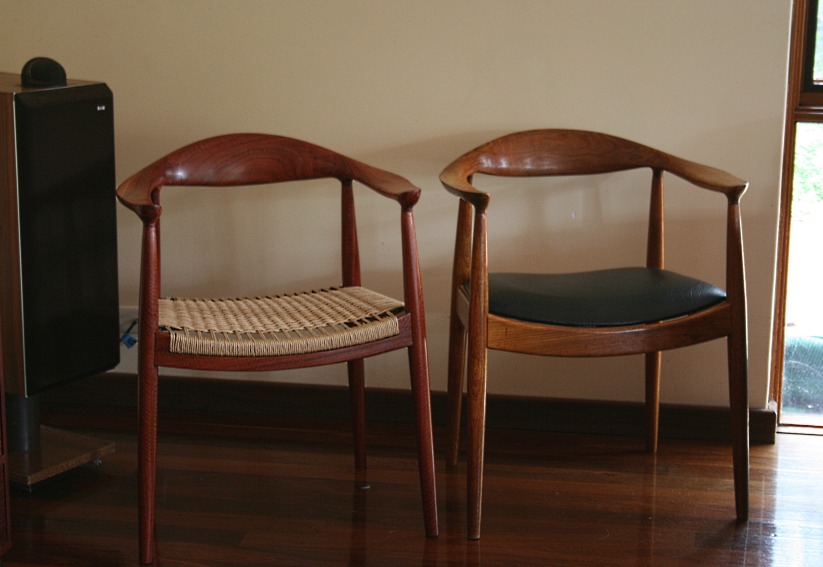
There is a challenge here - can I replicate it purely from photos? This is unlikely since one needs to examine an object in three dimensions to discover the subtleties of the design and construction. I have experience of this, having made an exact copy of Hans Wegner's "The Chair" or the "Round Chair" several years ago. What made this possible is that I own an original. One is mine and one is Wegner's ...
So the chairs I build will not be exact, but hopefully close. Actually, I am still on the fence about the arms and back and may modify this ... but will will see. We need to start with the seat. That is the key.
Help comes from two video I found ...
DC09 Making - YouTube
DC09 Chair designed by Inoda+Sveje on Vimeo
Some dimensions:
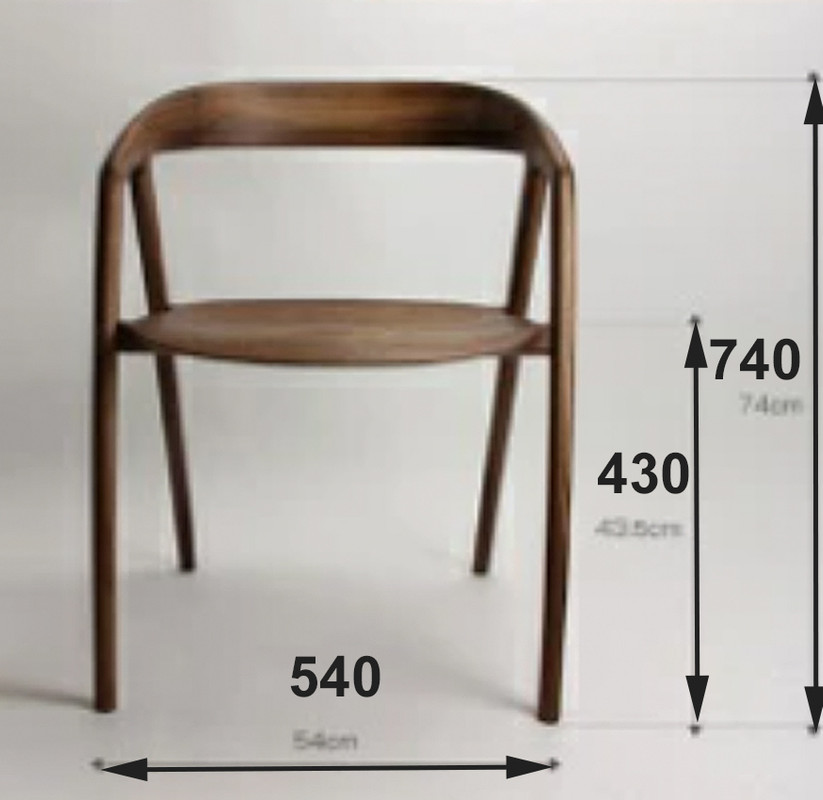
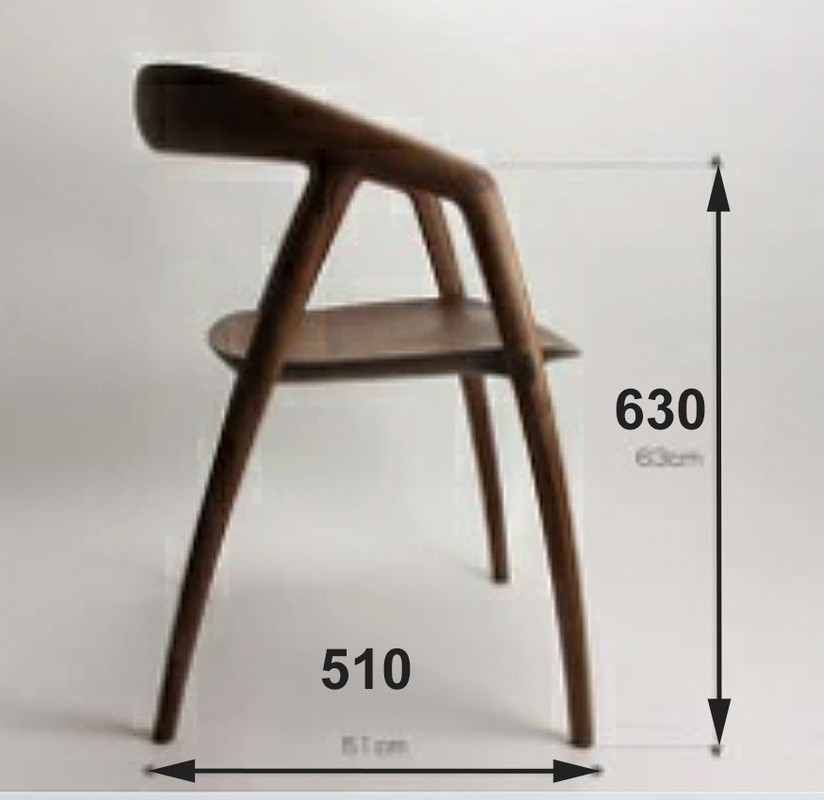
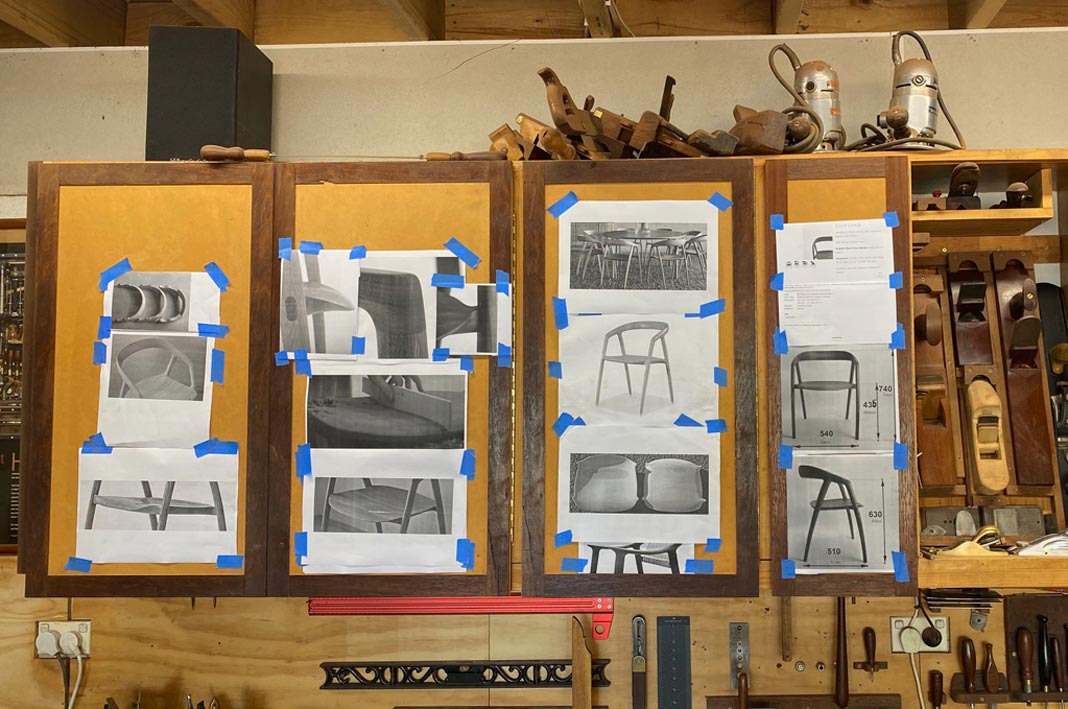
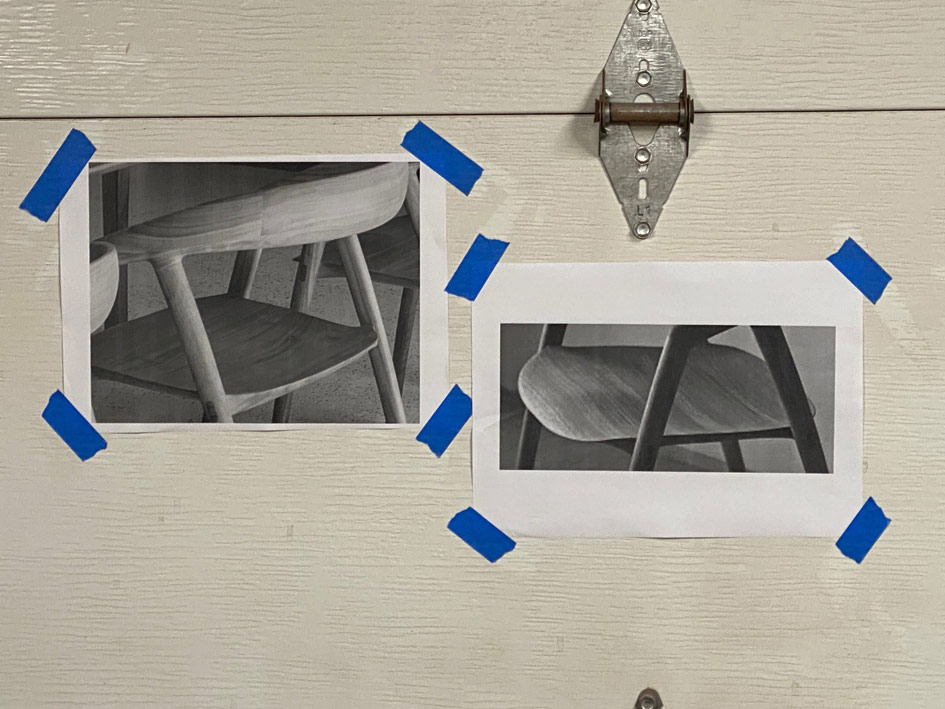
The doors above my bench make a place to pin details and photos ..
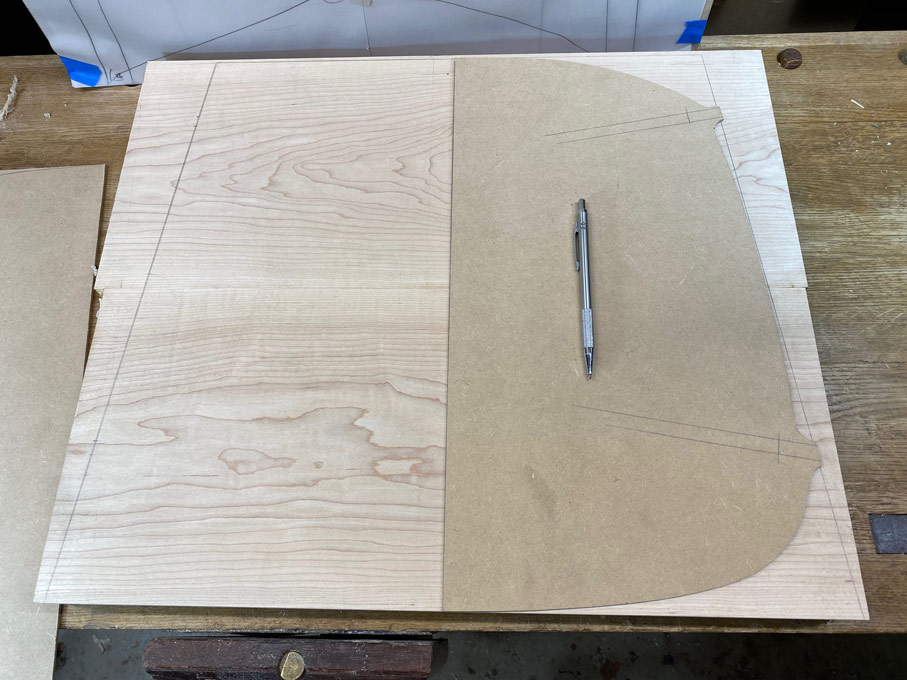
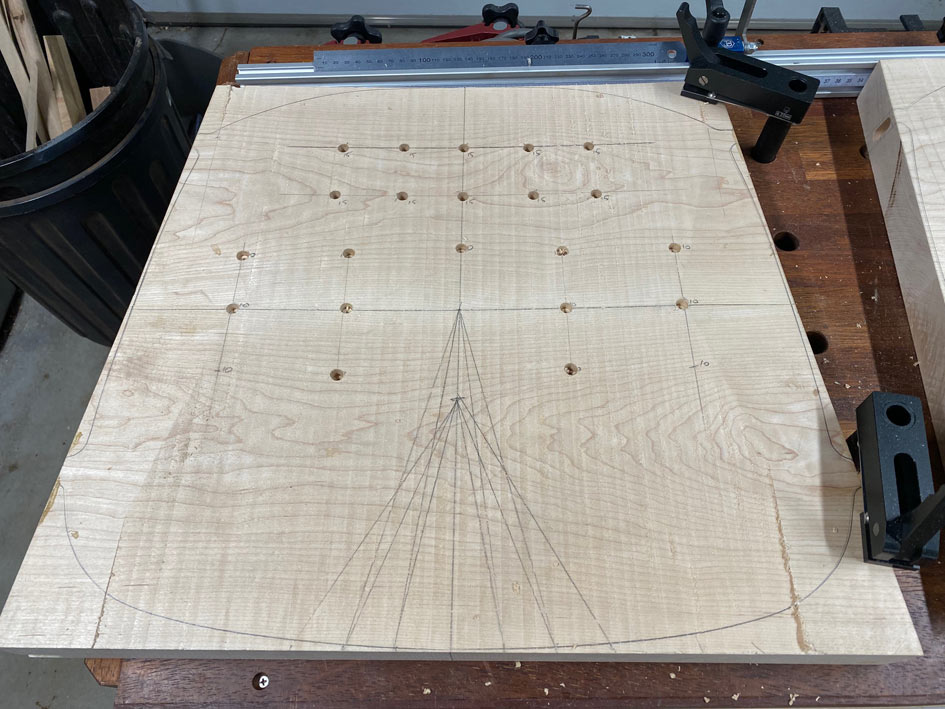
The seat plan was scaled and drawn using images from the videos and photos.
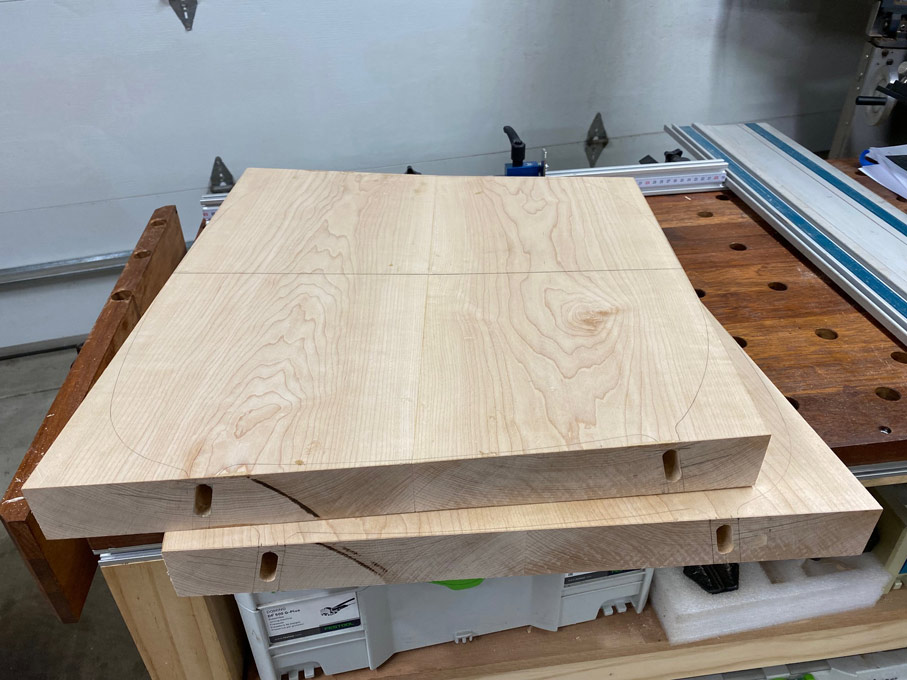
Two half-templates were created - the first was a straight-sided outline of the seat. The reason for this is that I planned to use loose tenon joinery, which would enable the tenons to have straight grain for maximum strength, and the mortices would be made using a Domino. These would be 30mm long x 10mm wide, in other words would use custom-made loose tenons. The straight sides would make it easier to cut the mortices ahead of shaping the seats.
The second half-template was the actual outline of the seat, and this positions the tenons.
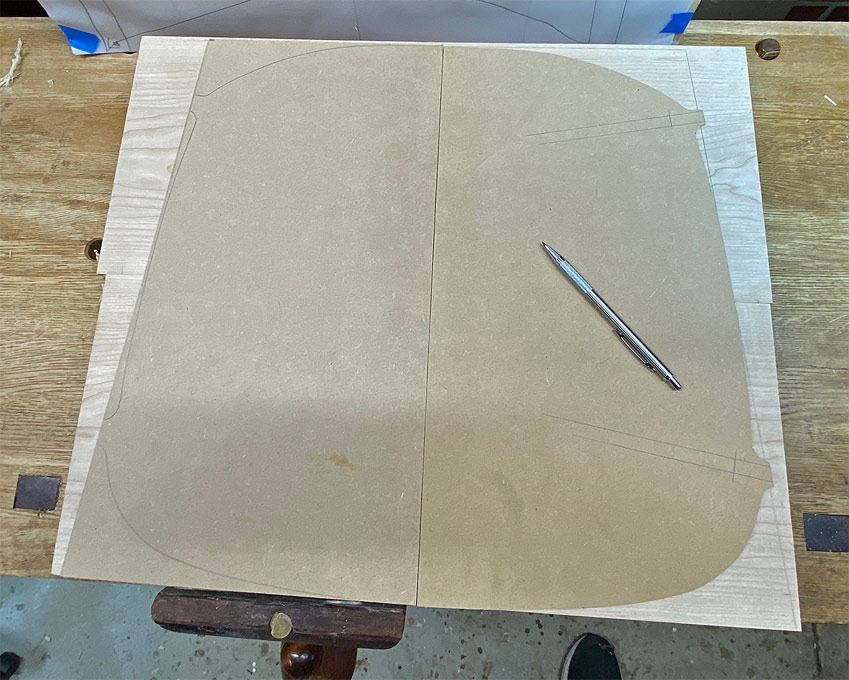
Here the tenons are positioned ...
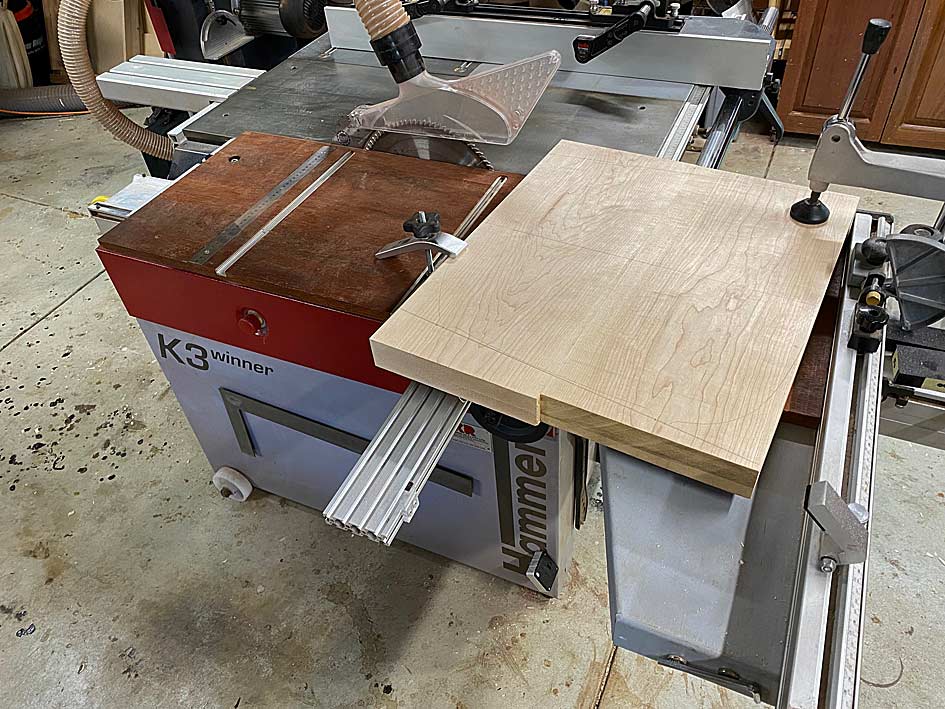
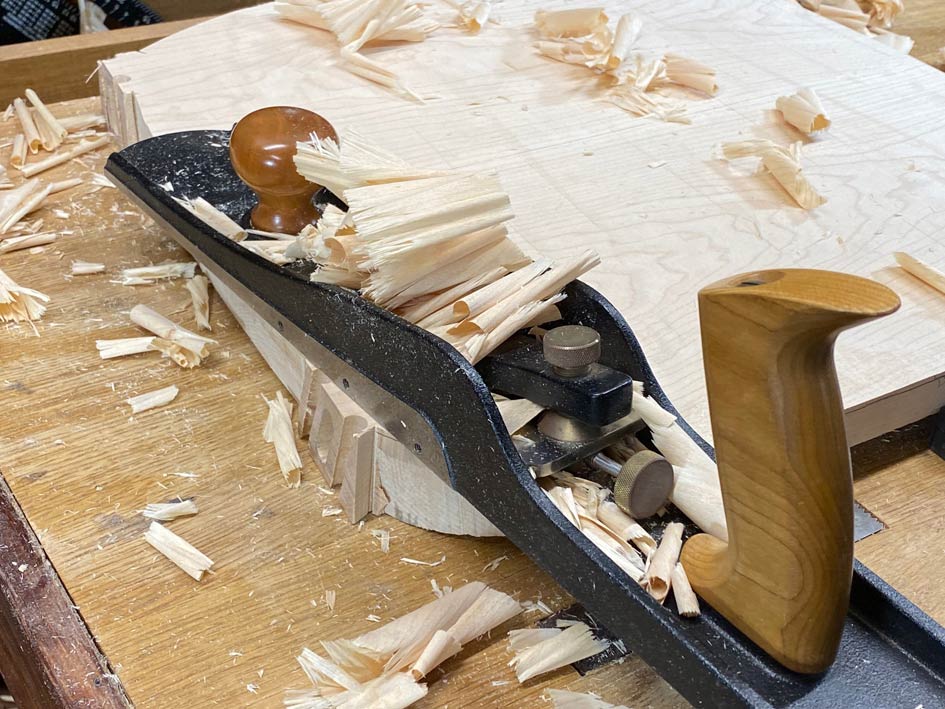
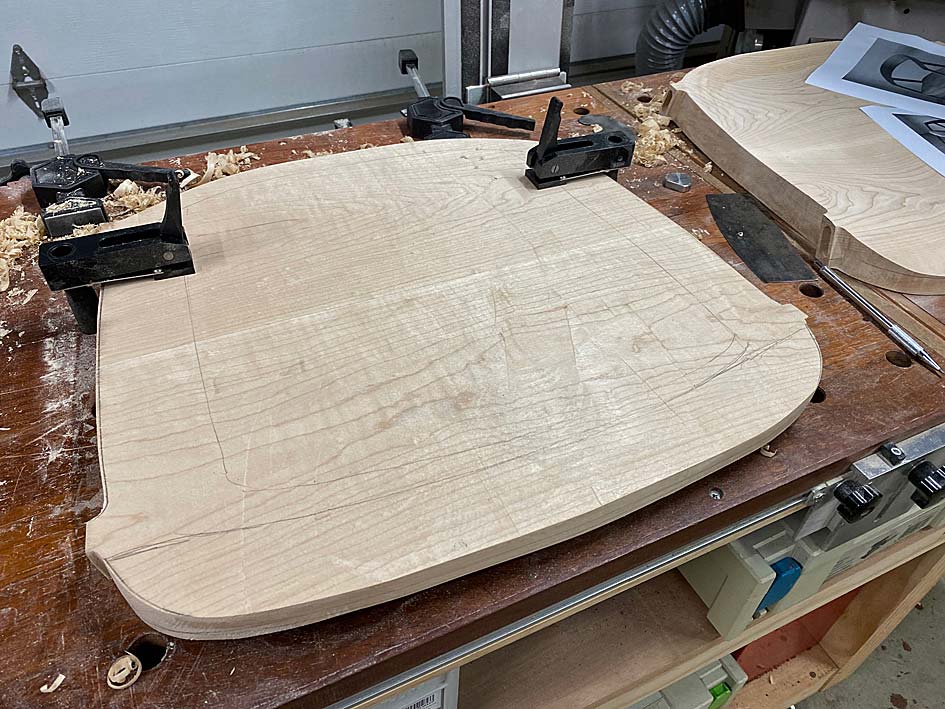
A little jack-planning to flatten the underside of the seat blanks ..
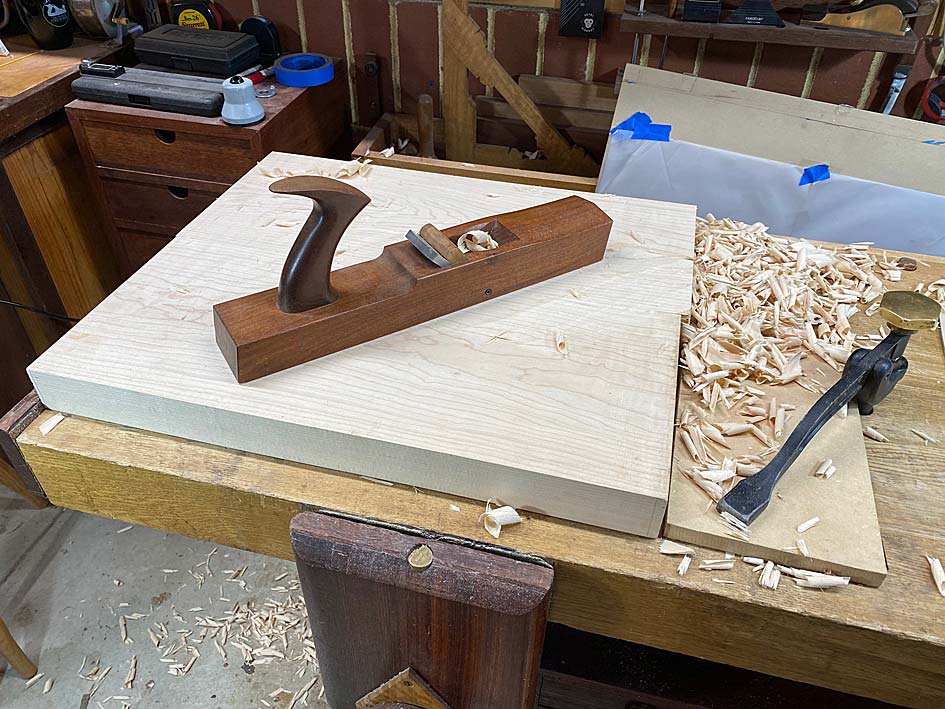
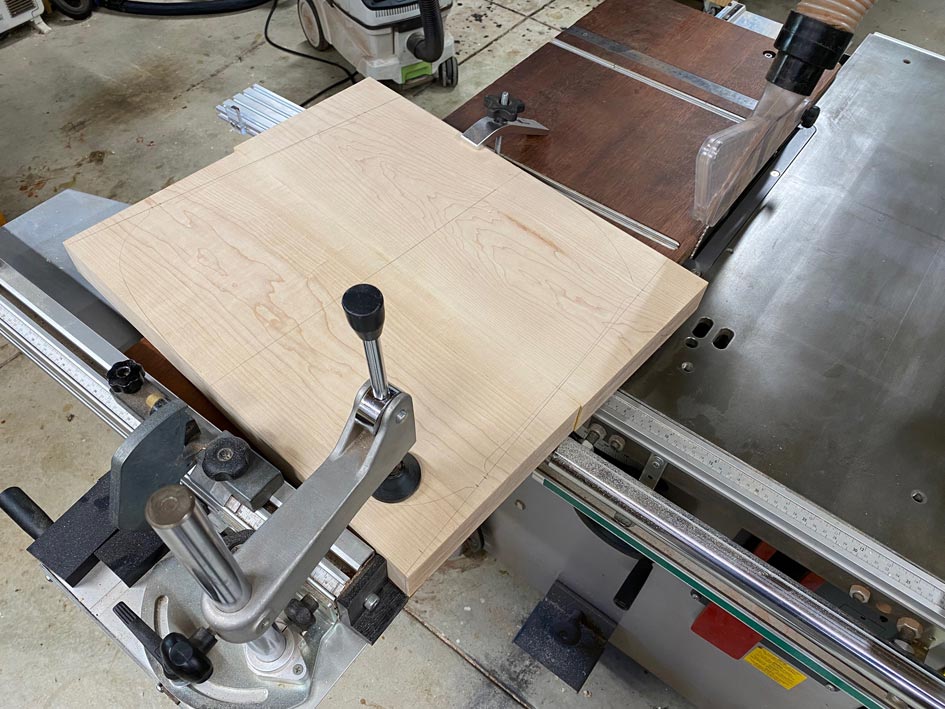
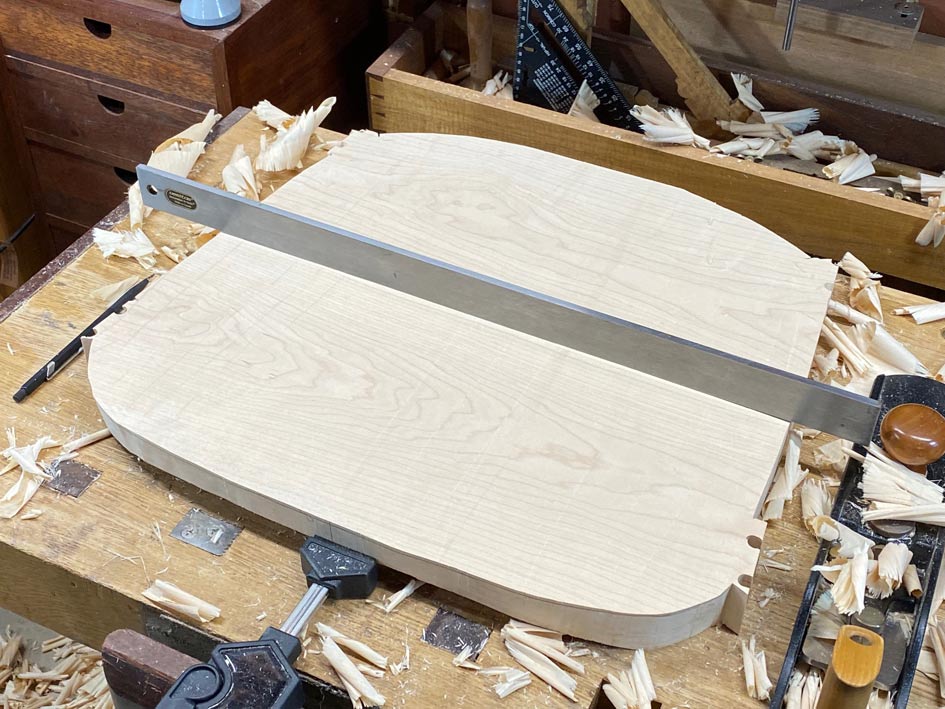
These are now sawn to shape ...
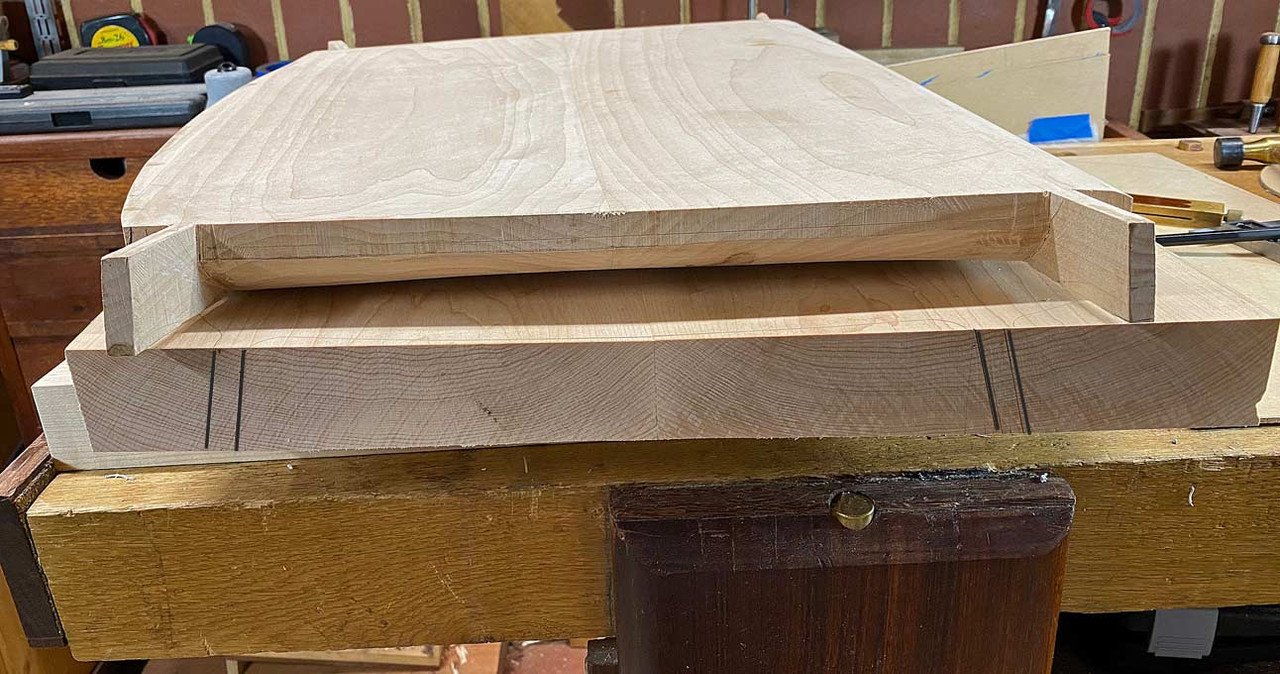
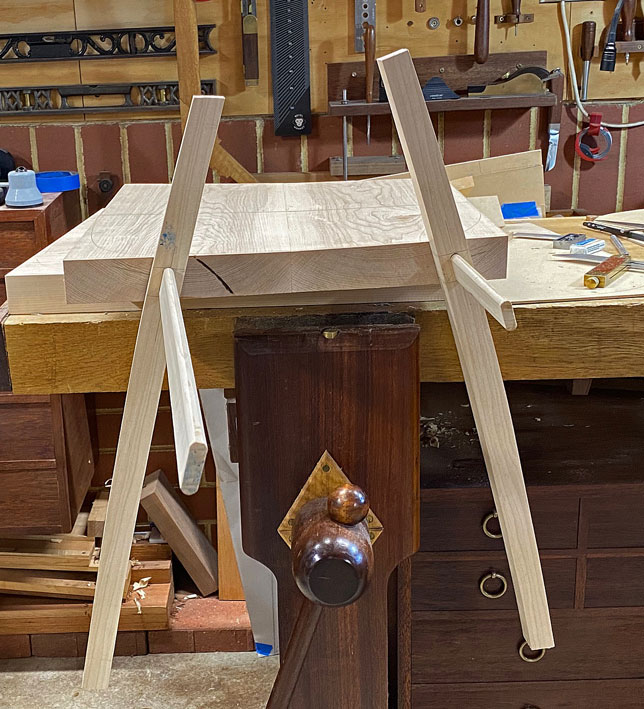
After this was done it became apparent just how the first shaping of the chairs differed from the DC09 design. Here is the first chair along with two legs. In the background can be seen the plan I had made for that build ...

It looks quite good, with the angles and spacings appearing correct. In fact, they are quite different from the DC09. Below is the DC09 seat below the first seat. You can see the positioning of the legs ..
Before I dominoed the mortices, the legs were mocked up to be sure of the angles. I discovered that they should be at 14 degrees and not 10 degrees, as they had been before. In the top right corner you can see a DC09 for comparison ...
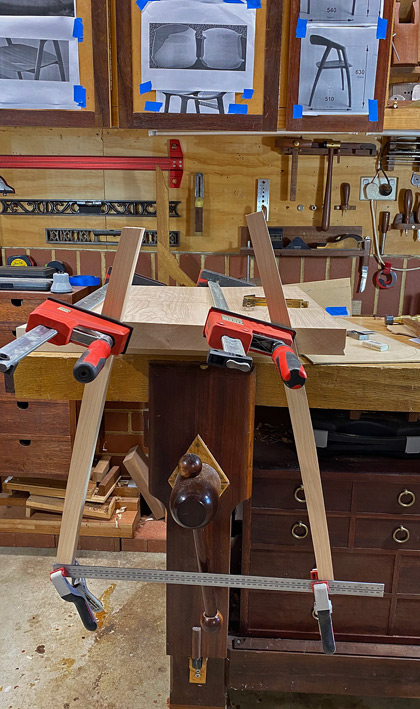
Guides for 14 degrees ...
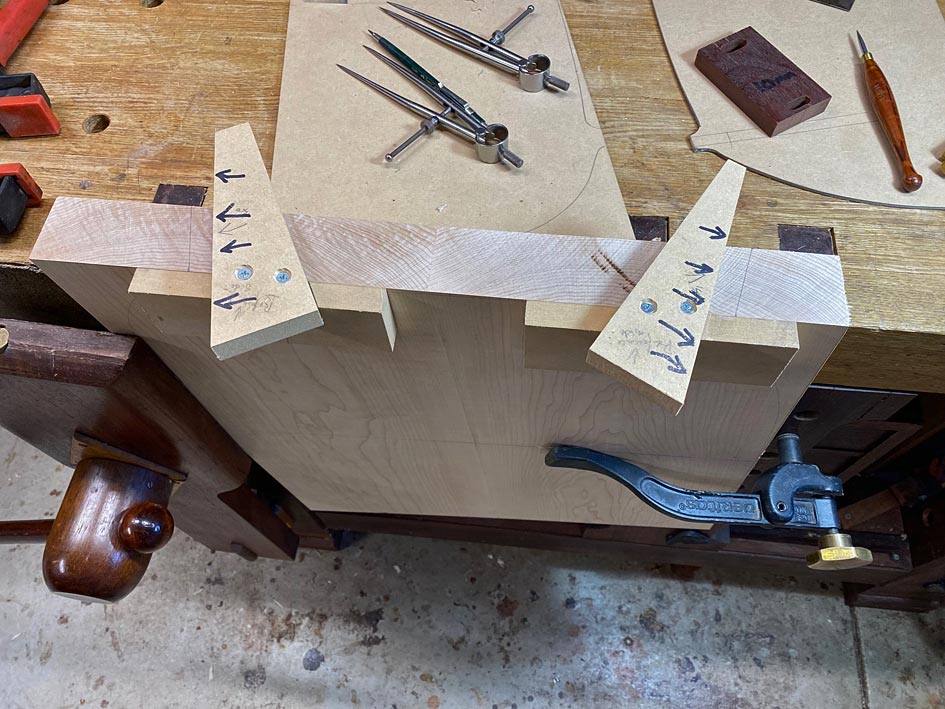
Marked and morticed ...

Tenons were made on the router table ...
All is looking right so far ...
The rule for chair backs is that thy need to allow for a lean of about 90-95 degrees. I have been thinking about this but decided to set aside this area for later. The priority is to get the seat shape correct - in three dimensions. - and its relationship with the legs (which were shaped in the first build - they are substantially correct, other than the upper ends being around 28mm against the - estimated - 40mm of the DC09. I will decide on whether to keep or replace these later). I have left the legs 1" longer in the lower half to adjust the tilt of the seat (the seat sits 18" off the ground and the ones I made previously are 19" in this respect).
I did stand the old chair along the table, and noted how low the arm rests were in reality - actually an ideal height for comfort. I do have some ideas how they may be "improved" aesthetically .... but this for later.
All advice gratefully received.
Regards from Perth
DerekVisit www.inthewoodshop.com for tutorials on constructing handtools, handtool reviews, and my trials and tribulations with furniture builds.
-
28th January 2024 04:42 AM # ADSGoogle Adsense Advertisement
- Join Date
- Always
- Location
- Advertising world
- Posts
- Many
-
28th January 2024, 02:35 PM #2
Be inspired. Be creative. Be bold.
- Join Date
- Apr 2001
- Location
- Perth
- Posts
- 10,826
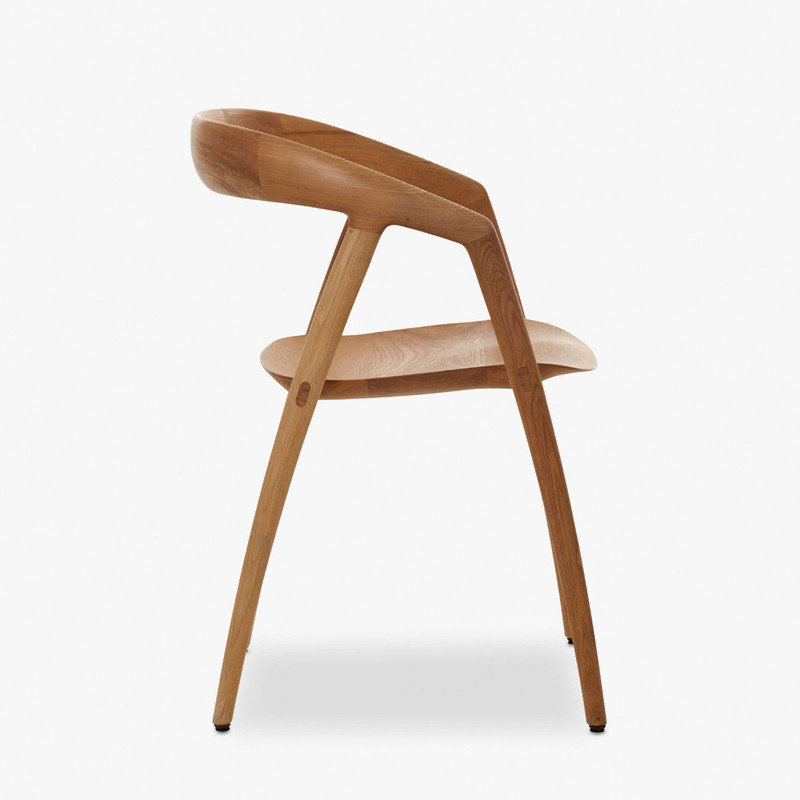
I was asked how I developed the drawings and plans, especially as there are numerous compound angles. It is a important question for those who want to use the ideas that are around us.
What I do is explore the videos and all photos, and then screen save relevant examples. From this I estimate or calculate size, approximate dimensions, and refine these over multiple examples. Here are some of the photos I used ....


Regards from Perth
DerekVisit www.inthewoodshop.com for tutorials on constructing handtools, handtool reviews, and my trials and tribulations with furniture builds.
-
29th January 2024, 11:59 PM #3
Be inspired. Be creative. Be bold.
- Join Date
- Apr 2001
- Location
- Perth
- Posts
- 10,826
A question about loose tenons
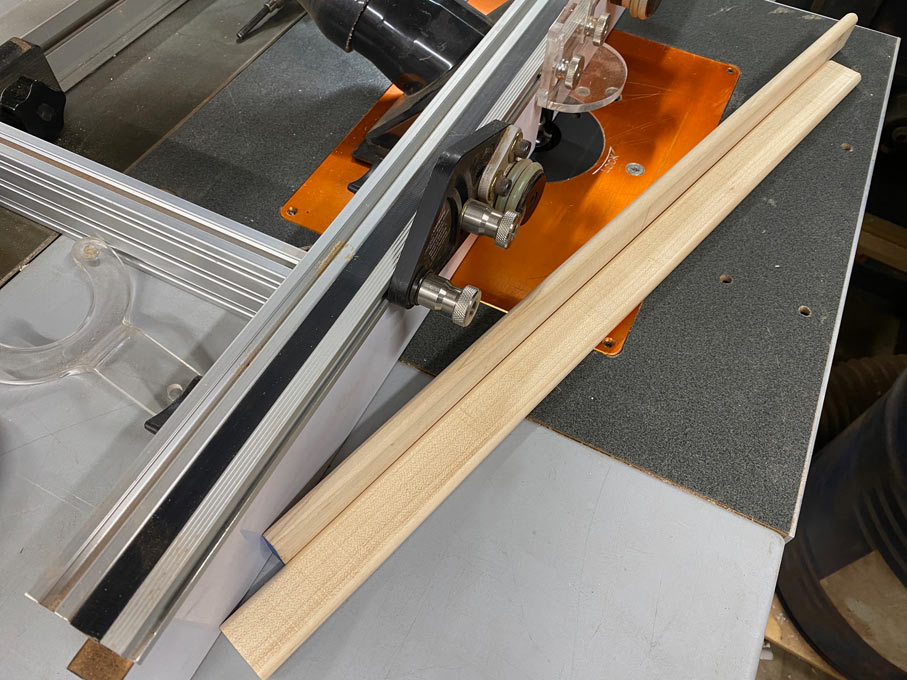
The legs will be joined to the seat with loose tenon mortice-and-tenon joinery. The tenons are Hard Maple, as with the rest of the build. I am in the process of choosing the stock for the 10mm wide x 30mm long tenons. The aim is to ensure that these are the best for a chair. Not any other purpose, but a chair.
The issue is grain direction: is it better to have the grain running horizontal or vertical?
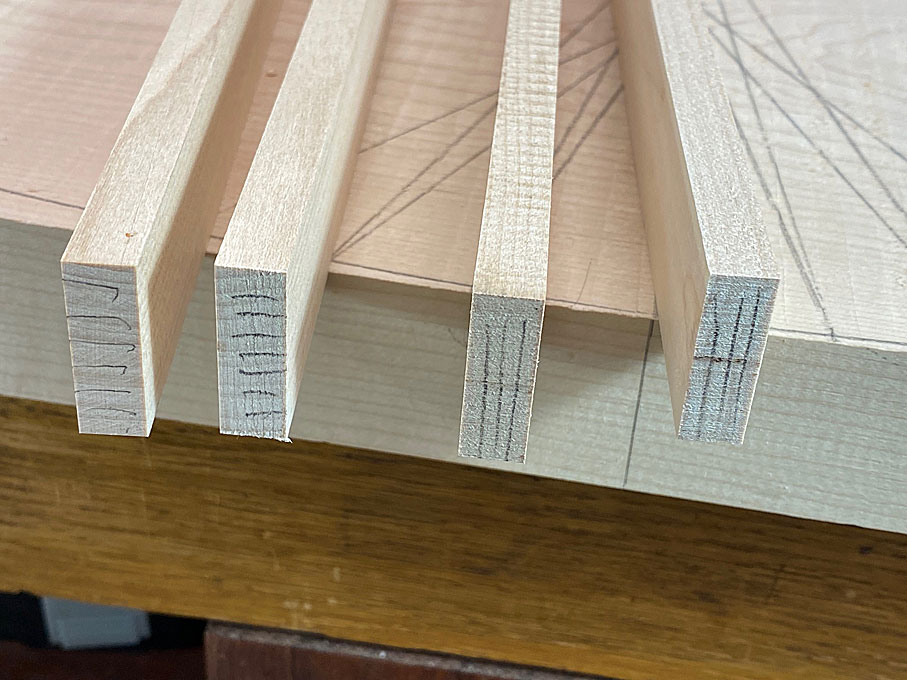
Vertical grain should offer more rigidity, while horizontal grain more flexibility. While is preferred - your opinion?
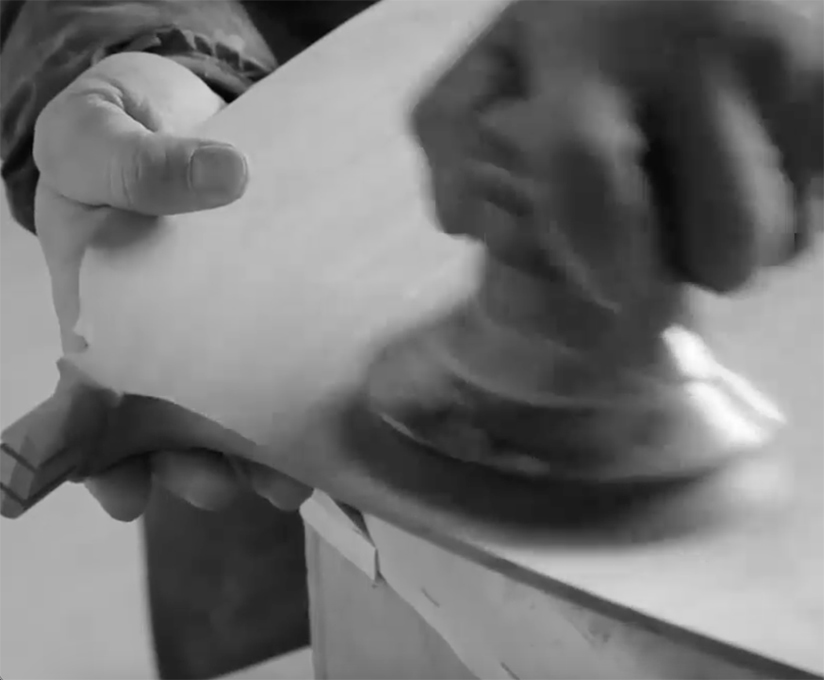
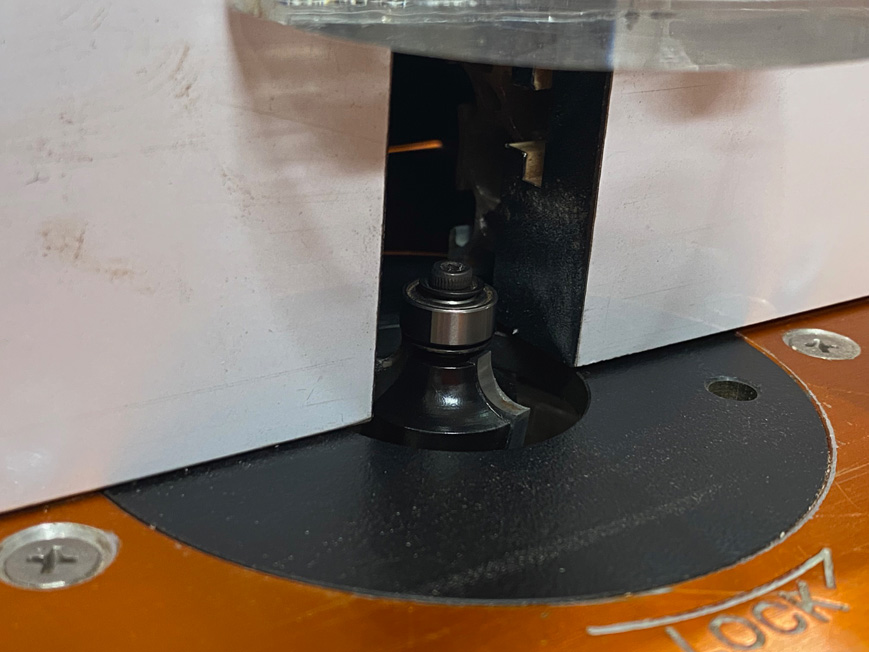
The square stock is shaped on the router table ...
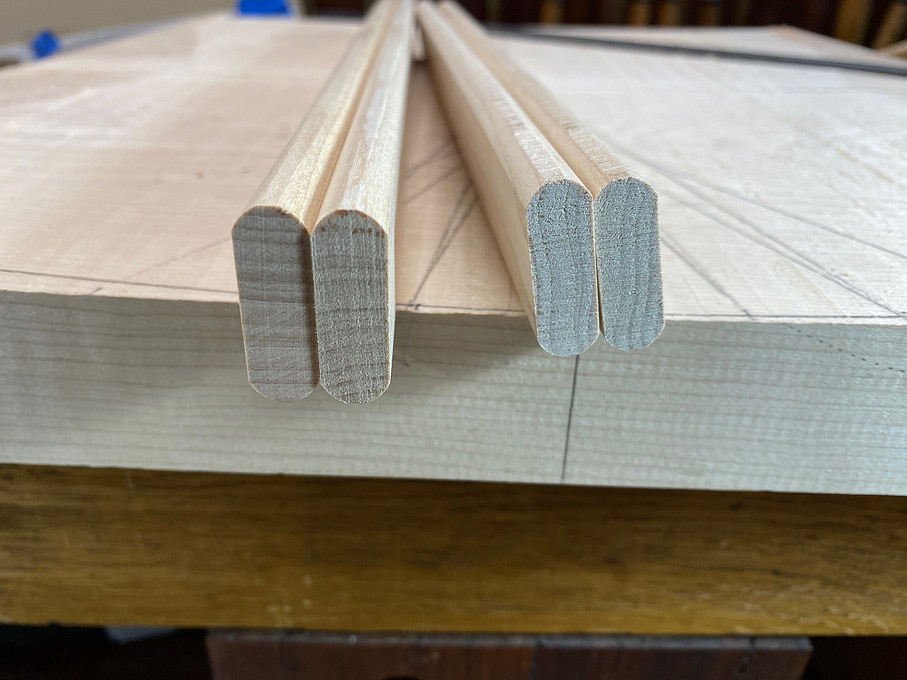
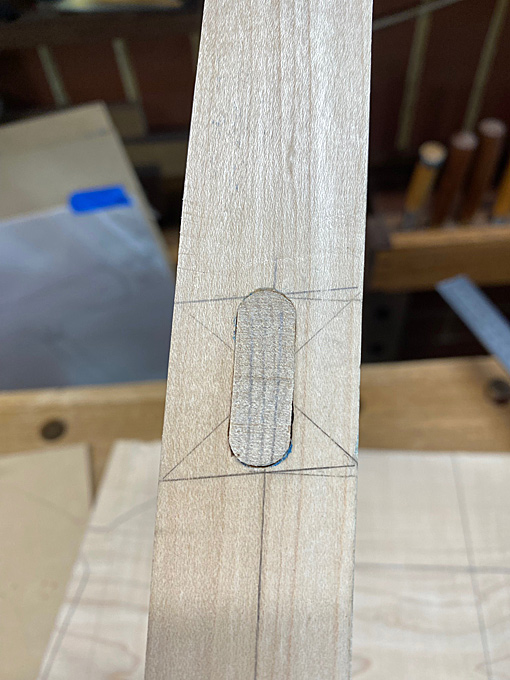
This is how it will look in the leg through mortice (minus the wedge and the rounded leg) ...
Regards from Perth
DerekVisit www.inthewoodshop.com for tutorials on constructing handtools, handtool reviews, and my trials and tribulations with furniture builds.
-
30th January 2024, 09:25 AM #4
GOLD MEMBER
- Join Date
- Aug 2011
- Location
- bilpin
- Posts
- 3,559
Both quarter cut and flat sawn have there pros and cons. A good compromise is rift sawn. It also looks nicer on the exposed end, is less likely to split than quarter sawn if using wedges and can be grain orientated by reversing the tenon.
-
5th February 2024, 01:32 AM #5
Be inspired. Be creative. Be bold.
- Join Date
- Apr 2001
- Location
- Perth
- Posts
- 10,826
This is a long post with a good many photos. Treat them like a comic strip - flip by. It's just that there is so much more than one might realise that needs to get done when carving a seat. It is a 3D construction, and more complicated than joining square sections. This will become apparent as we progress.
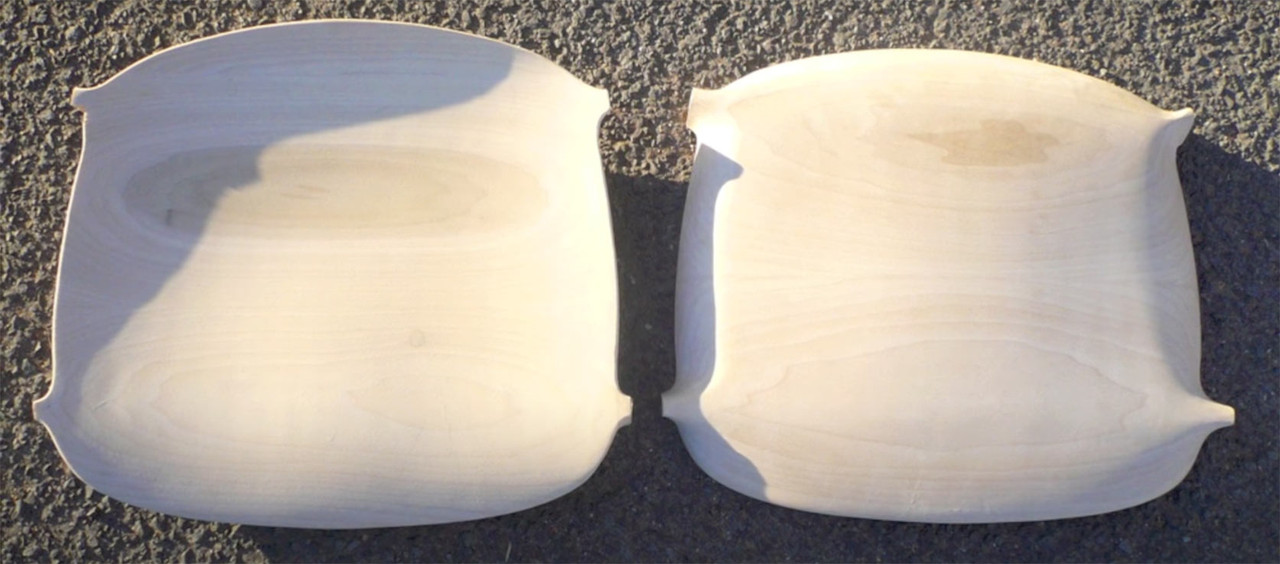
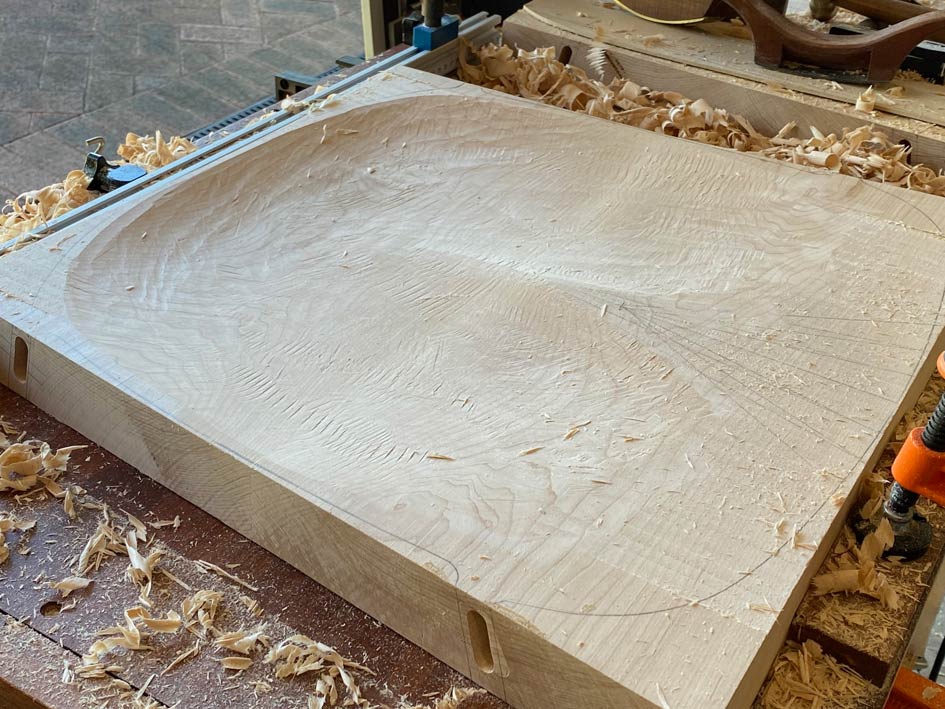
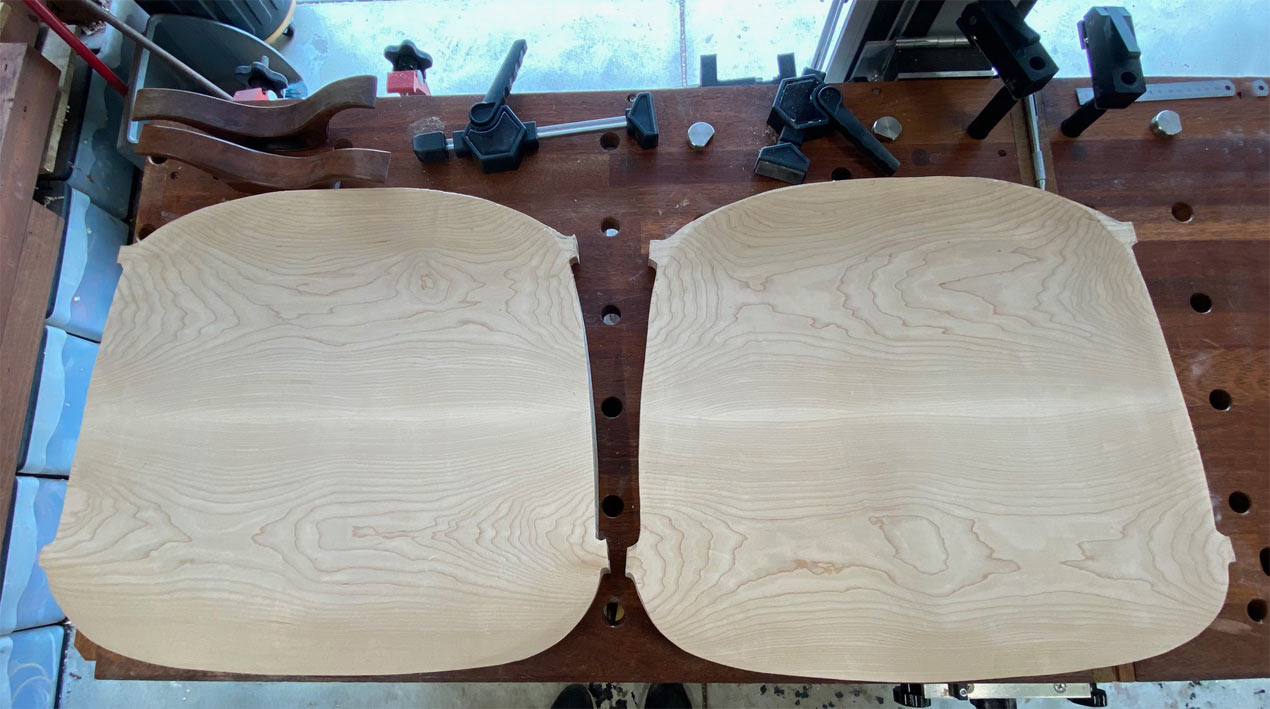
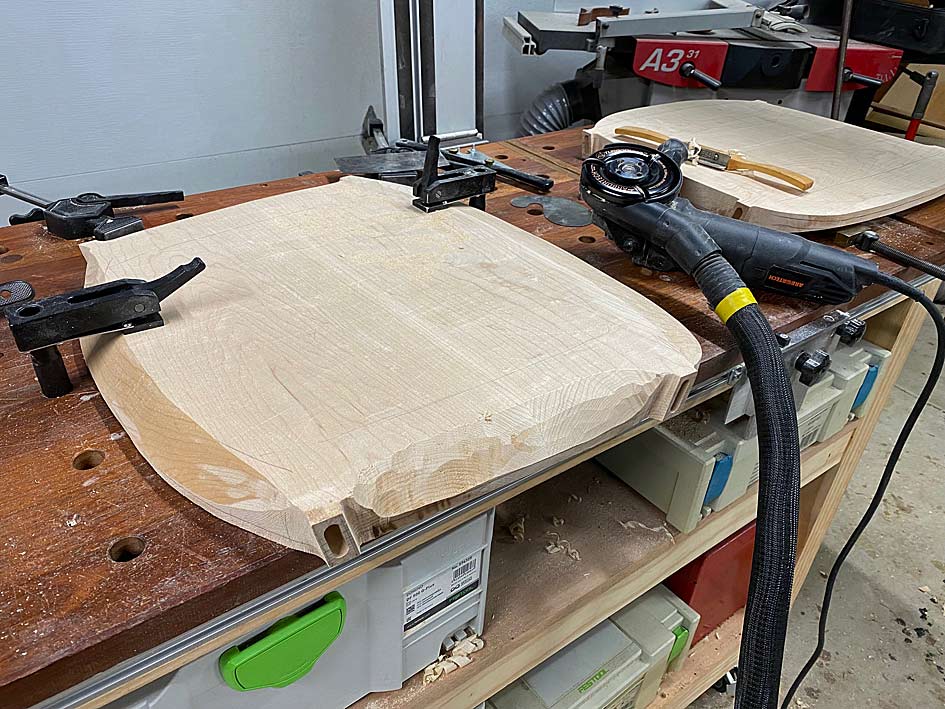
These are the two seats. Both have been prepped with drilled holed to carve to depth. My plan is to work two seats alongside one another, completing a section on one and then duplicating it on the other, moving on, back-and-forth. The first stage is to power carve the rear of the seat using the Arbortech ...

Garage doors make for a handy white board to hang photos. These are the seats, and the angles provide the needed guidance.
First shaping ..
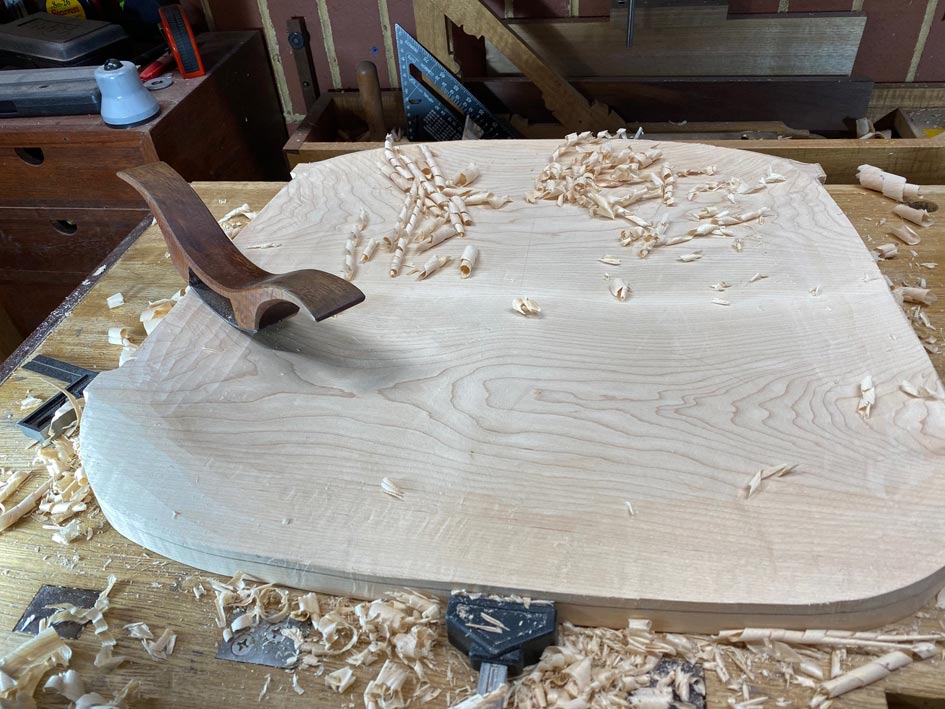
It's rougher than it looks. A travisher begins the process of smoothing the curves ..
Every now-and-then a scraper will refine the tear out ...
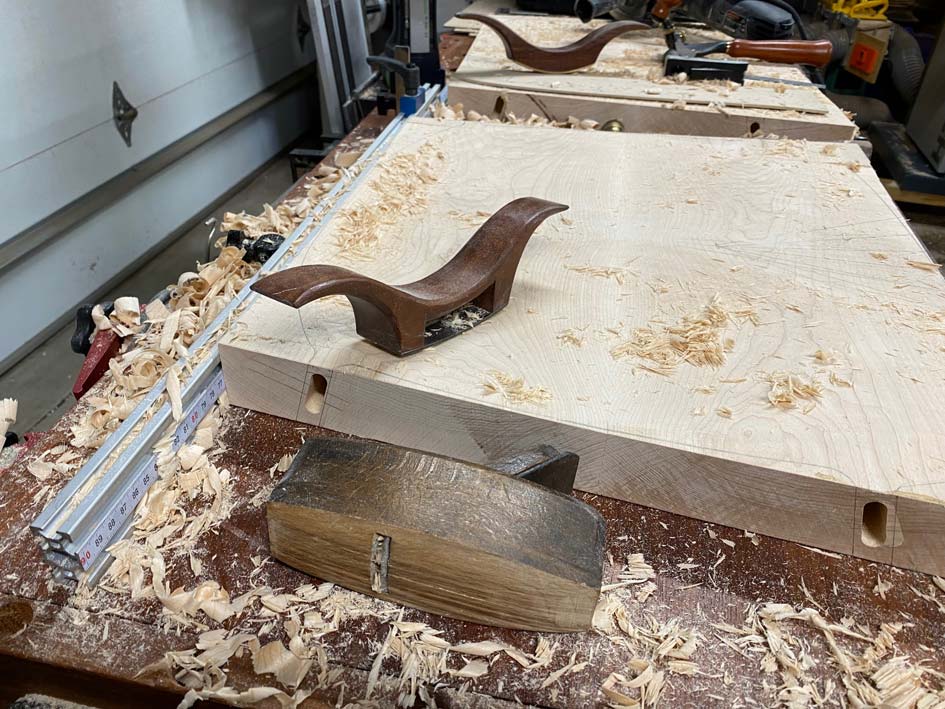
We begin the front section of the seat now, again using the Arbortech carver ...
And refine with a travisher ..
... always feeling the surface with a hand to detect any uinevenness ...
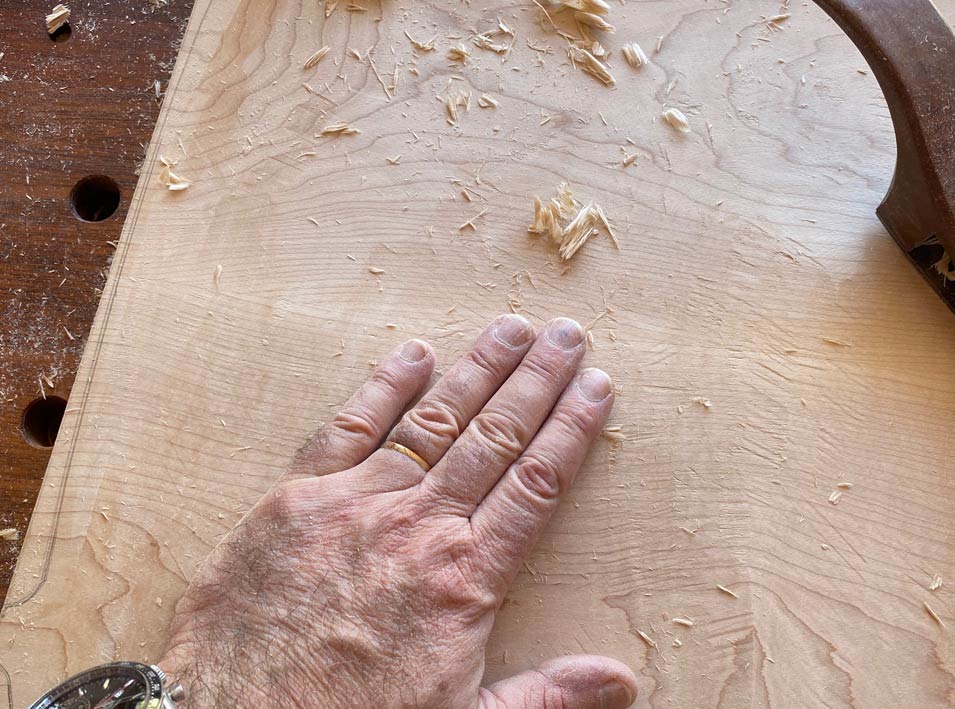
It is beginning to resemble the photos ...
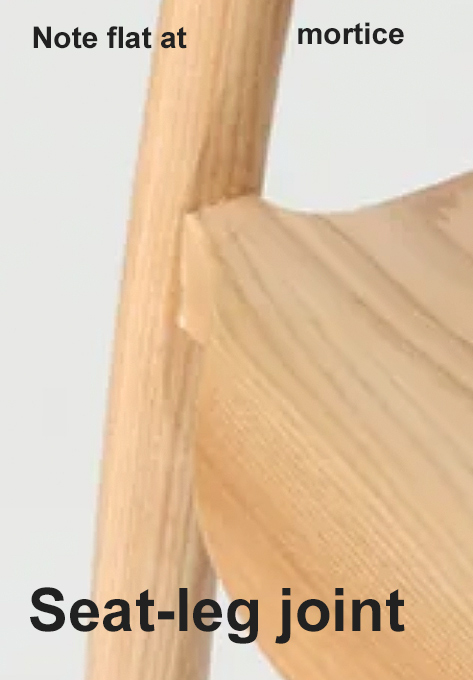
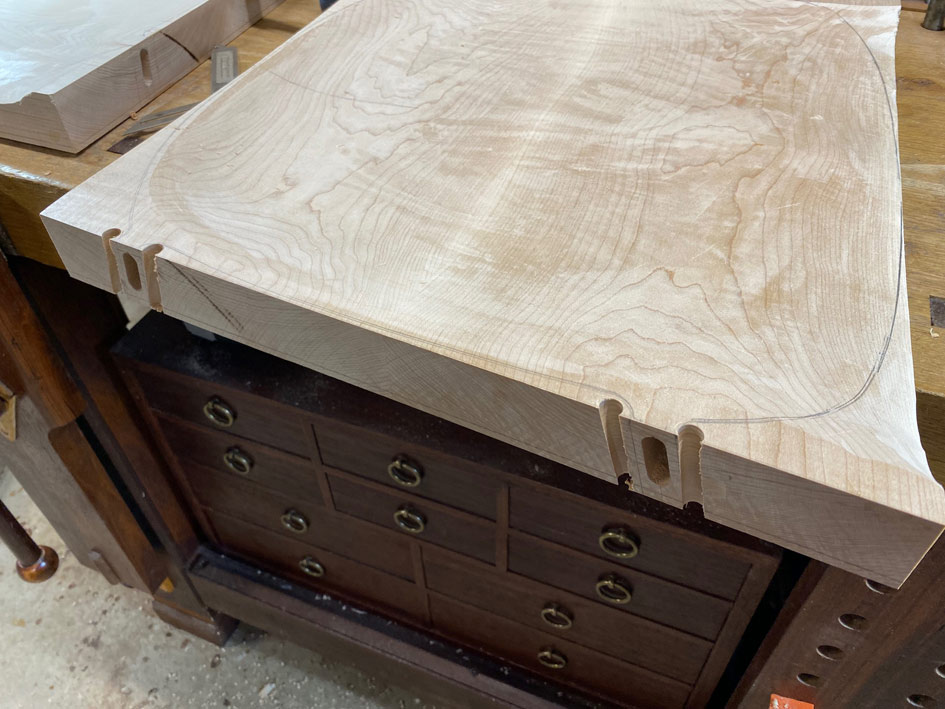
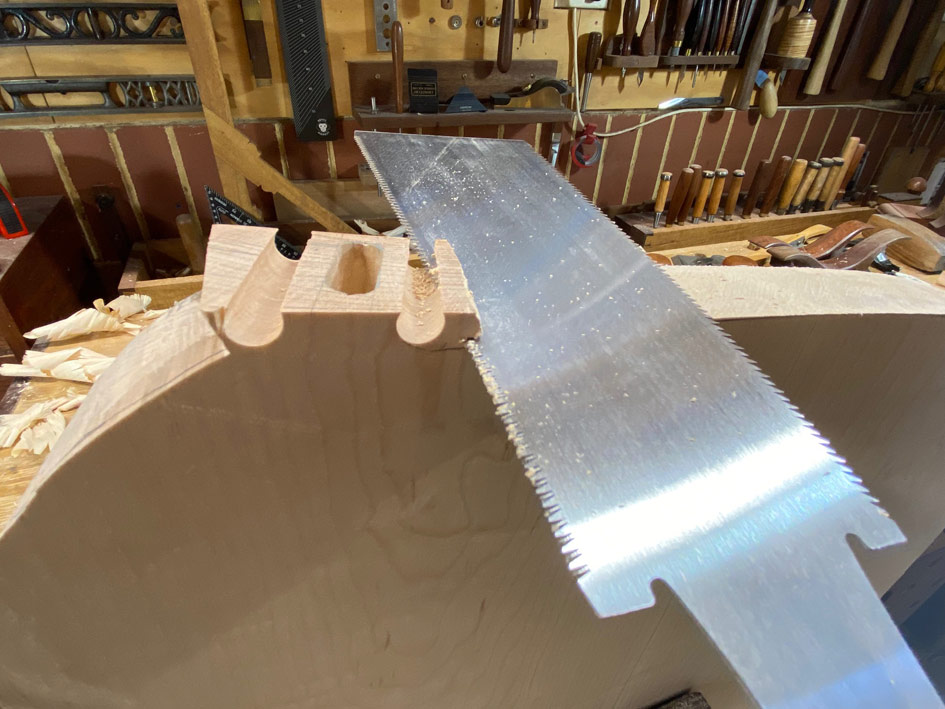
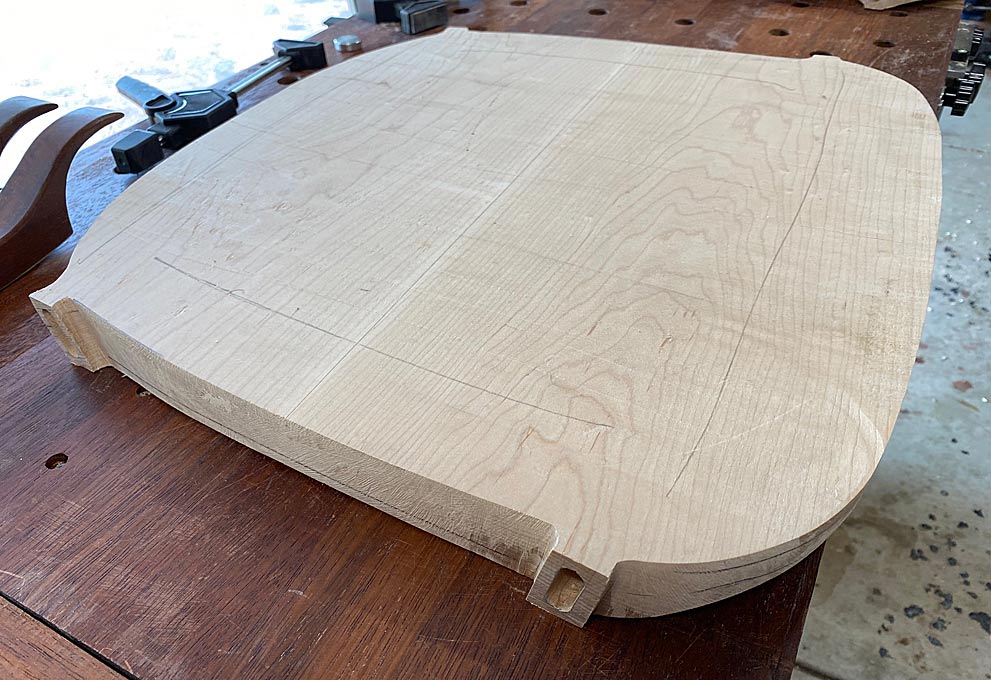
At this stage it is time to cut out the seat surround, but before this can be done, the mortices (for the loose tenons) need to be preserved. This is not straight forward as they angle at 14 degrees. As a result, it is not possible to saw from end to end. The area around the tenon will require extra shaping.
My plan was to drill alongside the base, which would refine it and also create a curved root ...

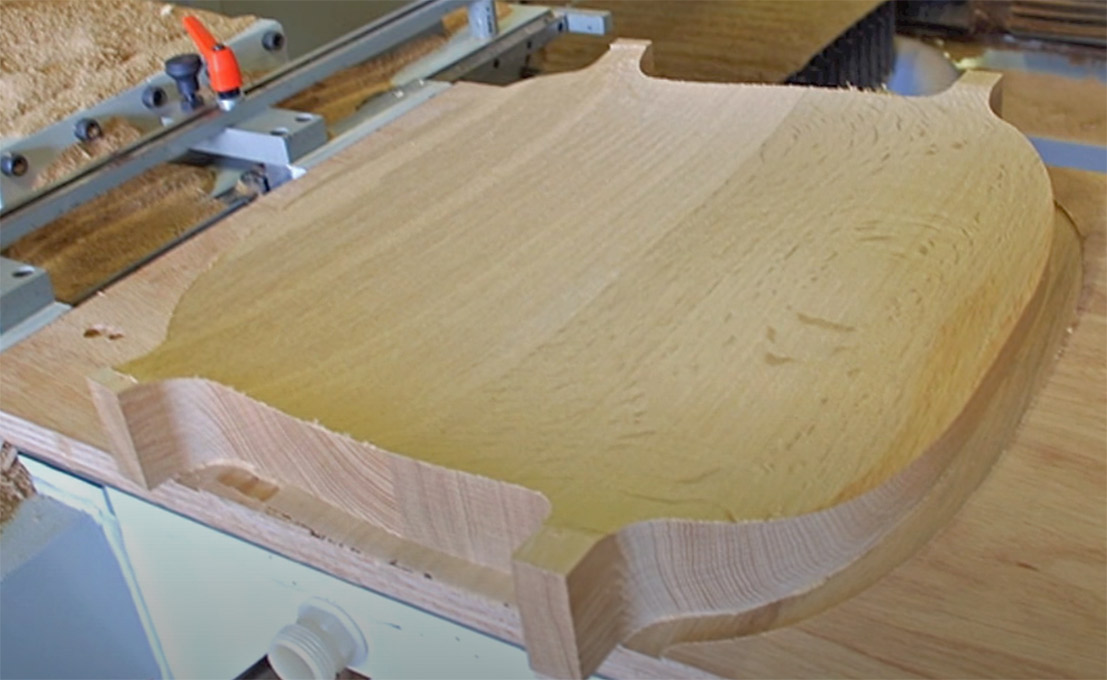
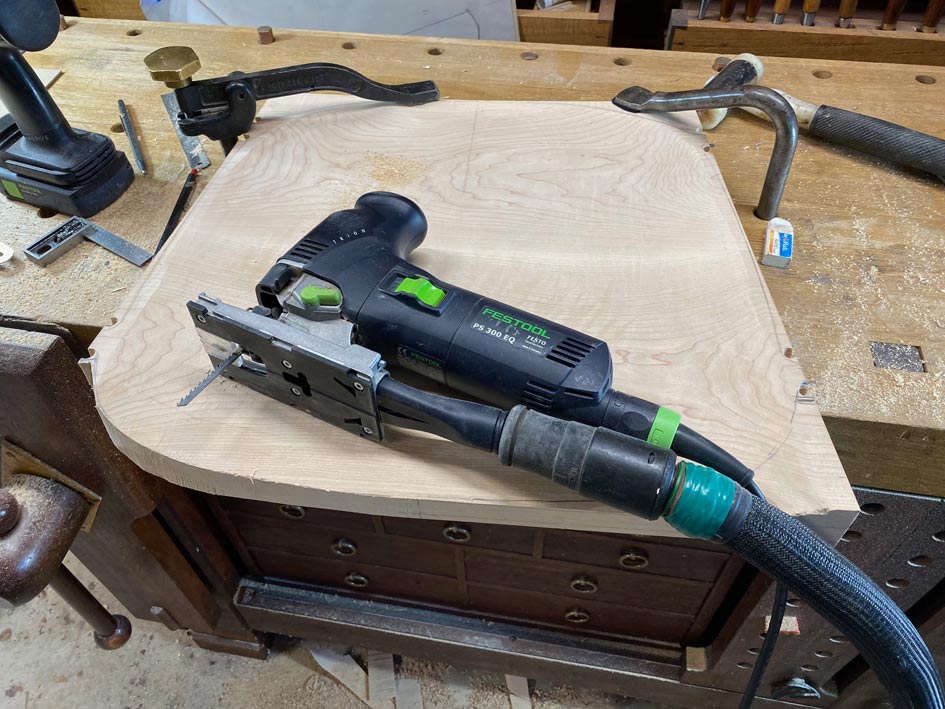
Then as much as possible was sawn away with a jigsaw ...
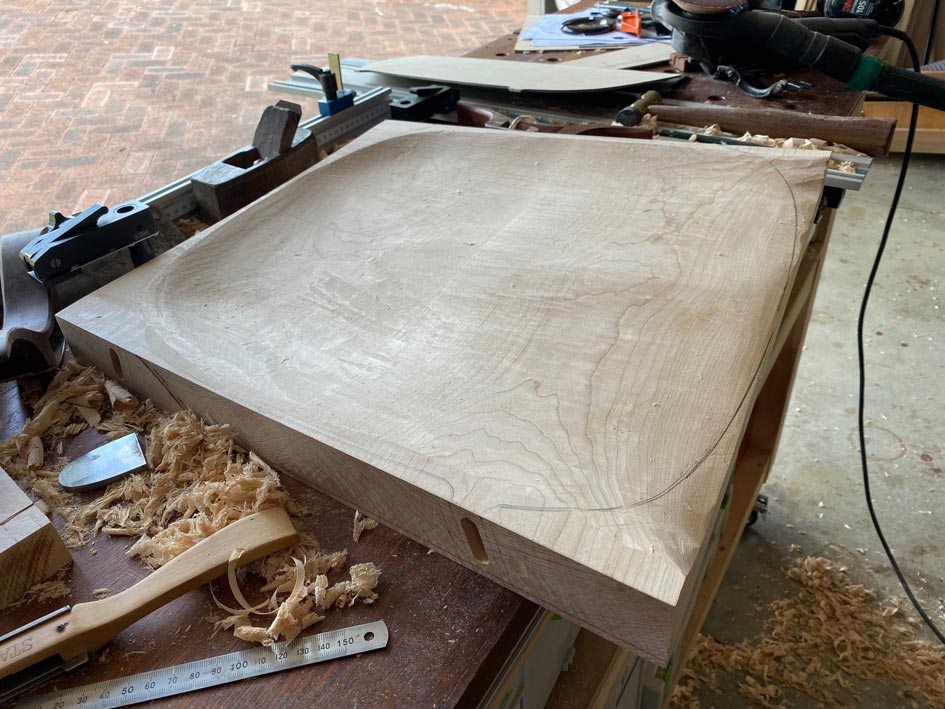
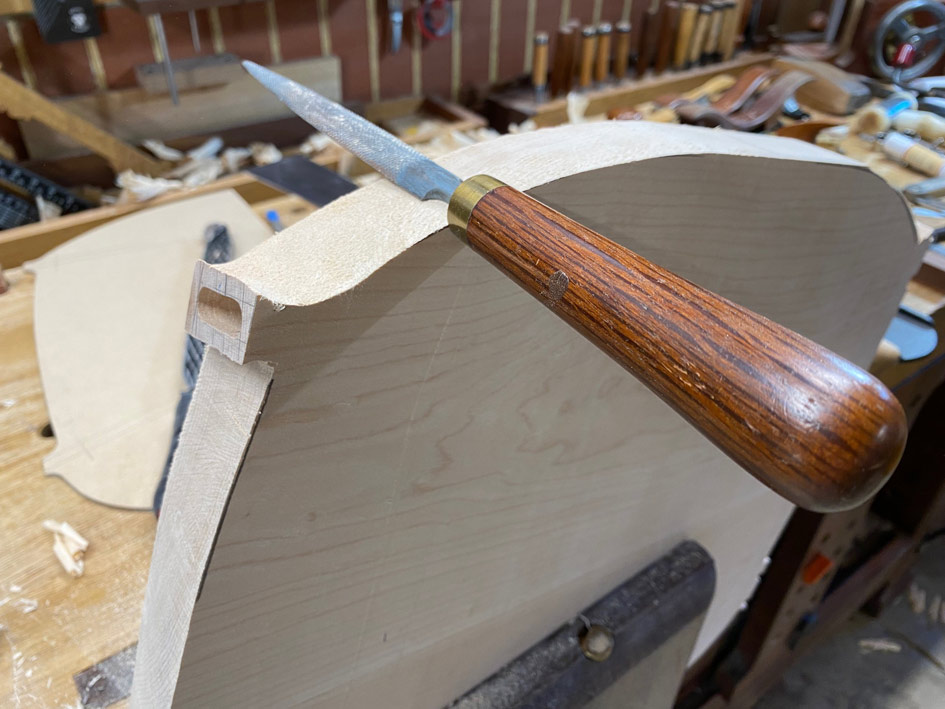
Time to refine the front section and tenons. To do this, the underside of the seat needed to be made perfectly flat: this will provide a reference side to mark the boundaries at the front for carving to; also, taking down the bottom will define the bottom of the tenons ..
The shape of the underside is estimated using the templates for the top side ..
.. and refined with a rasp ..
Waste sawn away ...
.. and shaped ...
Again and again ...
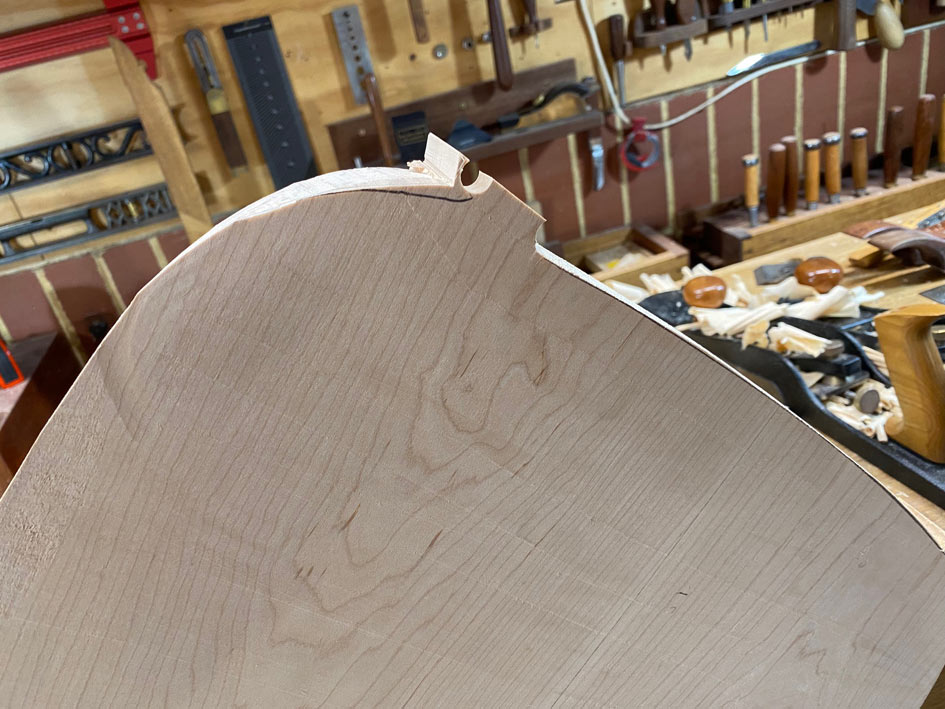
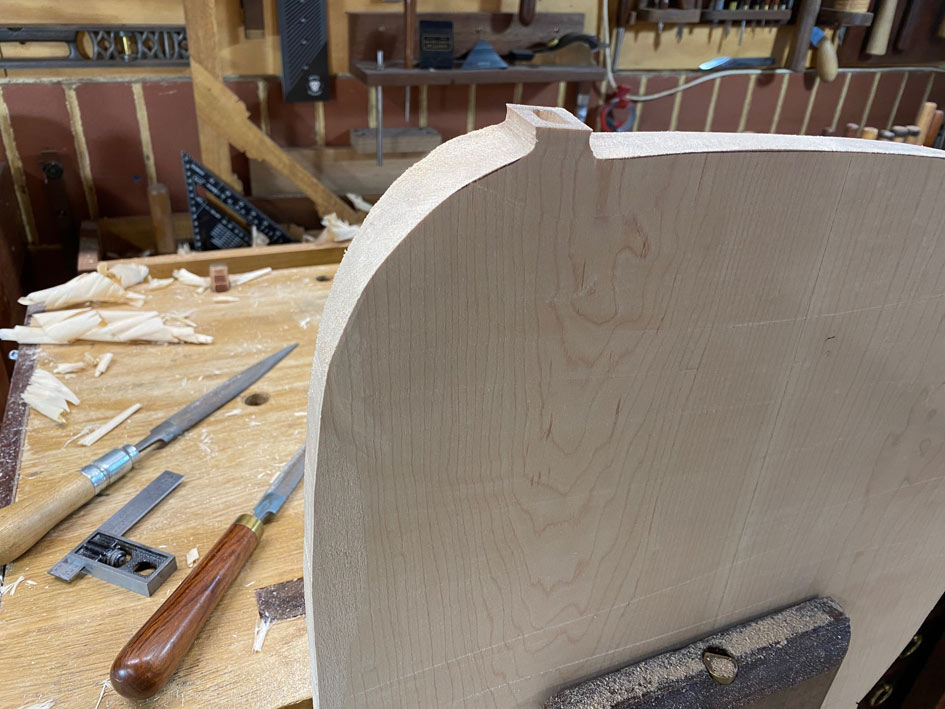
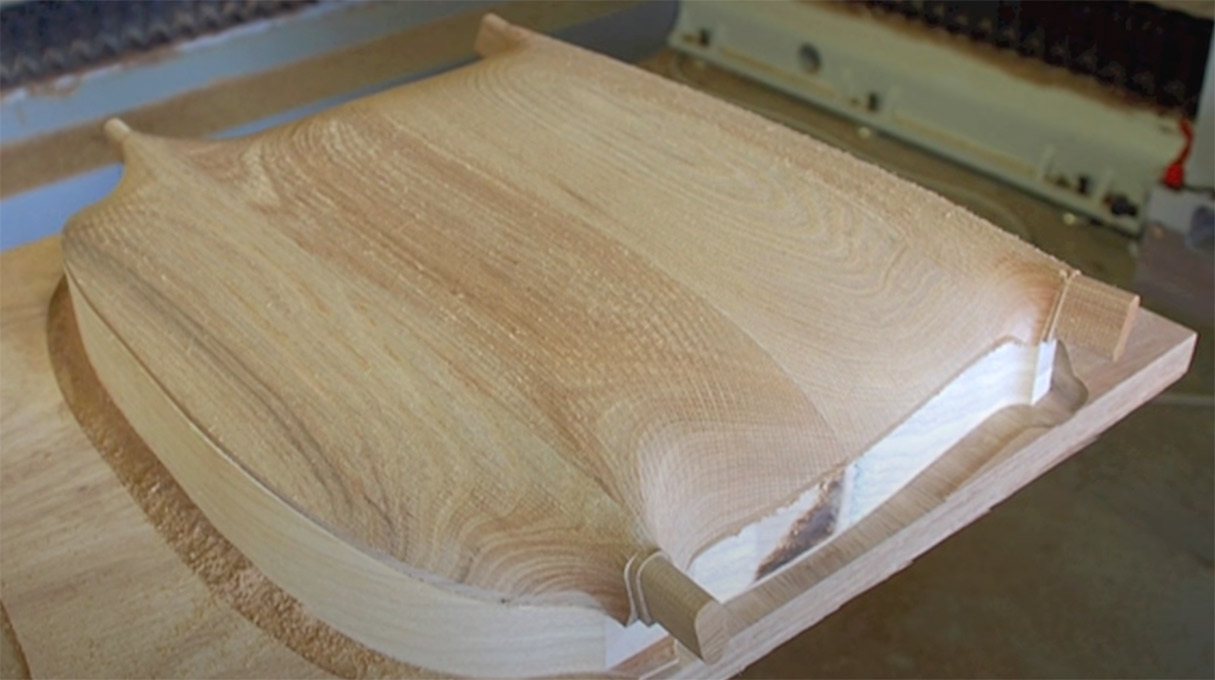
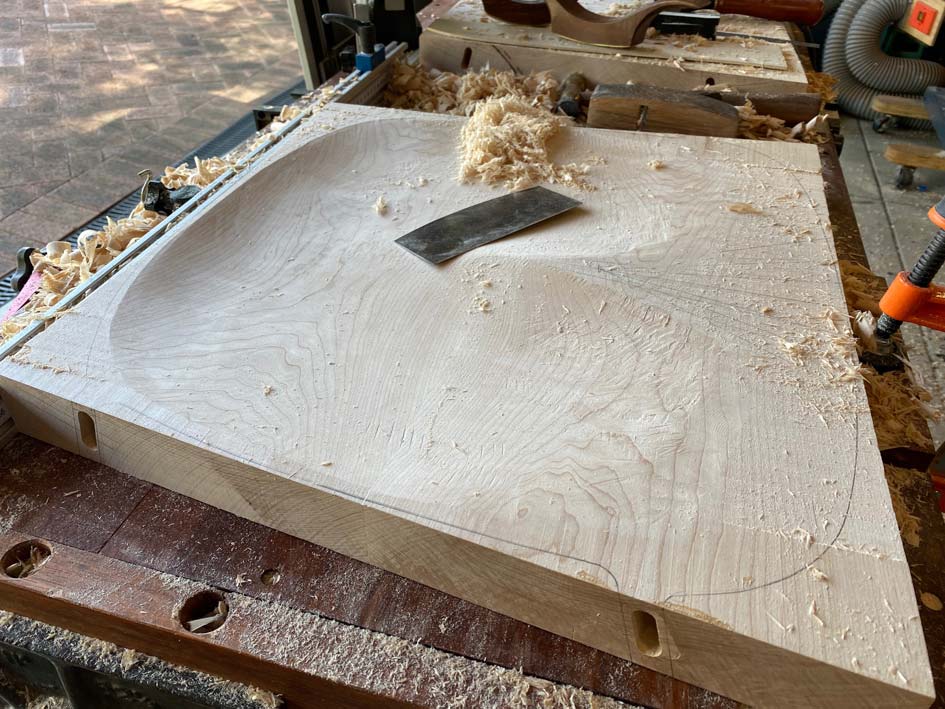
Finally the front of the seat can be shaped as it flows from the end of the tenons ...
With raking light, the tear out and bumps are more easily seen, and now sanded down with 80 grit (more will be done much later on) ...
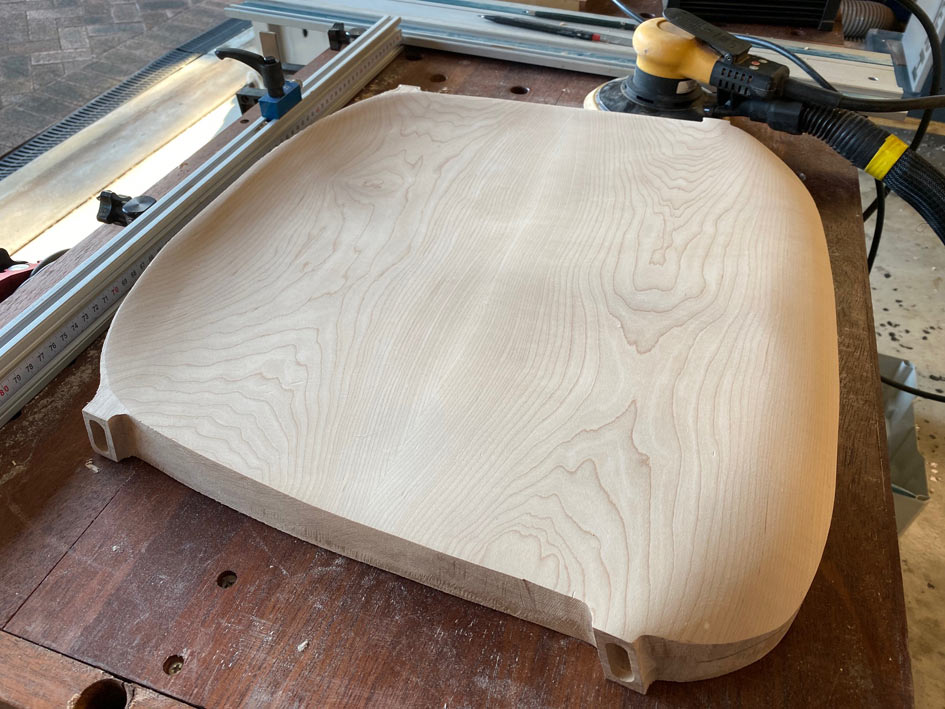

And that's it for today. Underside shaping to come.
Regards from Perth
DerekVisit www.inthewoodshop.com for tutorials on constructing handtools, handtool reviews, and my trials and tribulations with furniture builds.
-
5th February 2024, 08:27 AM #6
 GOLD MEMBER

- Join Date
- Nov 2011
- Location
- Melbourne
- Posts
- 7,013
Fantastic work Derek, but if this was a Comic strip, say like MAD, shouldn�t there be a Bum picture too check the seat works??.
Cheers Matt.
-
5th February 2024, 10:47 AM #7
... and this too shall pass away ...
- Join Date
- May 2012
- Location
- Brisbane (Chermside)
- Age
- 71
- Posts
- 2,084
Beautiful work.
-
5th February 2024, 12:40 PM #8
Be inspired. Be creative. Be bold.
- Join Date
- Apr 2001
- Location
- Perth
- Posts
- 10,826
I did get Lynndy to sit on (in?) the seat. As John said, "Beautiful work". But she would not let me post a photo of it Originally Posted by Simplicity

")
Regards from Perth
DerekVisit www.inthewoodshop.com for tutorials on constructing handtools, handtool reviews, and my trials and tribulations with furniture builds.
-
5th February 2024, 04:59 PM #9
GOLD MEMBER
- Join Date
- Nov 2011
- Location
- Melbourne
- Posts
- 7,013
Derek, Originally Posted by derekcohen
Lynndy, obviously does not want to be involved in your demise, I get it.
Looking forward too the next exciting episode.
Cheers Matt.
-
5th February 2024, 07:48 PM #10
GOLD MEMBER
- Join Date
- Nov 2004
- Location
- Redlands area, Brisbane
- Posts
- 1,490
As always Derek, inspirational!
-
6th February 2024, 11:20 AM #11
GOLD MEMBER
- Join Date
- Aug 2011
- Location
- bilpin
- Posts
- 3,559
Derek, I hope you are keeping an eye on the time. Chair making is very much a race against the clock. For instance, seat shaping should be about an hour. How did you go?
-
7th February 2024, 12:14 AM #12
Be inspired. Be creative. Be bold.
- Join Date
- Apr 2001
- Location
- Perth
- Posts
- 10,826
Absolutely not, RN. I was going to make a joke, but the truth is that I am really enjoying the challenge of this chair, but it is also a lot more work than I imagined. Originally Posted by rustynail
When I started out, it was just going to be a couple of carvers, and I took inspiration from the DC 09 chair. Time was spent calculating angles and sizes, but it was moving along.
Then (after the tenons on the first seats blew up, or threatened to do so), and I started again, the DC 09 became a challenge to copy. Now you look at the guys on YouTube building chairs, even the ones like this with complex and compound angles and curves, and they are using templates to mark out everything. Then it is a matter of sawing it out, joining the parts, and shaping/sanding the construction. But what happens when you do not have templates with which to work, and all you start with is a few photos.
Race the clock?!
Regards from Perth
DerekVisit www.inthewoodshop.com for tutorials on constructing handtools, handtool reviews, and my trials and tribulations with furniture builds.
-
7th February 2024, 03:07 PM #13
 Senior Member
- Join Date
- Aug 2005
- Location
- Gladstone, QLD
- Age
- 71
- Posts
- 478
That surely is beautiful work Derek.
-
7th February 2024, 03:11 PM #14
GOLD MEMBER
- Join Date
- Aug 2011
- Location
- bilpin
- Posts
- 3,559
Derek,I understand, there are many anomalies when it comes to a first time chair design/manufacture. I remember a commission for a dinning suite for a client of many years. The design was not a familiar one and to price the chairs I had to take the individual components, compare with similar from previous chairs and use that labour time as a guide. Thank goodness I keep records. The table was a breeze, the chairs are always where the work is. Eight of them means a miscalculation becomes expensive. Ten and you wish you had selected another profession!
Your comment, "Longer than I imagined." is very much the war cry of the bespoke chair maker.
I am pleased you are enjoying the experience. They are fun to make but can be very time consuming.
-
19th February 2024, 02:12 AM #15
Be inspired. Be creative. Be bold.
- Join Date
- Apr 2001
- Location
- Perth
- Posts
- 10,826
Time to finish the seats ... sort of ... well, very close.
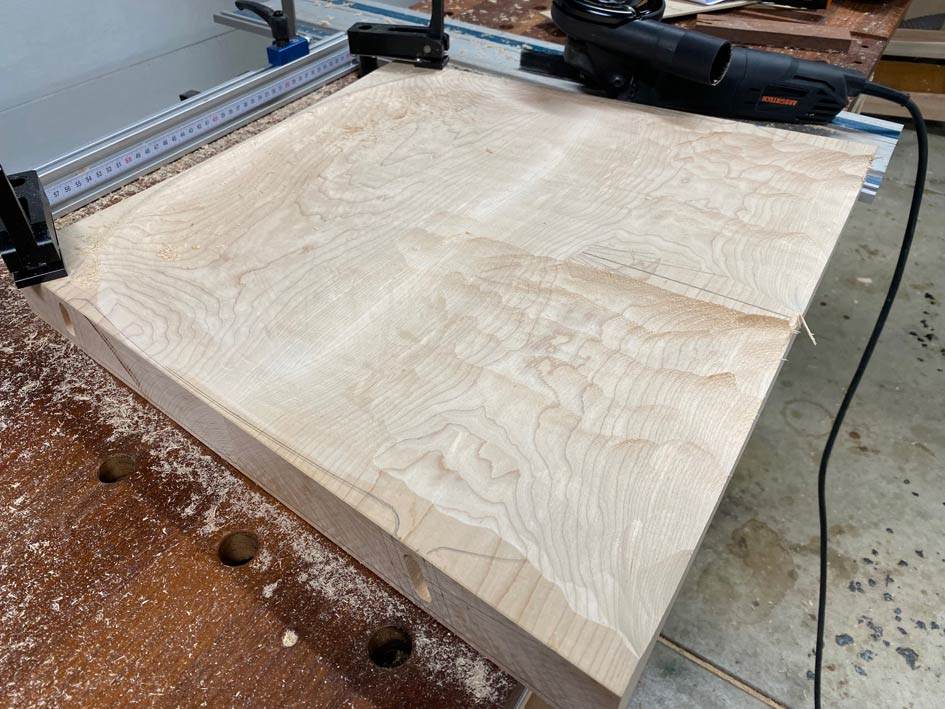
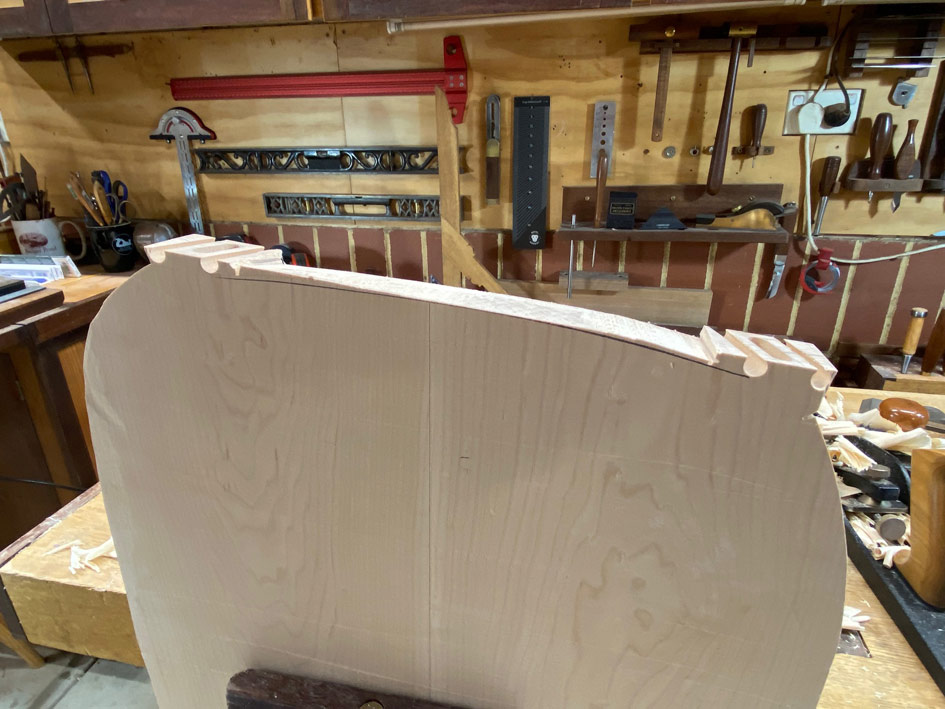
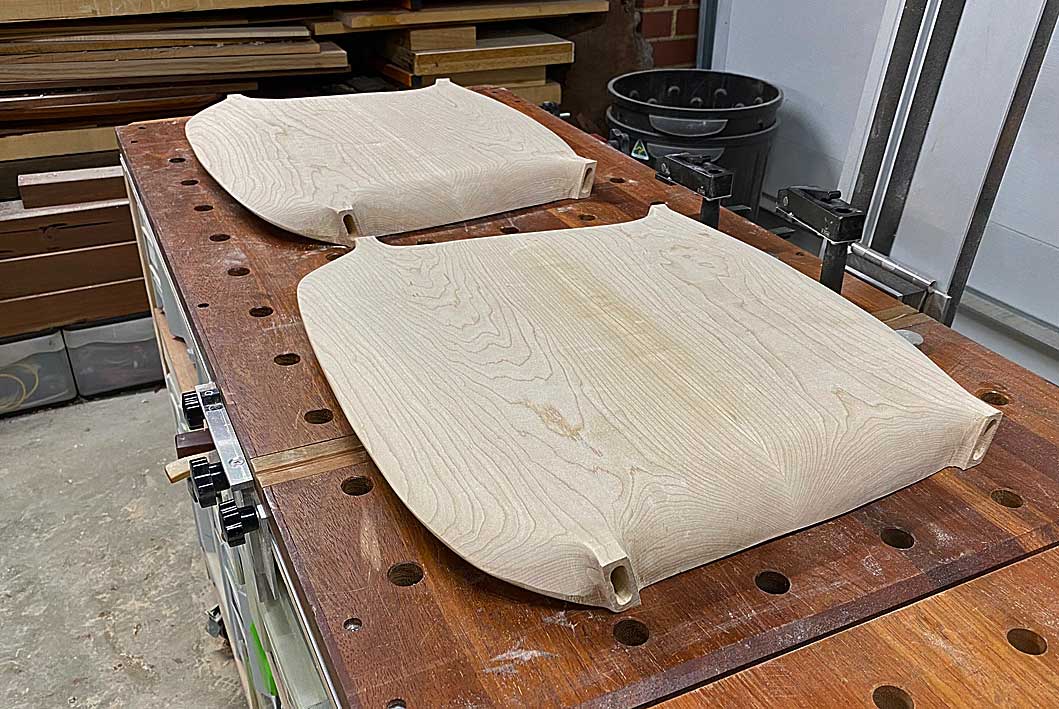
This is where we start - two seats completed on the upper side ...
Looking at the seat blanks from the side, it is apparent that they are 2" thick ...
... and they need to end up looking slim, like this ...
Clearly, there is a great deal of waste to remove from the sides. That is, not to thin the thickness, but to taper the sides to create the impression of thinness.
Here is another view, which better illustrates this ...
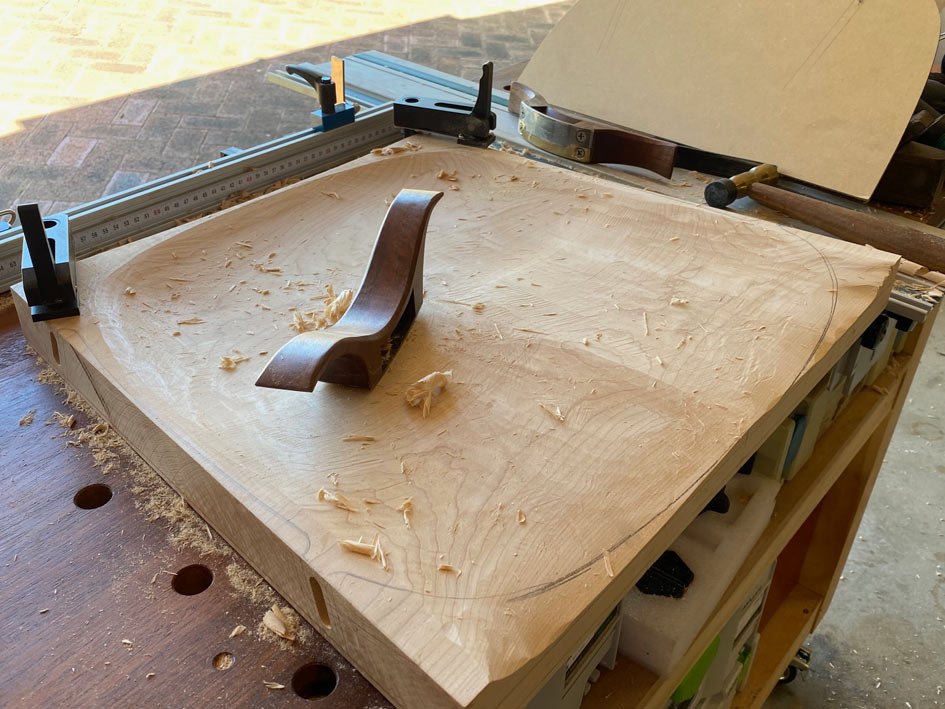
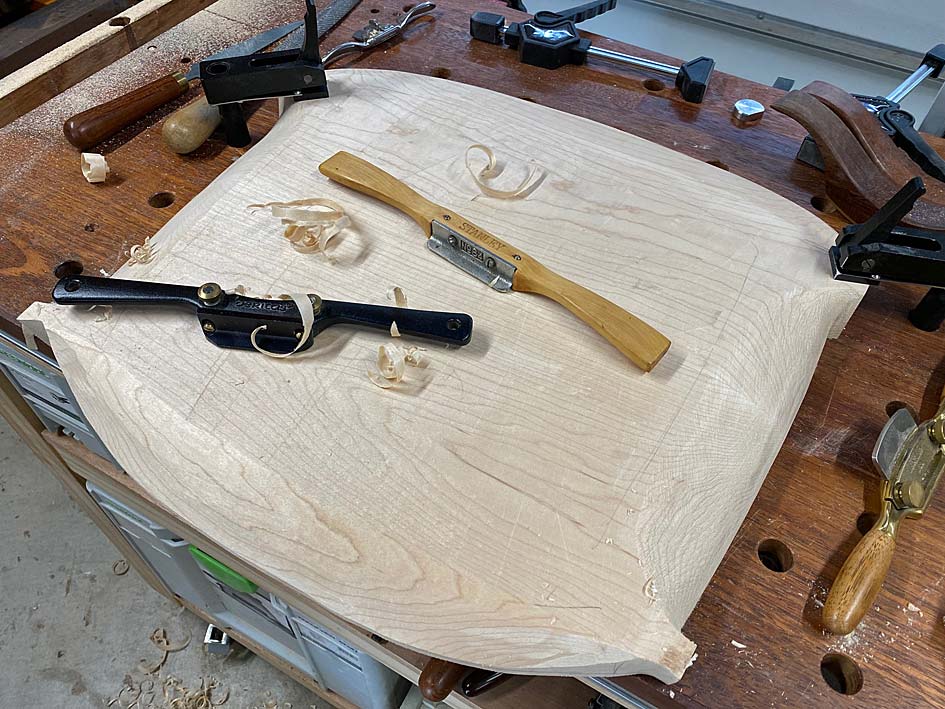
The MFT makes a good bench for carving ...
Lines are roughly pencilled on the seat and then the Arbortech is used to carve away as much waste as possible ..
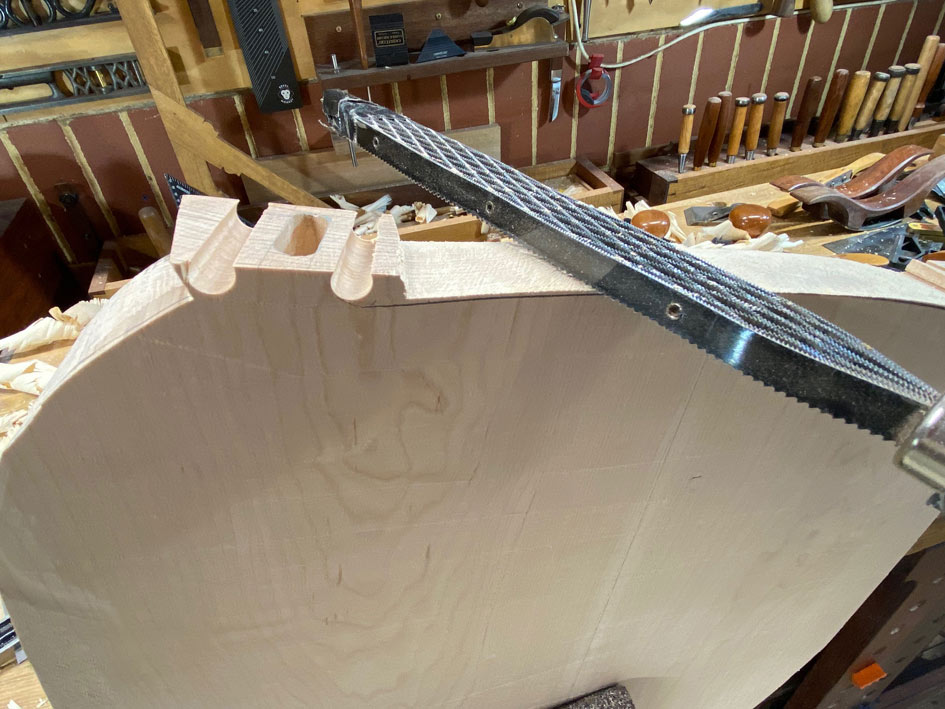
I relied on a Auriou 10-grain rasp to do most of the shaping ...
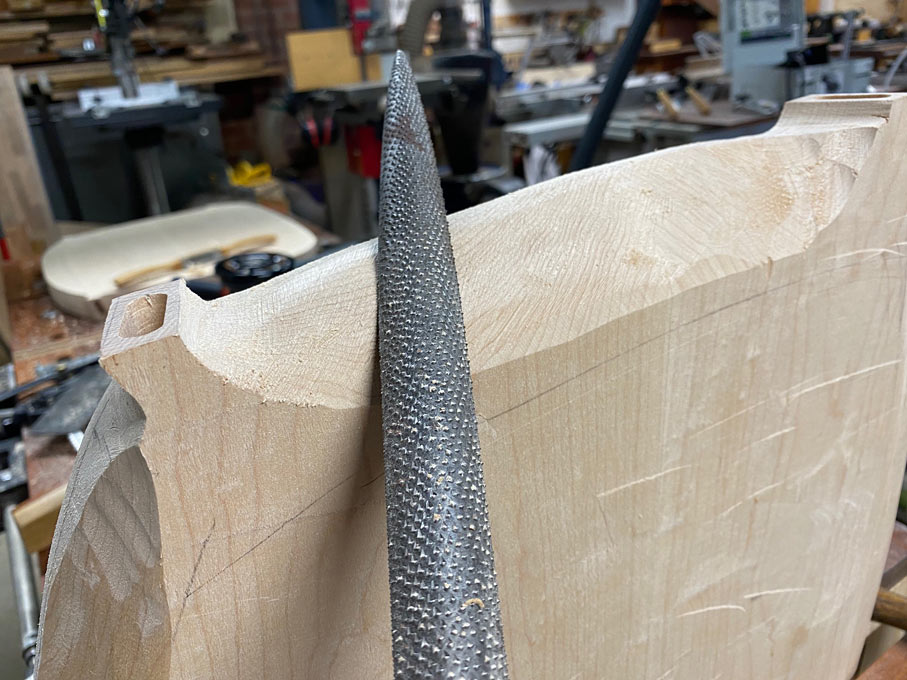
... until I was loaned the largest rasp I have ever seen. Large enough to cause most here rasp-envy. It says Nicholson on it, but it appeared larger than a Nicholson #50, and far, far coarser than the 11-grain it is advertised as having. Any ideas?

I moved between rasps and spokeshaves to shape and smooth the curves ..
To be frank, I worked without a specific plan other than to create fair curves - the curves almost decided what waste to remove, while I monitored the photos I had for reassurance.
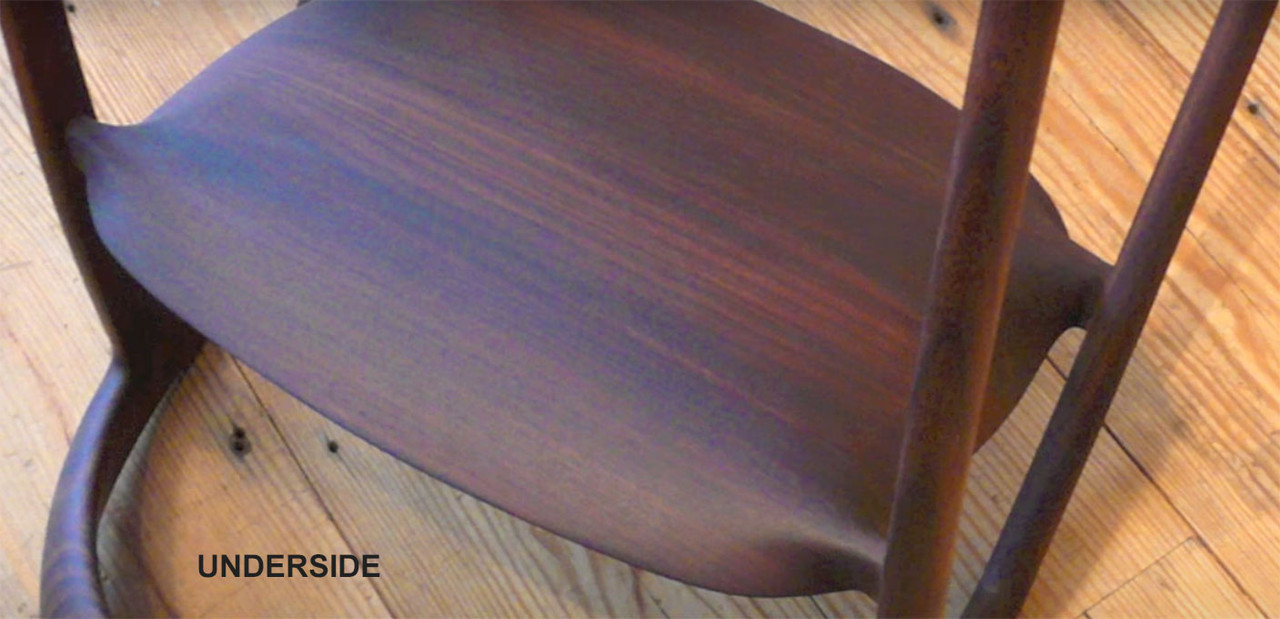
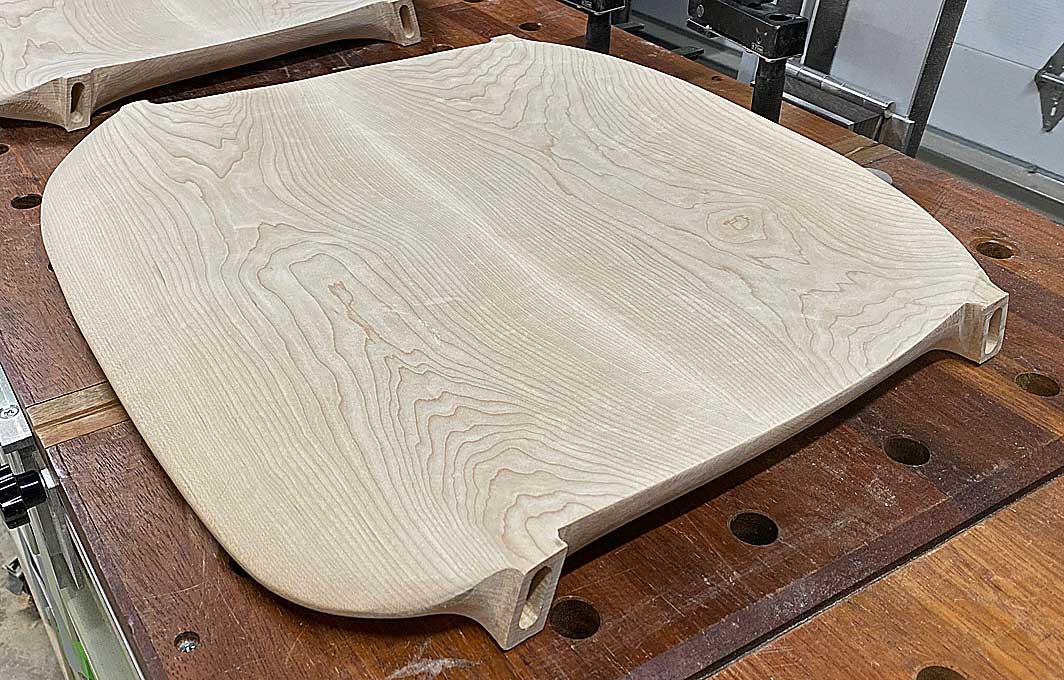
In the end, with everything sanded to 80-grit, this was the result. From the underside ...
The upper side, from the rear end ...
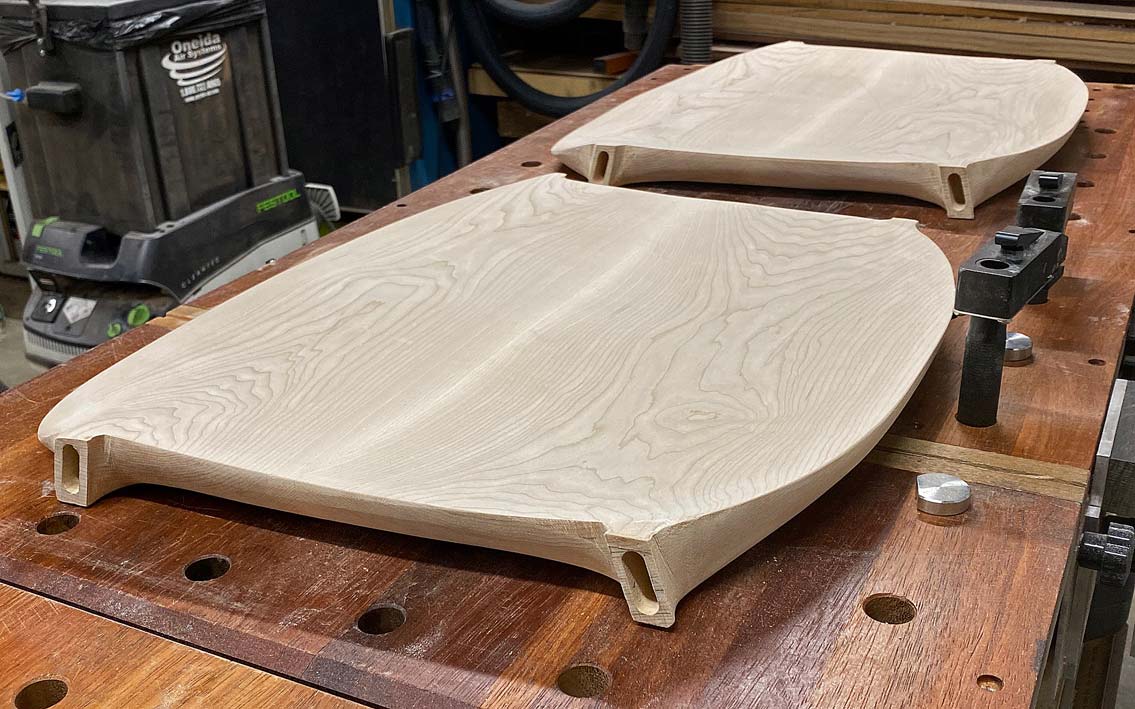
And side ...

And one more photo, taken at an angle similar to the "slim line" view above ...
There is still work remaining in the seats: every time I look at the chair photos new details become apparent. So I shall get on with the legs, and return to fine-tune the seats later.
Regards from Perth
DerekVisit www.inthewoodshop.com for tutorials on constructing handtools, handtool reviews, and my trials and tribulations with furniture builds.


 Reply With Quote

Similar Threads
-
Building dining room carver chairs
By derekcohen in forum FURNITURE, JOINERY, CABINETMAKING - formerly BIG STUFFReplies: 37Last Post: 25th January 2024, 10:01 PM -
Dining room chairs
By Template Tom in forum ROUTING FORUMReplies: 0Last Post: 18th May 2016, 06:15 PM -
dining room chairs
By Gaza in forum WOODWORK - GENERALReplies: 1Last Post: 23rd December 2007, 08:13 PM -
Dining Room Chairs
By dreinoga in forum DESIGNS & PLANS FOR PROJECTSReplies: 3Last Post: 13th November 2004, 09:28 PM -
Books on making dining-room chairs
By willy_punter in forum WOODWORK - GENERALReplies: 4Last Post: 8th June 2004, 05:21 PM
