

 Thanks:
  Likes:
  Needs Pictures: 0
 Picture(s) thanks:
Results 16 to 30 of 57
-
20th February 2024, 12:34 PM #16
 ... and this too shall pass away ...


- Join Date
- May 2012
- Location
- Brisbane (Chermside)
- Age
- 71
- Posts
- 2,084

Bloody gorgeous, Derek. I envy your skills and your patience.
-
20th February 2024 12:34 PM # ADSGoogle Adsense Advertisement
- Join Date
- Always
- Location
- Advertising world
- Age
- 2010
- Posts
- Many
-
27th February 2024, 01:16 AM #17
Be inspired. Be creative. Be bold.
- Join Date
- Apr 2001
- Location
- Perth
- Posts
- 10,826
New Legs
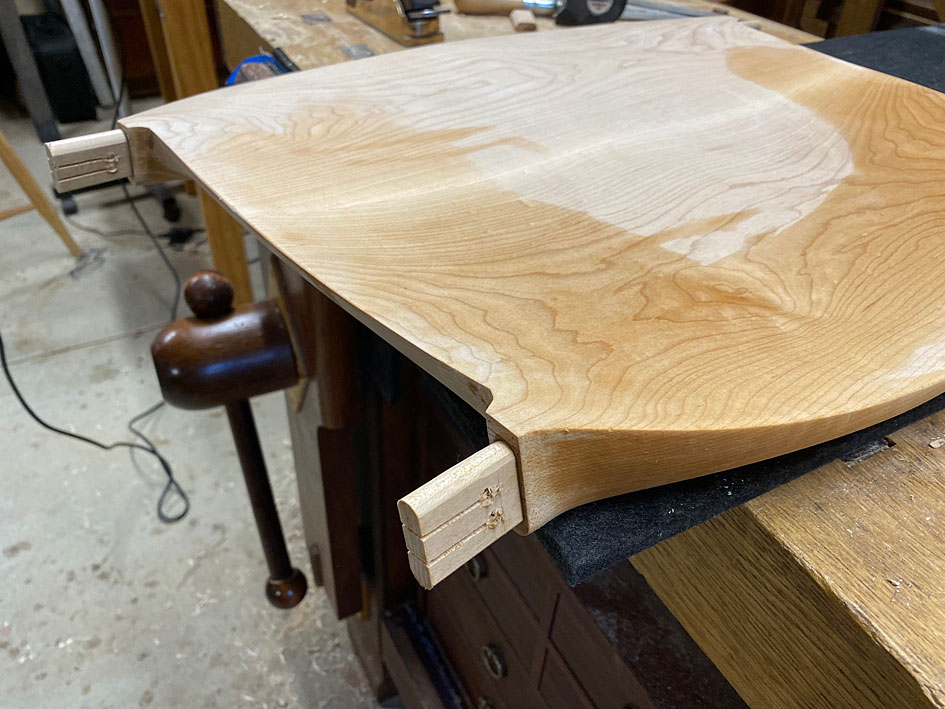
Every time I sit down to write up the progress made I feel like apologising for how little there is to show for the efforts made. I have made this observation before - it is tough to copy from photos when there are no measurements to follow, but it is especially so when the piece is curved and changes shape from different angles. I keep finding new detail to add in, and it seems like a never ending carousel.
One example, the front underside of the seat is concave and not convex. I added this, but need to do more ...
The seats need quite a bit more work, mainly refining details. For example, the sides need to be tapered more. For later.
For now I return to the legs.
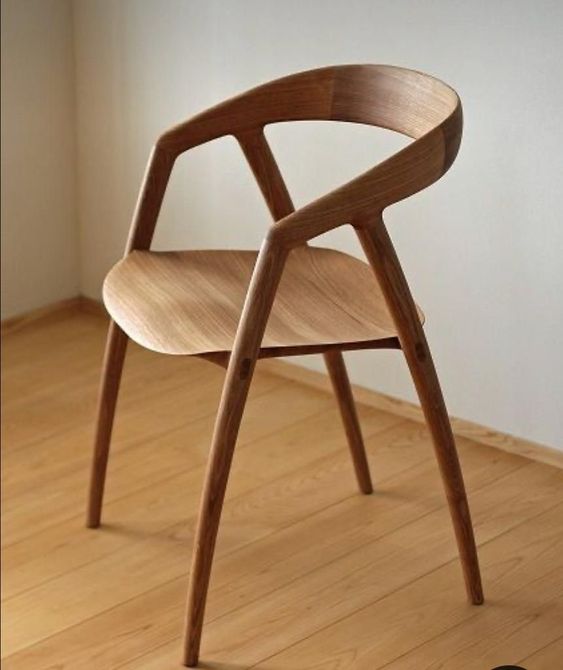
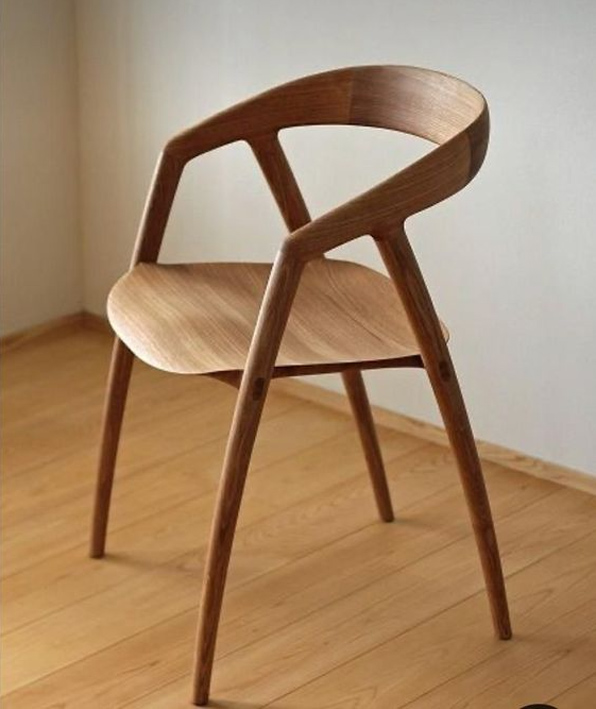
I did make 8 legs when building Mark 1 of the chairs, but now I am about to re-make them completely. Why? Because the first set of legs were designed for a chair which was inspired by the DC 09 Chair, but now that I am attempting to get close to this design, the legs also need to be in keeping.
Step one was to create a template, and then mark out 8 legs. These were bandsawed close to the lines, and then cleaned up with spokeshaves ...
The second time around is always easier, and marking out the mortises was much more efficient by measuring the front of the legs ...
... and then dropping the verticals ...
This is made possible by ensuring all sides were kept square when the leg blanks were made.
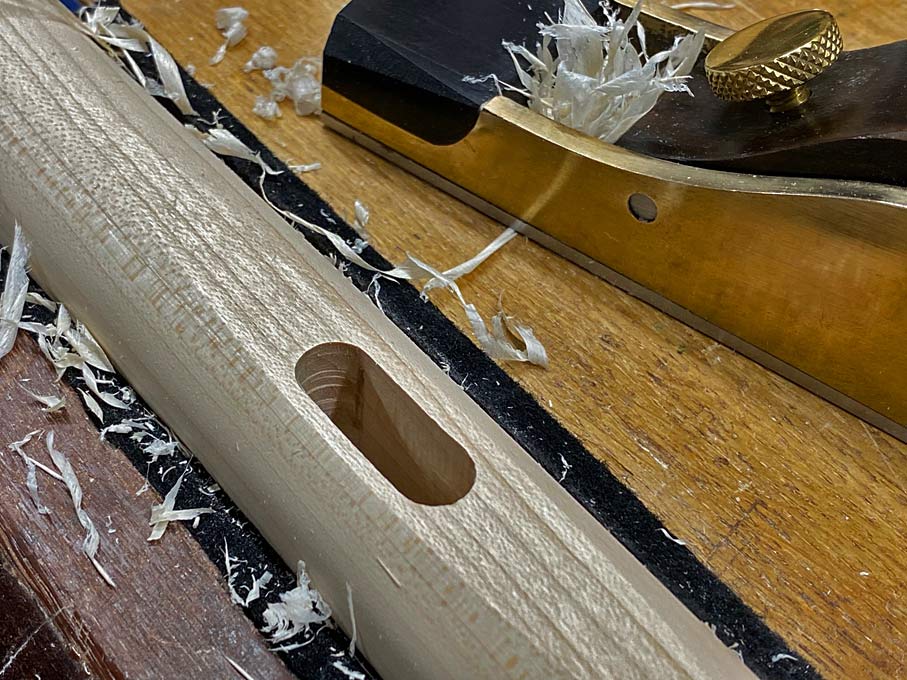
As before, the Domino was used to mortice the through tenons. The legs are clamped to a mortising fixture.
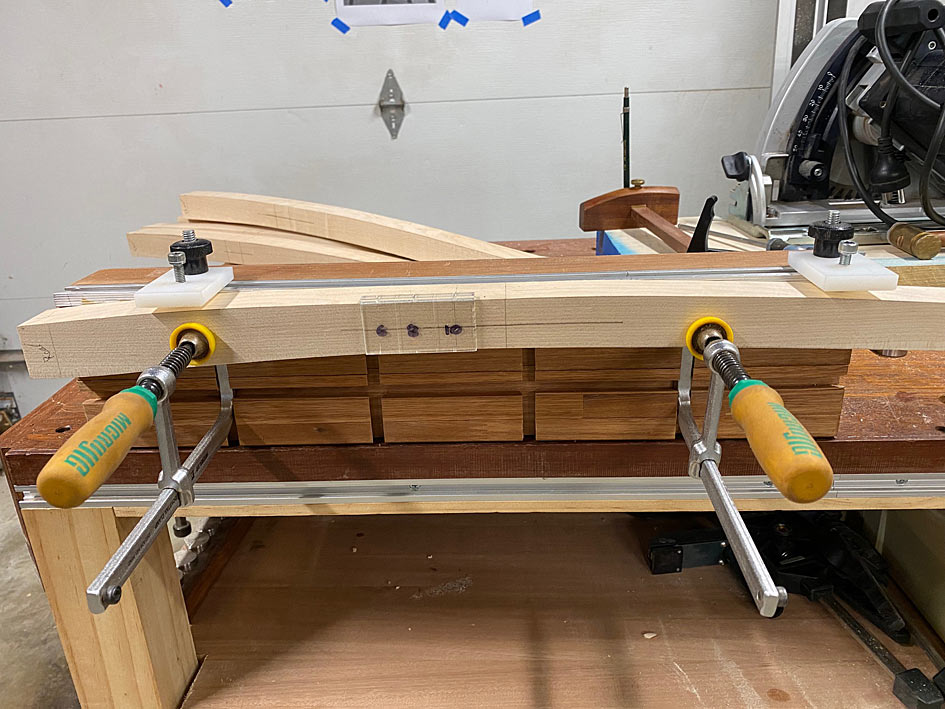
The mortises are 30mm long and 10mm wide, and through the 30mm thick legs. Since the Domino 500 can only rout to a depth of 28mm, it was done by working half way from each side.
The mortise needed to be marked very accurately, and to do this I used a marking jig I developed and wrote about recently ...

The article is here: https://www.inthewoodshop.com/Powere...AMortiser.html
It was possible to be as accurate as this for both sides and all the legs ...
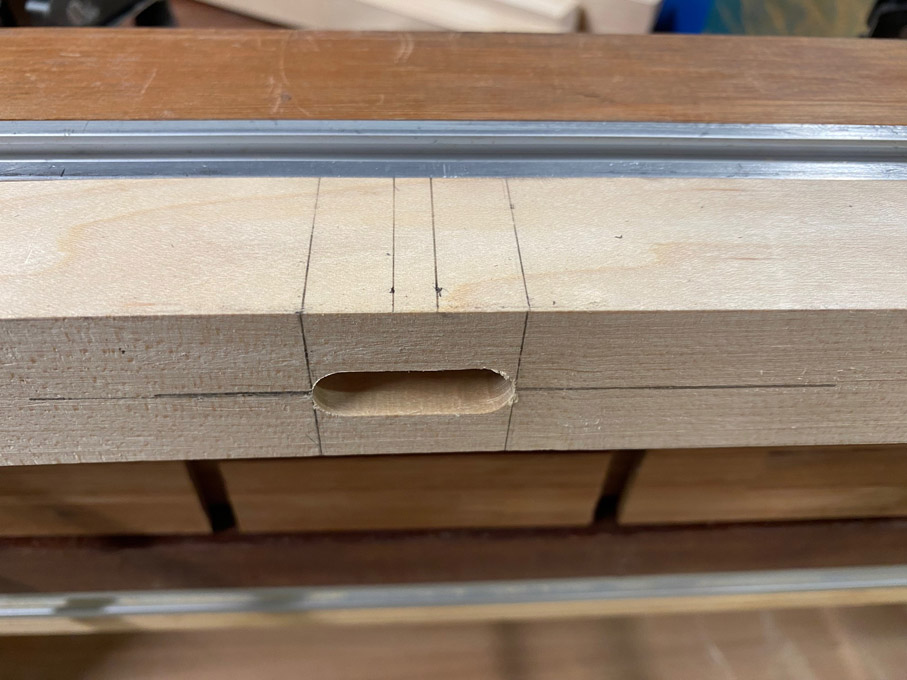
This ended with a pile of legs blanks plus mortises ..
Early on in the build of Mark 1, I attempted to use a half-round bit on a router table to round the legs. This was a disaster as the Rock Maple blew up, leaving me with wet trousers. Looking back on this sad experience, I realised that I had literally bitten off more than I should have chewed. So I was determined to try again, but this time rout in stages, little-by-little ...
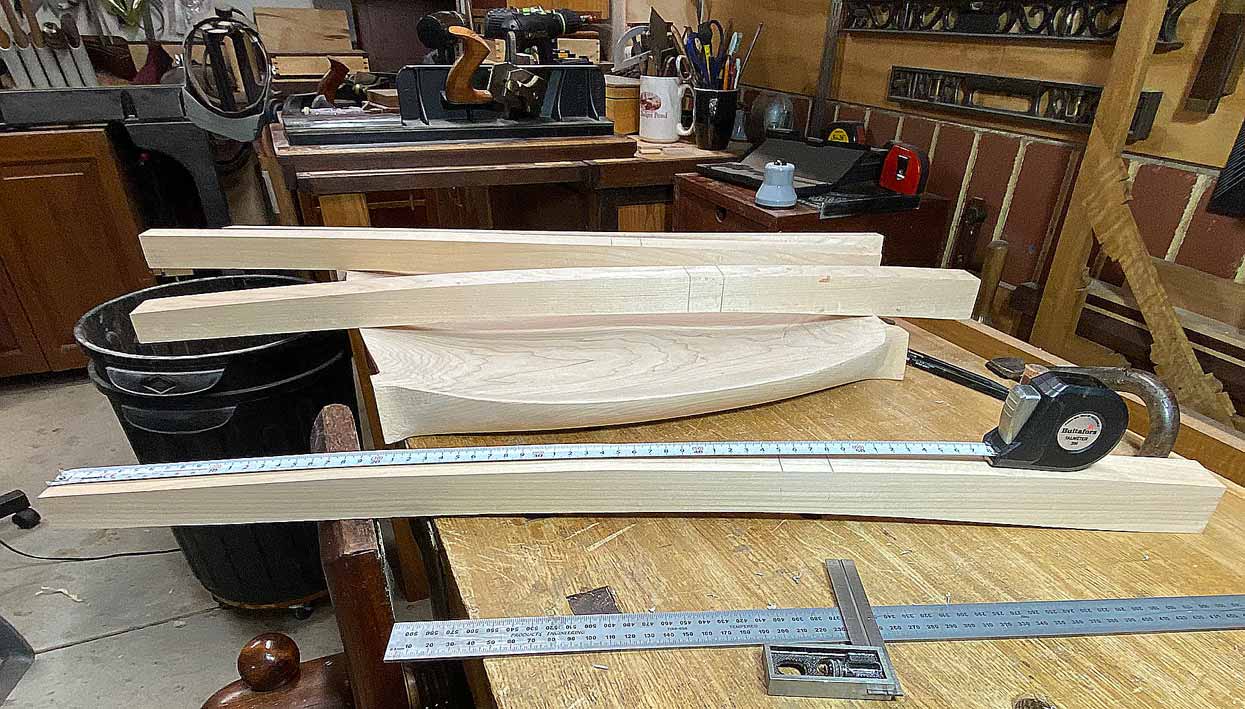
The leg at the rear is one I attempted purely with spokeshaves. It was a miserable experience - Rock Maple is well named.
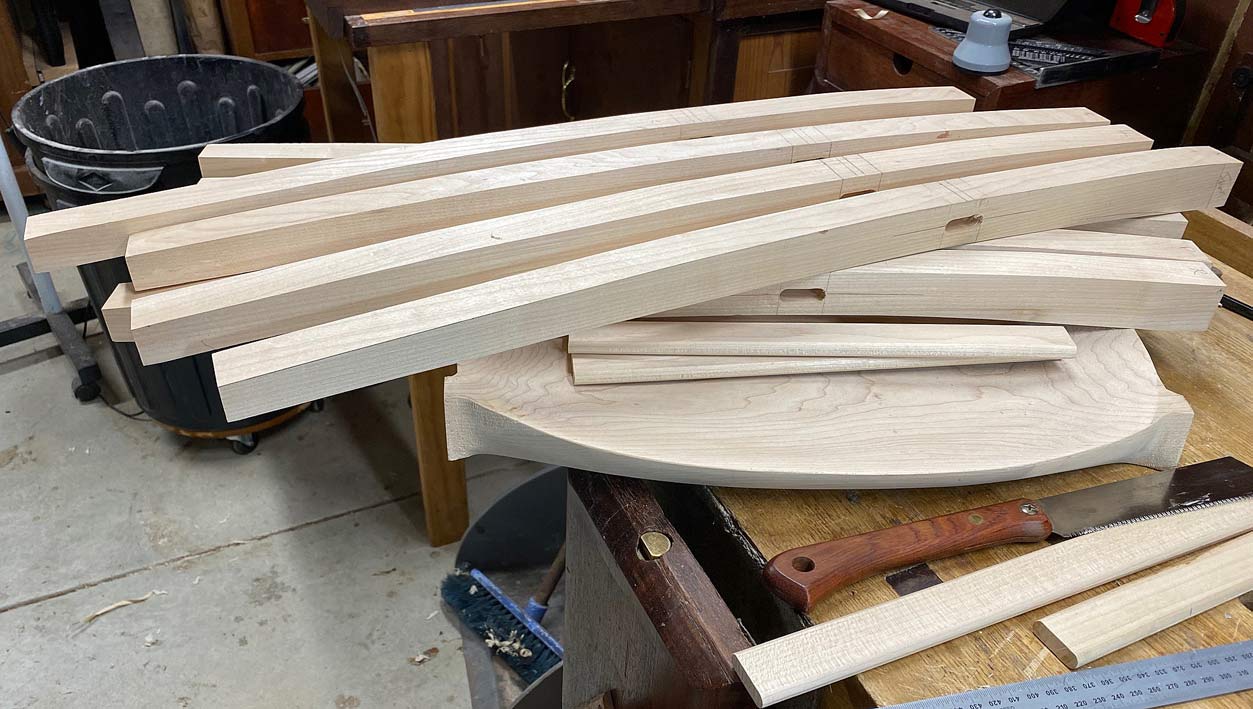
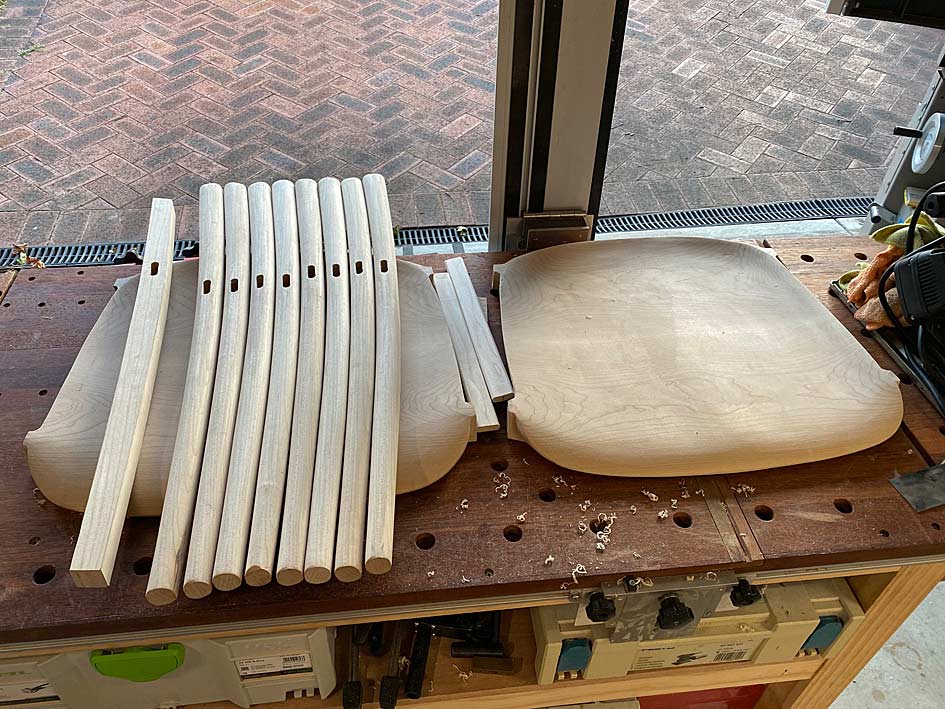
Here are 8 semi-finished legs. The corners have been rounded, but much of the leg is still square-ish owing to the tapered profile - the legs start at 35mm at the top, are 30mm by the mortise, and end at 22mm at the feet. Consequently, there is still a whole lot of shaping still to do.
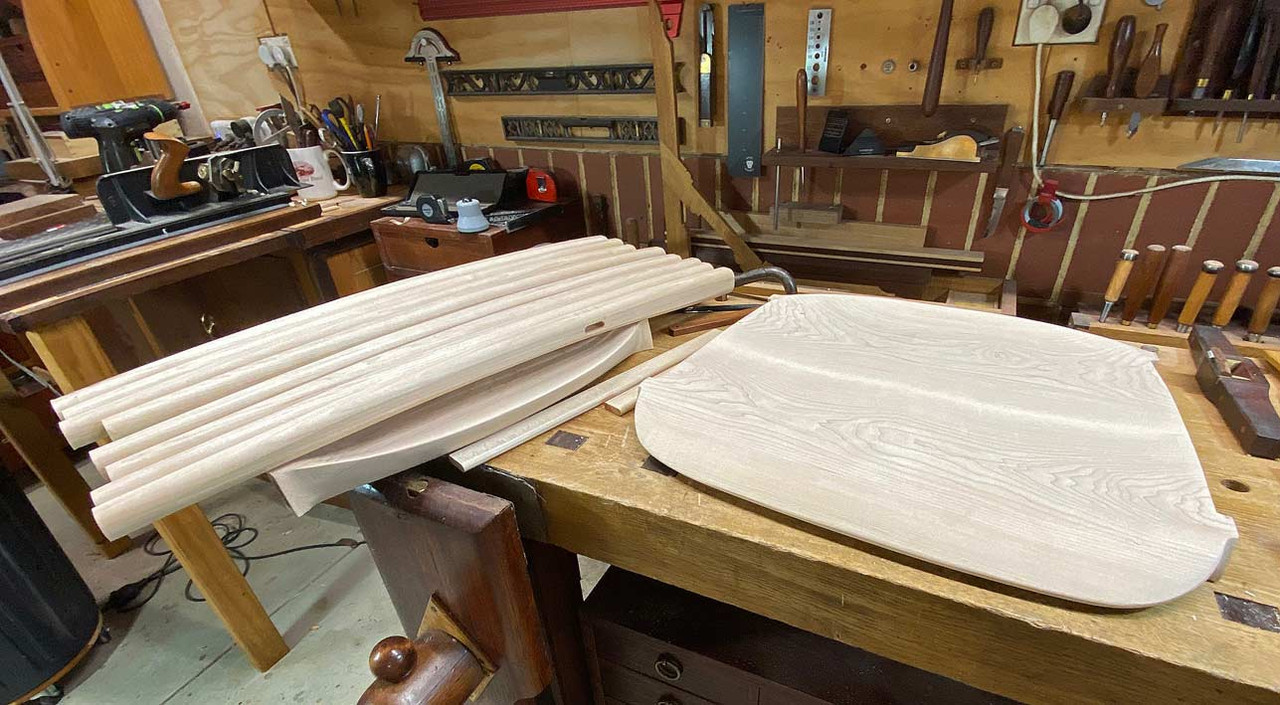
Look closely and you can see the flats on the sides.
There followed a lot of spokeshaving.
A progress shot of 4 completed legs and 4 incompleted legs ...
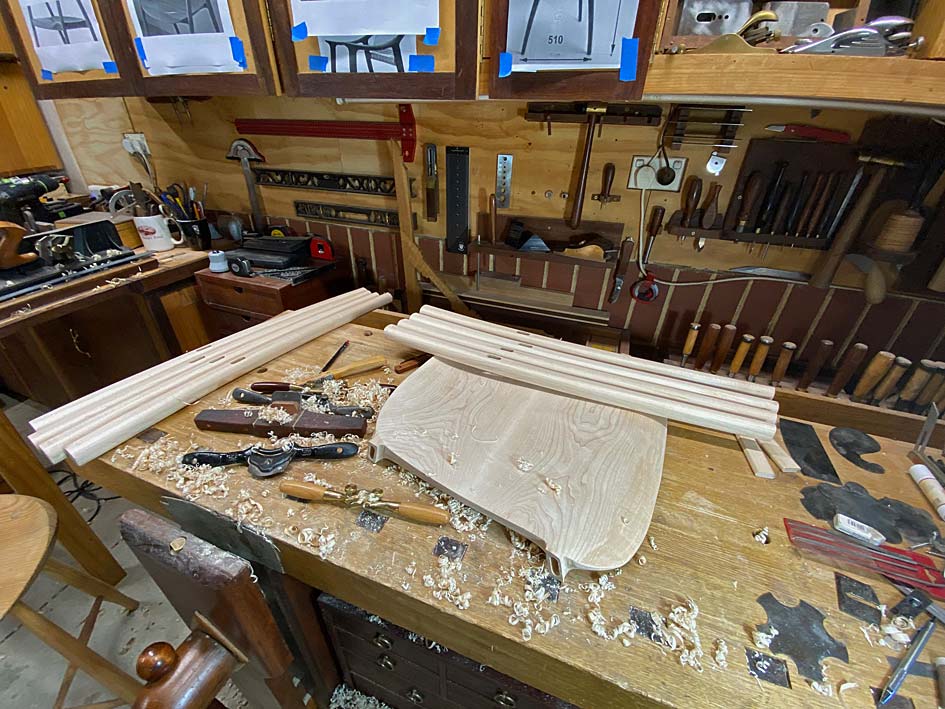
"Completed" really means "done for now". There is constant refining. Slowly the square becomes less so, and then round, but with imperfections, and then eventually there are just fine tracks ...
I must admit that it is so tempting to leave it like this, where fingers can caress the tool marks ...
This would look better on a different style of chair, and the DC 09 is better suited to a sanded finish.
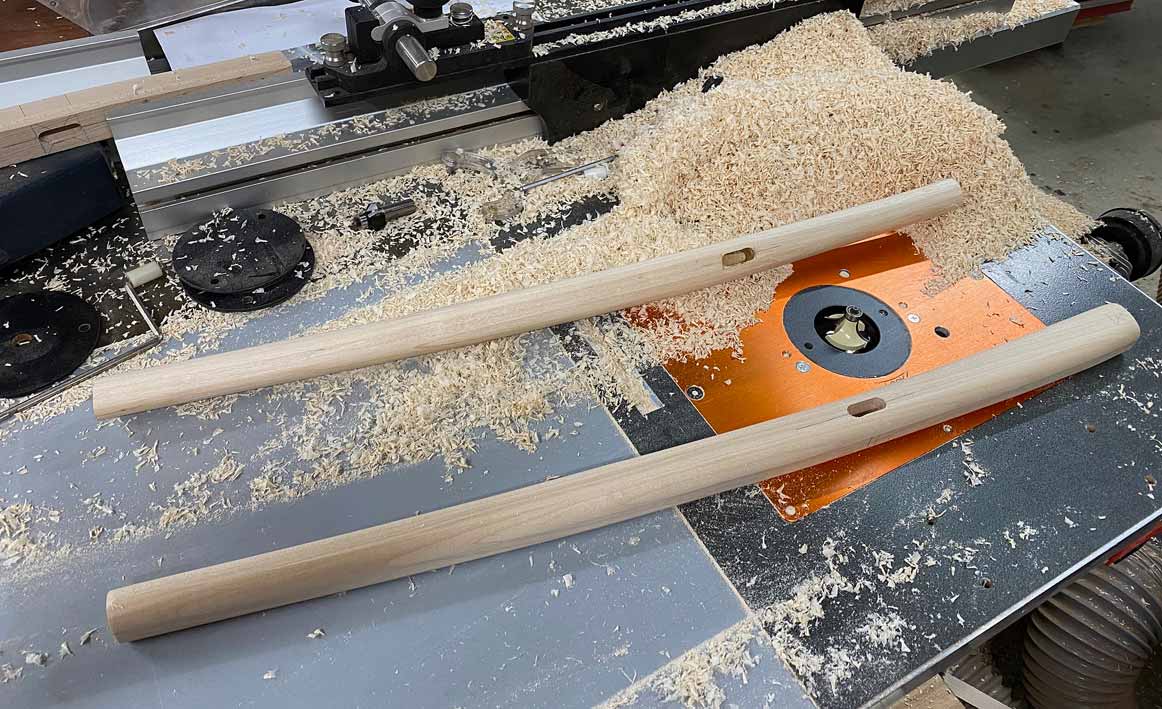
Here are two of the legs to gauge progress. Note the photo on the wall in the background for comparison (also recognise that the arm section of the legs has been left long at this stage)...
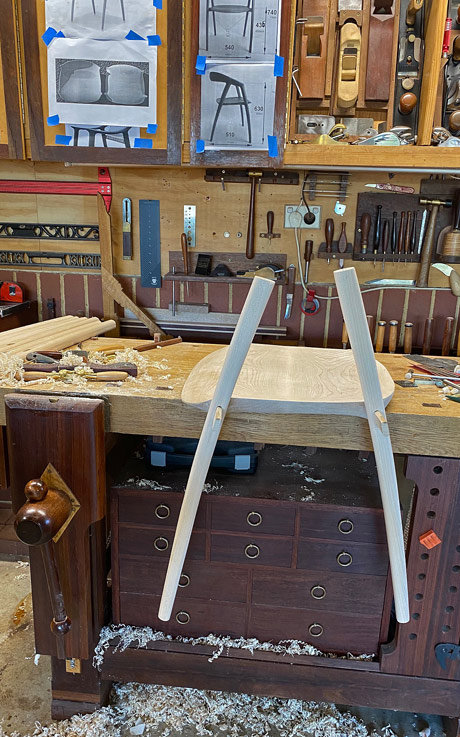

Until next time.
Regards from Perth
DerekVisit www.inthewoodshop.com for tutorials on constructing handtools, handtool reviews, and my trials and tribulations with furniture builds.
-
4th March 2024, 03:41 AM #18
Be inspired. Be creative. Be bold.
- Join Date
- Apr 2001
- Location
- Perth
- Posts
- 10,826
When I began this build, I looked at the legs of this chair and recognised that they were curved, tapered and oval. Well, oval at the top and round at the bottom ...
I wasn't sure how to do this - the tapered oval shape. I just accepted that I would discover this as we went along.
I began by shaping the legs in profile and cut the mortises ...
Then knocked off the corners with a round over bit. The leg at the rear was an attempt to do all with just spokeshaves - not great. The round over provides a helpful guide ...
This left them rectangular with rounded corners. This weekend the rectangles became tapered ovals.
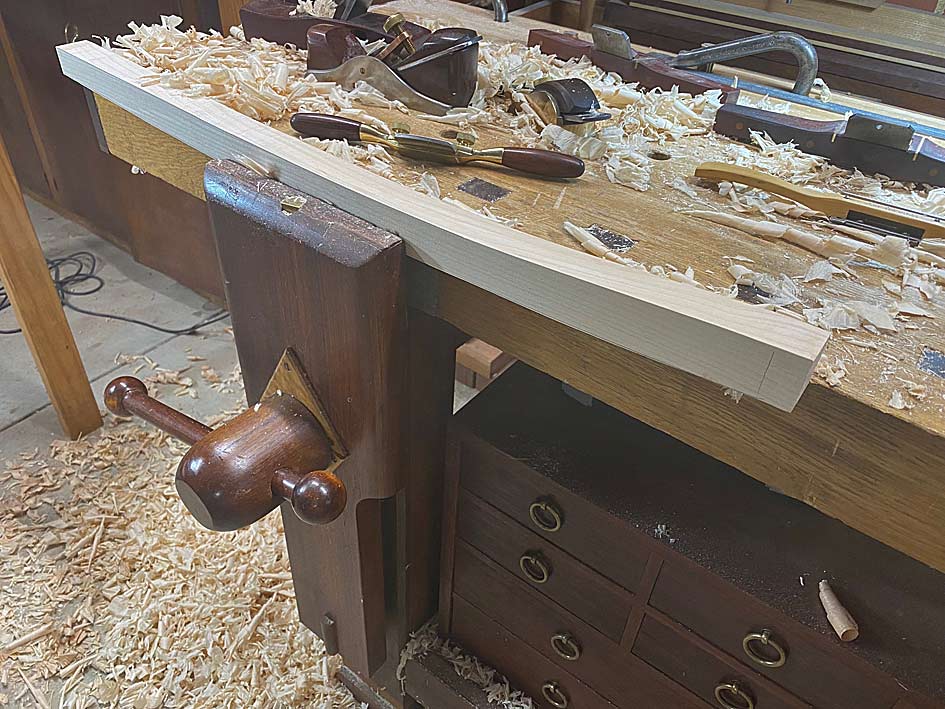
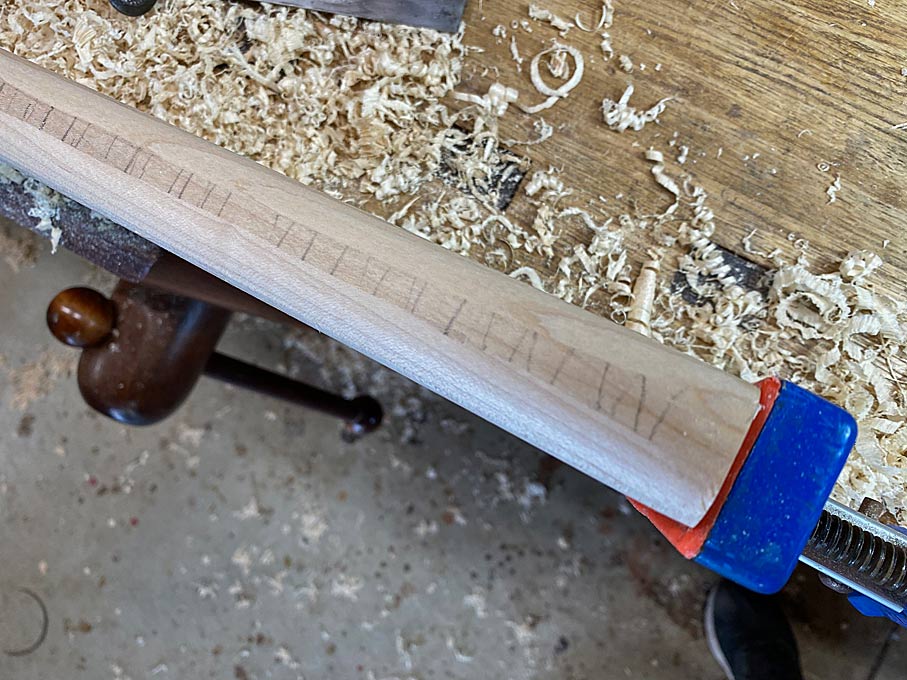
Working at the bench, holding the legs in a clamp ...
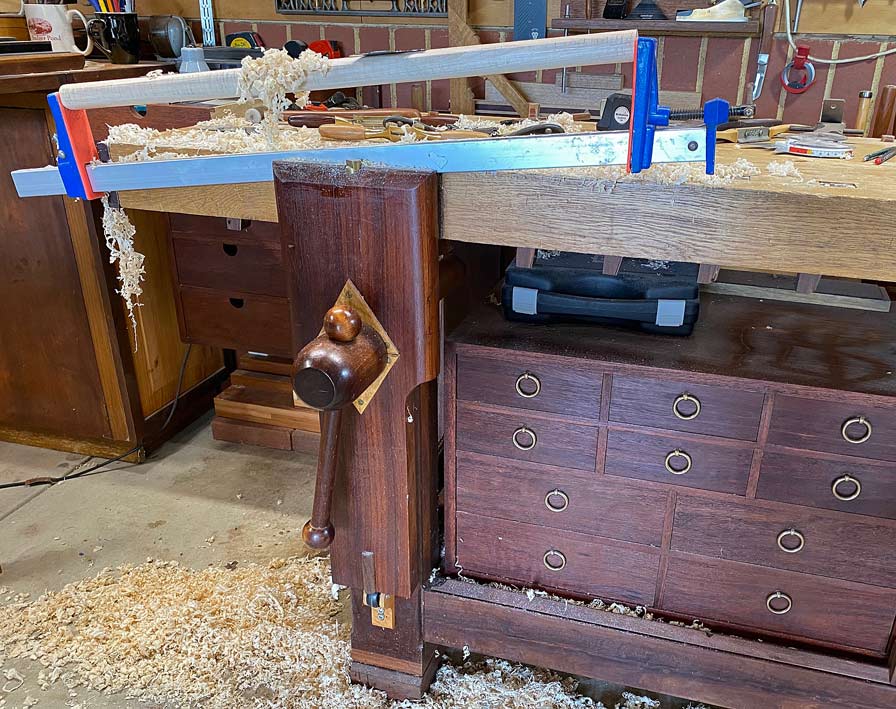
The first step was to cover the legs in pencil scribble. The purpose here is to make it easier to see where I am working. This Rock Maple is so light in colour and difficult to pick up details.
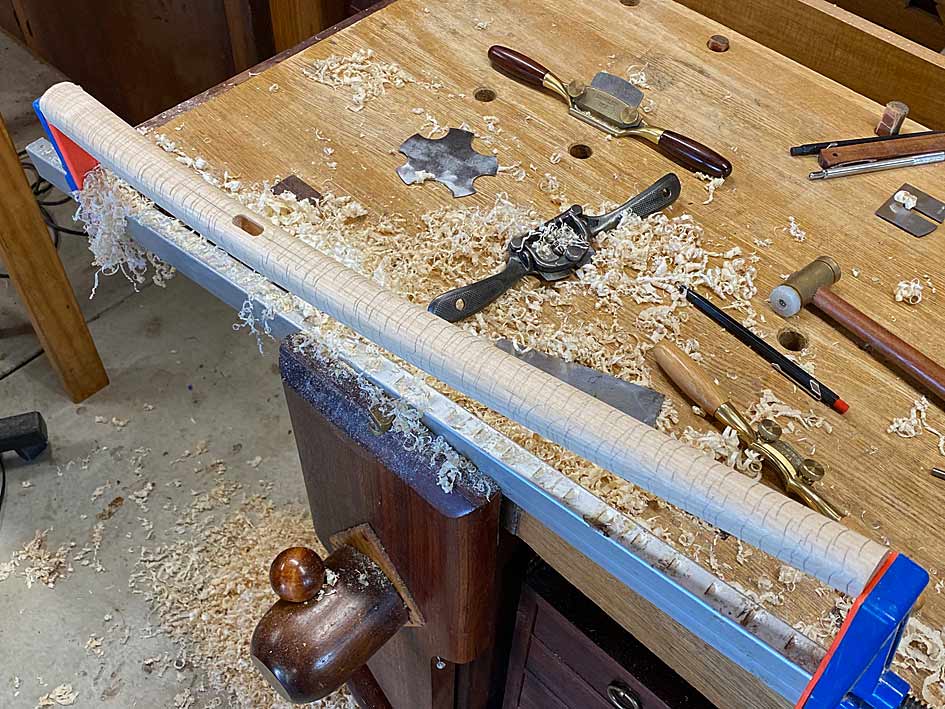
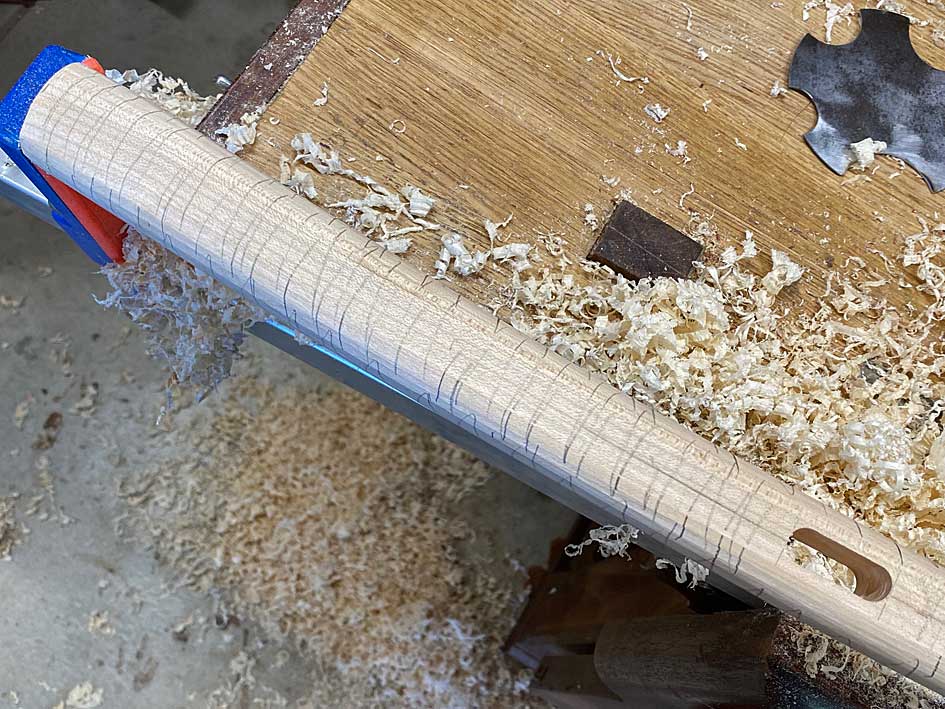
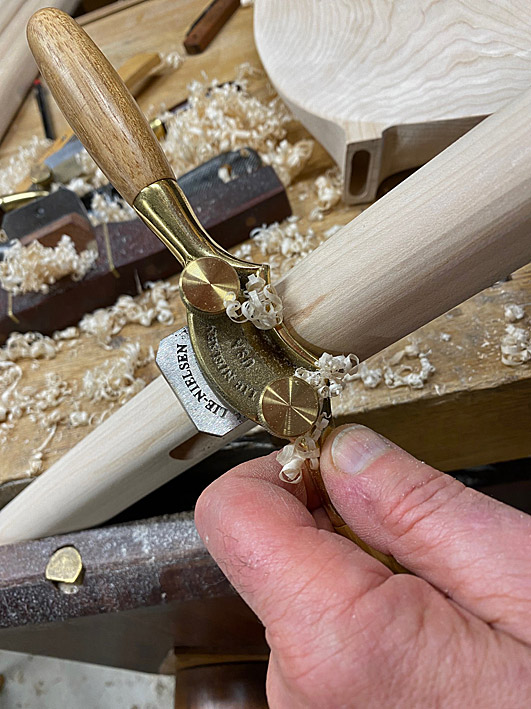
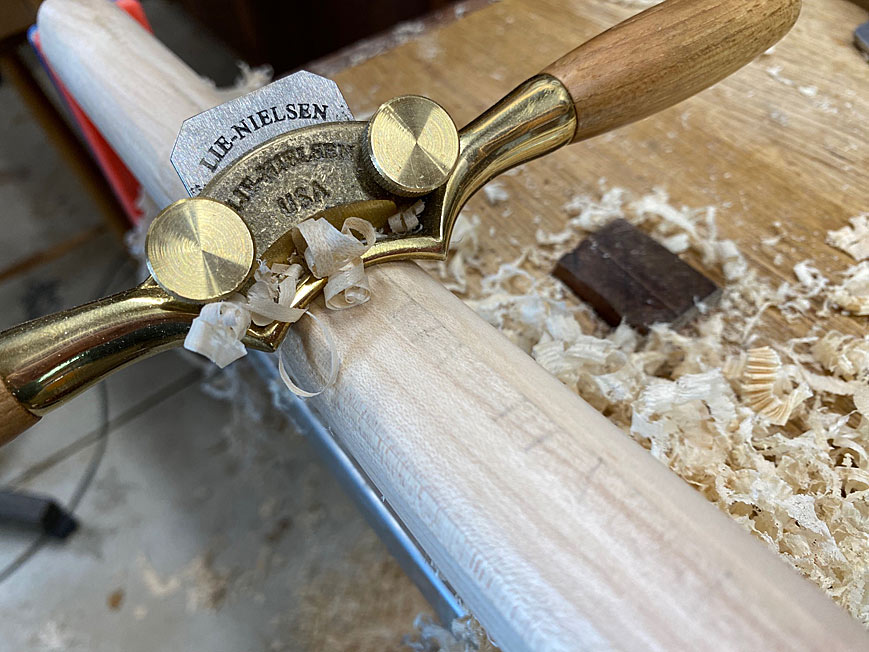
Some of the waste had already been removed by spokeshaves, but now the final shaping needed to take place. The tools used were a convex spokeshave and a set of convex scrapers - different sizes.
Once sharpened, the scraper make nice shavings ...
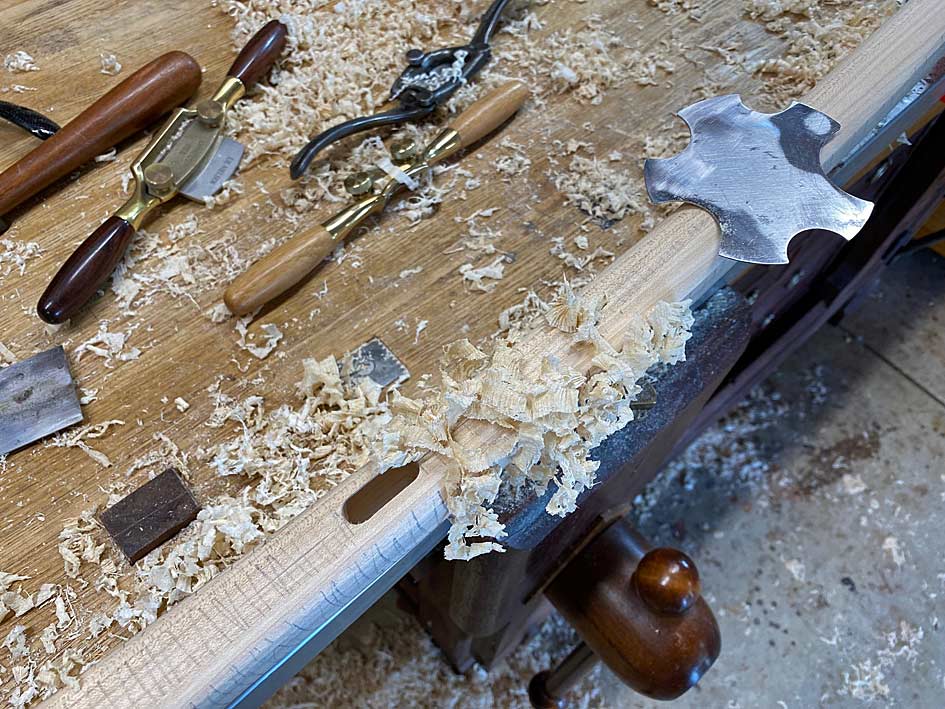
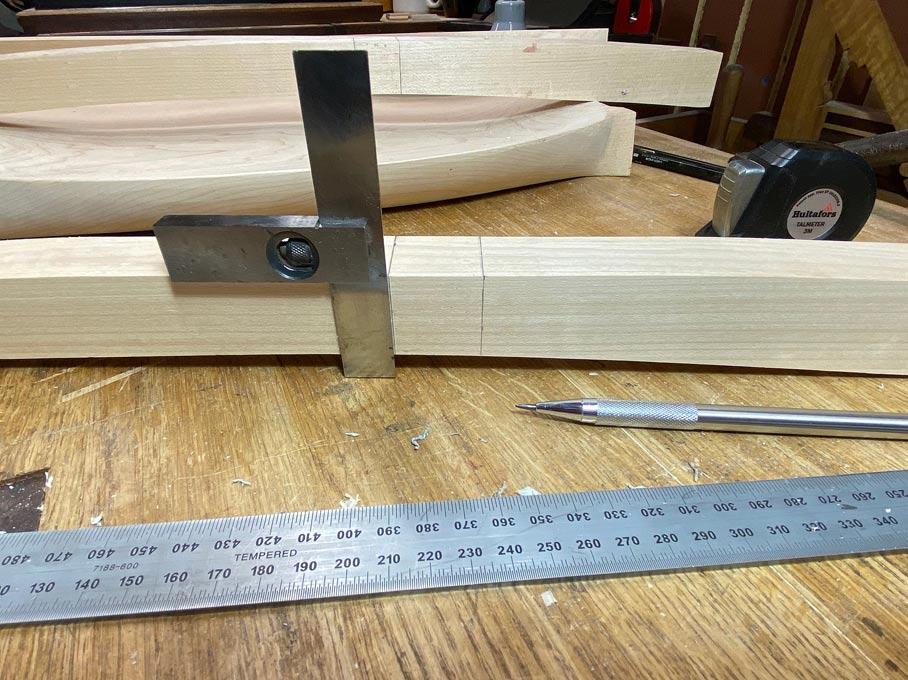
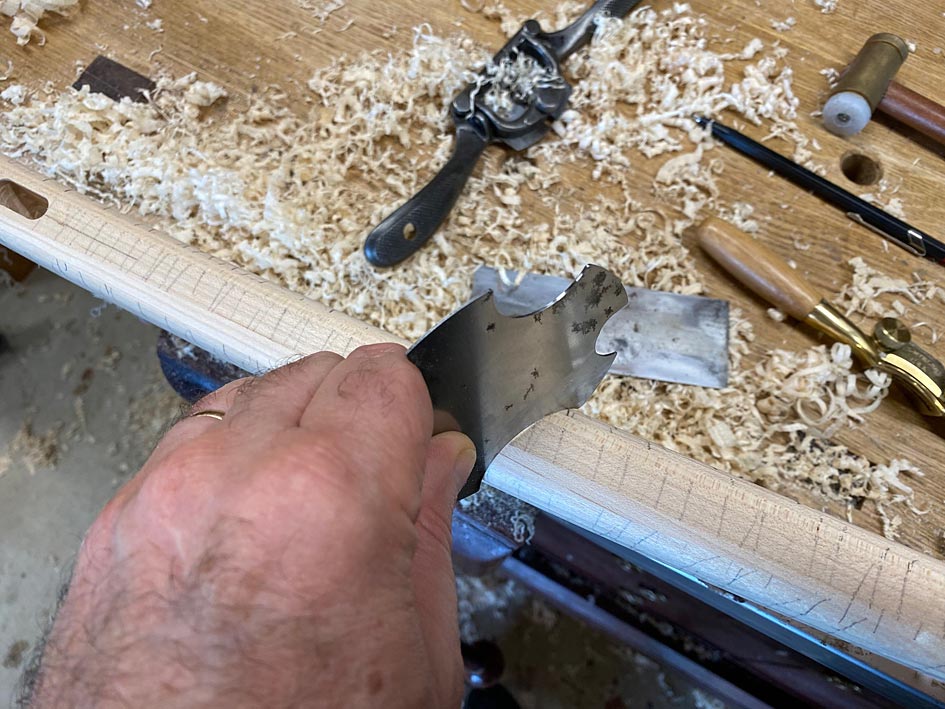
The scrapers also provided a template for the curves to be retained on the legs. The taper on the sides of the legs goes from 40mm at the top to 30mm at the mortice to 25mm at the feet. The edges (facing forward and rearward) is a uniform 30mm. So this meant that there was a single convex scraper for the edges and two scrapers for the sides.
This is the difference between a scraper and the leg ...
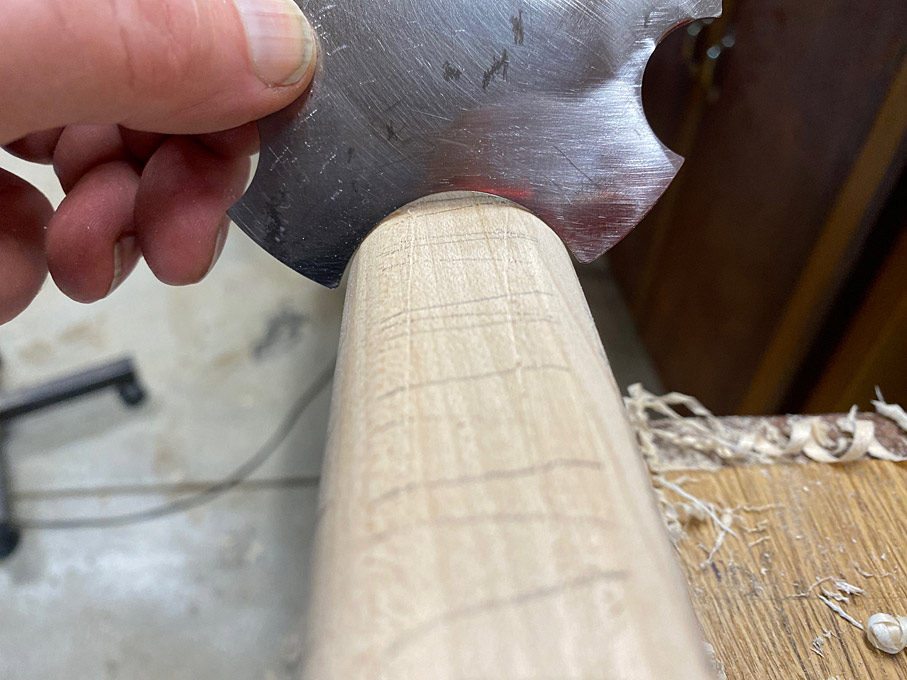
Running it along the leg reveals the low section through the centre ...
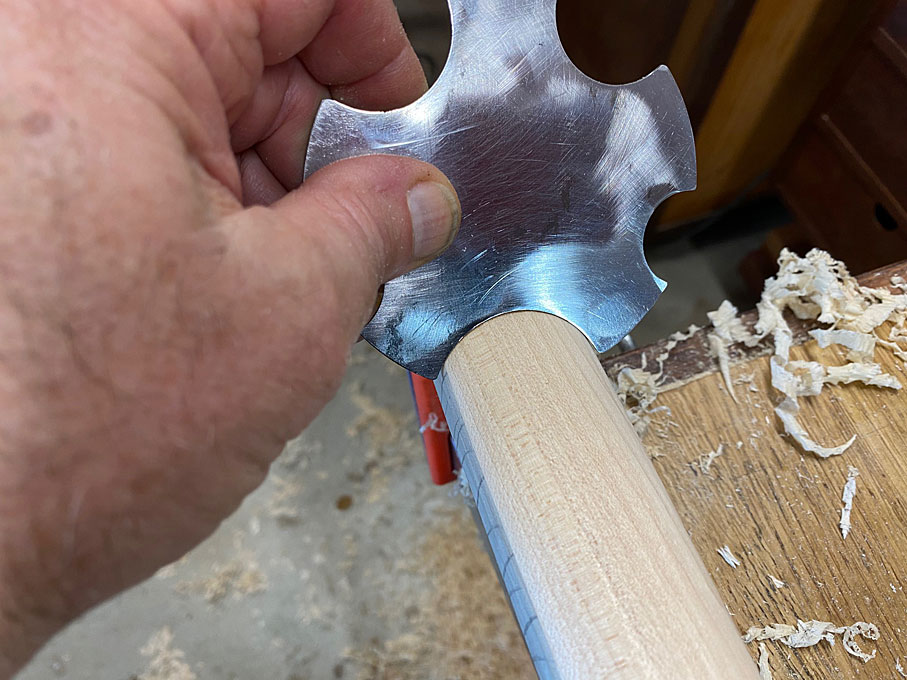
As you work down, so the curve increases, and the high spot gets smaller ...
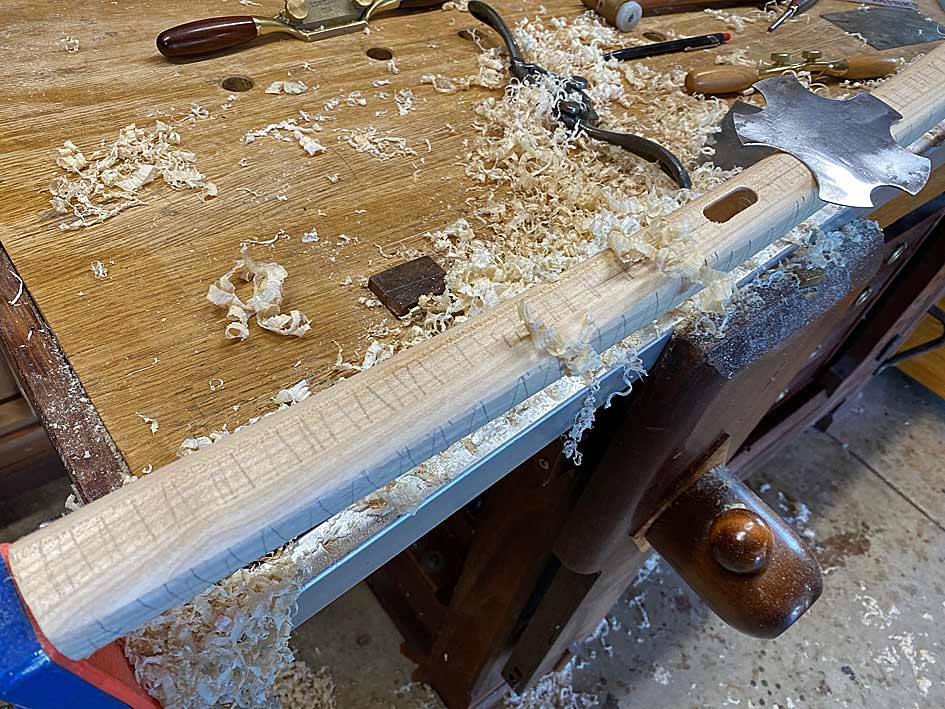
The convex spokeshave helps out ...
Also, angling the scraper allows a wider cutter to follow the outline of a narrower section ...
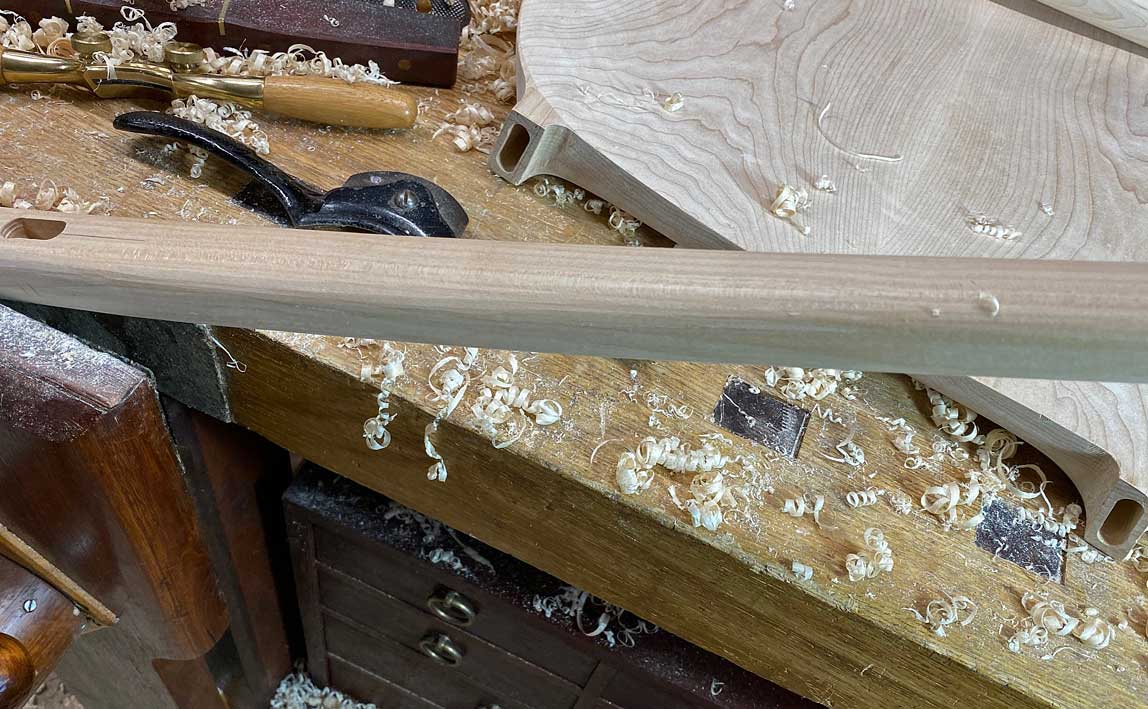
Eventually, the scraper and the leg share the same profile ..

Lots of work on a very humid weekend. All legs completed now ...
Regards from Perth
DerekVisit www.inthewoodshop.com for tutorials on constructing handtools, handtool reviews, and my trials and tribulations with furniture builds.
-
4th March 2024, 11:53 PM #19
Be inspired. Be creative. Be bold.
- Join Date
- Apr 2001
- Location
- Perth
- Posts
- 10,826
I must admit that this is an unusual build for me. I literally do not know what I am doing ... insofar as I have to keep returning to parts to refine and refine them. That is what is so time consuming. I don't always score high on being sensible, but I do on perseverance and being bloody minded!
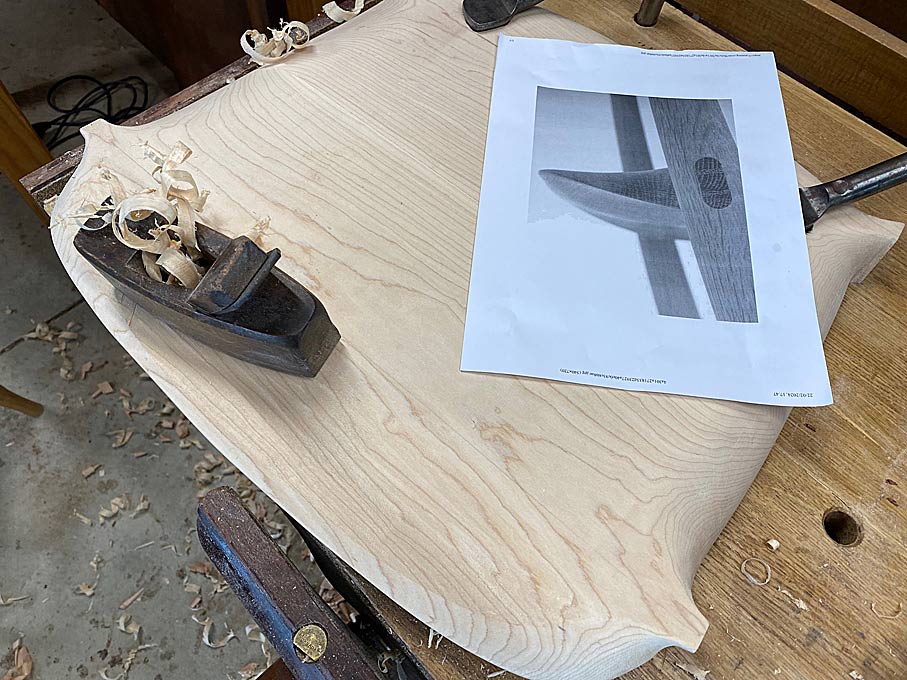
Today was not a work day, and I ear-marked completing the seats. The upper side was 99% done, but the underside needed fine-tuning. I have two photos to guide the shaping ...
That one (above) is from the factory building the prototype. They screwed the legs to the seat, rather than use integrated tenons. This proved to be a great model in my case.
The second photo is a production chair seat taken from the underside. In particular, this shows the treatment of the smoothing of the tenons and their integration with the back ...
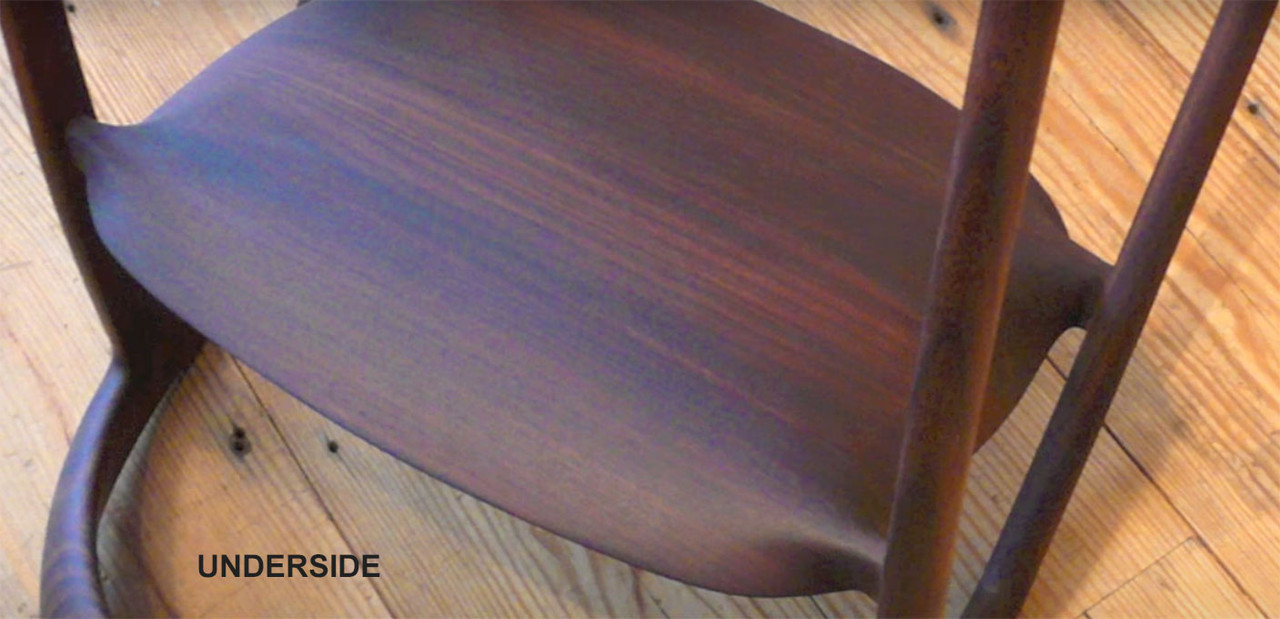
Lastly, I keep returning to this photo of the chair, which shows how thin the seat looks from the side. Keeping in mind that the seats started out at 50mm, and were 40mm after the plan was cut out, a great deal of tapering was necessary to achieve this look ...
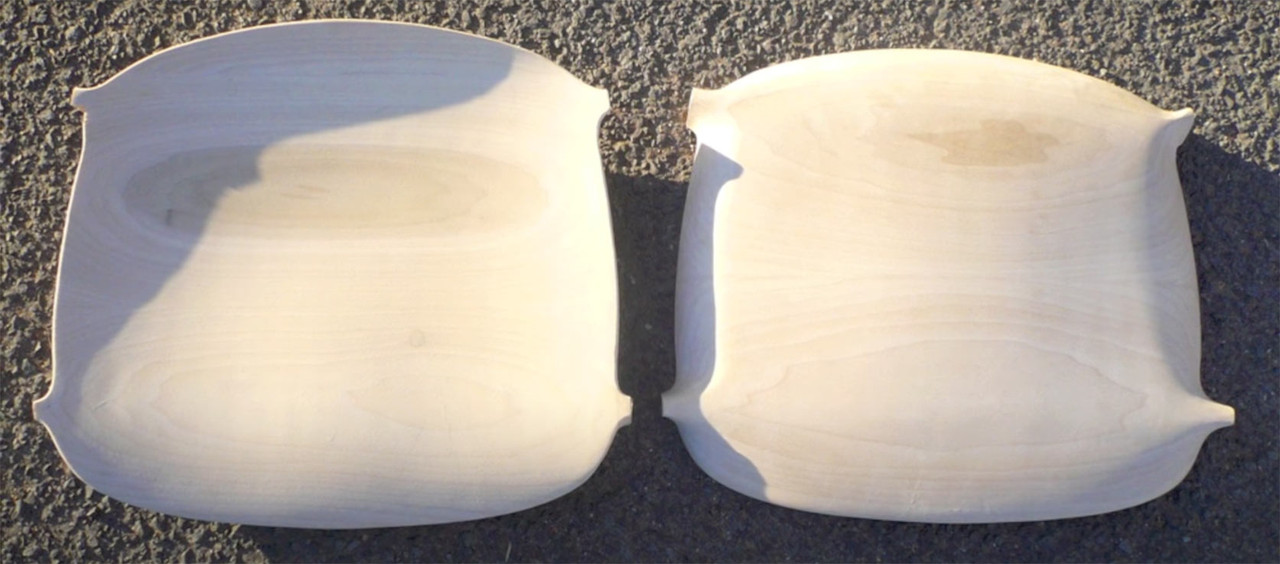
Here are the two completed seats. The seat on the left is face up, and the seat on the right is bottom up ...
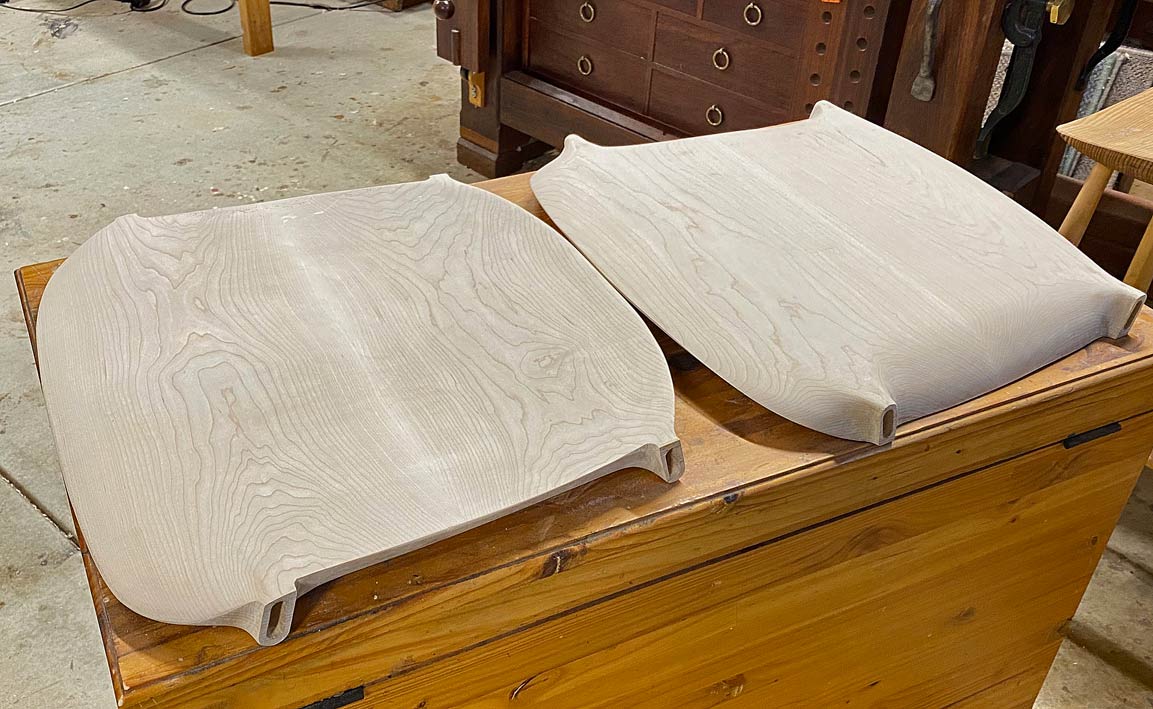
Regards from Perth
DerekVisit www.inthewoodshop.com for tutorials on constructing handtools, handtool reviews, and my trials and tribulations with furniture builds.
-
8th March 2024, 06:26 PM #20
Bowl Turner
- Join Date
- Apr 2007
- Location
- Adelaide Hills, South Australia
- Posts
- 4,337
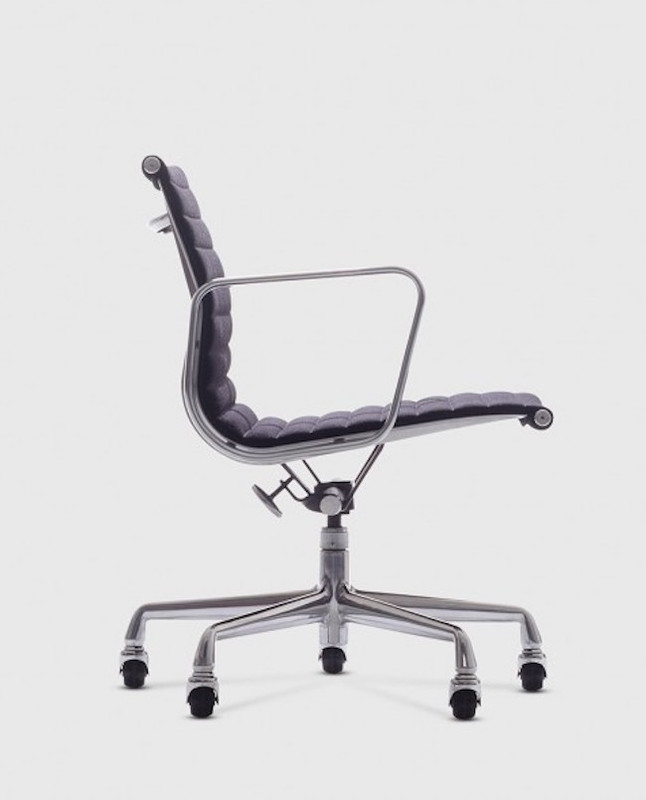
According to Mies van der Rohe..
�The chair is a very difficult object. Everyone who has ever tried to make one knows that. There are endless possibilities and many problems � the chair has to be light, it has to be strong, it has to be comfortable. It is almost easier to build a skyscraper than a chair.� He built more skyscrapers than almost anyone else, as well as a few chairs, so it'd be hard to argue with him on that...
No surprises then that you are being challenged there Derek. I could no more do any of that joinery than fly to the moon by flapping my arms!
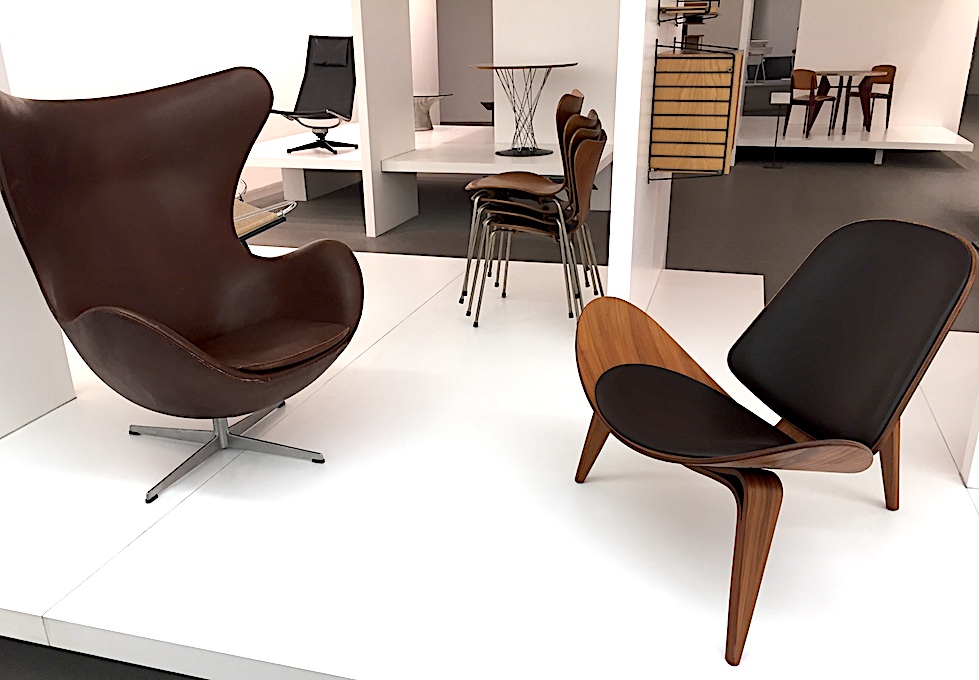
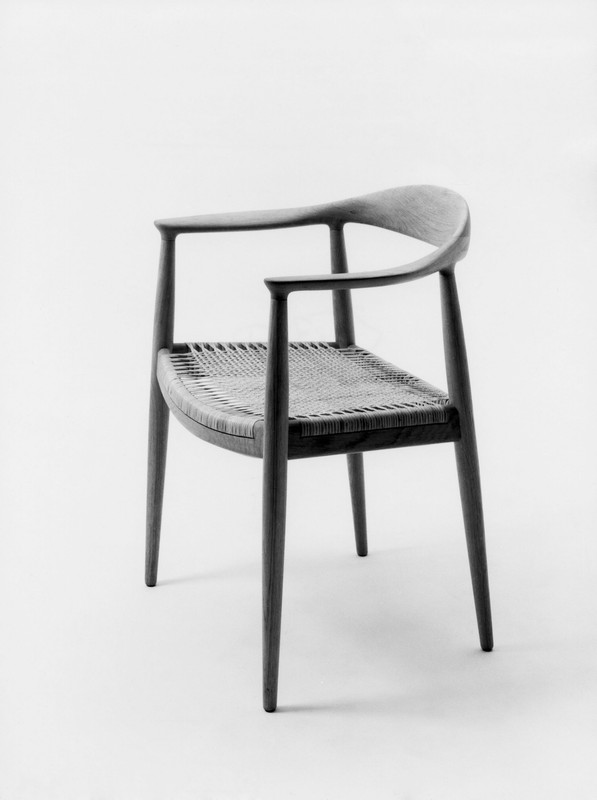
I saw the above statement by Mies when I was fortunate enough to get to see The Danish Chair: An International affair exhibition at the Design Museum in Denmark a few years ago...
THE DANISH CHAIR - Design Museum Denmark
What a wonderful experience that was. Although designed half a century later than the classics of the mid-century modern period in that exhibition, which I very much admire, I can see that the DC09 chair certainly has strong references back to those classics. Like those, I'm sure I would never tire of looking at that pair of DC09s that you are bringing to life.Stay sharp and stay safe!
Neil
-
8th March 2024, 07:49 PM #21
GOLD MEMBER

- Join Date
- Nov 2011
- Location
- Melbourne
- Posts
- 7,014
 Originally Posted by derekcohen

Derek,
Seriously just get Bloody on with it, you�re doing fine stop psycho analysing the problem, they will turn out fantastic, if you�re in doubt go look at some tools on line that you don�t need, it always helps me [emoji6].
Cheers Matt.
-
8th March 2024, 09:47 PM #22
Be inspired. Be creative. Be bold.
- Join Date
- Apr 2001
- Location
- Perth
- Posts
- 10,826
Neil, I am so envious of you having been to that exhibition! I did get to the Pinakothek Der Moderne in Munich in 2019, and that was a wonder!! Filled with Bau Haus items and furniture. Gad, I was in heaven ... Originally Posted by NeilS
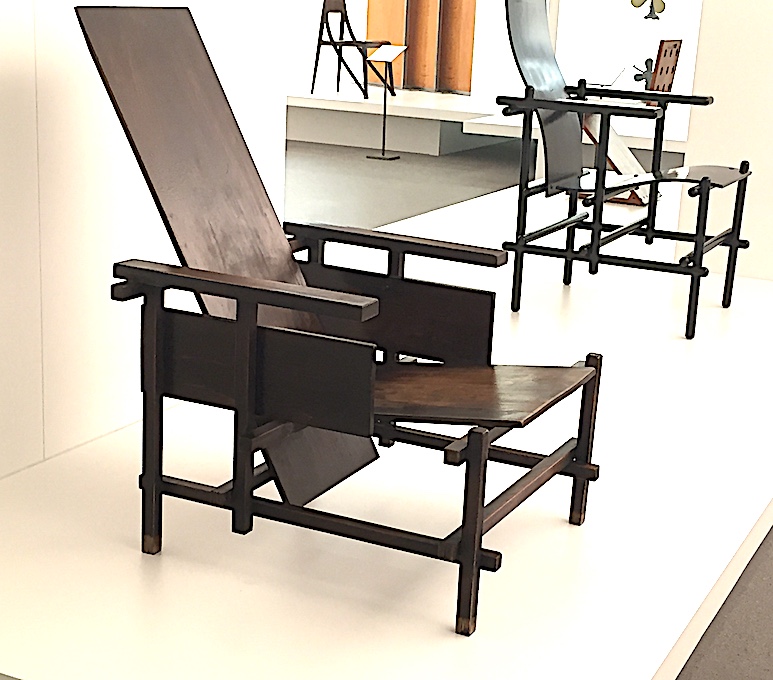
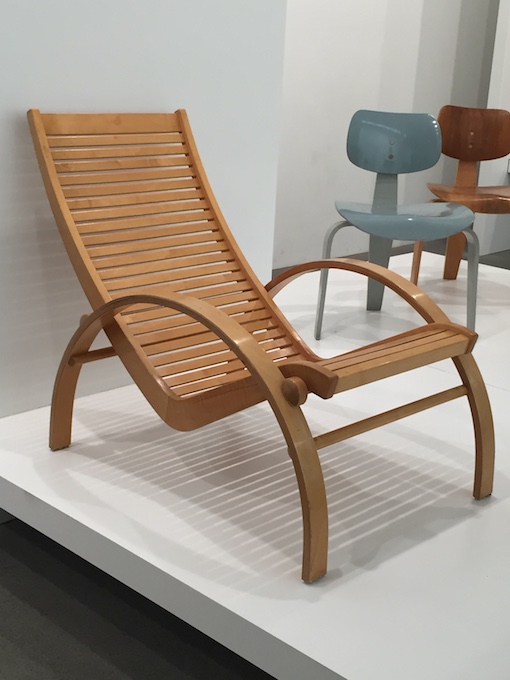
I have one of these ...
... and built one of these ...
And not just chairs, how about this buck for a Porsche 356 ...

Sigh ...
Regards from Perth
DerekVisit www.inthewoodshop.com for tutorials on constructing handtools, handtool reviews, and my trials and tribulations with furniture builds.
-
8th March 2024, 09:52 PM #23
Be inspired. Be creative. Be bold.
- Join Date
- Apr 2001
- Location
- Perth
- Posts
- 10,826
Originally Posted by Simplicity
Yo Matt, I hope I did not come across as a whinge - that was not my intent, just trying convey the complexity of this build. The progress has exceeded my expectations.
The plan this weekend is sanding seats and legs (I am so ambivalent here as the finish off the scrapers has a luster, and leaves lovely fine tracks which you can feel with fingers ... but I think it would not look good when oiled). Then to prepare the loose tenons (they must fit the base and the legs, and be sawn for wedges), shape the tenon base, cut the legs to length, and then glue together. I am looking forward to getting the seats and legs together.
Monday I will be in hospital for an op on my left patella, and forced to rest for a couple of days.
Regards from Perth
DerekVisit www.inthewoodshop.com for tutorials on constructing handtools, handtool reviews, and my trials and tribulations with furniture builds.
-
8th March 2024, 10:30 PM #24
Butcher of wood
- Join Date
- Jun 2010
- Location
- Bundaberg
- Age
- 54
- Posts
- 3,428
Ow; not cool so I hope it goes alright. Rest up as long as you need� we�ll wait! Originally Posted by derekcohen
Nothing succeeds like a budgie without a beak.
-
9th March 2024, 09:22 AM #25
GOLD MEMBER
- Join Date
- Nov 2011
- Location
- Melbourne
- Posts
- 7,014
Derek,
Hope the operation goes well, we will wait.
I even try an be �Patient� not the Patient your going to be, but the other one, the one my mother use too yell at me [emoji6].
Cheers Matt.
-
11th March 2024, 12:38 AM #26
Be inspired. Be creative. Be bold.
- Join Date
- Apr 2001
- Location
- Perth
- Posts
- 10,826
Today we reached the milestone I was patiently (okay, not so patiently) waiting for - glueing up the legs and seats. To get to this stage, however, required matching the mortices with the loose tenons, matching the loose tenons with the leg mortices, cutting slots for the wedges (into the tenons), and shaping the tenon mortise to fit the legs.
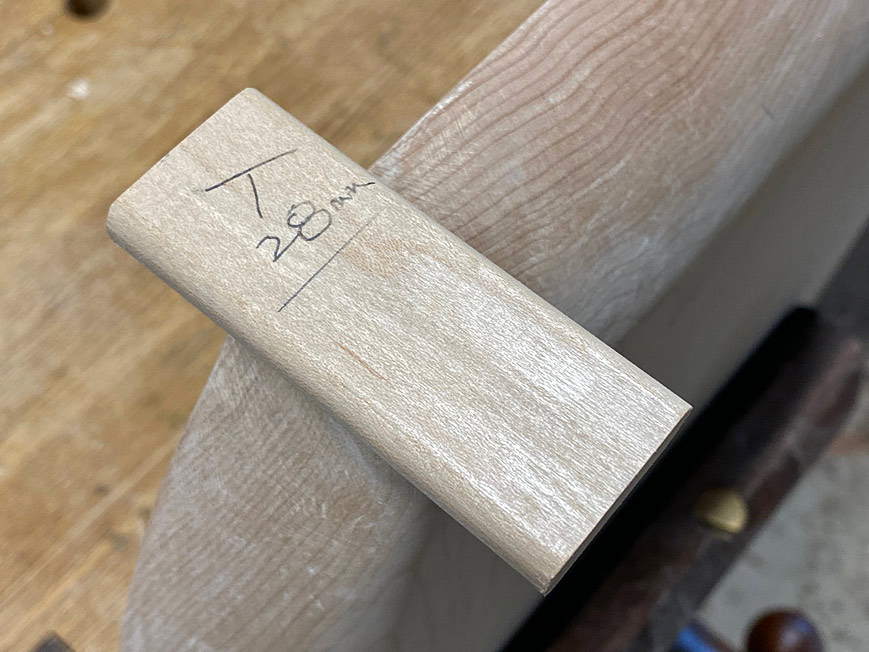
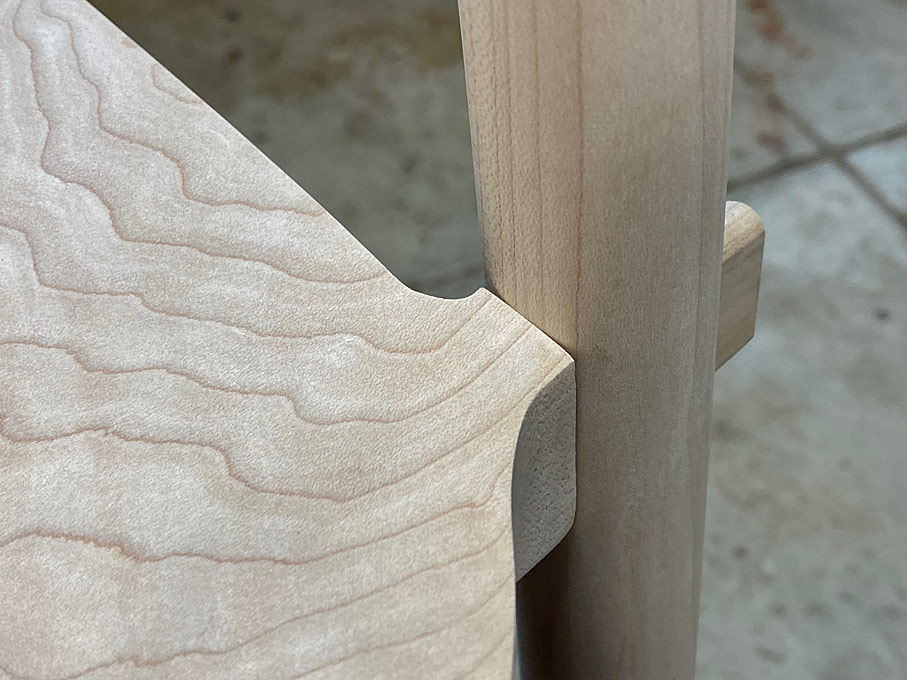
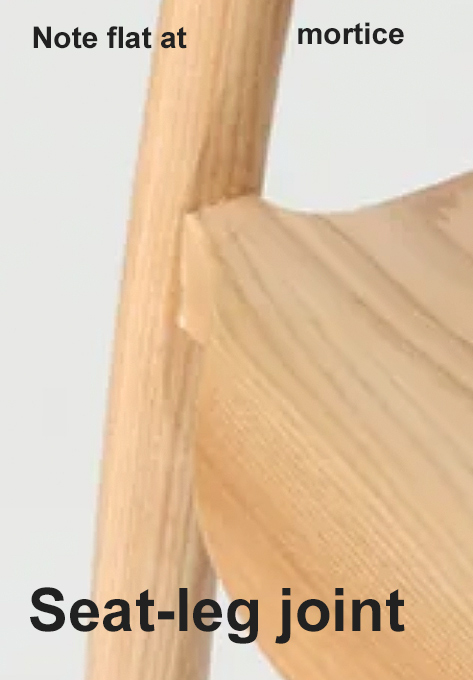
Let's start with the obvious. This is how the tenon and the tenon mortise will end up looking ...
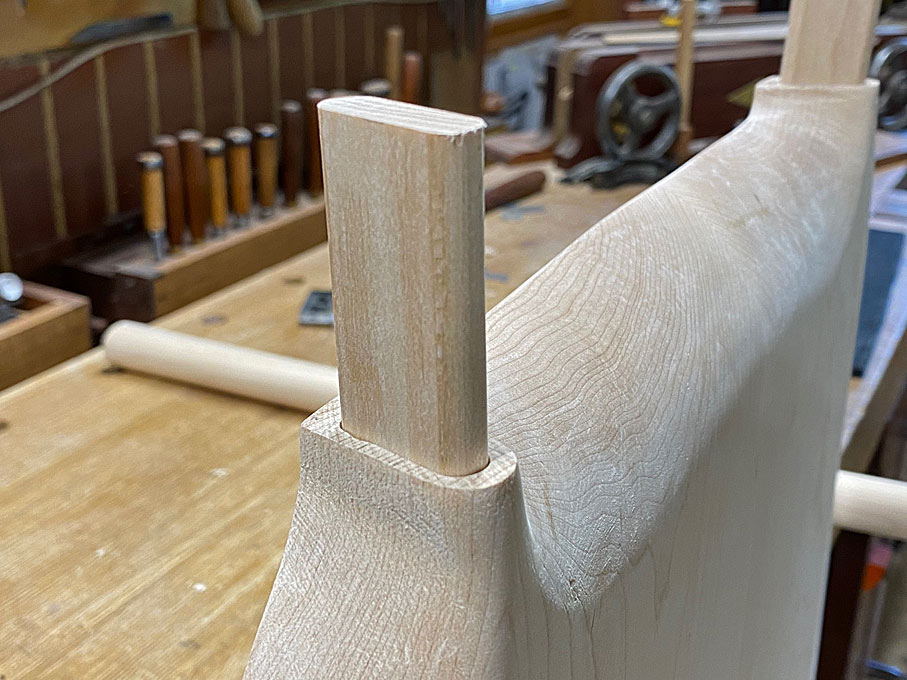
The loose tenon is 30mm wide and 10mm thick. It extends 28mm into the tenon mortise ...
This all looks rather neat, but it was the end result of further shaping to fit the legs with the seat. The issue was that the seat mortices were chunky ...
When joined, this was the fit ...
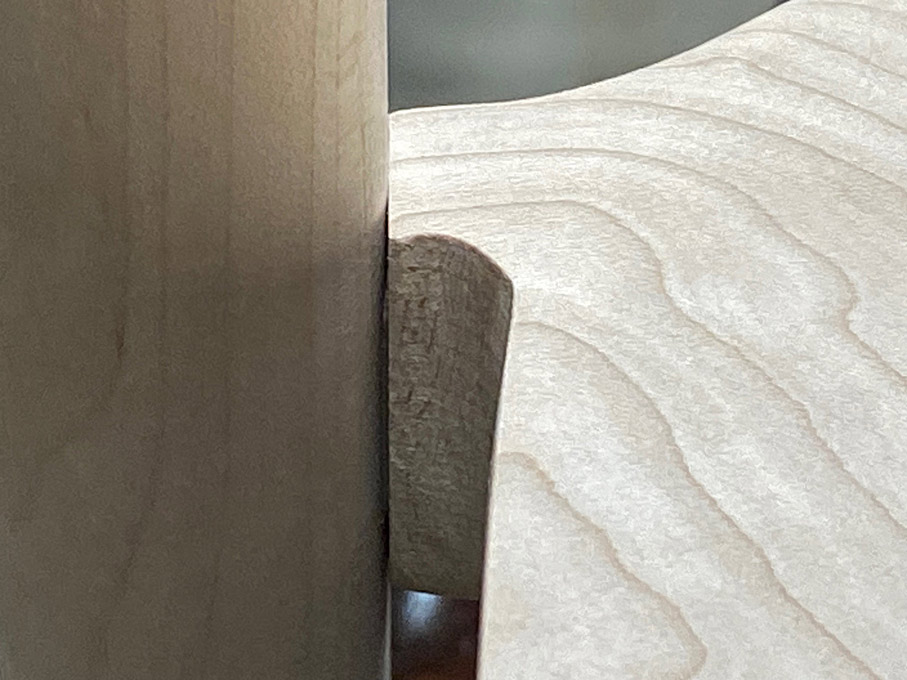
Two steps were involved. Firstly, the tenon mortise was reshaped to be thinner at the face (this involved removal of waste at the top edge and not the sides, which is needed support for the loose tenon) ...
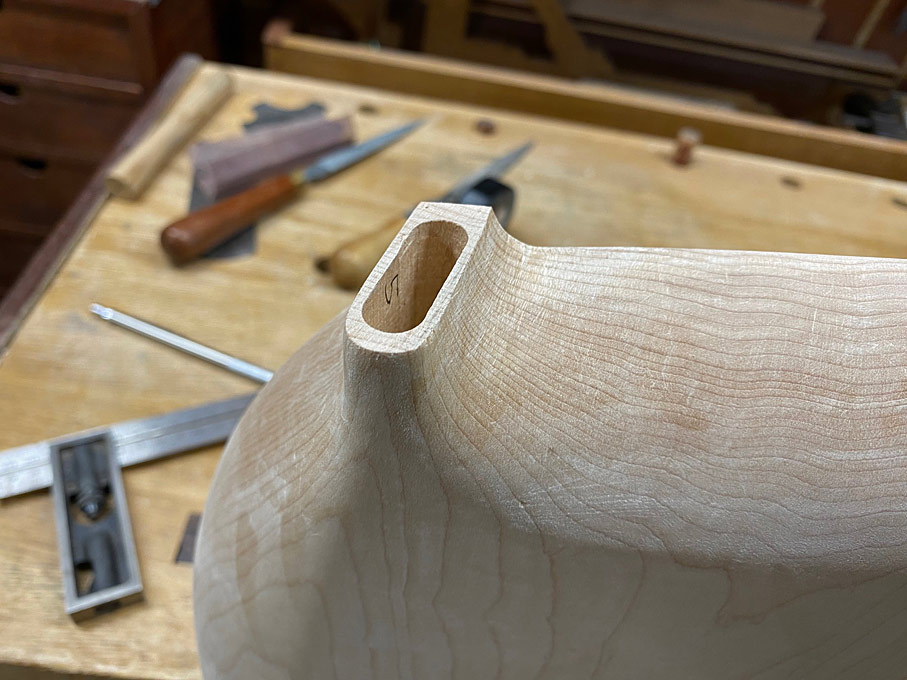
Secondly, the face of the leg mortise was planed flat to match the face of the seat mortise ...
This is how the original chair was fitted - photo I posted early on ...
This is the result ...
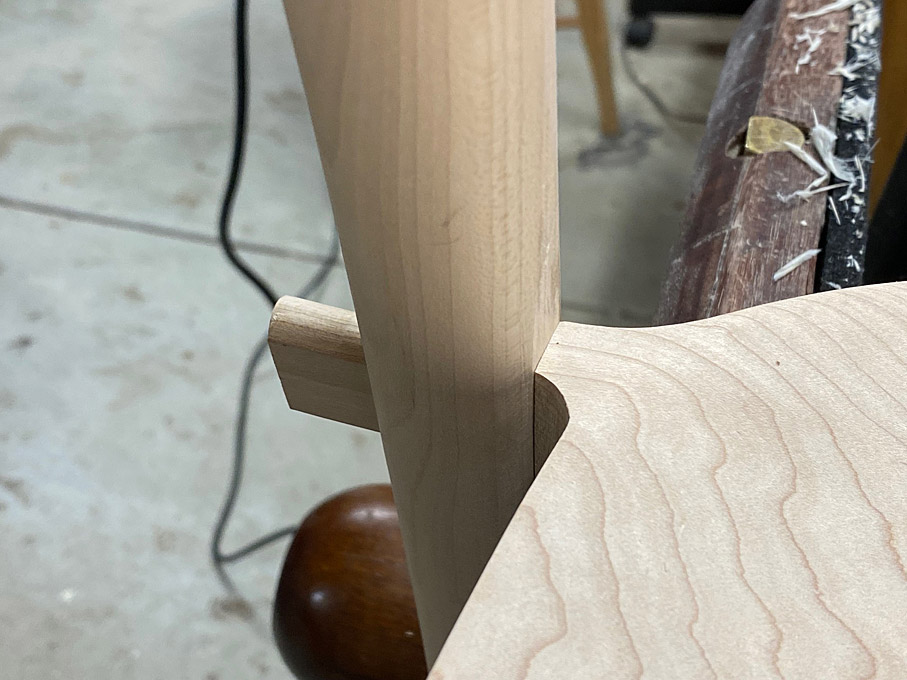
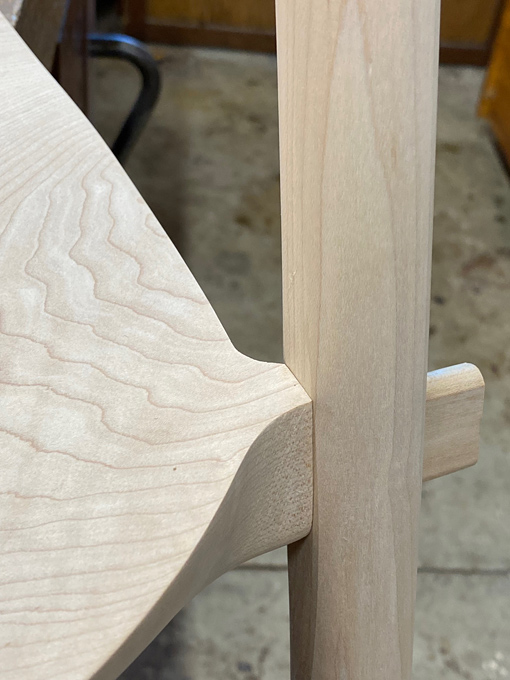
All the parts fitted, but not yet glued up ...
Loose tenons slotted for wedges, along with the wedges. Glue of choice: Old Brown hide glue. Why? Because at some stage in the future, hopefully many years from now, it is likely that the joinery will need to be re-glued.

The seat tenons are glued first and the glue allowed to dry (they are a bit long here, and were cut shorter before the legs were attached) ...
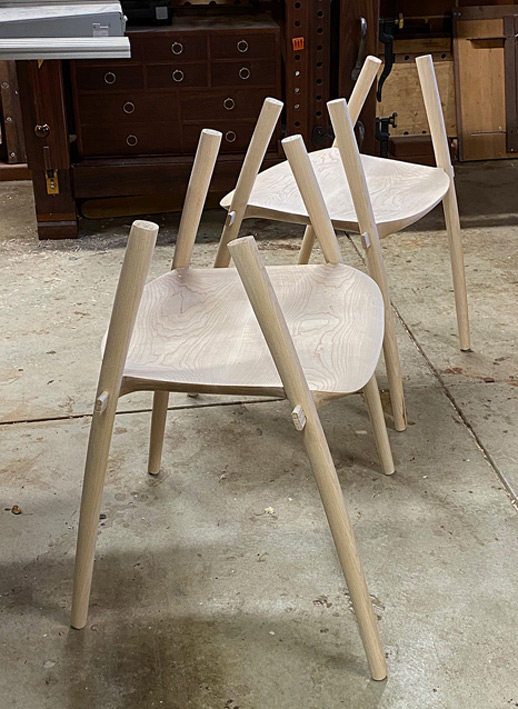
And a last photo of the final glue up. It will remain so for 24 hours.
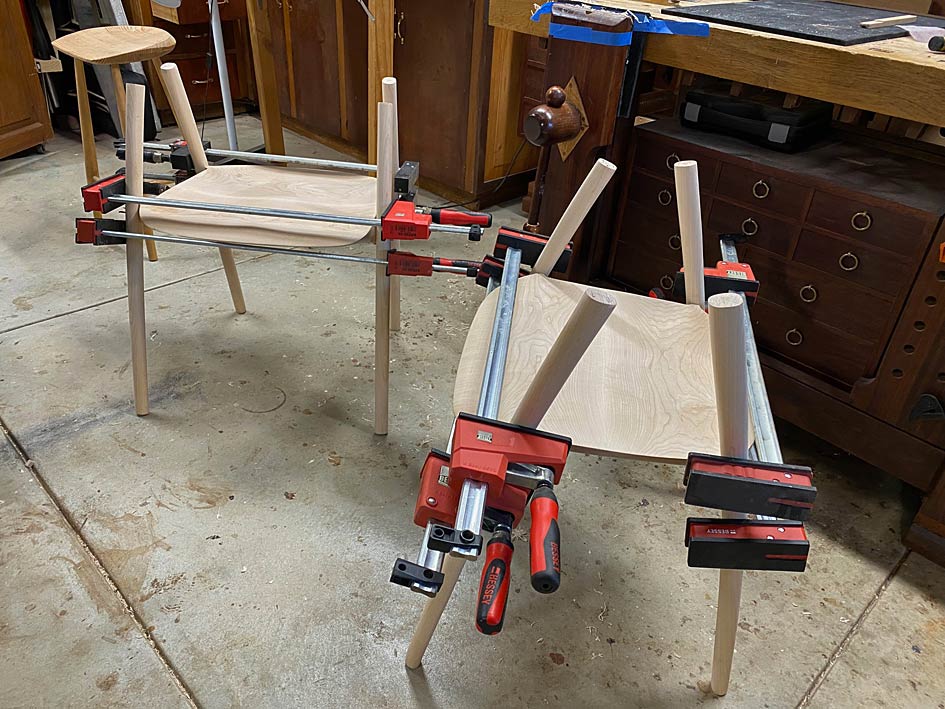
Starting to look like chairs!
Regards from Perth
DerekVisit www.inthewoodshop.com for tutorials on constructing handtools, handtool reviews, and my trials and tribulations with furniture builds.
-
11th March 2024, 11:31 AM #27
Butcher of wood
- Join Date
- Jun 2010
- Location
- Bundaberg
- Age
- 54
- Posts
- 3,428
The joins look very exact; well done! How did you ensure you were planing the flats square to the mortices; if you did it freehand then that's doubly impressive. Looking at the original chair my initial thoughts were that you'd have used a spokeshave so it was a bit of a surprise to see you do it with a block plane!
Out of interest; did you consider scribing the seat mortices into the legs?
Oh; good luck with the knee opp later on today.Nothing succeeds like a budgie without a beak.
-
11th March 2024, 12:17 PM #28
Be inspired. Be creative. Be bold.
- Join Date
- Apr 2001
- Location
- Perth
- Posts
- 10,826
Thanks CT!
I used the block plane (set up with a high cutting angle to prevent tearout) as it had more reference surface than a spokeshave. If you start the planing over the mortice, this provides some registration, which cutting increases. So, yes, all done freehand.
I have scribed seat mortises before, several times in fact, but wanted to follow the joinery used on the original build as closely as possible .... of course, the original was done with CNC machines, so I added the sound effects as I worked.
And thanks for the wishes ... sitting in the hospital waitingroom as I type this.
Regards from Perth
DerekVisit www.inthewoodshop.com for tutorials on constructing handtools, handtool reviews, and my trials and tribulations with furniture builds.
-
12th March 2024, 12:12 AM #29
 GOLD MEMBER
- Join Date
- Apr 2006
- Location
- Hobart
- Posts
- 5,130
When confronted with a similar problem of making curved legs that tapered from oval to round, I did the opposite to you, largely because I did not think of your option, Derek. Originally Posted by derekcohen
My process was:
- Cut the leg profiles,
- Cut the joints,
- Cut the taper in the square,
- Did a rough round-over on the router table,
- Finessed the rounding with spokeshaves and card scrapers.
Must wonder which of us guessed right - but both options gave good solutions.
-
12th March 2024, 12:24 AM #30
Be inspired. Be creative. Be bold.
- Join Date
- Apr 2001
- Location
- Perth
- Posts
- 10,826
Graeme, we did essentially the same. The only difference was you mortised before the tapering, while I mortised after tapering. We both did the profiling of the oval/round later.
In my case, the tapers were not an issue since the face edges were parallel (the side edges curve). The method I used to mark the mortise was accurate (witness that they met in the centre), and I used a flat registration (that was able to be set up for both sides of the legs).
The question I have is whether your mortises ran parallel and centred in the curve of your legs (mine do, owing to my sequence)? If so, how did you do this?
Regards from Perth
DerekVisit www.inthewoodshop.com for tutorials on constructing handtools, handtool reviews, and my trials and tribulations with furniture builds.

 Reply With Quote


Similar Threads
-
Building dining room carver chairs
By derekcohen in forum FURNITURE, JOINERY, CABINETMAKING - formerly BIG STUFFReplies: 37Last Post: 25th January 2024, 10:01 PM -
Dining room chairs
By Template Tom in forum ROUTING FORUMReplies: 0Last Post: 18th May 2016, 06:15 PM -
dining room chairs
By Gaza in forum WOODWORK - GENERALReplies: 1Last Post: 23rd December 2007, 08:13 PM -
Dining Room Chairs
By dreinoga in forum DESIGNS & PLANS FOR PROJECTSReplies: 3Last Post: 13th November 2004, 09:28 PM -
Books on making dining-room chairs
By willy_punter in forum WOODWORK - GENERALReplies: 4Last Post: 8th June 2004, 05:21 PM
