

 Thanks:
  Likes:
  Needs Pictures: 0
 Picture(s) thanks:
Results 31 to 45 of 57
-
12th March 2024, 09:03 AM #31
 GOLD MEMBER


- Join Date
- Aug 2011
- Location
- bilpin
- Posts
- 3,559

Derek, Are you planning on angling the ends of the mortices a little to take full advantage of the wedged tenons? The giant holes through the tenons worry me a bit. I guess you are hoping they fill with glue. The flat on the leg face to receive the seat mortice is an option but there is no relief for the tenon. If the leg is checked to flat then the seat is supported on the shoulder cut into the leg. When it comes to chairs, the more inbuilt support that can be created, without bulking up the design, the better.
They are looking good. Sad that a CNC can do it all in a fraction of the time. But at least we know, if the power goes off, we are still in the hunt.
I trust the op went well.
-
12th March 2024 09:03 AM # ADSGoogle Adsense Advertisement
- Join Date
- Always
- Location
- Advertising world
- Posts
- Many
-
12th March 2024, 12:07 PM #32
Be inspired. Be creative. Be bold.
- Join Date
- Apr 2001
- Location
- Perth
- Posts
- 10,826
Rusty, good questions.
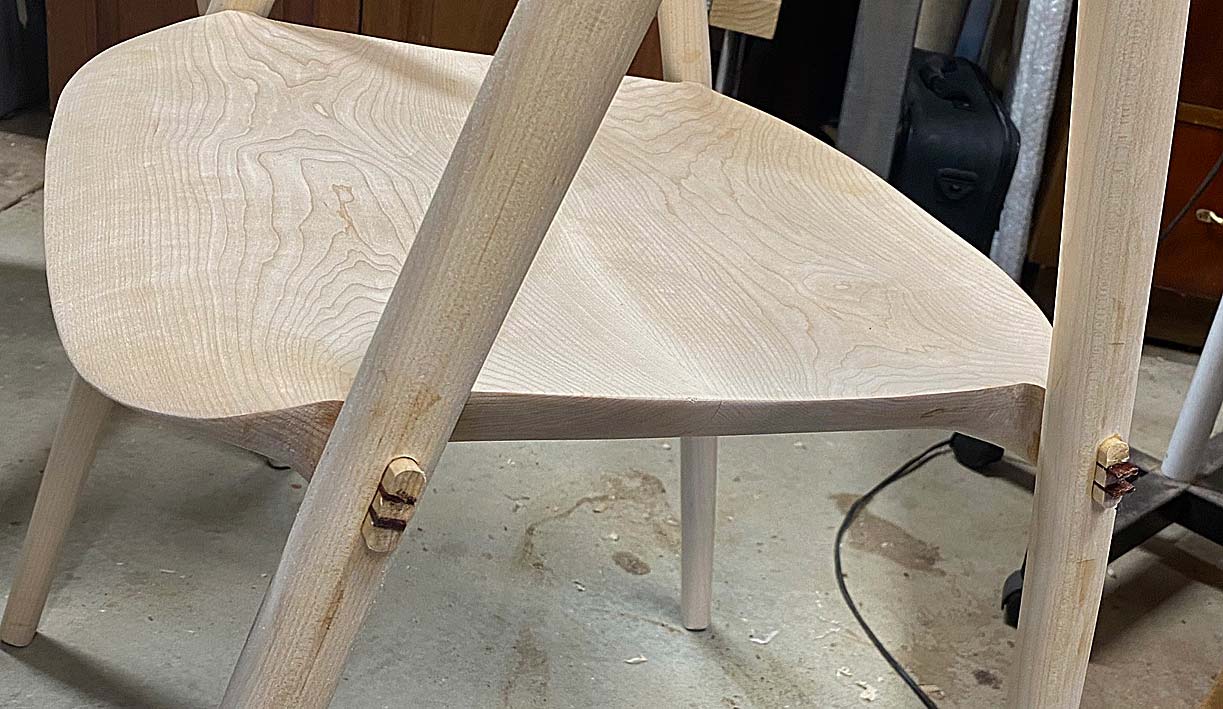
I am not sure if the photo provided must detail, but the wedges are tapers, but also long and skinny ...

They both fill the slot - which is full of glue - and create a wedging action, firmly pushing the tenon edges against the glued insides of the mortise. The mortises, both in the seat and legs was 30mm long. Most were exact, some of the legs were a little under a mm long. A little filing for all to create this tiny gap - it does not have to be more. The glue is enough and the wedges are security. Interestingly, this appears to be the same in the original chair, with the exception that they added a chamfer for the end of the wedge. I've never seen this before ..
EDIT TO ADD: In addition to the wedged legs, the arm/back structure adds stiffness and resists the legs wracking/moving. It is akin to triangulation of the construction (not really triangles, of course).
I have removed the clamps and the structure is really stiff already - I will wait until Lynndy is out of the way to take some photos. She-Who-Must-Be-Obeyed is keeping a steely eye on my "taking it easy" today!
Making by CNC takes all the planning out of woodworker and puts it, instead, into a computer.
Regards from Perth
DerekVisit www.inthewoodshop.com for tutorials on constructing handtools, handtool reviews, and my trials and tribulations with furniture builds.
-
12th March 2024, 02:55 PM #33
 GOLD MEMBER
- Join Date
- Apr 2006
- Location
- Hobart
- Posts
- 5,130
I didn't. I was being too cute in my post and said joint rather than mortise and actually used a modified Maloof joint. Much less elegant than your work in progress. Originally Posted by derekcohen

Angela's Chair - Detail 2.jpg
Really enjoying watching your progress on this one. This is one of those projects where designing how to make it is probably as important and harder than the actual design or make phases.
-
12th March 2024, 03:30 PM #34
GOLD MEMBER
- Join Date
- Aug 2011
- Location
- bilpin
- Posts
- 3,559
The purpose of the chamfer is to allow the thick end of the wedge to be much greater and therefore able to withstand the hammer strikes without the thin wedge fracturing as it reaches resistance. It also places extra pressure on the outer limit of the tenon to assure closure between tenon and mortice.
I return to the matter of sloping the mortice ends; A square ended mortice and tenon joint is reliant on either friction or glue. Friction is transient, once shrinkage sets in there is little holding power. Glue is much longer serving but, if it fails, there is nothing holding the joint. With flared ends to the mortice the wedges force the straight edges of the tenon out, as per a dovetail, preventing the joint from opening, even if the joint was unglued. I have never had a leg joint fail since I started using this method about forty years ago. Even when the glue has failed, the joint holds together.
-
12th March 2024, 04:45 PM #35
Be inspired. Be creative. Be bold.
- Join Date
- Apr 2001
- Location
- Perth
- Posts
- 10,826
Nice Graeme. They is not the Maloof Low Back Chair, but has similarities. Originally Posted by GraemeCook
I did consider this joinery at the start when looking to design the first lot of chairs. It was just not minimalistic enough for what I had in mind. I do have plans one day to build a Maloof rocker (doesn't everyone!).
Regards from Perth
DerekVisit www.inthewoodshop.com for tutorials on constructing handtools, handtool reviews, and my trials and tribulations with furniture builds.
-
12th March 2024, 04:51 PM #36
Be inspired. Be creative. Be bold.
- Join Date
- Apr 2001
- Location
- Perth
- Posts
- 10,826
Originally Posted by rustynail
Rusty, I agree 100% with you. I am trusting that the small amount of taper inside the mortises will add an extra layer of solidness.
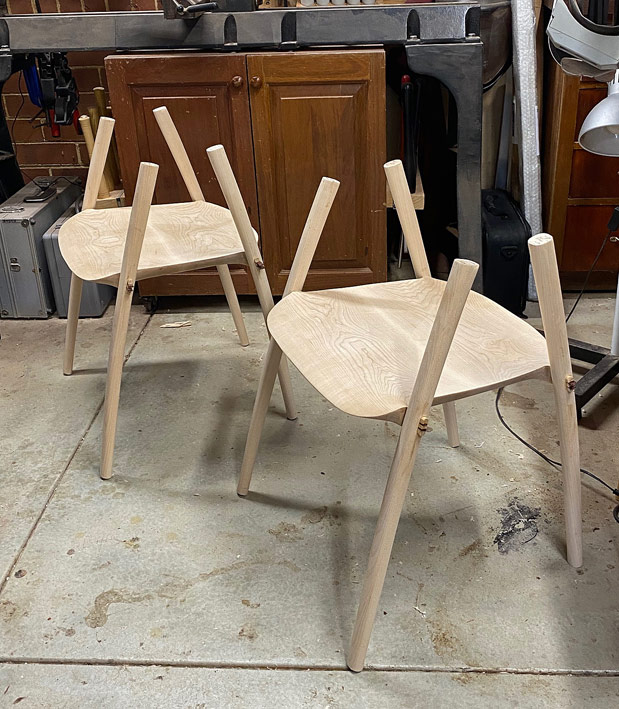
I snuck into the workshop to unclamp the glue up. Lynndy caught me! But she then asked to sit on one of the chairs (sans the arms and back). She did so gently, and then with all her weight (55Kg). The seats did not even sigh, and nothing moved. She proclaimed the seat very comfortable. Yay!
Tenons and wedges yet to be cut and levelled ...
Regards from Perth
DerekVisit www.inthewoodshop.com for tutorials on constructing handtools, handtool reviews, and my trials and tribulations with furniture builds.
-
12th March 2024, 04:53 PM #37
GOLD MEMBER
- Join Date
- Apr 2006
- Location
- Hobart
- Posts
- 5,130
True. I was attempting to incorporate the diagonal bracing of a Jimmy Possum Chair into a Maloof influenced design, but I was not brave enough in eliminating the unessential. Originally Posted by derekcohen
Still, it is a very comfortable and functional chair.
-
24th March 2024, 01:23 AM #38
Be inspired. Be creative. Be bold.
- Join Date
- Apr 2001
- Location
- Perth
- Posts
- 10,826
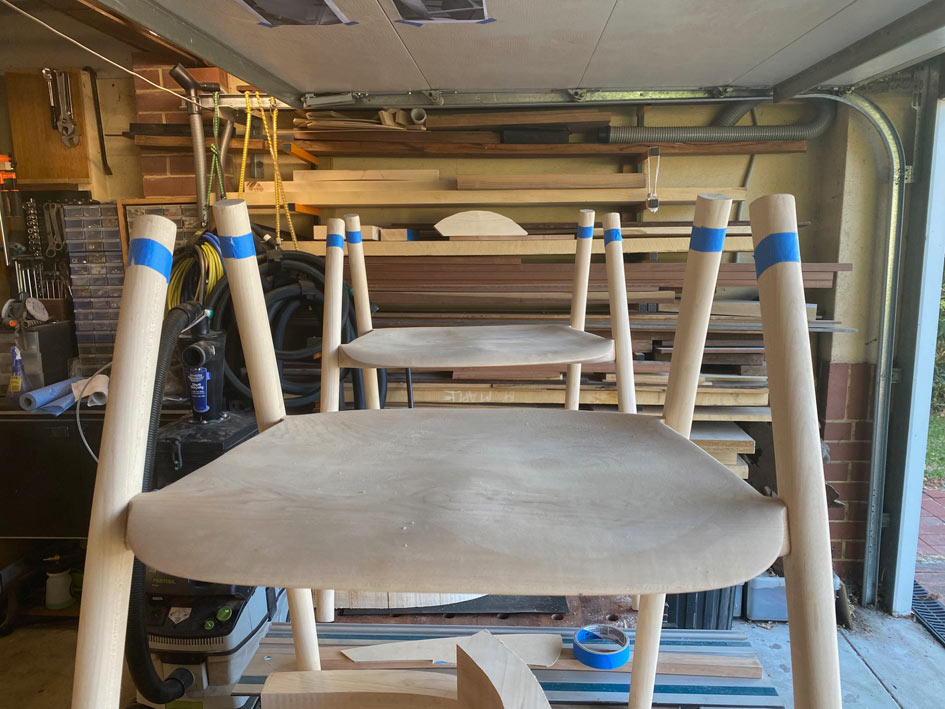
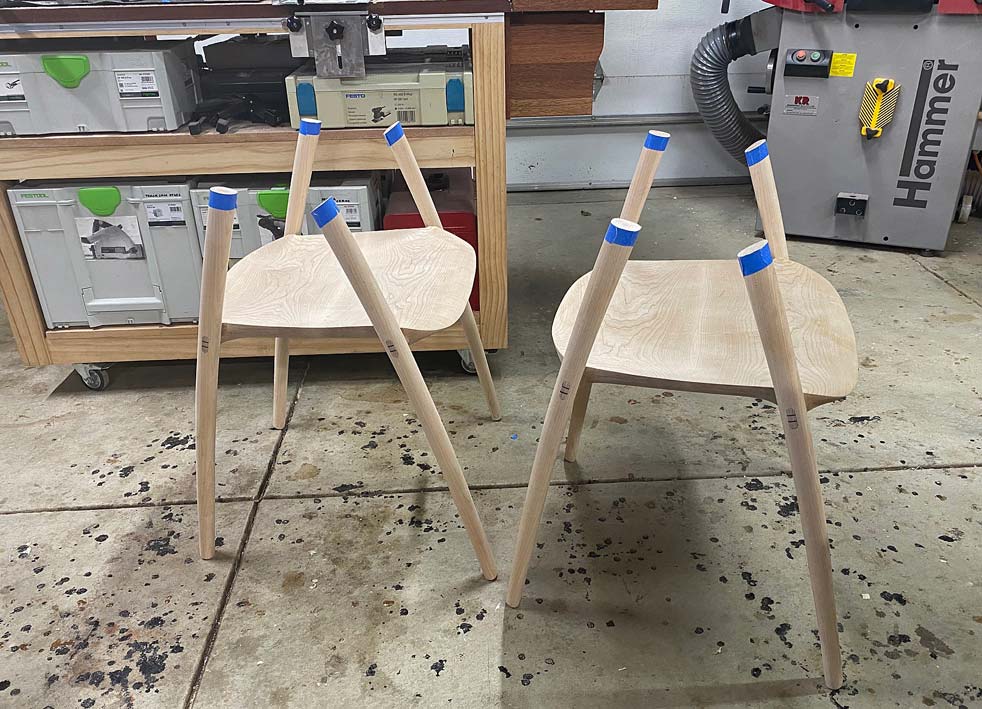
Beginning the arms and backs
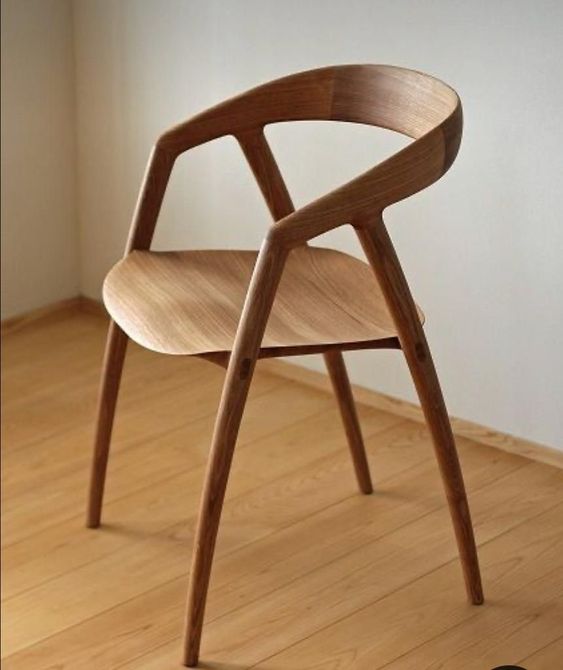
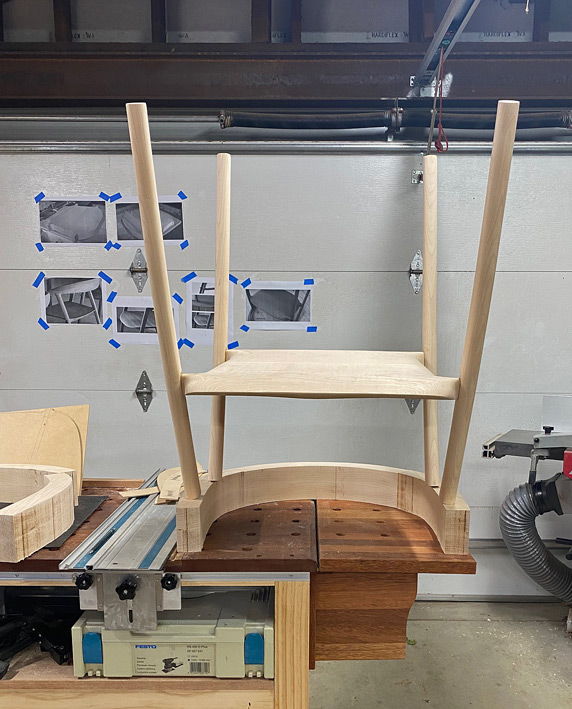
The legs and seats are done and it is time to move to the arms and backs. Once again, the chair to provide a context of where we are headed ...
I was fortunate to find a few photos on the Web showing the development of the arms/back, which provided some insight into how to construct this ...

The construction sequence that was really helpful was this (note these are from the underneath) ...
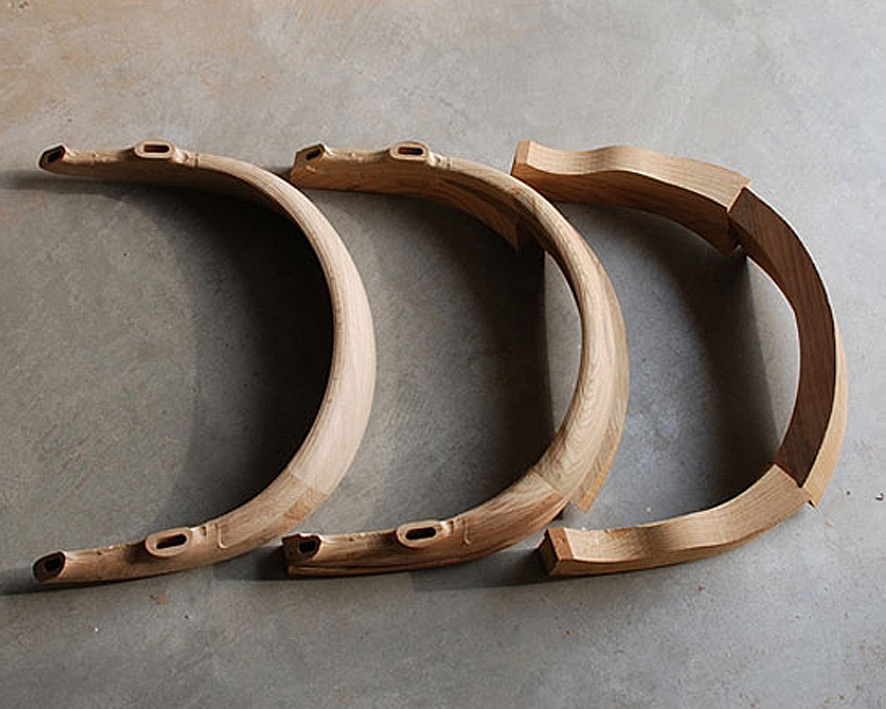
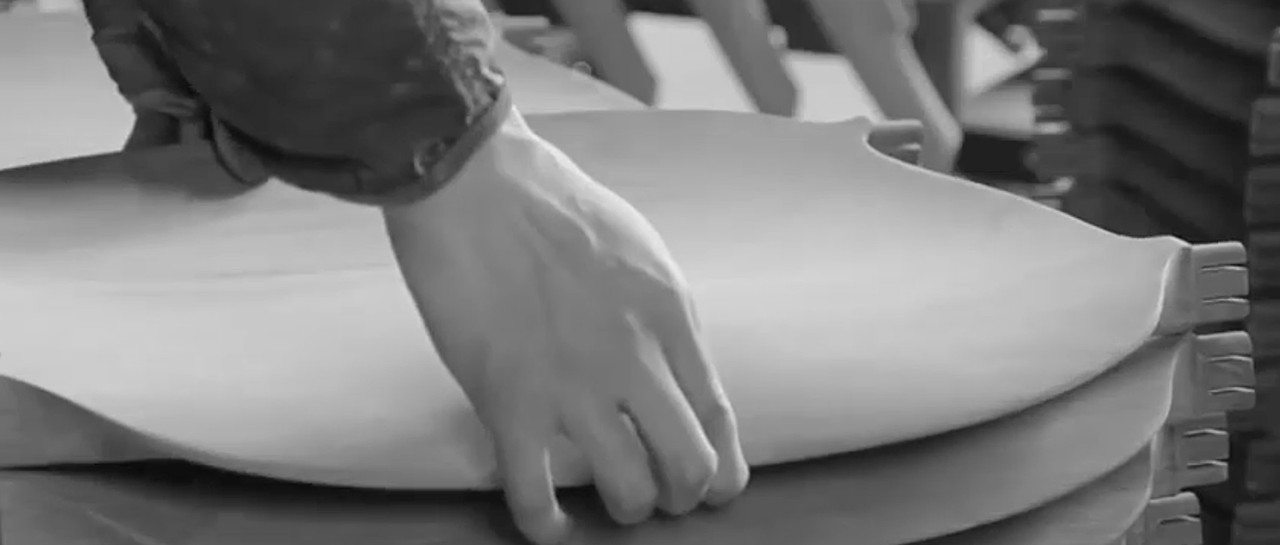
While this makes it all appear accessible, my experience building a Hand Wegner chair prepared me for the large chunks that make up the two arms and the back ...

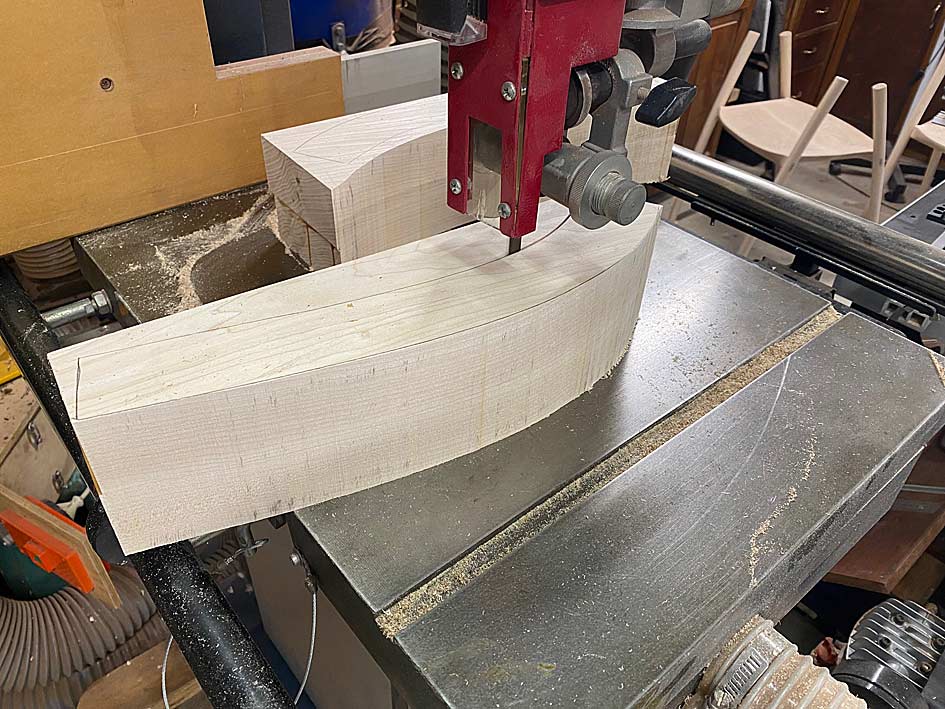
Giant slabs and lots of carving (since, unlike the factory, I do not have a CNC machine) ...

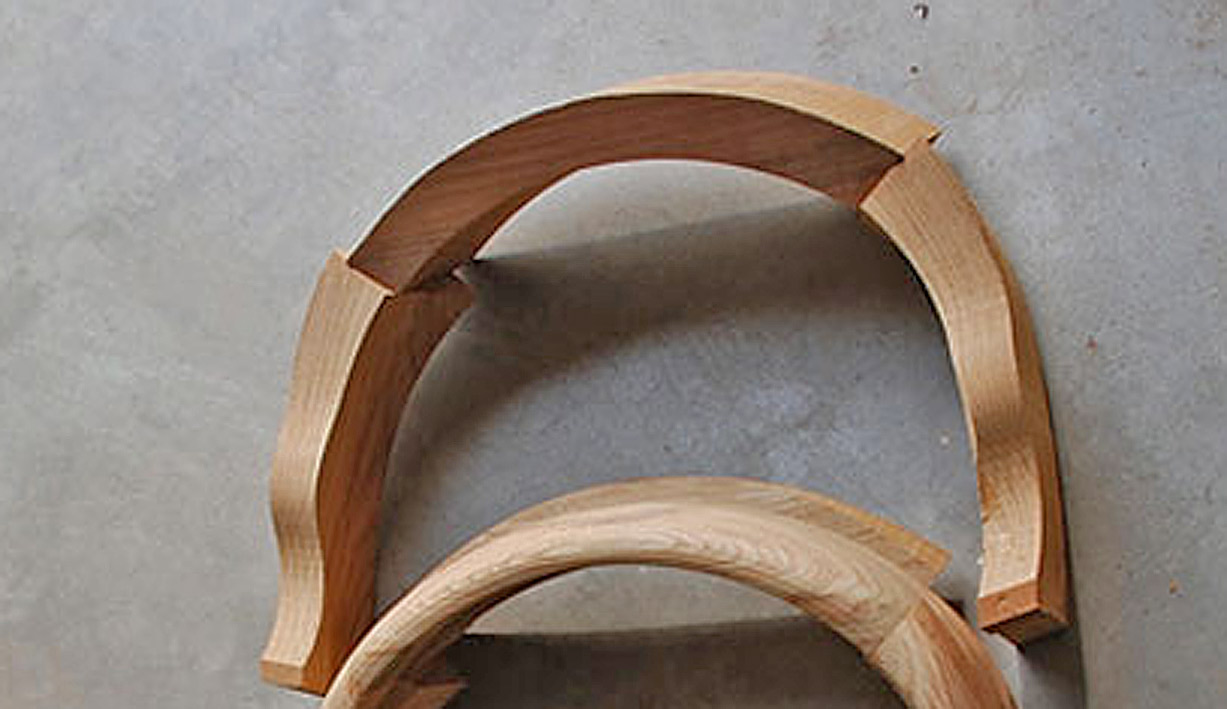
But look at the first photo in that sequence - the back is angled into the arms. Wonderful - less to carve!
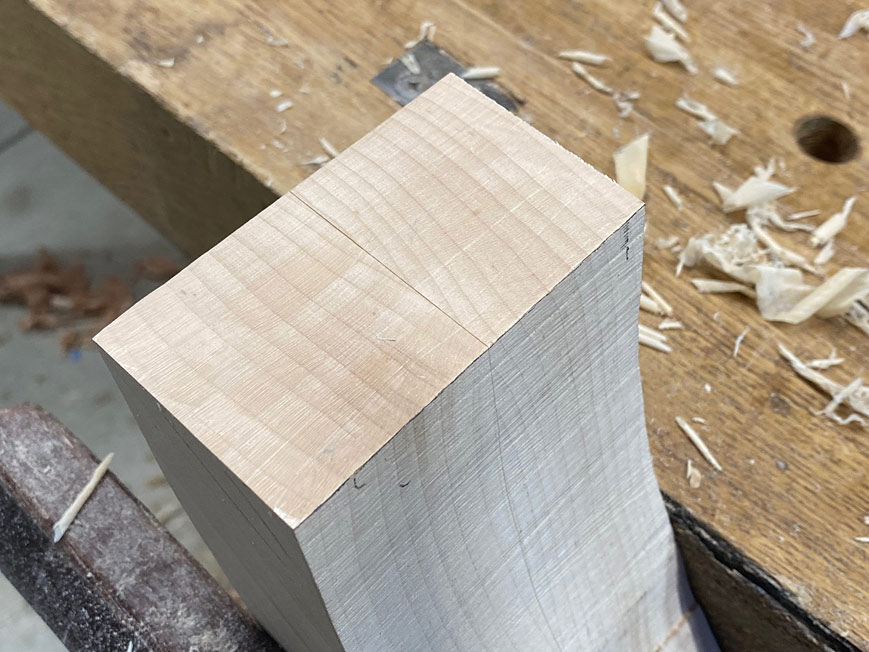
The arms need to be shaped from blocks 90mm high, so I got busy laminating ...

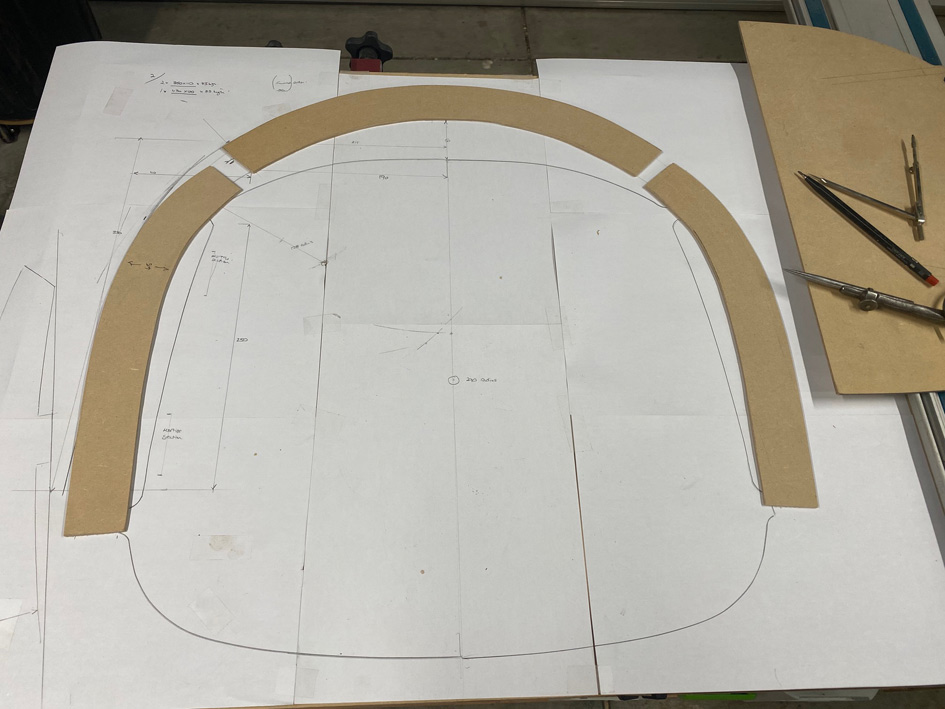
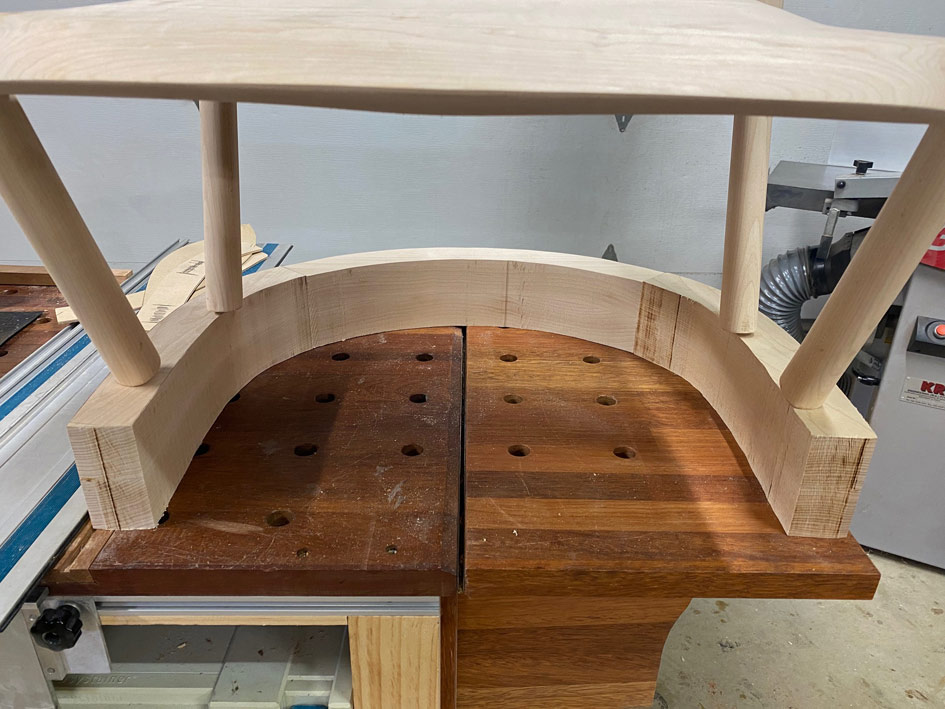
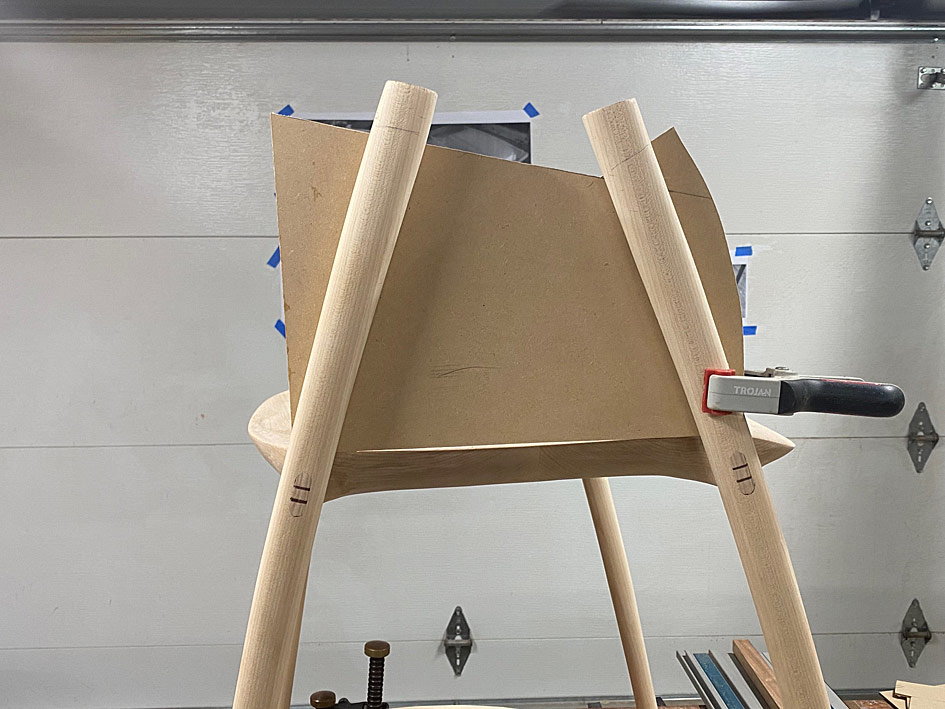
And while this was drying, time was spent on getting the profile for the side of the arms ...
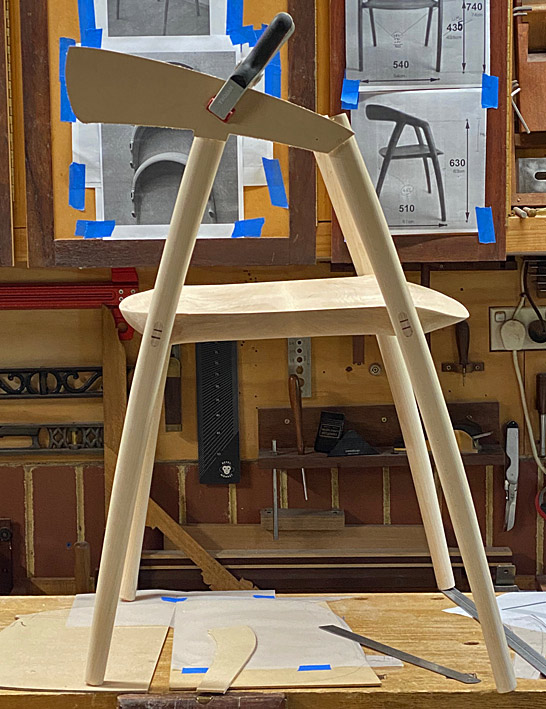
There's a photo on the wall behind against which to compare. Also, a first look at the completed through tenons.
That's the easy stuff. Time to design the arm and back profiles.
We start with a seat ...

... to use to frame around ...
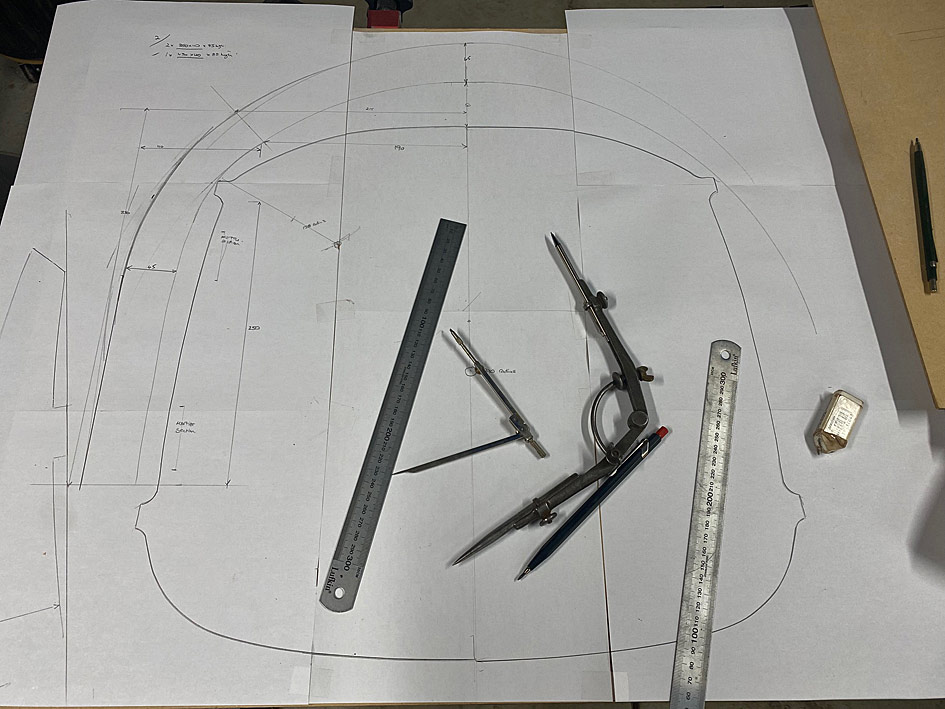
After much back-and-fro drawing, rubbing out, re-drawing, and transfering to MDF for templates ...
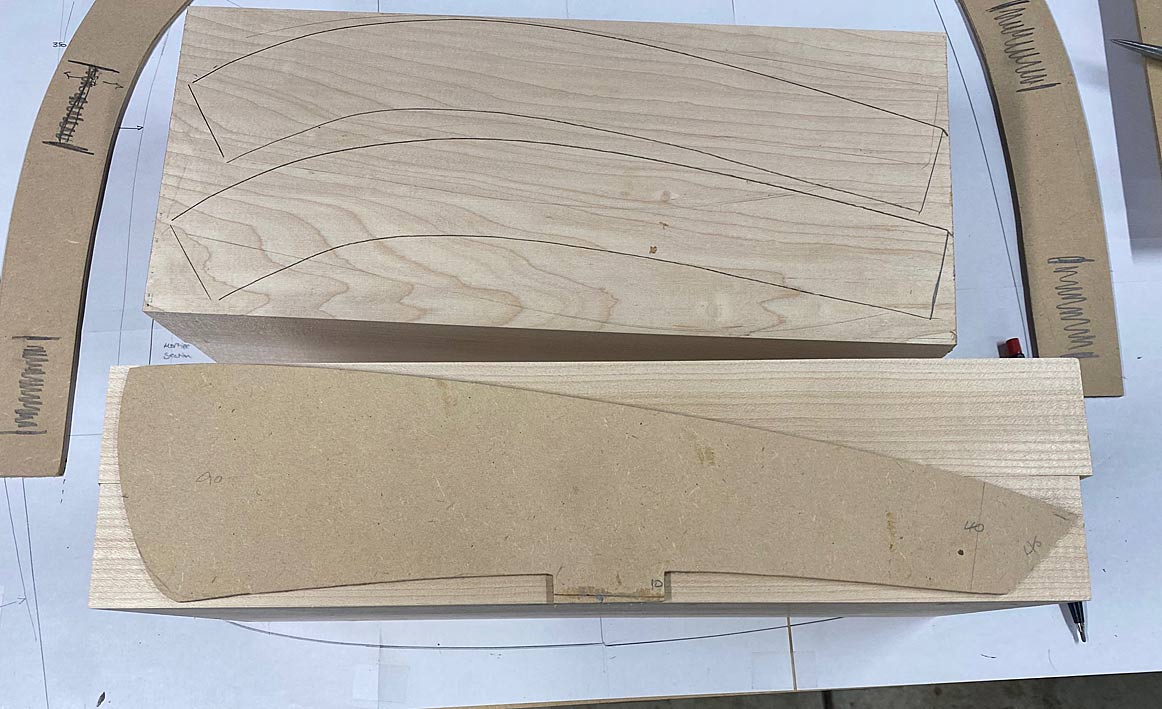
Each of the blocks (seen beng glued up earlier) create four arm blanks ...
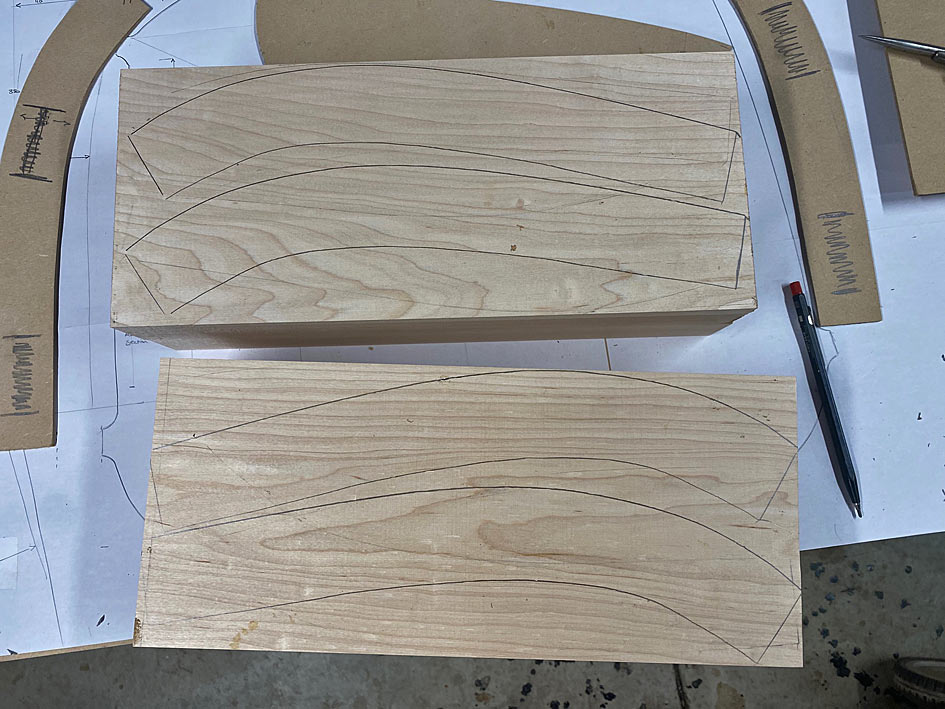
Here is the side elevation ...
Wood for the backs came from sawing up this 3m long board ...

And, for now, the backs are laminated and drying alongside the other blanks and templates ..
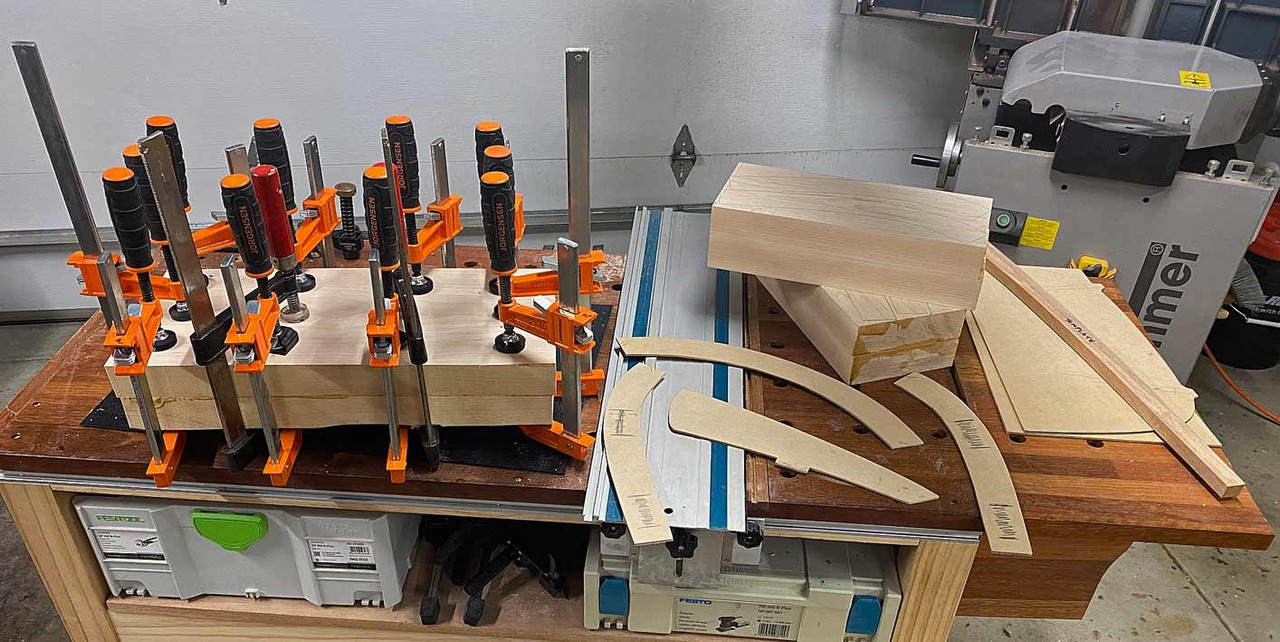
Tomorrow I shall begin cutting it all up, and joining pieces together.
A question for all is how you might connect/join the arms with the legs? Note that the back will be joined angled to the sides, as per the photo.
Regards from Perth
DerekVisit www.inthewoodshop.com for tutorials on constructing handtools, handtool reviews, and my trials and tribulations with furniture builds.
-
24th March 2024, 09:08 PM #39
GOLD MEMBER
- Join Date
- Aug 2004
- Location
- Coffs Harbour
- Posts
- 2,018
Awesome work Derek. I love your dedication to come up with an accurate plan from photos.
I struggle without making mock-ups.
Transferring 2D to 3D is too big a step without me being able to see how it works.
It is a very stylish chair.Scally
__________________________________________
The ark was built by an amateur
the titanic was built by professionals
-
25th March 2024, 01:38 AM #40
Be inspired. Be creative. Be bold.
- Join Date
- Apr 2001
- Location
- Perth
- Posts
- 10,826
More of the arm jigsaw
Here is the work done today, which was preparing the arms before shaping. Critical work, and the day went well. This was mainly due to working methodically. Looking back it all seemed so logical and straightforward, but it didn't feel this way before hand.
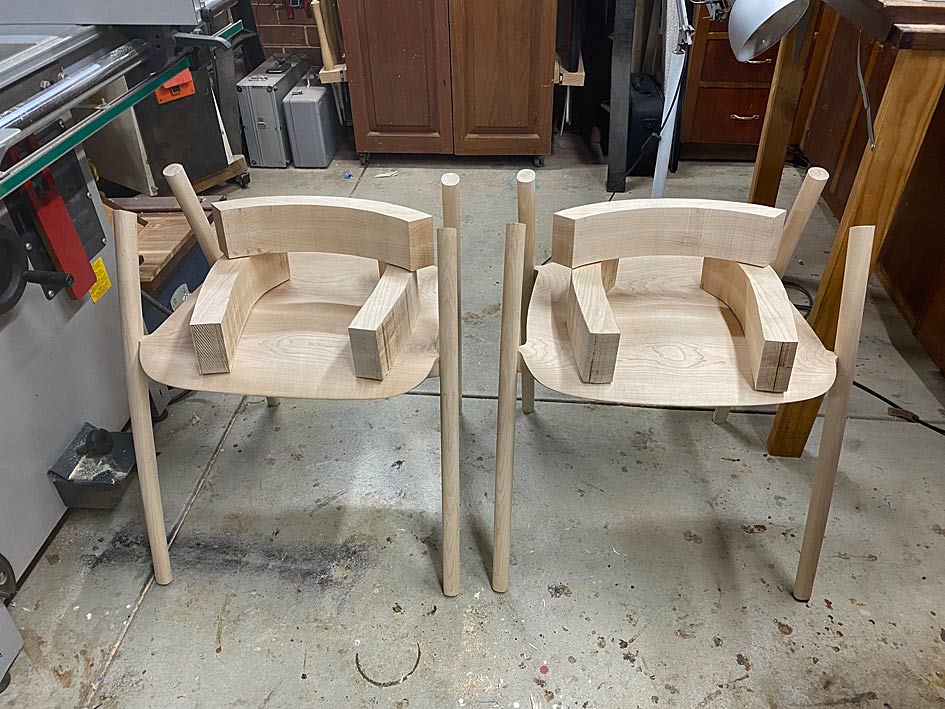
The first task was to bandsaw all the blocks of wood into shape, having outlined the parts with the templates.
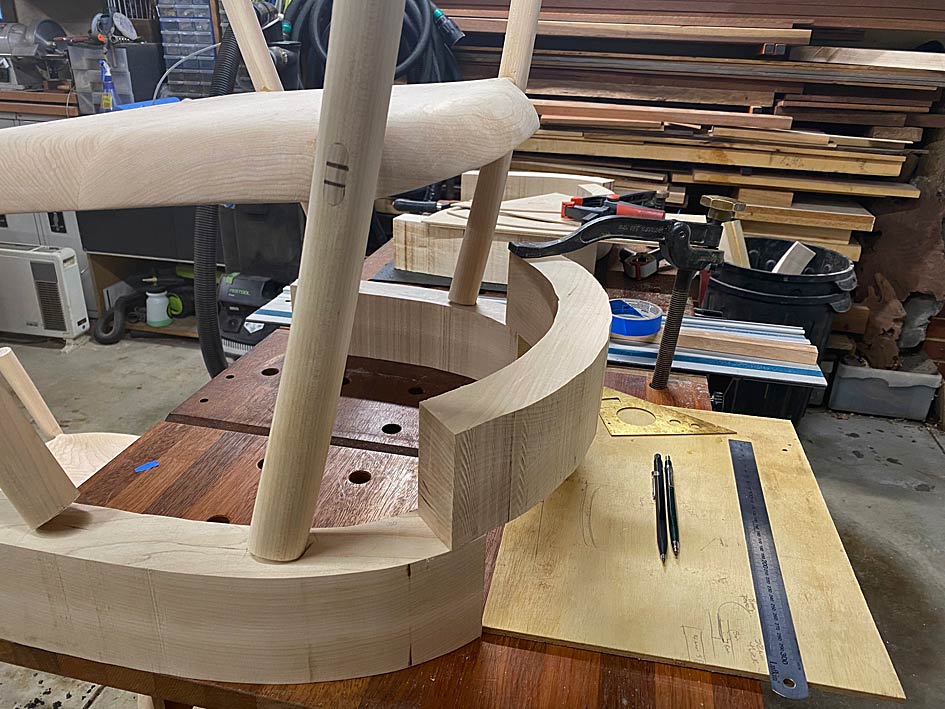
Lining up the arm parts for two chairs, three for each ...

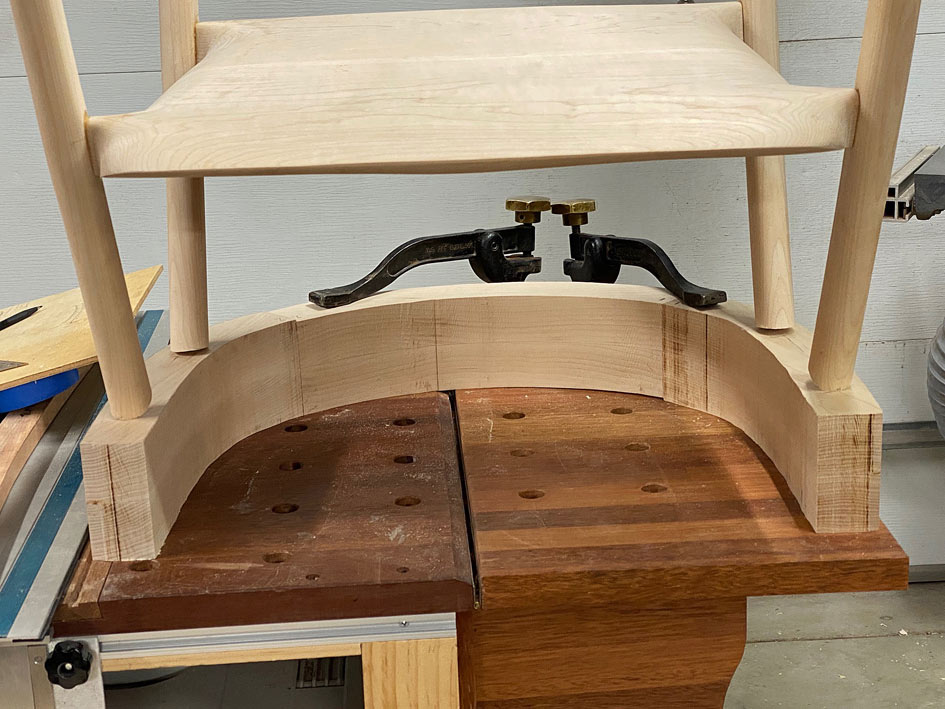
At first I thought I would clamp them together and balance the lot on top of each chair ... no, that would be silly! The chairs were turned upside down on the arms ...
This revealed that the spread of the arms was a little too wide. The arm supports need to be centred on the arm rests ...
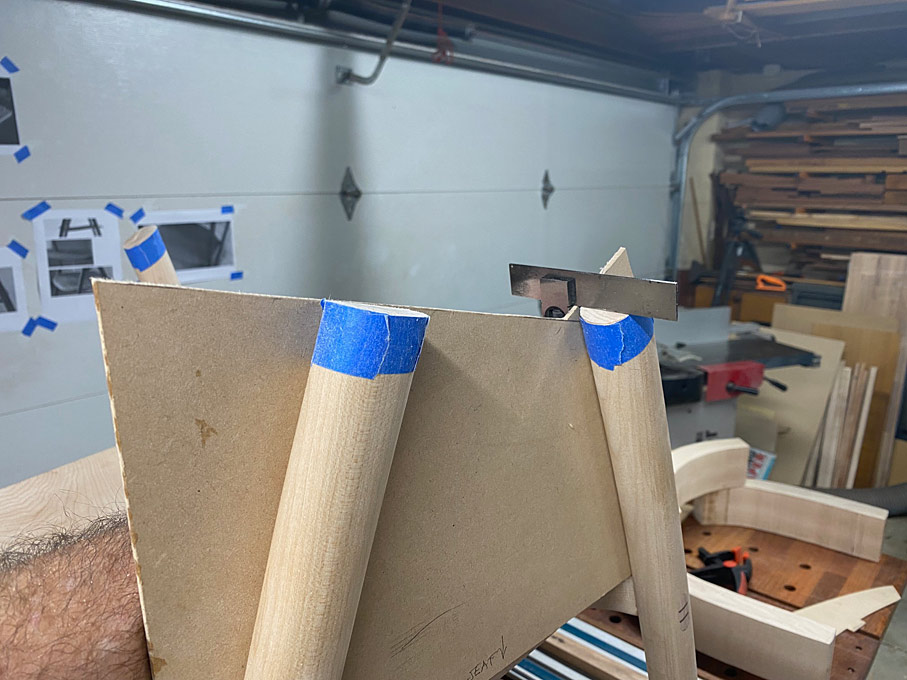
Before adjusting this, the next stage needed to be to cut the arm supports to length. To do this, first the template for the arm elevation was positioned ...
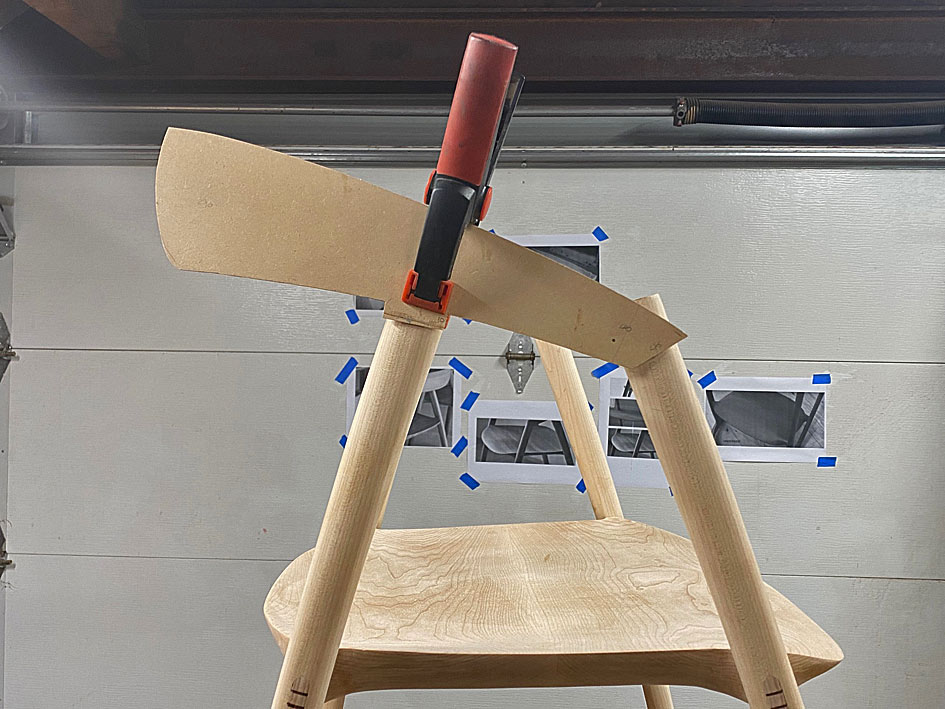
... and then a template was made to position this ...
This allowed all the arms supports to be marked on both sides ..

.. and marked with blue tape ...
The excess is sawn away ...
The template also enables the accuracy of the saw cuts to be checked, and for square. This will need to be fine tuned later, but good for now ...
The underside of the arms are marked so the positions on each will be the same, and the overhang at the rear was roughly calculated. Again, this will be adjusted after the arms parts are joined.
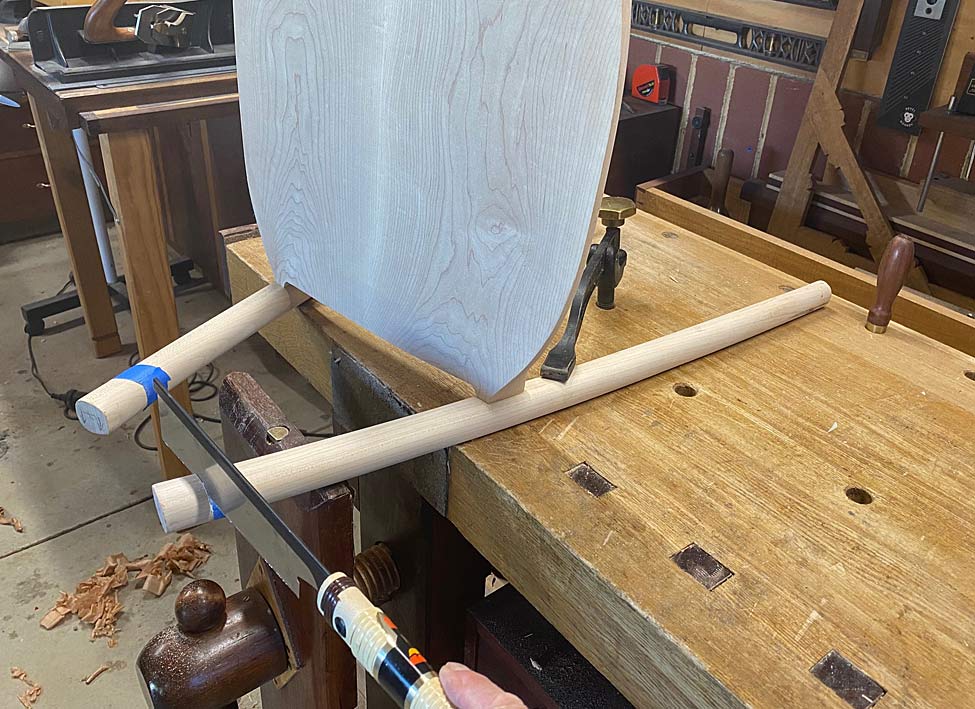
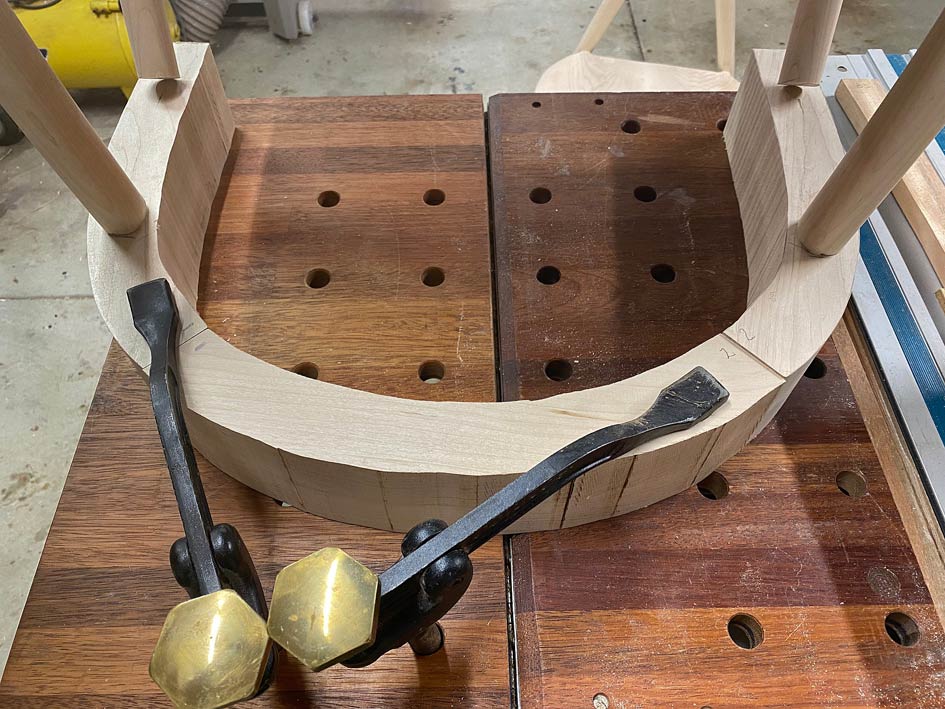
Now the top rail can be positioned for sizing ..
It is marked for sawing ...

Aligned on the slider ...
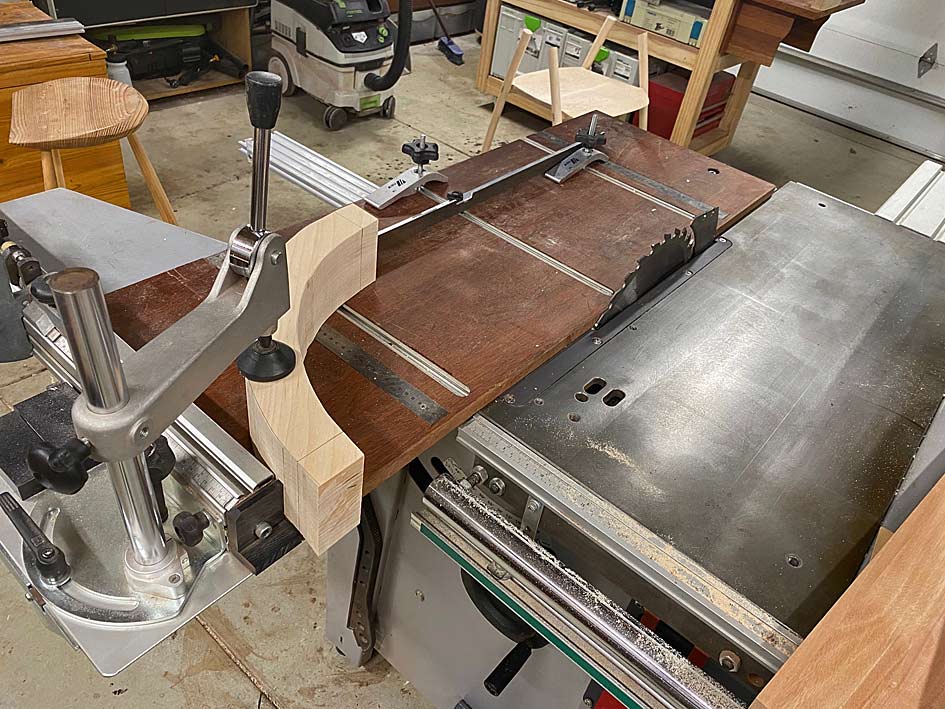
All the ends of the arms are squared this way, however the saw has a maximum cut height of 75mm and these parts are 90mm. This leaves 15mm to saw away with a hand saw, and then clean up with a block plane. This clean up is important as it is also jointing for the parts to fit together gap-free ...

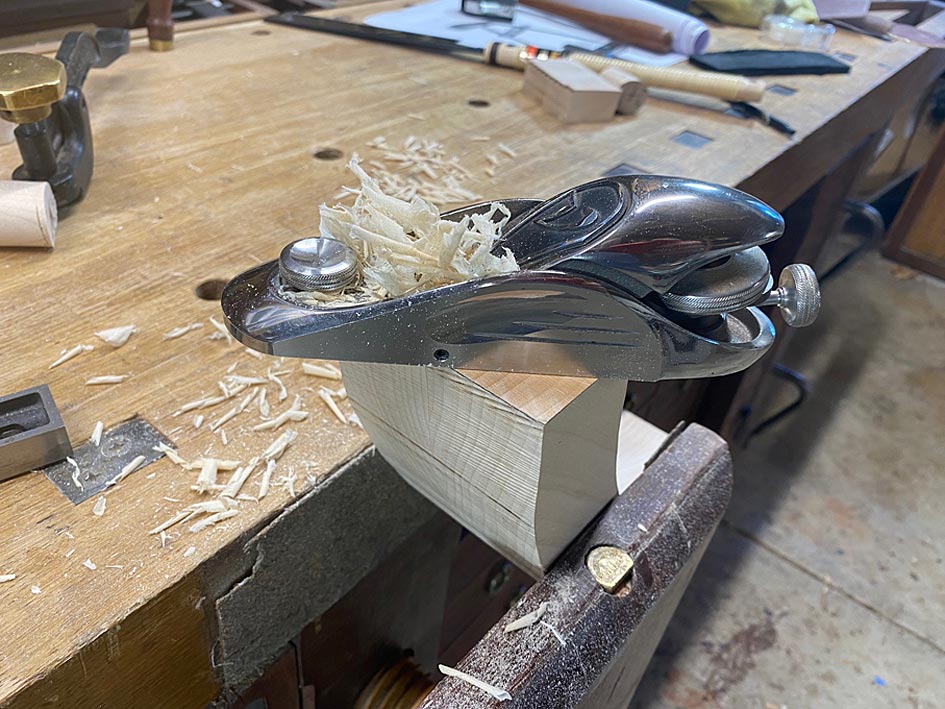
The arm parts are ready to fit together ...
And all done for the day ...
Regards from Perth
DerekVisit www.inthewoodshop.com for tutorials on constructing handtools, handtool reviews, and my trials and tribulations with furniture builds.
-
25th March 2024, 03:45 PM #41
GOLD MEMBER
- Join Date
- Aug 2011
- Location
- bilpin
- Posts
- 3,559
Legs are attached to arm rests same as seat to legs... mortice and tenon. The slope of the arm makes clamping difficult so I pitch the ends of the mortices and use blind wedges in the joints. The wedges are driven home when they reach the bottom of the mortice. The joint does not require clamping and remains closed even if the glue was to fail.
-
25th March 2024, 04:10 PM #42
 Butcher of wood
- Join Date
- Jun 2010
- Location
- Bundaberg
- Age
- 54
- Posts
- 3,429
The photos of the original build would indicate that Dominoes or a similar loose tenon system was used however the differently angled joints would make for an exciting time trying to fit them� I believe Sam Maloof used dowels for his chair arm joints; they would be easier to assemble as there is sufficient �meat� in the legs to allow dowels to be fitted at odd angles to the joining faces, while remaining parallel with each other Originally Posted by derekcohen
Do I win $5? Nothing succeeds like a budgie without a beak.
-
25th March 2024, 04:31 PM #43
Be inspired. Be creative. Be bold.
- Join Date
- Apr 2001
- Location
- Perth
- Posts
- 10,826
I will be using 10mm Jarrah dowels. The reason for this, rather than dominos, is that there is no reference surface to align a Domino, and chopping a mortise is too risky. The positioning for dowels can be accurately transferred using locator pins, as in the photo below (building a bed) ...

The need for accurate positioning is also important since the dowels will need to "thread the gap" in the wood remaining after the external waste is removed in shaping.
Regards from Perth
DerekVisit www.inthewoodshop.com for tutorials on constructing handtools, handtool reviews, and my trials and tribulations with furniture builds.
-
25th March 2024, 06:16 PM #44
GOLD MEMBER
- Join Date
- Aug 2011
- Location
- bilpin
- Posts
- 3,559
Oh well, another chair cheapened with dowels.
-
25th March 2024, 07:29 PM #45
Be inspired. Be creative. Be bold.
- Join Date
- Apr 2001
- Location
- Perth
- Posts
- 10,826
Originally Posted by rustynail

Regards from Perth
DerekVisit www.inthewoodshop.com for tutorials on constructing handtools, handtool reviews, and my trials and tribulations with furniture builds.

 Reply With Quote


Similar Threads
-
Building dining room carver chairs
By derekcohen in forum FURNITURE, JOINERY, CABINETMAKING - formerly BIG STUFFReplies: 37Last Post: 25th January 2024, 10:01 PM -
Dining room chairs
By Template Tom in forum ROUTING FORUMReplies: 0Last Post: 18th May 2016, 06:15 PM -
dining room chairs
By Gaza in forum WOODWORK - GENERALReplies: 1Last Post: 23rd December 2007, 08:13 PM -
Dining Room Chairs
By dreinoga in forum DESIGNS & PLANS FOR PROJECTSReplies: 3Last Post: 13th November 2004, 09:28 PM -
Books on making dining-room chairs
By willy_punter in forum WOODWORK - GENERALReplies: 4Last Post: 8th June 2004, 05:21 PM
