

 Thanks:
  Likes:
  Needs Pictures: 0
 Picture(s) thanks:
Results 1 to 15 of 37
Thread: Sofa Table
-
21st May 2017, 02:56 AM #1
 Be inspired. Be creative. Be bold.


- Join Date
- Apr 2001
- Location
- Perth
- Posts
- 10,820
 Sofa Table
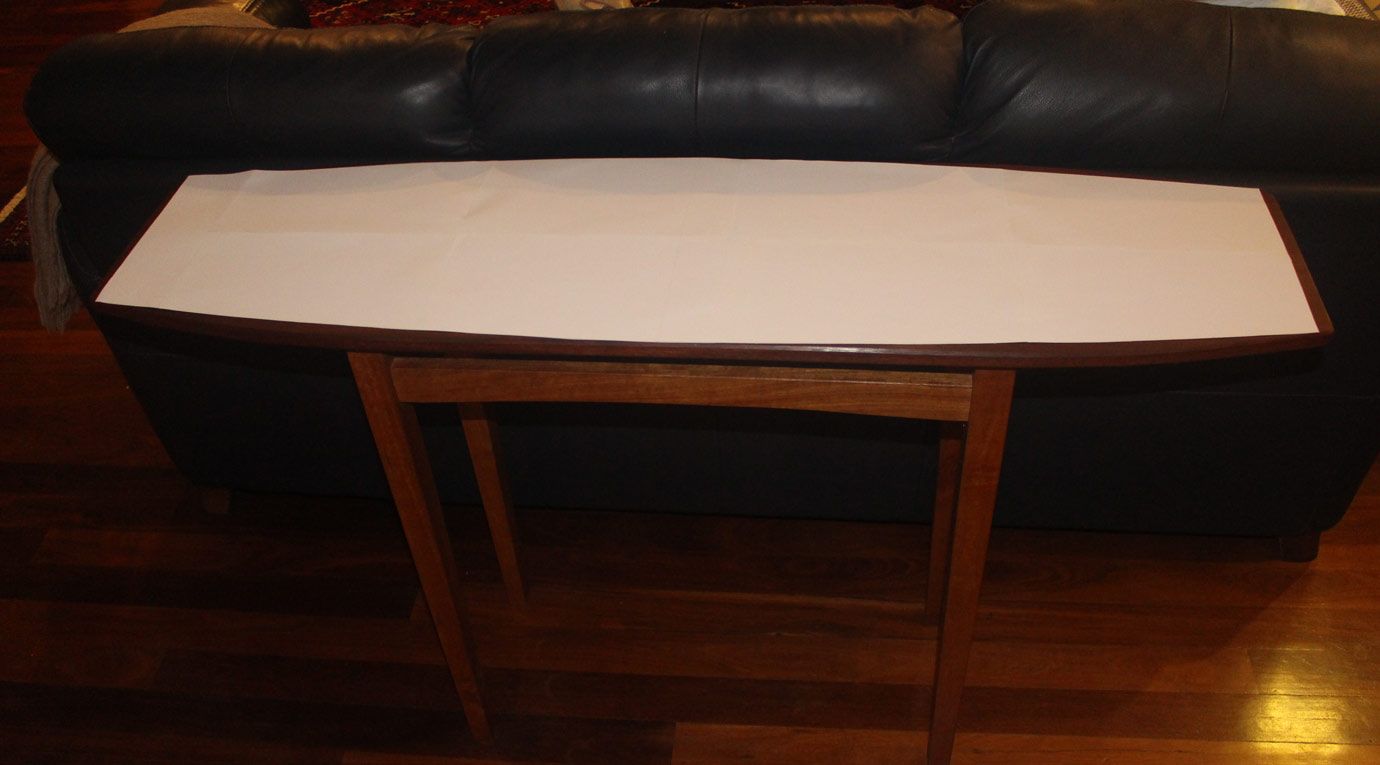
Now that the kitchen is done, I am free to build a piece that has been on my mind for a while. No, nothing as complex as the lingerie chest! Just something I want to do, and that is to replace a sofa table I built a dozen years ago. This one ...
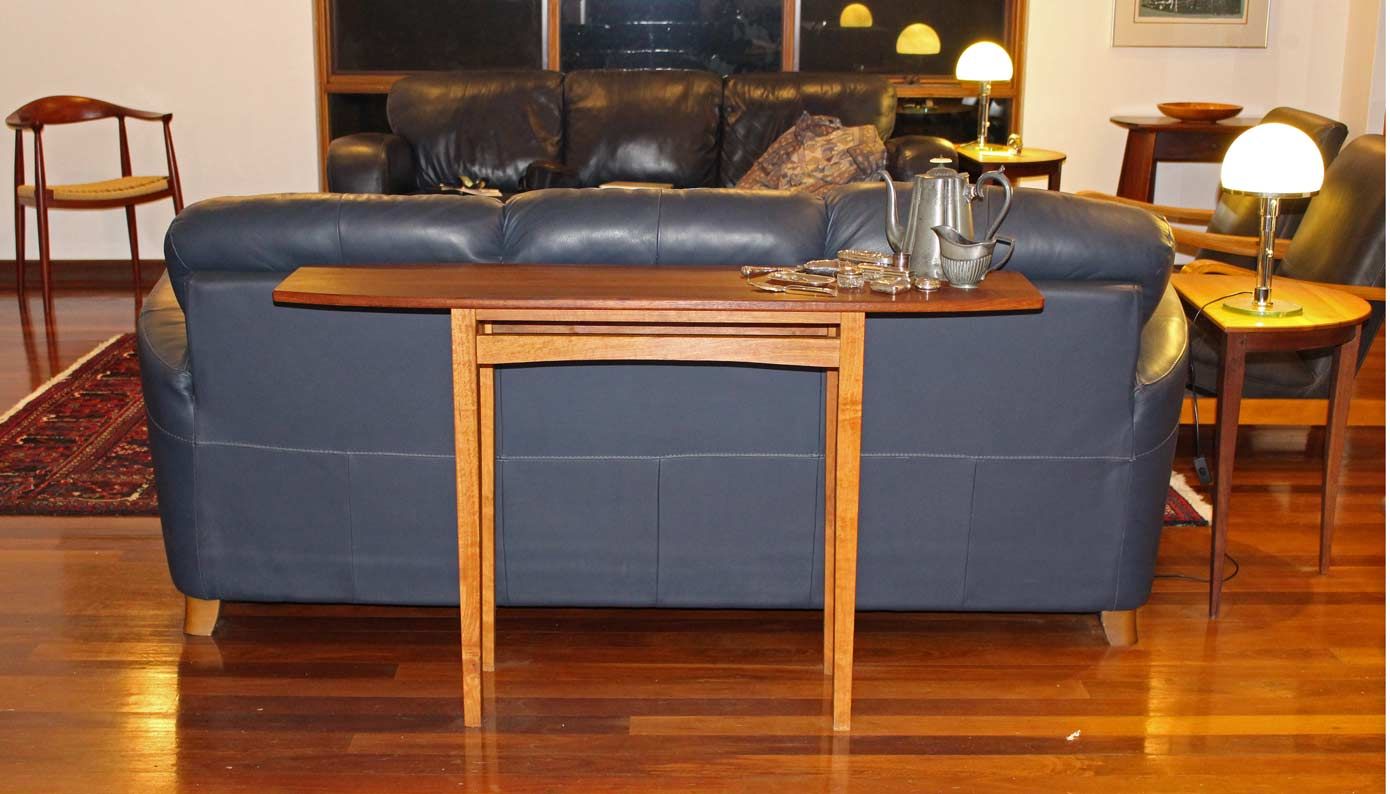
I'm courting trouble here since everyone, especially Lynndy, loves this table ... except me. I am not fond of it (I built is as a challenge to myself - the only plane was a jointer ... I was in an Alan Peters phase). Friends love it, and I have built a couple of similar versions for others. This one was a house warming gift several years ago. I like it better than mine ...
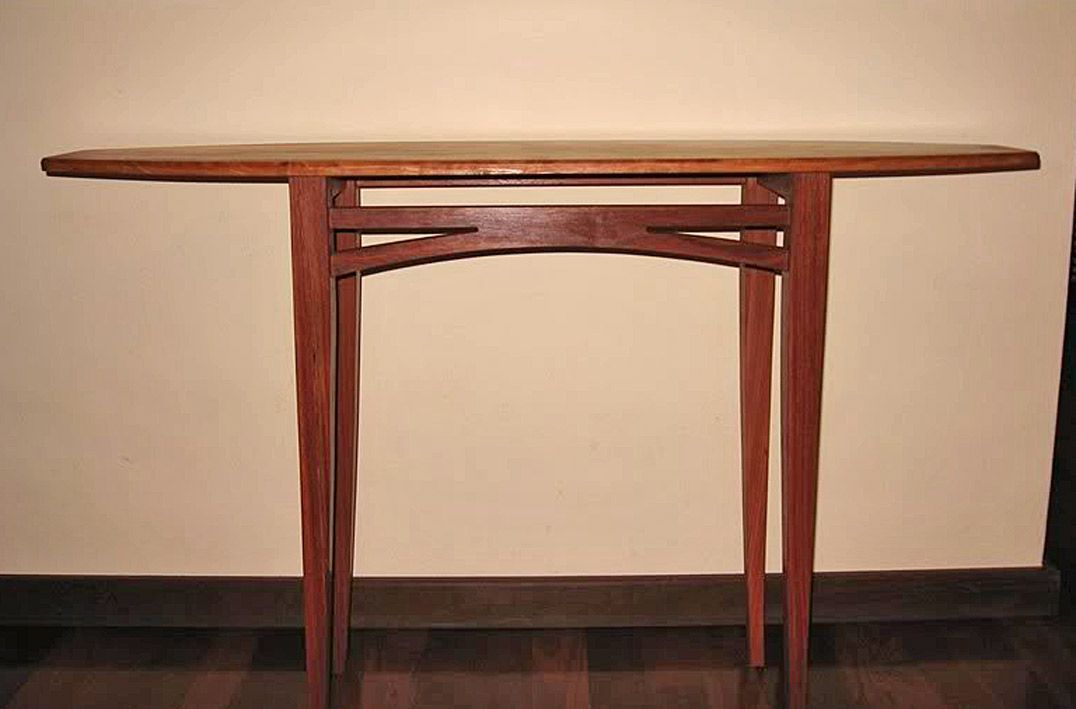
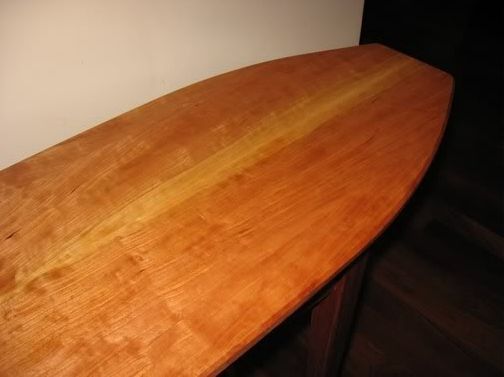
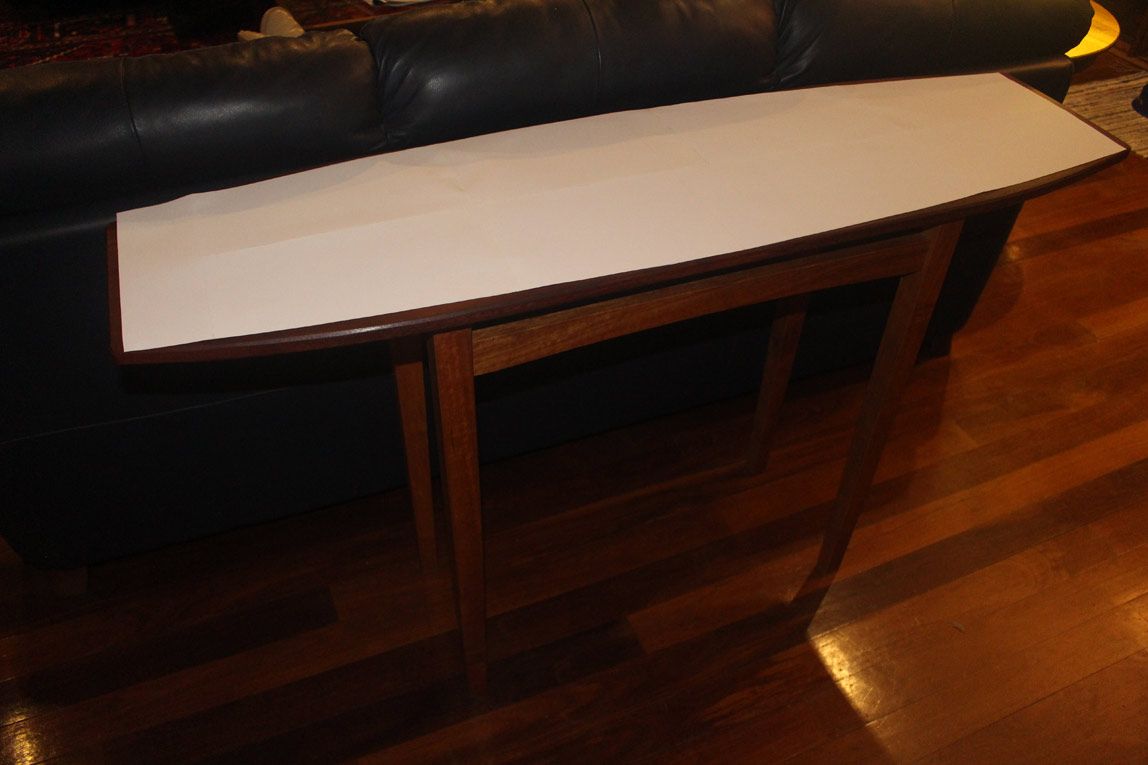
The top of the latter is Cherry. Ours is Jarrah. Both tables are about 1300mm long and essentially rectangular, with curved ends ..
My idea is to build the base of the replacement sofa table in Hard Maple, which is left over from the kitchen. As with the kitchen doors, the base will be finished in water-based poly to retain the light colour of the Hard Maple. The table will stand opposite the kitchen, and I see it as a link between the kitchen and the livingroom. The table top will be made of Black Walnut. This will be finished in oil. All of the timber comes from the USA.
The design? the aim is to create something with a simple "sophistication" . Most here are somewhat aware of my tastes: clean, simple lines and soft curves. I am hoping that I can also design in warmth and avoid anything too clinical. To this end, I will show my design, explain what I have in mind, describe the construction, and be open to your critique. I have already begun roughing out parts.
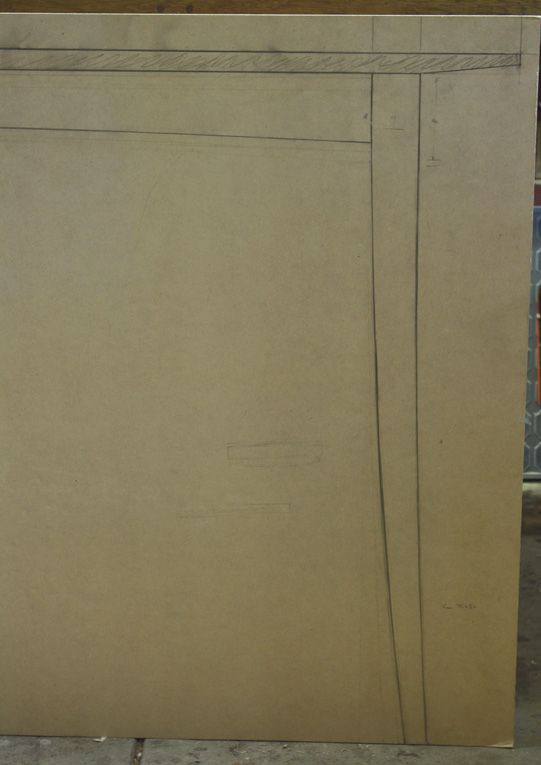
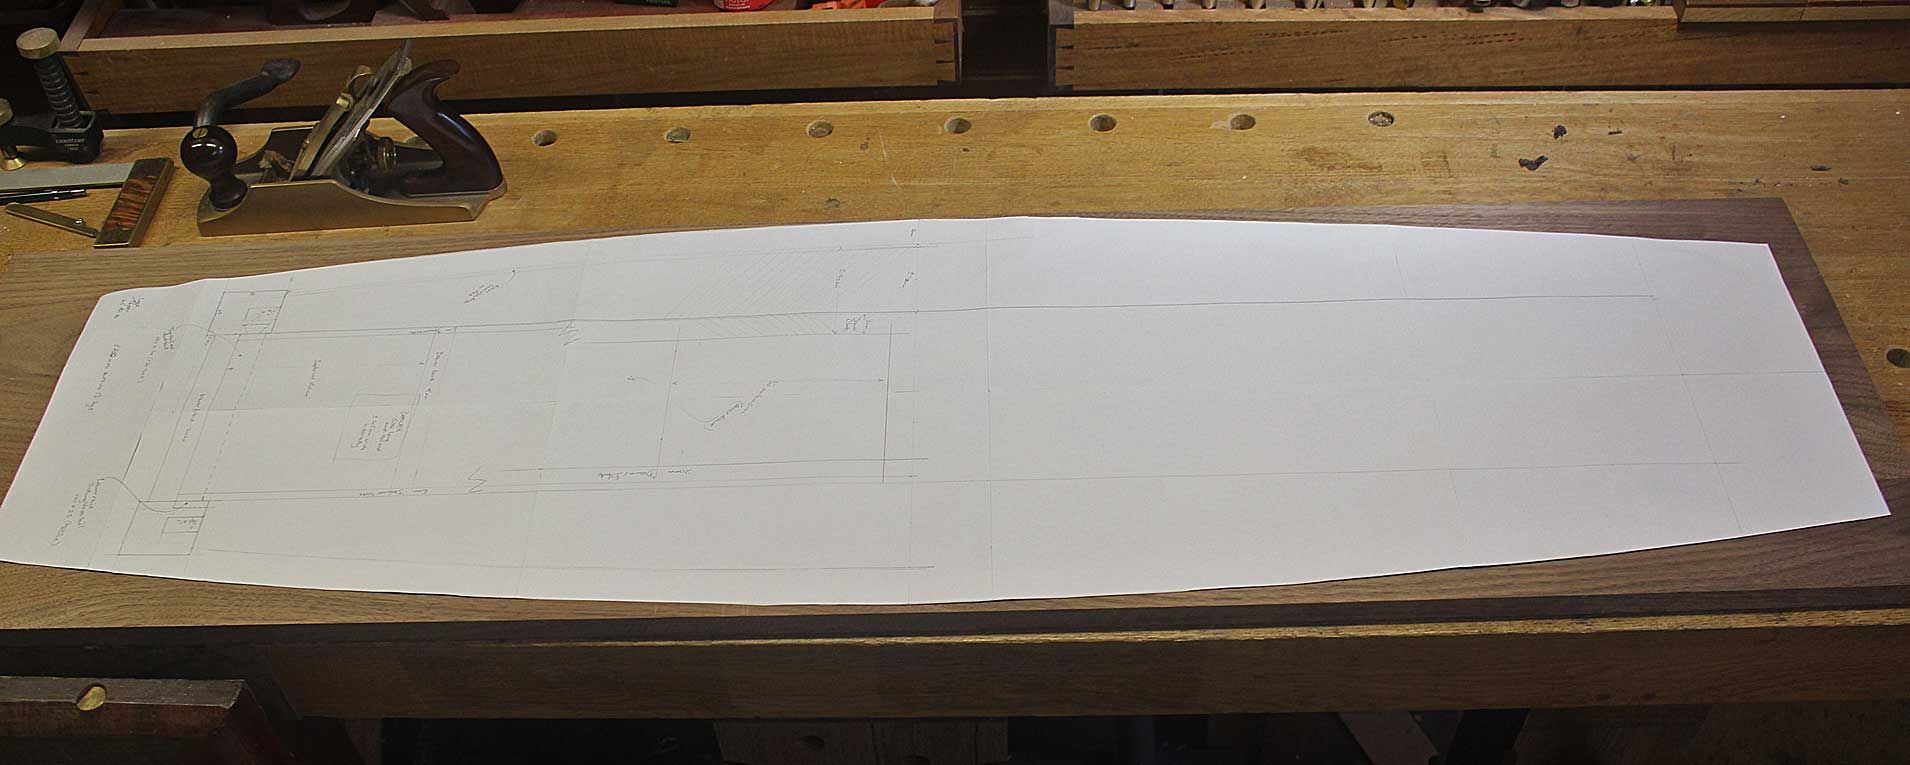
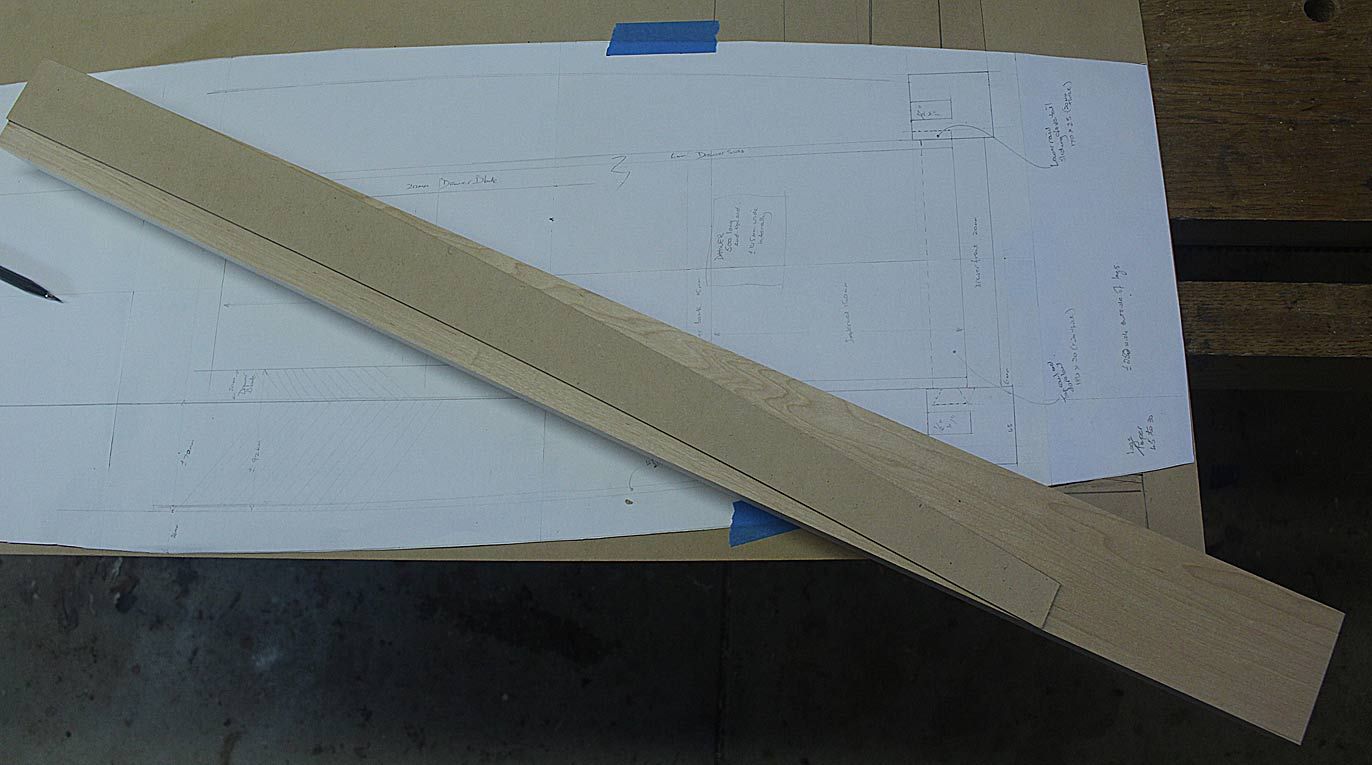
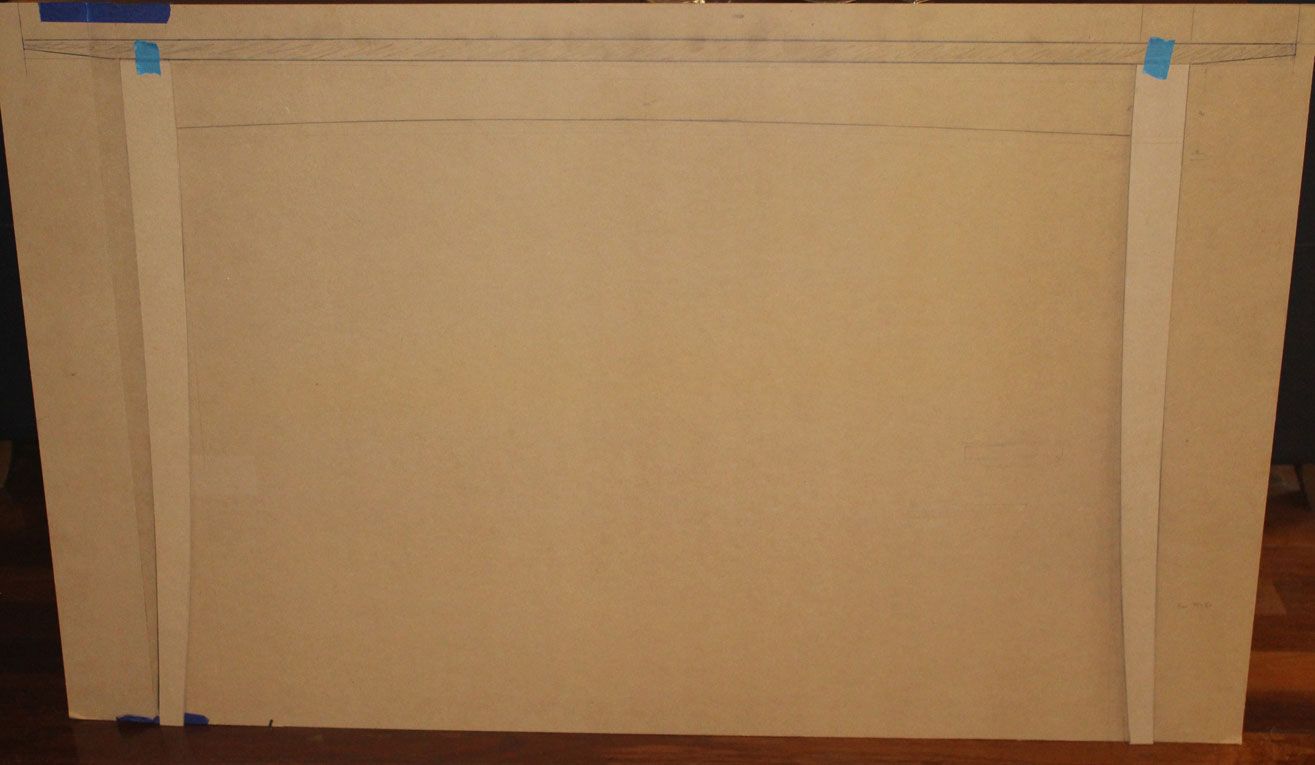
There are two parts to the table. First the front view (I draw all my builds life size on 3mm MDF sheets) ...
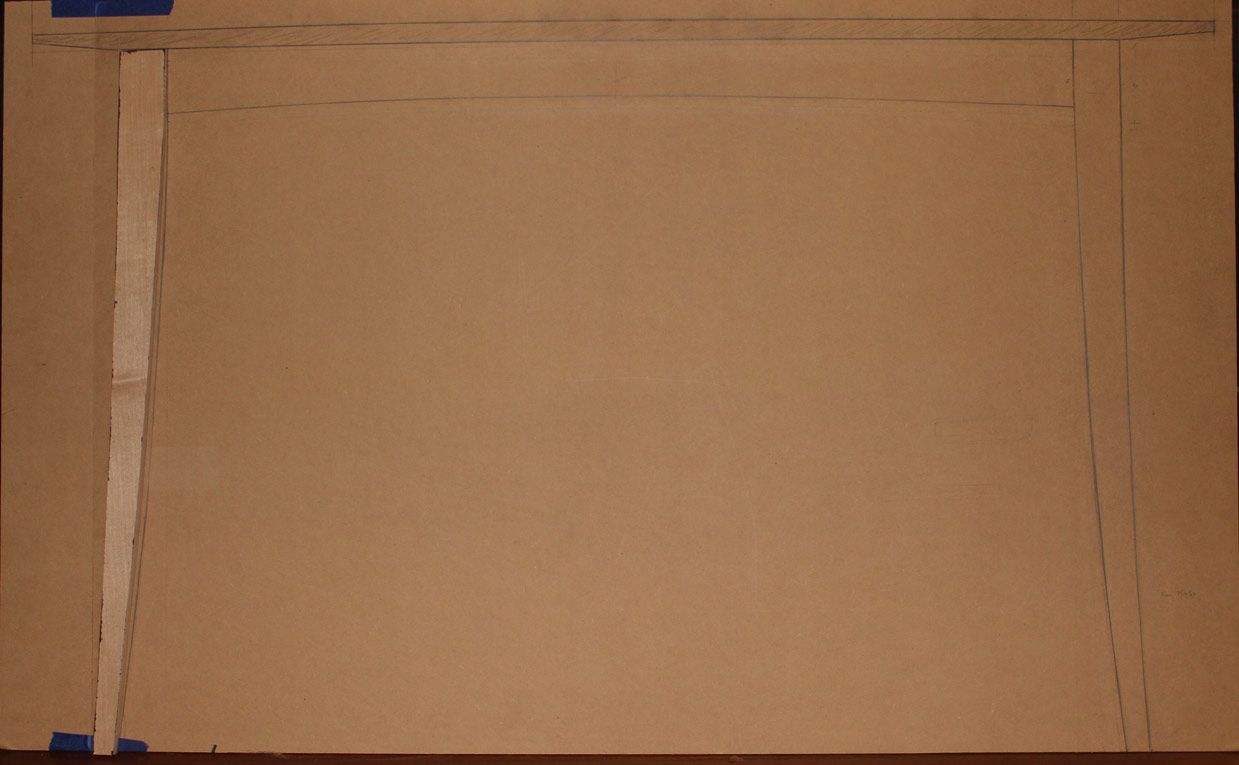
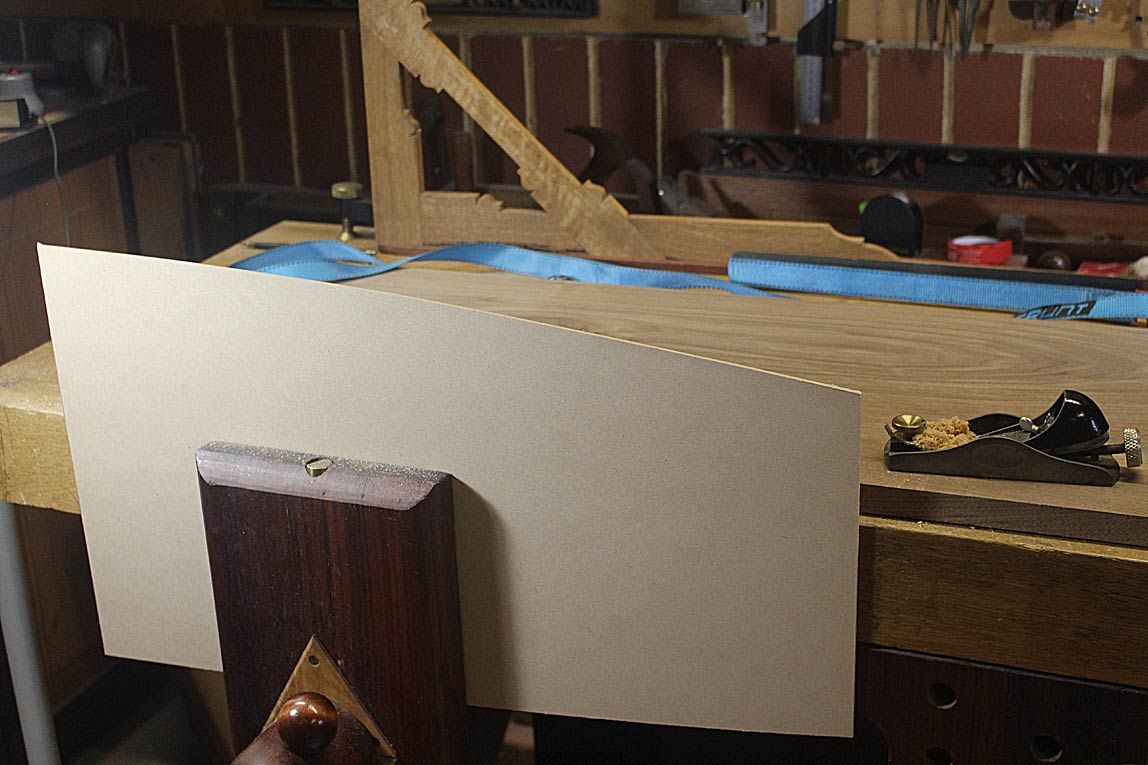
The curve and tapered legs will have a splay of 25mm (this is a better profile of a leg than the other photo) ..
The centre rail is a compound curve, that is, the underside is curved, and the rail itself is a bow front.
This bow will be the same as the top, which is curved the entire front and rear ...
The top is 1250mm long and 35mm wide at the centre point.
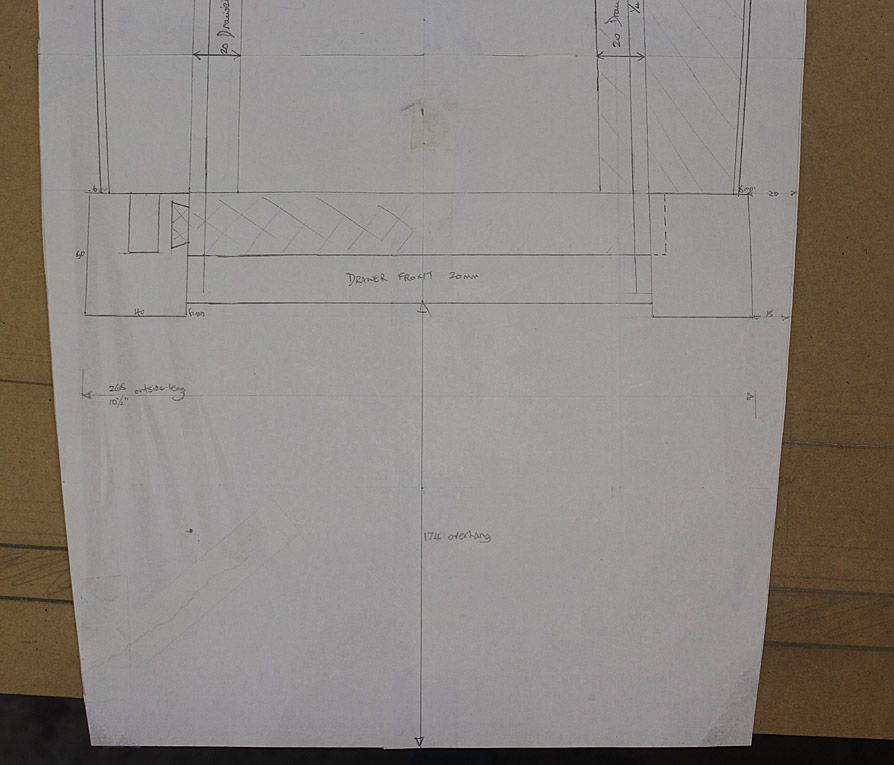
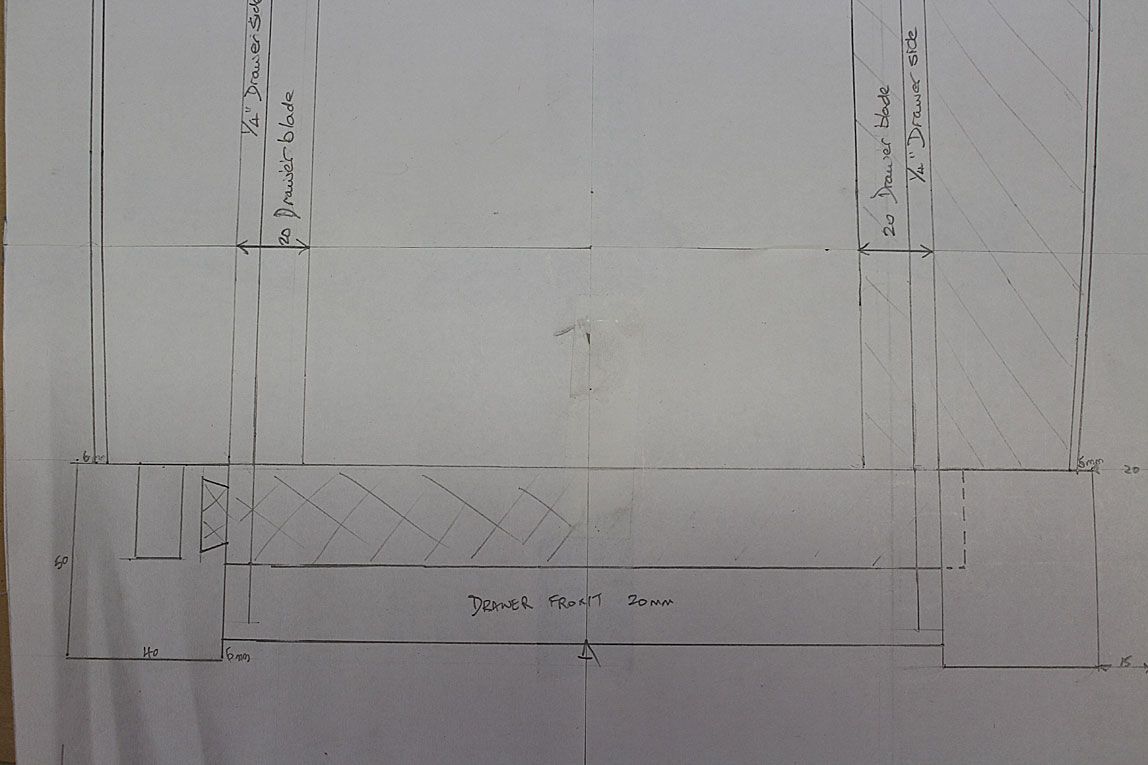
That is the simple part. The interesting part is that there will be two hidden drawers, one on each side of the table. This is one of the reasons for the design of the overhang (100mm/4"): it cannot be too long as to make it hard to reach under to grasp the drawer. The long bevel under the top at the ends is not only a design feature, but also to make this easier. The base of the drawers will be 500mm long, and this creates a long extension, enabling a shorter drawer to slide out and be fully accessible beyond the table top. The fun part is that there is space to add a secret drawer behind the drawer compartment.
I'm not sure if this plan can be easily read ...
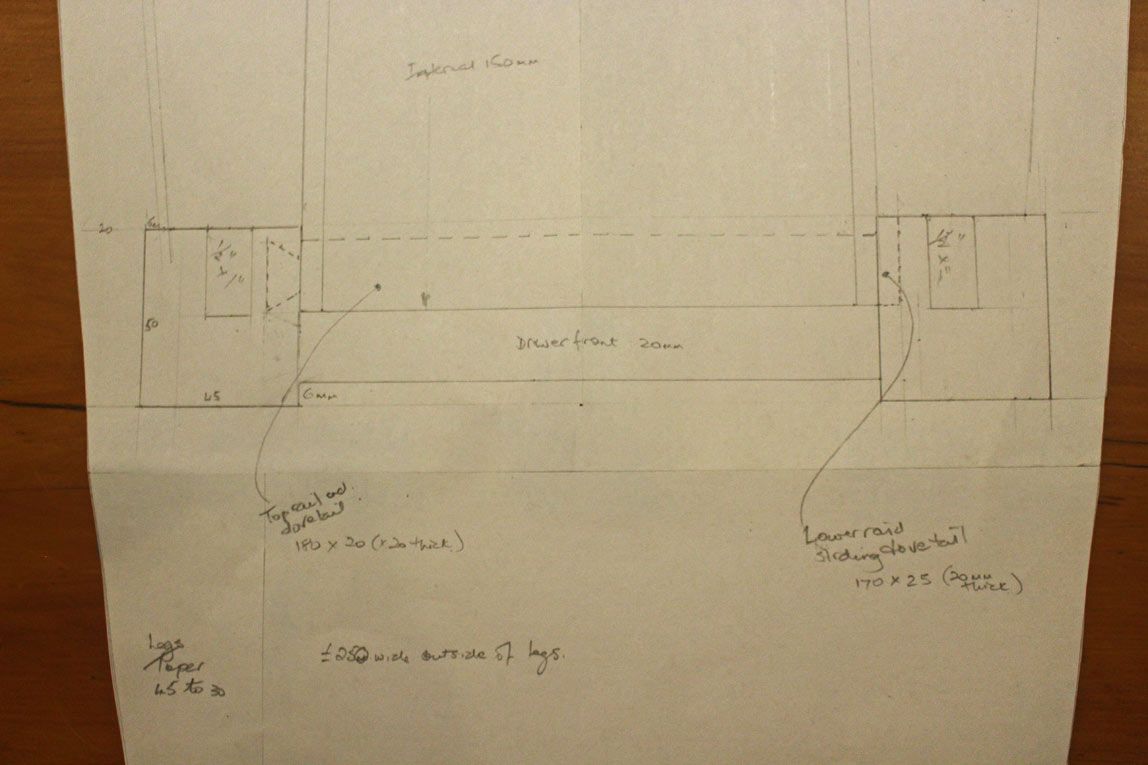
It details the bowed sides being joined with a 1/2" wide mortice-and-tenon into the legs. The ends are dovetail rail at the top and sliding dovetailed lower rail. Standard stuff.
Comments?
Regards from Perth
DerekVisit www.inthewoodshop.com for tutorials on constructing handtools, handtool reviews, and my trials and tribulations with furniture builds.
-
21st May 2017 02:56 AM # ADSGoogle Adsense Advertisement
- Join Date
- Always
- Location
- Advertising world
- Posts
- Many
-
21st May 2017, 03:28 AM #2
GOLD MEMBER
- Join Date
- Oct 2013
- Location
- Perth, Australia
- Posts
- 1,813
Can't add anything useful but I'm subbed up and along for the ride!
-
21st May 2017, 10:14 AM #3
GOLD MEMBER

- Join Date
- Aug 2016
- Location
- Brisbane
- Age
- 57
- Posts
- 1,315
Got my popcorn....
Sent from my SM-G935F using TapatalkMy YouTube channel: https://youtu.be/2_KPRN6I9SE
-
21st May 2017, 04:11 PM #4
GOLD MEMBER
- Join Date
- Feb 2003
- Location
- back in Alberta for a while
- Age
- 68
- Posts
- 12,006
Hi Derek
you asked for comment.
Can I suggest that you make a single double ended drawer. This will allow each end to open well beyond the overhang, and the space between the drawers could accommodate a secret drawer if you wish.
Personally, I'd make the top float above the legs and apron.
You timber choices
the piece of black walnut I have is almost the same colour as Ebony.
Given the colour of your floors and the Jarah and Tassie Oak demi-lune table, I suggest you make the legs and apron from the walnut and use the Maple for the top.
Construction details.
May I ask you to expand on the details in this drawing
regards from Alberta, Canada
ian
-
21st May 2017, 10:07 PM #5
Be inspired. Be creative. Be bold.
- Join Date
- Apr 2001
- Location
- Perth
- Posts
- 10,820
Hi Ian
I shall explain the details (above), but in the next post, since there have been modifications to the design.
With regard the timber, I only have enough walnut for the top. The idea for using the hard maple was to link the sofa table to the recent kitchen build. Therefore, maple it must be.
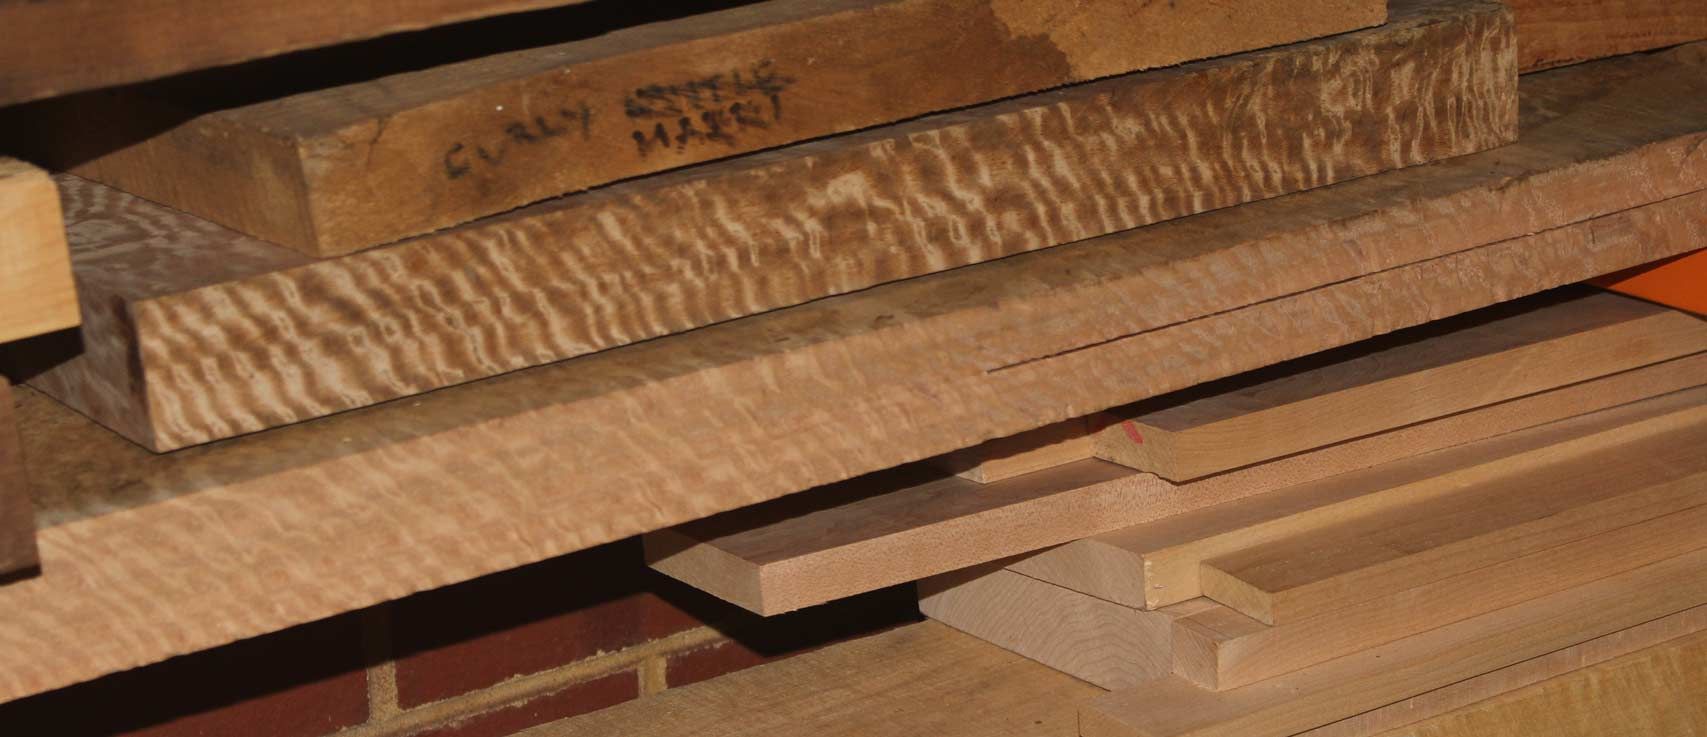
I was going to use Tasmanian Blue Gum for the top. I have a sab that is 2" thick and with the most amazing fiddleback I have seen. I bought it especially for this table. However, I struggled to resaw it (into 2 x 1" sections). The kerf keeps closing up (even with wedges added at the end of the board) and my Hammer bandsaw (4 hp) just bogs down.
Even if I can get it resawn, will it continue to move? It is dry enough to use.
Regards from Perth
DerekVisit www.inthewoodshop.com for tutorials on constructing handtools, handtool reviews, and my trials and tribulations with furniture builds.
-
22nd May 2017, 12:25 AM #6
Be inspired. Be creative. Be bold.
- Join Date
- Apr 2001
- Location
- Perth
- Posts
- 10,820
It is always helpful bouncing ideas off others. I received a good deal of feedback at WoodCentral. The consensus reinforced my own thought that the position of the legs did not create enough overhang. The issue here is that if there is too much overhang, it does not become possible to add a drawer to the side ... and I really want a drawer.
Before I show you the experimentation I did, just a comment about the wood: I cannot use walnut for the whole build as I only have enough for the top. Importantly, I wanted a significant part of the build to be in hard maple, since it is to link to the newly built kitchen. So we shall stay with that.
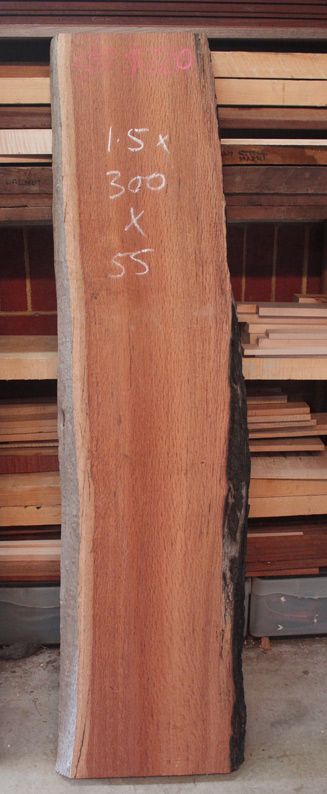
What type of black walnut? Perhaps you can tell me. I had an approximately 2" thick board that was about 8" wide - too narrow for a single-board table top. I re-sawed it into two pieces and ended with a book matched panel about 22mm (7/8") thick. There was a large knot in the board, which ended up on each side of the panel. To reduce this effect, I chose to remove that side of the board. The result is more pleasing ...
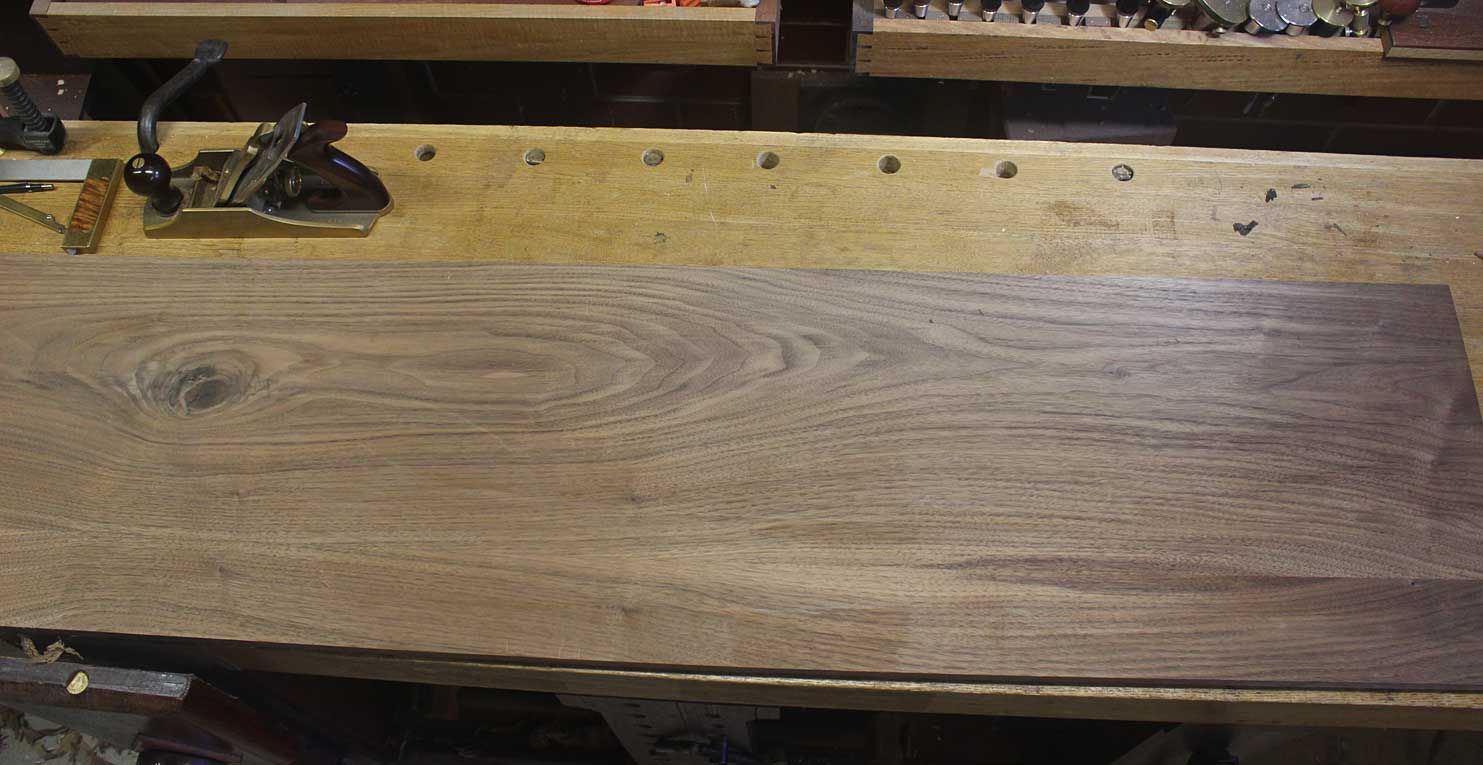
Still, I am not that thrilled with this board. I shall look out for something else.
The positioning of the legs went this way:
First, I made up a couple of templates. One for half of the top ..
.. and one for the legs ...
With an extra leg template, this is the original position ...
Moving the legs in by 50mm/2" ...
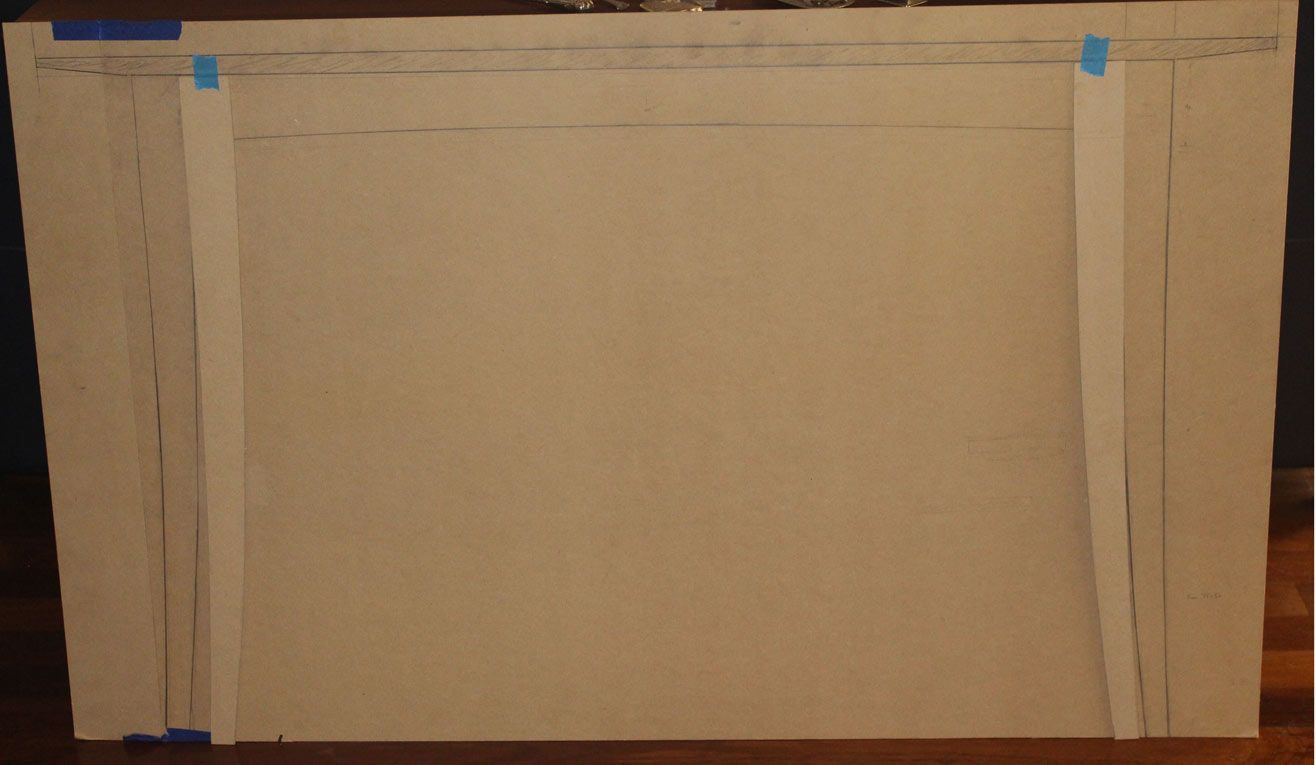
Not enough. So, moving them in by 100mm/4" ...
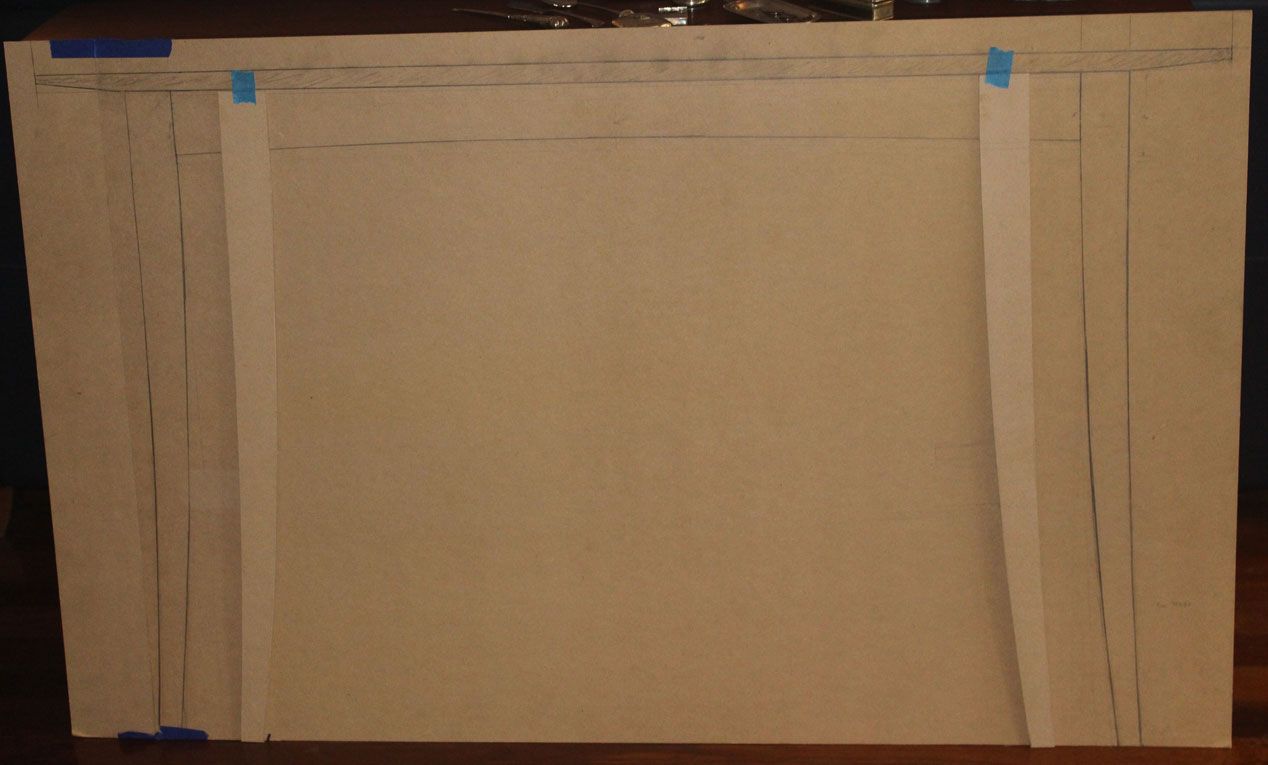
And that is what we will stay with.
I also increased the curve in the apron, another suggestion ...
... but I am not keen on this. It looks greater in real life than in the picture (and the original curve looks stronger with the legs moved in).
The advantage of moving the legs inward is to widen the stance, which should add to stability. This is how far in the undercarriage sits ..
A close of of the details ...
The aprons connect to the legs with a mortice-and-tenon. The left side of the plan shows the top rail dovetailed into the top of the leg. The right side shows the lower rail joined with a sliding dovetail. This is pretty standard for a drawer frame.
The apron will be built in three sections, with a pine centre sandwiched by maple. The maple will be a 4mm veneer on the outside of the bow, and on the inside provide the rebate that functions as a drawer fence and drawer blade.
There will only be a single drawer, on the left side. The other side of the table will be a solid apron, joined with mortice-and-tenon joints.
A single drawer can be made 750mm long, which will provide support for at least 300mm/12" of drawer clearance - plus some space behind for a second secret drawer, if wanted.
Any thoughts?
Regards from Perth
DerekVisit www.inthewoodshop.com for tutorials on constructing handtools, handtool reviews, and my trials and tribulations with furniture builds.
-
22nd May 2017, 10:12 AM #7
 GOLD MEMBER
- Join Date
- Mar 2004
- Location
- Brisbane (western suburbs)
- Age
- 77
- Posts
- 12,117
Derek, as far as I know, there is only one "Black" Walnut (Juglans nigra), native to the north-east of Nth America. "Claro" walnut (J. hindsii) is from the west coast & seems to be quite a different wood to work with as well as having some of the most spectacular figure imaginable. I don't know if there is much variation in colour or working qualities of Black W'nut throughout its range, but I get the impression it's all pretty similar. I've used a fair bit, but most was from the same large tree I bought whilst living in southern Ontario (which is about the limit of its natural range). I agree with those who say it's one of the nicest cabinet woods going, a sweet wood to work!
There is one thing about it, of which you are probably aware - those lovely purplish-black colours of the freshly-planed wood fade to a more nondescript brown after a while. Here are two pics of the same table, the first taken when it was freshly finished (French polished) & the second 24 years later (i.e., 2 minutes ago ). Coff tble 1.jpg coff tble 2.jpg
The quality of the first pic (digitised from a film negative), isn't great, but it does show how much the colour has changed during the intervening years.....
I liked the thought of Ian's suggestion to 'float' the top, but on reflection, I think that might cause trouble. With those spindly legs and minimalist frame, having the top well-attached with plenty of buttons or whatever your method of choice, will be an important element in torsional stability.
When making the rails for a table drawer, I do the top with dovetails, as you've drawn, but use a double M&T (or even triple on a wide rail) for the bottom rail joints. A sliding d'tail joint seems less strong (& more trouble to hide), to me....
Arf yer luck being back at 'real' woodwork - our kitchen is basically finished, just waiting for the bench-tops to arrive, after which I'll finish fitting the doors & drawer fronts. In the meantime, it's painting, painting, painting. The kitchen repaint morphed into a sewing-room job, and now it looks like I won't be allowed to stop before the whole interior has been 'freshened up'....
Cheers,IW
-
22nd May 2017, 11:08 AM #8
GOLD MEMBER
- Join Date
- Feb 2003
- Location
- back in Alberta for a while
- Age
- 68
- Posts
- 12,006
Hi Derek
some thoughts for you
The center stiffener will give you the torsional stiffness that IanW suggests is desirable.
My personal taste is for floating tops on sofa tables, especially ones with such a long overhang as you are contemplating.
Also, I think you can have a much lighter construction if the drawer runners and guides are separate pieces and not rebates cut into the apron rails.
I also agree with IanW that the aprons pieced by the drawer should be dovetailed at the top (as shown above) and mortised below the drawer.regards from Alberta, Canada
ian
-
22nd May 2017, 05:35 PM #9
Be inspired. Be creative. Be bold.
- Join Date
- Apr 2001
- Location
- Perth
- Posts
- 10,820
Ian, that is an amazing drawing! Very helpful. Plus I did not consider a central stiffener, although my thoughts were heading in that direction. I also agree with both Ians about the lower rail being held with a mortice and tenon. Frankly, that is easier than a sliding dovetail.
My last post requires all take a deep breath and slowly let go
One of the issues when posting a design at an early stage is that there will be many conflicting ideas from all concerned. This is not always helpful. However, it certainly forces me to try and understand the views of others and, importantly, where I am coming from.
I have gone back-and-forth on the positioning of the legs. Much of this is pressure from my wife, not just the comments on a forum, since I must accommodate her needs and aesthetic sense as well.
As I sit and ponder the way the parts come together into a whole, I see a loss of elegance as the legs close up. I think that she (and others) have seen the other sofa tables I have built, liked them, and expect something similar. However, this table was conceived with a different aim - I want it to contain a drawer. That is not conducive to an open frame. A different concept/design is needed.
Similarly, the impact that the curve of the apron has alters with the positioning of the legs. One aspect here is that the apron needs to be conceptualised in three dimensions, not the 2-D of the drawing/photos. The apron bows and is, therefore, a compound curve (and the bow of the apron went through several versions before ending where it is now - for similar reasons).
So I am giving more thought to the placement of the legs while I search for a replacement for the top ... partially back to the drawing board
Regards from Perth
DerekVisit www.inthewoodshop.com for tutorials on constructing handtools, handtool reviews, and my trials and tribulations with furniture builds.
-
22nd May 2017, 07:12 PM #10
GOLD MEMBER
- Join Date
- Mar 2004
- Location
- Brisbane (western suburbs)
- Age
- 77
- Posts
- 12,117
I'd say that's the person whose opinion trumps any you get here..... Originally Posted by derekcohen

You're a brave man to design 'out loud' like this Derek, you know what they say about 'design by committee' However, I guess by forcing yourself to justify your own views, it improves your chances of ending up with something that satisfies you. I wish I had taken much more time & care with the design phase with several things I've made over the years. It's not a good feeling when you drag the object you've spent so many late nights working on into the house, put it in place, step back to admire your cleverness, and " Oh ****** (insert expletive of choice here) that's not what I meant at all!"
Cheers,IW
-
22nd May 2017, 09:47 PM #11
Wood Planner
- Join Date
- Apr 2008
- Location
- Lalla, Tasmania
- Posts
- 1,350
I would consider a floating top that I think would give a better visual look side on.
my 2 cents worth.
SBPower corrupts, absolute power means we can run a hell of alot of power tools
-
23rd May 2017, 02:14 AM #12
GOLD MEMBER
- Join Date
- Feb 2003
- Location
- back in Alberta for a while
- Age
- 68
- Posts
- 12,006
Derek Originally Posted by derekcohen
you're welcome.
my training included a big emphasis on the importance of resolving construction details before commencing a build. and a CAD program makes drawing relatively easy. BTW, in the drawing I posted above, I would suggest that the back of drawer be attached to the (very long) drawer sides using a sliding dovetail. I didn't show that detail as I was concentrating on showing the drawer position relative to the top. When drawing by hand, I suggest you use a different colour pencil for each major components.
(as an aside, in this regard I find Sketch-up less than helpful as I find it just too hard to make adjustments to components and joint details using that program.)
Because you want to incorporate a drawer in your table, I strongly suggest that you resolve the details of the drawer's construction and support (runners, guides, kickers) before you finish the design of the table's aprons. Convention construction is a dovetailed rail above the drawer and a morticed and tenoned rail below the drawer.this table was conceived with a different aim - I want it to contain a drawer. That is not conducive to an open frame. A different concept/design is needed.
PM if you would like me to do some end elevations for you.
apart from the challenge of building aprons that curve in two dimensions, can I ask why? The top you have conceptualised will cover the long rails and mostly hide the apron.One aspect here is that the apron needs to be conceptualised in three dimensions, not the 2-D of the drawing/photos. The apron bows and is, therefore, a compound curve (and the bow of the apron went through several versions before ending where it is now - for similar reasons).
perhaps you could incorporate the compound curve into a stretcher that would then allow you to build legs even lighter than you have conceptalised.regards from Alberta, Canada
ian
-
26th May 2017, 02:49 AM #13
Be inspired. Be creative. Be bold.
- Join Date
- Apr 2001
- Location
- Perth
- Posts
- 10,820
Wait and see, Ianapart from the challenge of building aprons that curve in two dimensions, can I ask why? The top you have conceptualised will cover the long rails and mostly hide the apron.
I have made a few changes, and I like the result. But I'll sit on it for a little while ... hopefully post the start of the build after the weekend.
And thanks for all the excellent comments!
Regards from Perth
DerekVisit www.inthewoodshop.com for tutorials on constructing handtools, handtool reviews, and my trials and tribulations with furniture builds.
-
30th May 2017, 01:02 AM #14
Be inspired. Be creative. Be bold.
- Join Date
- Apr 2001
- Location
- Perth
- Posts
- 10,820
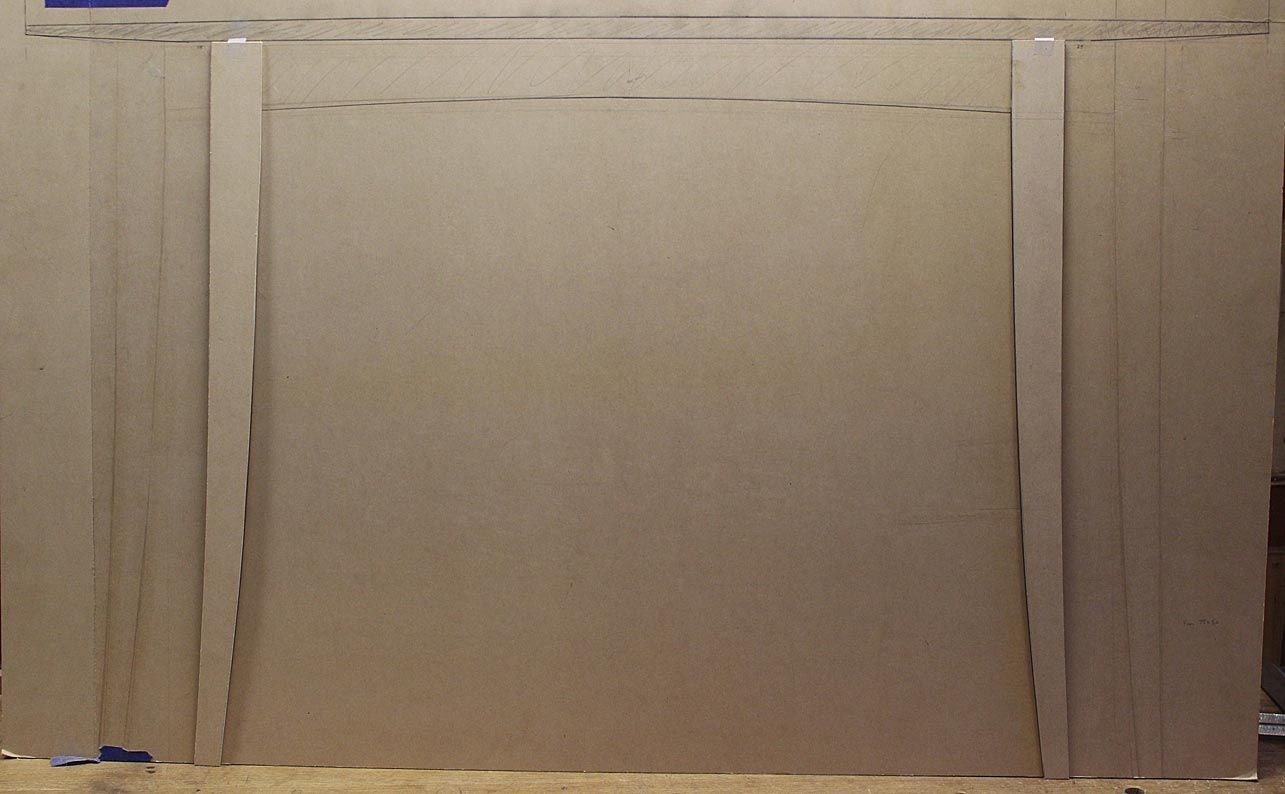
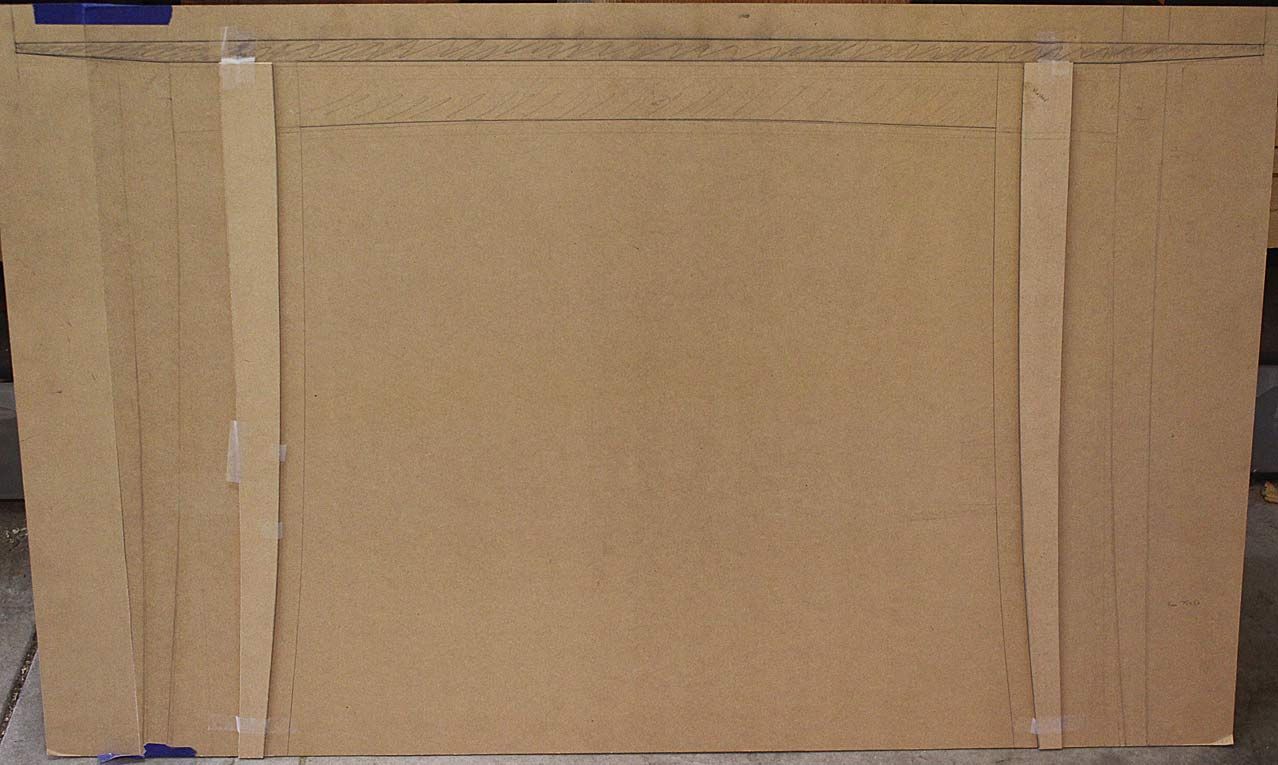
After a few final tweaks, the design has been settled, and the build begins. This is the front elevation, with the body in Hard Maple ...
The top ...
... will be West Australian Rose Sheoak.
This comes from my local urban salvage supplier, Derek Doak "The Timberbloke". Here you can see the 2" thick slab was saved from a fire ...
Re-sawn and book matched, the 1250mm top will be elegant and simple, and still hopefully stunning ..

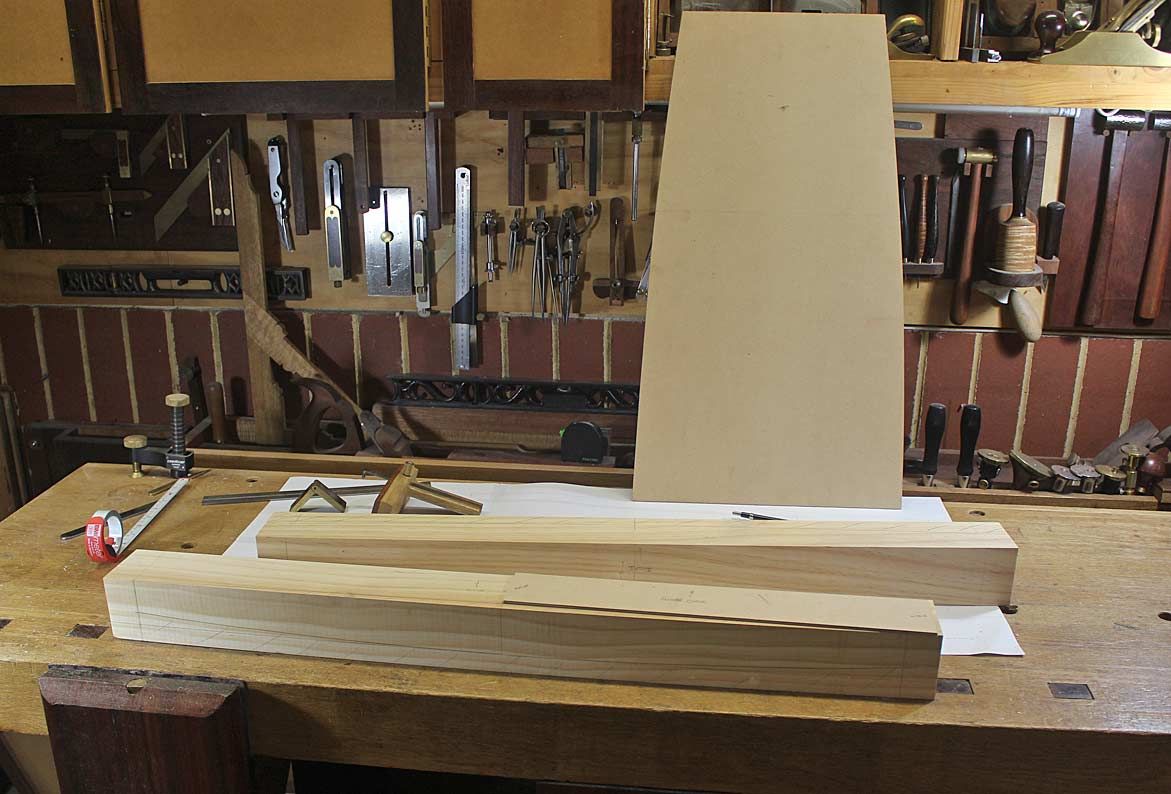
I decided to start the build with the aprons. The legs will follow next. They are complex in themselves, having multiple angles - more on that in a later post. However, the aprons are the key element as they are both bowed and receive a curve on the underside. They also need to support a drawer from one side.
Here is a plan ..
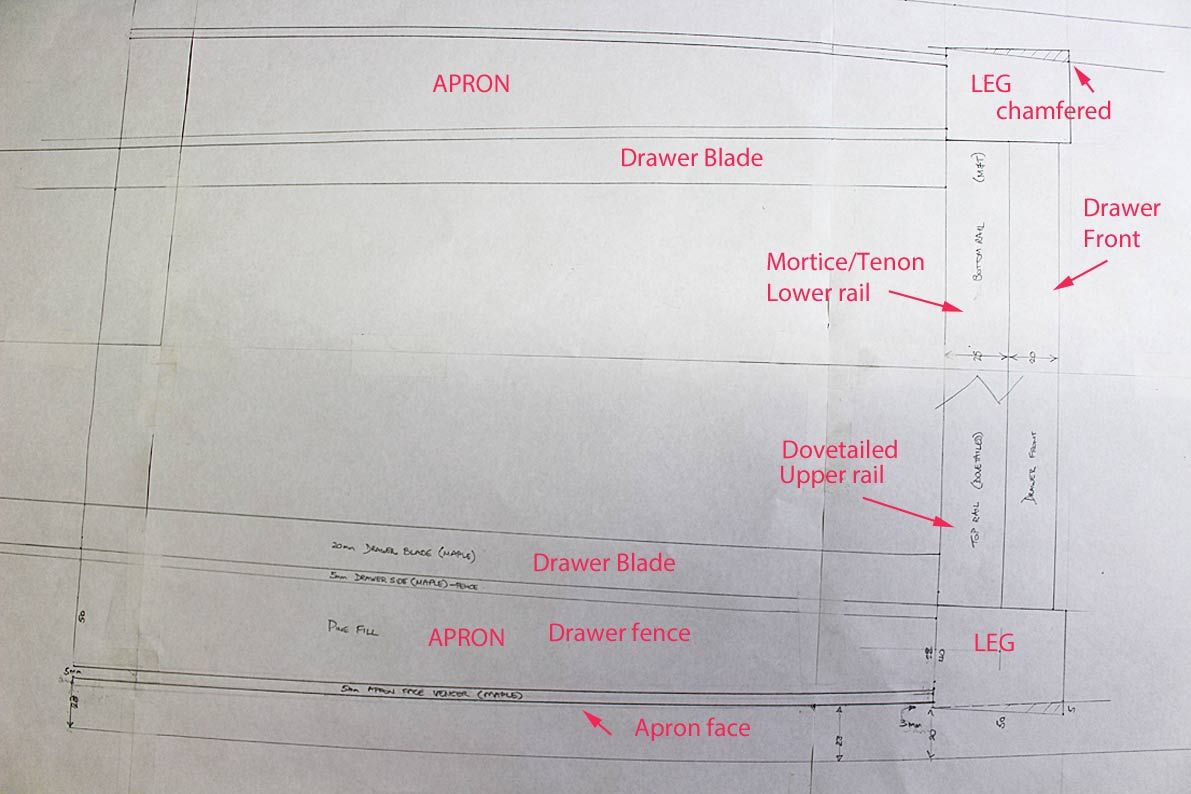
I have already made up all the templates needed for the table top, the legs, the bow of the apron, and the curve on the underside of the apron.
I decided that the core of the apron would be pine, which will be wrapped in Hard Maple. The alternate choices were either to build laminations of hard maple, or create all from solid maple. The end design seemed to me to be the easiest to build to ensure the support for an internal drawer along the length of the table, as well as economical for the maple, which is in limited supply in Australia in the size needed.
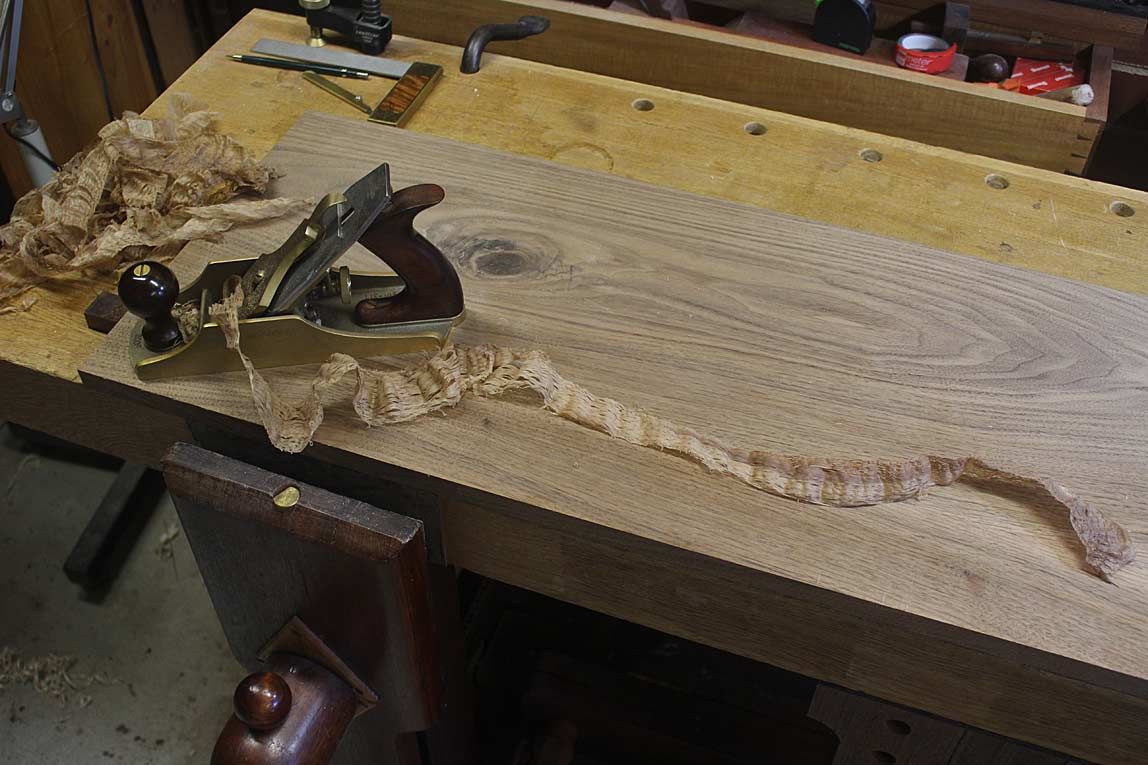
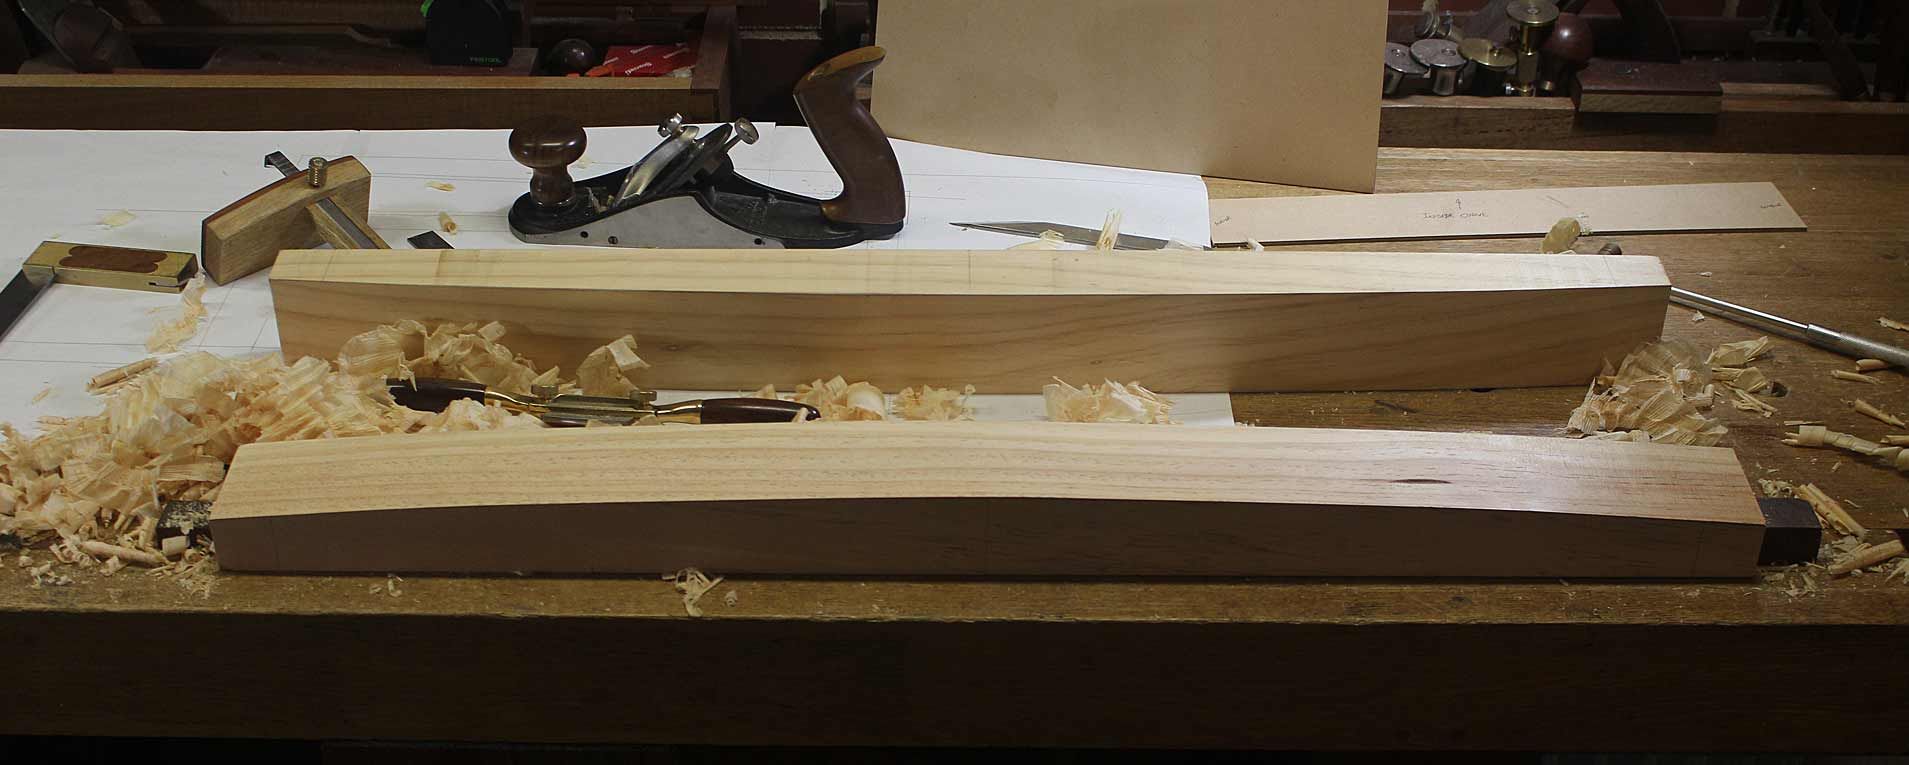
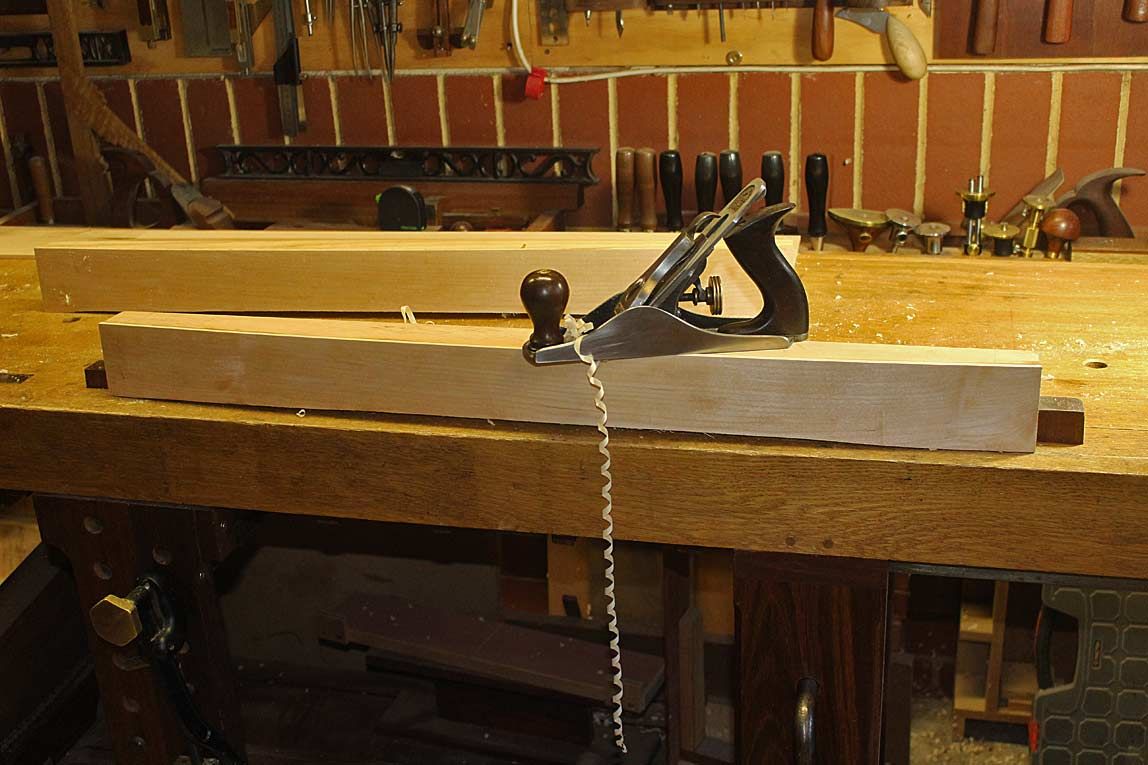
The bow front is marked out and bandsawed close to the line, and then cleaned up with a spokeshave ...
Save the waste, replace the bow on it to secure for the next step ..
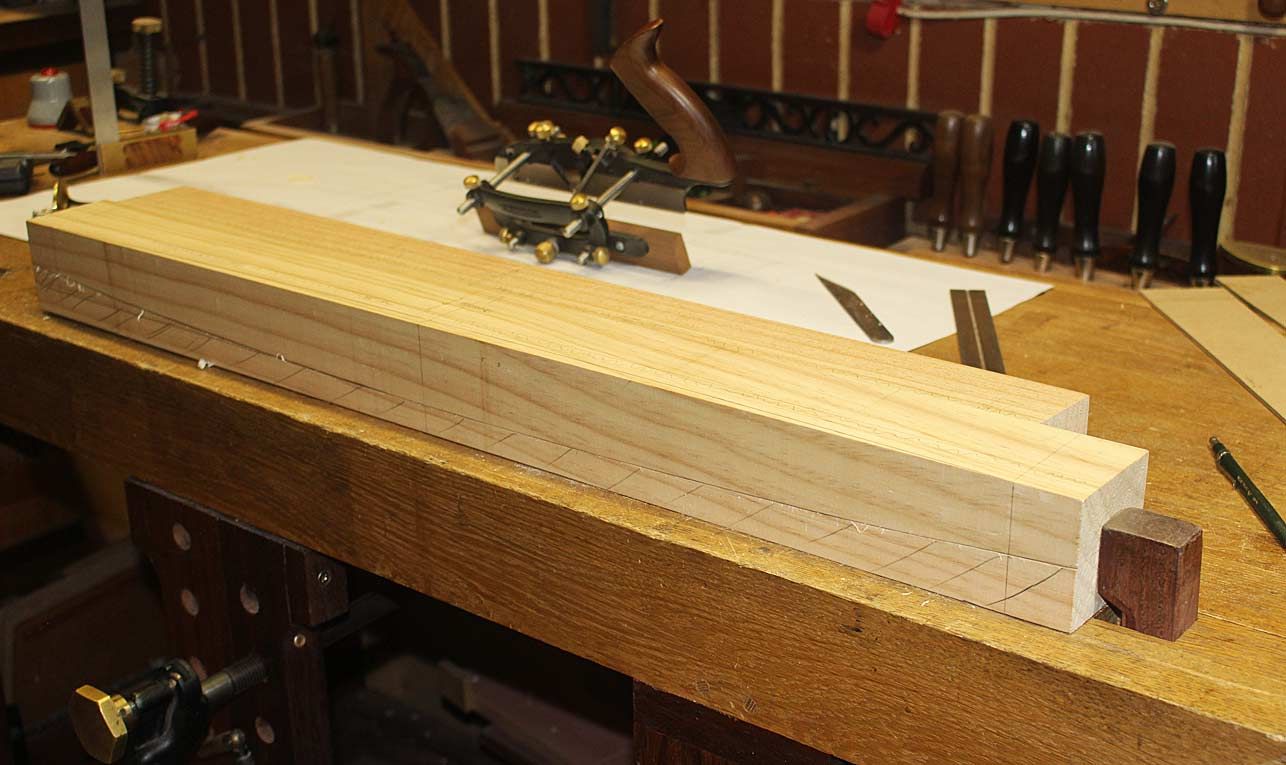
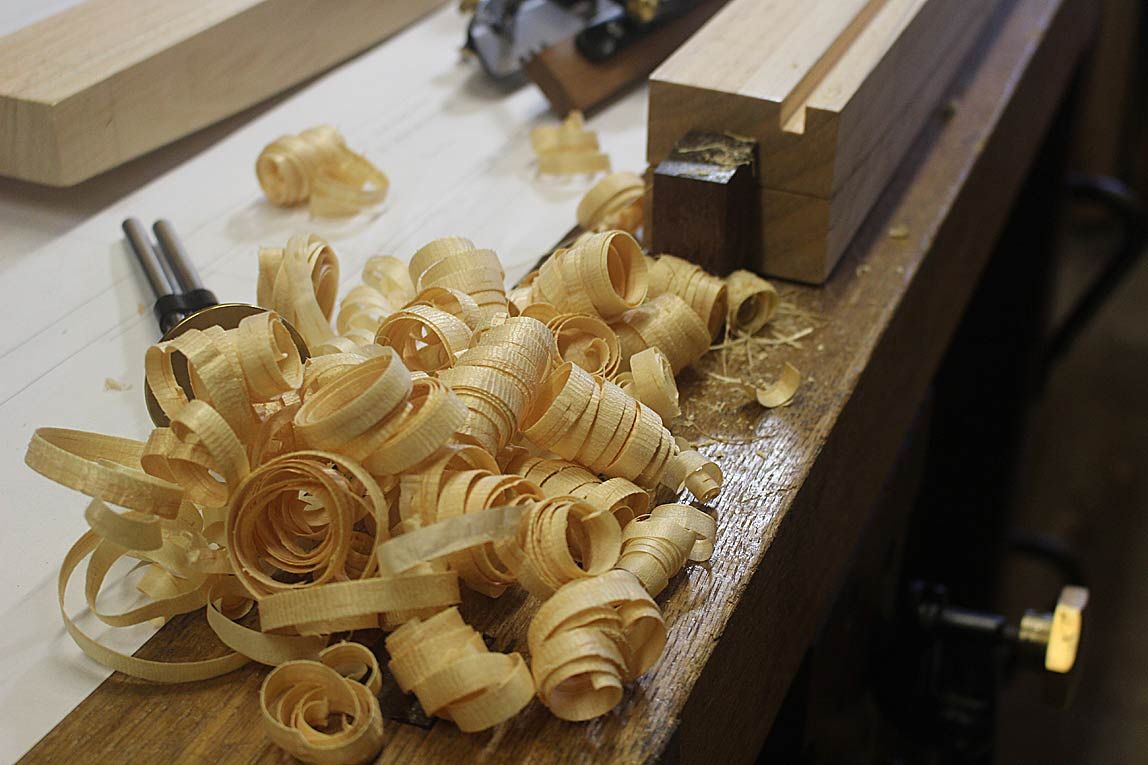
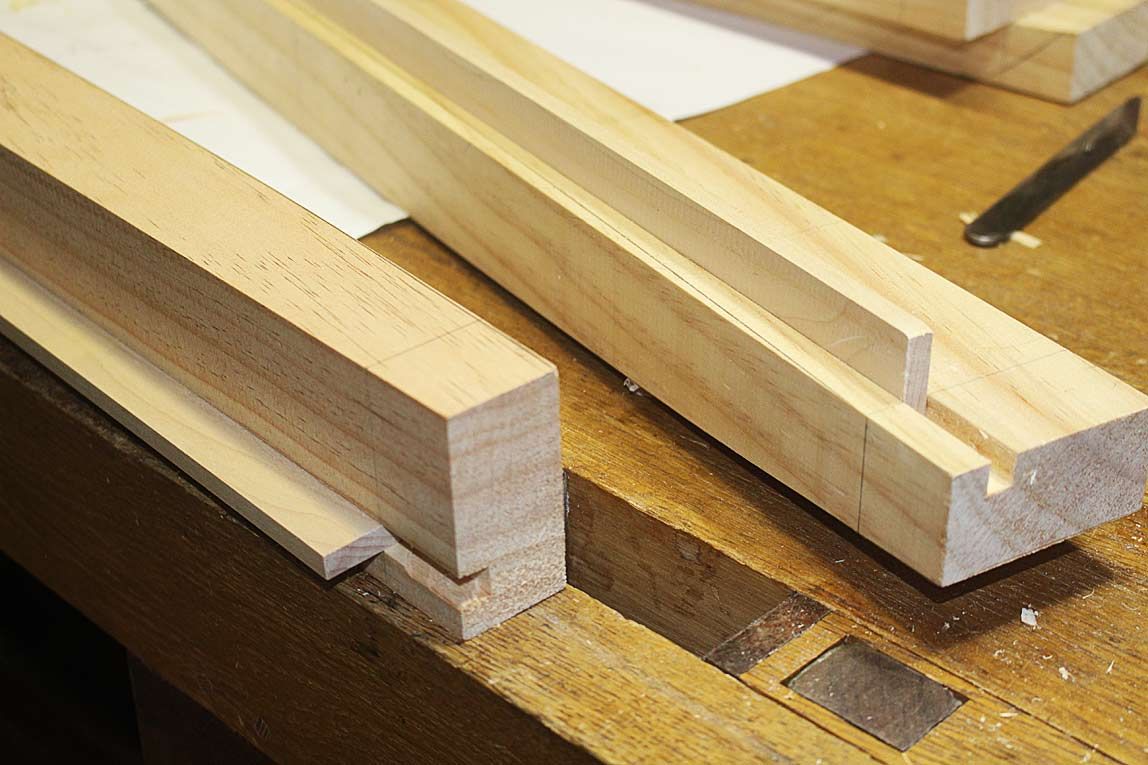
.. and now it is ready to plough out a 5/16" groove for the drawer blades ...
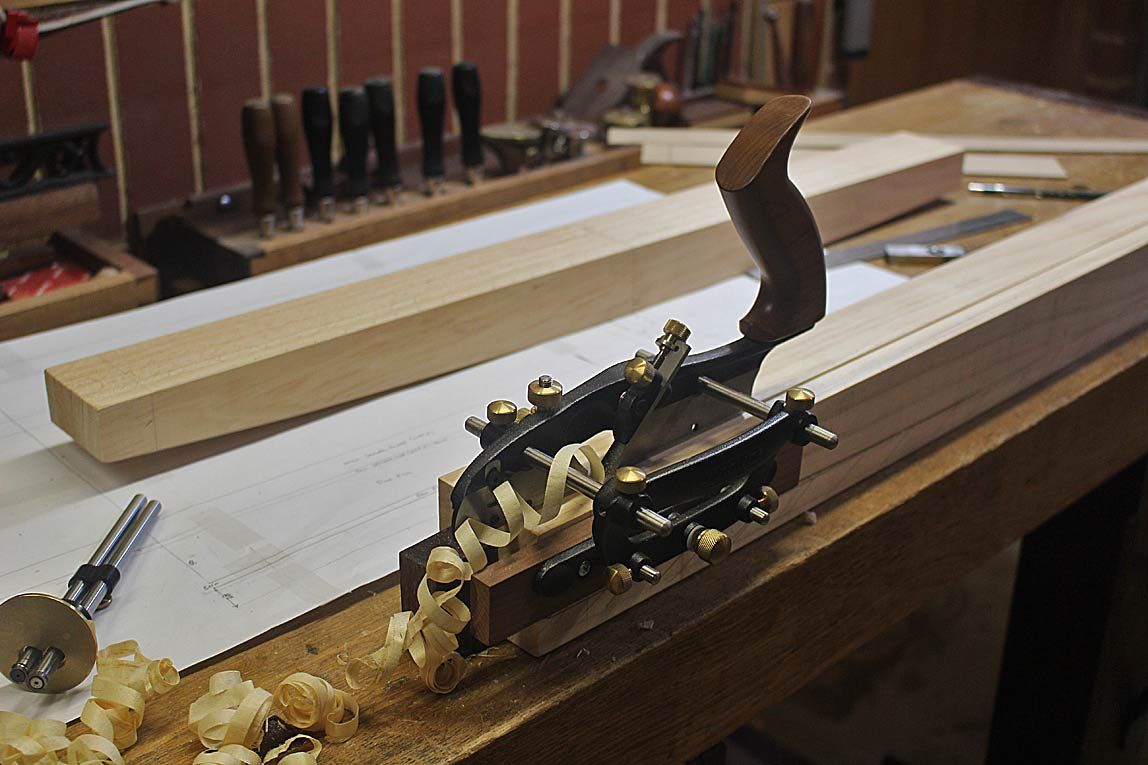
I am planing into the grain, so take fine shavings until the blade is below the surface, and then crank it up ...
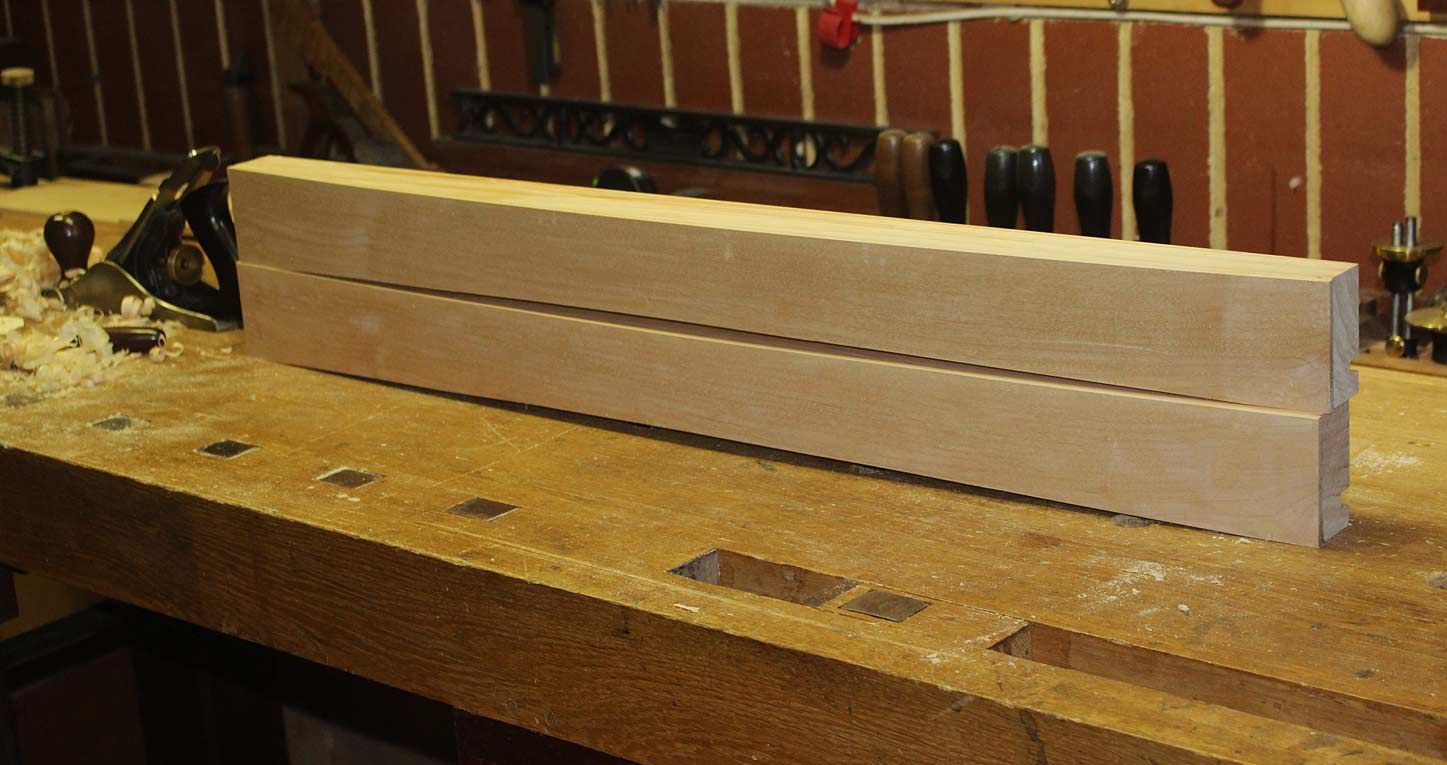
These are the drawer blades. I later replaced them with wider pieces since I had forgotten to take into account the 5mm thick internal veneer (the fence for the drawer).
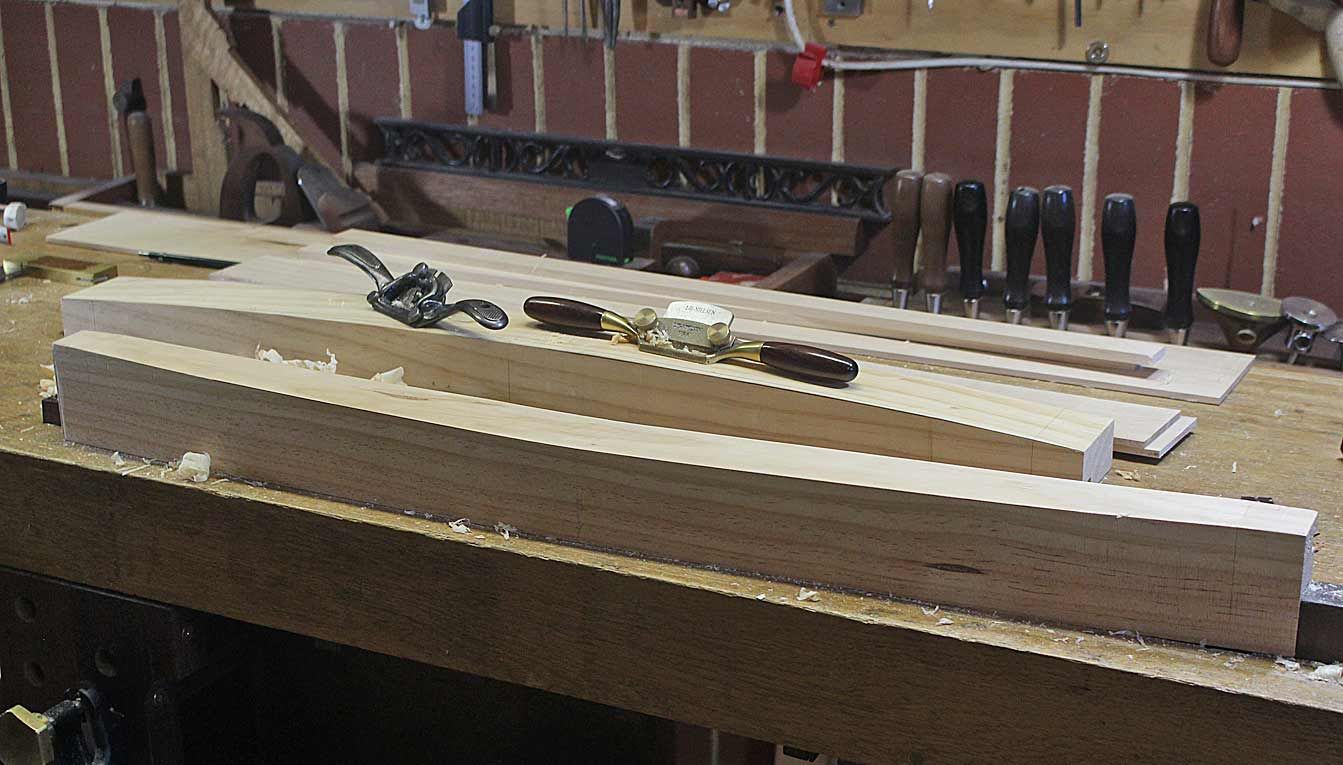
The curve for the underside of the apron is marked and the waste removed ...
The front of the apron will have a 5mm Hard Maple veneer. Here it is being finished ...
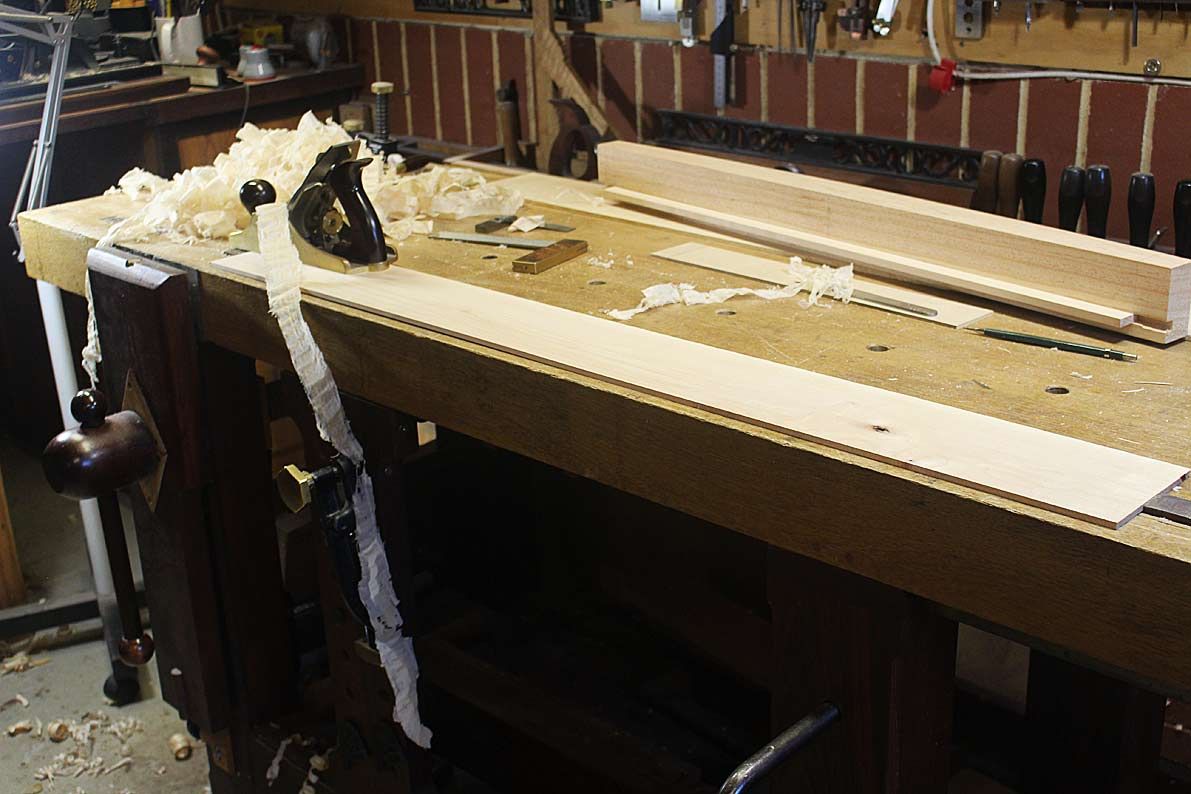
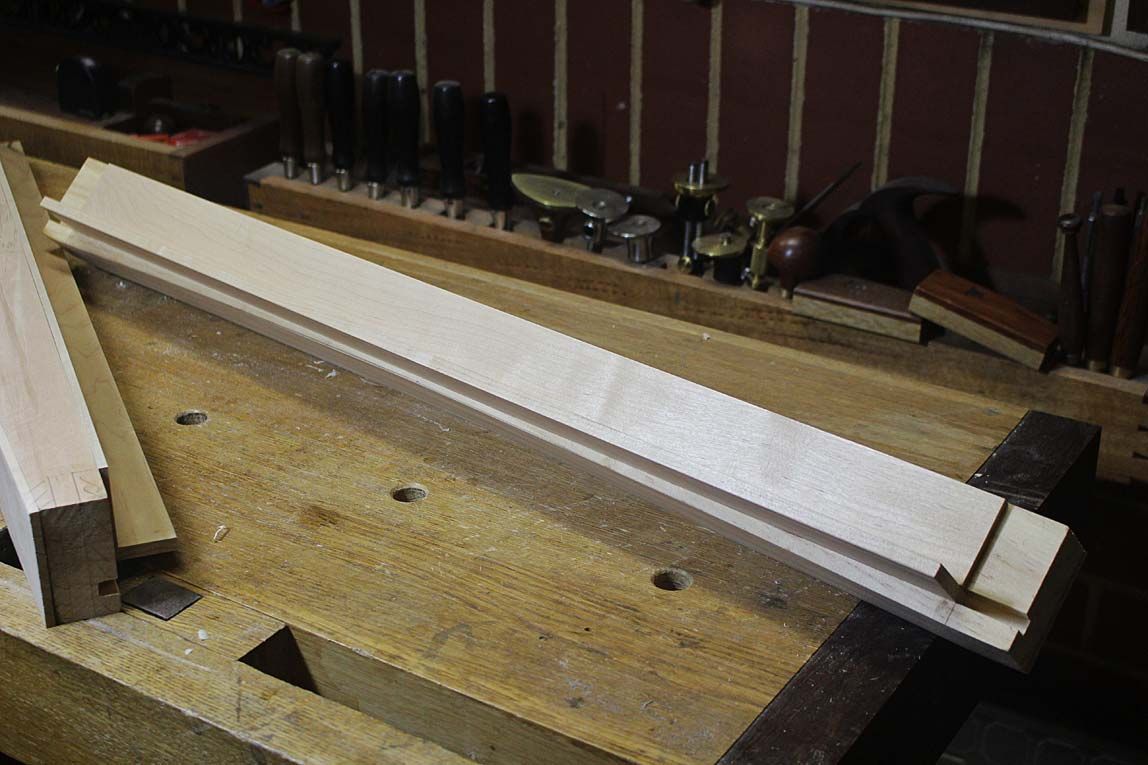
This is sawn slightly oversize, and then glued to the apron blank. Can't have too many clamps ...
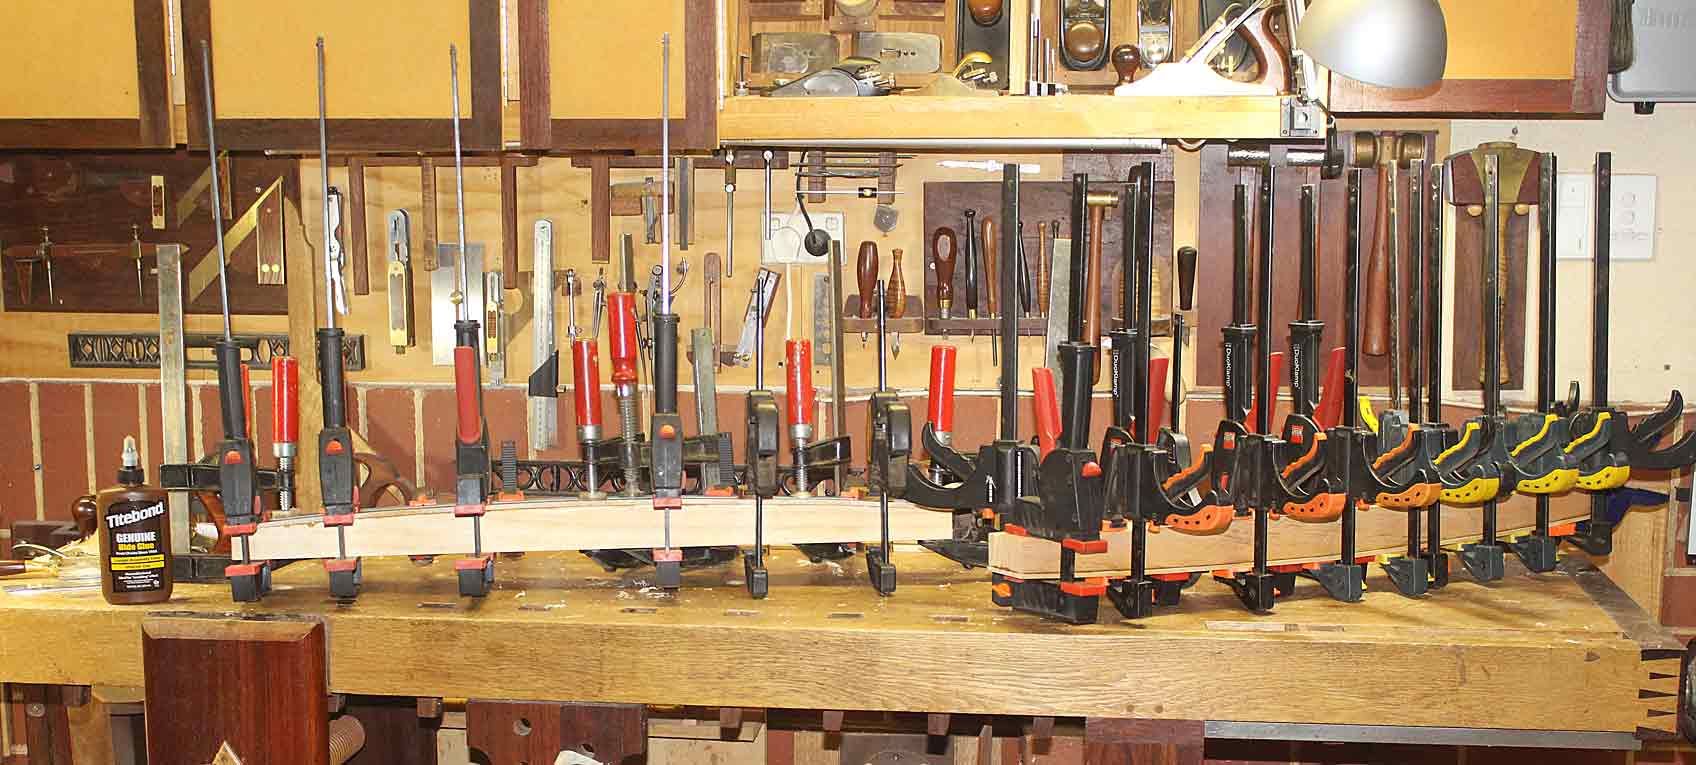
This was left overnight for the liquid hide glue to dry, and then trimmed down with a plane and a spokeshave ...
This will give a better idea of the curve to the underside. It is not intended to be a dramatic curve - simply to soften the lines.
Here are the replacement drawer blades. They will not be glued until the the aprons are attached to the legs as they will get in the way of sawing tenons.
Here is a view of the bow. Also note that the "fence" for the drawer has been glued in ...
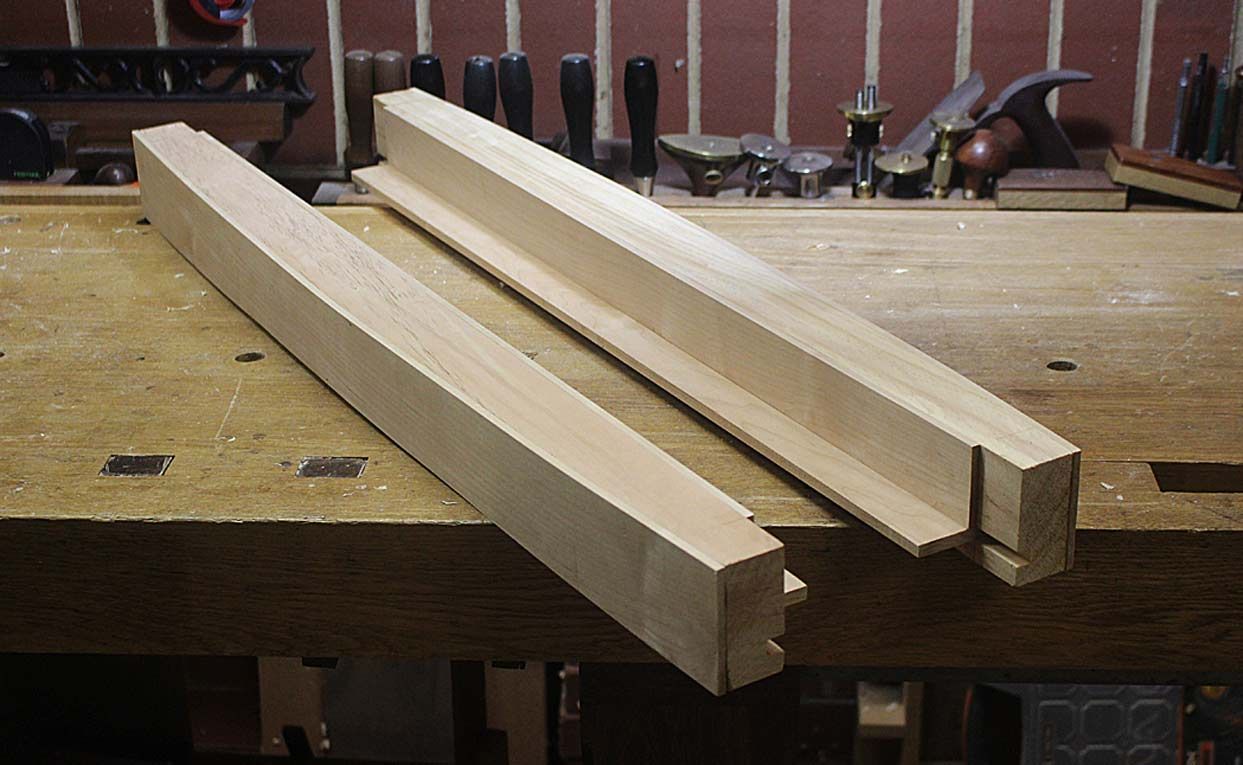
Another view of the bow, as it is likely to appear when assembled ..

This is roughly how the 1/2" tenons will be situated (just a quick pencilling in to provide a look).

And at that point I will end. Next stage is shaping the legs.
Any comments and suggestions are welcomed.
Regards from Perth
DerekVisit www.inthewoodshop.com for tutorials on constructing handtools, handtool reviews, and my trials and tribulations with furniture builds.
-
30th May 2017, 09:31 PM #15
GOLD MEMBER
- Join Date
- Oct 2013
- Location
- Perth, Australia
- Posts
- 1,813
Cheers for the photos as always Derek, they're very useful for people starting out like me. Liking the design progress and choice of timber for the top, I have a real soft spot for Sheoak.


 Reply With Quote


Similar Threads
-
tafe 2009 sofa table & bedside table
By nz_carver in forum WOODWORK PICSReplies: 6Last Post: 3rd December 2009, 11:38 AM -
Tall Coffee Table/Desk/BookCase/Holdall of important bits/Sofa Table
By RufflyRustic in forum WOODWORK PICSReplies: 11Last Post: 3rd December 2009, 12:14 AM -
Sofa table - tribute to JK
By derekcohen in forum WOODWORK PICSReplies: 12Last Post: 26th July 2007, 10:51 AM -
Jarrah Sofa Table
By Scissors in forum WOODWORK PICSReplies: 13Last Post: 14th November 2006, 06:03 AM -
Sofa table
By derekcohen in forum WOODWORK PICSReplies: 19Last Post: 4th November 2005, 09:49 AM
