

 Thanks:
  Likes:
  Needs Pictures: 0
 Picture(s) thanks:
Results 1 to 11 of 11
-
3rd November 2018, 04:30 PM #1
 Be inspired. Be creative. Be bold.


- Join Date
- Apr 2001
- Location
- Perth
- Posts
- 10,826
 Making the DC a little easier to use
My Dust Collector is just a generic 2 hp machine which I have had for about 10 years. It is linked to a dust separator (Super Dust Deputy), which does a decent job, and most of the dust is collected in the steel bin. The whole arrangement is due for upgrade at some time (I'd like a dedicated cyclone), but until then I have made a couple of mods to make it less of an irritation to use.
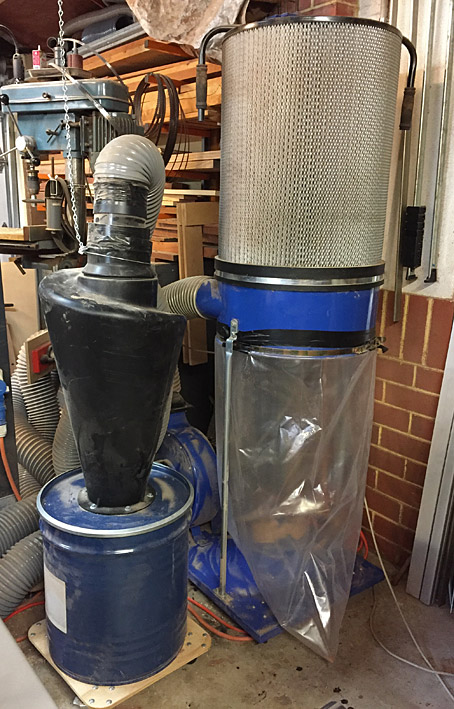
The first mod I made some while back was to connect the SDD to a chain attached to the ceiling ...

This made it easier to unclip the lid when it was time to empty the bin. It just hangs around, as they say ...

But by far the biggest irritation was having to replace the plastic bag. This would fill when I forgot to empty the steel bin. The next thing I knew, the bloody bag was full and it needed to be replaced! That involved unstrapping the bag, and refitting another. It was a little easier to hold in place by first taping it down, then adding more tape to seal the connection, and finally attaching the steel strap.
I really hated this procedure, and finally hit on a simple way to make changes easier.
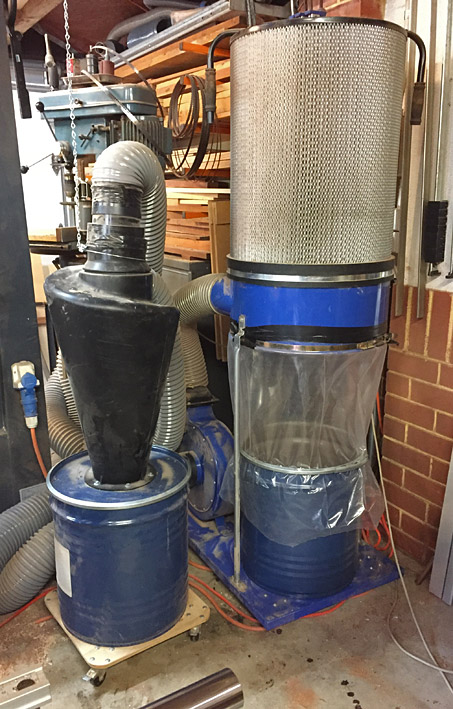
What I wanted to do was use a second steel bin in place of the plastic bag, which I had already, but I could not think of a way to connect it efficiently. Then the simplest solution finally percolated through my skull ... use the plastic bag!
First step is to add a gasket (door sealer) to the edge of the bin ...

Then cut off the bottom of the bag, tuck it over the bin, and use the clamp to seal it up ...
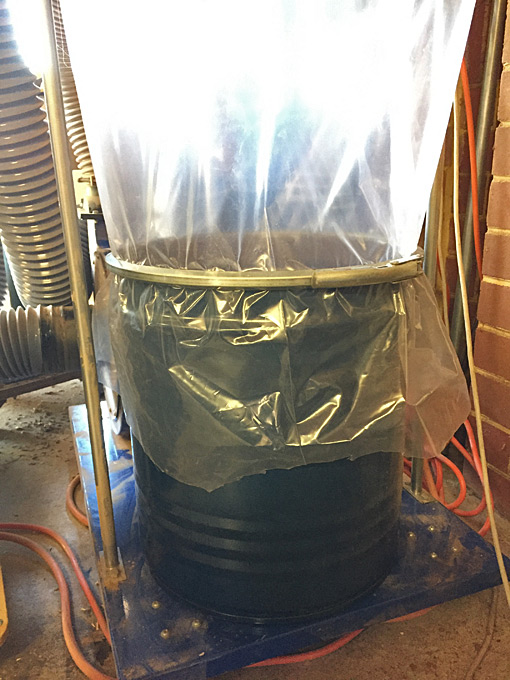
This is what it looks like with the DC running ...
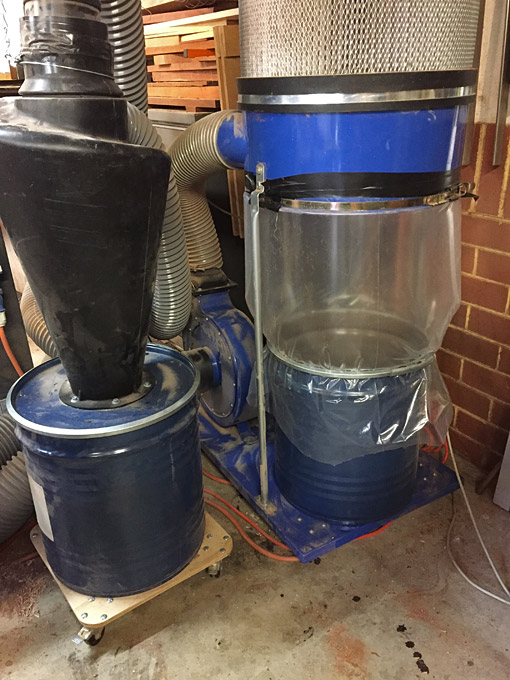
It is early days, and I have not yet experienced any problems. Any dust that does get into the DC bin is easy to see through the clear plastic. Now I need to do something about keeping an eye on the dust collecting in the DSS bin. Any ideas?
Regards from Perth
DerekVisit www.inthewoodshop.com for tutorials on constructing handtools, handtool reviews, and my trials and tribulations with furniture builds.
-
3rd November 2018 04:30 PM # ADSGoogle Adsense Advertisement
- Join Date
- Always
- Location
- Advertising world
- Posts
- Many
-
3rd November 2018, 05:35 PM #2
Member
- Join Date
- Feb 2012
- Location
- Brisbane, Qld
- Posts
- 95
Good idea with the plastic bag! Why don't you do the same thing with your DSS bin?
Geoff
-
3rd November 2018, 07:56 PM #3
Be inspired. Be creative. Be bold.
- Join Date
- Apr 2001
- Location
- Perth
- Posts
- 10,826
How so, Geoff? Do you mean add a transparent lid? The DSS Bin needs to be really stiff to avoid collapsing in on itself.
Regards from Perth
DerekVisit www.inthewoodshop.com for tutorials on constructing handtools, handtool reviews, and my trials and tribulations with furniture builds.
-
3rd November 2018, 09:10 PM #4
SENIOR MEMBER
- Join Date
- Oct 2016
- Location
- Melbourne
- Posts
- 169
Hi Derek
You can cut a hole and rivet a piece of perspex likes the taiwanese done on this bin.
20181103_205735.jpg
-
3rd November 2018, 10:11 PM #5
Be inspired. Be creative. Be bold.
- Join Date
- Apr 2001
- Location
- Perth
- Posts
- 10,826
Hoey, I have been considering that. I need to check how thick the perspex needs to be prevent it from deforming. Also how best to seal it - I recall Bob reporting that this mod is prone to leaking. I hope he chips in.
Regards from Perth
DerekVisit www.inthewoodshop.com for tutorials on constructing handtools, handtool reviews, and my trials and tribulations with furniture builds.
-
3rd November 2018, 10:28 PM #6
Member
- Join Date
- Feb 2017
- Location
- Bunbury, WA
- Posts
- 80
Derek, I'd suggest something like this: Cut the plastic at least 5cm larger in each dimension than the opening. Choose something nice and thick, 5 or 6mm perspex should be ok unless you want a really big window. Heat it evenly with a heat gun and let it sag over the curved side of your bin to get the shape right. Once it's cooled and you've drilled it for any fasteners you plan to use, using windscreen sealant (or another high-strength silicone) run a generous bead both sides of the line of holes (if you have any - in any event use a nice wide bead) and then fasten it to the bin. Make sure you seal the bolts themselves. Clean up the excess and smooth it off with a wet finger or something, and make sure you don't fasten it all the way down - leave a little bit of sealant between the plastic and the drum. Let it set, which might take several days to reach full strength - check the data sheet for your sealant.
-
3rd November 2018, 11:10 PM #7
 Butcher of wood
- Join Date
- Jun 2010
- Location
- Bundaberg
- Age
- 54
- Posts
- 3,429
In order to fit a window you'd have to somehow arrange it over those ribs in the barrel; the problem is that they are contributing to the intrinsic strength of the drum under a partial vacuum so flattening them may not be a good idea. I'd probably be looking at casting a "window frame" out of an epoxy putty or fiberglass and using that to hold the window; but that would have to be mounted internally and therefore has the pressure acting on the "wrong" side...
At our guild we have the same drums on our dustys as shown in Hoey's picture and to be frank they don't do much as they attract wood dust through static electrickery and you can't see inside. How about a different approach; drum weight? It shouldn't be too hard to adapt a BBQ LPG gas bottle weighing scale thingy to fit on the dolly?Nothing succeeds like a budgie without a beak.
-
3rd November 2018, 11:13 PM #8
SENIOR MEMBER
- Join Date
- Oct 2016
- Location
- Melbourne
- Posts
- 169
I replaced the lid form seal to thicker one as in pix, that's all I did and no leaksat all Originally Posted by derekcohen


20181103_224913.jpg
They reveted the plastic screen with metal bracket and thin form seal.
20181103_225118.jpg
20181103_224942.jpg
Here is how to keep the plastic clearing off the window when the dc is on, I cut out the bottom off the garbage bin.
20181103_225222.jpg
-
4th November 2018, 01:32 PM #9
Wood Planner
- Join Date
- Apr 2008
- Location
- Lalla, Tasmania
- Posts
- 1,350
This starting to get really good for a change. Some great ideas going on, with wheels, windows, rubbish bin liners and a handle on the side. Where have I been all my life? I think I need to think about stuff I want to modify in more depth, you guys are way ahead of me and I don't mean that in a funny way.
SBPower corrupts, absolute power means we can run a hell of alot of power tools
-
4th November 2018, 02:54 PM #10
GOLD MEMBER
- Join Date
- May 2010
- Location
- Not far enough away from Melbourne
- Posts
- 4,204
Derek, I did just as above in my home-made cyclone I have been using for probably 16 years without a problem. I have 2 x 44 gallon drums on top of each other, the top one has the cone for the cyclone and the bottom drum is just the collector. I have a 3mm perspex window in both drums. the bottom one to see how full the collector is and the top one to watch how the cyclone works (keeps grandkids out of the work area while I am cutting Originally Posted by djeddy
)
I pretty much did exactly what Djeddy said above but 3mm perspex is strong enough for the windows and is obviously easier to heat and curve than thicker stuff. I found smooth areas of the drums to cut the windows into and you will probably have to contend with the ribs, but with 3mm perspex, you could probably shape the ribs into the perspex by forming them over a ribbed part of the drum matching where the window goes.
There are no leaks in my system even after several years, verifiable by looking at the sealant between the perspex and the drum from the inside. Even if there were minor leaks it is on the part of the system before the blower so it would be sucking in clean air through the leak, not blowing dirty air out into the workspace. Originally Posted by derekcohen
I got sick of sitting around doing nothing - so I took up meditation.
-
4th November 2018, 09:10 PM #11
Member
- Join Date
- Feb 2012
- Location
- Brisbane, Qld
- Posts
- 95
Good point Derek. In my haste I didn't realise the cyclone is pre-blower and therefore your bin under negative pressure. I wonder if you can get a clear lid, or even a clear bin, or even further a section of round clear material to sit between the bintop and lid?


 Reply With Quote


Similar Threads
-
It always looks easier on youtube
By woodtryer in forum WOODTURNING - GENERALReplies: 7Last Post: 24th September 2018, 07:12 PM -
Any easier way to do this?
By John.G in forum WOODWORK - GENERALReplies: 16Last Post: 23rd February 2017, 05:42 PM -
Now this would make Toy & Model Making heaps easier - Hands Free CNC
By crowie in forum TOY MAKINGReplies: 2Last Post: 31st August 2016, 01:36 PM -
Leach Ribbons and making sail trim easier.
By Boatmik in forum Michael Storer Wooden Boat PlansReplies: 4Last Post: 24th January 2015, 06:17 PM
