

 Thanks: 0
 Likes:
  Needs Pictures: 0
 Picture(s) thanks:
Results 1 to 8 of 8
-
30th April 2017, 05:26 PM #1
 Supporting my wife's hobby.


- Join Date
- Nov 2013
- Location
- Caboolture QLD AU
- Posts
- 781
 Small workshop added DC ducting and layout.
Our small 6m x 3m WW workshop.
Its only taken a few years to figure out exactly what we really needed in our small WS, so I finally got around to adding the extra Dust collection ducting, I thought I�d post a few pictures of the WS and ducting.
All of the cabinets are on wheels, obviously to allow us to move them around and over to a previously spare single dust port, but in a small WS it still makes sense to have most thing movable.
The Bandsaw is the only machine that is not movable. 1. There are three dust connections to the BS and virtually all hard line connections, 2. In its new position there is no real need to move it as equipment either side is moveable.
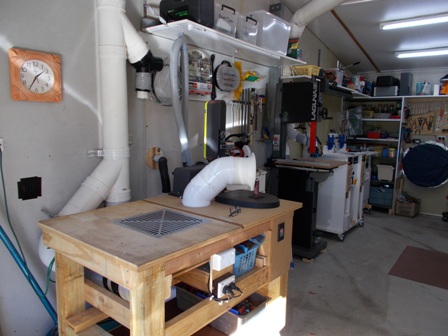
The existing 150mm ducting was run first to the lathe and then to the opposite wall down to the BS and a moveable general use "down draft" and inbuilt oscillating spindle sander table. There are two 150mm ports on the table, one for the downdraft box and one for the Spindle sander, each of those NOW has its own blast gate and can at last be left permanently connected, before this was the only spare DC connection and was shared with other equipment.
This layout with each machine having its own Dust port connection and Blast gate is now a real joy to use, everything can be left setup, no more moving this, unplugging that, plugging in this, and then putting it all back again. Still a lot of tiding up to do with the bench and draws to made for the Router table, bench and sanding table - it's finally starting to feel like a place you want to spend time in and making stuff is much more enjoyable.
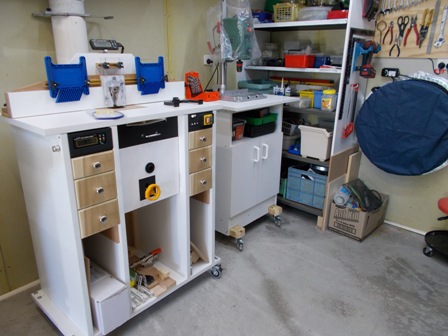
Below: General assembly, downdraft, and spindle sander table, a Y was added to this existing Duct to feed both ports on the table. There is now a spare port at the existing Y connection on the vertical Duct.
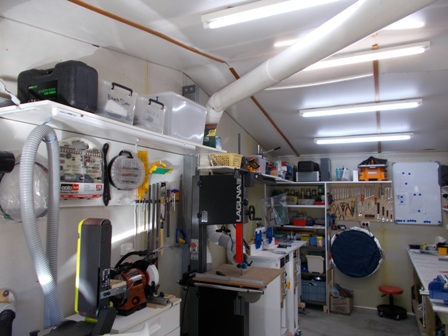
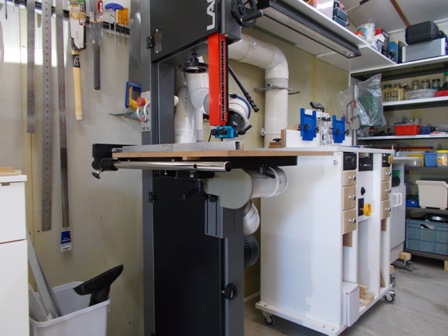
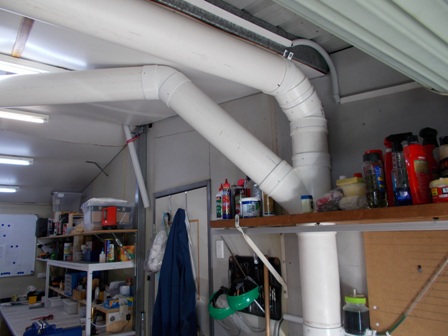
The 2nd pix shows the new overhead Ducting run feeding the relocated Band Saw and the Router table that I just finished building.
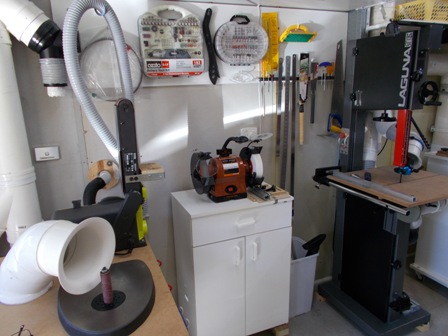
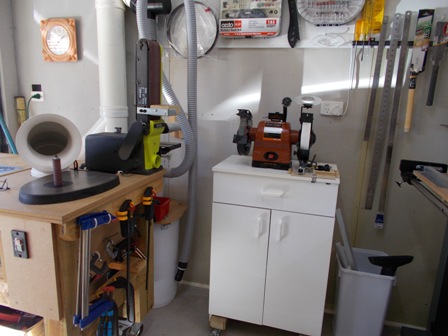
Below:The dust fitting next to the spindle sander can swivel 360 deg, it can have different length attachments fitted to suite almost any small power tool or dust making job we may do on the table. The small grey flex hanging from the shelf above the sanding bench is connected to a small cyclone sitting on a huge dust bin, the Vacuum cleaner is mounted on the outside wall, this hose reaches most of the WS and is used to pickup chips and saw dust from hand tools and lathe chips / timber curls, keeping the floors clean and cleaning hand powered tools after each use.
Also shown is a movable grinder/sharpening station (CBN wheel to come).
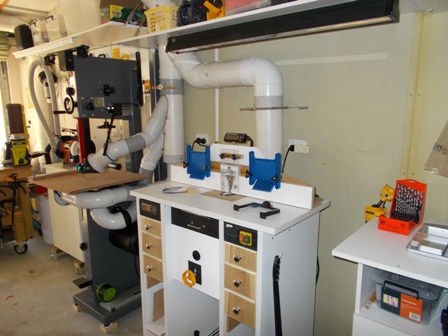
Below: Router table and Drill station table next to it. Moving the router table is simple, unlock the front wheels and just slide it forward, it unplugs itself from the DC duct, putting it back is the reverse, just line up the port and slide it back in, no reaching around the back or mucking around, the penalty for that was the use of another 90deg bend, however the collection is so efficient on this Router table (I posted a separate build on it) that even with completely dirty and partly blocked DC bags, it still catches absolutely everything.
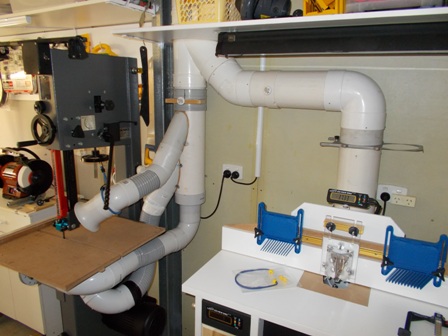
Below: More of the ducting to the BS pickup and main Bench.
In the pictures the round grey cover on the back wall is over a huge high volume 3 speed fan, it can actually pressurise this small room. The exit point is on the opposite wall over the top of the (soon to be removed) roller door. I also had a an extraction fan high up in the ceiling but have removed it in preparation for a larger unit driving into a larger above roof housing, again to remove any invisible dust that may float up high, the roller door will soon go, putting in a wall with a window and a BIG swing door, also with a small vertical glass panel.
FYI In redoing all the shelving (been there for over 3 years) and modifying the big bench I built along one wall, there was not one speck (seriously) of wood dust build up of any kind above / on the existing shelves or shed beams, only dust was a fine black grease, same as we get over everything from general crap in the air, lots of large scale housing site development around here for the past few years making it worse.
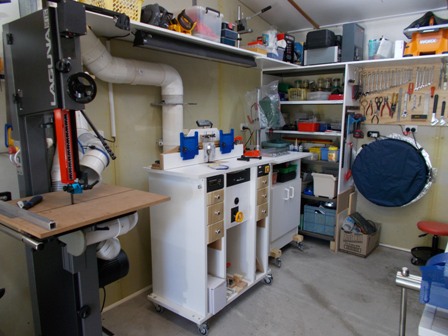
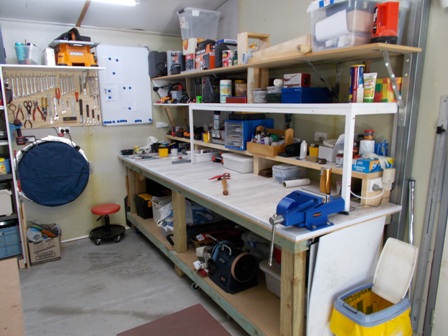
Below: The Workbench and Lathe, existing ducting runs from DC just right outside shed and first to the lathe, vertical to a new Y piece feeding the new ducting run to the relocated BS and almost finished Router table.

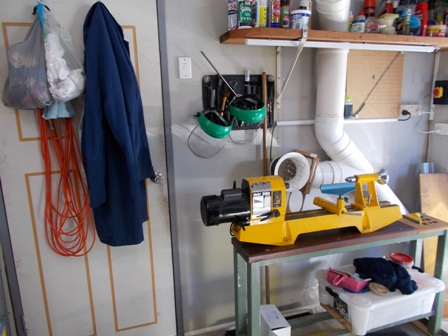
Below: The new ducting was tapped into the riser from the DC, this time I used long 90 bends made of 45 connections and 900mm straight connection piece. It runs 3m to the opposite wall and straight down into the Band saw via a simple tight space Blast gate I posted before. A 45 deg Y is used to feed the Router table from the new ducting, again via a blast gate, it is hardline 150mm all the way into the Router cabinet. Note: Old Ducting has tight 90's made from two 45's, sort of a waste really but way back then I thought it would help.
All ceiling lights are LED tubes, there is concealed LED lighting on the Bench and LED lighting under the shelves above the Router table and Grinder / sharpening station.
-
30th April 2017 05:26 PM # ADSGoogle Adsense Advertisement
- Join Date
- Always
- Location
- Advertising world
- Posts
- Many
-
30th April 2017, 05:45 PM #2
.
- Join Date
- Feb 2006
- Location
- Perth
- Posts
- 27,792
Very Slick and good to see some BMHs in action!

Interesting what you say about the colour of the dust. Black dust comes from things like combustion products, including motor vehicle exhaust, and rubber from car tyres in high traffic areas - think about how many tons of rubber are worn off and blown about as rubber dust each year, In a workshop you might want to look at slipping belts on WW machinery, Some of those black greasy dusts are formed from the action of bacteria on the ammonia released in animal and human breath and are the cause of legionaries disease. We had some in an under-ventilated lab once. The lab was shut down for a week while it was removed. Originally Posted by MandJ

-
30th April 2017, 07:28 PM #3
Supporting my wife's hobby.
- Join Date
- Nov 2013
- Location
- Caboolture QLD AU
- Posts
- 781
Hi Bob, no the dust is the same as we get on the outside tables, seats, motor vehicles, etc. Builds up over a month or two, likely feels greasy because I use a slightly damp cloth and vinegar to wipe it off. Same as our paths that go blackish after a few months, I though it was mould but turns out a lot of it is from dirt in the air. Not a lot of traffic here, but as I say, huge plumes of dust often in the air from earth works and wind, and clearing around large parcels of land, then housing being built and roads going in etc. Everyone complaining about it, the part of the shed (computer room) with no flow through ventilation had none unless I open the doors for a few days.
-
1st May 2017, 11:20 AM #4
Supporting my wife's hobby.
- Join Date
- Nov 2013
- Location
- Caboolture QLD AU
- Posts
- 781
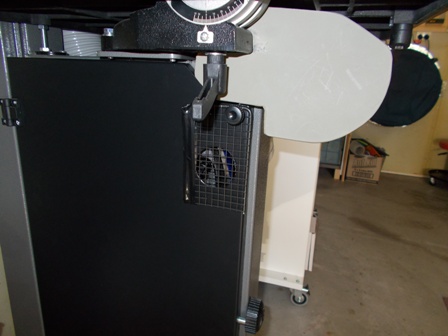
BS connections.
Thought I'd post a photo of the DE connections to the Band saw.
I have tried many different ways to get a neat connection layout to the BS without compromising flow with bends and long runs of flex, but again, some compromises were made for our small workshop. I made two shallow angled 100mm connection into a piece of 150mm ducting, one connects to the lower cabinet and has a 90deg fitting into the port in the top of the lower cabinet. Now I was not concerned about any loss for this connection, the lower cabinet is not opened up as the sole purpose of this pickup is to remove chips caught or stuck in the gullet of the blade - NO DUST as such reaches the lower cabinet - all fine dust and chips are effectively removed by the below table pickup. Those chips stuck in the gullet are expelled as the blade bends around the lower wheel.
We've had this BS for some time now, the bottom of the table is still covered with the manufacturing sealing grease, there is absolutely no dust in that grease, the only dust spot is a small 2" square on the sheltered side of the lower guide block, the side facing the DC pickup intake. everything else is spotless. No dust or chips spill onto the floor from below the table.
The above table pickup is using one of BobL's 100mm Bell mouth pickups, this can swivel and turn to any position, at the moment it's held roughly in place bay a strap, I'm going to make an adjustable arm that hangs from the shelf above the BS to locate and move/hold the Pickup into any desired position.
Providing I don't let the DC flow loss caused by dirty filter bags get to more than about 2" on the big wall mounted manometer then the dust collection on the BS is just brilliant. That same flow loss condition applies to the Lathe and the Sanding table.
-
1st May 2017, 03:33 PM #5
Supporting my wife's hobby.
- Join Date
- Nov 2013
- Location
- Caboolture QLD AU
- Posts
- 781
Correction
Just correcting an error I made in the previous post, I said I had not opened up the bottom cabinet, but in fact I did add a very small 50mm opening just slightly below the top extraction port, it helps grab those sticky wood chips that get stuck in the gullet and fly off the blade as it contacts the tyre and starts to bend around the wheel -not what you would really call opening up the bottom cabinet. BTW The gray cover is the end of the plug in below table dust extraction fitting.
The door swings open without having to remove or lower anything, unlike before, when you had to lower the side guard (metal slide where the hole and grill now reside) I used the two side guard lock knobs to hold the grill. The side guard is now inbuilt into the below table fitting, it's part of and behind the gray end fitting.
EDIT - FYI:
Where the BS dust extraction mods started Post #66 - Beginner attempt at DC - thanks to forum members
Router Table Build: Yet another Router table build.
Compact Blast gate - Post # 23 : Blast gate gallery
-
6th May 2017, 02:51 PM #6
Supporting my wife's hobby.
- Join Date
- Nov 2013
- Location
- Caboolture QLD AU
- Posts
- 781
Another Correction
I the previous post, the above line should have read: Originally Posted by MandJ
I did add a very small 50mm opening opposite and just slightly below the top extraction port.
-
13th May 2017, 09:56 AM #7
Senior Member
- Join Date
- Oct 2011
- Location
- Frankston, Melbourne
- Age
- 66
- Posts
- 195
Mandj......what DCd o you use.....pic?
cheers
-
13th May 2017, 12:08 PM #8
Supporting my wife's hobby.
- Join Date
- Nov 2013
- Location
- Caboolture QLD AU
- Posts
- 781
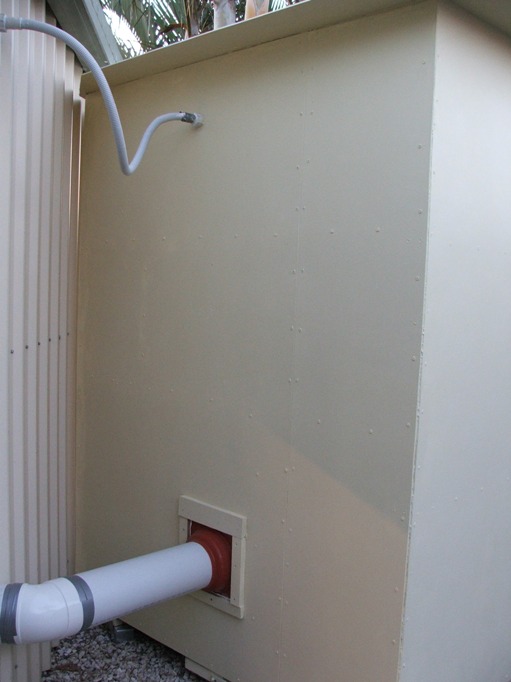
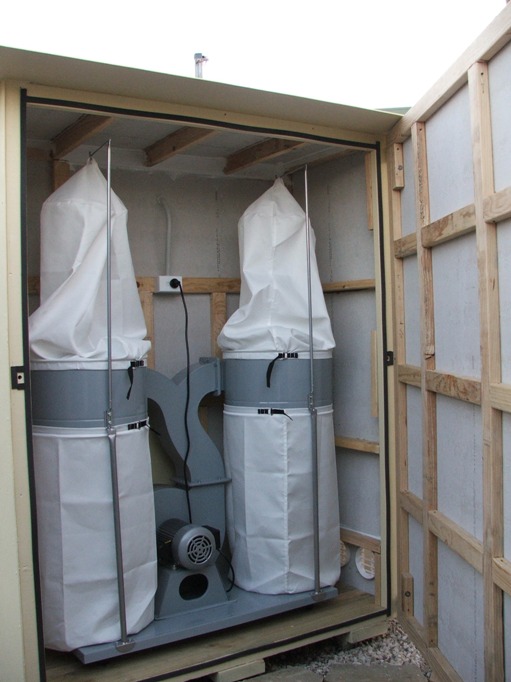
I'm using a 3 HP unit in an external cabinet, installed about 4 years ago, this is an old photo taken when it was first installed. Originally Posted by simops
The DC cabinet is mounted outside the wall next to the Lathe so a very short direct path to the Lathe. The small exhaust Vents shown in the cabinet were removed and the exhaust was greatly enlarged shortly after these photos were taken. You know the cabinet still looks like this (new) and is as clean inside now as when it was first installed years ago - I NOW clean the filter every few months to keep the flow rate high
More photos, mistakes and the leaning path in the Link posted in #5.


 Reply With Quote
Similar Threads
-
Home workshop layout
By Stephen H in forum METALWORK FORUMReplies: 19Last Post: 25th April 2014, 01:35 AM -
Ducting layout for new shed
By mick59wests in forum DUST EXTRACTIONReplies: 8Last Post: 22nd November 2013, 09:08 PM -
Ducting Layout
By markkr in forum DUST EXTRACTIONReplies: 13Last Post: 15th November 2013, 06:40 PM -
New Workshop Layout
By Lumber Bunker in forum WOODWORK - GENERALReplies: 4Last Post: 9th March 2008, 11:55 AM -
Workshop Layout
By Jim Grant in forum HAND TOOLS - UNPOWEREDReplies: 23Last Post: 28th February 2005, 12:11 AM
