

 Thanks: 0
 Likes: 0
 Needs Pictures: 0
 Picture(s) thanks: 0
Results 16 to 30 of 59
-
31st March 2010, 03:28 PM #16
 Senior Member


- Join Date
- Dec 2008
- Location
- Oshawa, Ont., Canada (I wish I was in Brissie)
- Posts
- 331
 Yep. Works well. I've also made some to keep the proper gaps between tracks on straights and curves.
 Originally Posted by drivesafe

I suppose I should update you all on what's been happening around here so here goes:
6 cast rocks and the last of my foam putty later I got this done before the lurgie that hit our family threw me back to bed.
I had a play with some ground cover, scenic cement, matt medium and some dry brushing.
The ballast is going to be super important on this layout. I'm going to have to be sure it compliments the rest of the scenery and doesn't draw attention to itself. I've also learned that I can't spray the diluted matt medium and not expect to get "spots". So from now on I'll just brush on the scenic cement first, apply ground cover, spray liberally with "wet water" and then use an eye dropper to place the matt medium and let it spread.
You live, you learn!
A little watered down black run into crevices and some earth and concrete dry brushed on and I think the rocks are coming together.
Meanwhile at the left end of the module I was busy gluing ground cover and talus into position around my rock outcrops:

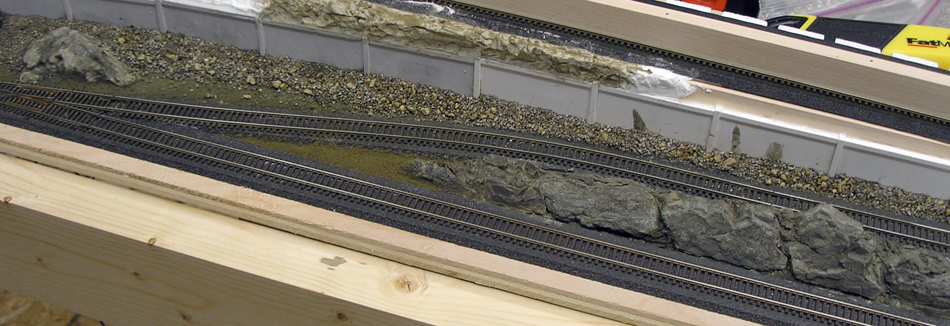
Still some work to do between the branch and main line and on top of the retaining wall but so far I'm happy with it.
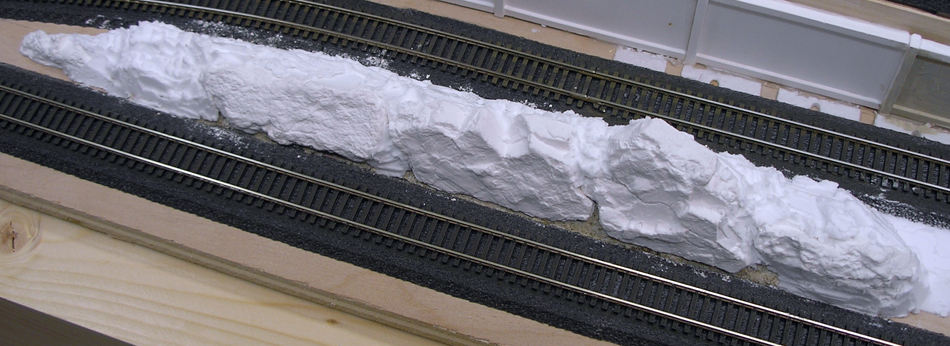
Now to the final detail work on the module I've been working on. I've completed the last of the rock carving and once it's completely dry tomorrow I'll colour it and detail it so I should be finished by Sunday, ready for some ballast! In the meantime I put some more ground foam around and more talus.
As you can see the retaining wall is looking a little "unloved" but there is much more to come for it. Awwwww......... I also have a couple more colours to apply as grass/ground as well as some grass clumps, bushes and other details. All in good time! You'd be surprised how long it takes to paint each piece of talus to get it the colour I want for the place it's laying.
While waiting for the foam putty to dry - it takes a while when you go in early with the grey rock wash - I decided to try adding some accents to the scenery. I even gave ballasting a go. I don't want to go overboard with the accents so I have a feeling that the bags I bought will be more than enough for the entire layout let alone this module or even this shelf!
I think I'll bring the ballast down with a couple of black washes once it's all laid and dry.

Panorama anyone? This about half of the module. Gotta complete the colouring of the rock above the retaining wall, do some more nasty things to said wall and of course add some scenic detail to the rock above the wall. My local store didn't have the proper brown ballast I want for the branch line so that'll have to wait.
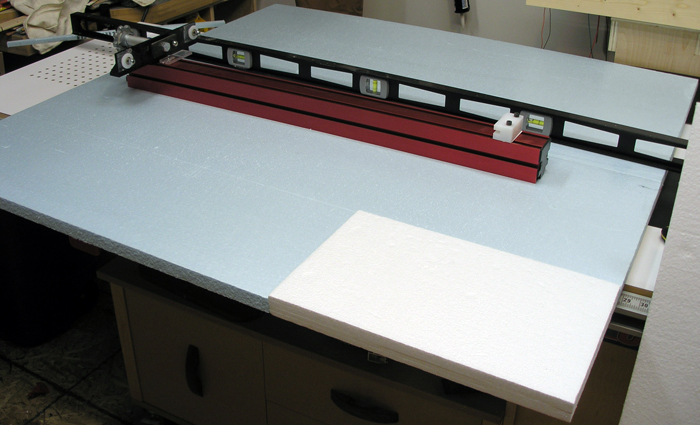
Starting to lay out the foam base for the next module on Shelf B. You're looking at it from the rear of the module in this shot. The notch for the hvac bulkhead in the corner of the room - which you can see on the layout plan - will be in the left front corner as we look at it here.
Not all of this foam will remain but I thought I may as well start with a 4'x4' area same as the 1/2" ply that's underneath it and then chop out what isn't required. The blue foam is 1" and the white is 11/4". So on top of 1/2" ply that gives me track heights of 11/2" and 13/4" above the shelf frames.
I glued the two sections of blue foam which are 24" wide together with Foam Tack Glue from WS and used tuck tape on the lower side to hold the pieces together and stop the glue oozing out onto the ply or my work centre. Then I used my table saw fence and my 6' steel level to hold the foam down and force the joint together. With the white foam I applied the foam tack glue and let it sit for an hour. Then I slid it into position with some wax paper along the edges to prevent the two surfaces touching and when it was all lined up I removed the wax paper and it was stuck!
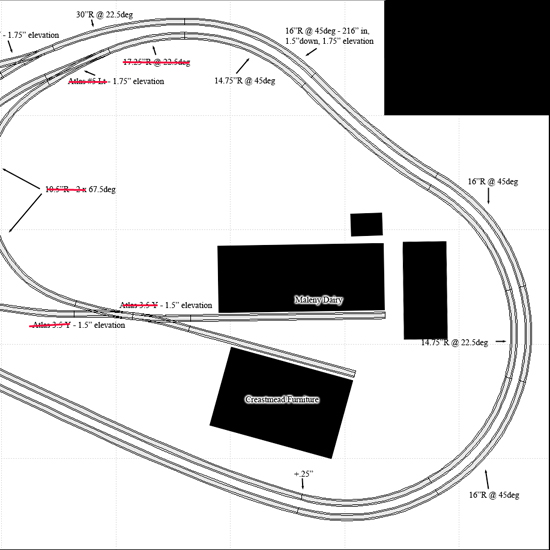
Now I get to draw a grid reference over the foam and begin laying out the track and building positions. This will be a fun module because of the different kind of scenery to the last one. There will still be rock carving to do but there is a short tunnel, at least three houses with their yards and two major industries with their service roads and car parks to bring into this area. A mainline and a branch running side by side through the tunnel as well as an X shaped spur for the industries and the mainline splitting out into four lines should make for some interesting viewing eventually. If only I had enough code 55 flex to do it all!
Oh and the red lines through some of the sections of the track plan? Well let's say I'm trying another aspect that's new for me with this layout and leave it at that for now. Little bits and pieces need finishing for Module 1 but nothing real serious and most of it has to wait till I can lay my hands on some more flex track and the proper shade of ballast for the branch line.Last edited by RETIRED; 7th March 2011 at 03:43 PM.
-
31st March 2010 03:28 PM # ADSGoogle Adsense Advertisement
- Join Date
- Always
- Location
- Advertising world
- Posts
- Many
-
4th March 2011, 12:50 PM #17
Senior Member
- Join Date
- Dec 2008
- Location
- Oshawa, Ont., Canada (I wish I was in Brissie)
- Posts
- 331
Wow! It's been almost a year since I posted any progress! That's not good. I did get a lot done before the weather and work and family and illness shut me down. Still a long way to go before trains are running though and there's an awful lot of woodworking to be done in there too!
I'll have to set some time aside in the ext few days and post updates on the work so far because right now I can hear it's time for a late supper and then off to bed early for a change. No rest for the wicked!
-
4th March 2011, 02:32 PM #18
GOLD MEMBER
- Join Date
- Jan 2004
- Location
- Kilmore, near Melbourne, Australia
- Age
- 66
- Posts
- 1,879
Awesome stuff dude - look forward to seeing any updates that flow in .... take care
Steve
Kilmore (Melbourne-ish)
Australia
....catchy phrase here
-
4th March 2011, 05:36 PM #19
Life's Good, Enjoy each new day & try to encourage
- Join Date
- Dec 2009
- Location
- Faulconbridge, Lower Blue Mountains
- Age
- 68
- Posts
- 11,186
G'Day "Expat" with the maroon blood,
This is a great layout WIP, thank you.
Cheers, Crowie
-
5th March 2011, 01:34 AM #20
Senior Member
- Join Date
- Dec 2008
- Location
- Oshawa, Ont., Canada (I wish I was in Brissie)
- Posts
- 331
Okay so here goes with the updates from the past year!
Because I was waiting for some other items to arrive in the mail and there wasn't that much more I could do on the first "module" I decided to start on another section of Shelf B. This would be the industrial park at the right end of the shelf.
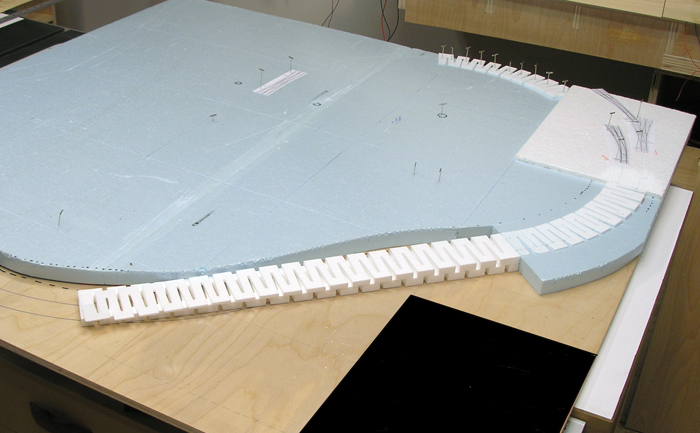
So here we go with the industrial park on Shelf B. I started with a 4'x4' piece of 1/2" ply - again it was just sitting around not doing much except taking up space!
Glued on some 1" foam sheet and two layers of white 5/8" foam sheet in one corner. You're looking from the rear-right corner of the layout here which would put you inside our foundation wall! Any leaks? The shaded area of the ply has to be removed for clearance because there is a HVAC bulkhead running up the wall.
Now why the 2 layers of 5/8" foam? Well two times 5/8" = 11/4" and you add that to the 1/2" ply and you get 13/4" of elevation. It'll all make sense soon enough.
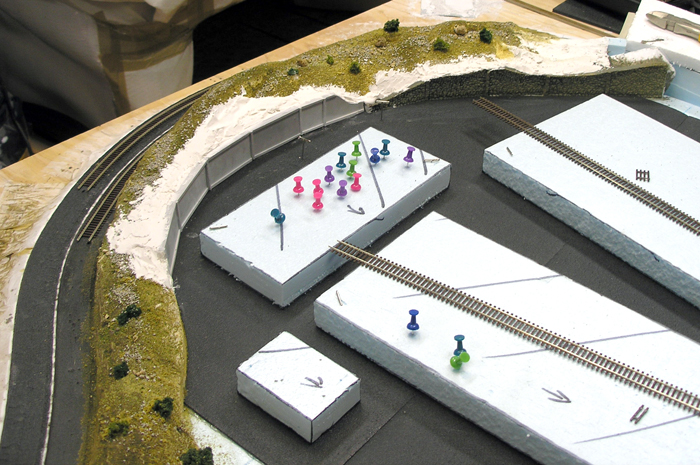
Look closely and you can see the changes in the track plan happening. I've added two curved turnouts and a 3-way turnout where once there were three Y's. Down in the industrial park I've taken away the back-to-back Y's and replaced them with a #6 c40 slipswitch. Fun!
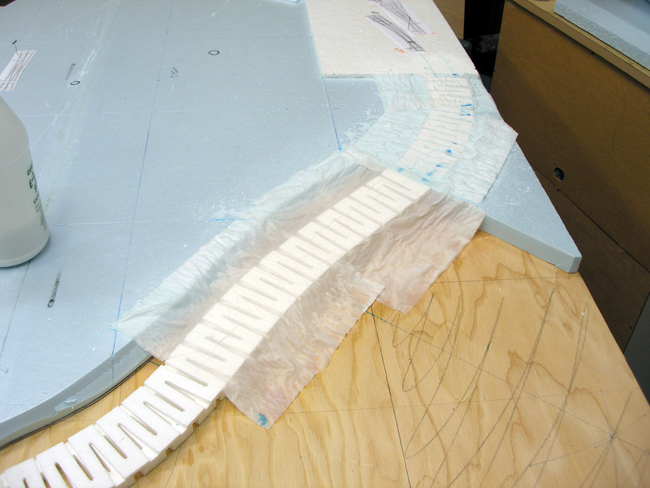
With the subroadbed in place I took some tissue paper and soaked it with Matte Medium from a spray bottle. While it was setting I smoothed it out with a damp brush and once it was hard I lightly sanded it smooth where the roadbed would go.
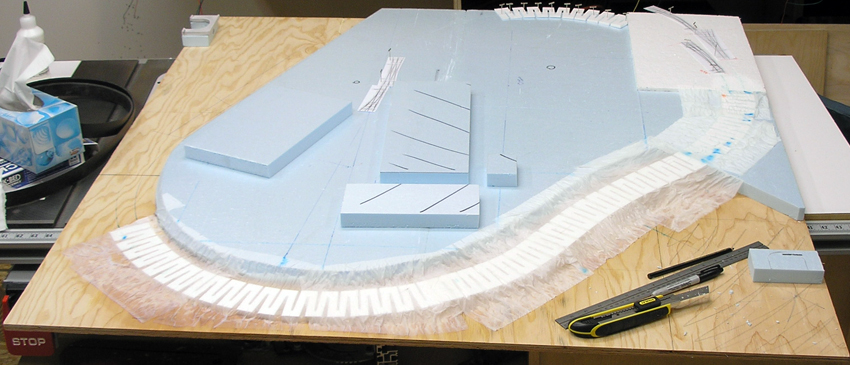
Tissue paper is dry and finished and I even had some spare foam to make outlines of the buildings going into the industrial park.
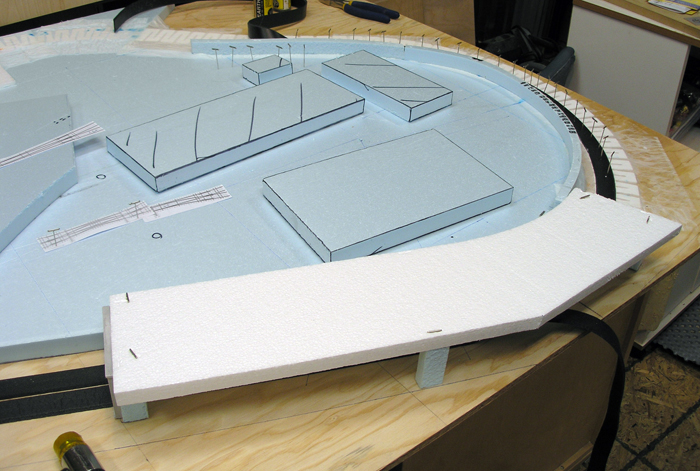
What's a layout without at least one tunnel? Still haven't made up my mind where the road servicing the industries is coming in from. I'll figure it out soon I suppose.
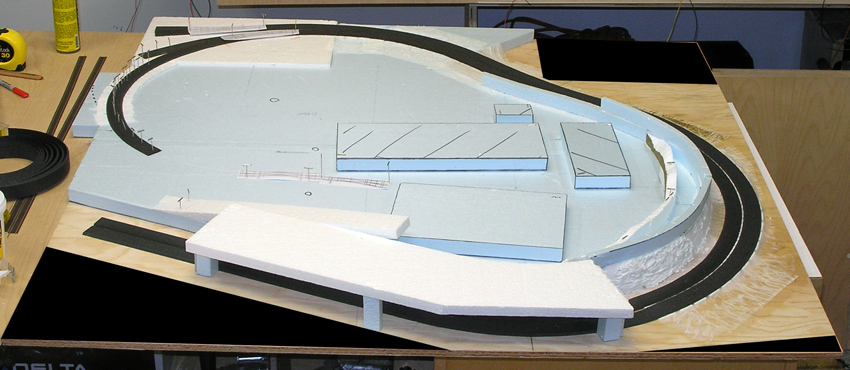
It's starting to look like something.
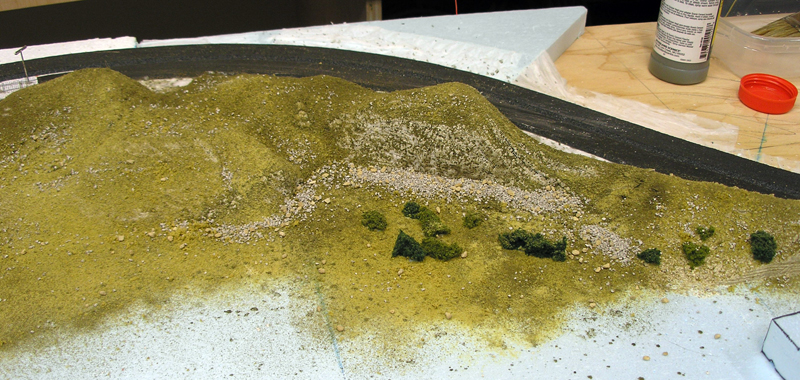
With a little bit of plaster cloth, some brushed on hydrocal, various ground covers, talus and some clumps of foliage it's getting there.
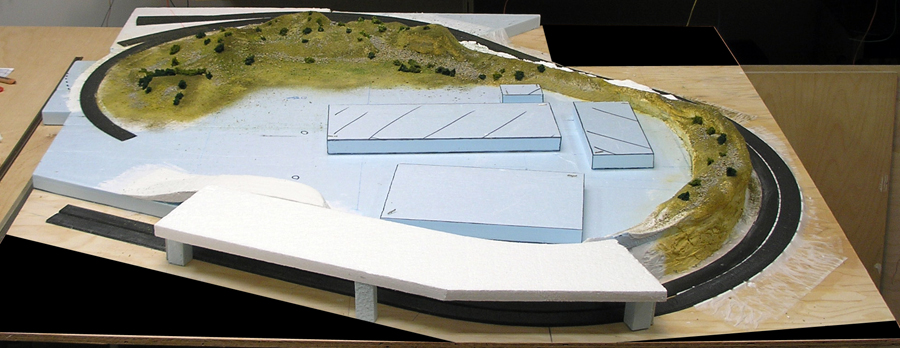
Me like! Now what's needed are some buildings to fill the space.....
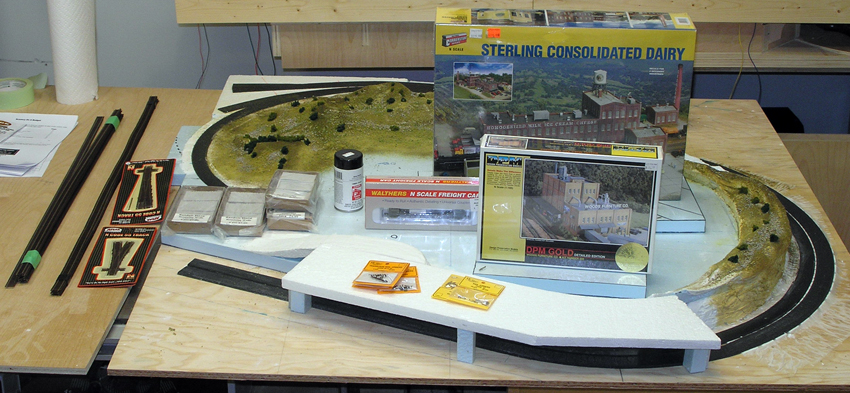
Nothing like a train show to empty the pockets and fill the layout! I got the furniture factory and dairy kits for less than the lowest price I had seen for the dairy alone so I was very pleased.
You might have noticed the two stacks of flex track on the left. One stack is Atlas code 55 which despite all the people telling me it was nowhere to be found I came away with 50 pieces all up although only 10 are shown here. The smaller stack is Micro Engineering code 40. Yes, code 40! I've gone completely mad and decided that all of my yards, sidings and spurs will be code 40. So that means A LOT of hand made turnouts doesn't it!?
More to come. Stay tuned.
-
5th March 2011, 01:43 AM #21
Senior Member
- Join Date
- Dec 2008
- Location
- Oshawa, Ont., Canada (I wish I was in Brissie)
- Posts
- 331
I was thinking that I should add a little "something" to the industrial park area just to provide something different and amusing and so......
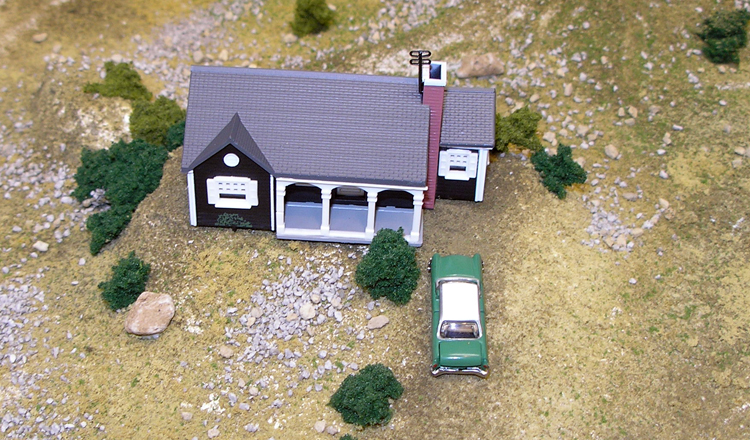
.....I picked up a couple of WS ready made items and placed them on the foundation I built earlier and.......
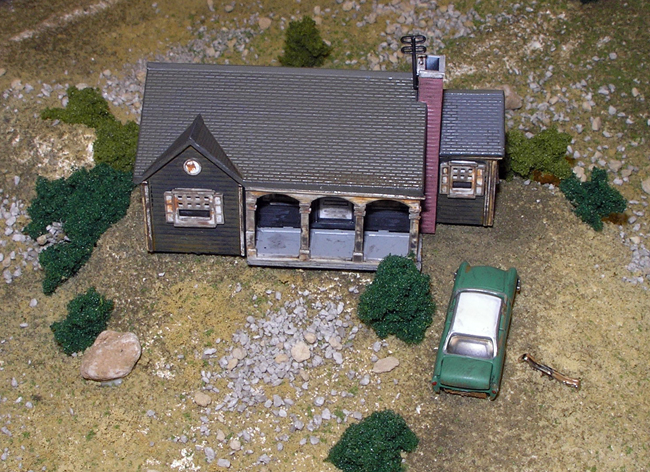
......with a bit of abuse and mistreatment we now have ourselves the local drunk's house and jalopy!
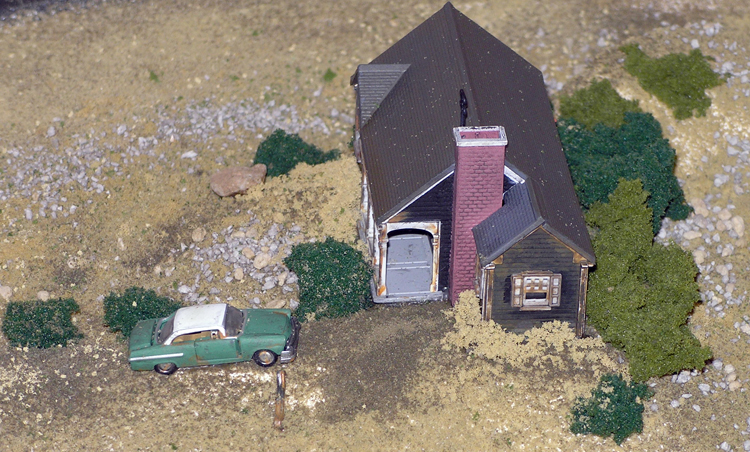
I'm going to add a pile of empty XXXX cans under a window.
Meanwhile the other end of the "module" was taking shape as well with retaining walls being installed.
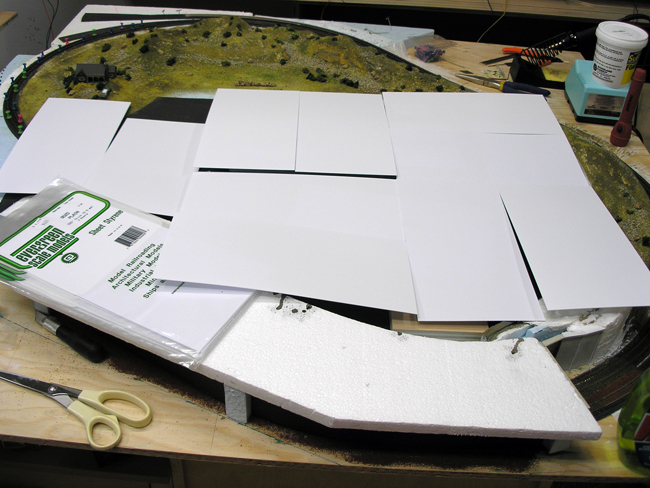
Eventually the car park and driveways of the industrial park will be paved in concrete so I checked to see how many sheets of styrene that would take.
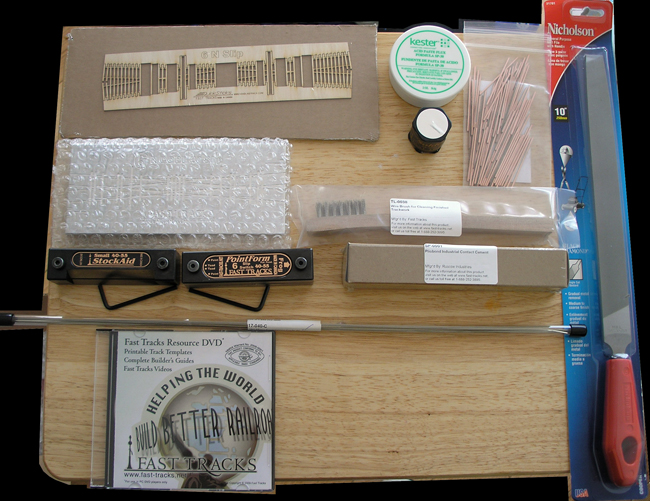
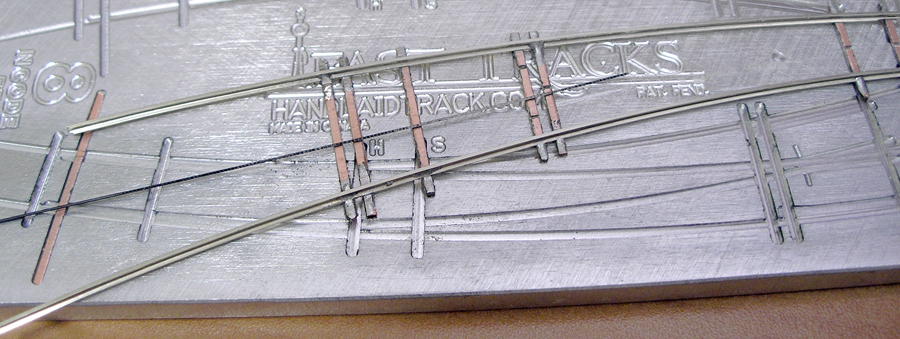
While that was happening a parcel arrived from Fast Tracks! One code 40 #6 Slipswitch has landed. Now the hard work begins.
After a lot of work and not following the instructions - because they do not work in N Scale - here she is having a fitting for her wiring. Next up is some paint but it looks right at home.
Purty ain't she!?
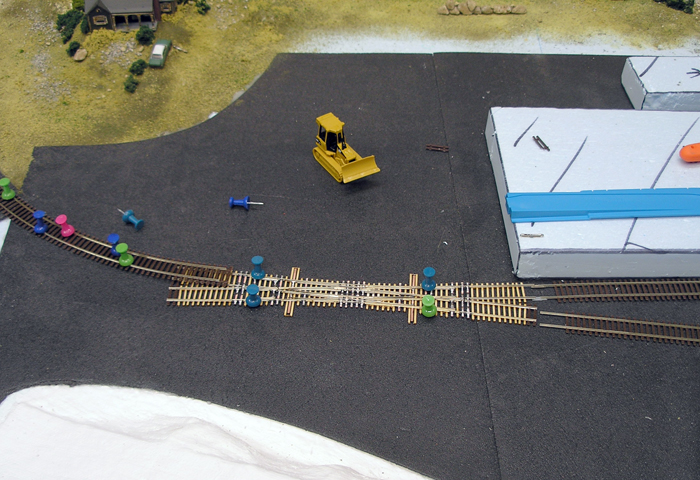
Well it was but not long after this I had to rip it out! One of the point rails came undone from the throwbar and it couldn't be repaired in place. So I decided to build the slip again because I wasn't all that happy with this one anyway. I made some changes to the build and it worked out a lot better. I'll show photos of the repair later.
Basically many of the steps in the slip building instructions work just fine but there are a few steps that simply cannot be used in the sequence suggested and some that cannot be used at all in N-Scale. The slipswitch I had on the layout was the second one I built but the only one completed at the time because I got to the point of cutting the points rails free on the first one and realised it was never going to be good enough to use. I went back and took a good hard look at the instructions and what I had been doing and worked out a better way. The second attempt proved me right but even then I knew I could do it better if I wanted to. I've had a back and forth with Tim Warris at Fast Tracks about this and he said they didn't release the slipswitch in N at first because they felt many of the measurements wouldn't transfer down properly but they had so many requests that they finally did release it. Well he was right, there are a lot of measurements and steps that do not work for N. Just look at this:
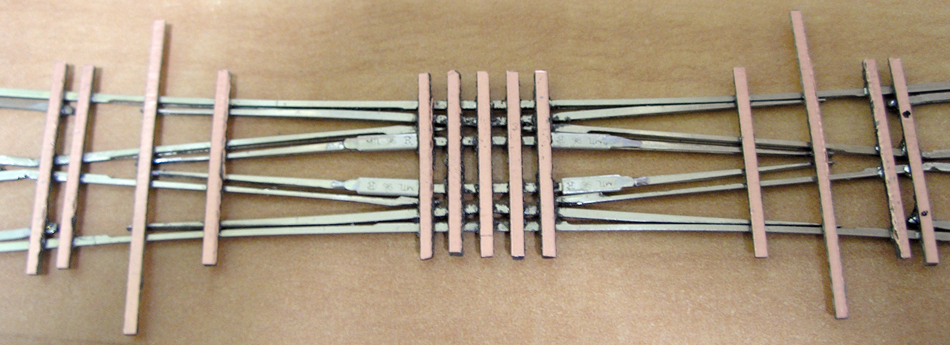
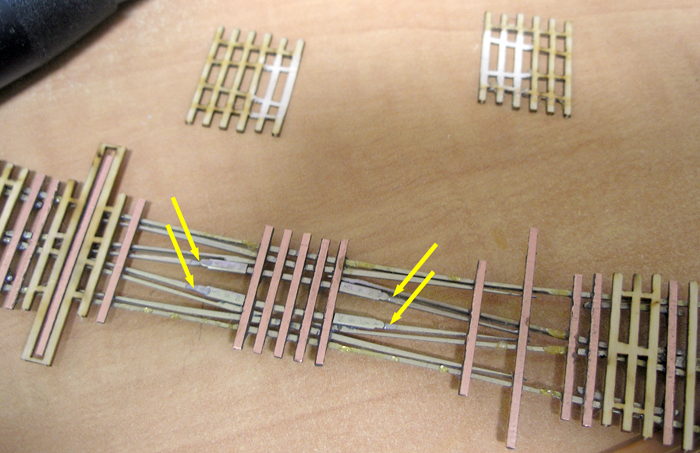
Just look at the lack of space around the rail joiners used for the points rails. Now in N you could certainly build the points rails solid as I did with the outer rails but then the switch would be really stiff and put a lot of strain on the solder joints - which is what happened eventually. Also I had to sand back the wood ties for clearance on those rail joiners so the ties would stick to the rails. Those are just two of the problems you run into in N that apparently don't occur in larger scales.
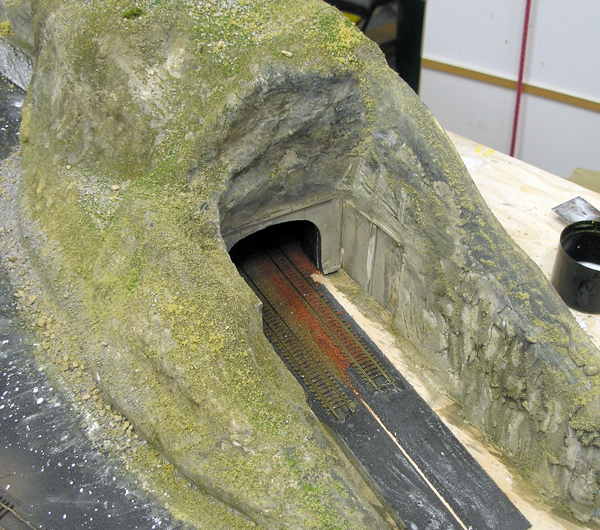
Time to finally attach the tunnel to the layout and get cracking on the rest of the scenery for this "module"!
Stay tuned for more.
-
5th March 2011, 01:45 AM #22
Senior Member
- Join Date
- Dec 2008
- Location
- Oshawa, Ont., Canada (I wish I was in Brissie)
- Posts
- 331
I thought I'd better get some work done around the tunnel before we headed off to the Canada Day fireworks and then to the in-laws for an extended long weekend back in July! Seems like eons ago now.
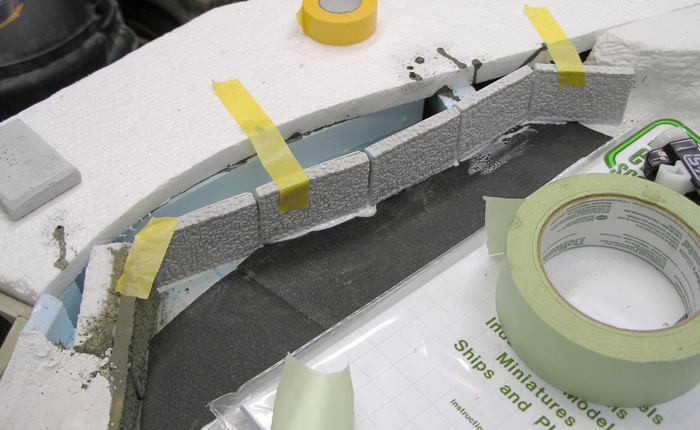
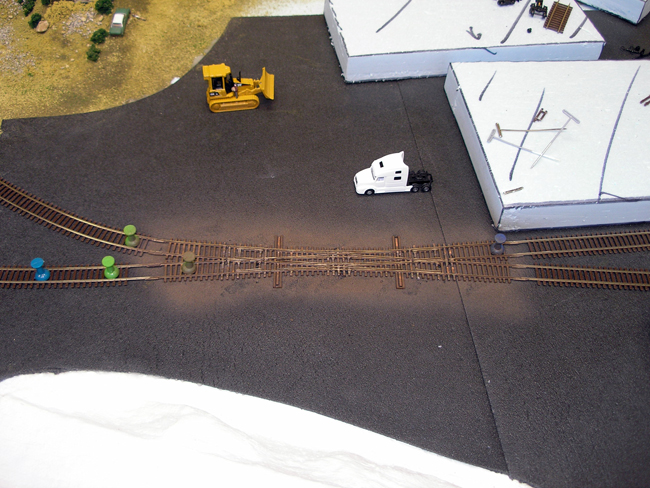
First some retaining walls needed to go in to define the edge of what will be the paved area of the industrial park.
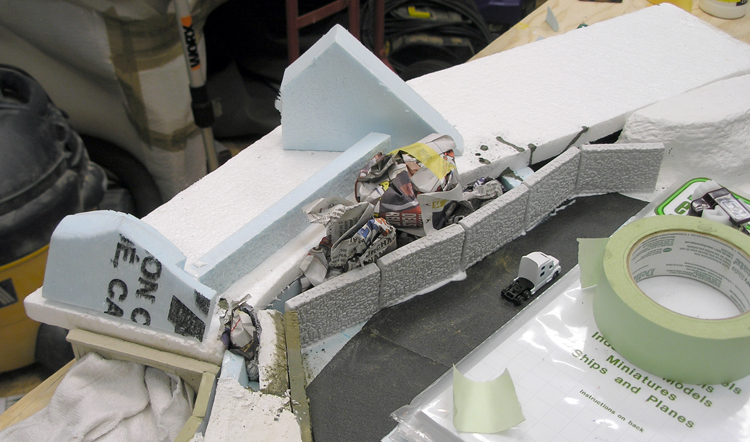
Next some foam scraps get glued in place and the first newspaper "balls" are thrown about. I had to wait for the glue to set up before I could do some foam carving and drape any plaster cloth over this lot but I stuffed a rag into the tunnel entrance to protect the tracks in anticipation.
The Volvo prime mover gives an idea of scale here. The roadway inside the industrial park will be one-way so I'll eventually paint some arrows on the "concrete" and erect some road signs.
-
5th March 2011, 01:49 AM #23
Senior Member
- Join Date
- Dec 2008
- Location
- Oshawa, Ont., Canada (I wish I was in Brissie)
- Posts
- 331
I know I should have been plastering - or is it hydrocaling? whatever - but a parcel arrived while we were off for the Canada Day long weekend.
A couple of minutes after opening the parcel I was this far along on the first of my c55 #8 22/16 curved turnouts. I now prefer to cut the isolation gaps in the pcb ties using a piece of jewellers saw blade that I hold down with my finger tip. Works great and quick too.

After around 30 minutes the turnout was complete waiting for me to glue the QuickSticks on. They're wood so there is some woodworking going on here!
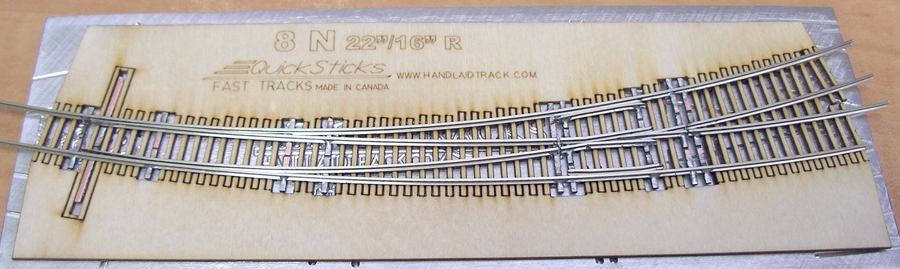
I waited a while till the contact adhesive was cured and then broke off the outside areas of the QuickSticks. I've wired it and painted it and installed it on the layout feeding into the industrial park and the slipswitch so you'll see that soon.
This was WAY easier than the slip. So easy I couldn't help wondering if I was missing something. It runs perfectly and no, I missed nothing. I actually added something that the instructions say you don't need but I put in the pcb tie if this were going to be a hinged point just for some extra strength.
-
5th March 2011, 01:54 AM #24
Senior Member
- Join Date
- Dec 2008
- Location
- Oshawa, Ont., Canada (I wish I was in Brissie)
- Posts
- 331
Finished the second of my curved turnouts. Had to grab a piece of rail from some ME code 55 flex I had laying around because 4 x 18" pieces wasn't enough for me even though there was no wastage! That's a little strange because according to the FT web site they ship 10 pieces with the kits and they're supposed to make 5 turnouts with that lot. Anyway......
I got into the tunnel and mountain again the next morning.
I start with the plaster cloth and drape that over the newspaper and foam scraps using my finger tips to blend it in along the edges till it's seated. Once it have that done I break out the brush dipped in water to smooth out the plaster as much as I can and to get right into the overlaps and blend those.
After about 10 minutes work this appeared. I waited an hour or so then mixed up some hydrocal and poured rock moulds to attach to the area above the tunnel portal at this end. No way I'd leave it with all those flat surfaces! The balance of the hydrocal was brushed onto the cloth to fill any remaining holes and to add some material to carve.
Speaking of carving the foam putty also came out to play so more of my plaster knife rock walls appeared.
I have to add the fascia board so I can lay the rest of the plaster cloth right up to the edge of the layout so that's on the to-do list for later. More woodworking. I love it.
Oh and I got the first curved turnout in place but not permanently attached as yet in this shot. Had to work on the transition from the code 55 branch track to the code 40 spur. On the main line the first of my 3-Way turnouts was the next piece in the puzzle and it was a little more of a challenge than the curved switches were. Fun, fun, fun!
-
7th March 2011, 02:35 PM #25
Senior Member
- Join Date
- Dec 2008
- Location
- Oshawa, Ont., Canada (I wish I was in Brissie)
- Posts
- 331
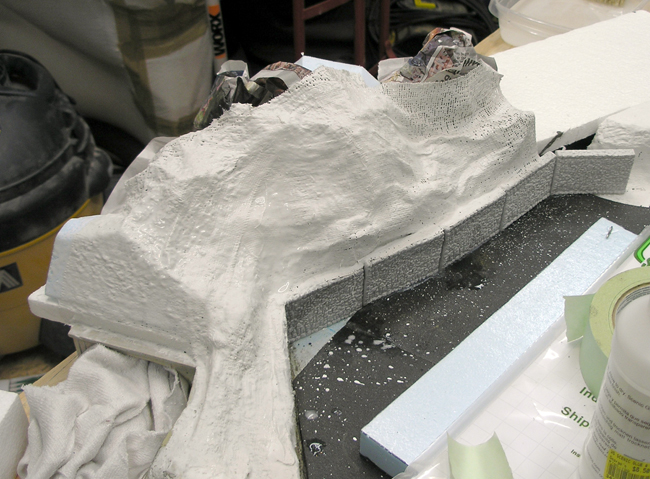
First things first. I'm not going to be able to mount the fascia until I have the module up on the shelf. So that presents a problem of where does the scenery end? What I decided to do was build a wall of foam scraps to attach the plaster cloth to for now and later, when the module is mounted on the shelf's framework I can mount the fascia and trim it to match the existing line of the terrain. I'll leave the last 1" or so of the plaster bare so I can drape some strips of plaster cloth along the top of the fascia and the existing plaster to match everything up like it was all done at once. Covered with the usual ground covers and such it'll all blend in perfectly....... that's the plan anyway!
Here's the plaster laid up to the edge of the foam and blended into the work I did earlier that day.
I had a bunch of retaining wall pieces to place along the outside of the tracks exiting the tunnel and then the rock wall had to rise up and blend into the foam/fascia. The small piece of plaster cloth I have filling the void in this photo is just to provide some stability for the foam walls.
There's still lots of small holes - and some big ones - that need to be filled at this point as well as general smoothing out of some cloth edges and foam edges but that was fixed when I brushed on the hydrocal. That area above the tunnel portal does look a little better but of course there's now a bunch of rock placed there and blended in.
I'd never used this technique before I found it quick and relatively painless. I think the outcome is okay. I wanted the landscape to be high enough to justify the tunnel but not so much that everything else was out of proportion. I also wanted it high in front - that is the front edge of the layout the foam false fascia is built on - so that as you approached the layout you'd see the mountain area and then as your perspective changed you'd start to see the trackage at the rear of the layout and finally the industrial park and double track cutting rising up as it curves around the end of the layout.
-
7th March 2011, 02:37 PM #26
Senior Member
- Join Date
- Dec 2008
- Location
- Oshawa, Ont., Canada (I wish I was in Brissie)
- Posts
- 331
Some more of the work done last year.
Heret I got the retaining walls in place as well as added to the false fascia support for the cutting walls and surrounding hills.
It filled in nicely.
Once the hydrocal was brushed on I began applying the foam putty to the cutting walls to give them the texture they needed. I can fill any silly looking overhangs or holes that way as well.
This was about as far as I got that day until the hydrocal rocks were cast and dry enough to smooth and shape.
-
7th March 2011, 02:40 PM #27
Senior Member
- Join Date
- Dec 2008
- Location
- Oshawa, Ont., Canada (I wish I was in Brissie)
- Posts
- 331
I'm using two styles of retaining wall - one for the tunnel portals and along the sides of tracks and a random stone style that I'm using for the industrial park walls. The ones alongside the tracks look like WS but they were not as expensive.
I wacked a bit of colour on there for a look see. It makes it easier to find faults. I found a few so I went over the places in question with some hydrocal brushed on.
At this point I really get into applying the cast rocks and foam putty with the majority of the faults sealed up and the plaster cloth dry enough to get after.
Foam putty does not like water so I had to leave applying it till the next morning. I love that stuff. Really easy to apply with a putty knife and easy to carve with the same putty knife or anything else in reach! Cleans up in soap and water and is light as a feather.
-
7th March 2011, 02:42 PM #28
Senior Member
- Join Date
- Dec 2008
- Location
- Oshawa, Ont., Canada (I wish I was in Brissie)
- Posts
- 331
Slowly but surely.......
I got a lot of the "carving" and colouring done. It's a mix of WS concrete, slate grey, raw umber, sienna, black and earth. I slop it on and work it around mixing the colours as I go till I'm happy. If I need to lighten things up then more concrete goes on and if I need to bring up mid-tones then I spray or slop on slate grey. The black I use sparingly but it does wonders for bringing out the peaks and cracks.
Once that was kind of dry I brushed on WS scenic cement and let it run where it may. Then it was a dusting of 6 different ground cover shades in varying thicknesses and textures. It's all very random just like in nature. If it looks too organised then it's wrong IMHO.
If this looks a little strange it's because after I added the mixed talus and some clumps of foliage I always wet everything down with more scenic cement to tie it all together. Once all of this dried I began adding trees and larger rocks, etc...
-
7th March 2011, 02:46 PM #29
Senior Member
- Join Date
- Dec 2008
- Location
- Oshawa, Ont., Canada (I wish I was in Brissie)
- Posts
- 331
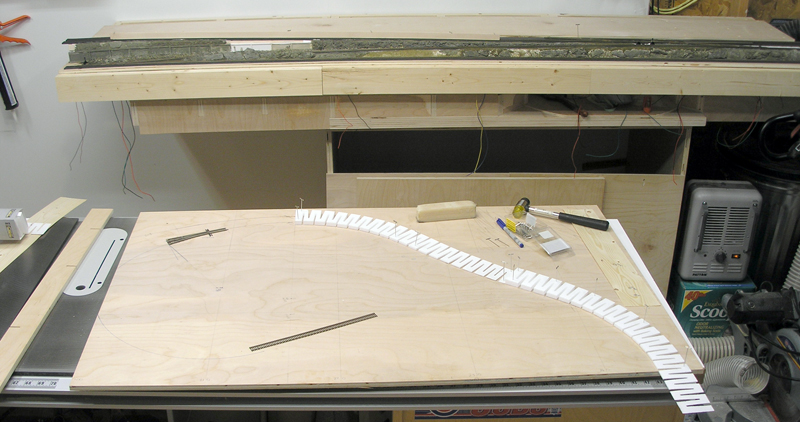
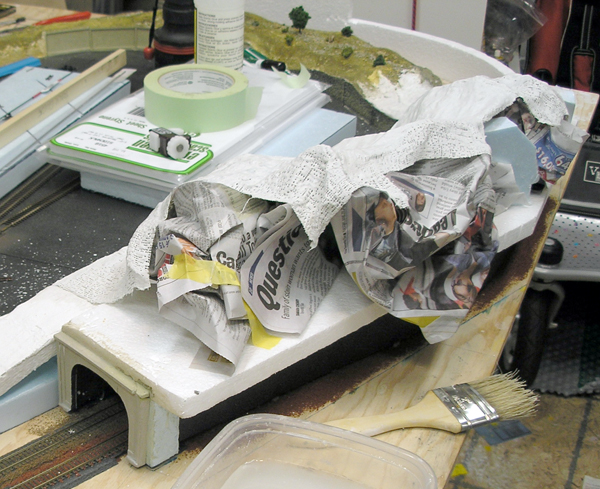
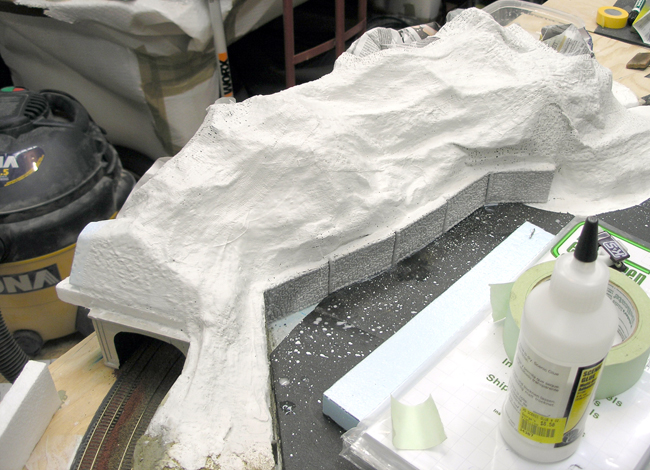
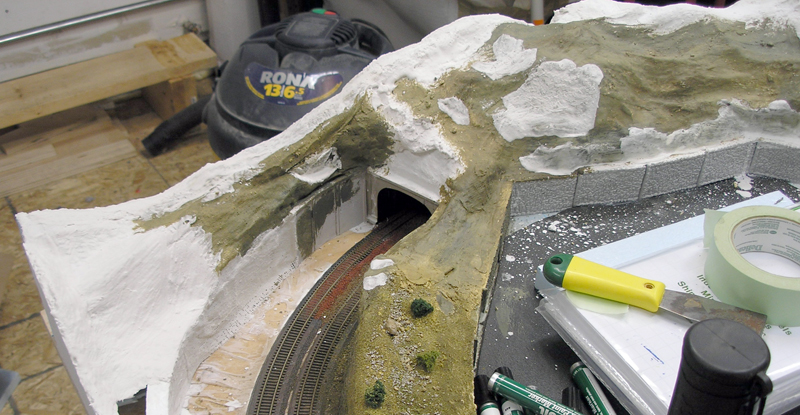
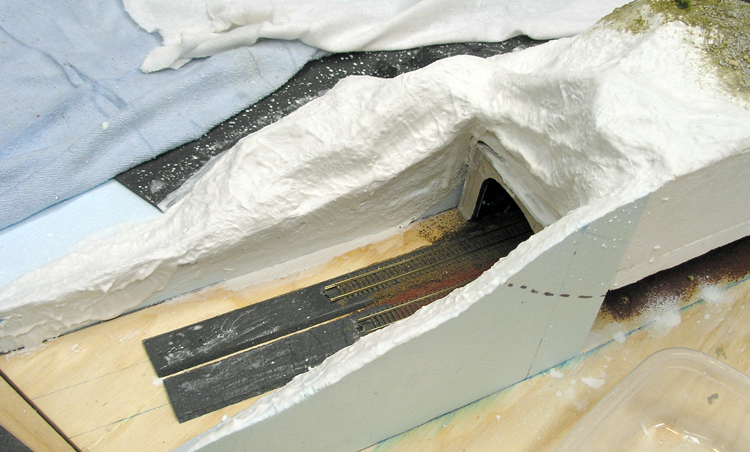
At this point I thought seeing as I was going to finish the other end of the tunnel that I should lay out how I do it step by step just in case some poor, misguided soul should ever want to copy what I do. This is not for the feint of heart by the way.
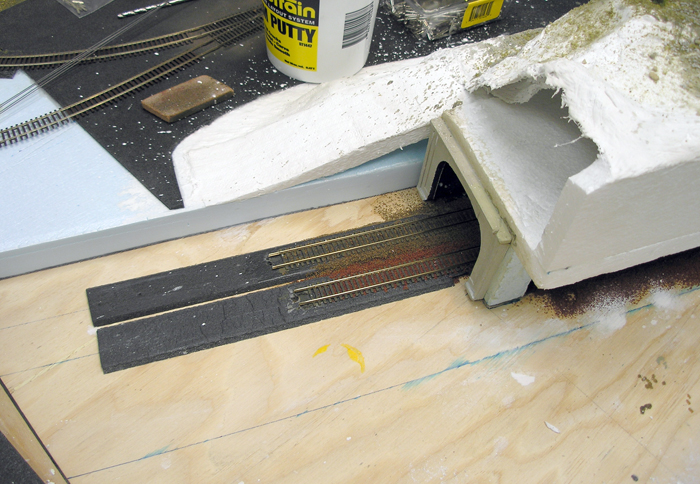
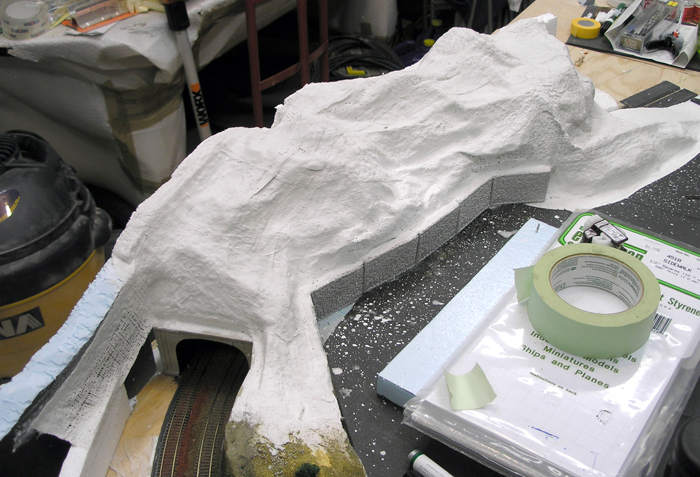
So here's where I left the mountain and the tunnel. I was originally going to have the service road for the industrial park come down from the mountain and turn back on itself but in the end it looked wrong so that road will be consumed by plaster!
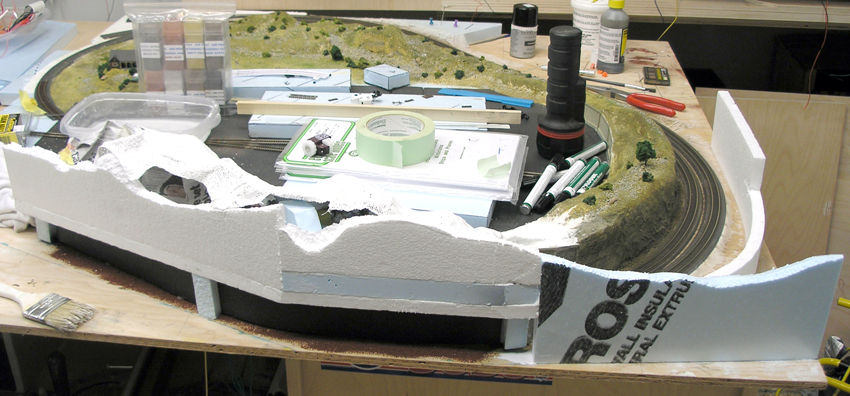
The bluish line you see on the plywood is the front edge of the layout. I'll be cutting that with a reciprocating saw and then sanding it smooth and straight with a belt sander. Of course if I hadn't procrastinated for the last few weeks over doing it I could have simply used a circular saw but I was lazy and it didn't get done!
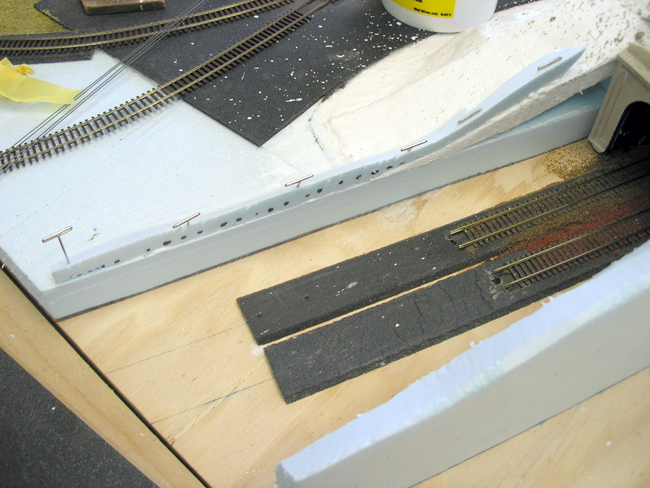
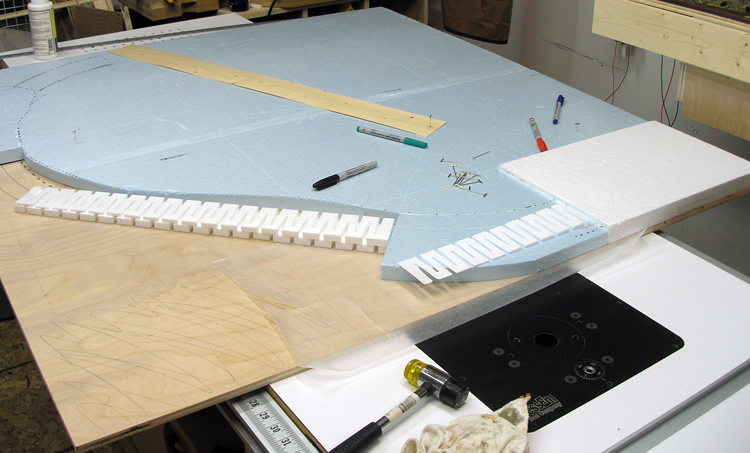
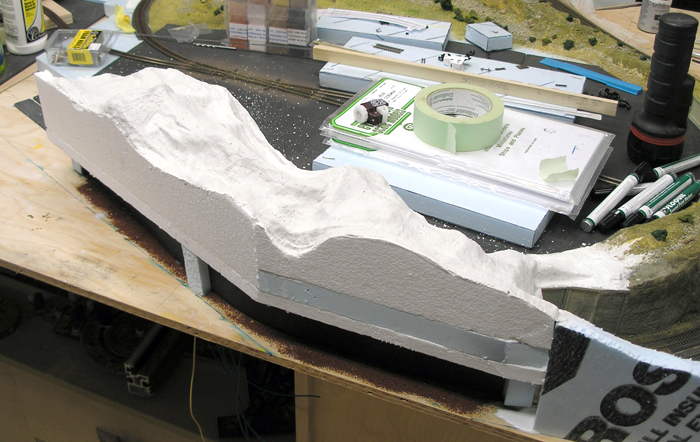
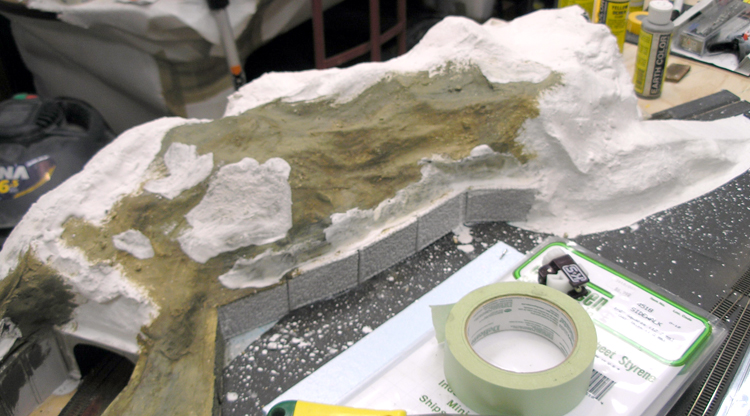
Cut and glued in place a largish piece of scrap foam that mates up to the white foam to form the false fascia. Another piece of scrap foam that I'd cut from the top of something else was glued to the inside wall of the cutting so it's not as sharp a rise from the flat "land".
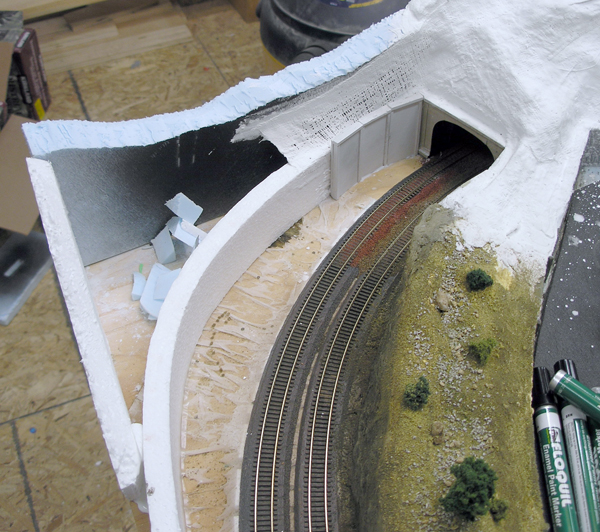
The WS scenic glue sets up in about 15 minutes so I was able to start applying plaster cloth pretty quickly.
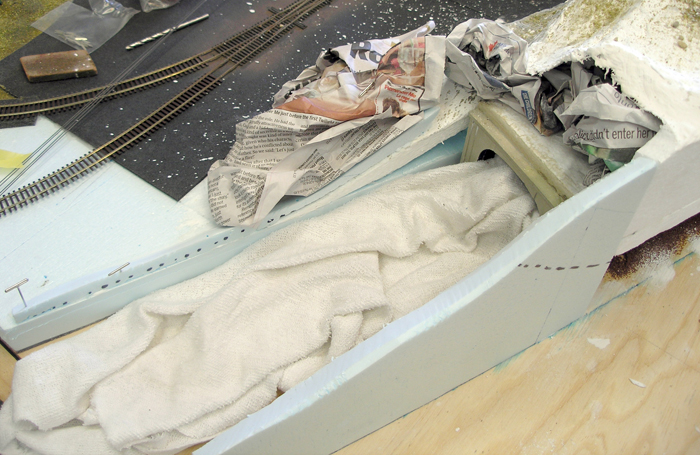
First a little crushed up newspaper for support. Some people use cardboard strips or balls of paper or foam carved to a rough shape or even mesh screen draped over forms. I've done all of those in th past but now I just rush at things and it seems to work. I wouldn't go leaning on any of the results but it'll do the job okay.
I covered the tracks with some rags and lay the plaster cloth where it felt right. Smoothed it out at the overlaps and edges with my finger tips and a brush dipped in water. Lots of holes of course but they'll be gone soon enough.
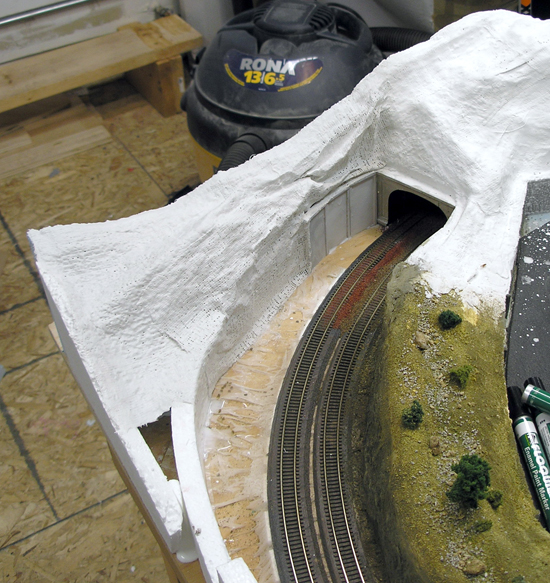
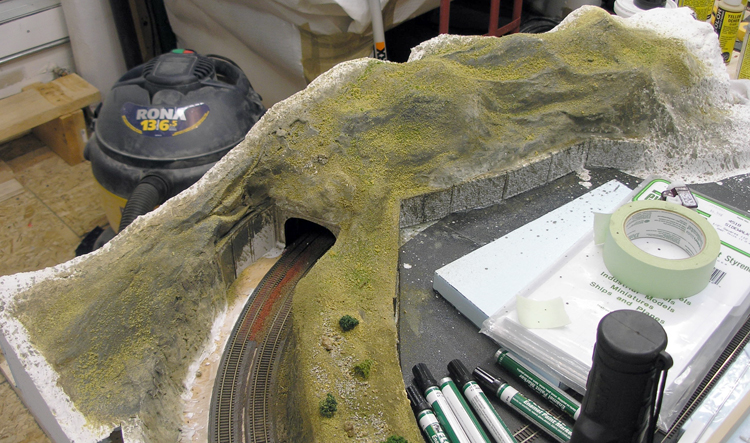
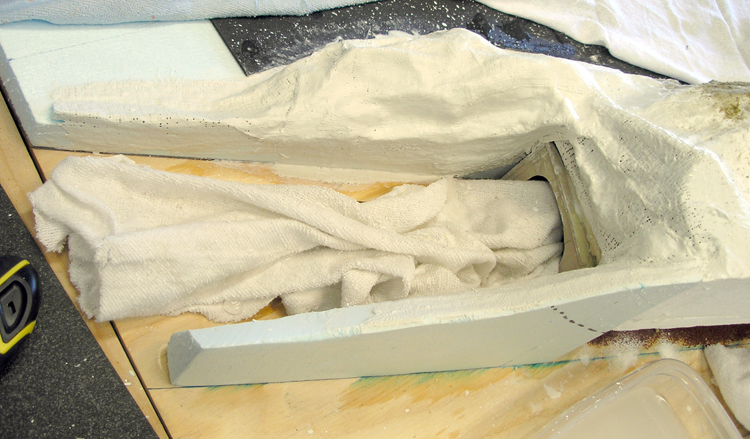
I tipped out most of the water I had in the tray for the plaster cloth and mixed in some hydrocal to a very soupy consistency. Took my brush and started applying the hydrocal wherever I saw holes or the cloth weave. As the hydrocal began to harden it thickened enough to begin stippling it to get rid of the lines left by brushing. I also used this method to apply more of the now margarine consistency hydrocal in places where cloth seams and holes still appeared.
Then I waited for the hydrocal/plaster to dry so I could glue the retaining walls in place. That was followed by foam putty for the cutting walls and above the tunnel portal. Once that dried on went the ground covers, talus and foliage. Photos of that coming up soon.
-
7th March 2011, 02:50 PM #30
Senior Member
- Join Date
- Dec 2008
- Location
- Oshawa, Ont., Canada (I wish I was in Brissie)
- Posts
- 331

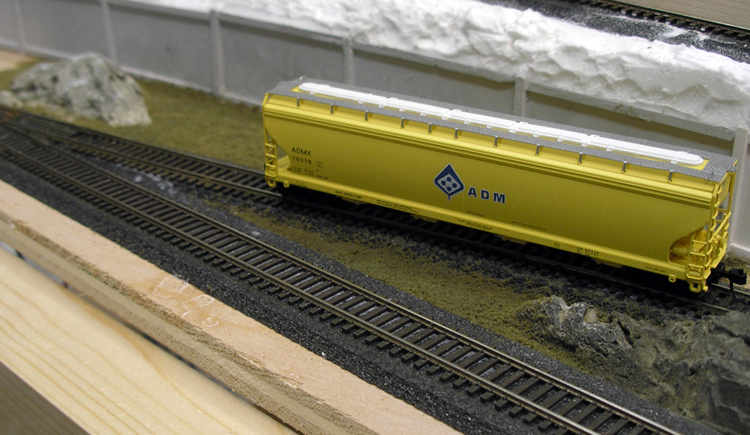
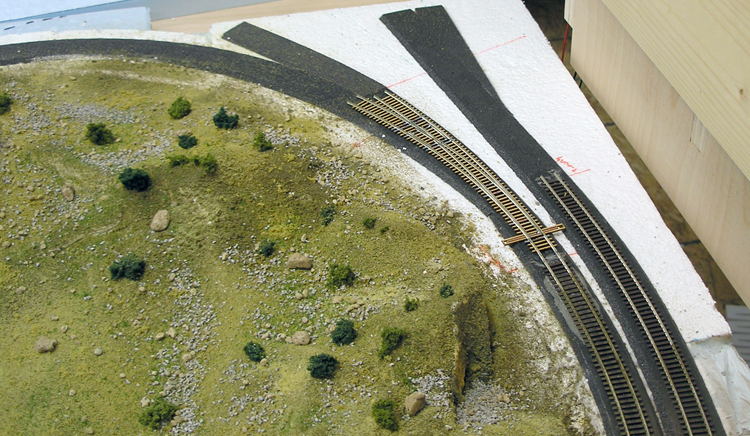
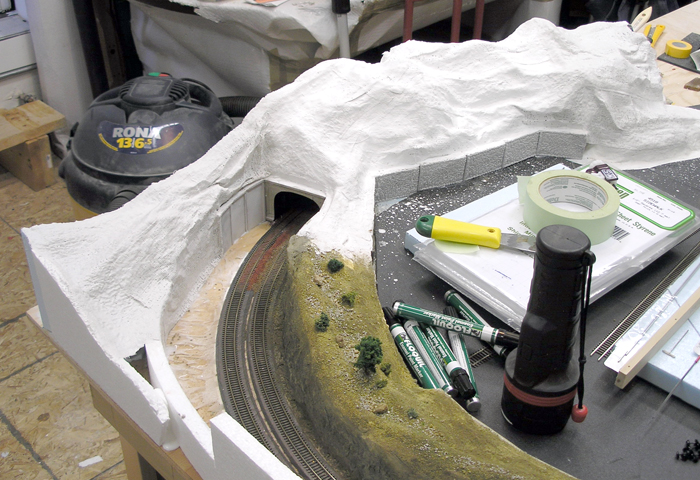
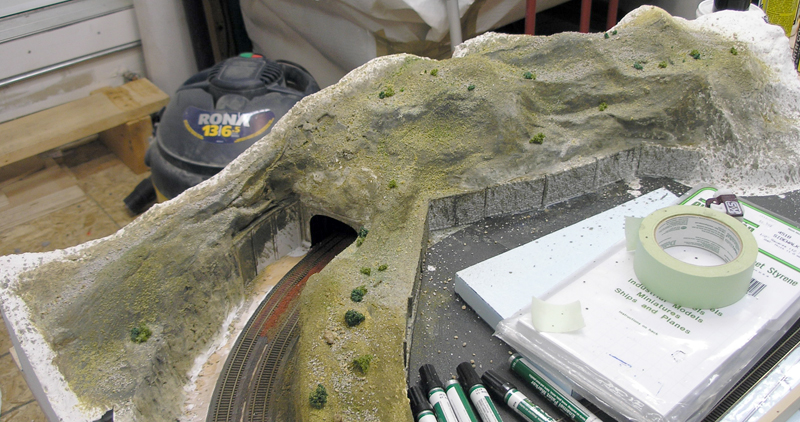
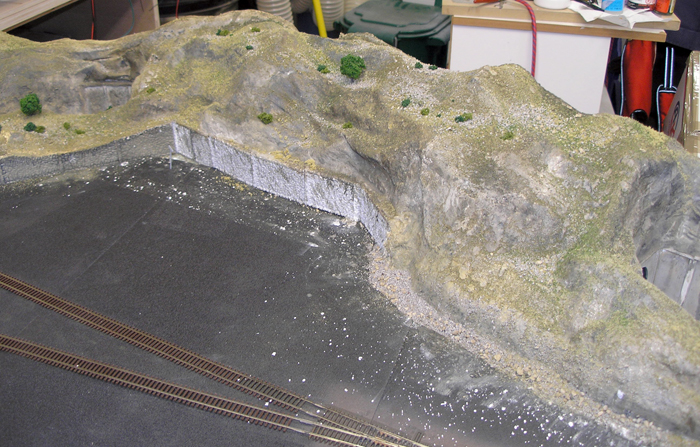
Retaining walls are in! Let that lot dry and the colours and ground covers went in.
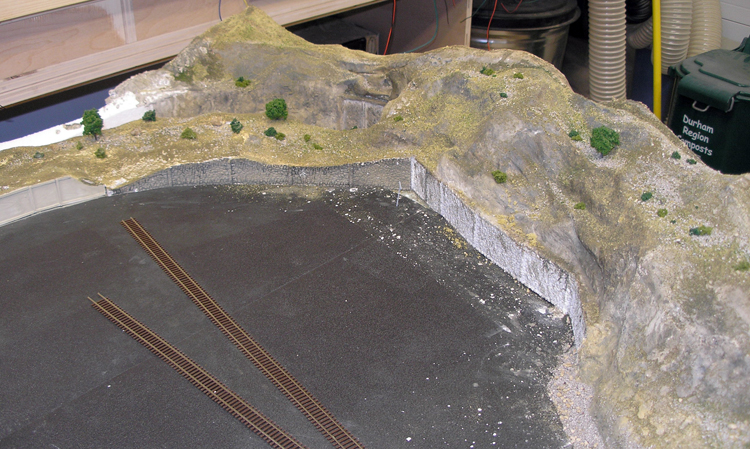
In these photos I still have to apply some foliage clumps and think about more of and diversity of trees as well as colouring the retaining wall but here is the tunnel/mountain range.
I think it all works pretty well. It looks a lot different now with the concrete driveways/car park of the industrial park in place of course.
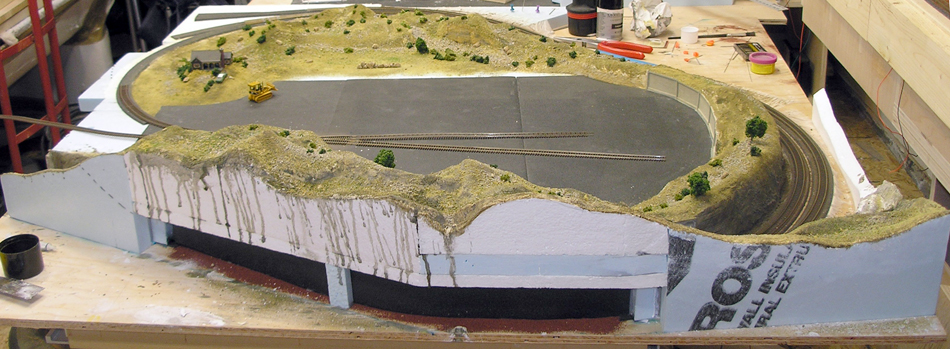
This is looking from the front of the layout. This "module" is 4'x4'.
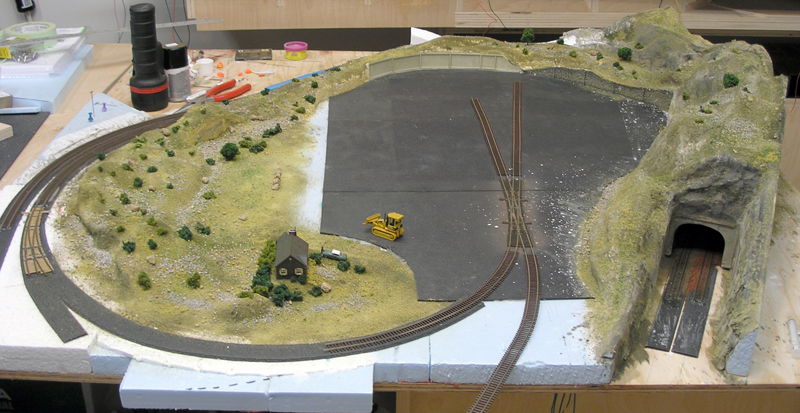
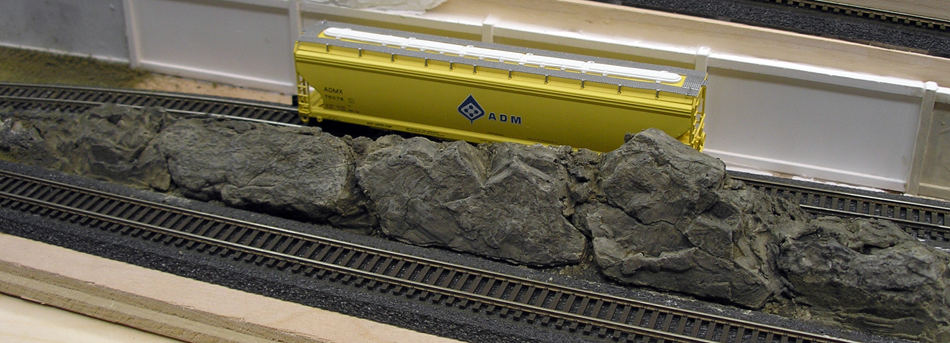
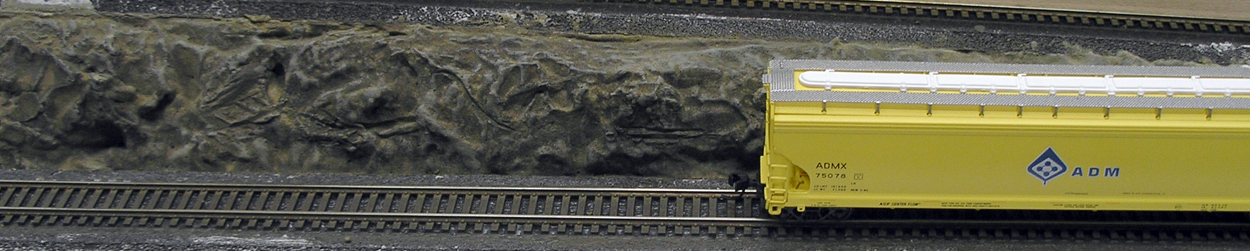
Looking from the left end of the shelf.

The retaining walls, tunnel portal and rock walls came out okay.

 Reply With Quote

Similar Threads
-
Great Southern Failure
By steven in forum NOTHING AT ALL TO DO WITH WOODWORKReplies: 15Last Post: 22nd May 2009, 12:50 AM -
Southern Gentleman
By Barry Hicks in forum WOODIES JOKESReplies: 1Last Post: 29th June 2008, 03:07 PM -
Southern Myrtle Bed
By BobR in forum WOODWORK PICSReplies: 16Last Post: 13th May 2008, 12:08 AM -
Need sharpening help - Southern Brisbane
By jisk in forum SHARPENINGReplies: 42Last Post: 14th August 2007, 06:08 PM
