

 Thanks:
  Likes:
  Needs Pictures: 0
 Picture(s) thanks:
Results 31 to 42 of 42
-
9th February 2016, 03:08 AM #31
 Be inspired. Be creative. Be bold.


- Join Date
- Apr 2001
- Location
- Perth
- Posts
- 10,827

Ian, I am most pleased to see that you have raised your boards above the height of the chop. I have been banging on for years that one will simply cut up a nice chop (with the marking knife) if this is not done. I was beginning to think that I was just being strange ..

Incidentally, I do not hold down the tail board with a clamp. The rest I use has sandpaper on it, and this is fantastic non-slip. Hand pressure is all that is needed.
The other interesting feature in your post is a "block of wood" to align the boards. I have just posted (on another forum) a little aid to make this process easier ....
.... one of the little aids I use when dovetailing ...
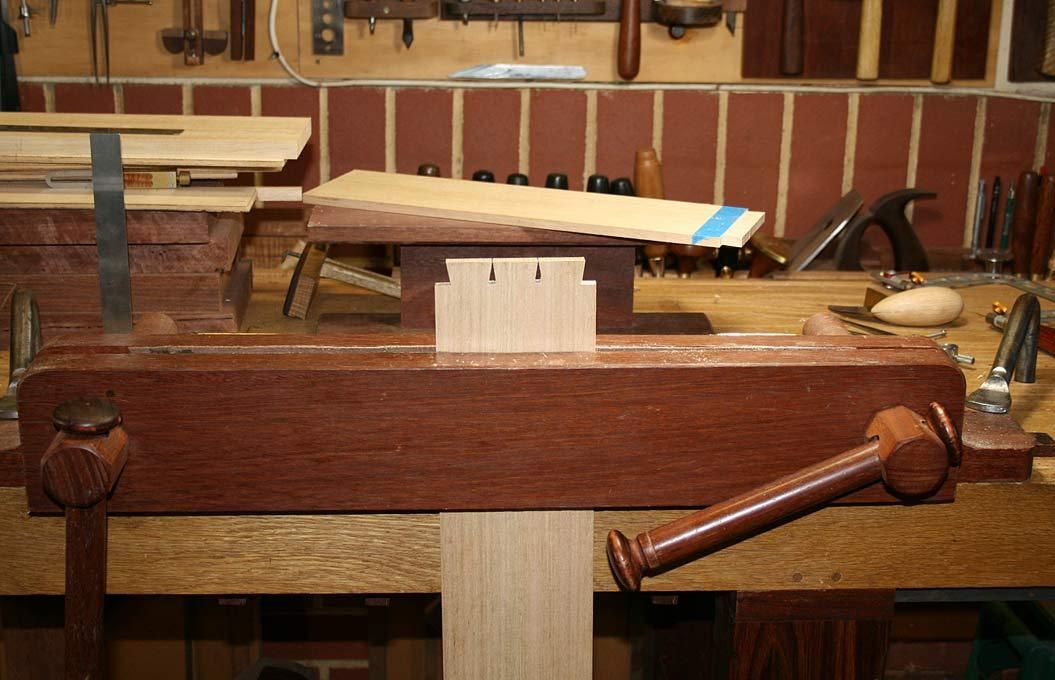
It came time to transfer the tails to the pin board ...
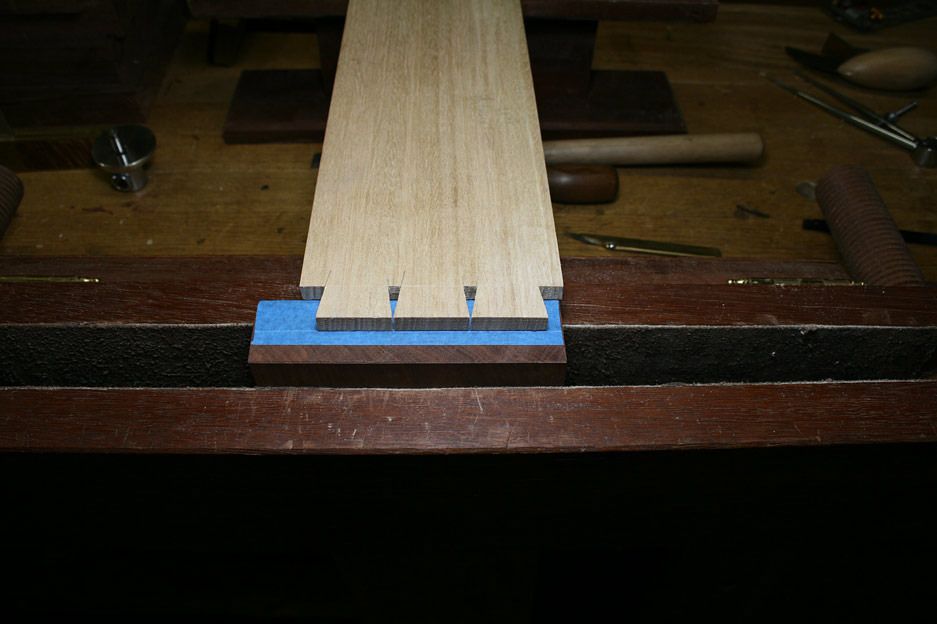
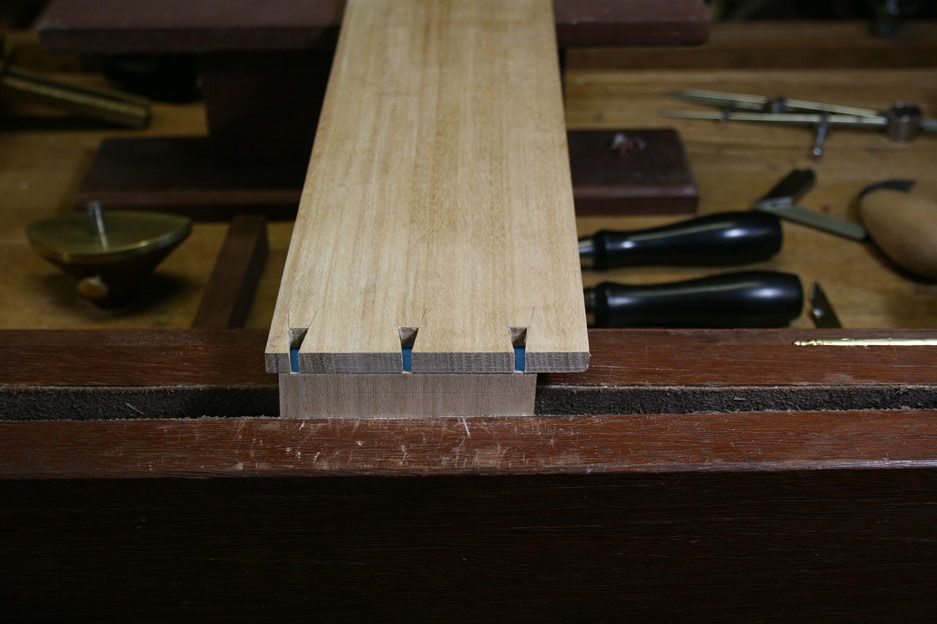
What you see here is a bow drawer front which will have half-blind sockets (the area in blue). The remainder will be sawn away (into a bow front) once the dovetails have been completed. This is done later, rather than earlier, so as to retain a reference side.
The issue here is to ensure that the drawer sides are square with the drawer front.
All one needs is a simple rectangle that is about 3/4" - 1" high. It must be square on the inside.
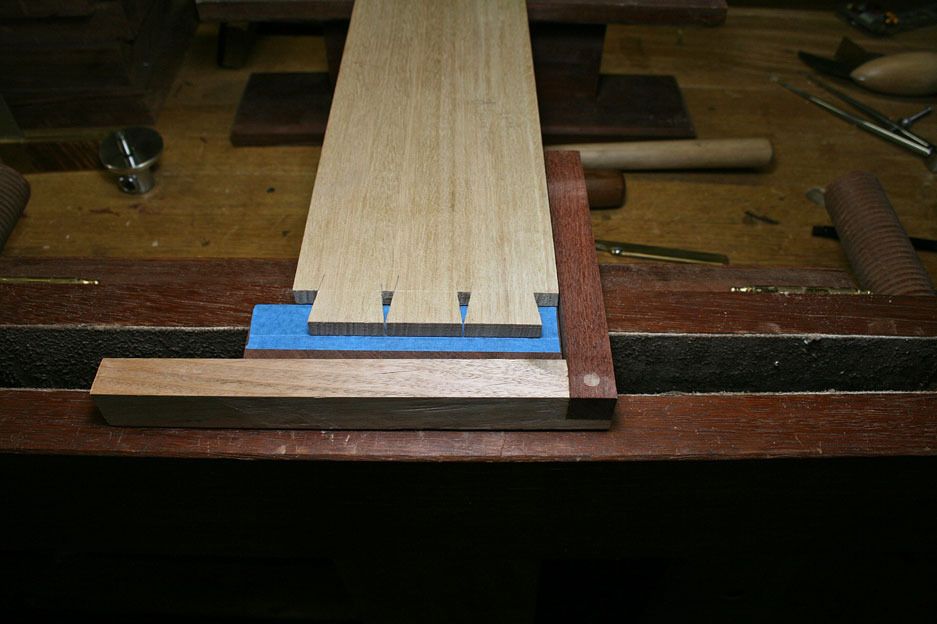
It is even easier to use when joining through dovetails.
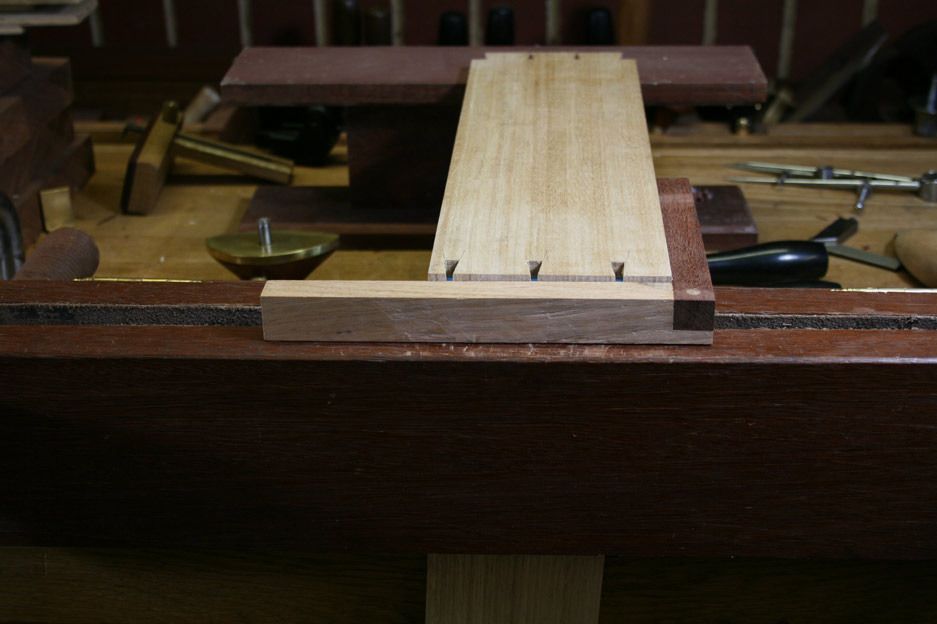
Once done, use the square as a rest for your chisels ...
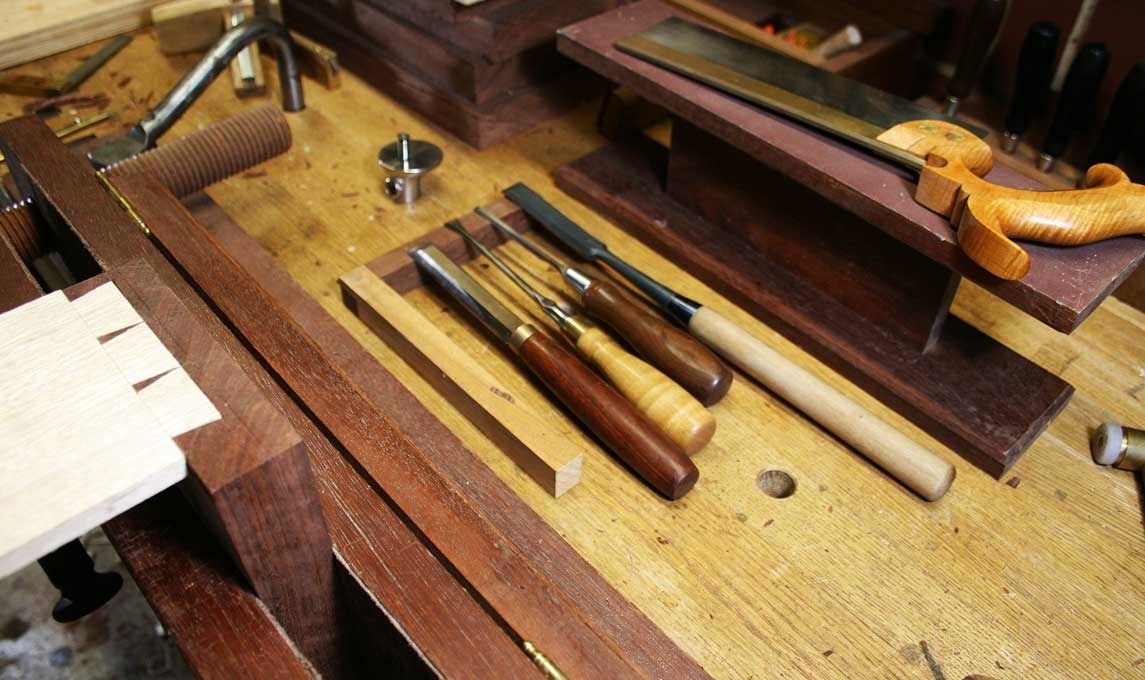
just for good measure, here is a through dovetail I did today ...
As you can see, it is not the easiest shape to align ..
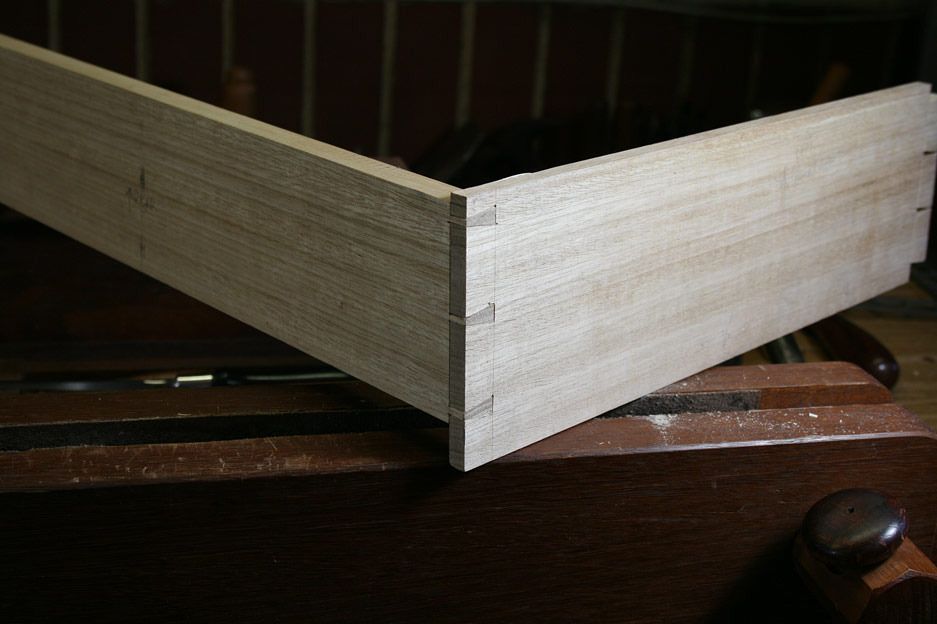
Rear of drawers ..
Regards from Perth
DerekVisit www.inthewoodshop.com for tutorials on constructing handtools, handtool reviews, and my trials and tribulations with furniture builds.
-
9th February 2016 03:08 AM # ADSGoogle Adsense Advertisement
- Join Date
- Always
- Location
- Advertising world
- Posts
- Many
-
9th February 2016, 08:46 AM #32
GOLD MEMBER
- Join Date
- Mar 2004
- Location
- Brisbane (western suburbs)
- Age
- 77
- Posts
- 12,134
Hi Derek, not sure why or when I started marking my pins this way, I've been doing it for so long I've forgotten! I suppose it just seemed a convenient way to do it, and it's now such a habit I can't imagine doing it any other way.
Yep, I can see the value of your 'fat square' in aligning the boards (though you should've dovetailed it together, not pinned it with a dowel! ). But as you show, there are instances where it won't work, such as half-laps and drawer ends. I suppose that's why I got in the habit of just using the scribe-lines or edges of the boards to align.
Here's another useful tip that occurred to me many moons ago (which will have occurred to many others, I'm sure): When making drawers, the first job I do after cutting out the sides is to run the grooves for the bottom. I can then set out the tails on the sides so that the groove is included neatly within the bottom tail, & when transferring the tails to front, I can use a slip of wood cut to fit firmly in the bottom groove as an extra alignment aid. (Of course, you could mark the tails & make the groove to bisect it, the main thing is to have the bottom grooves run before you start dovetailing). If all goes as well as it should, your sides not only match, but the bottom groove is perfectly aligned as well. Before this simple method dawned on me, I would always end up with a slight mismatch here or there, & it doesn't need much to stop the bottom sliding into the front groove nicely...
And while we're on this topic: I always make sure that I clamp the assembled drawer on the sawbench top or some other very flat surface, and leave it 'til the glue has set thoroughly. I don't think there is anything quite as disappointing, or as difficult to remedy, as a drawer that is slightly twisted, is there?
Cheers,IW
-
9th February 2016, 04:44 PM #33
Be inspired. Be creative. Be bold.
- Join Date
- Apr 2001
- Location
- Perth
- Posts
- 10,827
Yep, I can see the value of your 'fat square' in aligning the boards (though you should'vedovetailed it together, not pinned it with a dowel! ).
).
Yeah, that "fat square" was dovetailed, then I decided to trim it down ... and cut off the wrong side. Kept it as a reminder to check next time!
It's been a while since I built drawers with grooves. I tend to use slips. But I do know what you mean. There is a drawer design where the lower most dovetail is omitted. It looks unbalanced, but it does away with the difficulty of fitting in the groove.Here's another useful tip that occurred to me many moons ago (which will have occurred to many others, I'm sure): When making drawers, the first job I do after cutting out the sides is to run the grooves for the bottom. I can then set out the tails on the sides
Regards from Perth
DerekVisit www.inthewoodshop.com for tutorials on constructing handtools, handtool reviews, and my trials and tribulations with furniture builds.
-
9th February 2016, 07:38 PM #34
GOLD MEMBER
- Join Date
- Mar 2004
- Location
- Brisbane (western suburbs)
- Age
- 77
- Posts
- 12,134
Hmm, know what you mean, I have the odd 'reminder' around my shed, too! Originally Posted by derekcohen

Not fussed on slips, myself, & use them only rarely - I like a nice flat bottom, wall to wall. Slips do allow you to use satisfyingly thin sides, of course; always a bit of a tug of war between keeping drawer sides thin & having enough meat for grooves, but I try to strike a balance. Originally Posted by derekcohen
Leaving out the bottom dovetail seems like a wimp's way out to me - it's not that difficult to figure out a D/T spacing that will accommodate a drawer groove, is it? I usually use the traditional small cleats tacked to the drawer blade as stops, but I reckon that wouldn't be a good idea if there were no bottom dovetail to help hold things together when a drawer-full of stuff is slammed shut. Those of us as builds furniture tend to treat it with respect, but that can't be said for all users!
Cheers,IW
-
9th February 2016, 11:04 PM #35
GOLD MEMBER

- Join Date
- Jun 2014
- Location
- Seattle, Washington, USA
- Posts
- 1,857
Man, how did I not think of this??? This is such a good idea. I've got quite a bit of drawer building coming up soon and this will be invaluable. I've always got that nagging fear that I'm going to get ever so slightly off and the groove is going to show on the sides of the drawer. This completely eliminates that possibility. Originally Posted by IanW
Thanks, Ian. Great advice.
Cheers,
Luke
-
25th February 2016, 09:44 PM #36
Luddite Lite
- Join Date
- Jan 2009
- Location
- Brisbane
- Posts
- 800
Beautiful lil bench Ian! What a good moment to check back in on the forum. I'm thinking (probably all it will come to for the moment) about a little bench to fit over one end of my 'cat walk' deck. I was going to make a quick and dirty model, now I won't be happy with something without a nice set of wooden vices! Thanks, I think...
Matt
-
26th February 2016, 08:04 AM #37
GOLD MEMBER
- Join Date
- Mar 2004
- Location
- Brisbane (western suburbs)
- Age
- 77
- Posts
- 12,134
Well Matt, I know where there's some gear to thread the screws & tap the holes for them.... Originally Posted by Berlin
CheersIW
-
26th February 2016, 08:40 AM #38
Skwair2rownd
- Join Date
- Nov 2007
- Location
- Dundowran Beach
- Age
- 76
- Posts
- 19,922
I am beginning to have a love/hate relationship with these fora!!!
I've always loved them but now, just when I thought I had things sorted
in my mind all tis new stuphph pops up: bench bench, bench bench with legs,
bench bulls, differences in approach to Moxon build......I hate having to rethink things!!!
Maybe if I did not procrastinate so much... but then....
-
26th February 2016, 01:32 PM #39
Luddite Lite
- Join Date
- Jan 2009
- Location
- Brisbane
- Posts
- 800
Thanks Ian, as soon as I get the hyper drive for my time generator I'll be dropping by!
Actually, the bit of tulip wood (Harpulia pendula) that Bushmiller sliced up for me is nice and dry now and it looks like it could make great thread material - hard and fine and it planes cleanly... I'll order that hyper drive.
Matt
-
29th February 2016, 08:28 PM #40
Woodworking mechanic
- Join Date
- Jan 2014
- Location
- Sydney Upper North Shore
- Posts
- 4,470
IanW,
do you have a photo looking down from the top of the bench? I'm starting to think that a new small bench with Moxom would be more useful than a stand-a-lone Moxom.
Thanks
-
1st March 2016, 09:40 AM #41
GOLD MEMBER
- Join Date
- Mar 2004
- Location
- Brisbane (western suburbs)
- Age
- 77
- Posts
- 12,134
Hi Lappa, Originally Posted by Lappa
I didn't take a pic of a full plan view of the top, I'm afraid, but these two pics might give you the general idea: Top.jpg Top 2.jpg
And here's a shot of the workings of the tail vise, as it is being assembled: Tail vise.jpg
I could tip the bench over & try & get a full shot of the top if these don't convey the idea enough.
I've quickly discovered that having an extra 'permanent' bench is very convenient. I've set it up in it's niche so that the 'Moxon' side faces out, but a couple of times I've wished I could get at the 'conventional' side with front & tail vise. So the ideal situation would be having it in the middle of the shed, & I might try and rearrange things to enable that. But it's a bit like a Rubik's cube in my shed, you can't move X without moving Y to make room, which would mean Z has to go somewhere else, etc. Sound familiar?
Cheers,IW
-
1st March 2016, 05:45 PM #42
Woodworking mechanic
- Join Date
- Jan 2014
- Location
- Sydney Upper North Shore
- Posts
- 4,470
X, Y, Z is a major problem in my shed as well. I have a bench that runs 3/4 of the end wall BUT it's not really a wood working bench. I started the Moxom but realised if it was portable I'd have to store it somewhere which then added a W to the equation
Thanks for the other photos - I'll draw up the plans this weekend.
BTW, I went with your suggestion for the Moxom re welded nuts
image.jpg


 Reply With Quote

Similar Threads
-
1951 Bench Plans - Cabinet Bench and Tool Cupboard
By chrrris in forum THE WORK BENCHReplies: 2Last Post: 5th June 2014, 09:00 AM -
1942 Bench Plans - Bench and Work Table
By chrrris in forum THE WORK BENCHReplies: 3Last Post: 8th May 2014, 08:27 PM -
1943 Bench Plans - Bench Hook and Ideal Bench
By chrrris in forum THE WORK BENCHReplies: 9Last Post: 7th May 2014, 11:49 AM -
Carba tec bench jointer on Mobile work bench
By STAR in forum WOODWORK - GENERALReplies: 4Last Post: 22nd August 2011, 03:24 PM
