

 Thanks: 0
 Likes:
  Needs Pictures: 0
 Picture(s) thanks: 0
Results 1 to 15 of 18
Thread: Bench from recycled timber
-
2nd February 2015, 12:39 PM #1
 Senior Member


- Join Date
- Nov 2011
- Location
- Riverina NSW
- Posts
- 211
 Bench from recycled timber
Not quite finished yet but I've been working on this for a week and finally got to fit up all the main pieces last night. With a few splinters and a squished finger from a jigsaw I thought I'd better take a day off and throw up some pics of my progress.
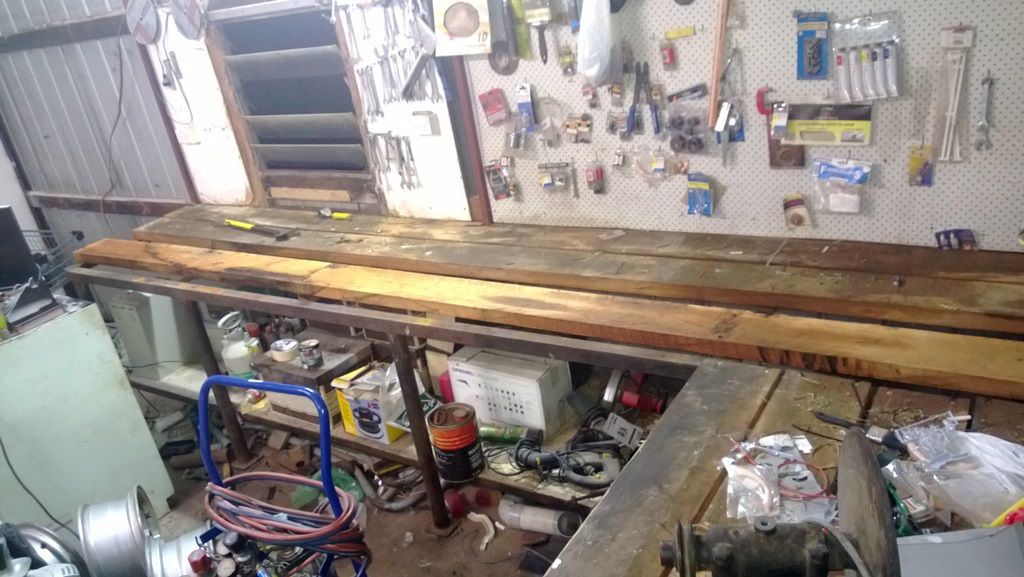
I started a shed refit nearly a couple years ago to line it with gyprock, insulate, add shelves etc. Part of the process required the removal of the old L shaped bench which had a steel tube and angle iron frame welded to the shed's frame and covered with hefty pieces of mainly Vic Ash with the longest 4 being 4m x 180mm x 50mm. The shed was built in the early 80s by the previous owner and I'd guess these Ash pieces would be over 25 yrs old. I figured I'd use these pieces to make another benchtop.
I had about eight used Redgum sleepers from maybe 10 years ago. Most crappy ones were burnt but I saved two that looked the most promising for future use. In this case I thought I'd use them on legs and stretchers. I figure the redgum would be about 20 yrs old, or more.
This has been testing for two reasons. Firstly as a newcomer I've slowly been building up hand tools for a few years, just the basics. Fascinated with tradition and history I thought I could one day do everything by hand. But I can't. How to rip and dress the bigger lumber into usable pieces? In the past I've ripped small logs and other sleepers freehand with a chainsaw so they can be further milled on my bandsaw which isn't really suitable for cutting heavy thick timber accurately. I don't have a thicknesser/planer nor a jointer and I needed to cut these bench pieces to acceptable dimensions for further work by hand. I caved in and bought a table saw, Makita 2704. It's something I thought I could do without and have held off for a few years when one would've been handy. But along with a Bosch SCS I bought a few years ago, it's become an indispensable tool.
Secondly, dealing with accuracy. Butt and flat joins with screws were all I could do previously. This bench would involve dovetails and through tenons. I thought it'd be easy enough but it's been a struggle to clear out waist from tails and paring mortises and tenons. I wont go into detail but in the end, snug fits and some freeplay has led to a workbench frame that somehow sits flat. But the ends of all the joins do look a bit gappy, not that anyone else seems to notice. But you know what it's like. I'm not a perfectionist as such but when you've done something that looks twisted, bent, misaligned etc, you know it and it's a bit of a pain, but lessons are learnt.
So bring on the pics.
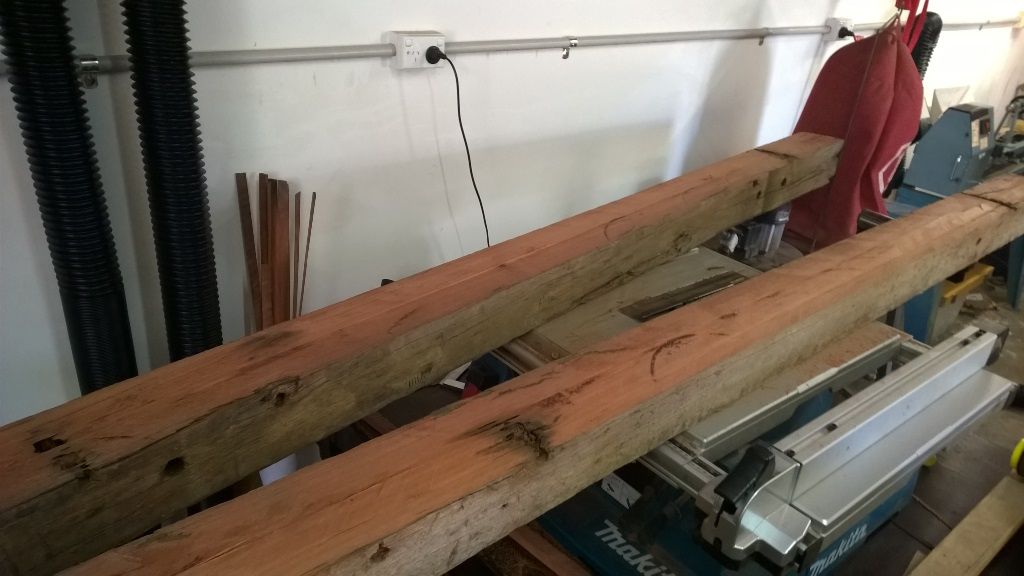
- Here's the Vic Ash being removed from the old workbench in July 2013,
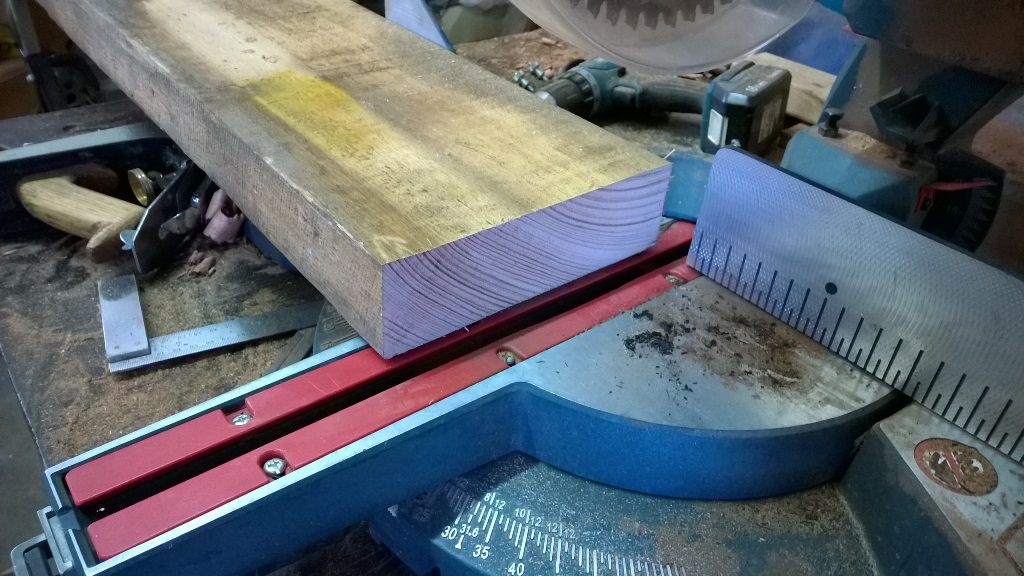
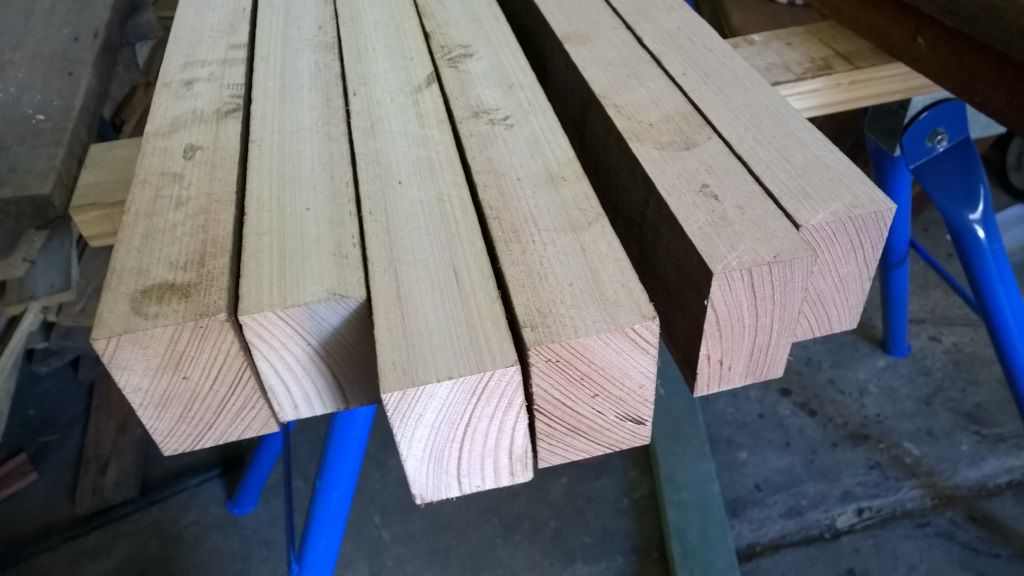
- 4m lengths cut in half, (love that grain)
- and ready for ripping.
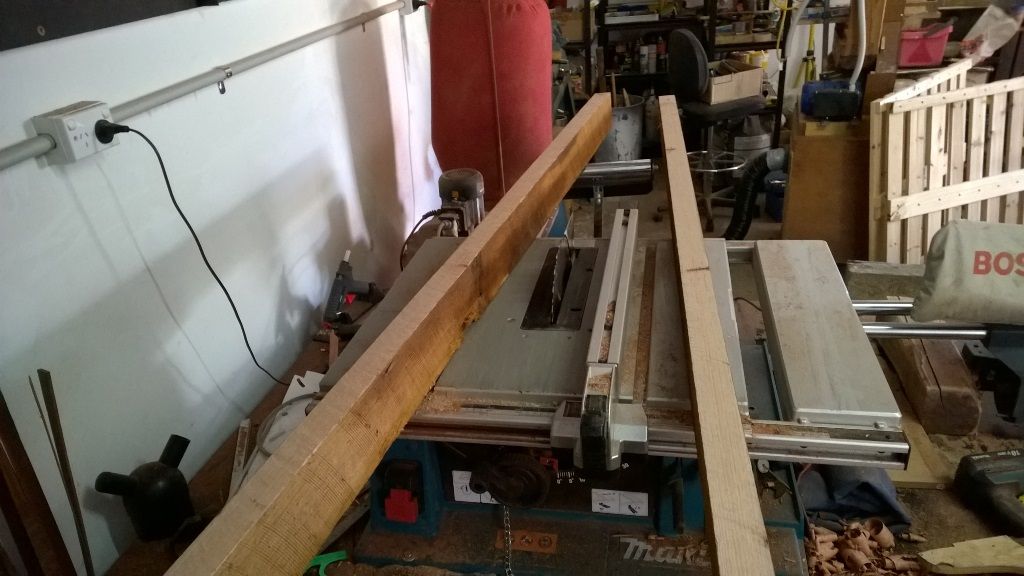
- RG sleeper for milling. This one was cut into full lengths. The second one had the ends chopped off then only the middle section was ripped. From two sleepers I got four 80x80mm posts plus side stretchers, plus a few other bits for use later. There's a lot of waste though.
- The TS has a max 90mm depth cut and the sleepers are 120mm thick I think. So most cuts required two passes with the timber being flipped to complete the rip.
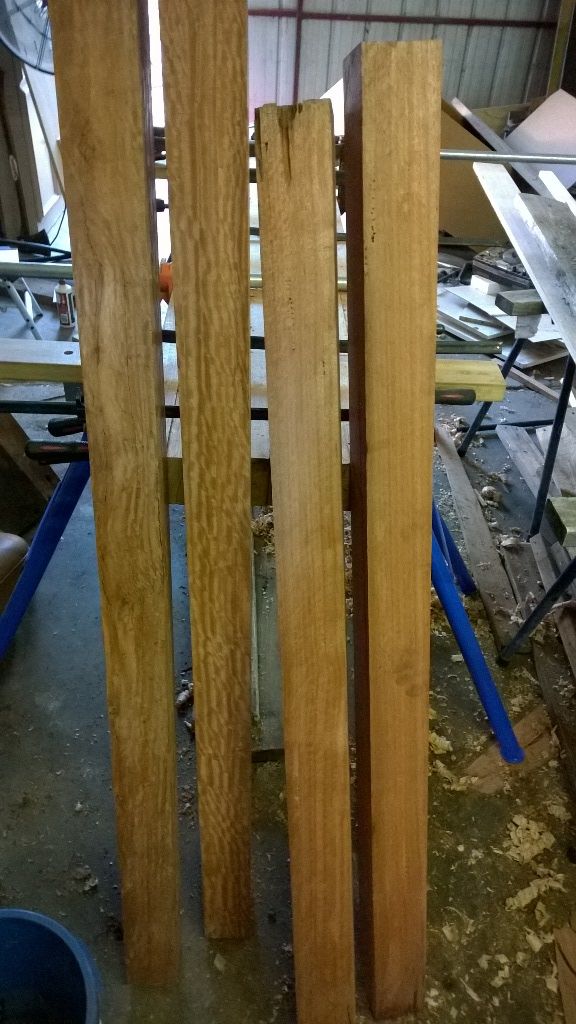
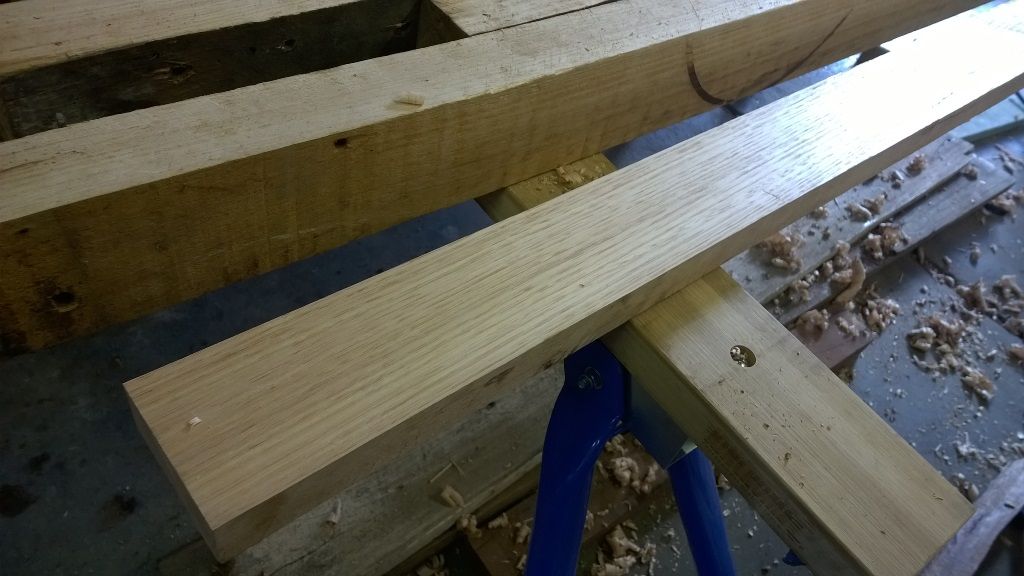
- After a number of squaring cuts there's four legs there, plus a bunch of other material got thrown through the TS, just for practice.
- A better view of the legs after some planing. I love fiddleback in RG.
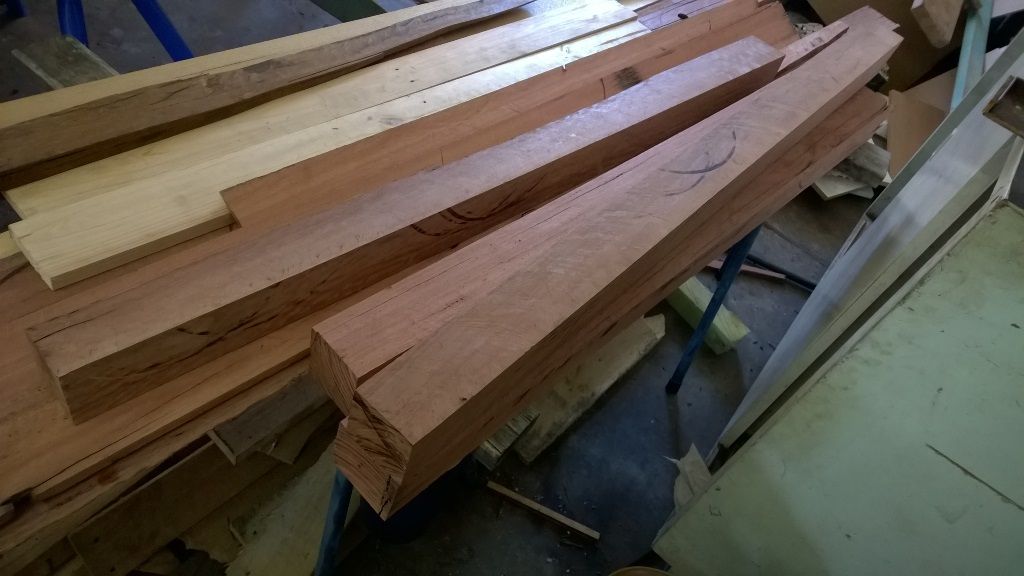
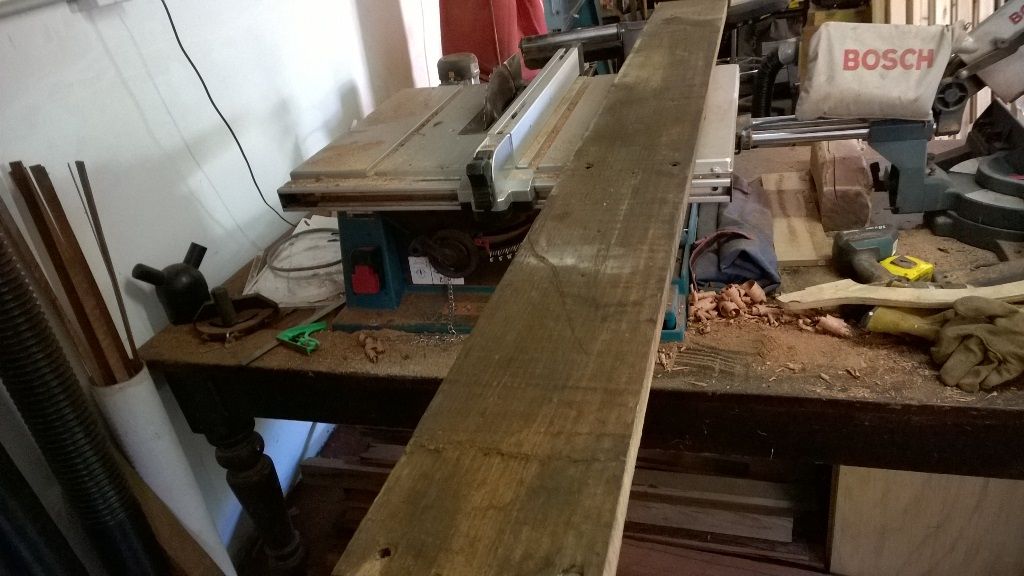
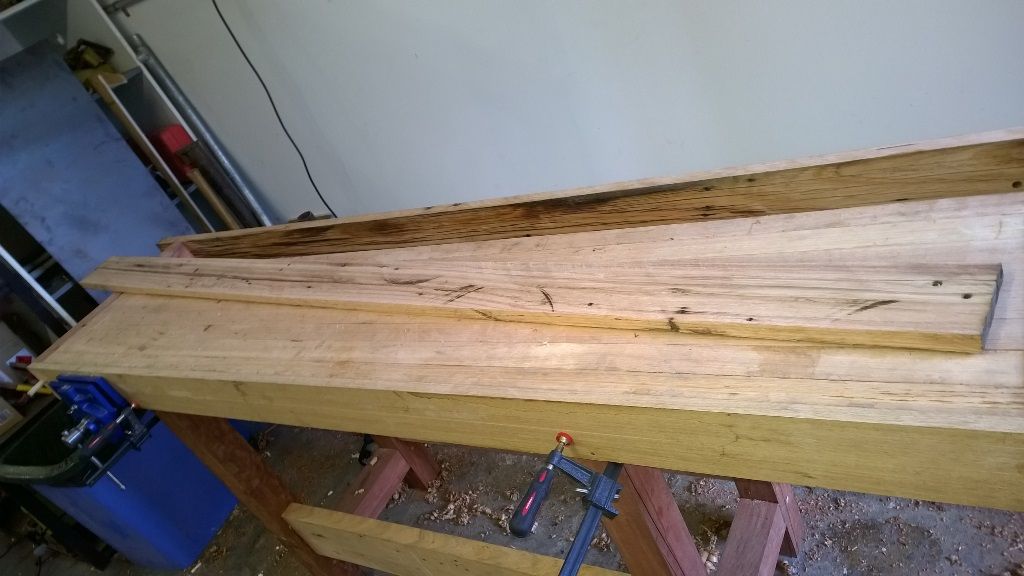
- Rough sawn vic ash for benchtop
- Laying out and ready for planing
- A lot of planing to get to this point, gut gee that's a nice timber.
-
2nd February 2015 12:39 PM # ADSGoogle Adsense Advertisement
- Join Date
- Always
- Location
- Advertising world
- Posts
- Many
-
2nd February 2015, 01:05 PM #2
Senior Member
- Join Date
- Nov 2011
- Location
- Riverina NSW
- Posts
- 211
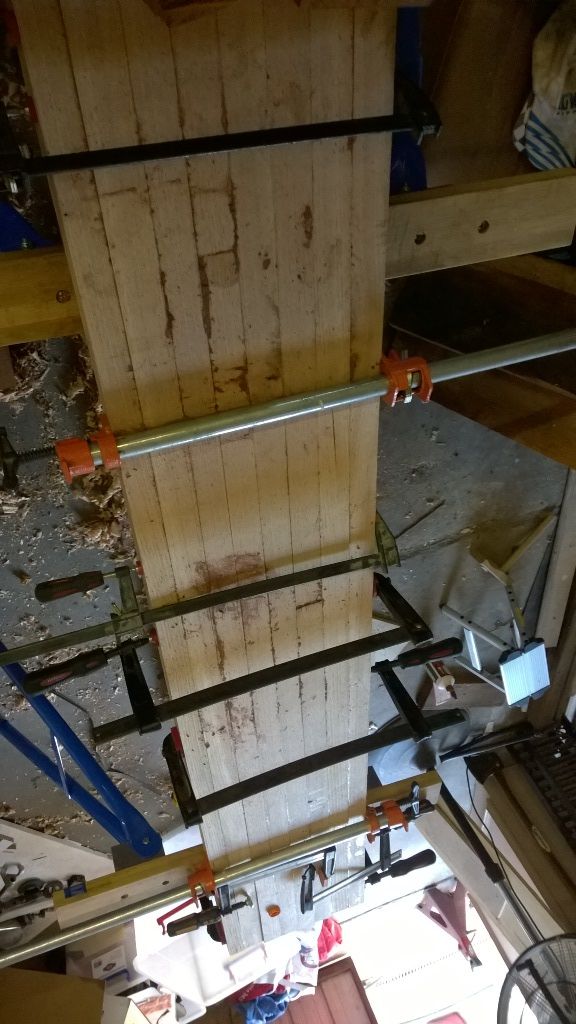
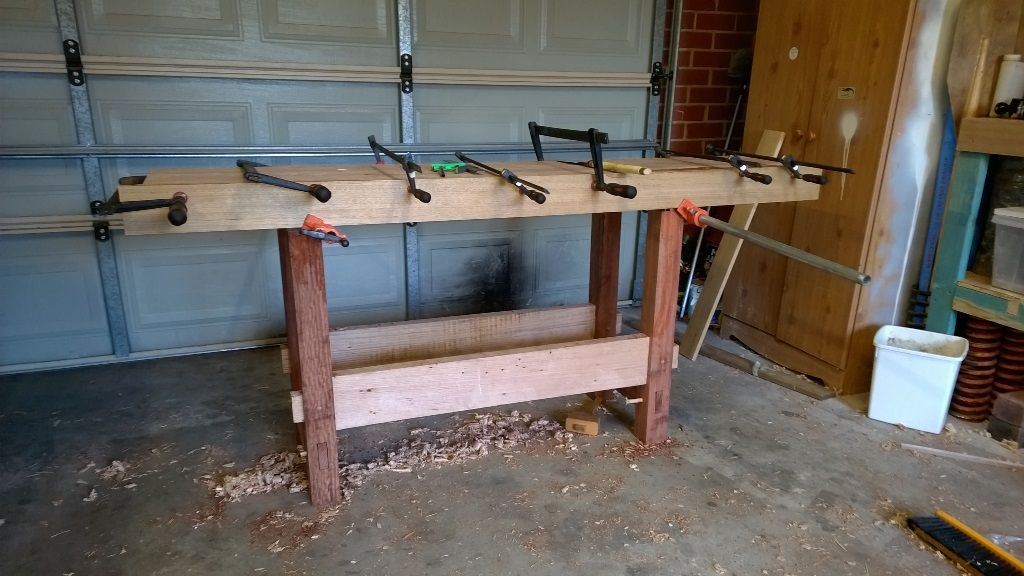
- There's not many pics of the benchtop glue up. Just when I had everything set to go, the glue went on, clamps applied and it all went a bit pear shaped. Lots of realigning before the clamps were fully tightened. I knew there'd be some movement but hadn't anticipated how much.
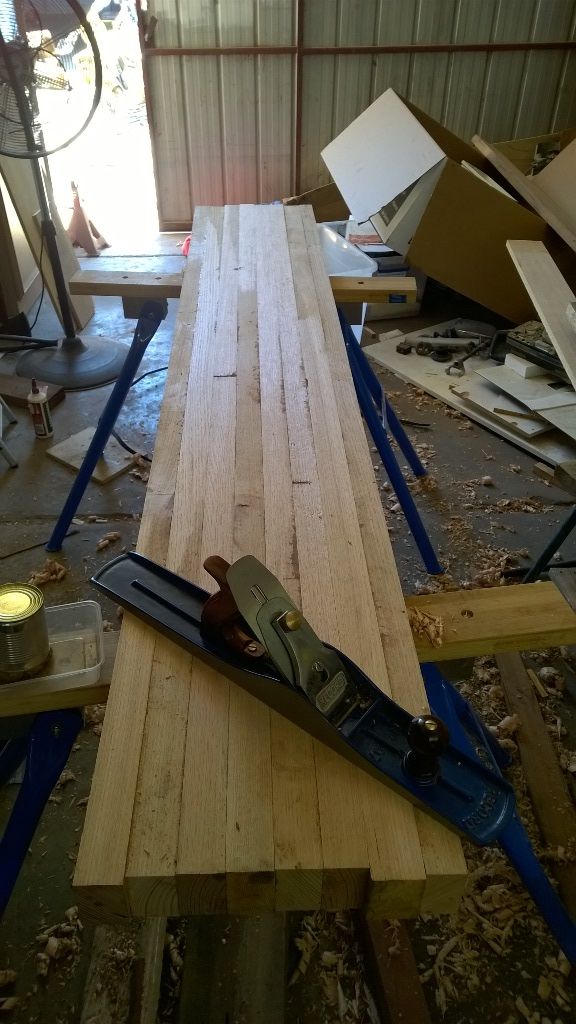
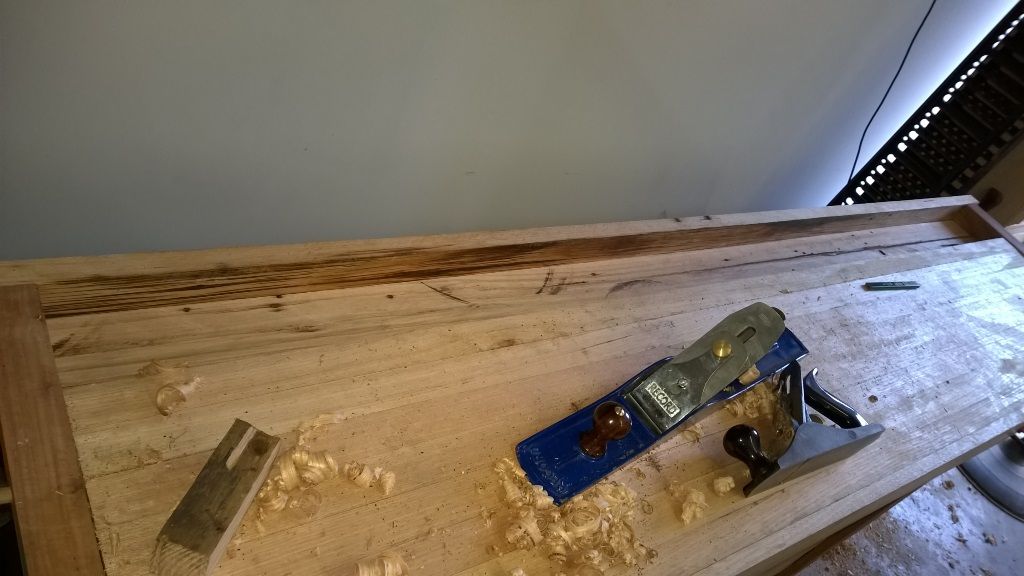
- There would be a lot of planing to do to get the top flat. This second photo was taken after I got to a point where I thought "maybe I can do this". I was contemplating buying a router and going that route, or taken the benchtop to a local shop to get thicknessed, however, with a mix of a stanley 4, 5 and Irwin 7 plane, 4mm was removed from the top. it took quite a few hours but I did enjoy it.
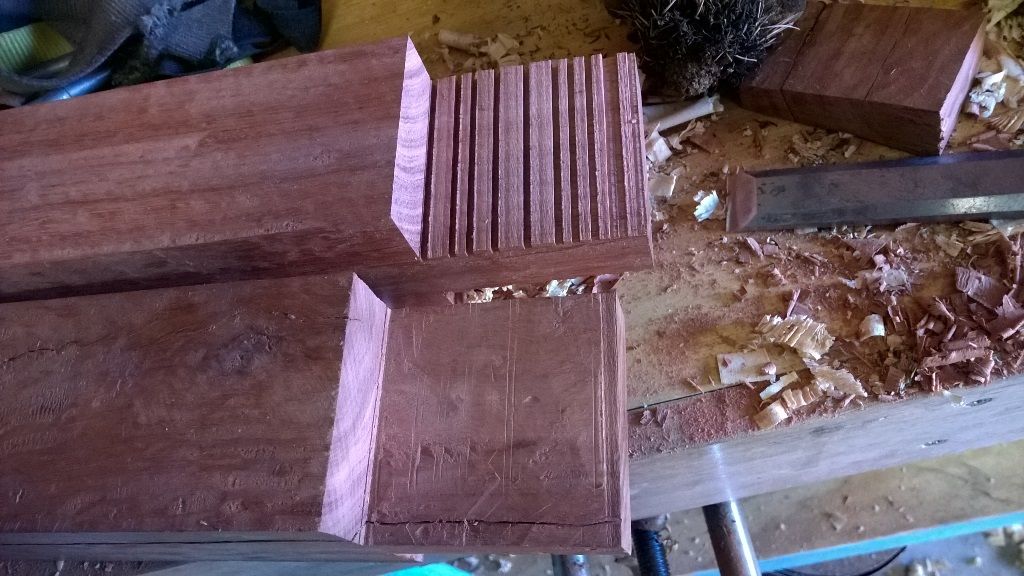
- Powertool wins again. Frustrated by trying to cut and pare tenons with japanese saws and stanley chisels, I went to the TS to make multiple cuts.
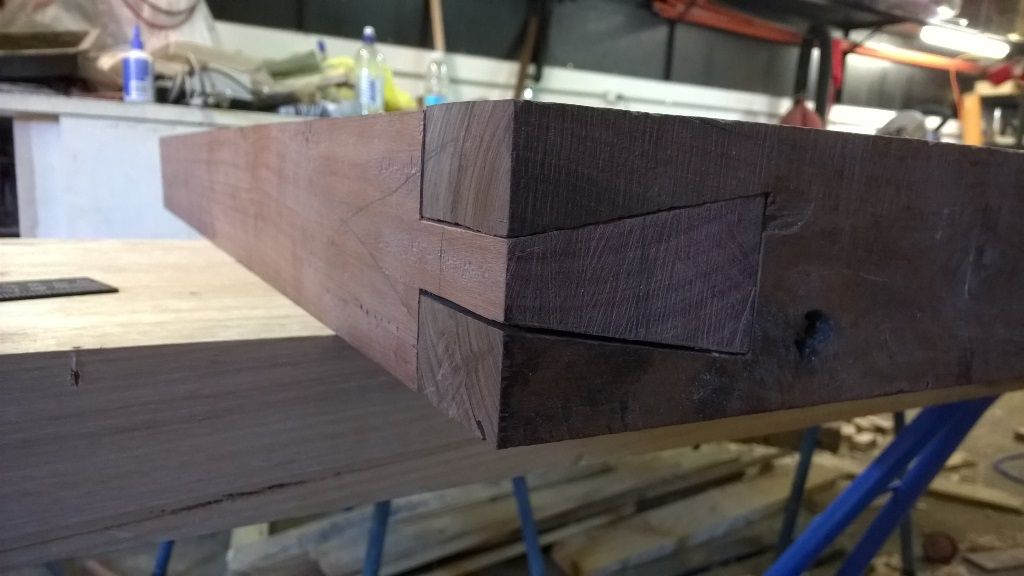
- Dovetail for side frame and top bearer. This was my best one.
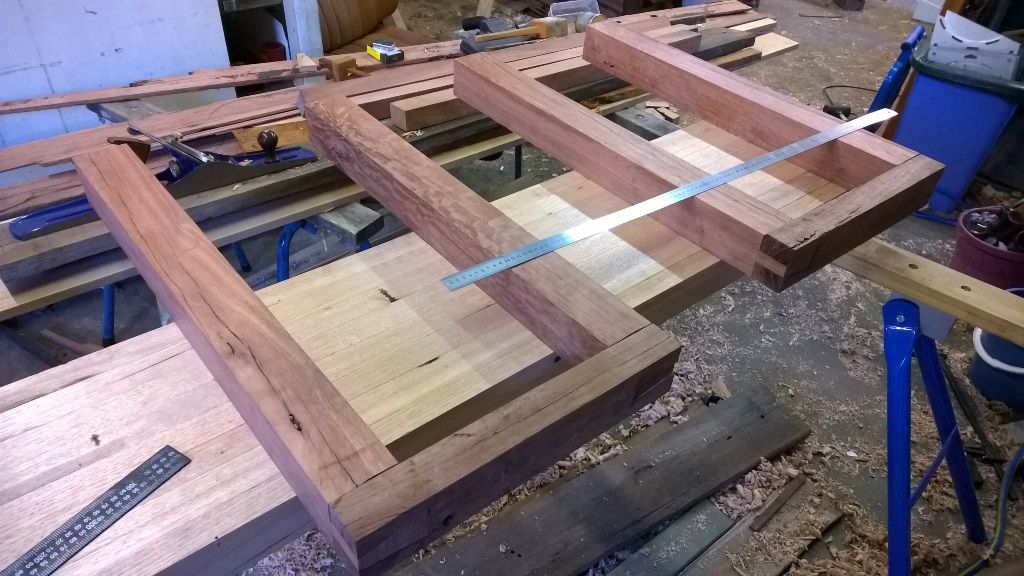
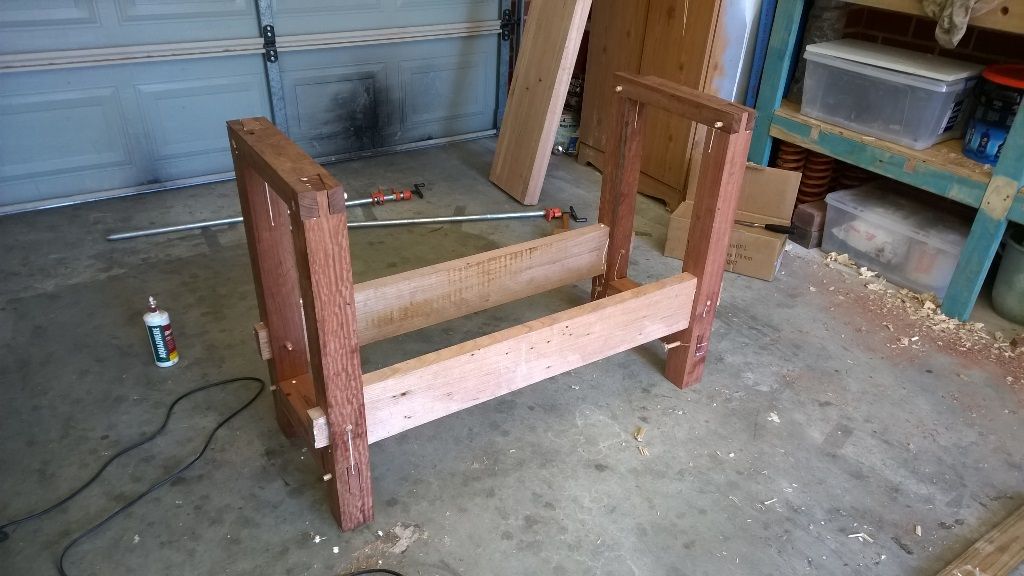
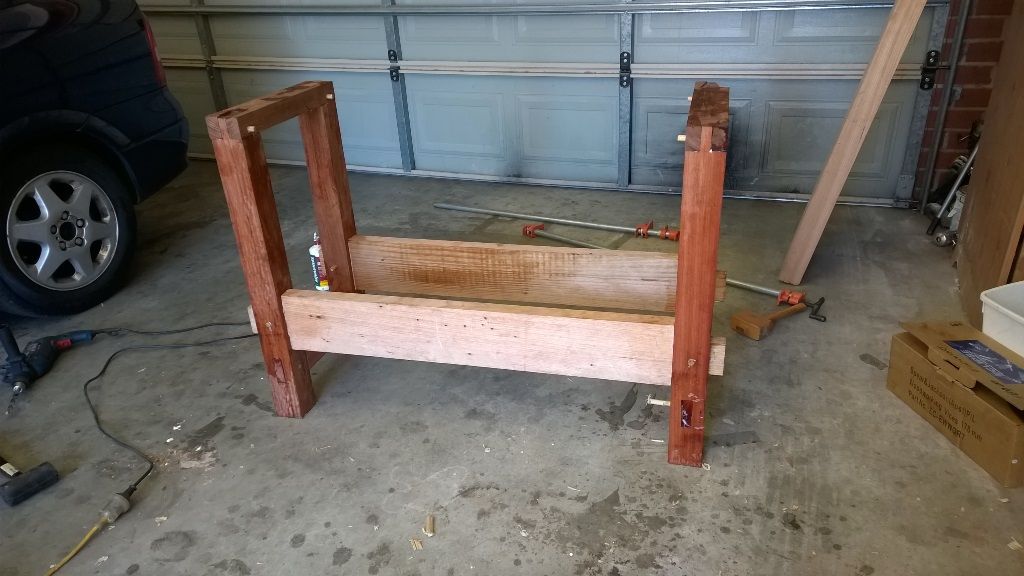
- Sideframes laid out on benchtop to check squareness.
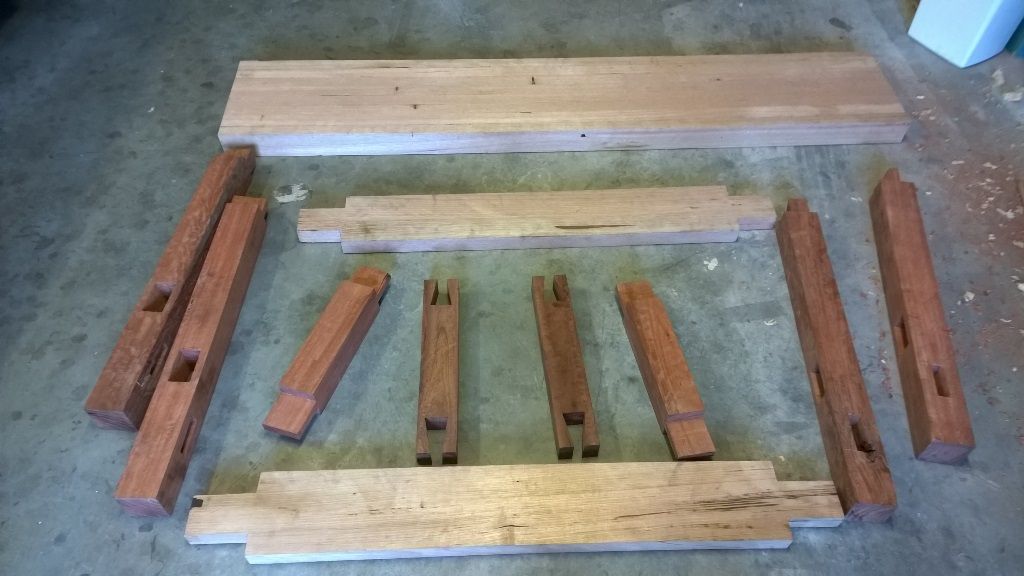
- Pieces ready for assembly
- With a bit of help from a rubber mallet it ended up remarkably straight.

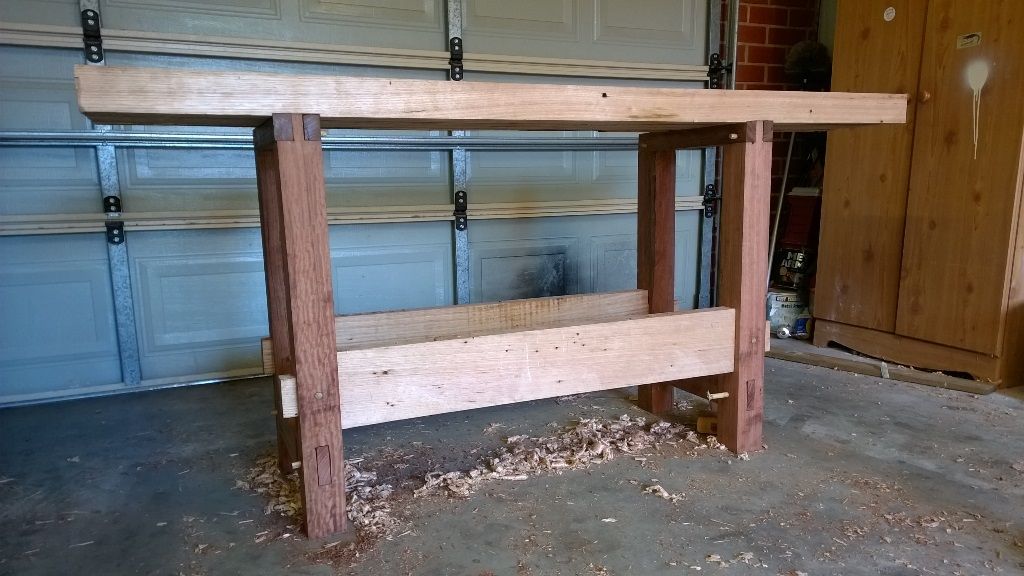
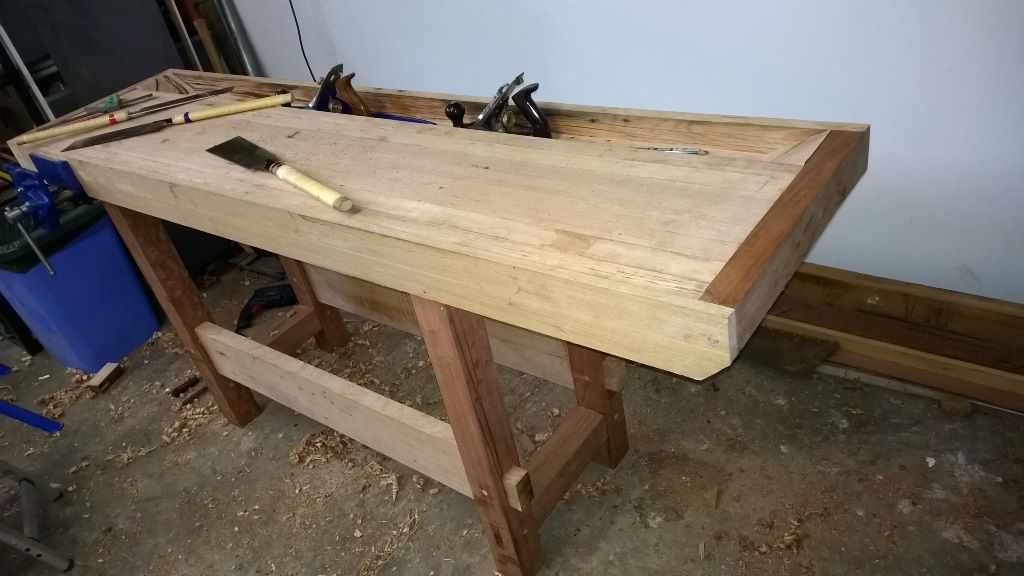
- The top resting on the frame, albeit back to front. I still have to cut a shallow rabbet into the underside of the bench top for the two top side bearers to fit into.
- Capping and a fascia still have to be applied
- A tool well will be added once the top is secured to the frame.
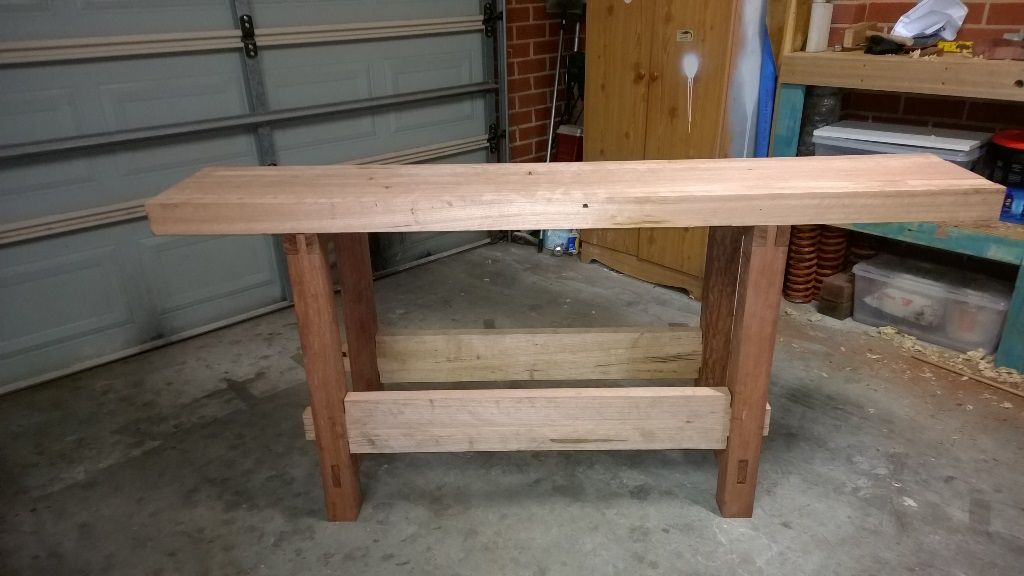
There's still decisions on what to do about vises. A front and tail for sure but whether they'll be home made jobs or not I don't know. I can't afford the more expensive vises and will probably settle for either carbatec construction vises or just go and get a number 5 Irwin from down the road so I can start using the darn bench and worry about other vises later. No idea on dog holes or timber finish yet either. I'll leave the holes until the vise/s appear.
EDIT:
I forgot to add specs.
Top is currently 340mm x 1895 though will be bigger once capped and tool well is in place. Aiming for 19"/480mm deep and just over 2m long. It's 72mm thick, 4mm down from the planned 3" thickness.
Height 905mm/36"
Weight at the moment is 64kg/140lbs.
No plans are involved. In the Oct 2012 edition of Wooden Boat mag there was a good article in their supplement section called Workbenches for Boatbuilding. Showing illustrations of German, English and French patterns with pros and cons that got me started and I've spent ages and ages looking over threads and doing searches for a few years and got tired of trying to make a decision on which bench. So I'm winging it but basing it on lots and lots of pics and advice.
-
2nd February 2015, 01:54 PM #3
almost a woodworker
- Join Date
- Feb 2007
- Location
- blue mountains
- Posts
- 4,886
You really gave that little table saw a workout. Seeing that huge sleeper on it made me wonder how it coped with the weight. Would make a good add for Makita. I like hand tools too but when it comes to large lumps of Oz hardwood you doo sometimes need a bit of powered help.
You have got a good solid bench there. As for vices the basic carbatec front vice is only about $80 and works fine. Good enough to get you going while you decide on a tail vice. I would suggest you get a couple of holdfasts as they are so handy. Wish I had cottoned on to them much earlier.
All up a good honest bench from recycled wood. What could be better.
Regards
John
-
2nd February 2015, 03:17 PM #4
Senior Member
- Join Date
- Nov 2011
- Location
- Riverina NSW
- Posts
- 211
Thanks John. Yeah the saw worked surprisingly well so far is it didn't bog down at any point even with full depth 90mm cuts in RG and it remained stable with the ABS plastic base bolted at the front only to the old dining table holding it up. Cheap roller stands were setup for in and out feed plus my 16yo son helped with the lifting. A pretty solid setup that could benefit from custom extension tables. The blade however, stock 24 tooth is pretty well kaput though, mainly due to a few rocks embedded in the sleepers that either chipped or shattered some carbide teeth. I looked over the sleepers for any thing that might damage the blade but there were unseen bits of ballast, only small, but enough to do damage. I wanted the Bosch equivalent to be honest but the Mak was the only thing I could get locally. I would've loved to have bought a bigger saw with cast iron top and better cutting depth but I really couldn't afford the extra for one of those. $1k was pretty much my limit.
That carbatec vise is exactly what I've been thinking of getting. I was at carbatec in Melb early Jan and am kicking myself I didn't buy one. Of all the masterpieces out there that deserve praise for their beauty and function, I get influenced and brought back to earth by the likes of Paul Sellers who gets by with a simple front vise in his youtube videos. Oh and the holdfasts, haven't forgotten about them, they're definitely on the cards.
-
3rd February 2015, 05:47 PM #5
almost a woodworker
- Join Date
- Feb 2007
- Location
- blue mountains
- Posts
- 4,886
Canoath,
Get a new blade for that poor saw as it has well and truley earned its place in the shed.
Carbatec do mailout orders and Mcjings have a similar vice. They have a single vice screw also that can be used to build an end or wagon vice. I got to make an end vice myself oneday when I get time. I bodged up a vice on the end of mine with a homemade dog that kind of does the job until I get around to a propper one. It clamps stuff with the bech dogs ok but the vice end of the workpiece has nothing underneath to support it. Still very handy a vice on the end and I use it more than the front one now. It was also free.
I also like the approach Paul Sellers has on woodwork. Making the best of what you have. Things like his poor man's router plane is pure gold.
Couple of pics of the poor mans end vice.
Regards
John
-
4th February 2015, 12:50 AM #6
Senior Member
- Join Date
- Nov 2011
- Location
- Riverina NSW
- Posts
- 211
I forgot to mention I got another blade. Sorry about that, I thought I did in my last post but I got BlueMak blade on Friday I think. 260mm, 32 teeth. I still used the old blade to do the last of the major redgum and all the main ripping of the vic ash. For final cuts for squaring I started using the new blade. What a difference in accuracy. There's not many reviews on this particular TS compared to the MLT100 but most say the supplied blade is rubbish. I thought mine was great till it wouldn't cut straight on deep cuts. It did have a major workout though. Apart from the bits of ballast, it went through two nails in the vic ash as well that I didn't notice.
Regarding vises, well, a major development today. I planned on getting the small or large carbatec front vise then last night was comparing the McJing ones and leaning that way because I wanted to get those holdfasts at the same time to save on postage since carbatec doesn't have forged holdfasts. I've bought carbatec online a few times and with a couple of visits to the melb shop over the past few years, I knew what their vises looked like, so I really wanted a carbatec one. Arrgh!
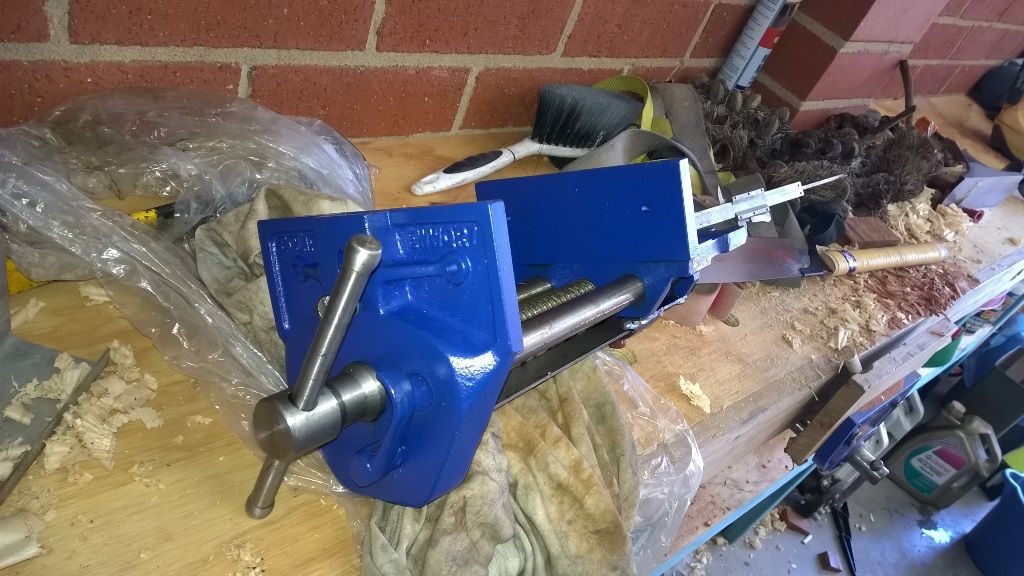
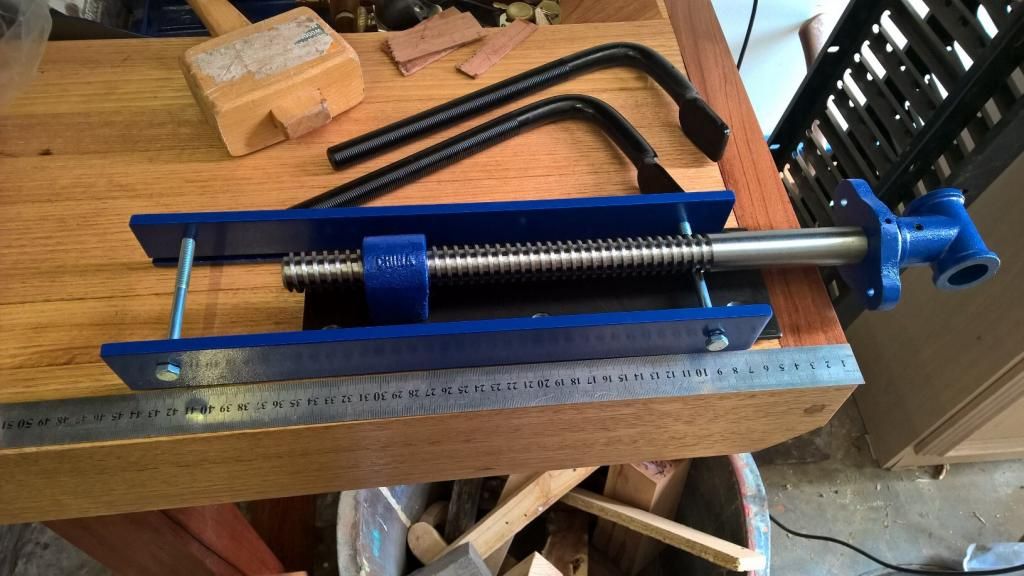
This morning I start researching again and comparing and of course, Mr Sellers' blog turns up in a search. (BTW, ditto on the poor man's router, been meaning to try that one) I wanted to have a flush fit broad front vise but after reading his thoughts and remembering all those vids with his Record vises I started looking at that style again. Time was running out for the day and I had to get all the joins draw bored, so off I went to a local engineering shop to buy a 12.5mm bit for my 12.6mm dowel and whaddya know...look what I picked up on sale for $89!
It's a 7" Spear & Jackson Eclipse quick release. I knew nothing of these, never heard of them but it looked alright, felt alright and the price was unbeatable. Plus I'm impatient and an order from carbatec or McJing probably wouldn't get here till Friday. I couldn't pass it up. Tonight I googled and found prices from $75US from Amazon up to $275 in Aus.
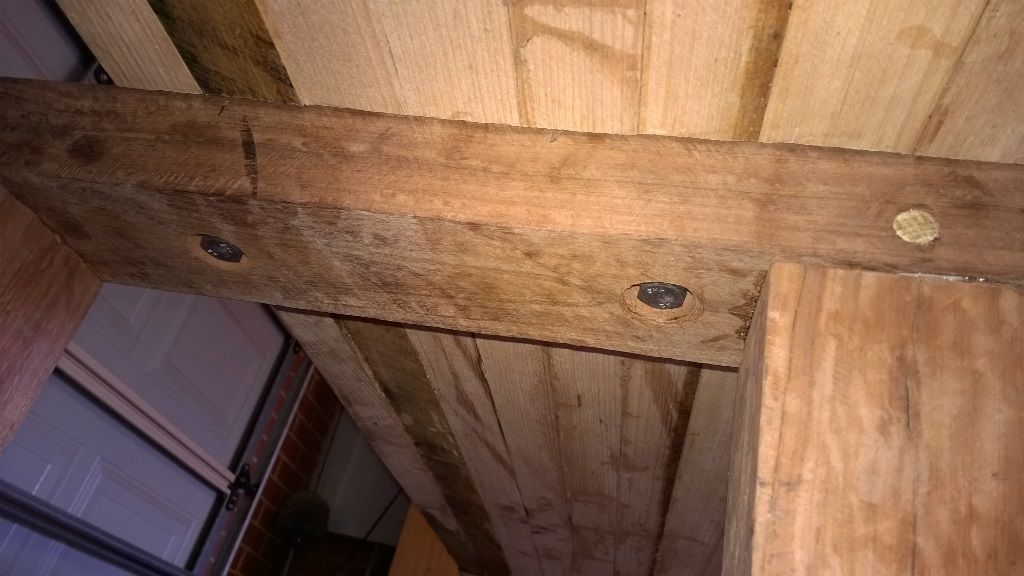
On to draw boring. It was my first time at trying this and I was worried that something might crack in the joins and split the legs but it was a lot of fun and worked amazingly well. I dunno, there's something primitive yet satisfying about smacking a round wooden peg with a wooden mallet into thick wood. No metal fastners, just crude yet efficient means of bringing it all together. I wanted to go and drill 2 holes for every join and do it all again, LOL.
And when I say crude, I mean my method was crude. For my first offset hole I took great care in marking a point on a tenon 2mm from the centre point of the mortise hole, but my Hafco drill press has some bad runout in the chuck, or arbour, or spindle, and made a meal of the start of the hole. I decided to just guess the start of the rest of the holes and only one needed a little more boring after a dowel wouldn't go through. The rest worked perfectly and the frame became one solid piece. Extremely satisfying. Protruding dowel will be flush cut tomorrow.
After draw boring, the frame tightened up and developed a little twist with one leg lifting 1mm off the concrete. It wasn't unexpected but luckily it was only a minor flaw. I flipped the table over and shaved some off a leg and found the lift was now 2mm. Doh, shaved the wrong leg. I tried one of the correct legs and it didn't make a difference. Answer...find a spot on the concrete a couple of feet away where the table doesn't wobble. The final resting place for the bench is going to be in my shed which has a much more uneven concrete floor. It's likely a leg or two will need shimming so I figured there's no point in trying to cut down legs yet. I'll be at it all night and by the time I get it right I'll be left with a coffee table.
All that matters is that the top ends up flat and secure. With a little twist in the frame, uneven bearers and an unfinished non planed underside of the bench, I had to rebate the underside of the benchtop and plane down one of the bearers to get the top to sit flat. Unable to use the underside of the the benchtop as a flat reference I took it to the sliding compound saw, using it like a radial arm saw I suppose, and cut a shallow dado for both leg bearers. Some planing and chiseling afterwards saw the benchtop fit nice and snug on the bearers. Four 10 x 75mm stainless coach screws were used to secure the top.
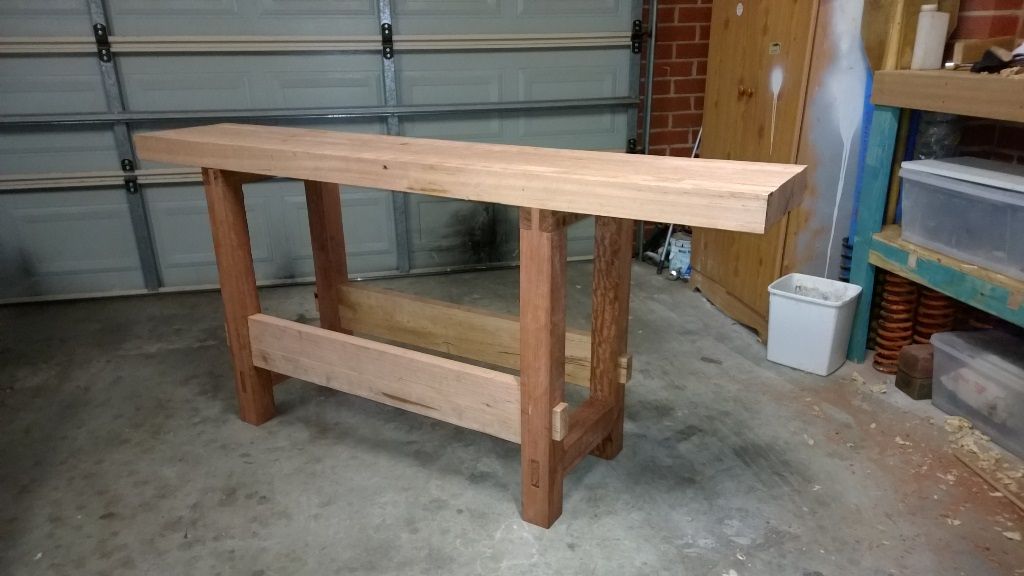
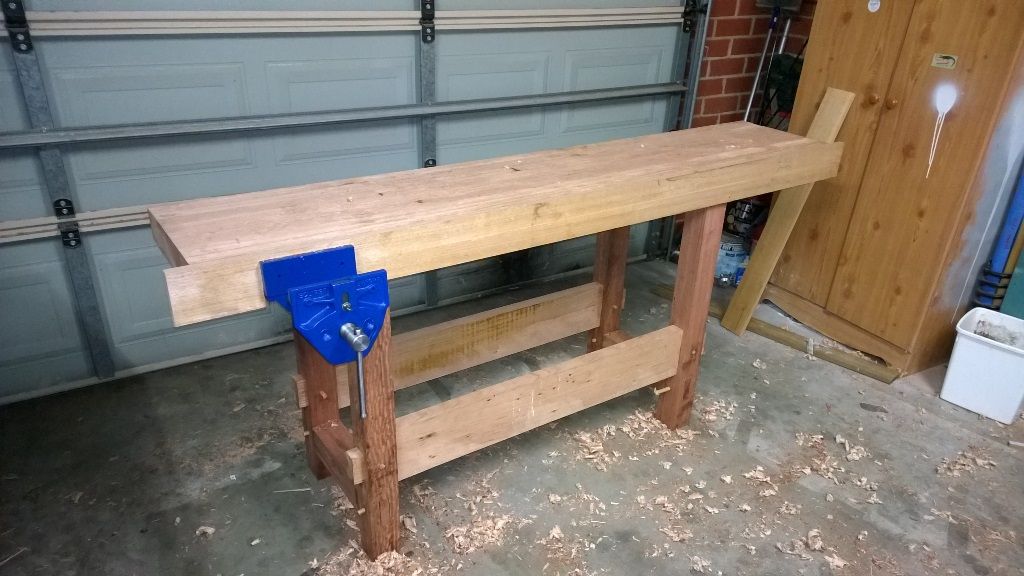
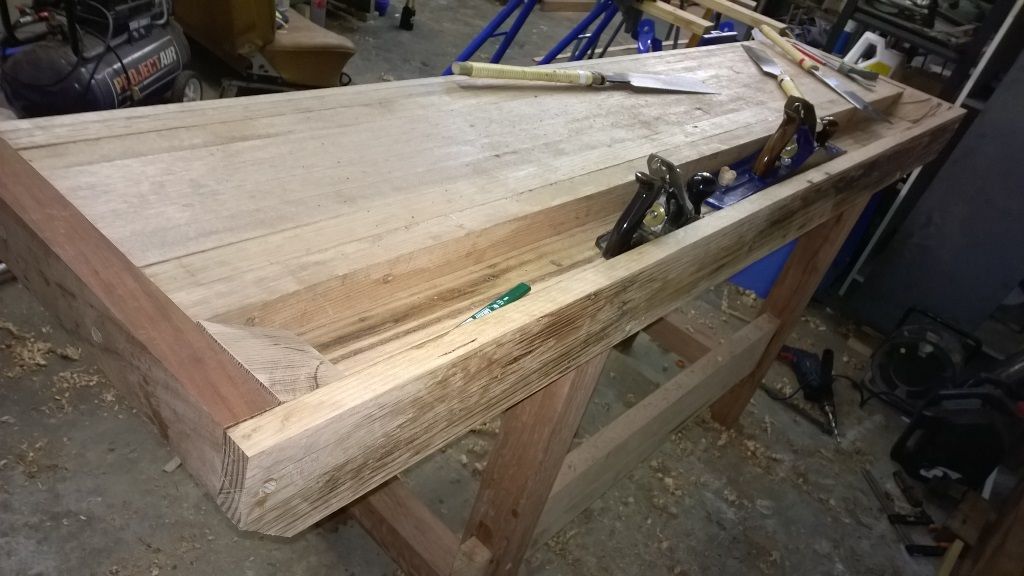
- I fitted the front apron which is some left over Tas Oak, 19x110mm.
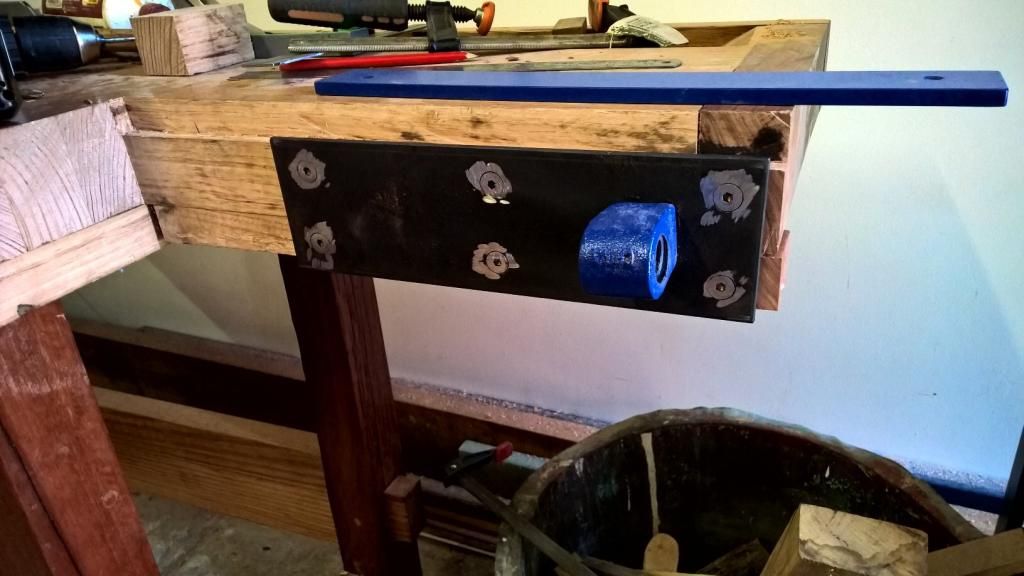
- Then after an hour or two, fitted the vise. I didn't know whether I should go left or right of the left leg but decided to go left and see how that works.
- Owing to Paul Sellers' thoughts I abandoned the idea of having a flush fit and sat the rear jaw on top of the tas oak skirt so the clamping surfaces will sit proud of the skirt and bench.
Tomorrow (today), I'll work on the tool well and end caps. Have to get this done by the weekend, holidays end on Sunday
Last edited by Canoath; 4th February 2015 at 09:00 PM. Reason: Change dimension of front skirt
-
4th February 2015, 07:44 AM #7
Mildly Moderate
- Join Date
- Nov 2007
- Location
- Albury Well Just Outside
- Posts
- 13,315
You are making very good progress.
-
4th February 2015, 12:22 PM #8
almost a woodworker
- Join Date
- Feb 2007
- Location
- blue mountains
- Posts
- 4,886
It's comeing together nicely. Never knew S&J made vices but they are a well regarded tool maker. Would have to be as good as a Record.
Regards
John
-
5th February 2015, 10:09 AM #9
Senior Member
- Join Date
- Nov 2011
- Location
- Riverina NSW
- Posts
- 211
Thanks fellas. Yeah I don't mind S&J. I have some S&J plastering and brickie hand tools, all have wooden handles and have served me well. I take care of them and reckon they'll last me forever.
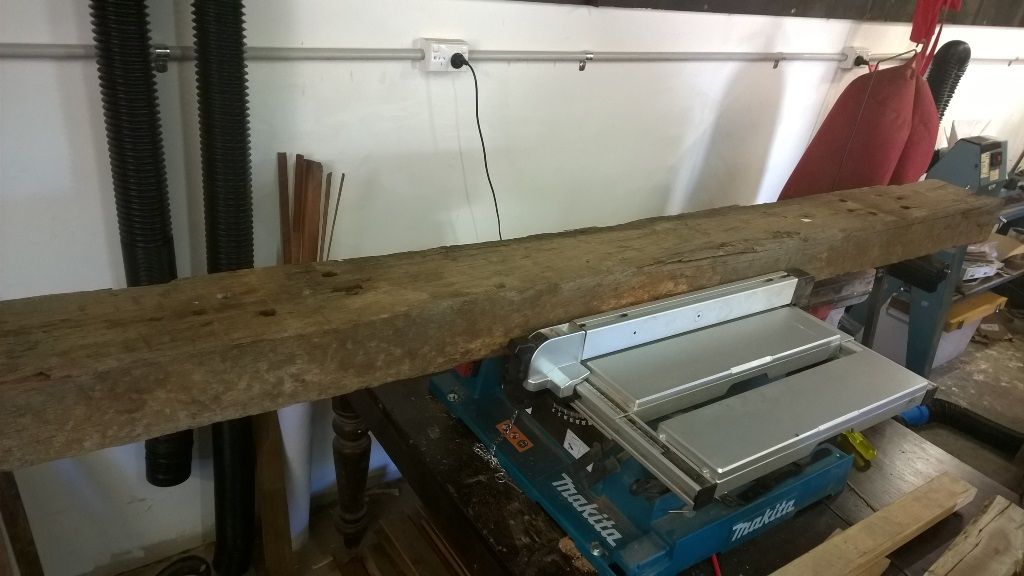
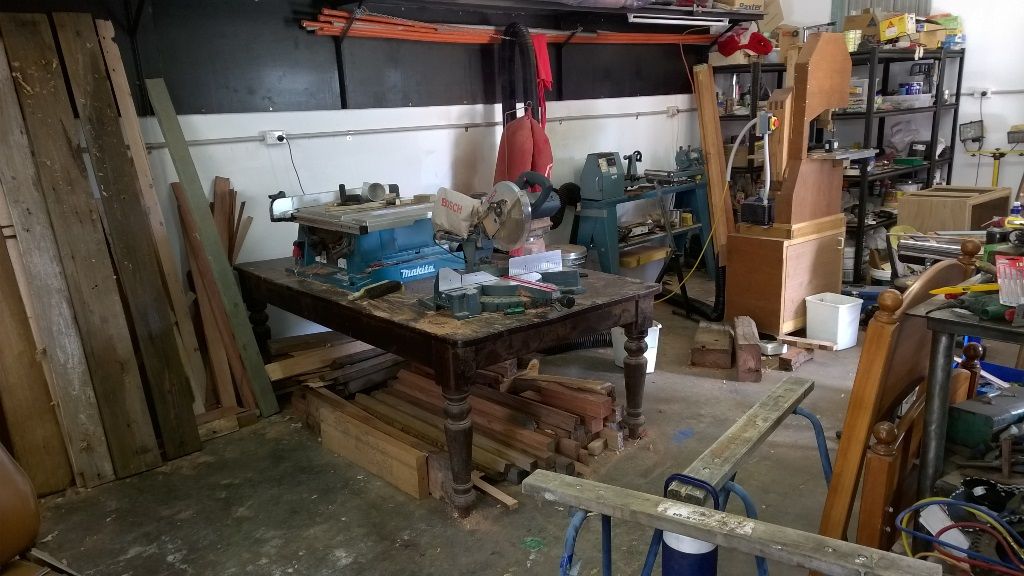
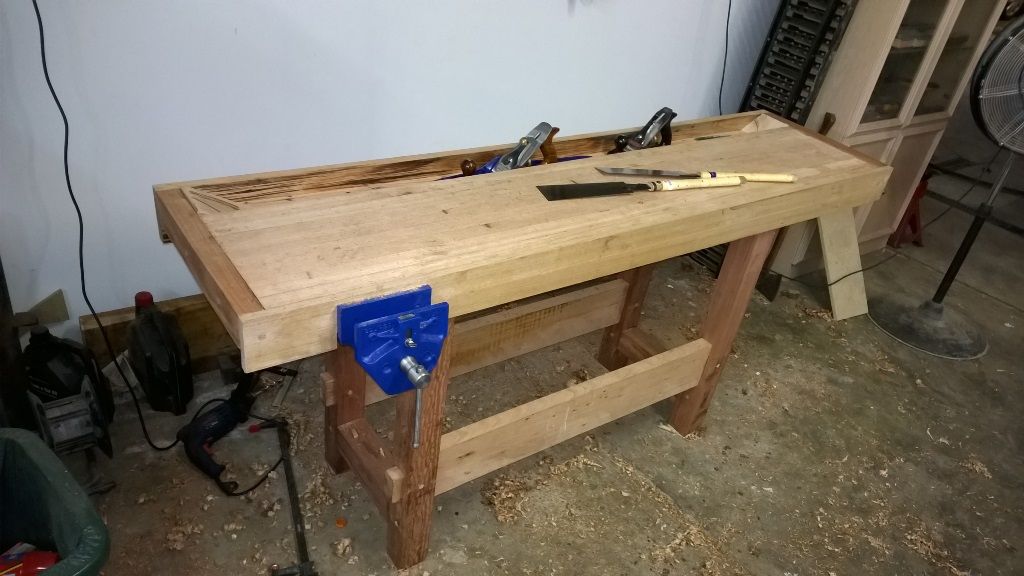
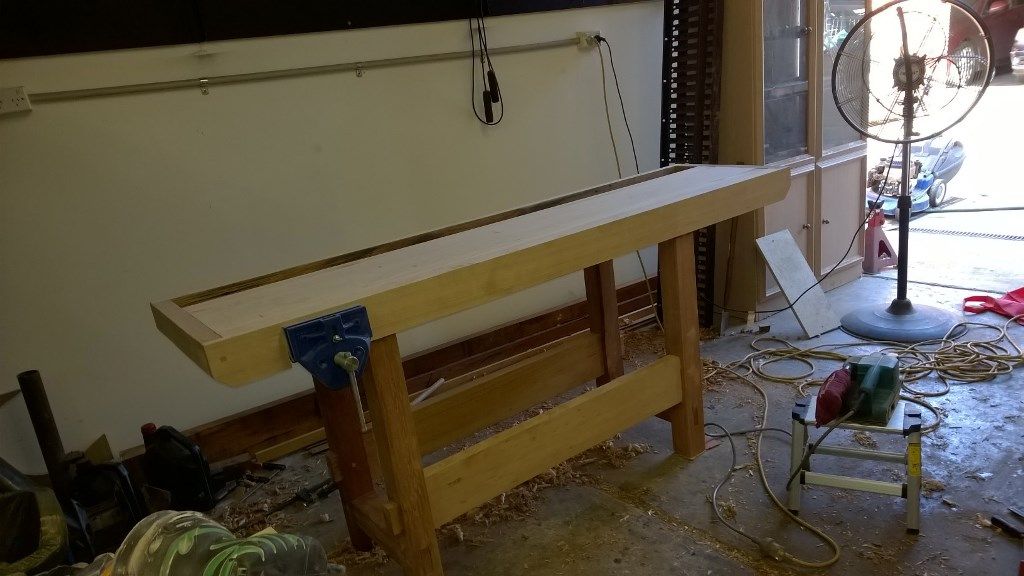
Yesterday I decided to do a general clean up first. Apart from loosing tools under shavings and tripping over things, I needed to make room for where the bench would go as shown below. I want to do some hand tool storage on the wall under the shelf there and the bench will be closer to the wall so everything's at reach. The unevenness of the floor has led to some packing under the left rear leg and that cupboard at the entrance to the shed is slowly inching towards the trailer.

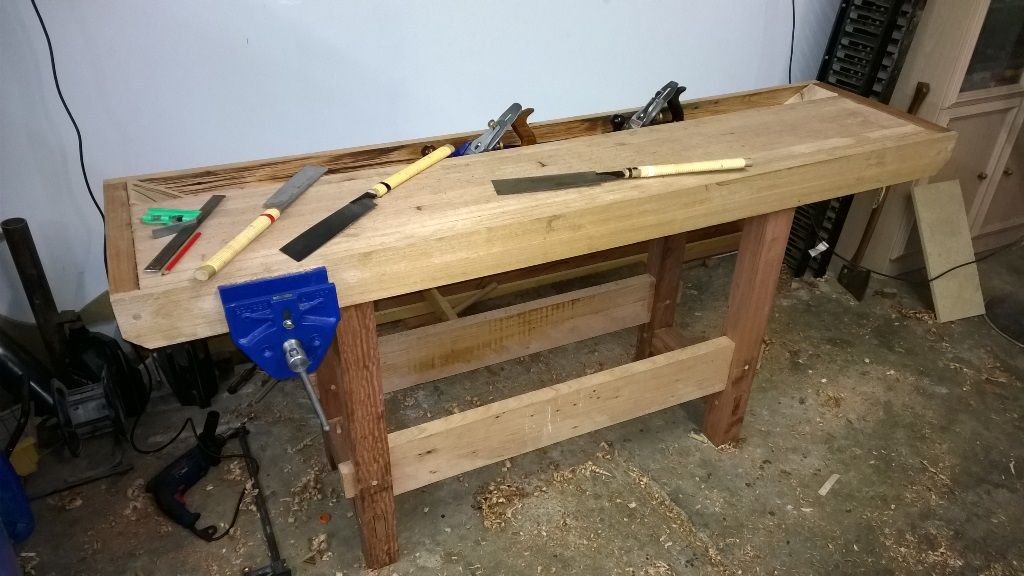
Here's diagonally opposite the bench. There's two darker planks resting on the wall to the left. They'll be used for the rear apron and tool well. Under the saw table is a mix of redgum, vic ash and turpentine, plus a stack of pallet pine at the back and a few bits of wattle behind the RG. RG will be used for the end caps.
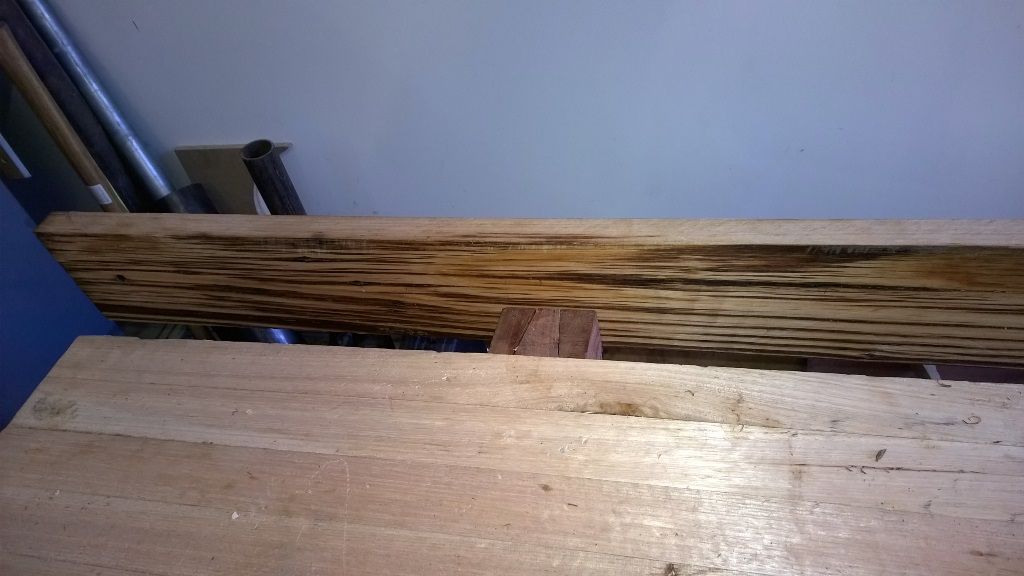
So check out this Zebrano! It actually looks better close up than it does on screen, but the two pieces for the rear skirt and tool well were both part of that old original bench in the shed in the first post. This bit of timber would have had all sorts of stuff leaking on it, from shearing gear by the previous owner to my chainsaw and I'm guessing that's how the pattern crept into cracks. The saw dust from milling it really clung together too, like it was oily. But the piece is vic ash, same as the longer pieces that I cut up for the top. Planing the edge and cross cutting revealed a grain exactly like the other vic ash boards and the oil staining doesn't go too deep. But I really like the effect, so I didn't seek to remove the the pattern.
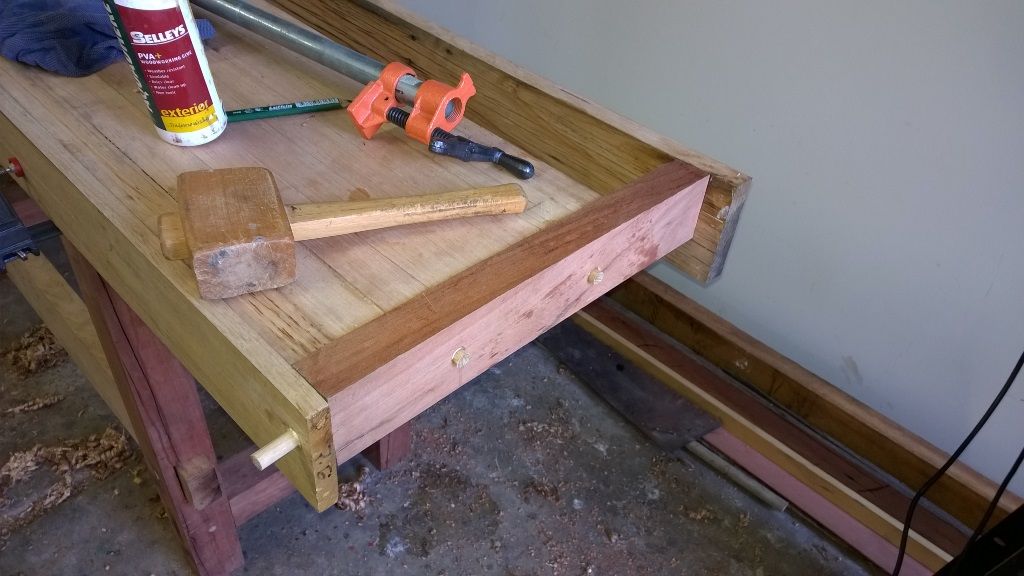
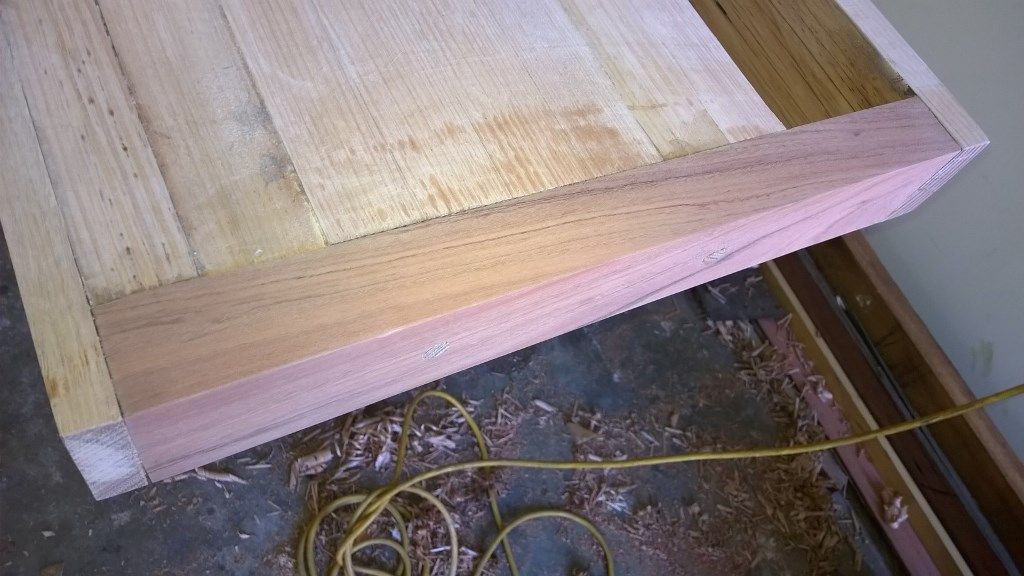
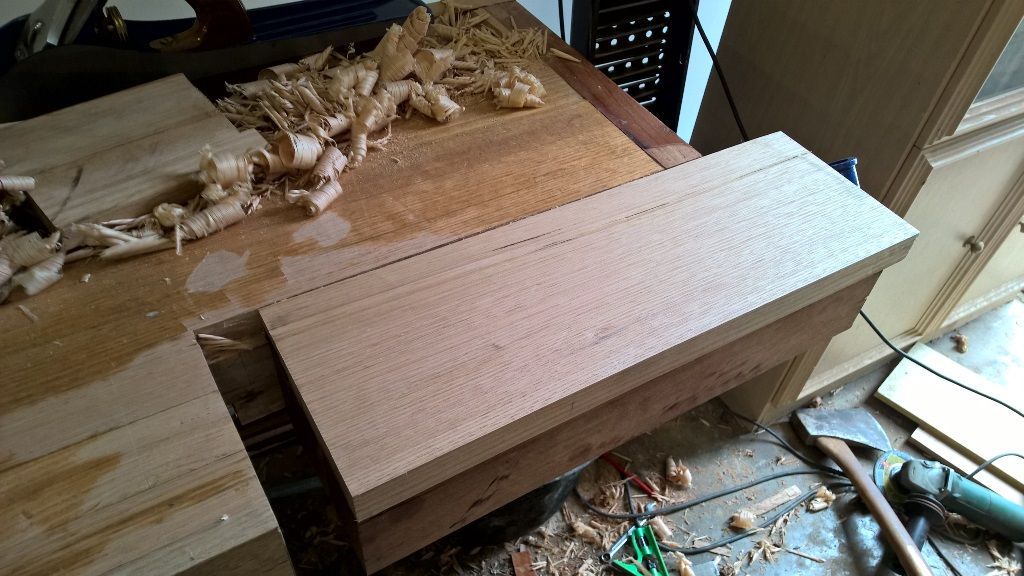
With a metre of dowel left and my new appreciation of draw boring, I wanted to attach the end caps and rear apron with pegs. And rather than use clamps to glue the end caps to the edges of the benchtop I thought I'd try and use an offset hole in the end caps to create pressure for the glued joint. With the end caps fitting snug between the skirts and benchtop, I drilled straight through the skirts slightly into the end caps' end grain, then removed the end caps and drilled at a slight angle away from the benchtop. When the dowels were hammered in the caps were effectively clamped against the benchtop. I did make a mistake on the left side whereby I hammered in the rear peg all the way home before tapping in the front peg which has led to a slight gap towards the front of the bench. The two dowels in the face side of the caps just go straight in to the benchtop.
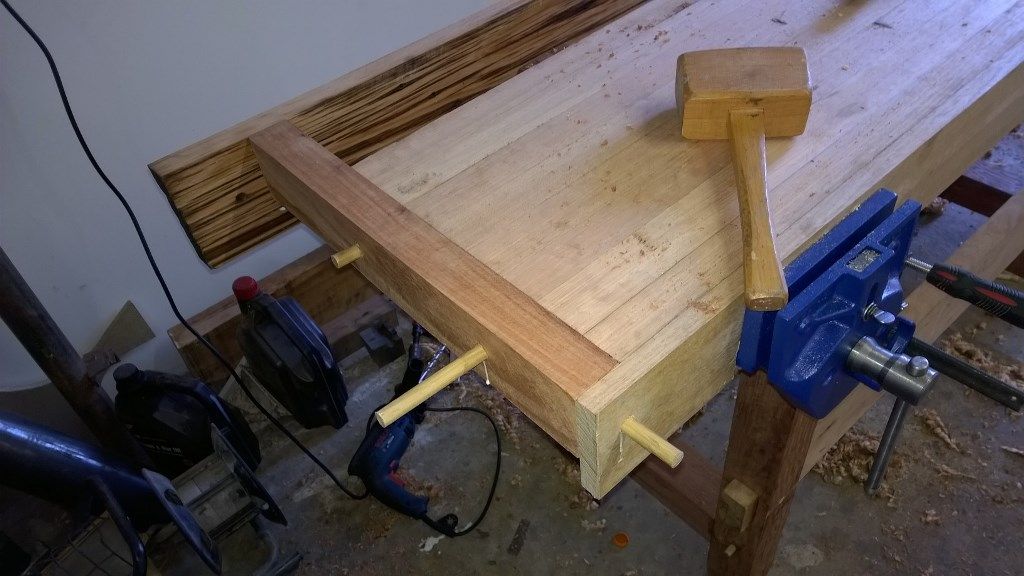
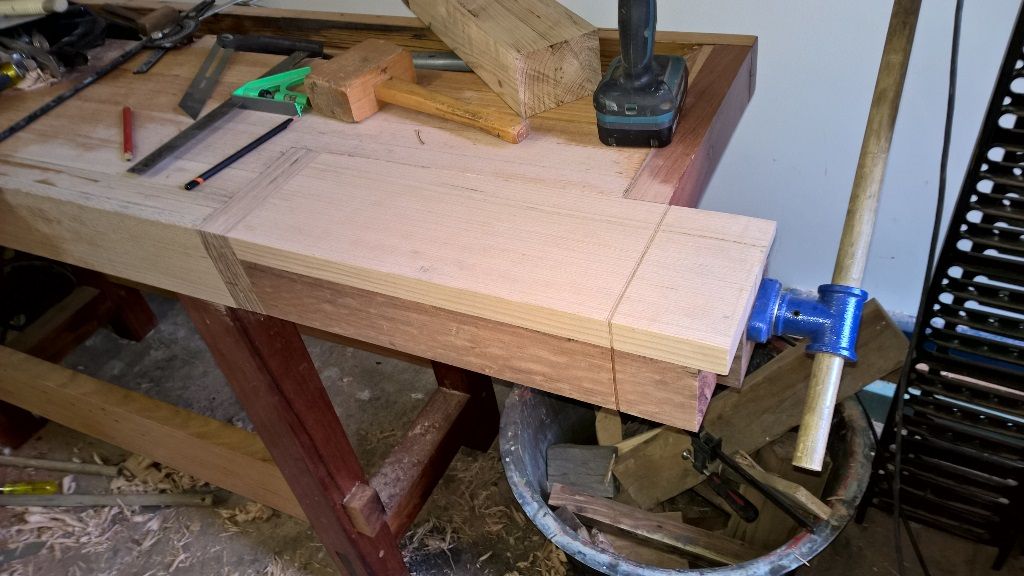
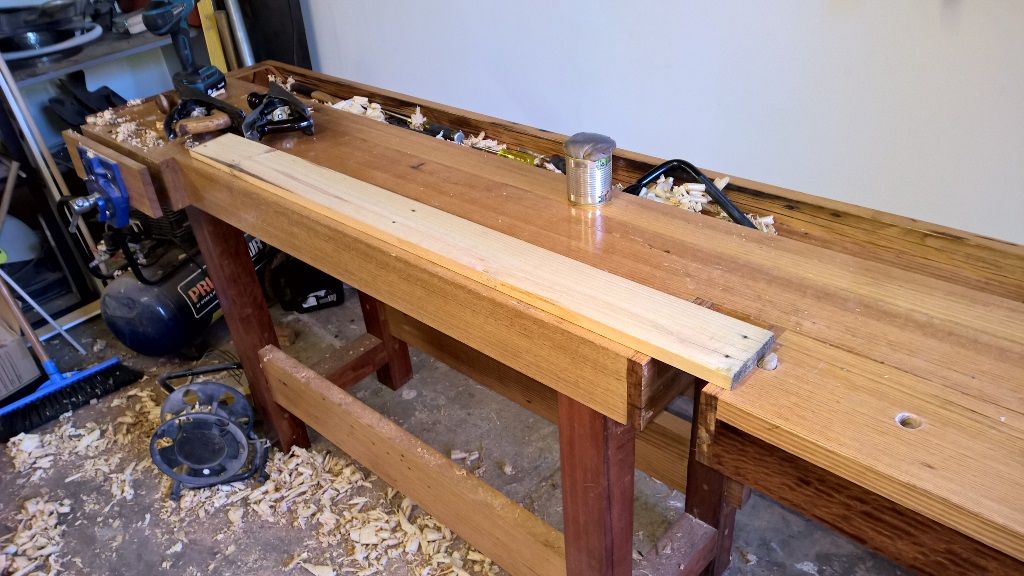
This is the second plank after ripping ready for test fitting to the tool well. It's 110mm wide and thick enough to support a fair amount of weight by just resting on the rear of the two leg bearers. I wont bother gluing it down or fastening it to anything but it does need some further finishing on the top side.
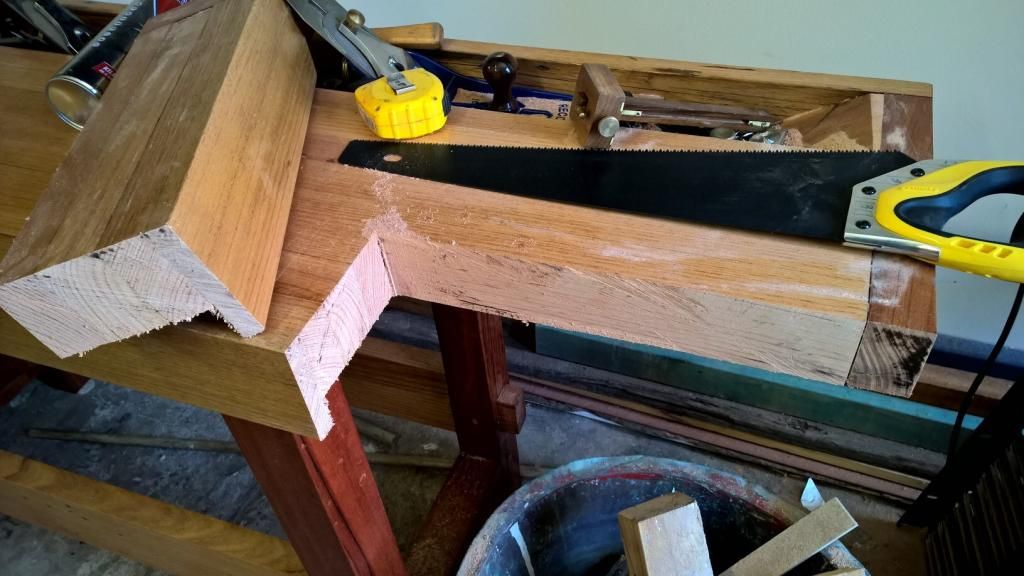
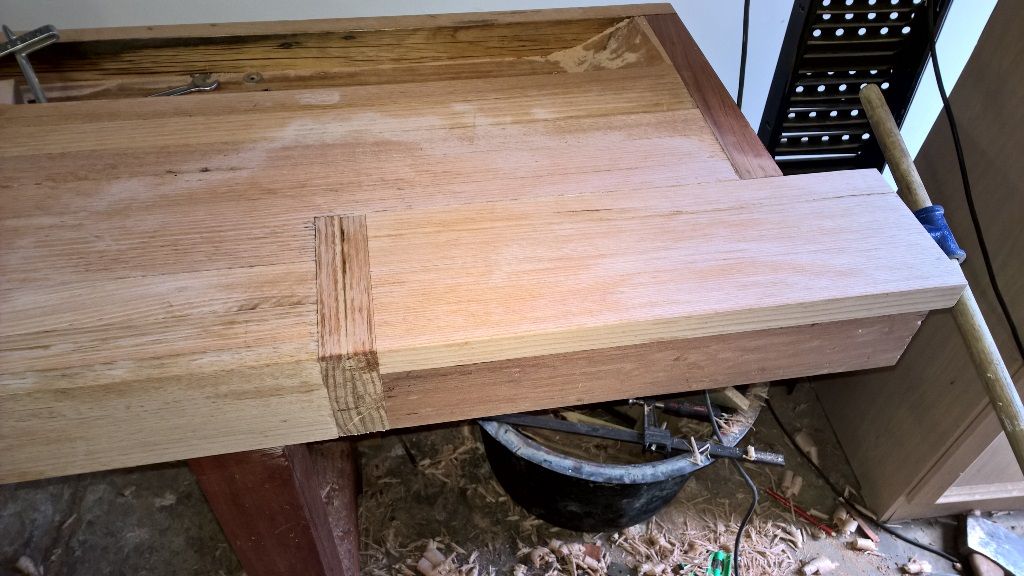
After trimming the remaining dowels and overhanging skirts I decided to cut a 45 from the end of the skirts. Not sure if I like it or not but they looked vulnerable to being bumped into and damaged, or worse, I'd bump my head on them whilst retrieving stuff off the floor. Here's a before and after.
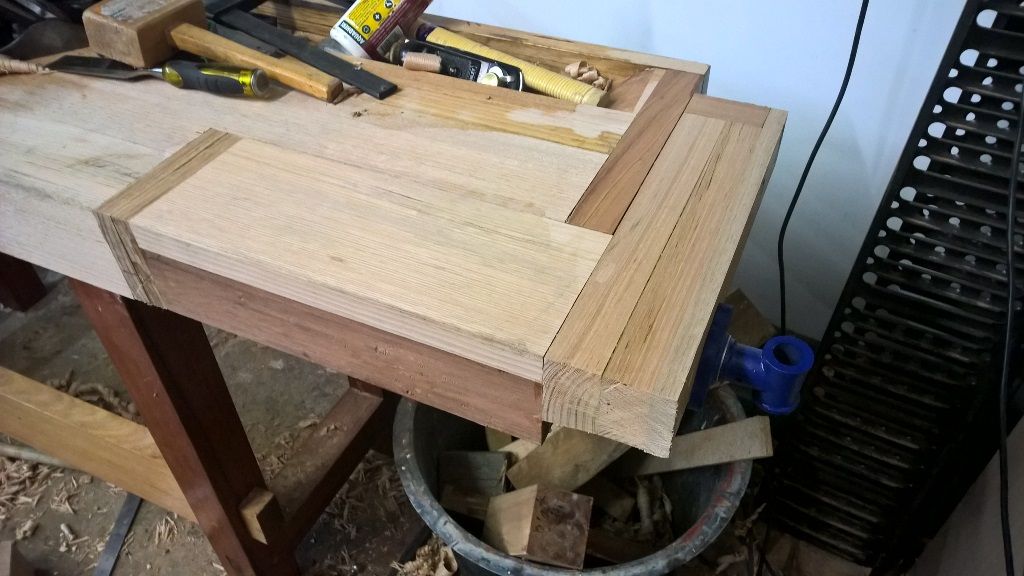
Finally, the ramps or inserts for the tool well were loose fitted. Still need to clean them up but the main components of the bench are all together. The caps and skirts sit proud of the benchtop so they'll need fairing and then it's on to the finish. An all round sand and cleanup then apply...I dunno, boiled linseed oil seems to be the go. Oh and make jaw inserts for the vice. Whilst dressing the tool well and skirt boards on the bench I really missed not having dogs, an end vice at least one holdfast. But I got a good feel for the ergonomics of bench height and size which seems perfect.
-
5th February 2015, 10:41 PM #10
Senior Member
- Join Date
- Nov 2011
- Location
- Riverina NSW
- Posts
- 211
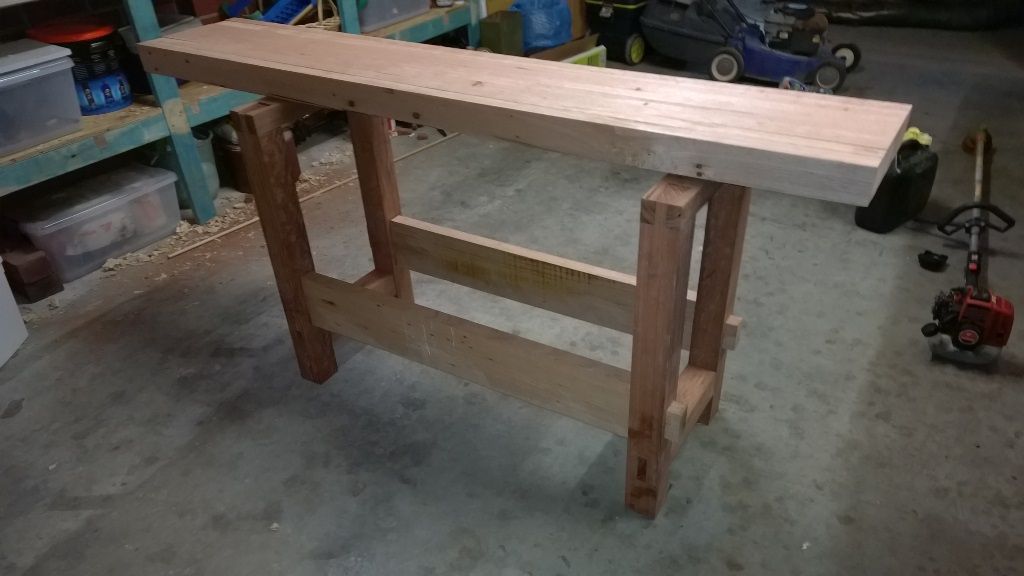
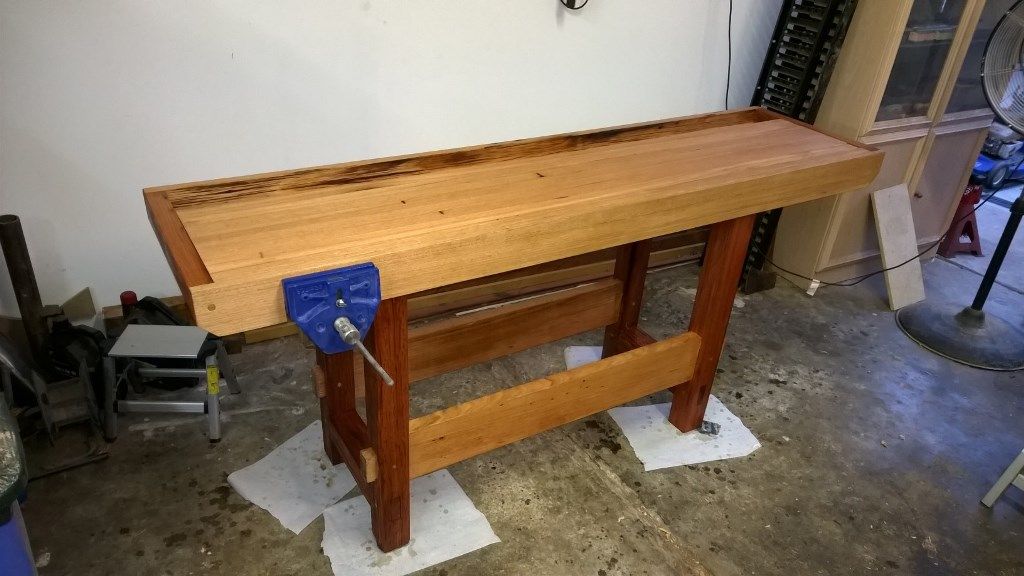
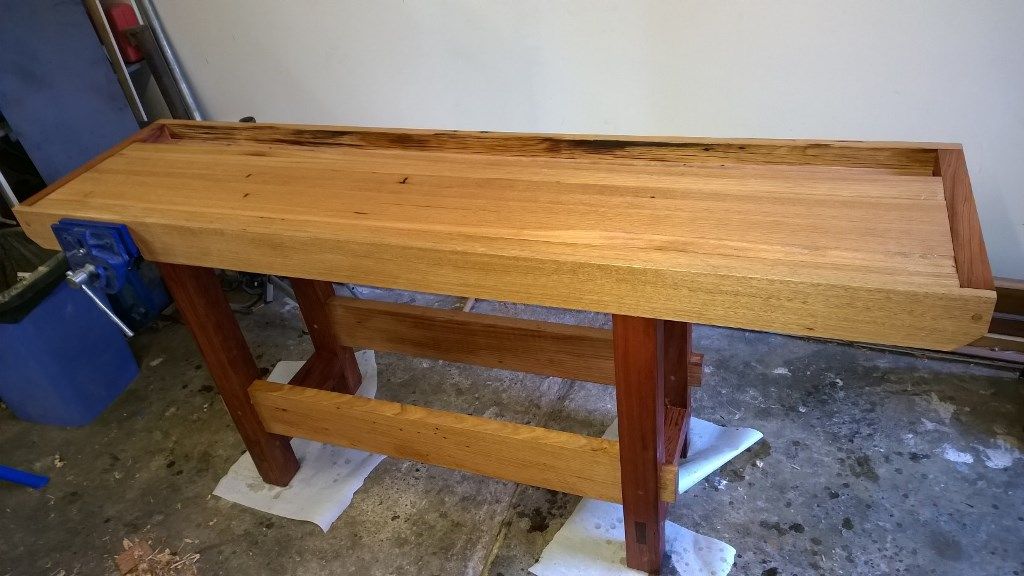
Just about done. I spent a fair bit of time today levelling the top, mainly with a number 7 plane. Then on to a belt sander at 120 then random orbital at 120 and 320. There was no need to go that fine but the top was coming up so well, particularly the RG end caps I that I had to keep going. If I had a finer grade I would've kept going just for the hell of it. I hate sanding but the result was superb. A photo wont do it justice but I'll throw one up regardless hehe. The legs and stretchers were sanded to 120 only.
I also spent some time reading about finishes and decided that whilst BLO was commonly used I thought I'd go for a 50/50 danish oil/turps mix. Two coats went on and that's where I'll leave it. I'll see how it feels after fully drying tomorrow but although it's beyond tacky now, there's no hint of it being slippery. There's some dust entrapment despite wiping the lot down with a damp rag but I don't think I'll sand it. Instead I might hand buff the top to knock those tiny bits down.
The only things to do now are to make jaw liners and make dog holes to really make the bench functional. Plus I need an end vice and holdfasts but they might take a while to order whilst I make up my mind on determining whether to get a tail, end or wagon vice. Then there's decision for dog holes, square v round or more likely, both in different places. For now I'll concentrate on the front vice jaw liners and use the thing to make accessories like a shooting board and bench hook.
This shot just shows up the sanded redgum cap. Doesn't do it justice.
All sanded
Lastly, what it looks like after two coats of danish oil (Feast & Watson's Scandanavian oil)
-
19th February 2015, 12:36 AM #11
Senior Member
- Join Date
- Nov 2011
- Location
- Riverina NSW
- Posts
- 211
Fitting the tail vice Pt1
About a week ago I got a delivery from McJings, a tail vice and holdfasts. I spent most of Saturday alternatively staring at the vice, then staring at my gleaming new bench, unsure of just how I was going to do this. After consulting the net over and over and reading about sagging vices I was beginning to doubt whether I should have a crack at this or not, but then again, reading about how invaluable they are perhaps more than a front vice I began planning on what I had to do. There were no instructions with the vice and although it looks fairly straight forward I struggled to determine what sort of dimensions were involved; how far to set it back, how deep it should sit, where would the dog holes go and so on.
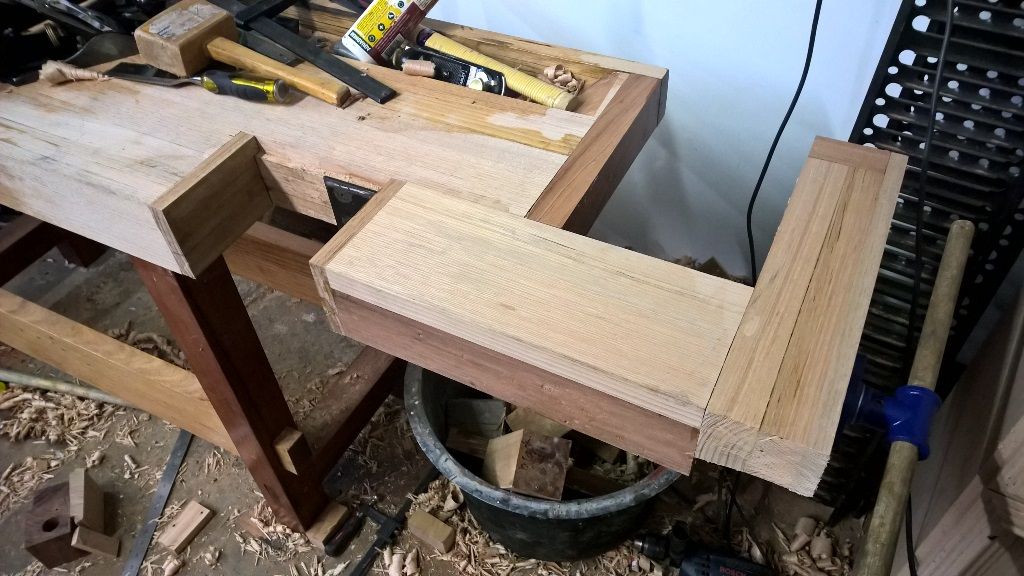
I found a 2 page pdf online from Woodcraft who sell a similar generic vice. There's no measurements as such but it does have two decent drawings of how it should go together and be incorporated into the bench. From there it was just a matter of holding the vice on the benchtop, moving it around, imagining dog hole positions etc and marking the first cut lines. So I've got no measurements recorded but so far it's turned out amazingly well despite a few mistakes and it's got a good amount of travel. I also made it "L" shaped which I was beginning to regret but it too is coming along nicely after a few corrections.
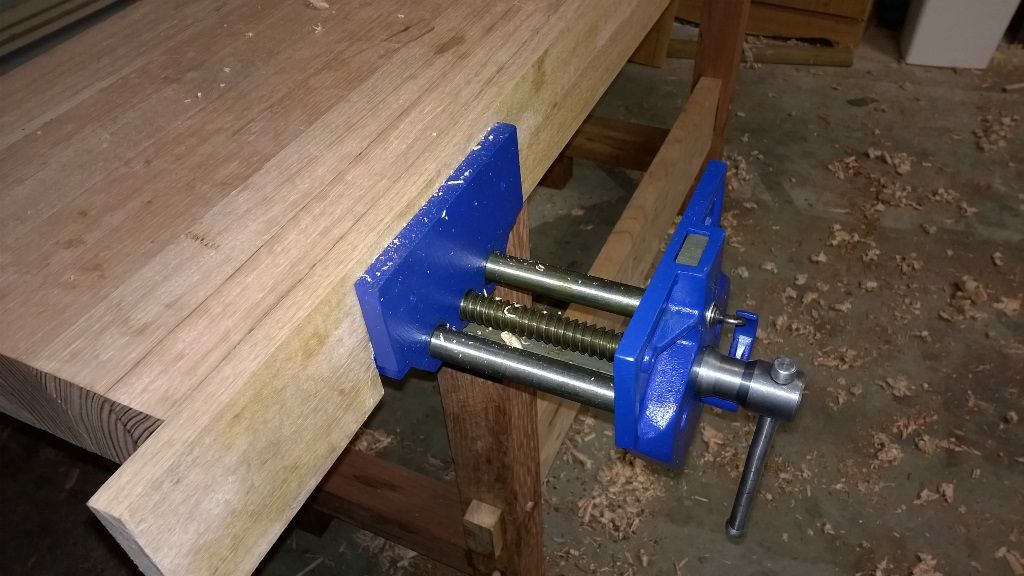
- vice and holdfasts. Vice is pretty good, but the jury's still out on the holdfasts. I didn't realise these ones had threaded shafts to help grip. The thread is rounded and not too aggressive but I was put off by comments I've read in the past about tearing up dog holes. I don't know. Veritas have a screw down hold fast with a similar shaft that I couldn't find any complaints about. There's a couple of other things but I've only tried them out on my garage bench. I'll wait till they've had a good workout on the new bench before I decide if I need to mod them.
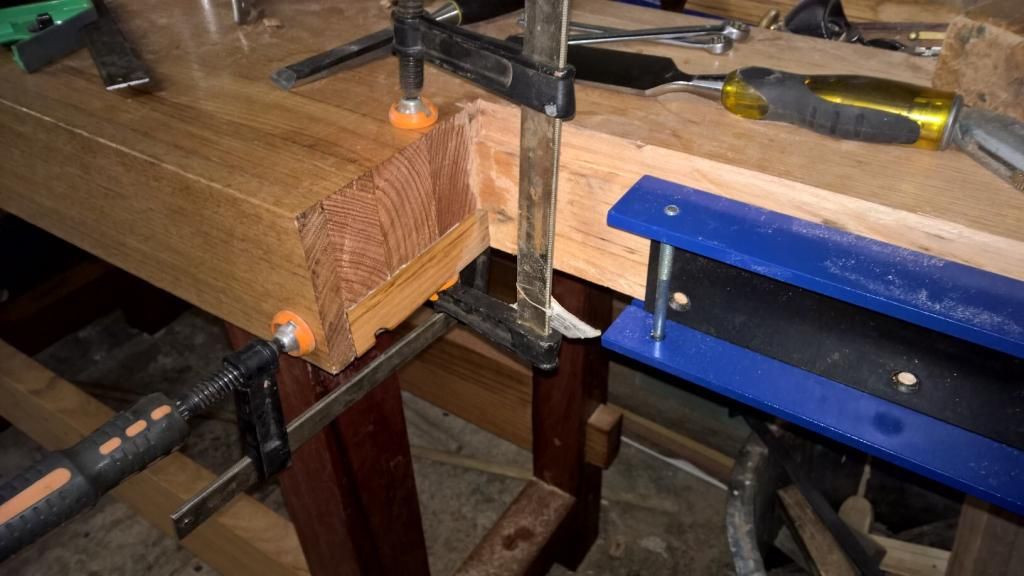
- No turning back now. Though I did think at the time I could just glue that bit back in.
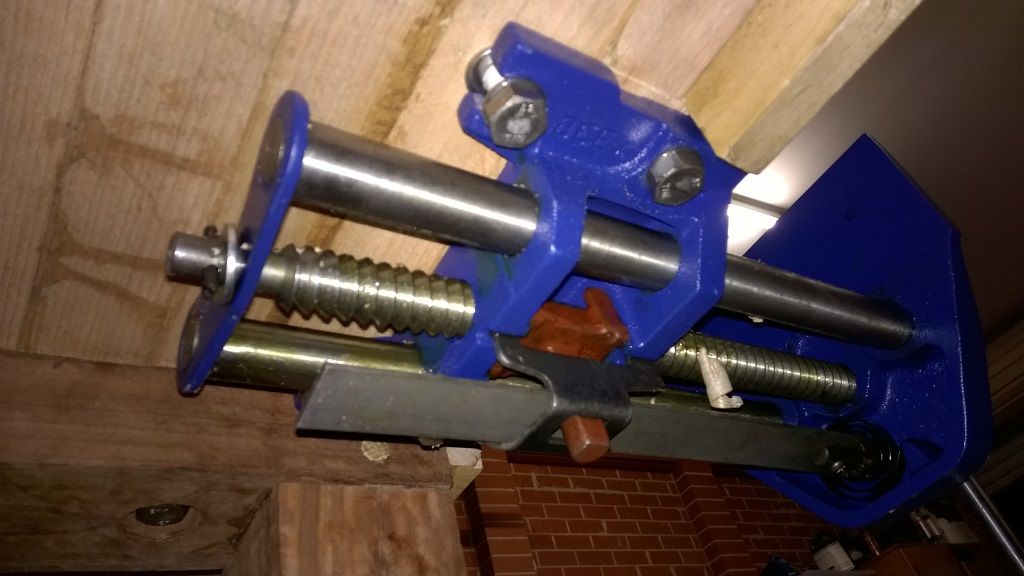
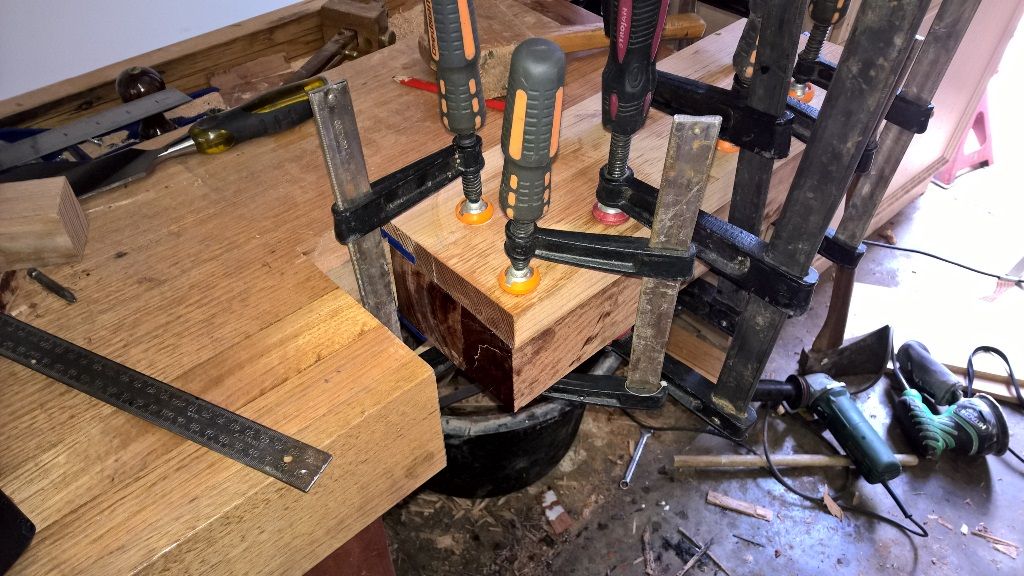
- I assembled and disassembled the vice numerous times to check fitment and movement. The first shot shows an extra piece of vic ash glued behind the vice's rear plate. The benchtop was too thin for all 6 screws to grab onto something.
- An extra piece was added as well to the fixed jaw side. The rebate above the rear plate can be seen which allows clearance for the top guide plate plus wooden top cover later.
- Temporary screws replaced with bugle headed in hex screws whose heads were ground flush with the steel plate to stop them creating drag on the main wooden block.
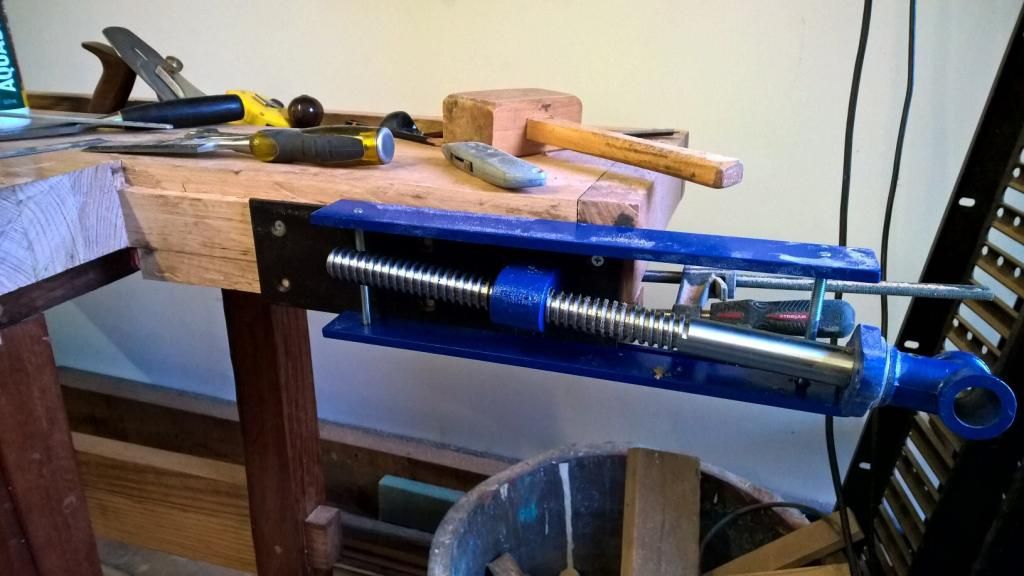
- This is the main block surrounding the vice nut and screw plus keeps the two blue plates spaced.
- It took a while to chop out the recess, then drill and align the hole for the screw which was done by hand and a 28mm spade bit which allowed freeplay of the screw during fitment. I still had to use a rounded rasp to clear the hole to allow the screw to move freely.
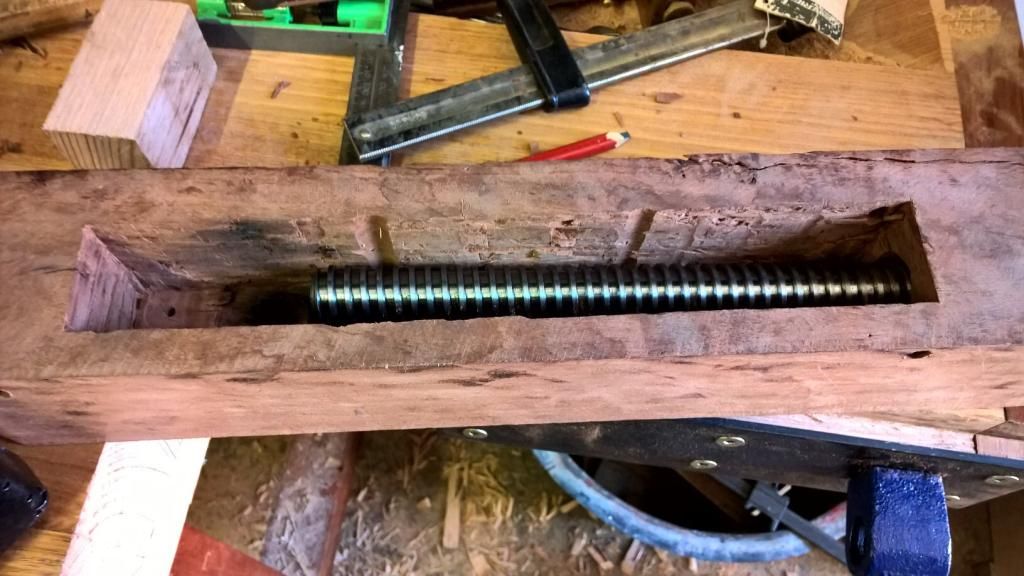
- Holes were drilled to accommodate the two screws that hold the top and bottom blue plates together. A lot of work went into getting the red gum to fit snug and despite this I stuffed up by giving the block a trapezoid cross section. Too stubborn to turn back, every bit from now on had the same angle copied with a bevel gauge marked to include the error so the front and top pieces would basically end up relatively flat with the benchtop's surfaces and the initial error would be invisible.

- Second piece of redgum attached to the front.
- Top cover with it's error bevel is being trial fitted over the top plate prior to further ripping.
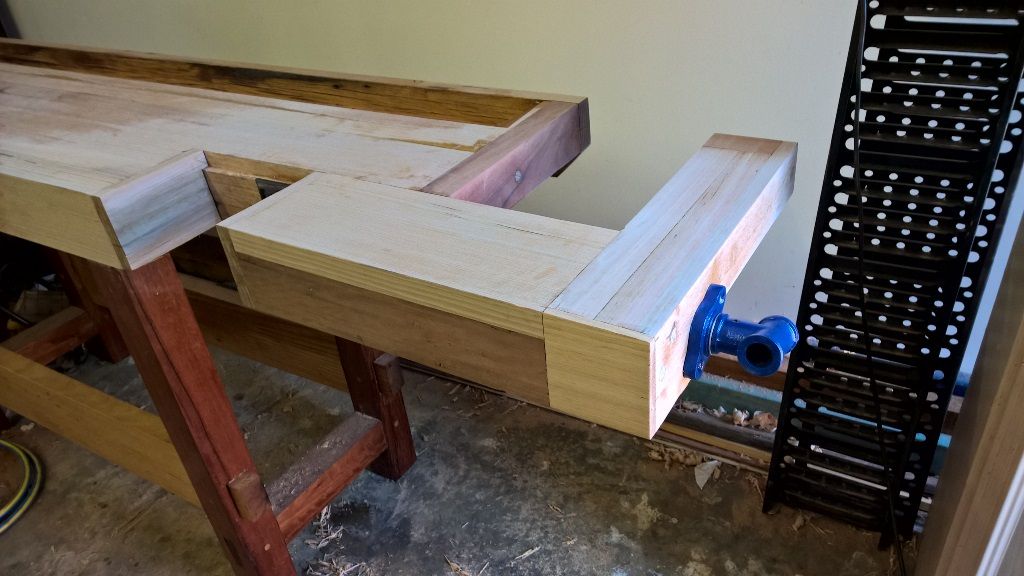
- Second piece of vic ash is added to the top. The front and top of the vice sit slightly proud of the bench's surfaces so they can be planed flat to match the benchtop.
- I think the second photo is after all the planing to the top and front were finished.
Last edited by Canoath; 19th February 2015 at 12:40 AM. Reason: Title
-
19th February 2015, 12:54 AM #12
Senior Member
- Join Date
- Nov 2011
- Location
- Riverina NSW
- Posts
- 211
Fitting the Tail Vice Pt2
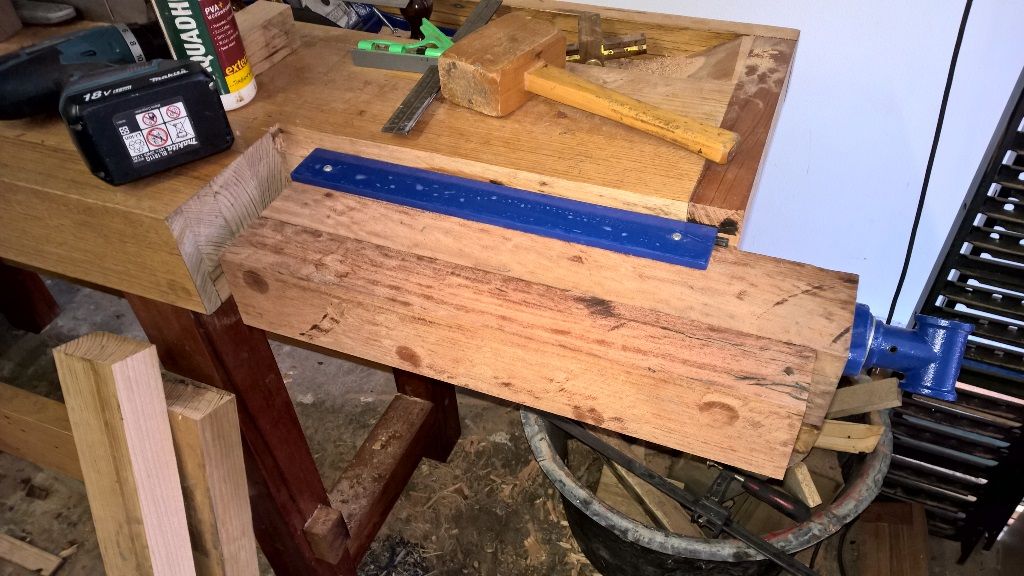
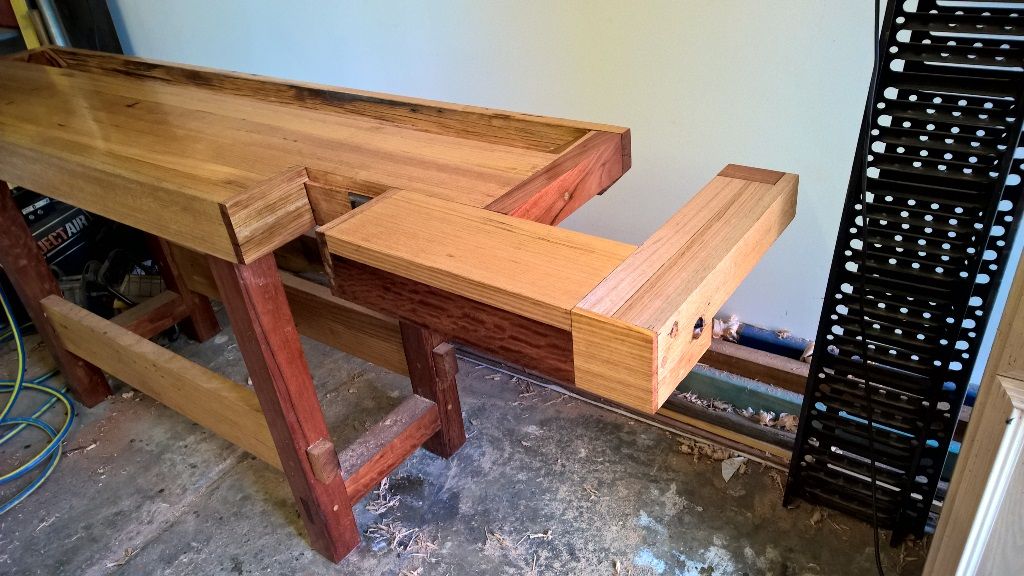
- Jaw liners were added. I'm not too sure what timber it is though. It was just a scrap piece that I could make both jaw liners from. I made a mess of cutting them flush with the apron, but they'll be fine.
- Now I decided to do the "L" thing. I used the offcut that occupied the vice's spot before. It's sitting next to the drill there.
- These are the last shots for now. I messed up the flush cut at the front again. I'm thinking I'll recess the front a little so I can glue in a block or veneer maybe. I also need to block up bellow the "L" jaw at the front to make it all look the same thickness.
- Above shows the vice closed and the one below fully opened. The "L" part has been glued on to the vice then two wooden pegs help keep it solid.
-
26th February 2015, 10:32 AM #13
Senior Member
- Join Date
- Nov 2011
- Location
- Riverina NSW
- Posts
- 211
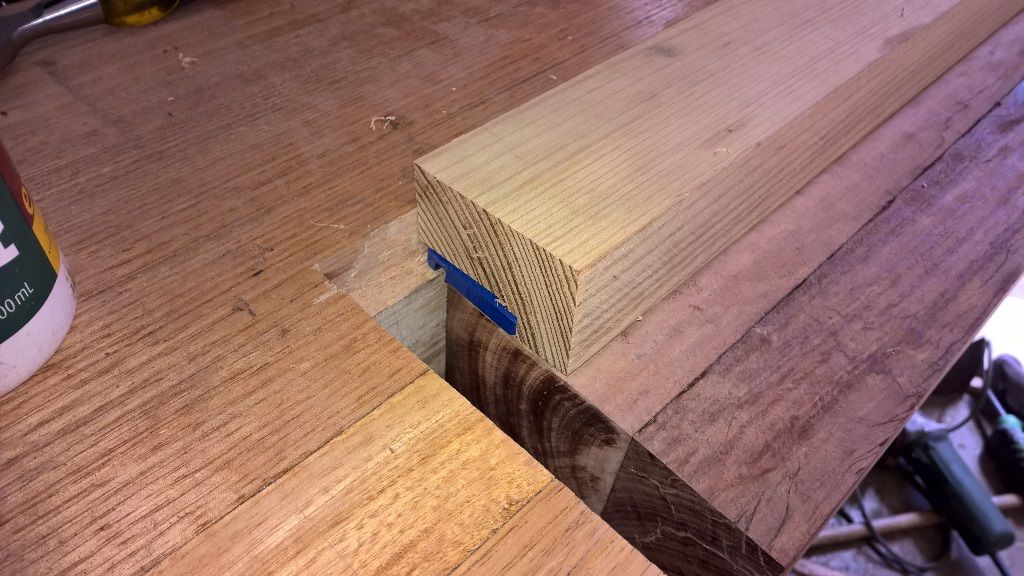
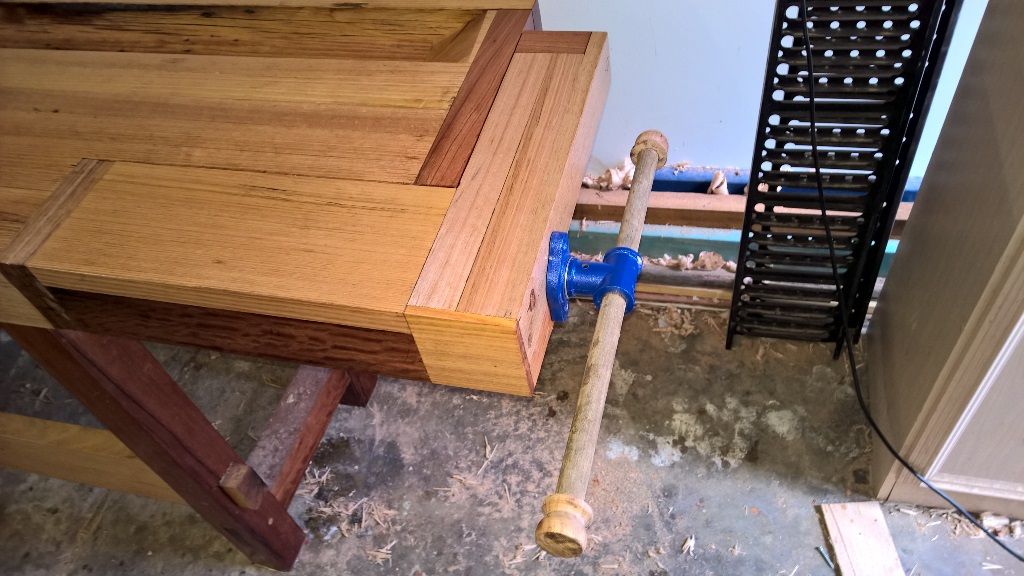
I forgot you can't edit posts after a certain time but the two pics below should've been in the above post. It shows another block and cap attached to the end of the tail vice to cover up end grain and pretty it up a bit. I'm quite pleased with how it turned out despite wondering how the overall join will fair over time without a whopping dovetail. I would've liked to do one but doubted my ability.
The last piece of the vice, the handle. I decided to stick with the old broom handle for the moment and turned some ends to keep it on but after some use, not only is this temporary handle way too long, but I think I'd like to put a wheel or at the very least a crank on the end.
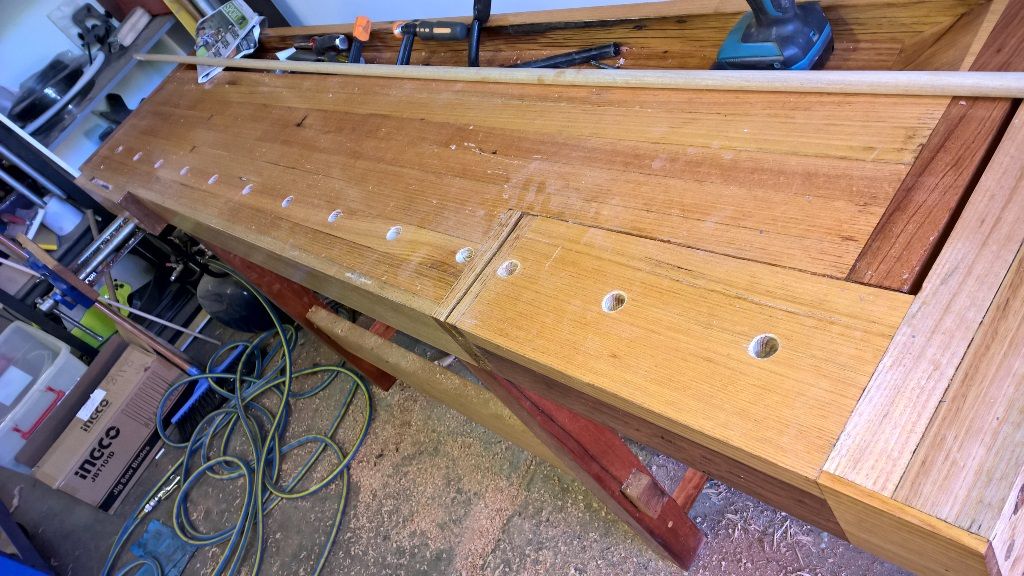
On to the dog holes and I really had no idea where to put them in. I'd read lots, saw pics, liked how some people could determine where they'll need them due to board sizes they work on but in the end I had 8" vice travel so I did 6" dog spacing. At first I thought I'd do a few holes then the rest later when I determined where they were needed but once I decided on the 6" spacing and location of the holes closest the jaw liners, I just kept going.
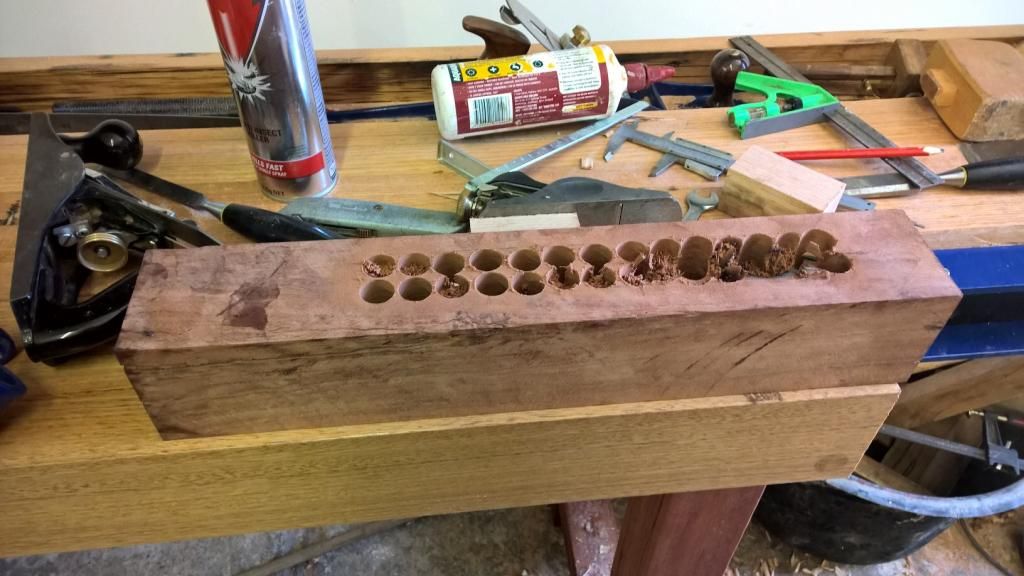
The holes were a bit of a disaster for a couple of reasons. The first two holes which were close to the jaw liners were done with the drill guide below but with an 18mm spade bit. The hole worked fine but needed to be 19mm or 3/4". I didn't have a bit that size so I bit the bullet and bought a $50 3/4" bit that's in the drill below. On about the 3rd or 4th hole the top hex connection for the drill guide developed a bend and made the unit useless. During that hole, the shaft of the new $50 bit became bent also. I've no idea what went one. Inspected the hole and it's all wood, no steel or anything. The powerdrill didn't swing round in my hand and the drill was set for lower than 50% power so I've no idea what's gone on. I had 5mm, very shallow pilot holes marking the dog holes so I continued with the the 3/4" bit freehand.
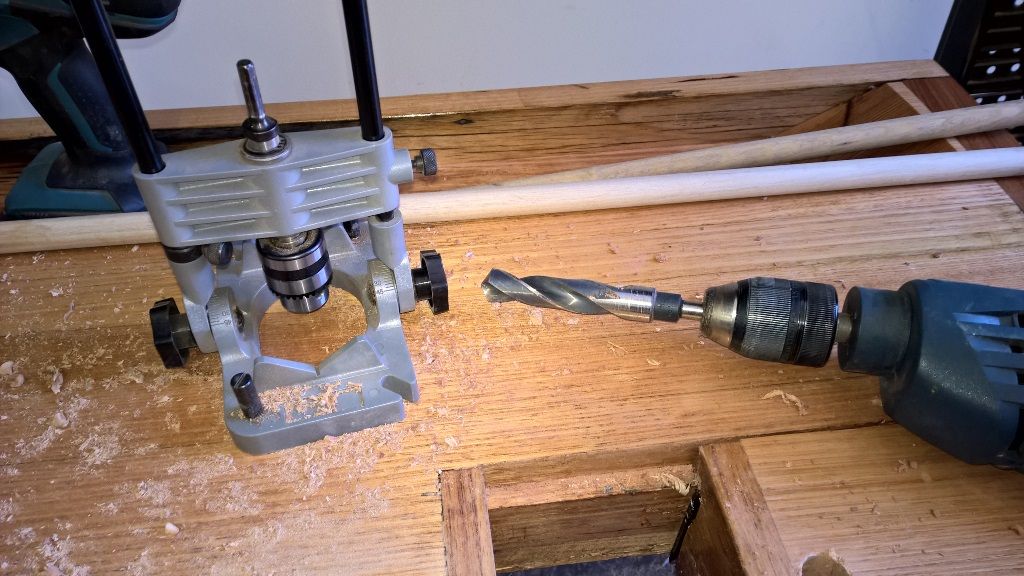
The disaster wasn't over. The holes either side of the jaw liners were the first holes, then I continued to the left, marking and predrilling holes two in advance. I had the above mishap on the 4th hole then continued free hand. I was progressing smoothly until the last two holes at the far end below. The first brought up metal shavings which I realised was from a bolt to the front vice. Cursing I moved to the second hole which looked like it would clear bolts but landed on the base of the front vice. I couldn't believe my stupidity. Those holes are useless unless I buy those click up and down type dogs. To make things worse I was only going to have one dog hole in the tail vice but after stuffing up the two holes at the other end I thought I needed to compensate and put two more in tail vice. The line of holes is a bit too close to the vice's thread. First hole no probs but the middle hole can only be used with limited movement and the last hole - the drill gouged through the head of the cast vice nut. Unbeleivable. It all works fine but geez.
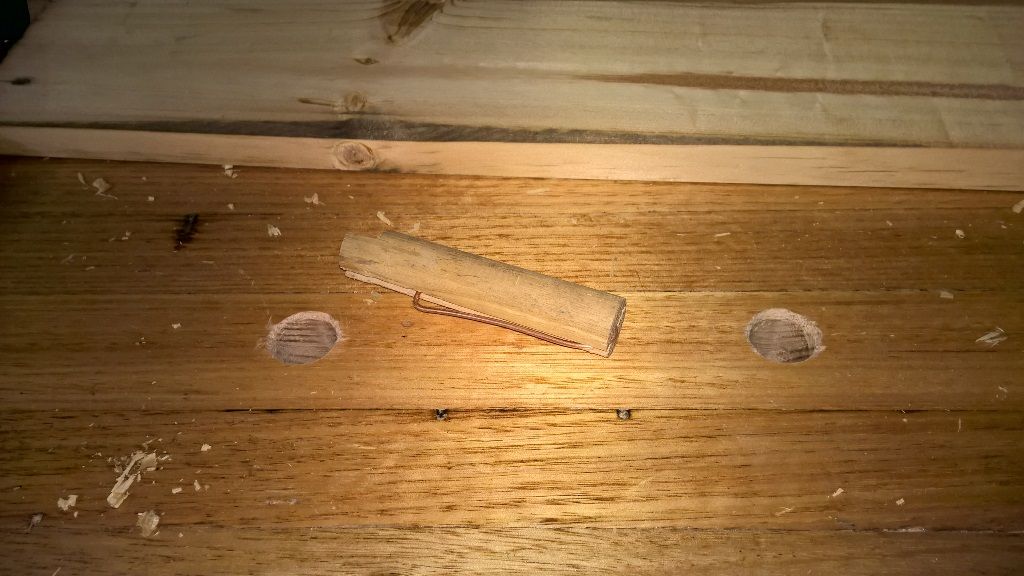
Dogs were made as per Paul Sellers' tutorial on benchdogs and work fine.
And that's pretty much it, apart from holdfast dog holes which I'll add when I need them. Just not in the mood after yesterday. Despite the mistakes particularly towards the end it's turned out pretty darn good. I did a lot of shaving and some cutting on it last night, putting nicks and dents into it adding that final finish. The tail vice and row of dog holes is so useful. The tool well is great and I'm glad I added it but it's a magnet and overflows too quickly so I really need another bench or tool cart to store tools on whilst working.
-
26th February 2015, 05:56 PM #14
Skwair2rownd
- Join Date
- Nov 2007
- Location
- Dundowran Beach
- Age
- 76
- Posts
- 19,922

That's a damned fine bench Canoath!!!
 .
.
Those vises look to be really good quality. Where did they come from??
-
26th February 2015, 06:15 PM #15
GOLD MEMBER
- Join Date
- Jan 2013
- Location
- Tasmaniac
- Posts
- 1,470
Really enjoyed reading about your bench Canoath, it looks mighty fine.
You say that the tool well is a magnet and it fills up too quick.
If your bench is to be located close to a wall (which it looks like it is), then an idea would be to put up a vertical shadow board type set up on the edge that is closest to the wall. You can then ad chisel and other tool racks to it to suit.


 Reply With Quote


Similar Threads
-
WIP - Recycled Hardwood Bench
By NCArcher in forum THE WORK BENCHReplies: 138Last Post: 16th January 2013, 08:56 PM -
Recycled timber
By chrisb691 in forum WOODWORK - GENERALReplies: 5Last Post: 25th April 2012, 07:48 AM -
my small recycled work bench build
By garageman in forum THE WORK BENCHReplies: 0Last Post: 23rd January 2011, 02:56 PM -
Recycled wood Glass Cutlery Bench
By NewWoody in forum WOODWORK PICSReplies: 10Last Post: 8th February 2006, 11:00 PM -
Recycled jarrah bench seat
By Moors in forum LANDSCAPING, GARDENING, OUTDOORSReplies: 3Last Post: 10th January 2006, 11:04 AM
