

 Thanks:
  Likes:
  Needs Pictures:
  Picture(s) thanks:
Results 31 to 45 of 92
Thread: Dogs Split Top
-
27th October 2016, 12:25 AM #31
 Member


- Join Date
- Jun 2016
- Location
- Thursday Island
- Age
- 49
- Posts
- 99
 Nathanael thanks mate. Yes I get them out every time I am planing but still have troubles. Some things I just get, others take time and others again just escape me completely. These are teetering in the latter category at the moment. I'm hoping one day all the tapping will suddenly click and I can get them working. Interestingly I have had to flatten the soles on multiple occasions already. Once again the humidity up here is playing havoc with things and this could be contributing to my problems. I will send Terry and email and see what he advises.
 Originally Posted by NathanaelBC

Funnily enough I have the shoulder plane and it worked from the jump. No endless tapping, no issues at all. Set it up on the bench, got the blade level, hammered in the wedge and started planing. This has me thinking that the other planes will be better once they settle down a bit and don't need flattening every other day.
We'll see. Enjoy your planes mate, they are really nice pieces of kit.
-
27th October 2016 12:25 AM # ADSGoogle Adsense Advertisement
- Join Date
- Always
- Location
- Advertising world
- Age
- 2010
- Posts
- Many
-
27th October 2016, 08:34 AM #32
GOLD MEMBER
- Join Date
- Mar 2004
- Location
- Brisbane (western suburbs)
- Age
- 77
- Posts
- 12,130
Yes, Dogs, I well know the feeling! And do be careful, the darn things can seize so tightly, you risk busting something trying to unscrew an overtight fit (damhik!). A few times I've persisted with slightly over-tight screws/nuts, hoping they might 'wear-in". They don't, or at least not for a very long time! Wood against wood obviously wears eventually (look at old wooden plane soles), but it takes far longer to wear a thread than most people have patience for. I've always ended up making a more immediate fix of some sort. In my case, it's easy, 'cos I have the gear, and it's virtually always the screw that's the problem, due to slightly less cutter protrusion than required. So as long as I haven't already disassembled the jig, it takes but a minute or two to retify. Originally Posted by Dogs857
In your case, I think the most practical solution will be to attack the screw, & if the thread angle is 60 deg., a 3-corner file will fit nicely. It will take more passes than you might expect, to remove the couple of thou required, so if you can rig up a way of rotating it slowly towards you, it will help, and keep the process even. By the looks of that "vise", you are no stranger to figuring out ways & means.....
Cheers,IW
-
4th November 2016, 01:27 AM #33
Member
- Join Date
- Jun 2016
- Location
- Thursday Island
- Age
- 49
- Posts
- 99
Thanks again for the advice mate, I really appreciate it. I will get myself a file and rig up some contraption to get this going.
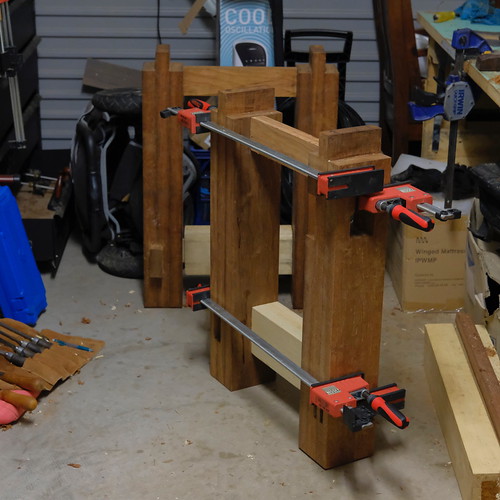
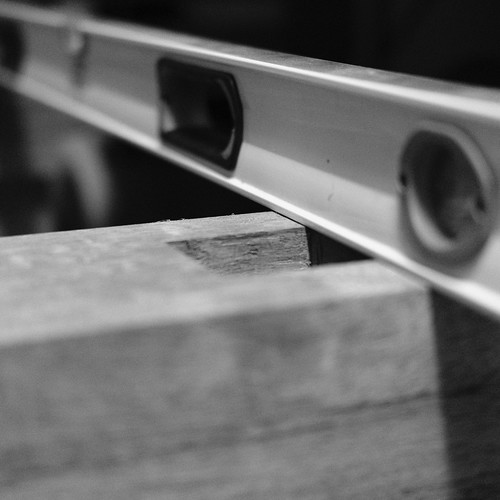
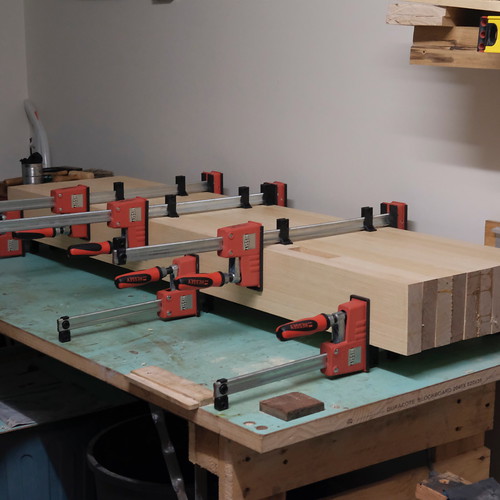
In the mean time my clamps turned up so I got to work gluing up my top.
IMG_0370.jpg
Lessons learnt:
1. Sweep up the shavings before starting to glue up on the deck. It took a while to get all the crap that ended up glued to my bare feet off again.
2. Dimension timber just before glue up in humid environments. I had flattened all this timber a month ago but it was warped again before I went to glue up.
3. I'm sure my temporary bench is just about to fall apart. I'm getting that worried feeling every time I try and plane something on it.
4. The wet season is coming and I am sweating like a prostitute in church. I was in the shop for an hour and a half and looked like I had just been for a swim.
I'm happy to see things progressing. Will be a lot happier once I get the base together but I need mortising time for that. Pounding away at timber with a mallet and a chisel at 2300 is not the way to keep wife/baby/neighbours happy.
Stay tuned.
-
4th November 2016, 05:26 PM #34
Mildly Moderate
- Join Date
- Nov 2007
- Location
- Albury Well Just Outside
- Posts
- 13,315
Originally Posted by Dogs857
I agree.
-
16th July 2017, 11:16 PM #35
Novice
- Join Date
- May 2017
- Location
- Melbourne
- Age
- 43
- Posts
- 24
Just wondering how this all panned out, I quiet enjoyed reading through it all and would love to see the i assume finished end result.
Cheers
Jim.
-
17th July 2017, 09:35 AM #36
Member
- Join Date
- Jun 2016
- Location
- Thursday Island
- Age
- 49
- Posts
- 99
Hey Jim
Thanks for thinking of me, I'm still lurking on the forum but the workbench build has been shelved for now.
My wife got extremely sick at the end of last year and a lot of my tools and other treasured items (motorbike, I still get teary thinking about it) was sold off to help cover expenses. That plus having to look after the baby full time meant that workshop time was no longer a priority.
We are not quite out of the woods yet but everything has gone back to resembling normal again. I am back at work and saving to replace all the tools that I sold. I have pulled all the timber out, dusted it off and started looking at finishing this again.
Once I get going I will update this thread.
Cheers
Jeff
-
17th July 2017, 06:27 PM #37
GOLD MEMBER
- Join Date
- Aug 2012
- Location
- Imbil
- Posts
- 1,167
Hi Dogs,
I also was enjoying the thread I was sorry to see you selling tools a while ago,I figured circumstances had changed,sorry to hear it was family health but glad to hear things are coming good and hope they continue to do so. Hoping you can get back to the workshop and the build soon.
Regards Rod.Rod Gilbert.
-
17th July 2017, 06:44 PM #38
GOLD MEMBER
- Join Date
- May 2011
- Location
- Albury
- Posts
- 3,039
Even the best laid plans have a spanner thrown in the works at times. Pleased to see you're apparently over the worst of a very stressful time. Hope you're back to enjoying your woodwork, and your family, ASAP.
All the best.
Cheers,
David
-
17th July 2017, 07:58 PM #39
Novice
- Join Date
- May 2017
- Location
- Melbourne
- Age
- 43
- Posts
- 24
I'm sorry to hear that mate, I'm glad things are going back to normal. I can understand how illness and injury can get in the way of the best laid plans, I spent 4 months in hospital and rehab hospital after an injury to my spinal cord and then 18 months later my mum spent the best part of 4 months in hospital. I hope everything continues along the right path.
Jim.
-
6th November 2018, 02:28 PM #40
Member
- Join Date
- Jun 2016
- Location
- Thursday Island
- Age
- 49
- Posts
- 99
Time to resurrect an old (almost zombie) thread.
Often, just when you think you have things figured out you get thrown another curve ball. The wife was in the clear, things were looking up so we took number one son to Vietnam to celebrate his first birthday because why not?? Life if for celebrating. However we celebrated a bit too hard and came back with number 2 in the oven. The wife was still not in the best shape for creating another mini me and the pregnancy was tough, so was looking after number 1. He tipped my beer all over my laptop, frying it completely and with it all my sketch up plans for the bench along with so much more. Backups saved a lot of it but the plans were gone.
Add to that the garage became a bit of a dumping ground as we cleaned and reorganised the house. Bits of the bench went everywhere, got dropped, had things stored on them, got bumped with so many items. Tools grew rust at an alarming rate as my storage isn't that air tight and the dust gets on everything. Number 2 came along and started keeping us up at night again, though nowhere near as badly as number one did. This little man smiles at everything, so even at 0300 you still can't get mad at him.
Despite all this I kept the dream alive, one day I shall return. I grew in optimism and bought some more HNT planes because, dammit, I really want them to work for me. I would brush loads of crap off my temporary bench and tap and plane away at bits of timber I had ripped off different pallets and other items. I got pretty good at it too, so grew more optimistic and bought a couple more. After a few more months I was getting really good, but another problem arose. I was needing to flatten the soles every time I used them I'm sorry Terry (the most helpful man I have dealt with) but I just don't think this is going to work for me. Yes they should stabilise with time, but how much of the plane will be left by then?? I have some metal planes inbound and will have to say goodbye to these again. I still want to explore some of his joinery planes, but I think I have to accept that HNT bench planes just are not meant for me.
Finally, about 6 weeks ago I threw a man sized tantrum, cleared out the garage and threw out a heap of junk, cleaned the place right up, found all the bits of my bench and kicked this project back into life. It felt like I had been chopping mortises for years but I kept it going until I hit the point where I could think about putting the base together. I fought the urge to rush and get it finished, but also had to accept some of my limitations. For starters what I think is vertical is generally not, secondly sawing straight lines is not my forte just yet either. I had to redo some of my tenons a few times, and redo a few mortises that were quite skewed, but I have time and patience on my side.
Some of my tenon shoulders may not be that pretty, but the joints are solid. That in itself is a win in my book, and those little gaps will help to show me how far I have (hopefully) come in a few years as I keep building stuff. I needed to plane my front legs front face a little to make sure they were matching as well, as the end result was a little skewed. No worries, I can do that too. The rest of the bench can be a little off, but I wanted that face flat. The rest is working on the "if it looks fair it's fair" principle. Eyeball it and everything looks great. use a strait edge and things are a little off, but nothing drastic.
I am so happy to be back in the shed, and happy that my little expanding family is happy, healthy and making noise.
Photos to follow for anyone who is interested, I just need to find time to upload them.
-
6th November 2018, 11:17 PM #41
Member
- Join Date
- Jun 2016
- Location
- Thursday Island
- Age
- 49
- Posts
- 99
And the promised photos.
1. Getting all the bits together so they look more like they belong to something.
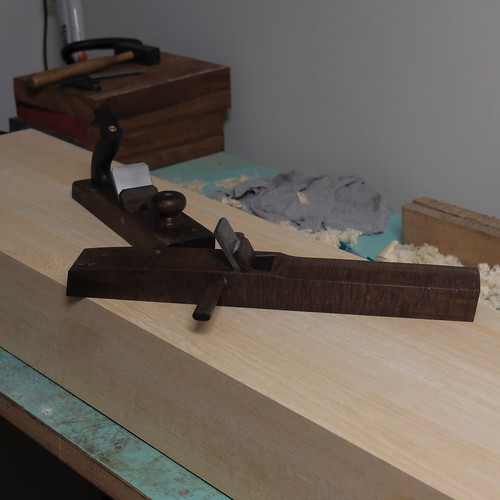
2. HNT brothers, palm smoother and ringed gidgee smoother. Great planes, just not for me it seems.
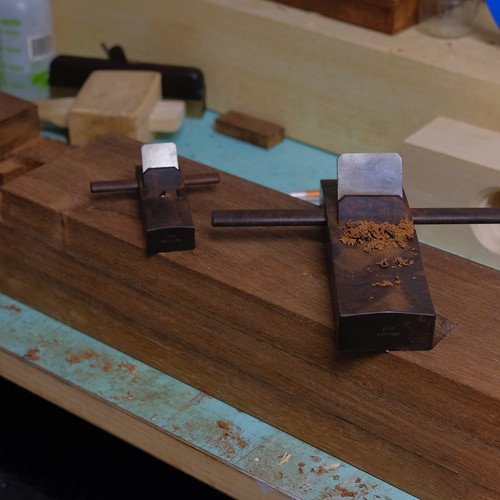
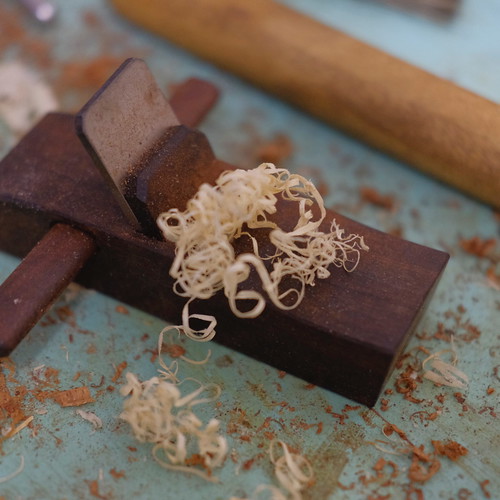
3. Palm smoothing
4. Coming together slowly
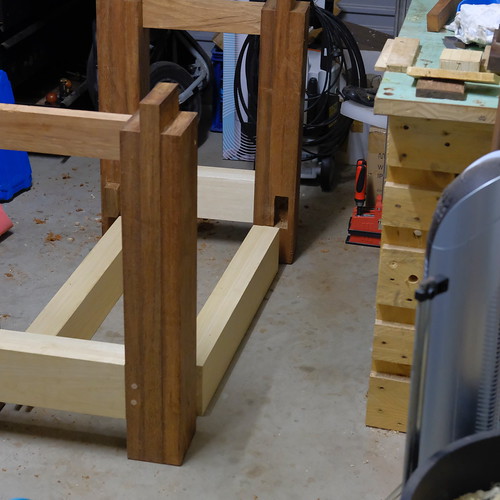
5. Just a hair off.
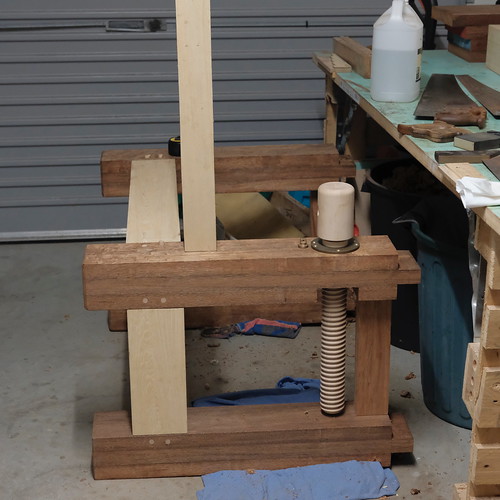
6. Sorting out positioning of the parallel guide and AYS guide chain.
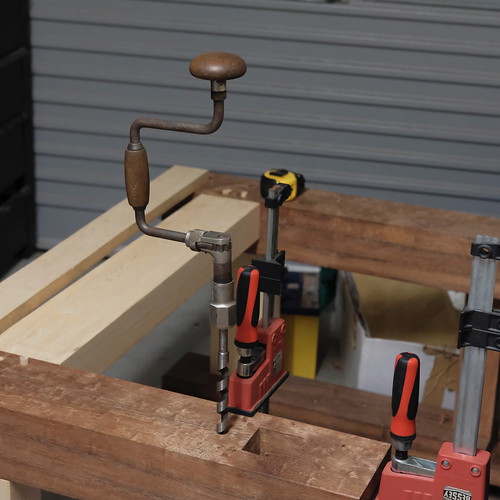
7. More drilling. This really is the aerobic way of doing things, especially in legs this thick. I have started using clamps as a vertical guide in two directions which is helping me a lot.
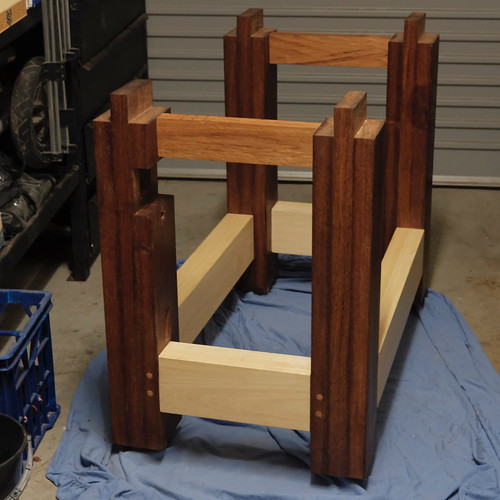
8. All together with a coat of Danish Oil. Things are starting to look like we are getting somewhere.
That is where I am up to right now. Time to start prepping the top.
Stand by for updates.
-
7th November 2018, 11:25 AM #42
Senior Member
- Join Date
- Dec 2010
- Location
- Townsville
- Posts
- 130
It's looking awesome. Don't stop now!
-
8th November 2018, 12:50 PM #43
Member
- Join Date
- Jun 2016
- Location
- Thursday Island
- Age
- 49
- Posts
- 99
Cheers Pedro, all things working in my favour will have this finished in less time than it began

Having just read back through my first round of this build I realised I could have saved myself some heartache as I mentioned the issue with having to continually flatten the wooden planes before. Ah well, at least I know deep down I tried again and just have to let them go.
Also I want to update my leg vise screw issues. In the end I contacted Lake Eerie Tool Works and asked them for some advice. They said that the screw had indeed swelled and that I would have little to no chance of getting it to work. They suggested that pumice powder and a lot of effort could work but not a great deal else.
When I replied that I would give it a go and thanked them for their time they offered to make me another screw with looser tolerances, which is what they normally do for people in high humidity areas, and then they told me they would have one out to me in a couple of weeks. When I asked how much the reply was "no charge at all", not even for the international postage!!. When I asked if they wanted the original screw back they said I could keep it and keep working on it. 4 weeks later a brand new screw and block arrived. It sat in the shed for the best part of a year and still works so should have no issues at all.
So this is a massive shout out to Lake Eerie Tool Works. I was certainly not expecting to have that happen when I first contacted them and am still extremely grateful for the way they helped me out. I was happy to pay, they were happy to just help. I didn't even get time to reply and thank them as things went downhill shortly after that, so will have to make sure I do so now. If you are looking for gear like this, give these blokes a call. I know I certainly will after this.
It also leads into another thing I have noticed. You pay more for tools from HNT Gordon, Lie Nielsen and Lake Eerie and the like, but if something goes wrong they will go out of their way to get you going again. That is worth the premium alone in my book.I, for one, like Roman Numerals
-
14th November 2018, 12:09 AM #44
Member
- Join Date
- Jun 2016
- Location
- Thursday Island
- Age
- 49
- Posts
- 99
I am getting a bit of time in the evenings now so things are starting to pick up pace.
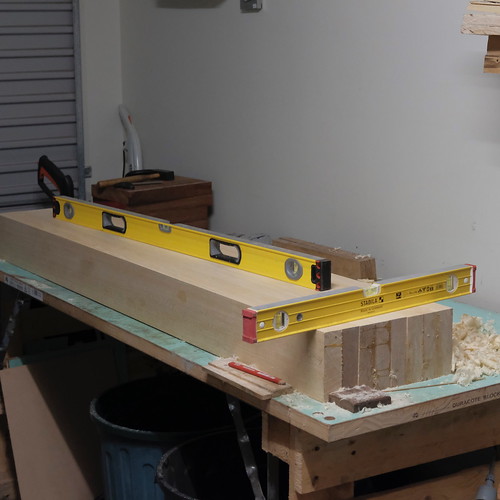
I glued up a big piece of the top and started to flatten the underside. I'm not going too crazy but I would like it to be flat. Then it was a matter of sizing and notching two extra pieces to go around the tenons in the top of the legs and adding them to the pile. This top is scarily heavy now, it's time to phone a friend to help me shift it into place.
From here the plan is to break down the temporary bench, put the new one in place and flatten the top and front face. Then add the HNT Gordon tail vise, then the leg vise can be made and added. Lastly I will add the remaining piece of the bench along the back and maybe fill in the bottom to add a shelf. I will be adding a deadman but it won't be a permanent fixture, instead I am looking at something that I can remove easily but that is still an idea in progress and one I will pursue should it become a need.
Flattening the bottom
HNT Boys in action (after flattening again)
The cheats way to mortise
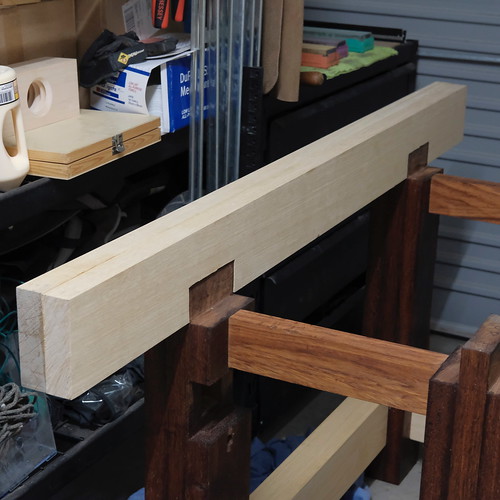
Sizing up
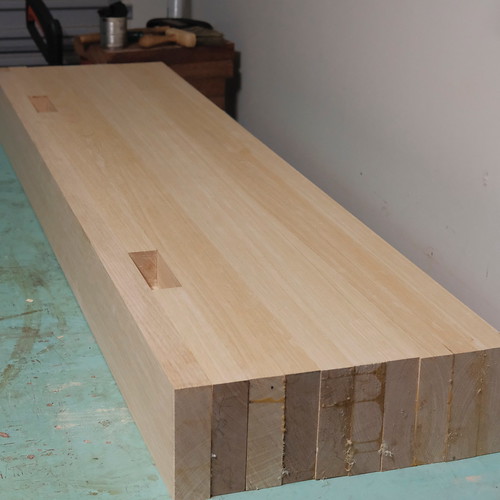
Glue up
Something to add on the list of things I am doing better.
Today was the first time I have come out of the garage after a glue up without shavings stuck to my feet or fingers. Now that is progress.I, for one, like Roman Numerals
-
14th November 2018, 05:30 PM #45
Member
- Join Date
- Jun 2016
- Location
- Thursday Island
- Age
- 49
- Posts
- 99
Ok a question for members with way more experience than I.
I have a concrete floor in my garage, and this bench should top out around the 160-180kg mark, will I need to worry about it moving noting that I am doing everything by hand??
Should I look at putting something under the feet to ensure it stays in place, and if so what?? I'm going to buy some leather to line the vise face so should I put some on the bottom of the legs just to make sure??
I just want to get ahead of things before I put on the top and it becomes a whole lot harder to get under the base of this bench.I, for one, like Roman Numerals


 Reply With Quote

Similar Threads
-
Lil Log Dogs
By MAPLEMAN in forum PETS, PETS & more PETS.Replies: 26Last Post: 10th June 2014, 08:31 PM -
'Lil' Log Dogs
By MAPLEMAN in forum PETS, PETS & more PETS.Replies: 0Last Post: 10th October 2010, 10:32 PM -
Yo dogs!
By Wongdai in forum G'day mate - THE WELCOME WAGON -Introduce yourselfReplies: 6Last Post: 31st October 2008, 03:33 PM
