

 Thanks:
  Likes:
  Needs Pictures: 0
 Picture(s) thanks:
Results 1 to 6 of 6
-
29th November 2019, 12:51 PM #1
 Supporting my wife's hobby.


- Join Date
- Nov 2013
- Location
- Caboolture QLD AU
- Posts
- 781
 Making a powerfull Magnetic base LED light for Lathe, scroll saw etc.
I was looking at prices for a quality Magnetic mount work light for the lathe, bandsaw and scroll saw, most powerfull units appear to use halogens, as the LED units available are usually much lower in power at around 150 to 300 LUMEN, I decided to make my own. I made this unit some time ago and thought I'd post the info here to give others some ideas and another option for a great mag base LED light.
The only problem with this approach is the LED flood light that I wanted to use were sold as a pair, so this blows out the cost of a single unit by $35.00. The final price for off the shelf parts when building two works out at around $116.00 each, cost would likely be lower by shopping around, these units make a very powerful quality LED flood light with a powerful magnet switch base.
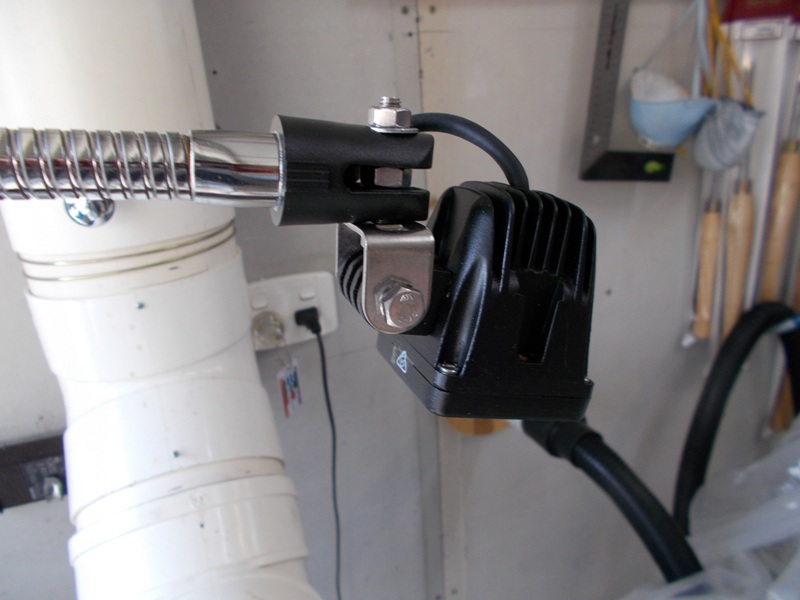
Below: LED Head mounting. The S-steel bracket comes with the LED Flood light, the attachment at the end of the gooseneck is a large brass insert carrier normally used for a microphone holder, the unit screws on to the head of the heavy duty gooseneck, the low voltage (9V to 60V) power cable runs inside the gooseneck stem, LED light is 51 mm square X 61 mm deep.
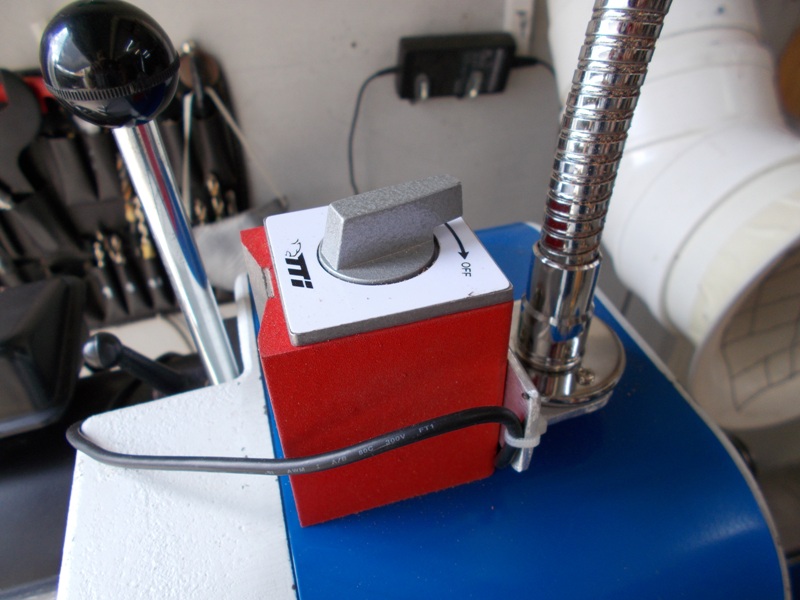
Below: Magnetic Base has a single screw large hole for attaching a fitting, I used a piece of thick aluminium angle to mount the Gooseneck Base, I never got around to bending the ends of the aluminium bracket back along each side, the idea was to stop it from rotating around the single mount bolt, however, it has never moved so I left it as is. Unit shown is magnetically locked to the sheet metal cover on the drive belt housing, it has not moved since day one, when locked to a cast iron surface, the mag base is almost immoveable.
BTW: The ON / OFF switch mechanically turns the Magnetic base on / off, allowing you to simply lift the base off or lock it magnetically to a metal surface.
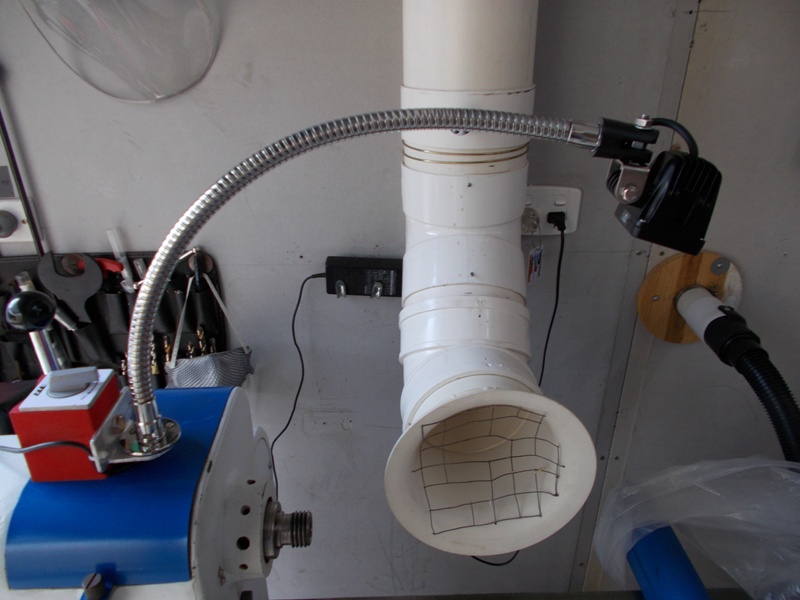
Below: Big beefy goose neck has NOT Sagged, it does not vibrate on the lathe even with very out of balance stock. You can just grab the LED light housing and move it anywhere, the Magnetic base does not move even on this sheet metal cover.
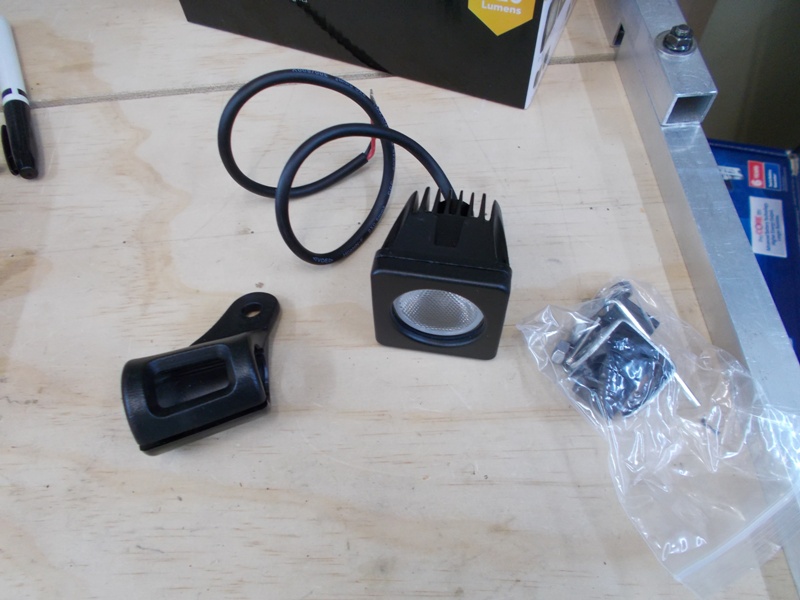
Below: Led flood and mounting hardware, the black piece at the front left of the photo is the microphone holder that was part of the goose neck mic attachment, it's unscrewed and discarded.
Parts:
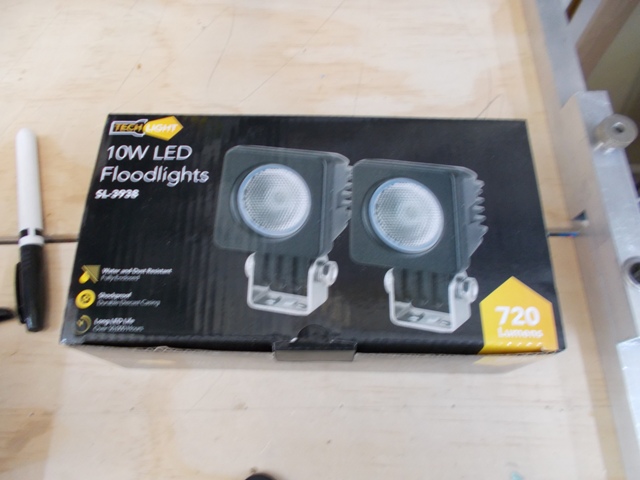
LED FLOODS: Jaycar SL3938 720 LUMEN LED Flood light with CREE LED. Two LED units per BOX, so $35 each but you have to purchase two.
These are built for 4WD and Marine use, water proof, dustproof, shockproof in a rugged alloy diecast housing. Size 51 mm square X 61 mm deep.
Power is 9 volts to 60 volts @ 10 watt, I use an old 15v DC plug pack, an old laptop plug pack can be used because of the very wide supply rating of these units
Gooseneck: Jaycar AM4127 5/8" 450mm long. $15.00
BASE: Jaycar AM4130. $6.00
Mic Holder: Jaycar AM4107. $7.00
The Magnetic switch base is available from a number of places, I grabbed one from my local Trade Tools. TTI Fine Adjustment Magnetic Base, $53.00
LINK
Mike.
EDIT:
1: Forgot to add, the cable to the LED runs inside gooseneck.
2: For anyone wanting a bit more info on powering these LED floods.
These units incorporate an SMPS power interface. This means that any power pack with a voltage output between 9 volts DC and 30 volts DC (or more) will drive these LED lights to exactly the same brightness. The internal SMPS always turns the wide range of input voltages into the correct value for the LED. I like old laptop or LCD monitor supplies because they usually have a separate removable 240V AC power lead, but again, any DC power pack that can supply around 1.2A at 9V or less than 1A at voltages above 12V will do. As the input voltage rises the current needed drops, these unit draw around 10W regardless of input voltage.(1) Our small workshop layout __ (2) Bandsaw circle cutting jig __ (3) Spindle sander modifications __ (4) Dust Sensor
(5) Router table redesigned ____ (6) DC and where it all began __ (7) Bandsaw dust extraction build
-
29th November 2019 12:51 PM # ADSGoogle Adsense Advertisement
- Join Date
- Always
- Location
- Advertising world
- Posts
- Many
-
10th December 2019, 08:46 PM #2
SENIOR MEMBER
- Join Date
- Oct 2017
- Location
- Sydney
- Posts
- 148
Hi Mike,
Thanks for the details, I have taken your design and with the help of a guy with a 3D printer (and design) I have come up with a design that uses 18V Makita Batteries.
20191210_202820.jpg20191210_202748.jpg
-
11th December 2019, 09:07 AM #3
Supporting my wife's hobby.
- Join Date
- Nov 2013
- Location
- Caboolture QLD AU
- Posts
- 781
Hi pach, really nice work, with the 3D printed attachments it looks really professional.
Although I have power available at every work machine, there are times on the lathe when you want to quickly move the LED lamp from above the work piece to the lathe bed, espically when deep hollowing large material, this would be an ideal option and remove the concern of a power lead getting in the way.
I have a few old 18V packs and the parts for a second MAG LED Light, so a battery unit is next on my todo list.
Thanks for posting.
Mike.(1) Our small workshop layout __ (2) Bandsaw circle cutting jig __ (3) Spindle sander modifications __ (4) Dust Sensor
(5) Router table redesigned ____ (6) DC and where it all began __ (7) Bandsaw dust extraction build
-
11th December 2019, 09:11 AM #4
GOLD MEMBER

- Join Date
- Nov 2018
- Location
- Newcastle
- Posts
- 1,016
Nice.
As the magnetic base is around half the total price, you could save a chunk by asking a 2 year-old Chinese sweatshop worker to send you one - this one's around $15 on bangood. 30kg holding force.
Screenshot 2019-12-11 09.10.56.jpg
-
11th December 2019, 09:20 AM #5
Supporting my wife's hobby.
- Join Date
- Nov 2013
- Location
- Caboolture QLD AU
- Posts
- 781
Yes totally agree, and thanks for the link.
Likewise the LED units, but the big problem I've had in the past with some low cost LED devices is with poor quality LED inserts that have low output, just something to look out for.
Mike.(1) Our small workshop layout __ (2) Bandsaw circle cutting jig __ (3) Spindle sander modifications __ (4) Dust Sensor
(5) Router table redesigned ____ (6) DC and where it all began __ (7) Bandsaw dust extraction build
-
11th December 2019, 10:44 AM #6
SENIOR MEMBER
- Join Date
- Oct 2017
- Location
- Sydney
- Posts
- 148
I actually went the cheaper route.
1. Purchased a Magnet from Ebay $24
2. LED's from Ebay $18 for 2 (so $9 each)
3. Gooseneck and fittings from Jaycar (as per @MandJ post)
4. I paid $30 for the 3d printed component which included the Makita battery terminal


 Reply With Quote
Similar Threads
-
Eclipse magnetic base info
By MWF FEED in forum METALWORK FORUMReplies: 0Last Post: 22nd July 2018, 01:20 PM -
Making magnetic blocks
By Ueee in forum METALWORK FORUMReplies: 24Last Post: 18th October 2013, 02:40 PM -
Flexible magnetic base
By morrisman in forum METALWORK FORUMReplies: 17Last Post: 22nd August 2012, 12:05 AM
