

 Thanks:
  Likes:
  Needs Pictures: 0
 Picture(s) thanks: 0
Results 1 to 15 of 21
-
13th February 2016, 06:58 PM #1
 New Member


- Join Date
- Feb 2016
- Location
- Sydney
- Age
- 51
- Posts
- 6
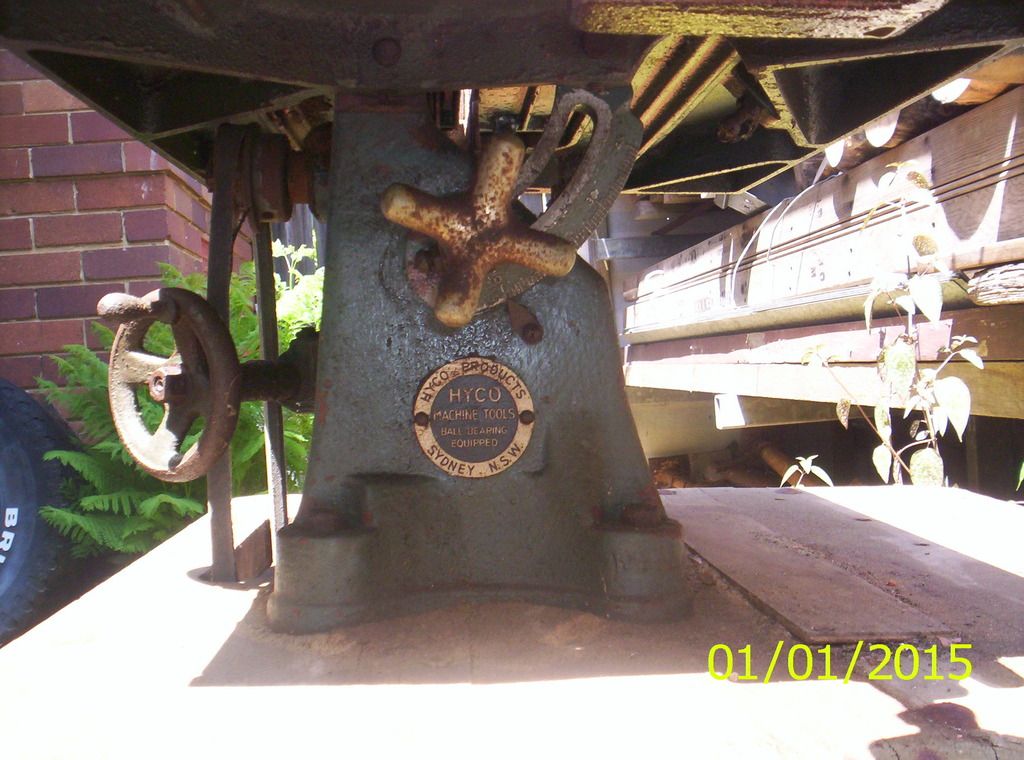
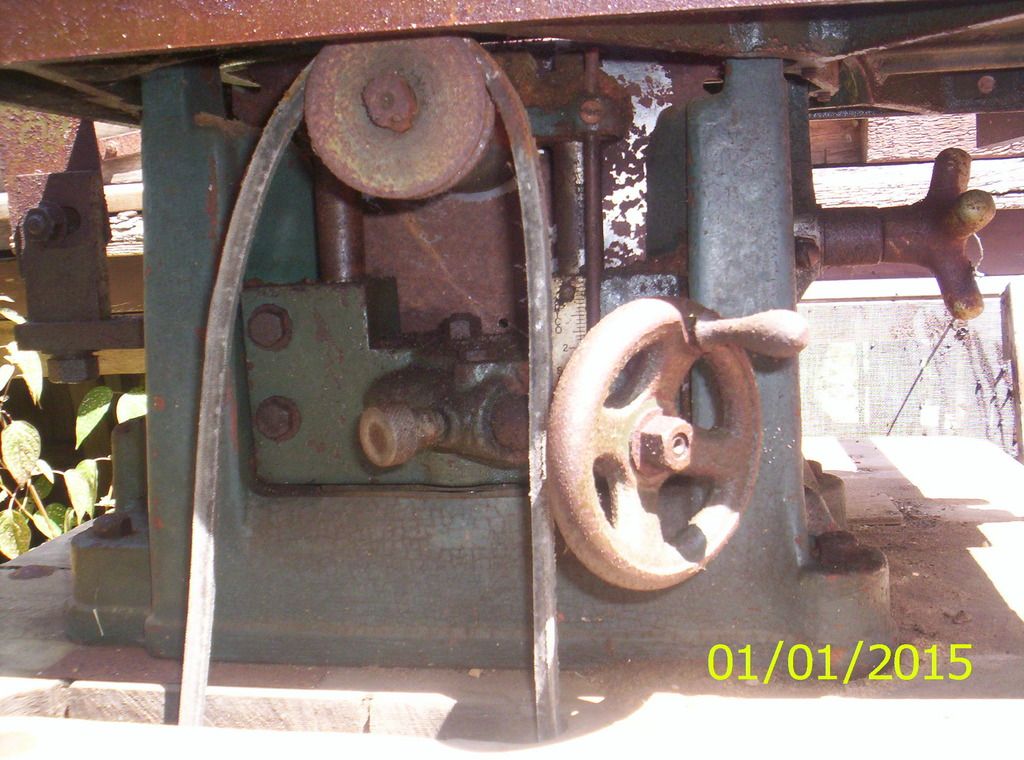
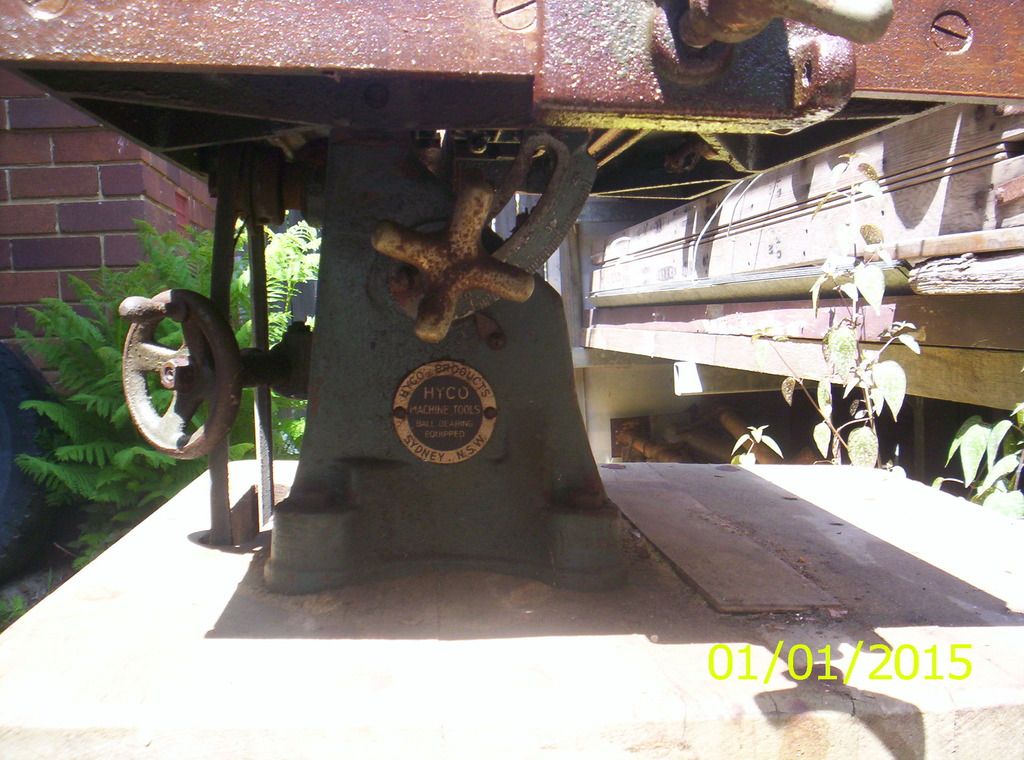
 Hyco Junior Table saw (or bench saw ?)
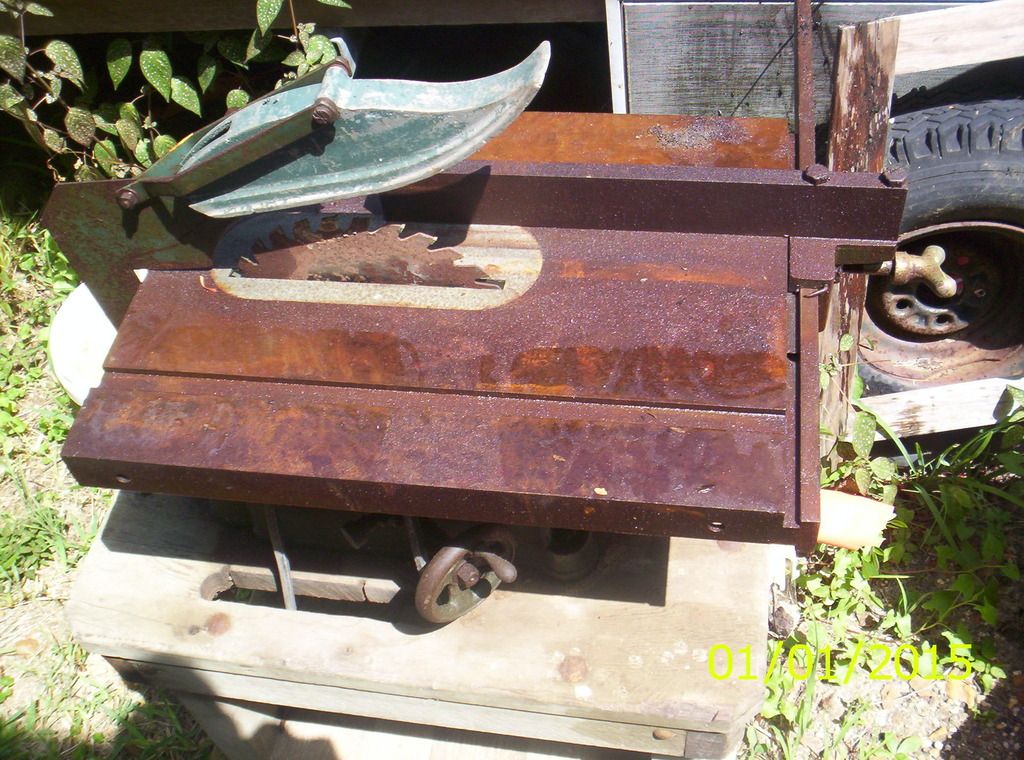
I recently purchased a Hyco Junior table saw off evil bay and am currently in the process of doing a tidy up \ restoration.
Pic_001.jpg
Luckily everything that was meant to turn turned freely and all fasteners came loose without any drama at all. After derusting via electrolysis I'm ready to prime then paint. Add some new bearings, pulley, belt & blade and we're set to go. Luckily at the time my good ole ma was getting rid of a treadmill so power will be supplied by said treadmill motor & electronics.
I was just wondering if any of you kind people have any info or pictures relating to this machine.
Cheers
Rob
-
13th February 2016 06:58 PM # ADSGoogle Adsense Advertisement
- Join Date
- Always
- Location
- Advertising world
- Age
- 2010
- Posts
- Many
-
14th February 2016, 03:45 PM #2
Senior Member
- Join Date
- Dec 2013
- Location
- Sydney
- Posts
- 139
Rob,
Nice saw. I recently restored something similar, mine is a tilt top Hyco, also from e***. For what it's worth I used Brunswick Green enamel on mine because it seemed to match the original colour.
I found it difficult to find info on Hyco, but have a hunt around Trove here; 25 Jul 1952 - Advertising
And here; Index of /www.titaniumstudios.com/titaniumstudios.com/tooljunkie/paper
My saw bears a close resemblance to Walker Turners of the same era. There must have been some sort of licensing arrangement, or else they just plain copied many aspects the designs. You can find info on Walker Turners here VintageMachinery.org | Welcome
Graham.
IMG_5956.jpg
-
15th February 2016, 10:06 AM #3
New Member
- Join Date
- Feb 2016
- Location
- Sydney
- Age
- 51
- Posts
- 6
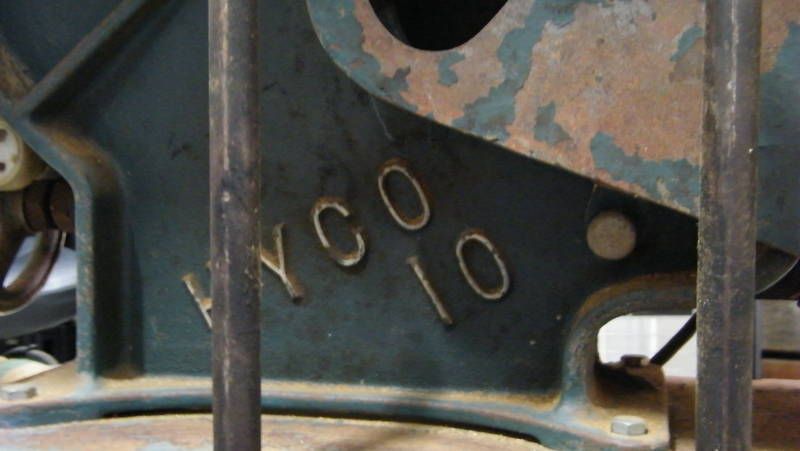
Thanks for the info Graham, my particular one seems to be a bit of an orphan machine, I'm even wondering if it could even be a prototype or a "foreign order" machine. Hight and tilt adjustments have no markings and are all manual, no fancy wheels or the like. The original colour seems to be a bit of a guess, main body seems to be Indian Red but the under side of the table was bright red.
The spindle is curious in that the bearings are 5/8" and the arbour for the blade is 16mm, maybe this might give an indication to it's period, or not, or some where along the line a new spindle was manufactured.
Did you spend much time using filler on the castings or did you just paint them in the "raw" state ? Now that mine are panted they look really rough or would a light sand and recoat suffice ?
Cheers
Rob
-
15th February 2016, 10:43 AM #4
Senior Member
- Join Date
- Dec 2013
- Location
- Sydney
- Posts
- 139
Rob,
Ahh, I didn't realise from the photo that your table tilts.
When restoring machines like this I deliberately try to not improve on the original finish, but rather try to bring it back to how it looked from the factory. So if something's broken, or rusted away I'll repair it, but I try very hard not to fill casting marks that were there from the factory and were not originally filled. Both my Hyco tilting saw, and a Hyco bandsaw I restored had surprisingly rough castings, much worse that British or US one's I've seen, and it was very tempting to get the angle grinder out, or to use body filler, but I resisted. For little holes and divots that from photos I can see were filled at the factory I fill them with either car bog (on the bare cast iron) or blade putty between two primer coats. I also brush or roll good quality enamel, correctly thinned, on for multiple top coats which helps smooth out the small casting marks.
The process I use on a machine like this is; de-grease, paint strip, wire brush/sand where necessary to get all the paint off, de-rust, phosphoric acid treatment, light wire brush, enamel primer, light sand, second primer coat if necessary, brush or roll 2 or 3 top coats of epoxy enamel. I generally don't sand between top coats, but I do leave them a long time between coats (1 or 2 weeks minimum depending on weather). Also, when the first coat of primer is on I will take a cold chisel and knock off any of those little spherical blobs that seem to grow out of the cast iron. A second primer coat seals over these areas.
Graham.
IMG_5937.jpg
-
15th February 2016, 11:38 AM #5
New Member
- Join Date
- Feb 2016
- Location
- Sydney
- Age
- 51
- Posts
- 6
Cheers for that, I think I'll sand back the first top coat, not entirely happy with the colour, then hit it again with a few more coats.And if I'm feeling really enthusiastic a coat of clear.
This is my first tool restoration so I'm a little wet behind the ears.
-
15th February 2016, 11:41 AM #6
Senior Member
- Join Date
- Dec 2013
- Location
- Sydney
- Posts
- 139
More photos please. You're keeping us all in suspense!
Graham.
-
15th February 2016, 02:22 PM #7
Senior Member
- Join Date
- Sep 2011
- Location
- Northern Beaches, Sydney
- Age
- 68
- Posts
- 329
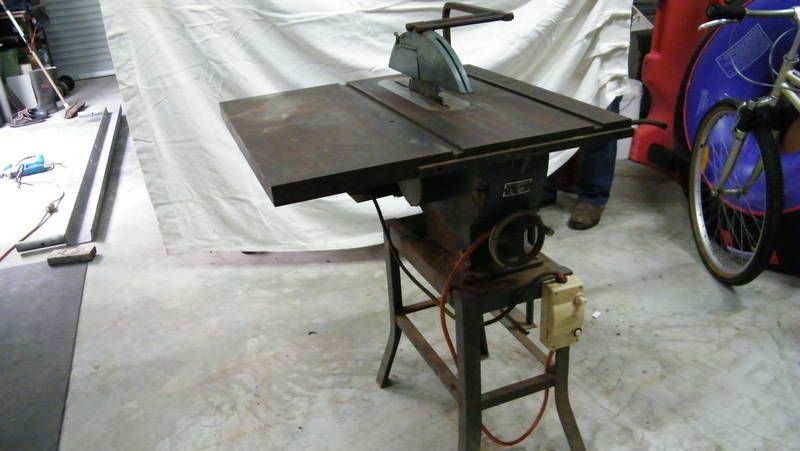
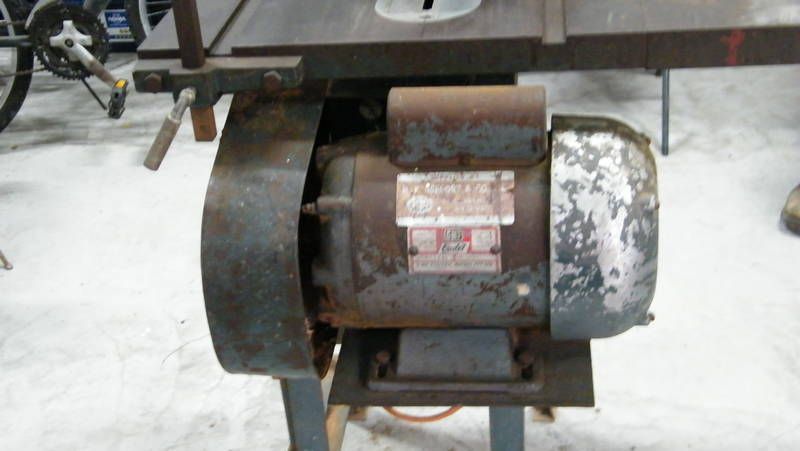
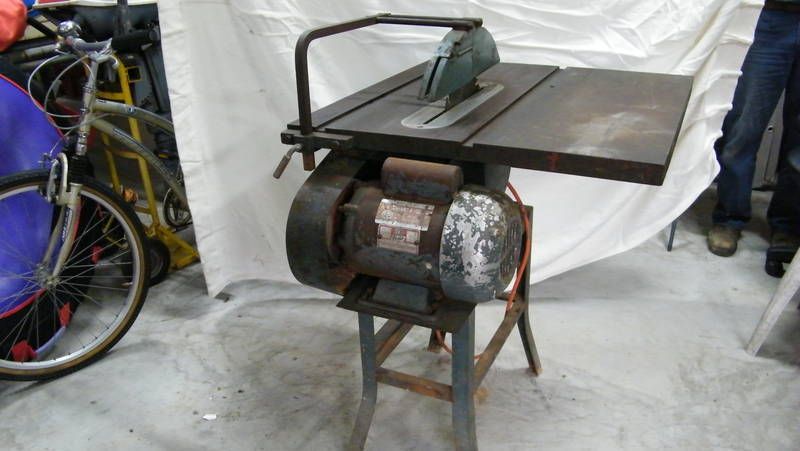
I have some photos of a Hyco 10" tablesaw that I can post up if you like. Nothing too closesup as it was for an ebay ad a couple of years ago. It is the same model as mine except mine has a heavy hardwood stand so if you want some more detailed shots I can whip the tarp off and take a few.
Stewie
-
15th February 2016, 02:39 PM #8
Senior Member
- Join Date
- Dec 2013
- Location
- Sydney
- Posts
- 139
Stewie,
If your question was to me, I always like to see more Hyco photos, so yes please. My request was to Rob for photos of his restoration.
Graham.
-
16th February 2016, 12:01 AM #9
New Member
- Join Date
- Feb 2016
- Location
- Sydney
- Age
- 51
- Posts
- 6
Some pics....colour is well a bit hmm
photo 1.jpg
Table looks rusty in photo but actually came up ok, is pitted but that can be worked around.
photo 2.jpg
Fence bracket after dip in electrolysis bath and hit with brass wheel. Actually has been spray with chain wax to keep rust at by for the moment.
photo 3.jpg
-
16th February 2016, 07:06 AM #10
Senior Member
- Join Date
- Dec 2013
- Location
- Sydney
- Posts
- 139
Rob,
Nice colour!
So it looks like you're rattle can spraying? In that shot of the main casting I can see what you mean by the rough surface. Did you prime first? Maybe try many more coats of top coat? Or if it really bothers you, strip the top coat off, it won't take long if it's rattle can paint, then start again with multiple heavy coats of primer.
The paint I use, White Knight Epoxy Enamel, is available in two forms, rattle can spray, and conventional liquid tins as are other brands. Ive often wondered if it's the same paint inside, the only difference being how much it's thinned. If it's typically the same, then adding more coats should get to the same film thickness eventually.
Graham.
-
16th February 2016, 07:32 AM #11
New Member
- Join Date
- Feb 2016
- Location
- Sydney
- Age
- 51
- Posts
- 6
Two coats of primer and just a single top coat. I was thinking a couple more top coats might be the answer.
Still not 100% about the colour.
I'm using Rust-oleum epoxy gloss, White Knight didn't have the colour I was after, tho not sure if this is colour I'm after .
.
Then again as long as it works that's the main point, not wanting a show piece.
-
16th February 2016, 06:41 PM #12
Senior Member
- Join Date
- Dec 2013
- Location
- Sydney
- Posts
- 139
Bunnings will mix White Knight epoxy enamel to any colour. I had them use their colour matching machine to mix me the paint for my recent Hyco bandsaw project.
Do you still have a sample of the original colour?
But yes, it's just a tool
Graham.
-
19th February 2016, 12:30 PM #13
Senior Member
- Join Date
- Sep 2011
- Location
- Northern Beaches, Sydney
- Age
- 68
- Posts
- 329
So here are a few photos of my 9 1/4" Hyco tablesaw from under the tarp plus a link to a 10" hyco on ebay at the moment for reference. In my archives I have a Safari website of a Hyco Junior like bladehunters above but for the life of me the photos won't come up. Hmmm.
10" Hyco tablesaw on ebay
Table SAW Highest Quality Australian Made in VIC | eBay
I think I have some photos of another 9" Hyco like mine but they may be on another computer.
Here we go...

Stewie
-
21st July 2017, 09:11 AM #14
Senior Member
- Join Date
- Aug 2011
- Location
- Stockton
- Posts
- 291
Rob Originally Posted by bladehunter

do have any pictures of the finished restoration?
Cheers stew
-
21st July 2017, 11:51 AM #15
Woodworking mechanic
- Join Date
- Jan 2014
- Location
- Sydney Upper North Shore
- Posts
- 4,470
Photo bucket strikes!!!!
We were warned!

 Reply With Quote


Similar Threads
-
1942 Bench Plans - Bench and Work Table
By chrrris in forum THE WORK BENCHReplies: 3Last Post: 8th May 2014, 08:27 PM -
Hyco Table Saw - Tilting Table
By Twisted Tenon in forum TABLE SAWS & COMBINATIONSReplies: 8Last Post: 4th December 2012, 09:32 AM -
GMF 6'' Junior bench grinder
By jack620 in forum METALWORK FORUMReplies: 20Last Post: 20th June 2011, 10:39 AM -
Converting table saw bench to router table
By 46150 in forum ROUTING FORUMReplies: 4Last Post: 21st June 2009, 02:18 PM
Tags for this Thread
treadmill,
luckily,
hyco,
table,
junior,
belt,
rid,
power,
pulley,
blade,
time,
set,
ole,
motor,
pictures,
info,
people,
relating,
rob,
cheers,
machine,
supplied,
bearings,
electronics,
wondering,
electrolysis,
tidy,
process,
restoration,
371472,
purchased,
recently,
bench,
evil,
bay,
meant,
ready,
prime,
add,
paint,
derusting,
fasteners,
freely,
loose,
drama
