

 Thanks: 0
 Likes: 0
 Needs Pictures: 0
 Picture(s) thanks: 0
Results 31 to 45 of 58
Thread: Loki's Deck
-
2nd November 2007, 11:08 PM #31
 Senior Member


- Join Date
- Sep 2007
- Location
- Melbourne, Australia
- Posts
- 335

Thats great work Loki.
I like how the line of the screws are so nice and straight.
I made a jig for mine, but I stopped using it after a while...Still turned out ok, some of the screw lines a little wobbly but only I can notice it on my deck..
Nice work cutting round those posts..I had a heck of a time cutting around mine..but yeah...im an ameture! LOL
-
2nd November 2007 11:08 PM # ADSGoogle Adsense Advertisement
- Join Date
- Always
- Location
- Advertising world
- Posts
- Many
-
2nd November 2007, 11:19 PM #32
Senior Member
- Join Date
- Dec 2005
- Location
- Western Australia
- Posts
- 306
Nice one Loki!!!
Looking good!
-
14th November 2007, 08:09 AM #33
Nearly finished
- Join Date
- Jan 2007
- Location
- Sydney
- Posts
- 86
Time for an update I think!
Construction has been progressing slowly. I'm back at work and struggling to get time to concentrate on the deck building. Plus we've had a heap of rain in Sydney lately that has stopped me!
Anyway decking is finished, handrails and balustrade finished, and the frame for the roofing all finished too. I've started putting the Suntuf roofing on and hope to finish that off this weekend. (Maybe I should have built the roof first then I would have been able to work undercover...)
The handrails are 90 x 41 merbau to match the posts. Posts and handrails were routed joints and I sanded then chamfered the edges of the handrails before installing them. Very time consuming with over an hours work in each handrail!
The balustrade is s/steel which I purchased pre-made from Miami Stainless. I was very happy with the result, it was easy to install, plus they were very helpful when I ordered it and it was delivered to my door the following day. Highly recommended.
I bought some oil and have oiled the roof frame prior to putting the covering on. I bought Cabots Aquadeck for a couple of reasons - it is water based so is easy to clean up, and it has a quick drying time which will be desirable for me when doing the deck (you try keeping two dogs and a cat off the deck long enough for the oil to dry.) However although I am happy with the result on the roof frame where I have applied some to some scrap decking I'm not overly happy with the result. It seems to be a bit dull and flat. It seems to have very good water repelling capabilities but in my opinion doesn't bring out the colour or grain of the decking. Anyway a friend at work has brought in the leftovers of a tin of Feast & Watson which I briefly tried last night. Seems to be much better but I'll wait until I can see it sunlight and compare with the Aquadeck. I've got another couple of weeks work before I'm ready to oil the deck anyway.
As for those merbau posts - yuck! I don't know how people use that stuff all the time. It makes a mess on everything including staining itself. My nice shiny new galv stirrups and bolts are now all dirty and red, the concrete pad is a dirty red/brown colour. These I'm not too worried about however where I have drilled holes in the intermediate support posts for the balustrade the rain on the merbau has caused a stain to run down the post below each hole. Does anyone have any suggestions on how to clean these? Nappisan? Bleach? Or will I have to sand them?
As for the stairs - yes I have settled on a design and have ordered the extra timber required. It will be double tread/riser stairs the full width between the posts which will double as seating. Then down the middle I'm going to add extra normal size stairs approx 2m wide.
I'm going to have to start building them soon as I'm getting pretty tired of having to jump up and down from the deck all the time!
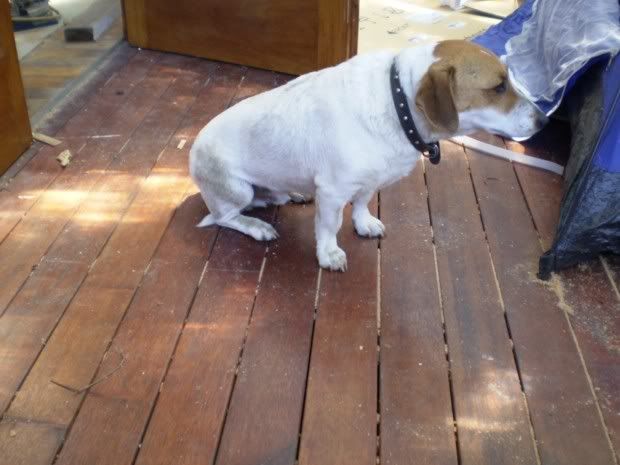
Anyway here's few pics of the current progress. Also couldn't resist adding a pic of the dog sleeping on the tray I made for their food bowls in an attempt to find somewhere dry during all the rain recently.
Oh and yes that is still a hole for the spa to go. Should be delivered in a couple of weeks now! I've started building a pad for it to sit on too - 4 x 2.4m TP sleepers nailed together, filled with rubble and then topped with concrete.
Cheers
Loki
-
14th November 2007, 08:30 AM #34
Senior Member
- Join Date
- Sep 2007
- Location
- Canberra
- Posts
- 159
niiiice work on that corner detail, and the balustrade as a whole!

what are your plans for the spa - it is going to sit directly on the conc. pad? will you put some of that flexible foam filler they use for bathtubs as well? someone once told me that you 1/2 fill the bathtub with water before you put the filler in & leave it there for it to go off. can't remember why though... thinkin about it, when you fill the spa the conc pad is going to sink a little. maybe that had something to do with it.
i think napisan will go to work on the timber itself, as well as the leaching. maybe a light scrub then a light sand will give you the most consistent results.
r's brynk
-
14th November 2007, 09:13 AM #35
Nearly finished
- Join Date
- Jan 2007
- Location
- Sydney
- Posts
- 86
The spa comes with its own timber cabinet and they say all that is required is a flat surface to place it on. So it will be sitting directly on the concrete pad.
I hadn't thought about the pad settling slightly with the weight of the spa full of water however. I do have a slight margin to work with (5 - 10mm) and will keep an eye on the levels as we fill the spa, and then over the next few weeks. If it settles too much then we can always lift the spa slightly (empty it first) and then put some packing under it. I'm waiting for it to be delivered before I trim the decking to shape too.
-
14th November 2007, 09:20 AM #36
Senior Member
- Join Date
- Sep 2007
- Location
- Melbourne, Australia
- Posts
- 335
Whaoh....thats awsome Loki.
I like what you did with the handrails. I'll be putting my handrails on this weekend hopefully and the Balustrade should be at my house by friday if I get the order in today. I wont be pre ordering like you did, I prefer to put it all together myself...Plus Im notorious for getting my measurements wrong, I have to measure things 3 or 4 times..Im terrible!
Just a quick question Loki, What will be using to close the gap around your deck? I have seen decks that use merbau, and I think it looks really classy but will obviously have costs involved that may not be required, or will you just be using plynth boards?
You dont have many stumps that go all the way to the ground as your intermediate hand rail posts stop at the bearer, so you may have trouble nailing the board into something, and it may warp if u use merbau or something..Would love to get ur thoughts
Since my deck is so low to the ground I'll be using merbau only on the visible sides, coz it wont cost that much really.
When you ordered the stuff from miami steel, did that mean you had to drill your holes big enough to fit the bottle screw through as well, how does it look is it really noticable that the hole is bigger?
What are the gaps you used between the balustrading 125mm? you have 8 runs, im assuming those handrail posts are 1 meter.
Also, with the top of the handrail, I like you chiseled out 5-10mm and so it would sit nice ontop of the posts. Is there any advantage for doing it this way, i was just going to sit mine on top, but chisel the corner posts so it slots into them. Again, would love your input!?
Great work Loki, very impressed. Cant wait to see it with the spa.
Do you have to put a fence around the spa? In vic, we dont have to if you use one of those solid lids that clip down, not sure about the regs in Sydney.
Im having the same problem with leeching with my merbau, its leeching alot and losing a bit of color, im hoping that the oil will rejuvinate it after a good deck wash. Let me know how u go with the oil.
Cheers.
-
14th November 2007, 09:46 AM #37
Nearly finished
- Join Date
- Jan 2007
- Location
- Sydney
- Posts
- 86
Hi oohsam
The underside of the deck needs to be kept open. We're building in what's classed as a category 2 fire zone and that is one of the conditions (along with the minimum 5mm gap between the decking boards.) A fair bit of the long side of the deck will be covered by the stairs/seats that go on next and for the rest of the exposed bearer (that is marked and dirty - one of the problems of using rough sawn h'wood) I may stain it or even clad it in some decking if I have enough left over.
Re the balustrade I used the streamlined fittings. All I had to do was remove the locking nut and the hole swaged end / tensioning system passed through the hole. I'm happy with the result and don't believe the hole looks too large. Gaps between wires are 114mm. My plans that were approved by the Council and a private certifier clearly show the heights off the ground, material, and a spacing of 125mm between wires so I should be ok there. Looking at the BCA reg's they want a spacing of 80mm which I felt would be too much wire as well as being very expensive! The majority of the deck is < 1m off the ground anyway.
The handrails were rebated 10mm over the intermediate posts in order to locate them accurately, provide a stronger joint, and for neatness. Pretty easy to cut too if you have a router. If you don't then I would just sit the handrail directly on top of the post. I had trouble however cutting my posts accurately. Holding a circular saw sideways and cutting 1m off the ground is not easy! And to make things harder my saw would only cut about 85mm deep and the posts are 91mm .
.
Spa - no fence required. You do however have to have a "lockable" cover for it. The lockable part here is a bit of a joke as they are basically just web straps on each corner with plastic clips and locks. It would however stop a kid from removing the cover and drowning themself.
-
14th November 2007, 09:52 AM #38
Senior Member
- Join Date
- Sep 2007
- Location
- Melbourne, Australia
- Posts
- 335
Thanks for the reply. One more question, with the balustrade, I read in your other post that they have to be hydraulicly pressed. Does this mean I cant order the bits and put it all together myself? I have to order it to size? From inside post to inside post?
EDIt- sorry, they have hand swaggable and hydraluic types.
-
14th November 2007, 11:32 AM #39
SENIOR MEMBER
- Join Date
- Apr 2005
- Location
- Sydney
- Age
- 63
- Posts
- 1,619
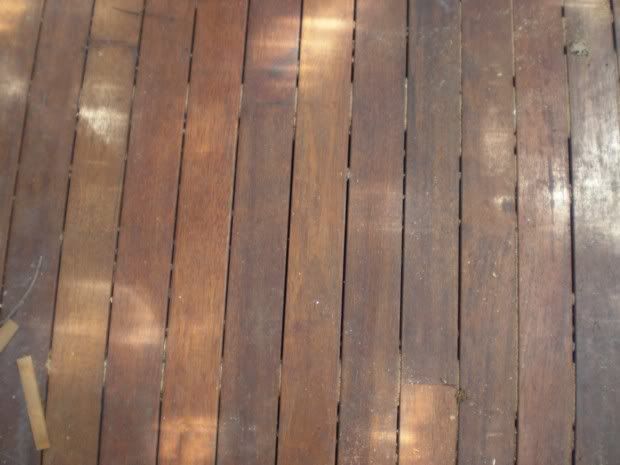
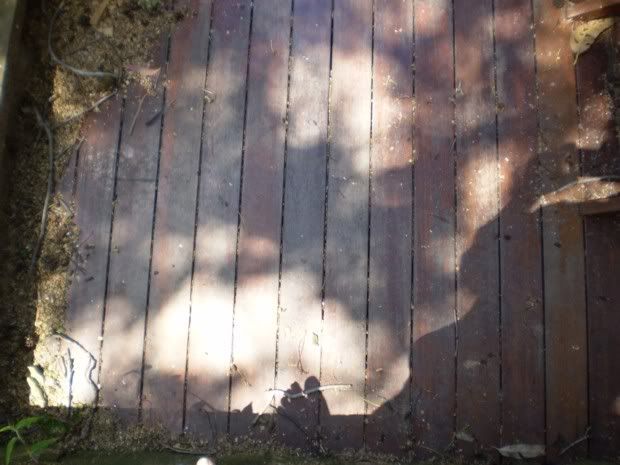
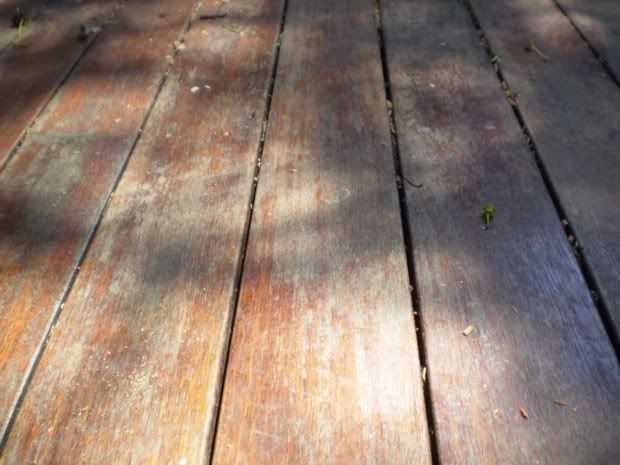
I used Cabots Exterior Varnish Stain on my pergola, and I used Feast Watson Weatherproof on my deck. After a year, I'm happy with it where the deck is under cover; Originally Posted by Loki429


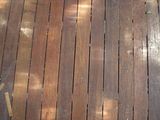
But it hasn't performed as well where it's exposed to rain, and a bit more traffic (although it does say that it's not for floors and decking);
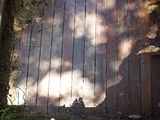

Being poly, you can't just throw another coat on, (although I did six months ago, and it looked better) it would need a re-sand in the affected areas.
Excuse the mess and sawdust, I'm doing some work out there at the moment.
-
14th January 2008, 02:23 PM #40
Nearly finished
- Join Date
- Jan 2007
- Location
- Sydney
- Posts
- 86
Time for another update.
Well the deck is very nearly complete! Some timber on the sides of the stairs to be put on, finish oiling the deck and handrails, and complete the drain for the downpipes.
For those that were asking how the spa was going to be installed I've attached a pic of the underside of the deck showing the spa cabinet and the slab it sits on. The slab was formed with 4 x 2.4m treated pine sleepers then filled, compacted and concrete poured on the top. I then placed plastic over this before putting the spa on to help with pest control. I lifted the decking around where the spa was to fit to make installation of the spa easier, and then cut the decking to length and shape to neatly fit around it.
I'm happy with how the stairs turned out, however there was a surprising (to me anyway) amount of work involved! The sides are yet to receive more decking to close them in and cover the frame. They've given me the look and feel I was after, and I believe they assist in making the deck transition to the lawn and not be a stopping or cutoff point.
For the downpipe I opted for a "Rain Chain". These are a traditional Japanese downpipe method known as 'kusari doi'. I wanted to avoid having an ugly downpipe on the corner of the deck and having seen rain chains before thought they would make a good feature. So I bought two of them to fit either side of the steps. At the bottom of the chain I have installed pipe to the stormwater system. Around this drain I will make a concrete 'pad' that I will cover with some decorative pebbles. The water from the rain chains will splash onto the pebbles and then go down the drain.
As for heat under the polycarbonate roofing - yes you can feel the heat but it is considerably cooler than being in the sun and is quite comfortable. We do get a good airflow through which is a great help too. I've also noticed the back room of the house is much cooler now.
I bought the Feast and Watson decking oil and have applied one coat so far. It has turned out a bit darker than I was expecting but I'm still very happy with the result. It's also extremely easy and quick to apply - I wish painting was that quick!
Here's a few pics now and I'll post a few more next weekend (as long as it has stopped raining...)
Cheers
Loki
-
14th January 2008, 10:12 PM #41
New Member
- Join Date
- Jan 2008
- Location
- Adelaide
- Posts
- 6
Gee Loki, that deck looks sensational!
After seeing your impressive handiwork I don't know if I can post pictures of mine when I build it, as it might look a tad inferior.
Can you post a picture and some more details of this rain chain? Sounds interesting.
SteveLast edited by battyman; 14th January 2008 at 10:13 PM. Reason: misspelling
-
15th January 2008, 09:04 AM #42
Member
- Join Date
- Nov 2007
- Location
- Melbourne
- Posts
- 51
Loki, did you choose the natural or a coloured oil?
Cheers
-
15th January 2008, 06:05 PM #43
Nearly finished
- Join Date
- Jan 2007
- Location
- Sydney
- Posts
- 86
BMD - the oil is definitely "Natural" not coloured. It's pretty much the same colour the timber goes when wet anyway.
The colour is better after sanding, however not as good as I remember when it first went down and was wet for the first time. If I was to do it again I would oil the deck pretty much as I laid it to preserve the colour.
battyman - here's another pic of the rain chain, and a link to wikipedia for a definition. http://en.wikipedia.org/wiki/Rain_chain
If you type 'rain chain' into an Internet search engine you will find a lot of places that sell them online and have a lot more information. There are many different styles of "cups" too.
I ended up buying mine off ebay from a seller in the US.
cheers,
Loki
-
16th January 2008, 09:39 PM #44
Senior Member
- Join Date
- Sep 2007
- Location
- Canberra
- Posts
- 159
gday bloke
looks bloody brilliant. can't wait to see the 2nd-storey extension
r's brynk"Man got the opposable thumb - woman got four opposable fingers." - Rowdy
-
17th January 2008, 10:20 PM #45
Wookie
- Join Date
- Dec 2006
- Location
- Tamborine
- Posts
- 56
Brilliant looking deck. I'm a little ashamed of mine now.


Similar Threads
-
Help with deck finishing
By aussieorchid in forum FINISHINGReplies: 8Last Post: 24th January 2007, 10:34 AM -
Deck refinishing
By jimj in forum FINISHINGReplies: 2Last Post: 20th April 2005, 07:33 AM -
best for aged deck timber
By marineman in forum TIMBERReplies: 6Last Post: 10th January 2005, 08:25 AM
