

 Thanks: 0
 Likes: 0
 Needs Pictures: 0
 Picture(s) thanks: 0
Results 1 to 15 of 18
Thread: my chair
-
11th January 2007, 06:41 PM #1
 New Member


- Join Date
- Apr 2006
- Location
- williamstown
- Posts
- 6
 my chair
hello all.. some may remember most will not a thread i posted about wanting to carve a chair from the arbortech website, as my year 12 design and technology project. ..
well after a lot of work, i finished it on time and got decent marks for it and my folio, so i thought i would post it up here for some critisisim.
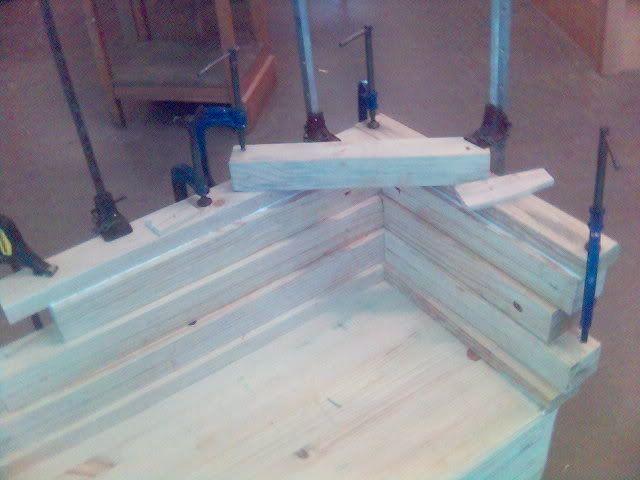
i call this clamp world
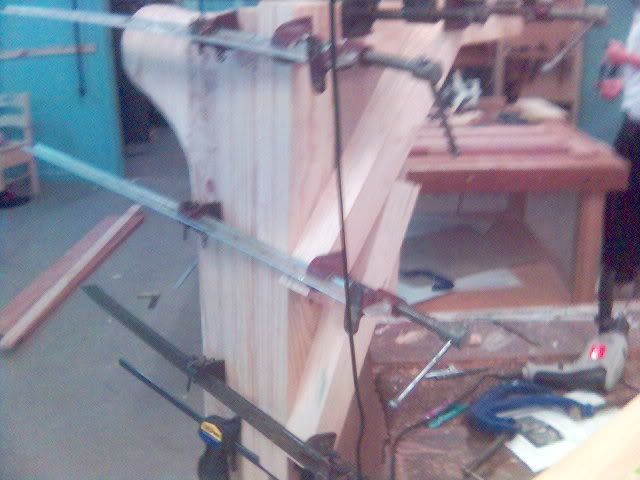
and this is a section of clamp world... this was probaly the hardest bit, glueing and screwin on the higher back pieces, as each one stepped out a little, so i had little to clamp it down to.
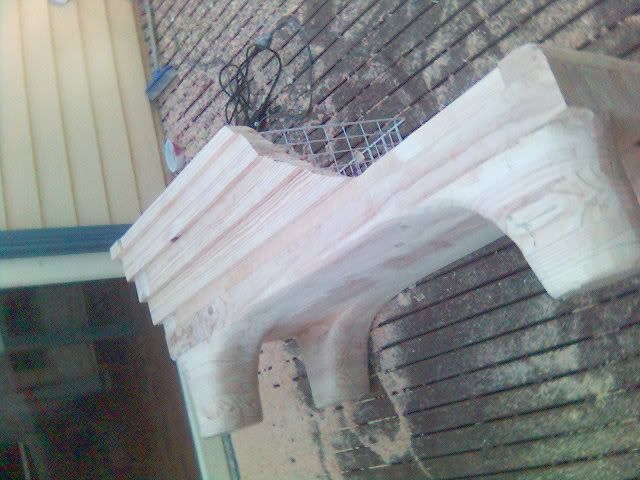
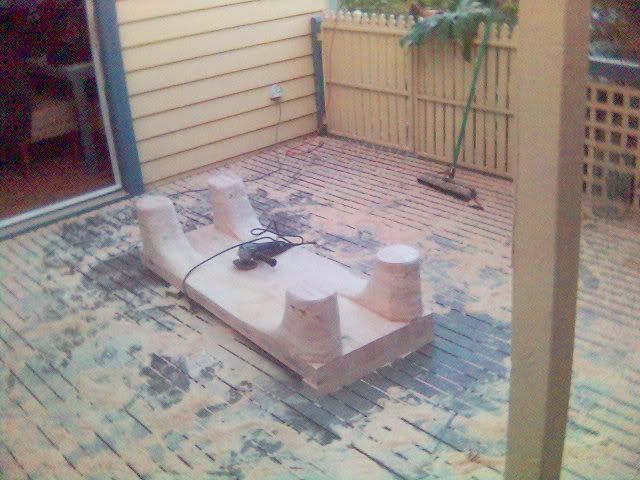
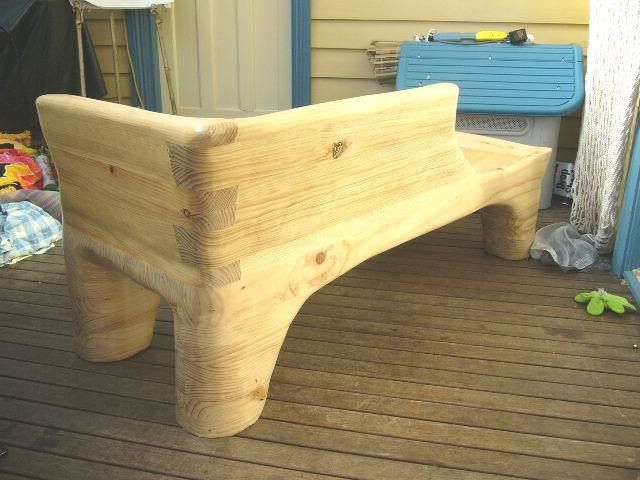
i did it all in sections, made the legs, and the seat plank, then glued/screwd them together, carved that out, the attached the back layer by layer. here is it before i carved the back and arm rest.
bit of carveing
mum sure wasnt hapy when she came home.. and sweepin it all through the cracks of the deck attracts rats and mice... trust me i found out first hand.
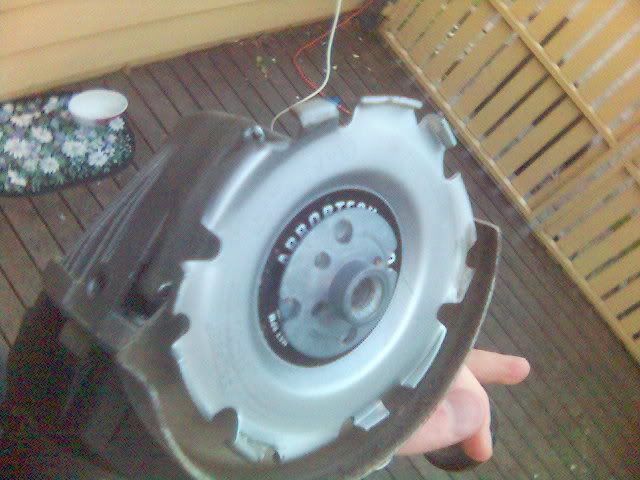
my favourite tool in the world
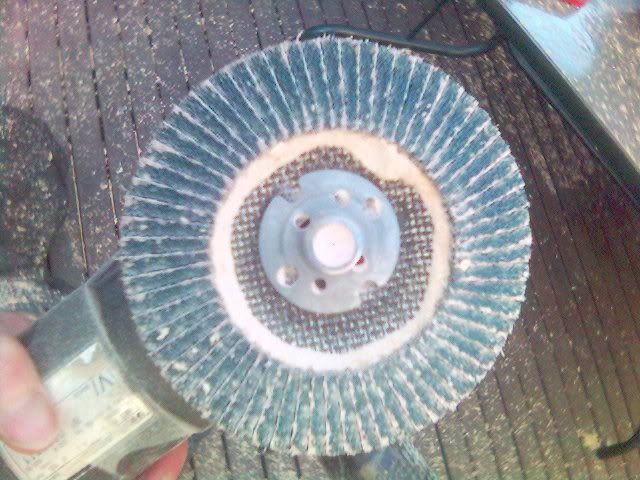
my second favourite.
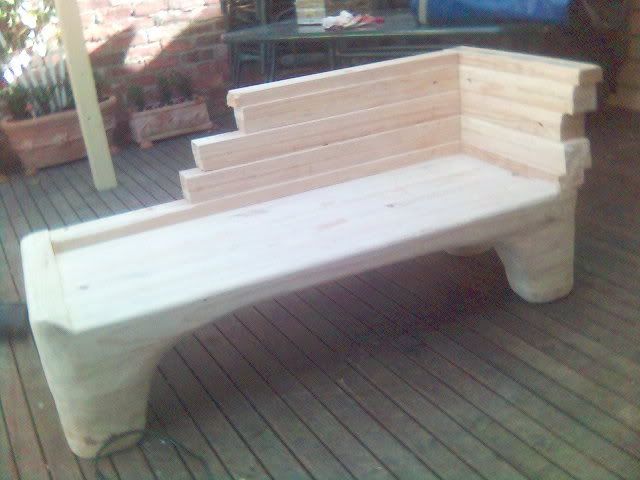
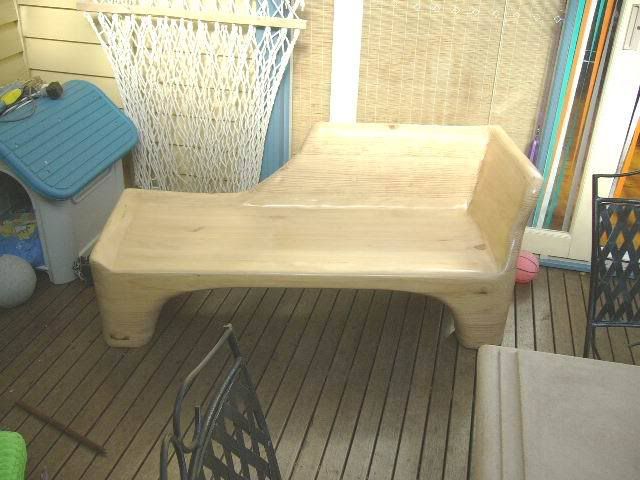
couple finishing pics
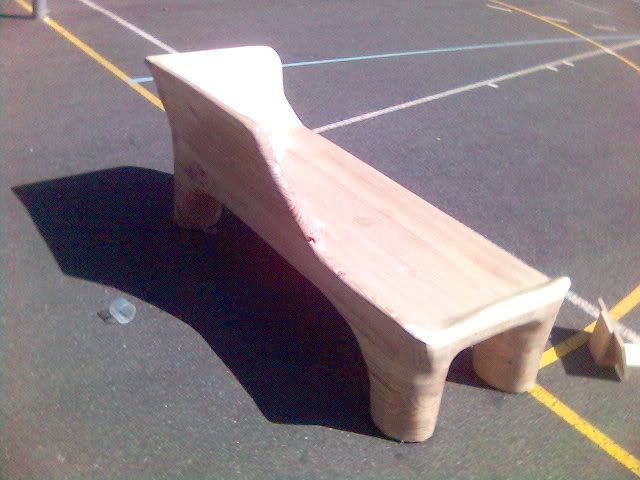
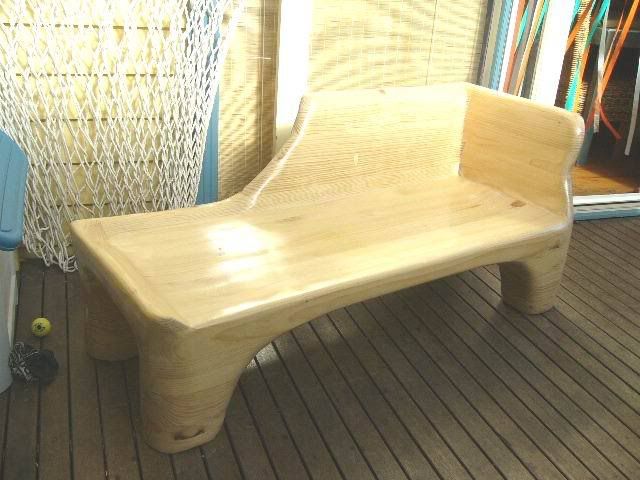
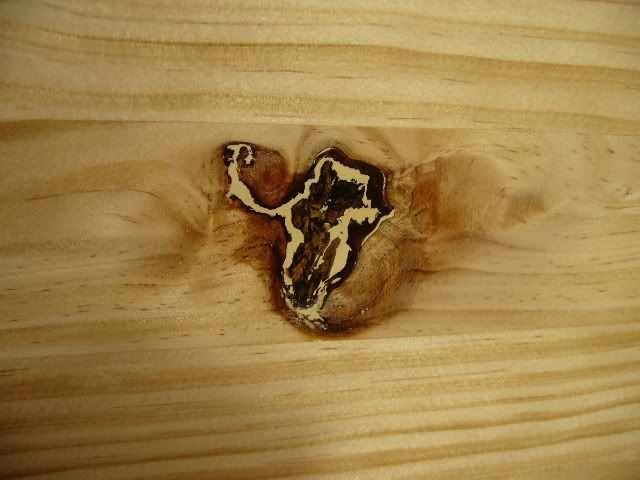
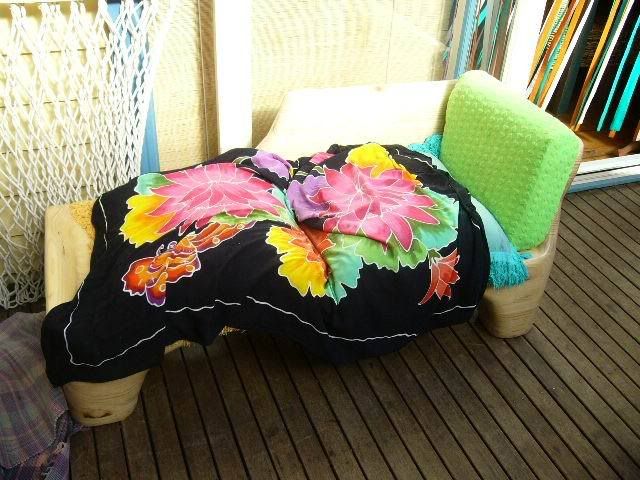
out of the hole chair my favourite part..
and how it gets used when people are round.. pine is to soft to sit on, unless your naked.
In the end, i am happy i took up the challange, it wasnt as hard as i thought it would be, just time consuming.
in my time line, i was going to take 10 weeks more then what i had, but i just worked back after school, and took it home on weekends etc.
In the last few weeks i had to rush, which is where i stuffed up the arm rest (dud shape), which i am very annoyed about.
Next time (if there is), i wouldnt use pine as it is just to soft, everythign that touches it dings it (belts, jeans, shoes, shorts, skin ) .. but it was the easiet to carve, and sand
i sure support the sandpaper makers, went through almost 150 sheets. (luky i work in a hardware store)
all up it cost me just over 200, with wood, carveing bit, paper, and estapol.
(i have plenty more pics, a pic was takin atleast every step... (400mb of them actaully hahaha)
opinions wanted!
cheers
alex
-
11th January 2007 06:41 PM # ADSGoogle Adsense Advertisement
- Join Date
- Always
- Location
- Advertising world
- Posts
- Many
-
11th January 2007, 06:54 PM #2
SENIOR MEMBER
- Join Date
- Nov 2004
- Location
- Port Pirie SA
- Age
- 52
- Posts
- 6,908
Looks cool, sure is a hard way to make a seat...
....................................................................
")
-
11th January 2007, 07:04 PM #3
SENIOR MEMBER
- Join Date
- Feb 2003
- Location
- Garvoc VIC AUSTRALIA
- Posts
- 11,464
-
11th January 2007, 07:07 PM #4
......say what?
- Join Date
- Feb 2005
- Location
- Melbourne, Australia
- Age
- 46
- Posts
- 2,346
whoa, looks good....pretty different!
I bet there would of been a hell of a mess from all the carving! Hope you, the cat and the dog wore a dust
 I know not with what weapons World War III will be fought, but World War IV will be fought with sticks and stones.
Albert Einstein
-
11th January 2007, 07:17 PM #5
You've got to risk it to get the biscuit
- Join Date
- Jan 2006
- Location
- Canberra
- Age
- 32
- Posts
- 4,195
cool work.
cheersS T I R L O
-
11th January 2007, 07:56 PM #6
Head Moderator
Sister of the DarkSide
- Join Date
- Dec 2004
- Location
- Toowoomba Q 4350
- Posts
- 9,217
Alex!!!!! You Did It !!! You built/ground the chair that I've been wanting to do for ages!! Congratulations!! It's brilliant!!
Greenie Well Deserved!!
cheers
Wendy Box Challenge 2011 - Check out the amazing Boxes!
Twist One - Wooden Hinge/Latch/Catch/Handle
Twist Two - Found Object
Twist Three - Anything Goes
-
11th January 2007, 08:03 PM #7
SENIOR MEMBER
- Join Date
- Jul 2006
- Location
- Canberra
- Age
- 54
- Posts
- 914
Nice job. I wish my school let us tackle big tasks like the one you have done.
It is a concern that it is comfy unless you are naked..... when else would you use such a chair????
PeteIf you are never in over your head how do you know how tall you are?
-
11th January 2007, 08:38 PM #8
Dehydrated Hydrographer
- Join Date
- Jun 1999
- Location
- Westleigh, Sydney
- Age
- 77
- Posts
- 9,550
Great piece of work, glad you scored well with it. Don't worry about getting minor dings, they're part of the life story of the piece.
My only crit would be the shape of the backrest, perhaps an ogee shape would have looked better. Would have gone well with the organic shape of the legs. Still, a great piece.
-
12th January 2007, 09:33 AM #9
Ox and Herdsman Vanished
- Join Date
- May 2005
- Location
- Eden Hills, South Australia
- Age
- 63
- Posts
- 3,458
Never seen a chair made this way: I like they way you've made the whole thing work as one solid piece. The huge finger joints visible from the rear of the back corner look great.
The filled knot does look good. For next time, maybe think about using a darker filler, or clear casting resin, which takes on the surrounding colour (usually close to black).Those are my principles, and if you don't like them . . . well, I have others.
-
12th January 2007, 09:50 AM #10
SENIOR MEMBER
- Join Date
- Feb 2003
- Location
- Garvoc VIC AUSTRALIA
- Posts
- 11,464
Sounds like a good project for your new shed. Originally Posted by rufflyrustic

-
12th January 2007, 09:57 AM #11
Quick and Rough
- Join Date
- Sep 2005
- Location
- Leithfield, New Zealand
- Posts
- 915
Very impressive. It's not my thing -I don't have the eye to make shapes the way you did but I like the finished product.
-
12th January 2007, 10:03 AM #12
GOLD MEMBER
- Join Date
- Dec 2006
- Location
- MEL VIC AUS
- Age
- 59
- Posts
- 1,604
looks great ,,, you need a new nut for your grinder did you loose the rubber base ,,arboteck are great fun ..savage like
smile and the world will smile with you
-
12th January 2007, 12:33 PM #13
SENIOR MEMBER
- Join Date
- Jun 2005
- Location
- W.A.
- Posts
- 644
Great job, Alex! Something to be proud of, for sure! No doubt you'll spend many happy years making sawdust! It's great to see young people putting time and energy into a past-time like woodwork.
Cheers,
Jill
-
12th January 2007, 01:03 PM #14
New Member
- Join Date
- Apr 2006
- Location
- williamstown
- Posts
- 6
yeah i compltly agree, thats probaly the only part that im let down about, i just rushed it to much with my deadlines comin in quick.. Originally Posted by AlexS
didnt really stand back and look at it enough. more just QUICK QUICK QUICK CARVEEEEEEEEEE
thanks for the replys guys!
-
12th January 2007, 01:07 PM #15
Tool Whore
- Join Date
- Oct 2006
- Location
- Armidale NSW
- Age
- 53
- Posts
- 1,938
That's a very interesting piece of work Alex.
You can see there would be a fair bit of time and dust involved in it.
Good on you
Cheers.
Vernon.
__________________________________________________
Bite off more than you can chew and then chew like crazy.

 Reply With Quote


Similar Threads
-
Chair from hell
By AlexS in forum WOODWORK PICSReplies: 20Last Post: 23rd March 2011, 08:08 PM -
Rocking Chair help
By Lena_Saturn in forum WOODWORK - GENERALReplies: 6Last Post: 2nd December 2006, 06:30 PM -
Jarrah zigzag chair
By Rocker in forum WOODWORK PICSReplies: 42Last Post: 15th February 2006, 02:33 PM -
Help sought repairing a Jason reclining chair
By Oldblock in forum WOODWORK - GENERALReplies: 8Last Post: 24th April 2005, 08:24 PM -
Captain's chair revisited
By Rocker in forum FURNITURE, JOINERY, CABINETMAKING - formerly BIG STUFFReplies: 13Last Post: 30th September 2004, 05:31 PM
