

 Thanks:
  Likes:
  Needs Pictures: 0
 Picture(s) thanks: 0
Results 1 to 15 of 69
-
12th October 2013, 11:22 AM #1
 Senior Member


- Join Date
- Sep 2008
- Location
- Riddells Creek
- Posts
- 300
 Bringing an old Robot back to life - Surface Grinder.
I picked up this old grinder a couple of months ago and the previous owner told me that it was all working before being put into storage last year, I soon found out that all was not OK with the machine.
I intend to post regular updates on the process of getting this machine up and running again although I will not be going overboard with it as all I need is good reliable workshop grinder.
Lex.
http://i38.photobucket.com/albums/e1...pse443b228.jpg
http://i38.photobucket.com/albums/e1...ps1c0c73e3.jpg
http://i38.photobucket.com/albums/e1...psd984be54.jpg
http://i38.photobucket.com/albums/e1...ps507ff5c6.jpg
-
12th October 2013 11:22 AM # ADSGoogle Adsense Advertisement
- Join Date
- Always
- Location
- Advertising world
- Posts
- Many
-
12th October 2013, 11:38 PM #2
GOLD MEMBER
- Join Date
- May 2011
- Location
- Murray Bridge SA
- Posts
- 3,339
Hope you got a good deal on it??? What's the other item in the trailer???? Why did you have to unload it at night, was that so the other half couldn't see it

Kryn
-
12th October 2013, 11:52 PM #3
GOLD MEMBER
- Join Date
- Aug 2010
- Location
- Bendigo
- Age
- 72
- Posts
- 1,986
That looks astonishingly similar to the Brown & Sharpe I'm rebuilding.... I'm amazed.
What are the specs for this one?Cheers,
Joe
9"thicknesser/planer, 12" bench saw, 2Hp Dusty, 5/8" Drill press, 10" Makita drop saw, 2Hp Makita outer, the usual power tools and carpentry hand tools...
-
13th October 2013, 09:29 PM #4
Senior Member
- Join Date
- Sep 2008
- Location
- Riddells Creek
- Posts
- 300
Kryn, the other machine in the trailer is a diesel injector grinder and it's base that I intend to turn into a small tool grinder. As for unloading the ROBOT at night, it just turned out that way after I got home and got all the lifting gear organised it was dark, before daylight saving time.
-
13th October 2013, 09:40 PM #5
Senior Member
- Join Date
- Sep 2008
- Location
- Riddells Creek
- Posts
- 300
Yes Joe, very similar to the B & S, specs are the same.
Lex.
-
19th October 2013, 10:38 PM #6
Senior Member
- Join Date
- Sep 2008
- Location
- Riddells Creek
- Posts
- 300
One of the first things I had to fix was the feed mechanism, you can see the two broken cast pieces in this picture.
http://i38.photobucket.com/albums/e1...psa3623d68.jpg
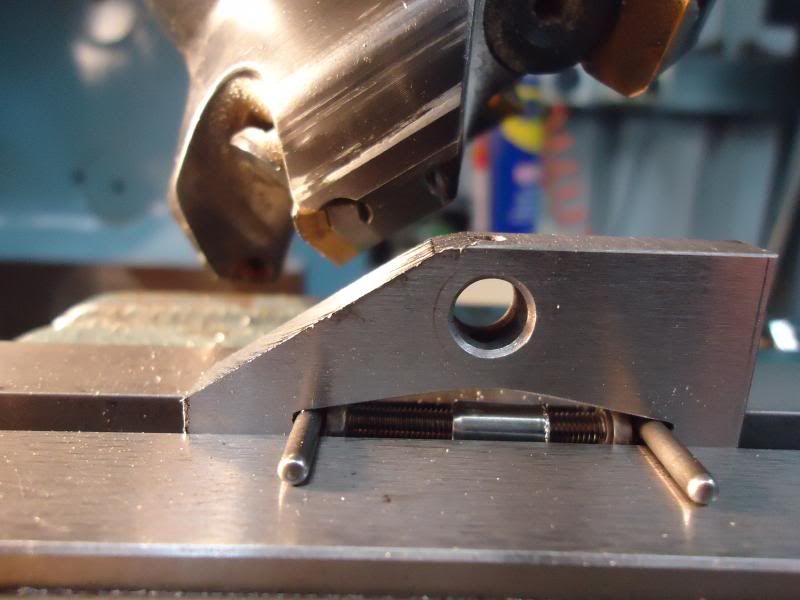
Here is the new lever and shaft assembly I made being reamed for taper pins.
http://i38.photobucket.com/albums/e1...g?t=1382095628
The feed mechanism with the new assembly fitted.
http://i38.photobucket.com/albums/e1...psc4f18dc8.jpg
-
20th October 2013, 10:04 PM #7
Senior Member
- Join Date
- Sep 2008
- Location
- Riddells Creek
- Posts
- 300
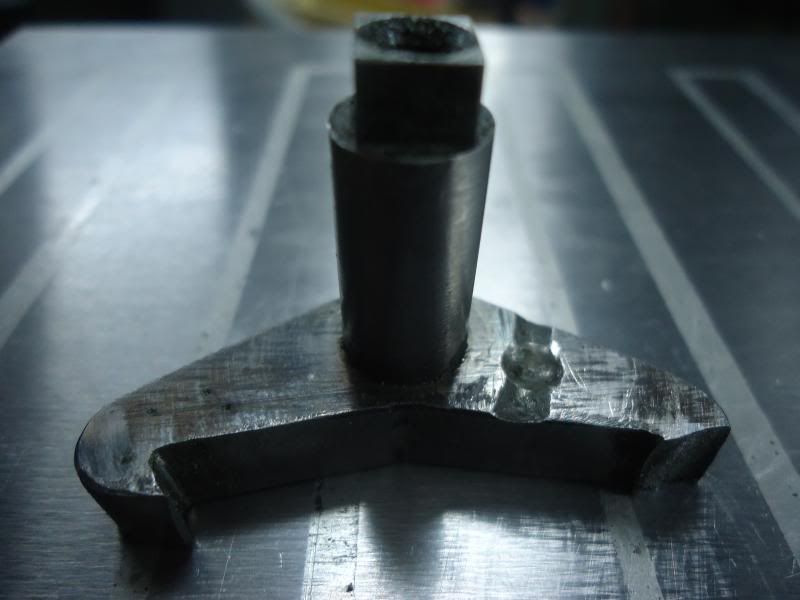
With the longitudinal feed now working I started work on the crossfeed. A simple double ended pawl had one end broken off so I started work on a new one, I didn't think this little thing would require about 14hrs of solid work to complete.
This is the broken one.
http://i38.photobucket.com/albums/e1...ps9ee333dc.jpg
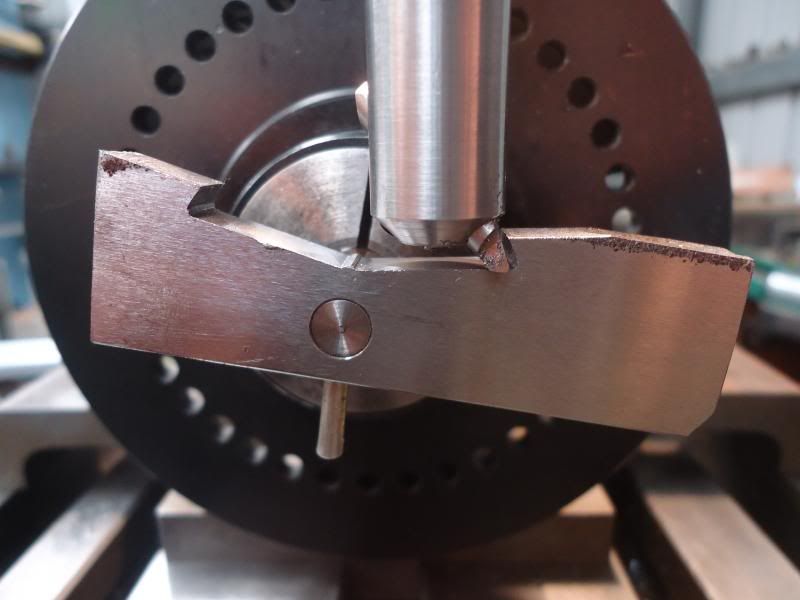
The new one in progress.
http://i38.photobucket.com/albums/e1...psfb7a2f95.jpg
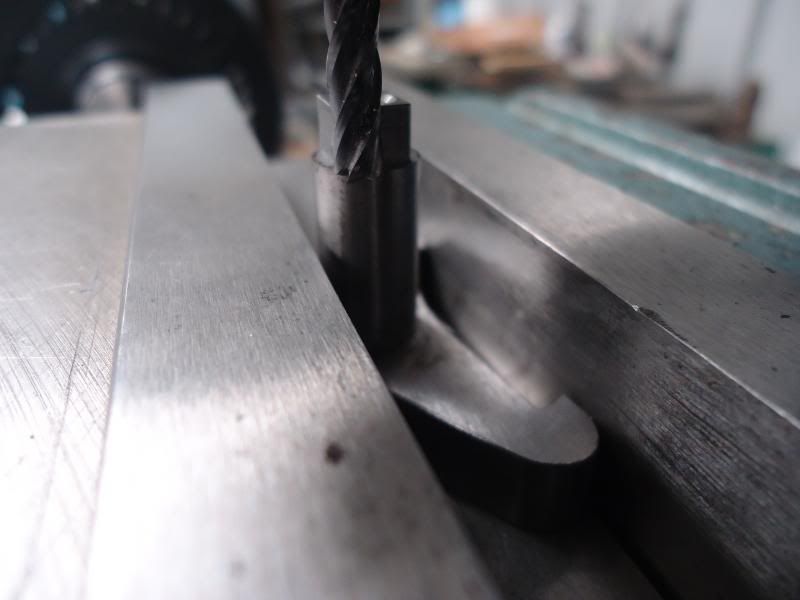
Cutting the 3/8" square.
http://i38.photobucket.com/albums/e1...ps117f8128.jpg
Lex.
-
22nd October 2013, 09:49 PM #8
Blacksmith, Cabinetmaker, Machinist, Messmaker
- Join Date
- Dec 2011
- Location
- Canberra
- Age
- 40
- Posts
- 4,467
Nice work, but that is a bit of a painful shape to machine...i take it the 14 hours includes making the fly cutter....
With the images put the links between [IMG] and [/IMG] to get them to show up on the forum, or click the little insert image button (just above theABCButton) and add the URL that way.
Cheers,
Ew1915 17"x50" LeBlond heavy duty Lathe, 24" Queen city shaper, 1970's G Vernier FV.3.TO Universal Mill, 1958 Blohm HFS 6 surface grinder, 1942 Rivett 715 Lathe, 14"x40" Antrac Lathe, Startrite H225 Bandsaw, 1949 Hercus Camelback Drill press, 1947 Holbrook C10 Lathe.
-
23rd October 2013, 09:51 PM #9
Senior Member
- Join Date
- Sep 2008
- Location
- Riddells Creek
- Posts
- 300
Thanks for the tip Ew, yes the time to make this included setup time and making tools etc, all part of the process.
Regards, Lex.
-
7th November 2013, 09:28 PM #10
Senior Member
- Join Date
- Sep 2008
- Location
- Riddells Creek
- Posts
- 300
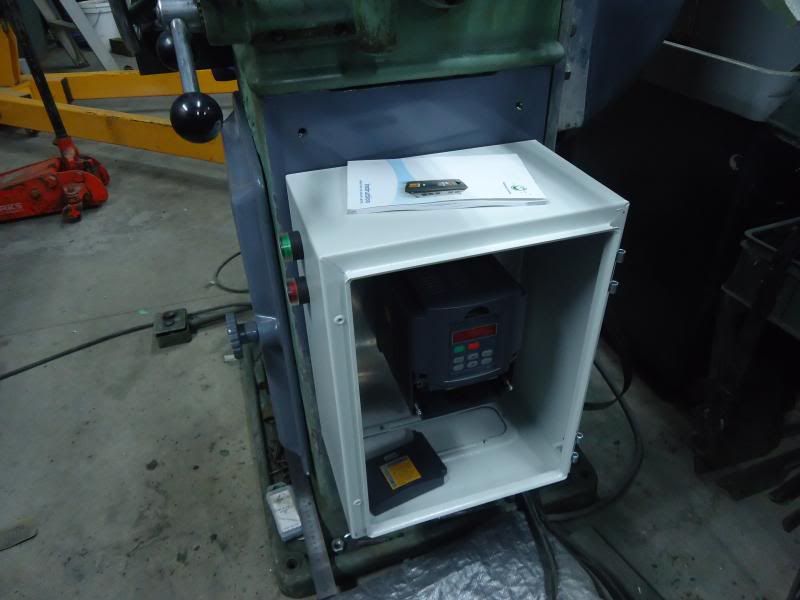
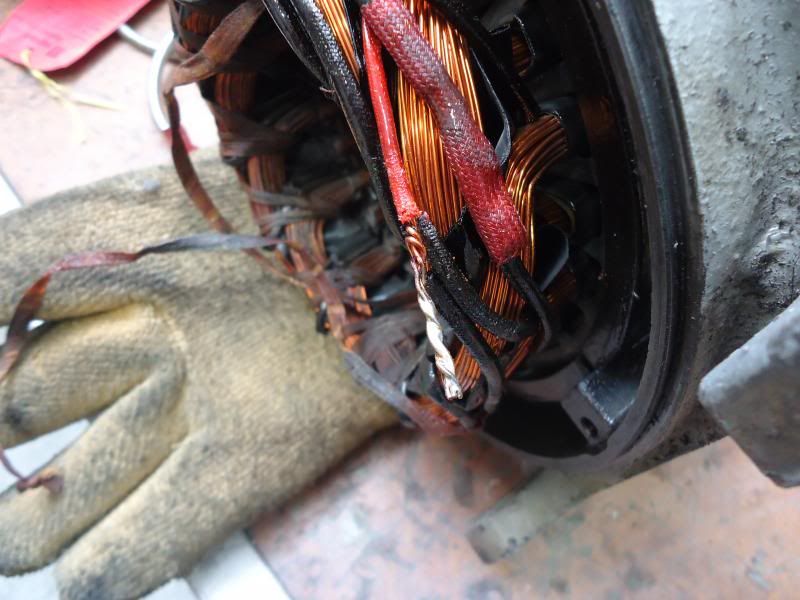
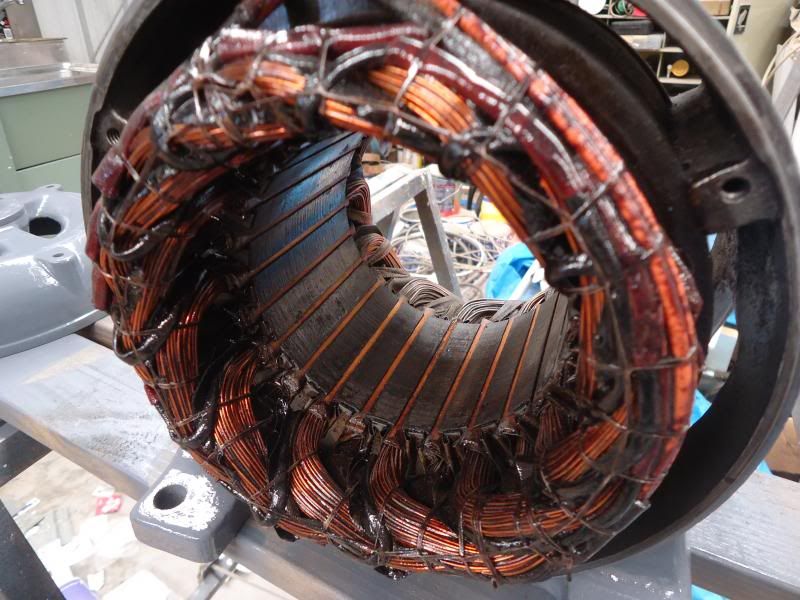
With the machine now up and running I have spent the last few days fitting an enclosure to house a VFD and converting the original motor to Delta configuration.
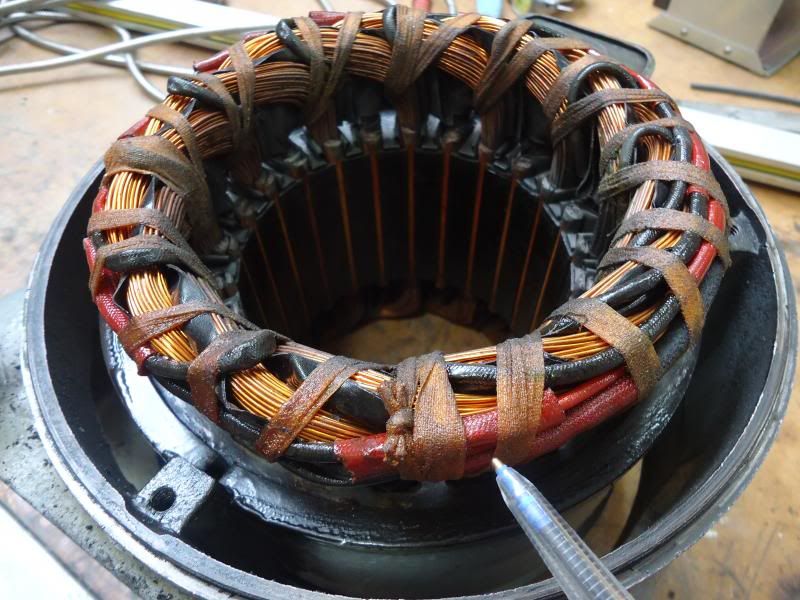
The Star connection point was very easy to locate.
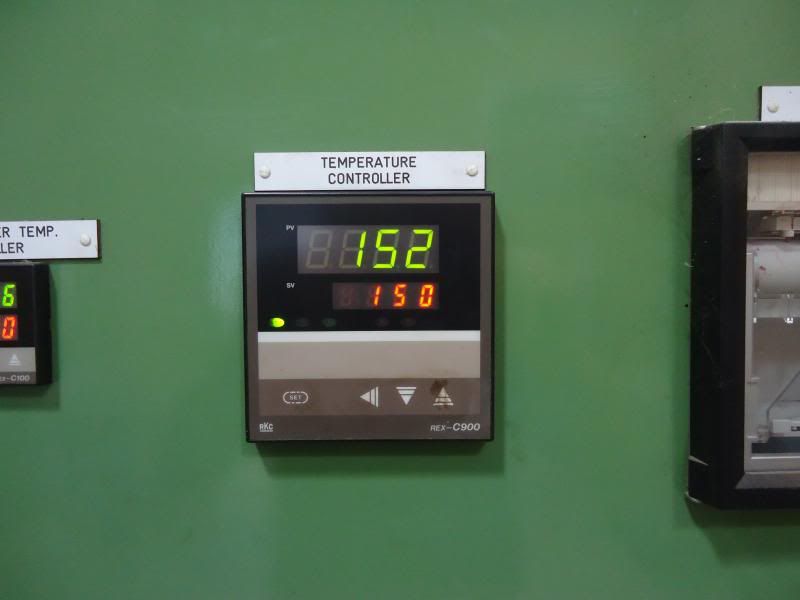
Into the oven for about an hour to soften the varnish.
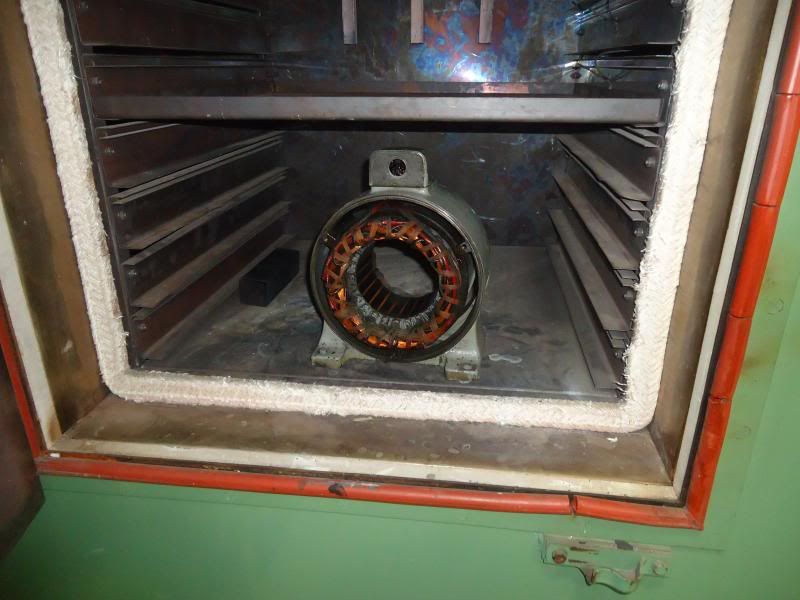
150 degrees C softens things nicely to allow easy removal.
Star Connection.
-
17th November 2013, 10:08 PM #11
Senior Member
- Join Date
- Sep 2008
- Location
- Riddells Creek
- Posts
- 300
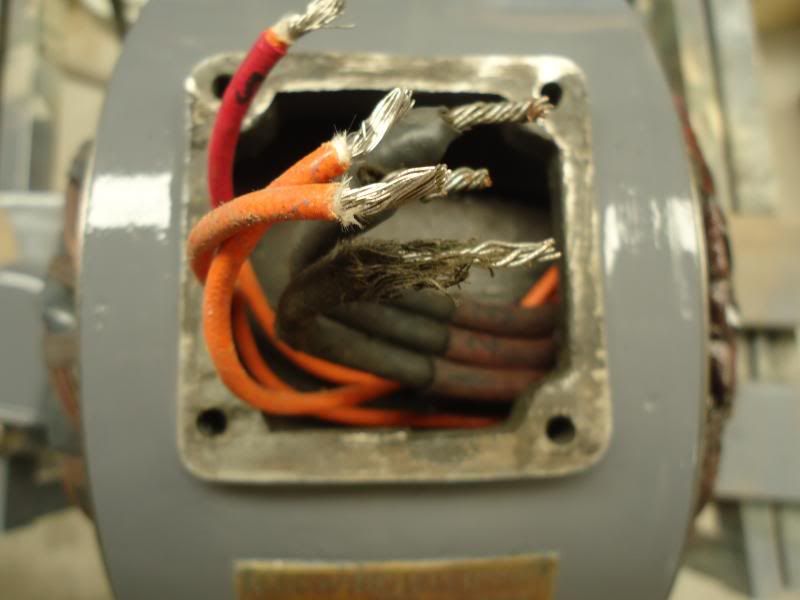
I made some good progress today and now have the machine running on the VFD. The motor conversion to Delta worked out well and it now starts better than it used to with the DOL starter

The 3 orange wires have been joined to the 3 wires at what was the star connection.
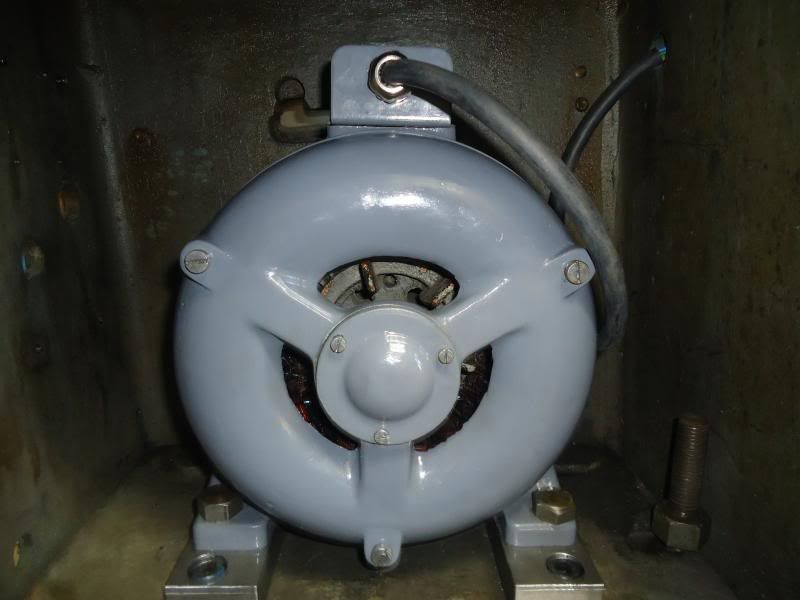
The repainted motor sitting on new mounts to allow better location.
VFD running at 50Hz and momentary push button controls.
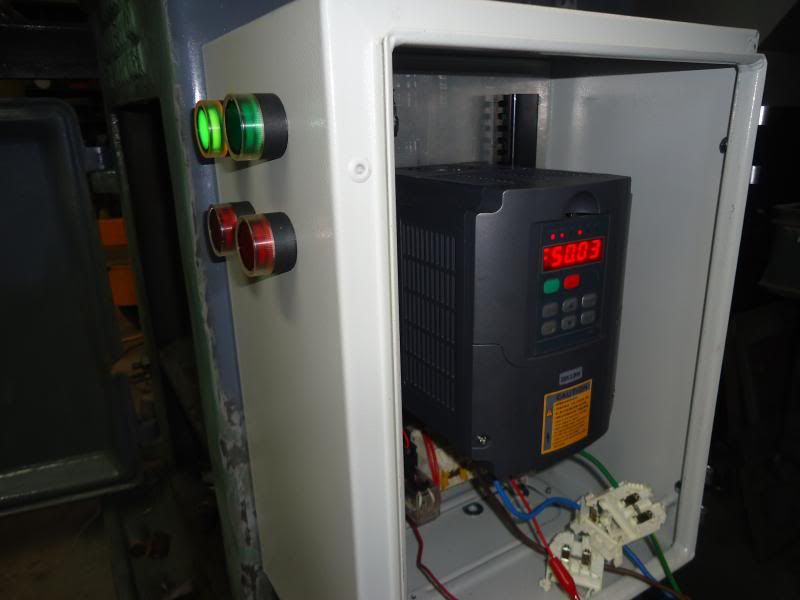
Overall I am very happy with the Huanyang drive, it performs very well in a simple application like this and is quite easy to set up and use compared to other brands I have used.
Lex.
-
18th November 2013, 09:01 AM #12
Senior Member
- Join Date
- Dec 2011
- Location
- Sydney
- Posts
- 178
I like your nice restoration of the motor, likewise the VFD setup.
A few questions:
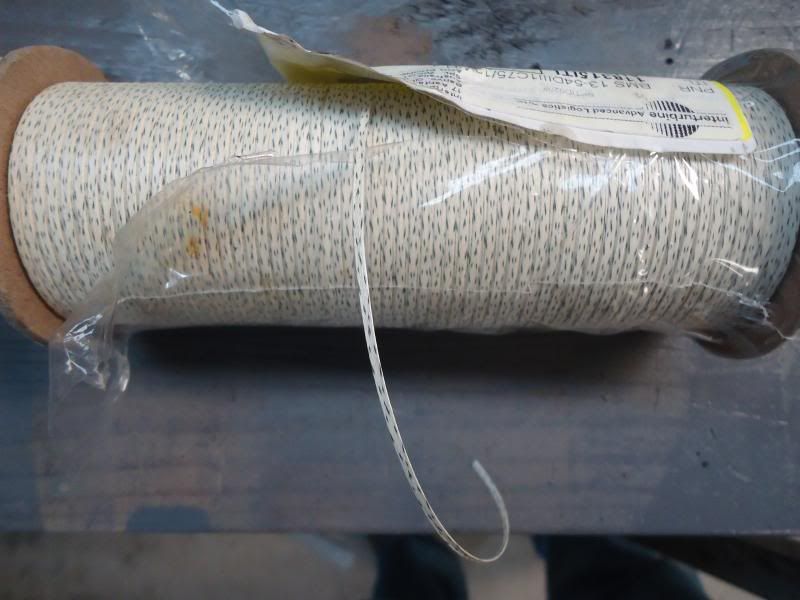
1. What type of tape or string did you use to bind up the stator windings after bringing out the star point?
2. Source of the VFD enclosure?
3. Can you give some details about the switch controls for your VFD setup (ie any e-stop etc)? I noticed that one photo seemed to show two indicator lamps (pushbutton switches?) on the outside of the enclosure, and a later view showed four.
Regards,
Bill
-
18th November 2013, 10:35 PM #13
Senior Member
- Join Date
- Sep 2008
- Location
- Riddells Creek
- Posts
- 300
Bill, I used lacing tape similar to that in the first picture and then brushed on some special varnish made for motors shown in the second picture. This varnish requires a low temperature bake to dry it so it spent a couple of hours in the oven.
I got the enclosure through RS Components online with free delivery.
The push button switches are for the spindle stop/start and for an electric clutch that I will be fitting to allow the feed drive mechanism to be disengaged when not in use as it is a little noisy.
I may fit an E stop later on.
Regards, Lex.
-
19th November 2013, 11:43 PM #14
Senior Member
- Join Date
- Dec 2011
- Location
- Sydney
- Posts
- 178
Thanks, Lex,
Threads like this help to keep me plugging on with my own s-l-o-w projects.
Regards,
Bill
-
23rd November 2013, 11:56 AM #15
GOLD MEMBER
- Join Date
- Jan 2011
- Location
- Far West Wimmera
- Age
- 63
- Posts
- 2,765
Did you buy a length of the tape or the roll? Where did the varnish come from? Originally Posted by Techo1

I have a 3ph 7.5hp motor 2 speed motor in my new lathe. I need to convert it to work with a 4kw Huanyang variable drive. I am planning on having a look at the motor soon. Maybe this weekend if I get the time. I will have a problem fitting it into an oven. We have a wood range and a small oven. The former will be too inaccurate and hard to control, the latter too small to fit this motor.
Dean


Similar Threads
-
Bringing Back Beauty
By jakoa2008 in forum FURNITURE, JOINERY, CABINETMAKING - formerly BIG STUFFReplies: 3Last Post: 6th June 2011, 03:29 PM -
bringing pine to life
By shane r in forum FINISHINGReplies: 4Last Post: 20th October 2009, 10:37 PM -
Bringing Hall Tables Back To Sydney
By soulspirit in forum WOODWORK - GENERALReplies: 1Last Post: 4th October 2009, 02:16 PM -
surface grinder
By Arron in forum METALWORK FORUMReplies: 9Last Post: 16th September 2006, 11:43 AM
