

 Thanks: 0
 Likes: 0
 Needs Pictures: 0
 Picture(s) thanks: 0
Results 1 to 15 of 159
-
4th November 2010, 09:42 PM #1Dave J Guest
 Changing the top quill bearing to a taper one on a HM52
Hi,
I spoke about changing the top quill bearing over from a deep groove bearing a few months ago. After using it for a month, I find it to give better results and the taper bearing is designed for both axial and radial load were as the deep groove standard one is not.
I first thought of this idea when regreasing the bearings just after getting the mill new and seeing they put a deep groove bearing at the top? I remembered seeing a bench top mill that had taper bearing top and bottom which seemed logical and after a bit of a search I found it again.
Round Column Mill Drill Spindle Quill Removal Procedure! Harbor Freight 8x12 and Sieg X2 Mini Mill, DRO, CNC Conversion Plans, Machining/Metalworking How-tos and Resources
You can also see in the pictures lower down that page, the bench top mills have a lot more cast inside around the quill for support.
I went and bought all new SKF bearings for the entire mill (well under $200) and took along the quill and spindle to discuss it with the the guys at SKF. There thoughts confirmed mine, that it should be a taper bearing, but gave the usual disclaimer that they were not engineers.
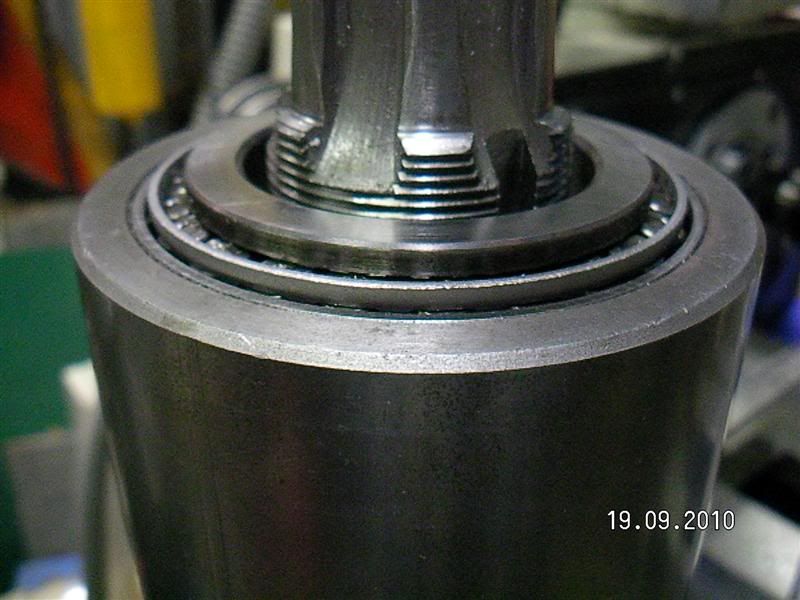
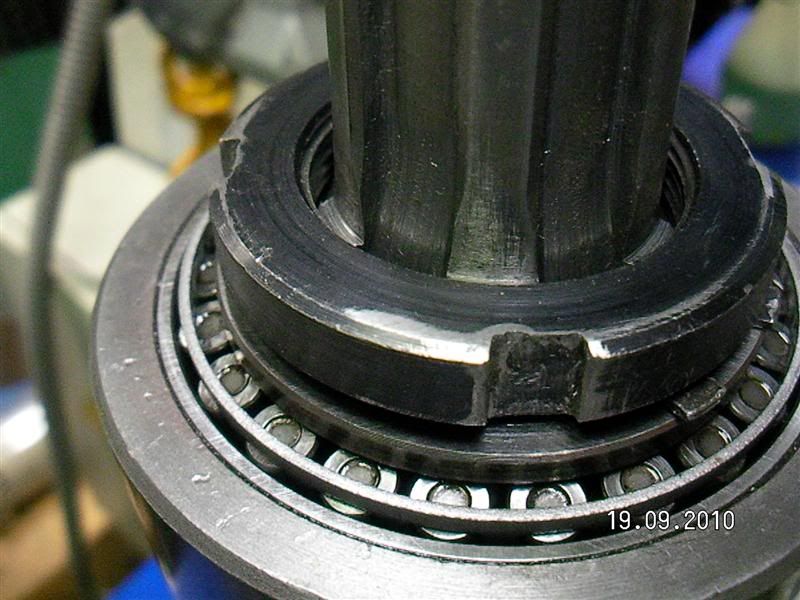
The new taper bearing 32009 X/Q sits higher (20mm instead of 16mm) in the centre than the deep groove one, so the spindle would only be left with a few full threads for the standard nut and tab washer to thread onto it. There was also the problem of the taper bearing not having rubber shields like the standard bearing so it would need a cover of some sort.
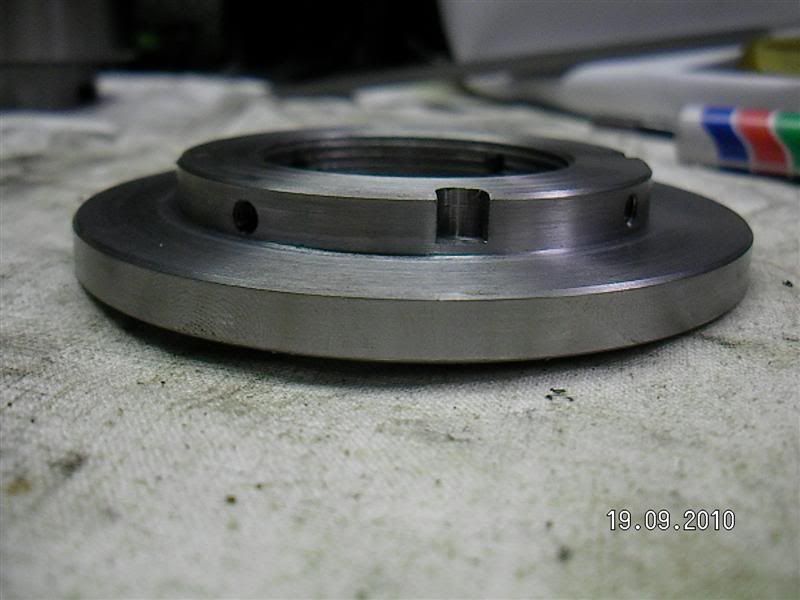
I thought about it a bit and could see that to get more thread engagement I could make a nut with a extended centre that goes down inside the bearing and be large enough to cover the whole bearing out to the edge of the quill. The shaft that the bearing sits on is 45mm and the threaded area is M40x1.5, so that gives a 2.5mm gap ( 2.4mm allowing for clearance) between the bearing and the thread each side which allows the nut to go inside.
I found the standard nut to be a really loose fit from being made to big and the standard bearing only sat 3/4 of way on the spindle as standard. So I could not see that the extra 4mm of height of the taper bearing being unsupported being a problem as it will be on 11mm of it's 20 height and the top bearing has almost no weight on it compared to the bottom.
I used some emery paper on the spindle with it in the lathe because the fit on both standard and taper bearings was a medium to heavy press fit. Adjusting the preload would be near impossible if left the way it was, so I took it down enough to be a light press fit. The bearing can be pushed on about a 1/8 of the way by hand and then needs the nut to press it on further.
Important
If the spindle to bearing clearance is left too tight, when you adjust the preload with the nut, the bearing will bind on the shaft and then when there enough pressure it will jump down the shaft (instead of sliding down), causing it to over preload the bearings. Also if you do happen to over preload it with a tight fit, it will take some big hits with a hammer to back it off, which is not good for your new bearings. You should be able to turn the nut with a C spanner (the one from a ER32 collet chuck works) fairly easily to push the bearing onto the shaft.
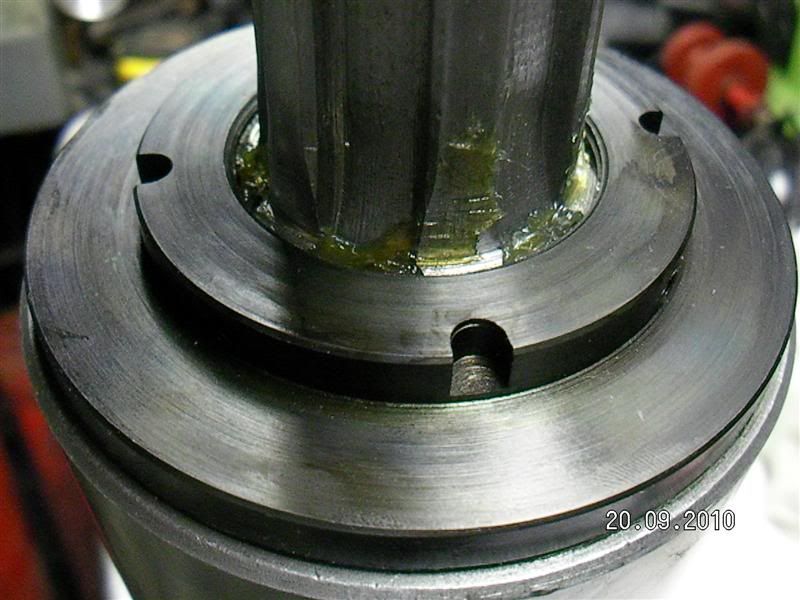
Taper bearing fitted showing how the centre is raised and the little amount of thread left. The standard bearing sits flush with the top of the quill so there is almost full engagement of the standard nut with it's tab washer.
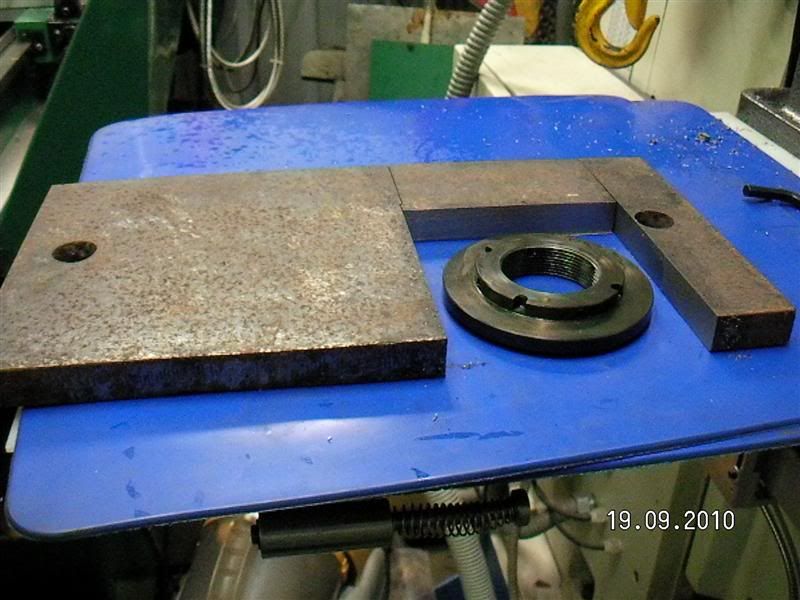
The only thing I had handy was a shed base plate I picked up, I cut a piece out to make the nut.
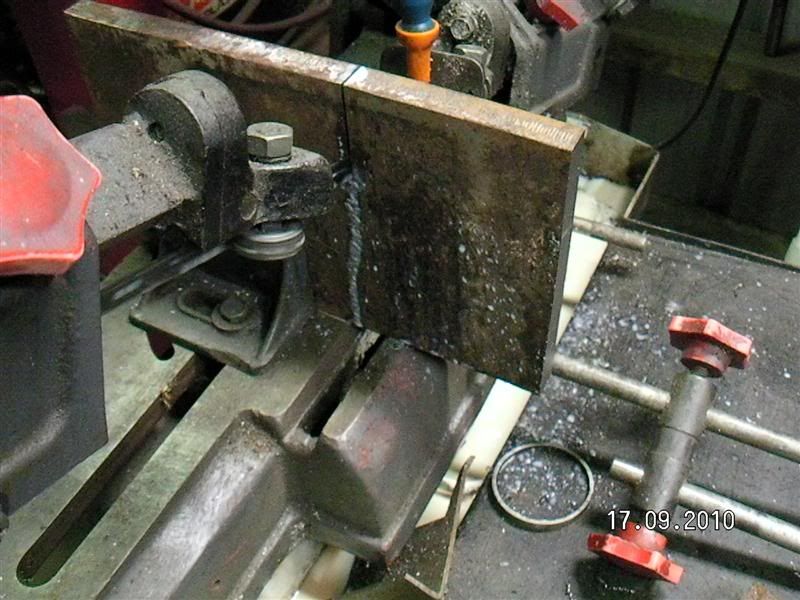
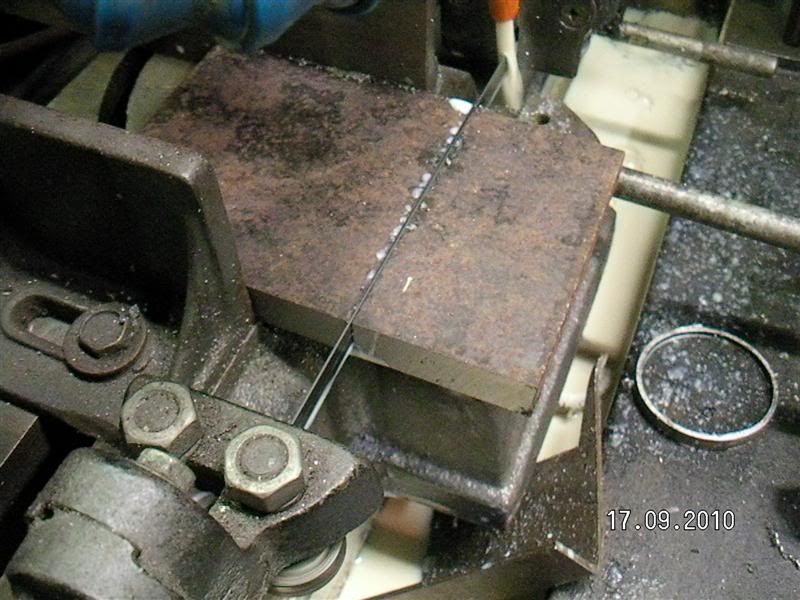
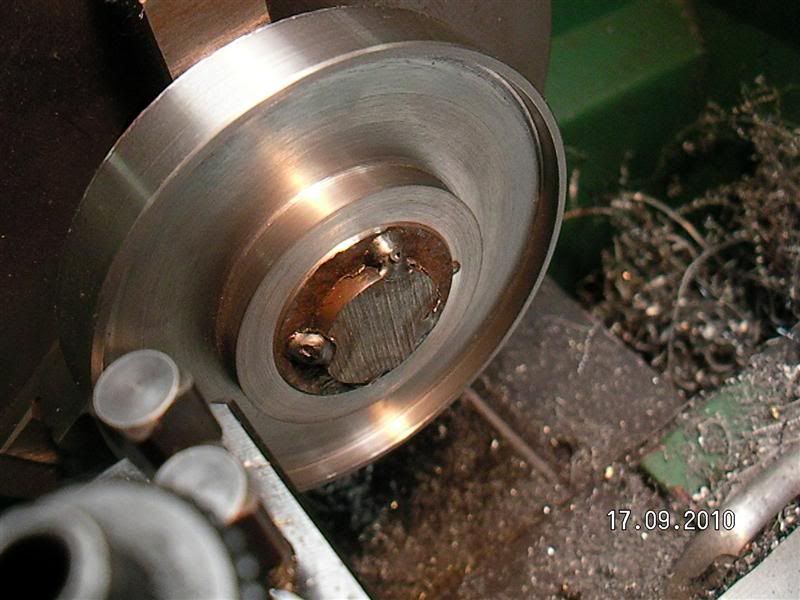
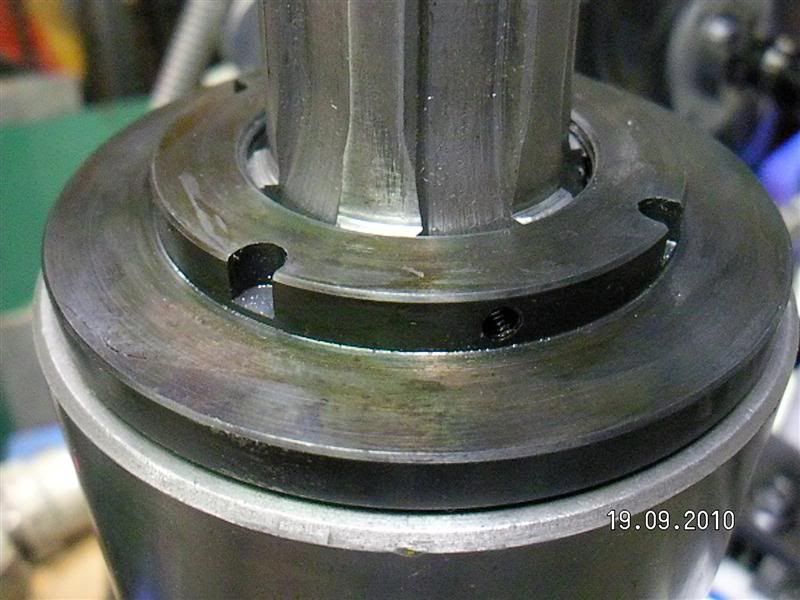
I cut the corners off on the bandsaw to save so many interrupted cuts on the lathe and drilled a hole for a shaft to be welded in temporary to machine it. When I was finished I faced it off and it cut through the welds to separated the two. I then turned it around and machined the other side to shape, bored it out and cut the 40 x 1.5 thread. I then machined the spanner slots on the mill with a 5mm end mill and the 4 holes for the M4 grub screw. I decided to go with a grub screw instead of the original tab washer because there was no way to fit it, and the tabs were already showing wear with one broken. Only one grub screw is used and it works out well, when one hole goes out of alignment with the lower part of the spline the next hole picks up on another. You can get to this grub screw on the HM52 through the hole in the side of the head that has a little round aluminum plate on it.
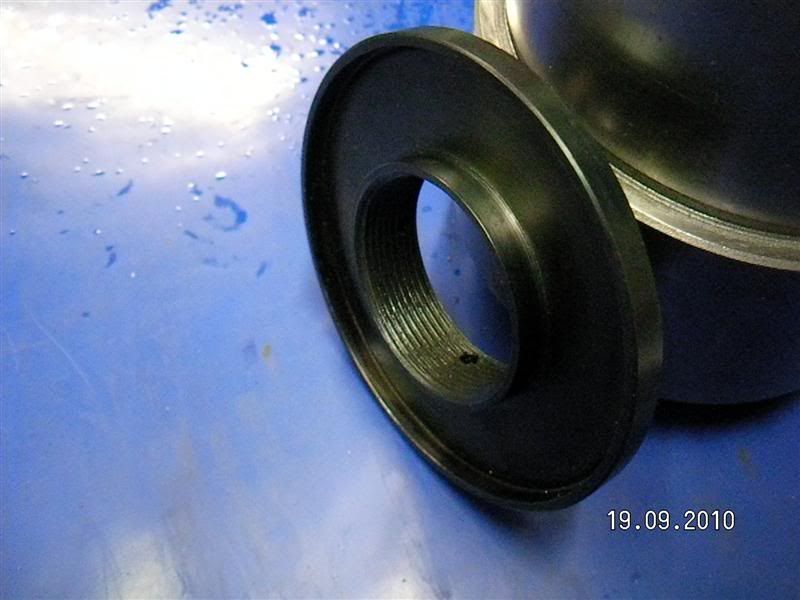
After oil blackening
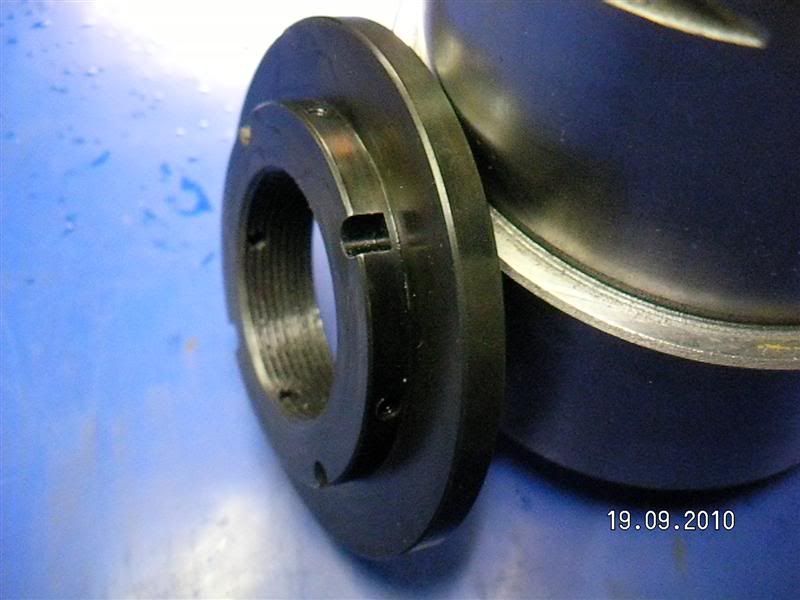
Standard nut and tab washer fitted showing how little thread is engaged with the taper bearing.
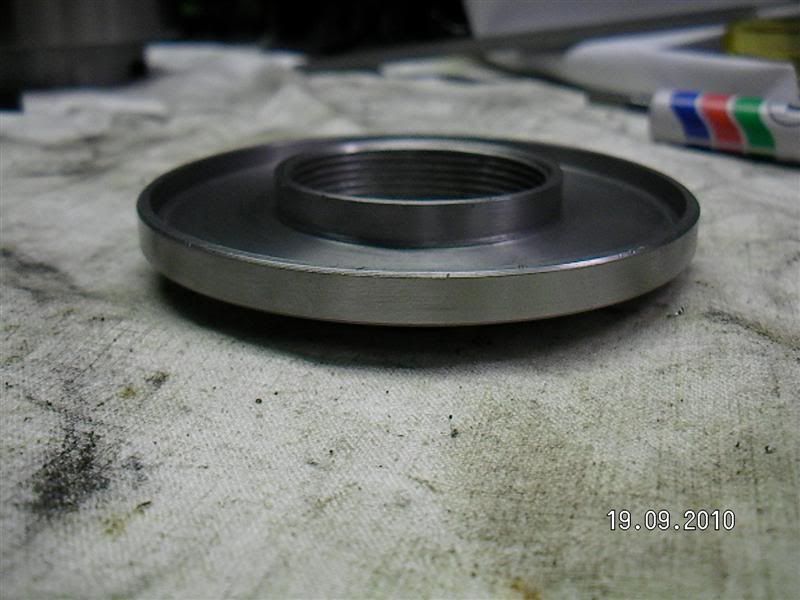
New nut with taper bearing.
The plate the nut came out of
Dave
-
4th November 2010 09:42 PM # ADSGoogle Adsense Advertisement
-
4th November 2010, 10:01 PM #2
 Member


- Join Date
- May 2007
- Location
- Ballarat,victoria
- Posts
- 82
Beautiful Work Dave !

-
4th November 2010, 10:44 PM #3
GOLD MEMBER
- Join Date
- Jul 2010
- Location
- Melbourne
- Posts
- 7,775
Nice as always Dave
How do you oil the top bearing now?
Stuart
-
4th November 2010, 11:21 PM #4Dave J Guest
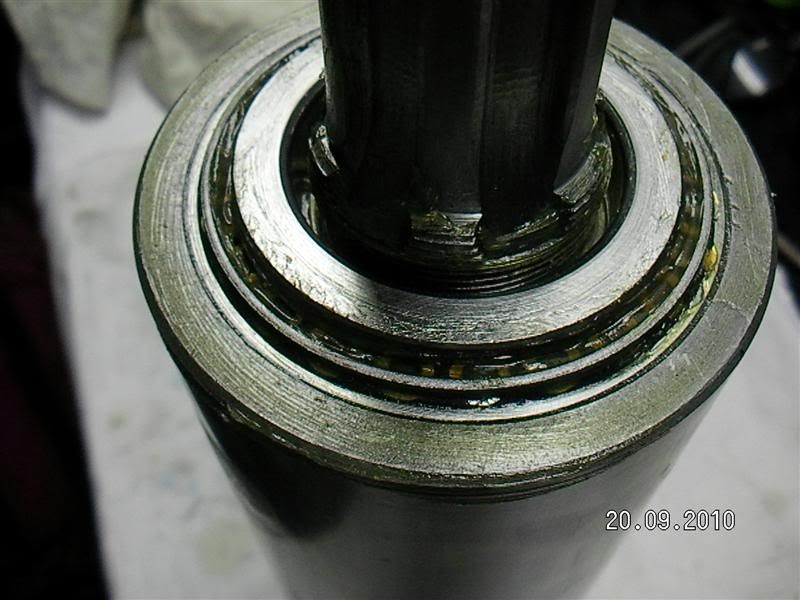
These are greased not oiled like yours. The original was a standard sealed grease lubricated bearing.
 Originally Posted by Stustoys

I will swap you mills if you don't want to oil your anymore. LOL
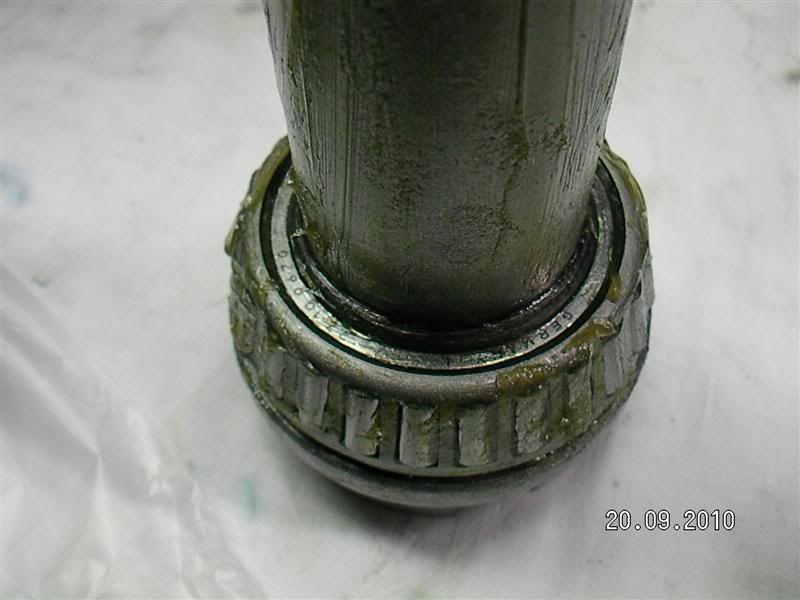
The pictures only show the trial fitting here is the one before the quill was installed.
Dave
PS
If anybody is wondering why I am putting double pictures up, it is because I see on so many forums where people have closed their Photo bucket accounts and the thread is left with no pictures to show or explain.
This way you get to see the photos full size in the thread and if anything ever happens to my account it will have the clickable thumbnails still here on the forum. Hope that makes sense?
-
4th November 2010, 11:31 PM #5
GOLD MEMBER
- Join Date
- Jul 2010
- Location
- Melbourne
- Posts
- 7,775
And the bottom bearing? Originally Posted by Dave J
No No it's fine, I'm starting to like my old mill now.
Stuart
It makes sense but there is something funny with my pc, most of the time I only see the links and have to click anyway. Must be a setting somewhere
-
4th November 2010, 11:42 PM #6Dave J Guest
Here you go, it's greased as well.
The pictures show up strait away on mine.
Dave
-
5th November 2010, 08:23 AM #7
GOLD MEMBER
- Join Date
- Jul 2006
- Location
- Adelaide
- Posts
- 2,680
great work Dave
when is my nut due to arrive....lol
has it fixed the spline rattle?
Ronmack sent over a new top but no shaft....I will replace and see what happens but I expect it will all be the same as it is now
-
5th November 2010, 08:29 AM #8
Hoarder of Timber
- Join Date
- Jun 2006
- Location
- East Warburton, Vic
- Age
- 54
- Posts
- 14,189
You can copy the URL of the fullsize image at the time of uploading them and insert into the post rather than the photobucket ones. After the image has been uploaded, just right click and copy from the list below the reply box then insert. Originally Posted by Dave J
Cheers
DJ
ADMIN
-
5th November 2010, 10:03 AM #9
Distracted Member
- Join Date
- May 2010
- Location
- Lower Lakes SA
- Age
- 58
- Posts
- 2,557
Stuart, in User CP, click Edit Options (under Settings & Options). Scroll down to Thread Display Options, about half way down. Tick the Show Images box. Originally Posted by Stustoys
I've only just figured this out - in fact reading your post made me go looking for it. My forum experience just got a whole lot better!
-
5th November 2010, 01:24 PM #10
GOLD MEMBER
- Join Date
- Jul 2010
- Location
- Melbourne
- Posts
- 7,775
Thanks Bryan. As you say, a great improvment.
Stuart
-
5th November 2010, 01:55 PM #11Dave J Guest
Hi DJ, Originally Posted by DJ's Timber
Not sure what you mean there, I do post them as a direct link in the message from photo bucket but if the account was to be closed for some reason the photos in the thread would be gone. Posting them as an attachment makes everybody have to click on them to see it full size, so I was only adding them as a backup to the photo bucket account.
Are you talking about up loading them from my computer to the forum server?
Not right up to speed on this and thought I had it mastered, LOL so any help would be appreciated if it makes it less work or keeps the photos up for good.
Dave
-
5th November 2010, 02:25 PM #12
GOLD MEMBER
- Join Date
- Jul 2010
- Location
- Melbourne
- Posts
- 7,775
I think I get what he means Dave. I'll make a post to test it.
Stuart
p.s. I was wrong it didnt work
-
5th November 2010, 11:05 PM #13
Hoarder of Timber
- Join Date
- Jun 2006
- Location
- East Warburton, Vic
- Age
- 54
- Posts
- 14,189
I'll do a how to when I get back home on Sunday on my other computer. Originally Posted by Dave J
Cheers
DJ
ADMIN
-
5th November 2010, 11:06 PM #14
Hoarder of Timber
- Join Date
- Jun 2006
- Location
- East Warburton, Vic
- Age
- 54
- Posts
- 14,189
You need to insert the image using the Originally Posted by Stustoys
 button for it to work
Cheers
button for it to work
Cheers
DJ
ADMIN
-
5th November 2010, 11:21 PM #15
GOLD MEMBER
- Join Date
- Jul 2010
- Location
- Melbourne
- Posts
- 7,775
Got it DJ.
Thanks
Stuart


Similar Threads
-
HM52 CNC Conversion
By RayG in forum METALWORK FORUMReplies: 182Last Post: 16th November 2010, 09:03 PM -
HM52 lathe
By Stustoys in forum METALWORK FORUMReplies: 6Last Post: 21st August 2010, 01:39 AM -
Wiring Diagram HM52
By eskimo in forum METALWORK FORUMReplies: 1Last Post: 30th May 2010, 02:15 PM -
S/h hm52
By Dave J in forum METALWORK FORUMReplies: 0Last Post: 23rd April 2010, 06:35 PM
 Members who have read this thread: 0
There are no members to list at the moment.