

 Thanks: 0
 Likes:
  Needs Pictures: 0
 Picture(s) thanks: 0
Results 16 to 29 of 29
-
15th June 2013, 02:49 PM #16
 GOLD MEMBER


- Join Date
- Mar 2008
- Location
- Townsville, Nth Qld
- Posts
- 4,236

Early this morning I sanded back the box with 1200, wiped it down with a dry rag, made sure it was dead smooth to touch and just applied the 1:2 mix, in long streaks, just the one run in the one direction, before doing the adjacent run with minimal overlay, if any.
The dried finish was near perfect, just a little rough in places. And the finish is starting to look shiny, at last. .
.
I imagine if there is any minor gritty feeling anywhere on the final coat, the UBeaut EEE Ultra cutting compound will soon get rid of that.
Many thanks to Fletty and Neil and Alex for your help and support. Will post pics of the final finishregards,
Dengy
-
15th June 2013 02:49 PM # ADSGoogle Adsense Advertisement
- Join Date
- Always
- Location
- Advertising world
- Posts
- Many
-
16th June 2013, 09:55 AM #17
Benevolent Dictator
- Join Date
- May 1999
- Location
- Grovedale (Geelong) Victoria
- Age
- 74
- Posts
- 12,208
Dengue - My best suggestion for anyone using shellac for the first time or if they have had a problem of any sort in the past with using shellac is below:
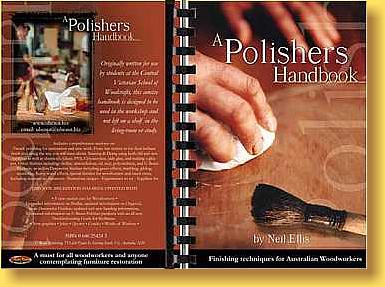
A Polishers Handbook. Written by yours truly.

Might not help for this box right now but definitely will for any future shellac finishing.
I think your problem is definitely inexperience coupled with (I suspect) using flannelette as your application rag, applying too much and rubbing it over and over with a shellac dampened rag which is basically the making for a fine mess rather than making for a fine finish.
As per my suggestion in an earlier post: Practice on a scrap piece of the same timber, that has been prepared exactly the same as the project piece. Not a good idea to jump in boots and all without doing this. Are you doing this on the scrap piece or on the box?
Did you get a good brush as suggested or are you ragging the entire finish on?
Might be worth having a bit of a look at these video's below. They are from a demo I did for the Triton Woodworkers Club at Holmesglen back in 2006. The 4 videos are around 20 minutes each and go through basic flat finishes. The first one is mainly about our products and a bit of brief info on each and the next three show and explain how to get a basic finish onto a flat surface and includes how to use a brush.
They may be of some use to you. Each one takes a couple of minutes to download so it might be easier to download tem to a file on your computer then play them from there rather than wait for around 8-10 minutes to download them individually before they play.
DOWNLOAD THIS VIDEO 1 DOWNLOAD THIS VIDEO 2 DOWNLOAD THIS VIDEO 3 DOWNLOAD THIS VIDEO 4
Cheers - Neil
-
16th June 2013, 03:12 PM #18
GOLD MEMBER
- Join Date
- Mar 2008
- Location
- Townsville, Nth Qld
- Posts
- 4,236
Running with turkeys !!
It must be very difficult for you guys to soar like eagles when you have to deal with turkeys like myself.
At the risk of making myself a laughing stock, I hereby put the following mistakes down for future learners.
Mistake 1: The finish was not getting shiny after 7 coats !! That was because I was using the wrong mix. Original thinning was to be 25%, so my mind decided it was roughly 1:4, so added 50mm of the dewaxed shellac to 200mm of metho.
And I was sanding each coat back with 1200 grit paper
For a stronger, thicker final coats I decided on a 1:2 mix, so added 100mm of shellac to 200mm of metho, again sanding between coats.
After about 9 coats , the finish was very smooth and what I thought to be a nice satin finish.
Finally woke up and used a proper 25% mix - added 25mm metho to 100mm shellac - the finish was much better, more glossy.
Mistake 2: I did not practice on a similar board, mainly because I was in a hurry, and because I didn't have any board left that was dressed and finished the same as the box. Rush, rush, rush.
Mistake 3: I did not start in from the edges and wipe back towards the edges, then do a small overlap at the beginning of the previous wipe. As a result I ended up with some messy buildup at each corner of the box. If I had read Neil's Polishers Handbook first, there is a section devoted to this technique ( 4th edition page 16 - The Swooge Coat). It was clearly demonstrated on the 4th video, but using a brush.
Mistake 4: I did a number of swipes of the shellac rag over the same spot, which caused the gritty mess by dissolving the previous coat. Yes Neil, it was definitely a fine mess
Some further points of consideration:
I found that the recommended watercolour brush was $50 from our local art supplier, so gave that a miss. Tried a good quality Monarch brush, but tended to flood the work. Tried a cotton sheet, but still tended to flood the work, but at that time I was still going over the same work and resulting in the grit.
I then moved to the flannelette sheet, and had also discovered the need to just do a single swipe in the one direction, and then another swipe beside it with minimal, if any, overlap until the workpiece was fully covered.
I found the flannelette good to work with, once it was filled , and it does tend to absorb the shellac a fair bit initially - but it gave an even coat and didn't dry up too quickly, and was easy to refill by just tipping some shellac out of the bottle on to it. If I had a large open tray holding some shellac, I suppose I could have dipped the flannelette pad into it for refills.
Also, I popped the wet flannelette rag into an airtight jar, and it was still right to go, after a couple of hours, on the next coat
And they say that you learn from your mistakes, eh?
Anyway, I hope this helps others going down the shellac path.regards,
Dengy
-
16th June 2013, 03:21 PM #19
Senior Member
- Join Date
- Dec 2007
- Location
- Gravesend NSW
- Age
- 57
- Posts
- 269
Thanks Dengue as a fellow turkey with eagle aspirations.
I priced the mop as well and was a bit shocked at the cost, I think I will definitely go with your experience and thanks again neil and all the other guys and Girls who helped a lot of questions were answered for me , especially with the Vids that neil supplied
Cheers
GlennCheers
Glenn
-
16th June 2013, 08:01 PM #20
Mildly Moderate
- Join Date
- Nov 2007
- Location
- Albury Well Just Outside
- Posts
- 13,315
The price of the mop as you say at $50.00 is a good price if you think how long this will last you. Now we are talking decades and decades.
And for the record no I do not have one yet.
-
17th June 2013, 12:41 AM #21
Benevolent Dictator
- Join Date
- May 1999
- Location
- Grovedale (Geelong) Victoria
- Age
- 74
- Posts
- 12,208
I purchased 3 camel hair mops from an art supply shop about 12 mths ago. Shop was in the LaTrobe Valley so expected them to cost a fair bit. $22 each. they still have the price stuck to them.
$50 for a 1 inch camel hair mop is way over the
Here's a couple of Neef Camelhair brushes I found online in a quick search.....
3/4" Camel Hair Mop $8.42 (inc Tax)
1" Camel Hair Mop $12.03 (inc Tax)
-
17th June 2013, 01:05 AM #22
Senior Member
- Join Date
- Dec 2007
- Location
- Gravesend NSW
- Age
- 57
- Posts
- 269
Thanks Neil
When I looked before Google definitely wasn't my friend , after watching the video it does seem much easier with the brush , thanks again for the help
GlennCheers
Glenn
-
17th June 2013, 09:40 PM #23
GOLD MEMBER
- Join Date
- Mar 2008
- Location
- Townsville, Nth Qld
- Posts
- 4,236
Many thanks Neil for the links. I have ordered a couple of 1" brushes as you recommended above.
regards,
Dengy
-
17th June 2013, 10:56 PM #24
gentleman woodworker
- Join Date
- Mar 2005
- Location
- Camden, NSW
- Age
- 74
- Posts
- 3,576
My copy of Fine WoodWorking arrived today .... woohoo..... page 38.....
Make Shellac Your Go-To Finish
'a simple brushed finish produces stunning results"Dengy, in a week or 2 you can write your own article, can't wait for your pics!
flettya rock is an obsolete tool ......... until you don�t have a hammer!
-
18th June 2013, 09:48 AM #25
Dehydrated Hydrographer
- Join Date
- Jun 1999
- Location
- Westleigh, Sydney
- Age
- 77
- Posts
- 9,550
Just an addendum. If you want a really shiny finish on an open grained timber like silky oak, you can use a wood grain filler before sanding. I've used Wattyl, don't know if it's still available. Tint it with pigment so it's a little darker than the wood, then rub it in well with a piece of hessian. When it's dry, sand and finish with shellac as you've done.
-
13th August 2013, 01:51 PM #26
GOLD MEMBER
- Join Date
- Mar 2008
- Location
- Townsville, Nth Qld
- Posts
- 4,236
Done!!!
I had to put this box to one side for a while, getting nowhere after about 100 coats of shellac and then sanding them off because of imperfections.
Started from bare timber again, and used the camel hair brush as recommended by Neil above, and this time virtually removed all the shellac liquid on the brush and wiped a mere faint smear each coat, as suggested by fletty, the finer the smear, the better.
After about 3 coats on the box carcase, I was not game to do any more, it looked good enough, not a really glossy finish that I would have preferred, but I had had enough and did not want to risk any imperfections and subsequent sanding.
The lid was a different matter. The problem was the raised panel, and the thin surrounding frame on the top side, and the various rebates on the inside. Tried the brush without success - the problem was going around each of the corners on the frame. In the end I used the flannellete pad, did two sides of the frame, then when they had dried, did two opposite sides. I was unable to achieve a uniform finish on the outer frame, in some places it looked like a spot had been missed, just a bit duller than adjacent parts on the frame.
After a week of drying / hardening time, I used the EEE Ultra cutting compound and buffed it and it all came up nicely, as you will see on the attached pics.
The hinges are Brusso 95 degree JB-103, but had to be filed down to suit the 10mm thick box sides. Will make future boxes 12mm thick. That size is better suited to the SmartHinge too.
The recipient of this gift is a youngish lady who is mad keen on dinosaurs, in particular the T-Rex. Took ages to find a decent image that could be engraved
Many thanks for all your help, encouragement and support in doing this job, my first jewellery box. I now have to make another two before early October
P1050688_1 (Large).jpgP1050691_1 (Large).jpgP1050695_1 (Large).jpgP1050707_1 (Large).jpgP1050716_1 (Large).jpgP1050709_1 (Large).jpgP1050703_1 (Large).jpgP1050720_1 (Large).jpgregards,
Dengy
-
13th August 2013, 05:16 PM #27
GOLD MEMBER
- Join Date
- Mar 2009
- Location
- Sydney
- Age
- 37
- Posts
- 2,711
Well done Dengy! You've done well
I'm looking forward to seeing your next batch of boxes.
-
13th August 2013, 07:46 PM #28
Dehydrated Hydrographer
- Join Date
- Jun 1999
- Location
- Westleigh, Sydney
- Age
- 77
- Posts
- 9,550
-
17th August 2013, 10:20 AM #29
GOLD MEMBER
- Join Date
- Mar 2008
- Location
- Townsville, Nth Qld
- Posts
- 4,236
This gift to my son for his partner's birthday was very well received, albeit 6 months late

or you could say 6 months early, but she has been presented with it, and loves it.regards,
Dengy

 Reply With Quote


Similar Threads
-
Finishing silky oak
By tillysfurniture in forum FINISHINGReplies: 8Last Post: 21st September 2010, 02:45 AM -
Silky Oak finishing help
By irish in forum FINISHINGReplies: 4Last Post: 3rd March 2008, 10:58 PM -
Finishing Silky Oak
By Sam Bridgham in forum FINISHINGReplies: 2Last Post: 9th March 2005, 09:37 AM -
Finishing Silky Oak
By Mick S in forum WOODWORK - GENERALReplies: 2Last Post: 7th July 2002, 04:34 PM -
Finishing Silky Oak
By Eastie in forum FINISHINGReplies: 3Last Post: 22nd March 2002, 11:14 AM
