

 Thanks: 0
 Likes: 0
 Needs Pictures: 0
 Picture(s) thanks: 0
Results 1 to 15 of 48
-
5th February 2009, 11:21 PM #1
 Novice


- Join Date
- Feb 2009
- Location
- Hobart, Tasmania
- Posts
- 15
 1st woodwork project- Construction of a Strat / Superstrat style guitar
Hey everyone, my name's Luke and I've got barely any woodworking experience but I'm having a go at building an electric guitar with my granddad. I think I've made about one joint in my life and that's it for woodwork.
I really really love guitars so I don't think I'll lose the motivation to keep working on it.
I've been working on this for about a week.
I've sort of been rushing through some of the steps because I really want this thing built, so I haven't got any pictures from right at the beginning and this first post will have lots of pics to catch up to where I am now. However, I've pieced together bits of wood that I've cut so you can see what they were like before.
This guitar is pretty basic, if you want a good idea of what it will look like look up "Carvin dc127" in google, it's pretty similar but with a different control layout.
Now, I've fudged a lot of probably important things in relation to body design etc due to budget issues, but I'll be better prepared (and ready to fork out wads of cash) when I make another guitar.
Alrighty let's get started...
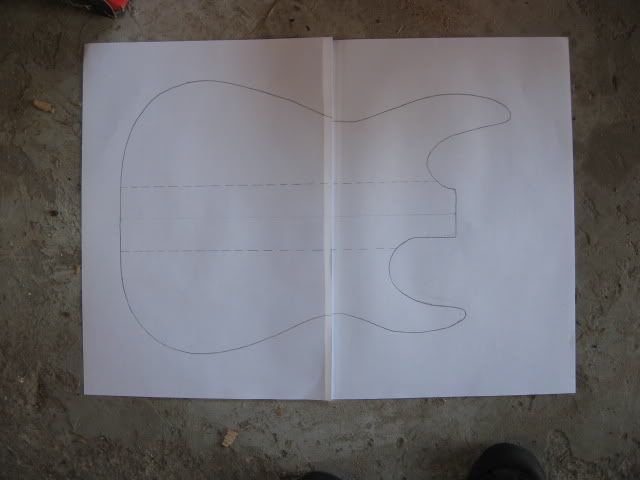
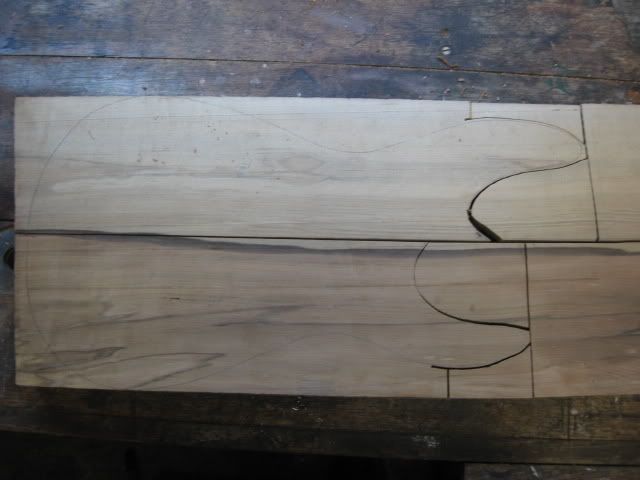
Here's my plan, it's not very good but it's just the body shape, please don't grill me for lack of detail. I'll decide on pickup positioning and electronics later, when I've got the bits. (suggestions and comments on changes to the body shape are welcome, but from me looking at it it doesn't seem to have any problems with playability.
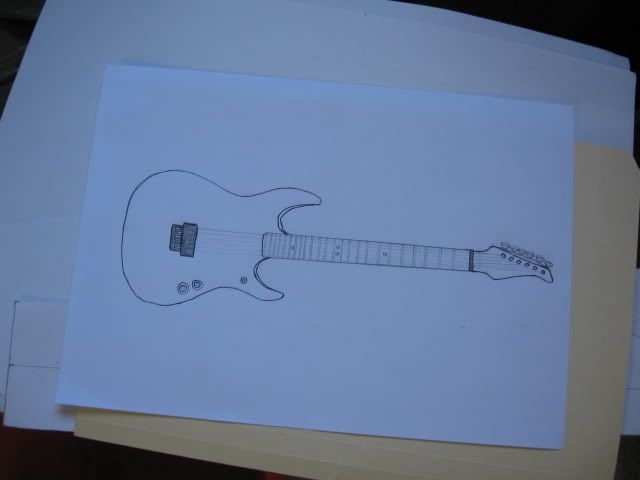
And here's what it should look like...
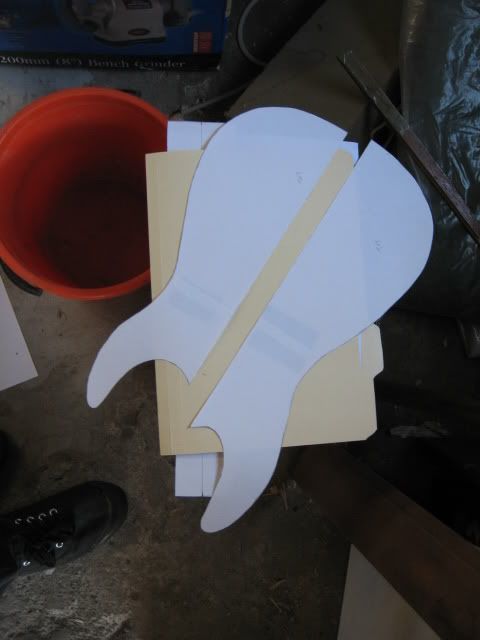
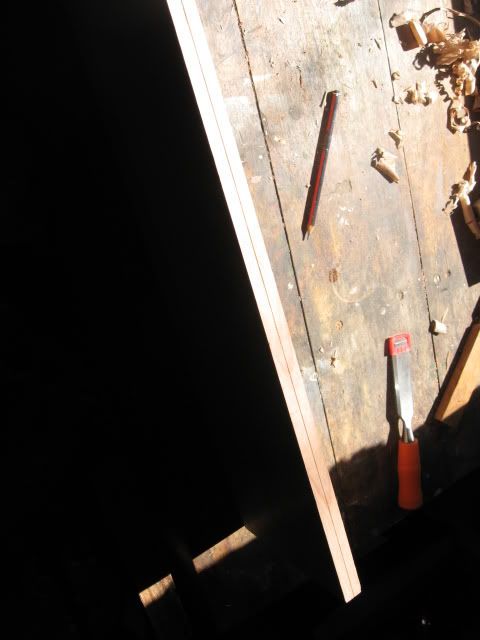
THese are the templates I used to trace the body shape onto the wood.
There's a bit of a funny choice of woods for the guitar. First off there's blackheart sassafras for most of the body, leatherwood for the neck and vaguely striped tassie oak for the top of the body.
Sassafras
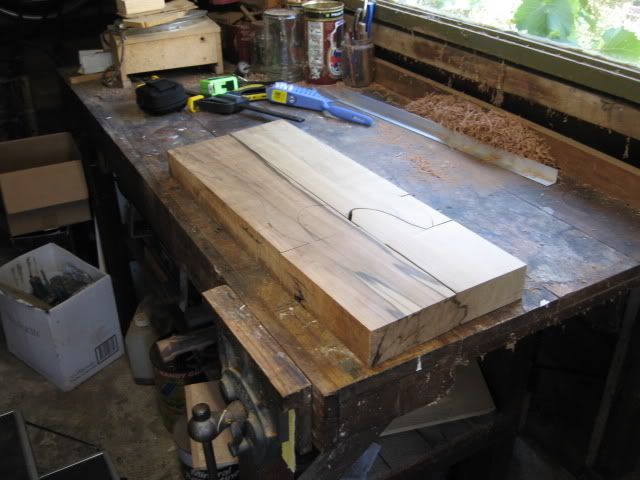

Tassie Oak
We haggled this piece (Now half it's original size) from $20 to $8, which I think is a good deal. It did have a few knots though...
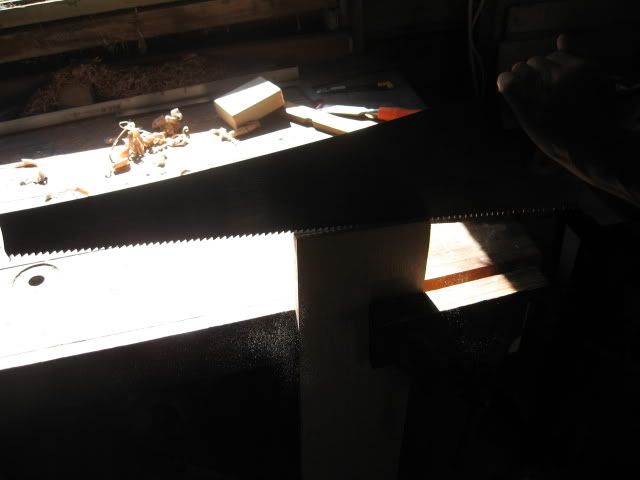
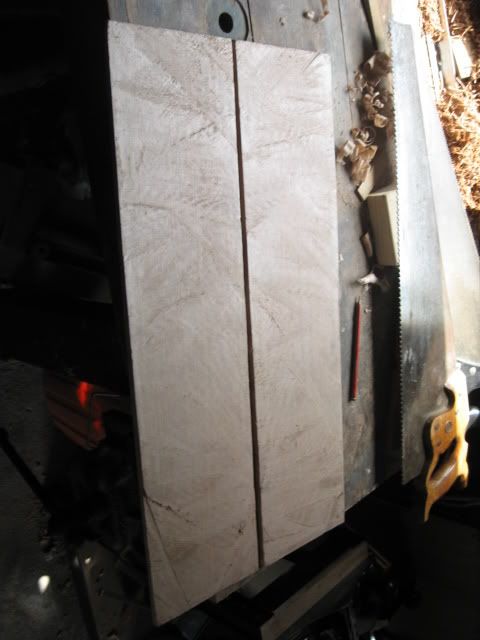
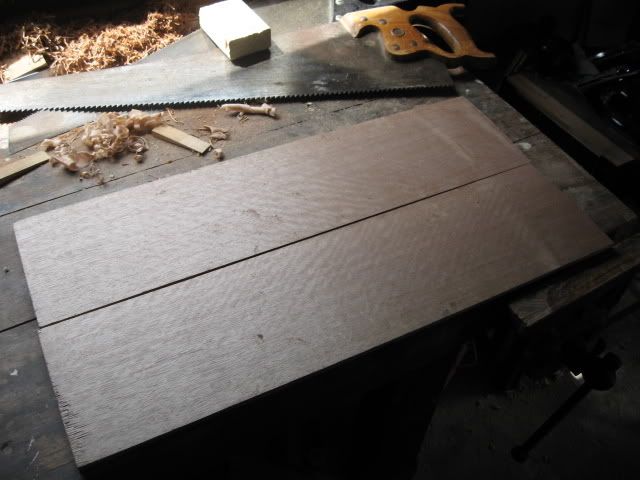
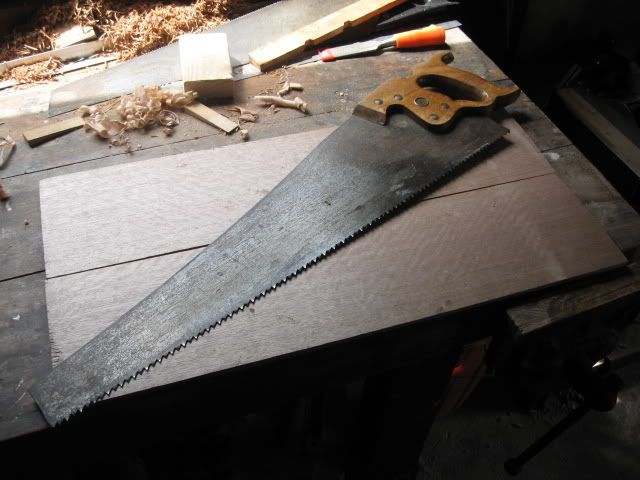
Now what we had to do with the oak was, because it was too thick, was cut it down lengthways with the ripsaw, old fashioned elbow grease style. It took a morning of nonstop cutting (and now we've both got horrible RSI from not doing it much before now...)
THis is the marking and cutting...
-
5th February 2009 11:21 PM # ADSGoogle Adsense Advertisement
- Join Date
- Always
- Location
- Advertising world
- Posts
- Many
-
5th February 2009, 11:39 PM #2
Novice
- Join Date
- Feb 2009
- Location
- Hobart, Tasmania
- Posts
- 15
From here it was nasty...

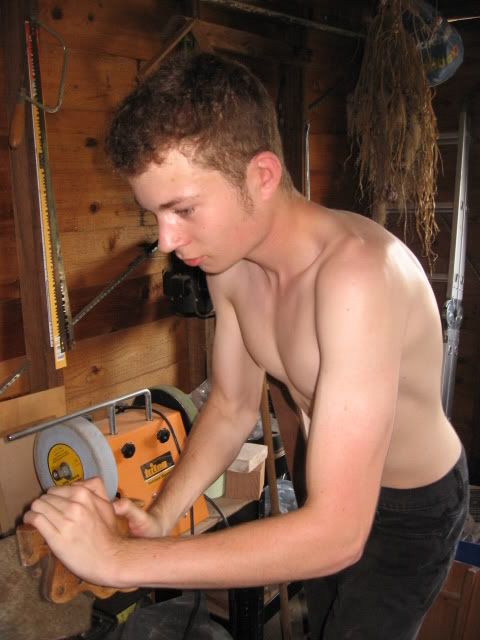
(Sorry i'm shirtless, in Tassie we got hit by the Australian heatwave a bit as well so it was pretty toasty, especially with the sun baking down on the corrugated iron roof of the shed)
ANyway finally finished, here's showing off the wood
AND posing with the blunt beast that did the dirty work.
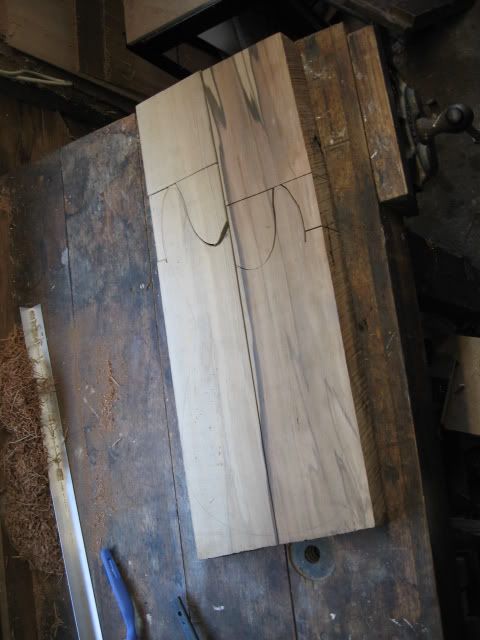
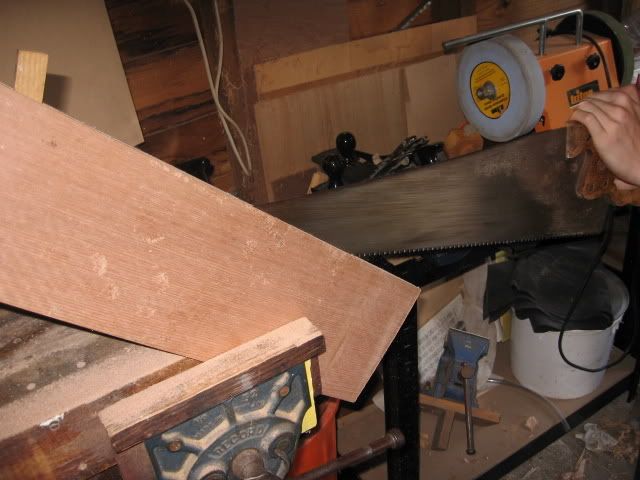
Here's a few random photos, first showing the body pieces together after facing the bandsaw, Then with the leatherwood neck in place.
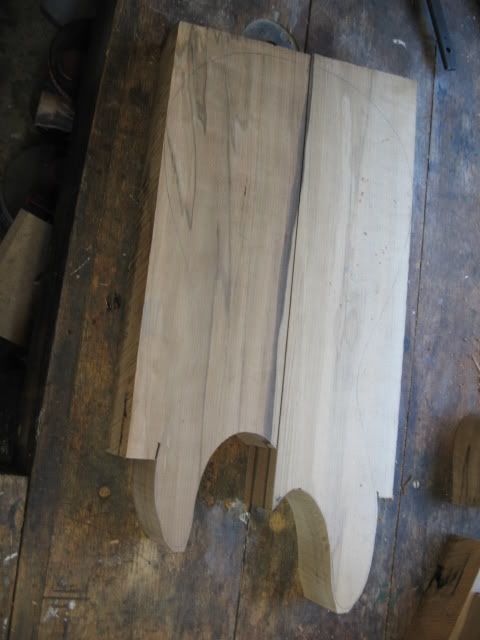
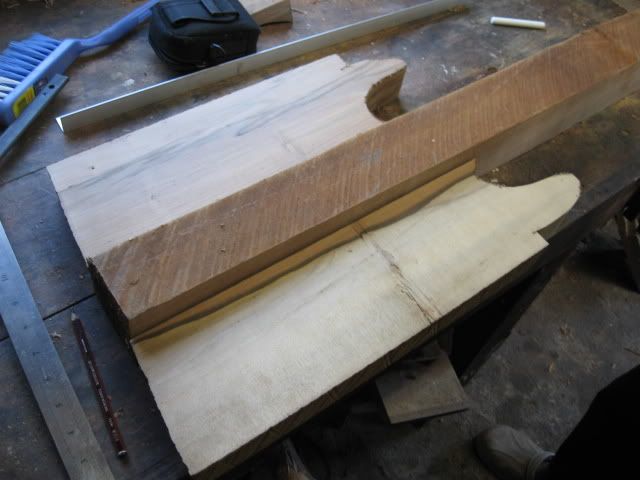
Now here's the sneaky part. At first we were going to do a neck through guitar because the sassafras wasn't wide enough to make a full body (It is SO hard to find good wide, thick timber in Tasmania??????? WHY?)
Instead, I though that we could just just use some of the neck wood cut separately to be a giant "laminate" in between the sassafras, as shown...
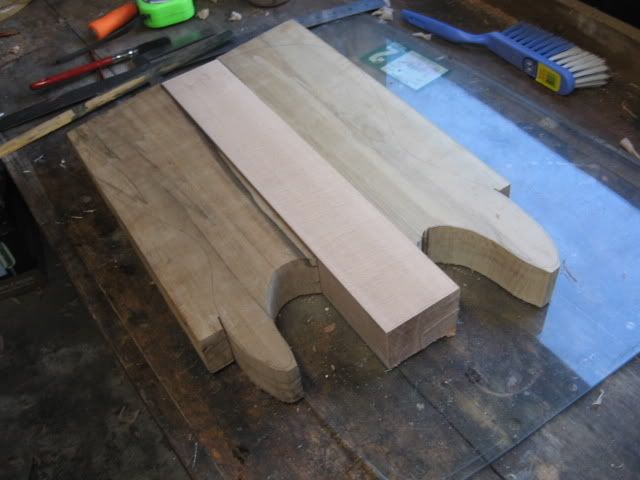
So now it's going to be a bolt on or set neck, in case we stuff up the neck.
BTW, it took a lot of planing and scraping to get those pieces of wood to fit together, they were all bits of wood with badly sloped sides...
But when you're on a tight budget anything will do.
OTher things:
I ordered an Indian Rosewood fretboard, some kind of truss rod and fret wire off the Luthier Mercantile website, which I'll post pictures of when I get them.
THe rest of the hardware, electronics I can probably buy from places near where I live.
Now because this is a big post, I've probably forgotten some of the things I've done, I can fix it up later. Any advice or constructive criticism (or maybe even praise) would be greatly appreciated! From now on I'll post pics and stuff as I go. School starts soon so that might slow me down a bit, but we'll see...
-
6th February 2009, 12:38 AM #3
Apprentice
- Join Date
- Apr 2008
- Location
- Perth Aus
- Posts
- 577
nice
it is good to see more aussie eucalyptus being deployed!
-
6th February 2009, 05:25 AM #4
Necrotreeophile

- Join Date
- May 2007
- Location
- Blue Mountains
- Posts
- 2,613
Oooohhh nice Sassy, drool....
Seems like your working out what you need to Luke, but if you have a question there are lots of guys on this forum who know what they are doing"We must never become callous. When we experience the conflicts ever more deeply we are living in truth. The quiet conscience is an invention of the devil." - Albert Schweizer
My blog. http://theupanddownblog.blogspot.com
-
6th February 2009, 09:03 AM #5
QUID PRO QUO
- Join Date
- Dec 2008
- Location
- NEWCASTLE
- Posts
- 52
adore the blackheart sassafras, great choice for a body my young man.
aren't grandad's awesome. my two are long gone but definatley not forgotten, good to see skills being passed down.
your guitar looks like a good one. i like the fact that you are flexible enough to change your design on the fly to compensate for wood issues etc.
don't worry bout budget constraints, ingenuity and passion beats lack of funds anyday.
nice work, look foward to seeing it progress.
-
6th February 2009, 10:09 AM #6
Senior Member
- Join Date
- Sep 2006
- Location
- Sydney
- Age
- 62
- Posts
- 423
Hey that IS looking good already, and great to see someone not scared of a bit of hard work. Ripping that tassy oak plank BY HAND is something not many other people would even want to think about. But then, you are your father's son
 ... and your grandfather knows how to sharpen his tools!
(Luke is my nephew. He helped me hog out the top of my cornerless bass, and also built a Uke from a kit, so he's done a little bit more than he lets on. And he sure knows how to shred. Look after him!)
Matthew
-
6th February 2009, 10:16 AM #7
Novice
- Join Date
- Feb 2009
- Location
- Hobart, Tasmania
- Posts
- 15
THanks guys and thanks for pointing out the design flexibility aspect of this project, I guess I have planned for things to change as I go along! How unprofessional...
I checked on the oak that we sawed down the middle and unfortunately, in the heat it warped a bit. However, when we attach it as a layer to the top surface, we will have planed it quite thin, to about 1/4". When it's this thin, will we be able to flatten the wood down at all so that it glues to the body?
-
6th February 2009, 10:26 AM #8
Novice
- Join Date
- Feb 2009
- Location
- Hobart, Tasmania
- Posts
- 15
That's true... that Uke did take a bit of work to put together, but the body shape was already made for us. There wasn't as much worry about whether we would have enough wood to keep it made from only a few different pieces, or whether it would split when we worked it!
Oh I forgot to mention... I'm really sorry guys... but that sassafras was originally too thick and we couldn't chop it with the band saw because it was too wide. So we took it out to a joinery to thin it and sadly about a third of it ended up as sawdust... oh well, perhaps a sacrifice to the woodworking gods that all goes well!
-
6th February 2009, 10:30 AM #9
Senior Member
- Join Date
- Sep 2006
- Location
- Sydney
- Age
- 62
- Posts
- 423
I think, if you leave it for a while so the air circulates evenly, and not in the sun, the warp will probably sort itself out. By sawing it down the middle, you have suddenly exposed the virgin middle bit to heat and dryness, and the drying will cause the warp. Don't leave the planks flat on the bench, stack them upright or layered with thin stick so the air can circulate. when the drying is even, it may straighten.
If you ever need to COAX a warp in a flat wooden plate, spray one surface with water and watch what happens!
-
6th February 2009, 10:51 AM #10
Novice
- Join Date
- Feb 2009
- Location
- Hobart, Tasmania
- Posts
- 15
Thanks, I'll ring grandad and tell him to put the wood upright.
-
6th February 2009, 12:06 PM #11
SENIOR MEMBER
- Join Date
- Feb 2007
- Location
- sydney
- Age
- 35
- Posts
- 580
looking good so far. good job on splitting that whole piece with the ripsaw!
-
6th February 2009, 01:45 PM #12
SENIOR MEMBER
- Join Date
- Sep 2008
- Location
- sydney
- Posts
- 2,370
looking good dude
splitting wood with a handsaw is a pain!!!!
i used to run both sides across the table saw then just handsaw the middle section, dunno if thats what you did?
is this going to have a trem on it?
keep up the good work man
-
6th February 2009, 03:10 PM #13
Novice
- Join Date
- Feb 2009
- Location
- Hobart, Tasmania
- Posts
- 15
I've thought about putting a trem in it, I've got several other guitars all with floating trem but I've played a guitar with a floyd rose and loved it, so I'm prepared to put up with intonation and stringing hassles. If that's too expensive then I'll use locking tuners.
Anyone here with experience putting in and setting up a tremolo? If it's really complicated I might just use a fixed bridge, at least for my first home made guitar.
-
6th February 2009, 03:26 PM #14
Senior Member
- Join Date
- Sep 2006
- Location
- Sydney
- Age
- 62
- Posts
- 423
Luke, as you said, you have guitars with whammy bar. So time for a fixed bridge, i think, and make your life simple.
(Don't you think "trem" is such a wimpy word? WHAMMY BAR!!!!
-
6th February 2009, 04:04 PM #15
SENIOR MEMBER
- Join Date
- Sep 2008
- Location
- sydney
- Posts
- 2,370
LOL
well whammy bar just sounds queer
trem is short and to the point
yea i reckon go hardtail if you already have a few geetars with Trem's

 Reply With Quote


Similar Threads
-
New Kit Guitar Building Manual For Martin Style Guitars
By Beachcomber in forum ANNOUNCEMENTSReplies: 0Last Post: 20th July 2008, 04:12 PM -
Wood for project guitar
By hawks08 in forum MUSICAL INSTRUMENTSReplies: 7Last Post: 31st May 2008, 01:37 AM -
new project and photo of first guitar
By black_labb in forum MUSICAL INSTRUMENTSReplies: 2Last Post: 17th April 2007, 11:03 AM -
My Guitar Project
By Strungout in forum WOODWORK PICSReplies: 16Last Post: 23rd March 2005, 08:15 PM -
Project 2 - Chinese Style Mirror
By `Felix` in forum WOODWORK PICSReplies: 1Last Post: 24th March 2004, 10:10 PM
