

 Thanks: 0
 Likes: 0
 Needs Pictures: 0
 Picture(s) thanks: 0
Results 46 to 60 of 63
-
21st July 2012, 12:39 PM #46
 GOLD MEMBER


- Join Date
- Dec 2008
- Location
- Bradbury
- Posts
- 1,429

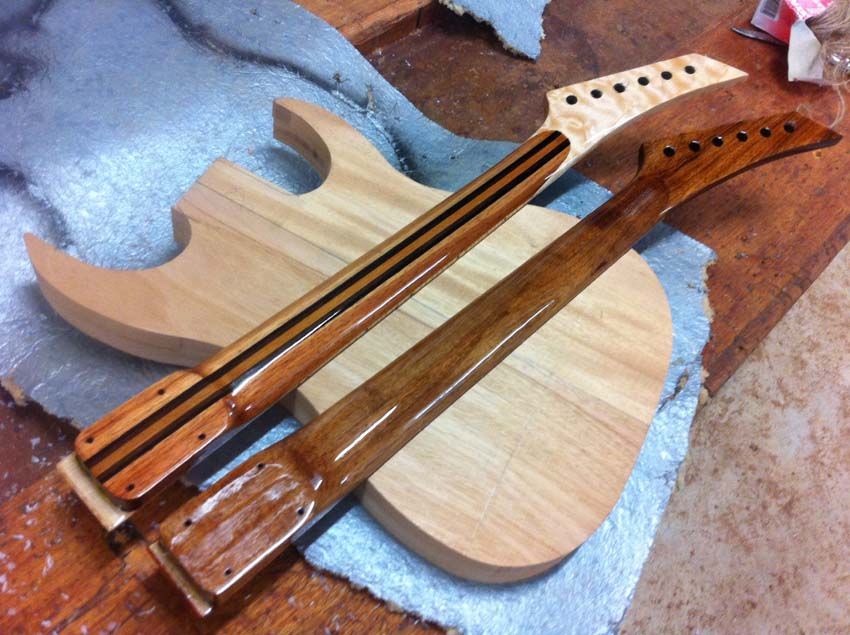
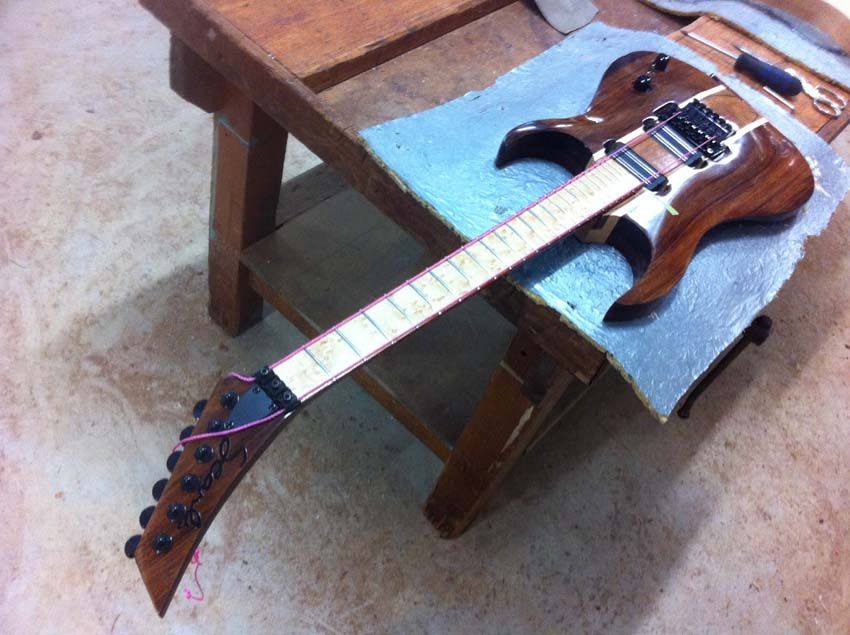
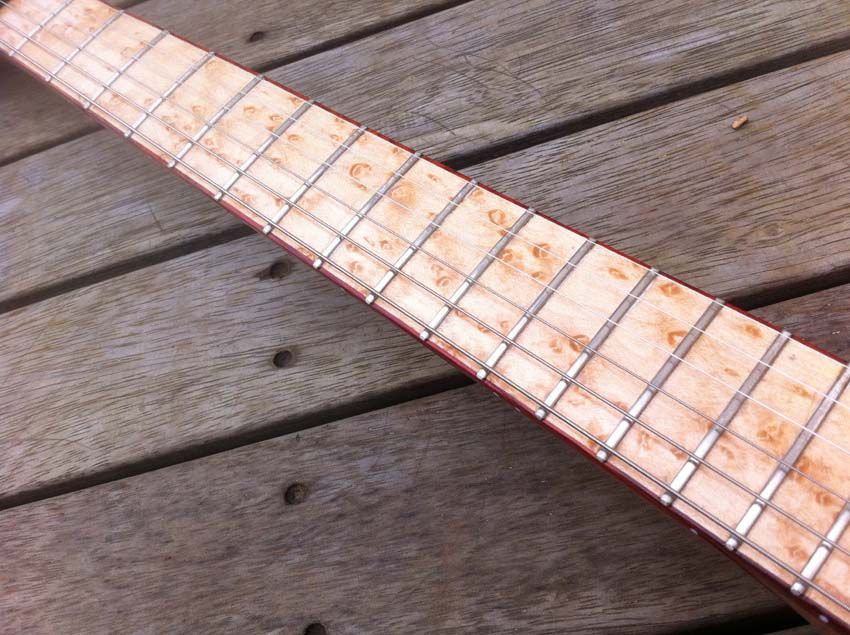
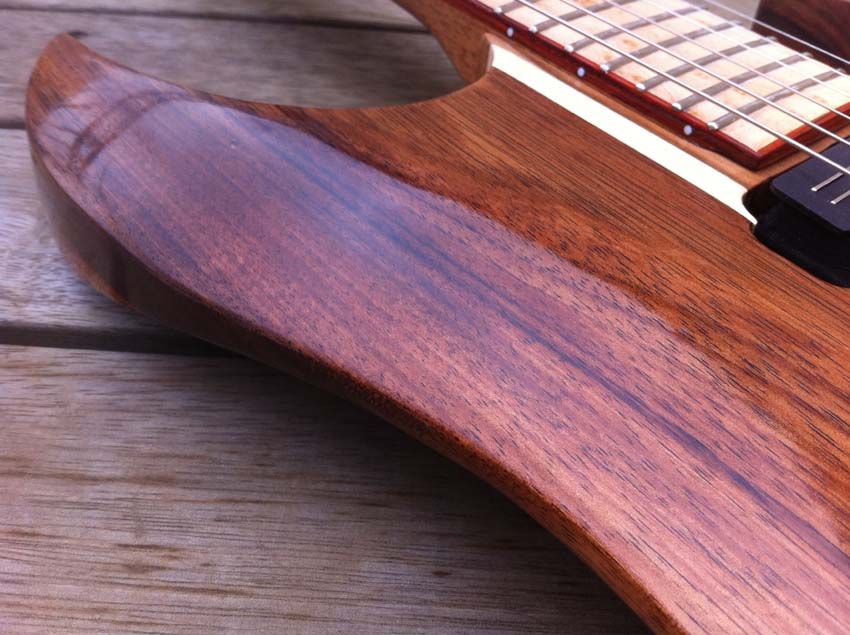
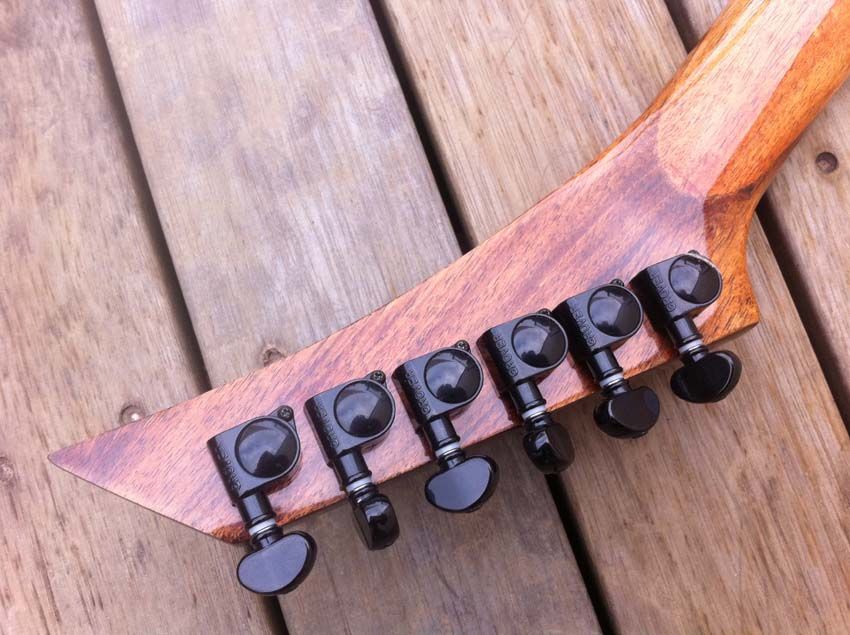
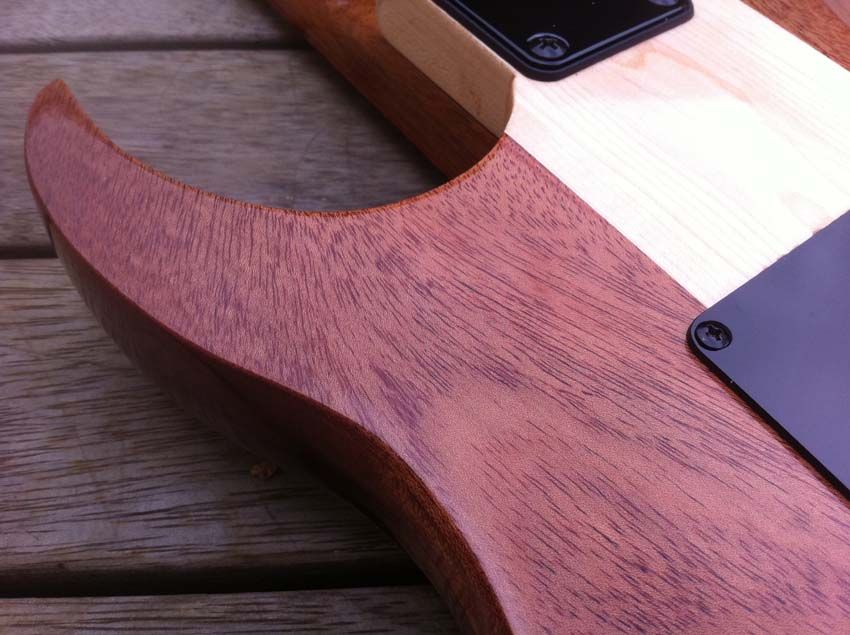
Looks good. Nice looking carve. Personally I can't really get along with guitars with square heels but every guitarist is different
Oh yea, that fretboard is beautiful!!!
-
21st July 2012 12:39 PM # ADSGoogle Adsense Advertisement
- Join Date
- Always
- Location
- Advertising world
- Posts
- Many
-
23rd July 2012, 03:35 PM #47
Senior Member
- Join Date
- Jul 2005
- Location
- Victoria Australia
- Posts
- 116
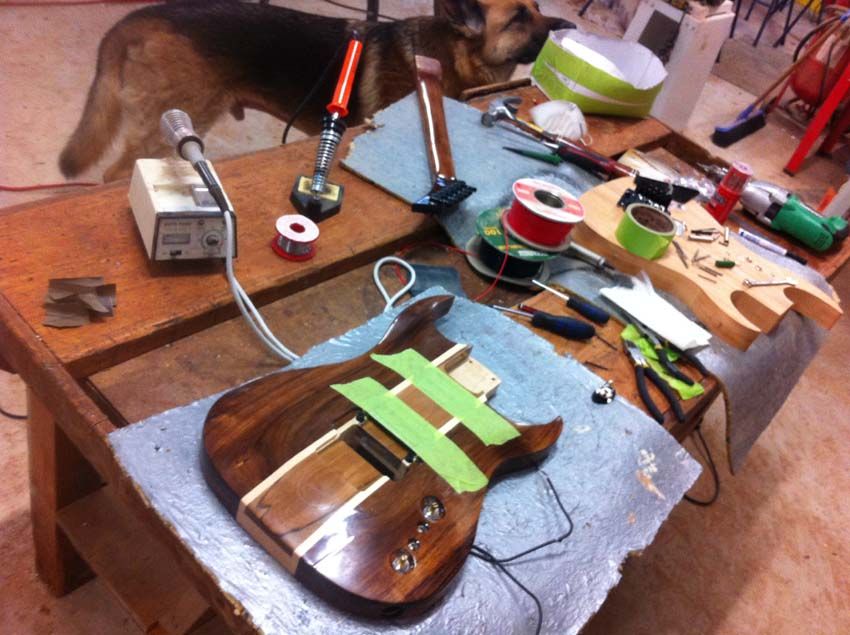
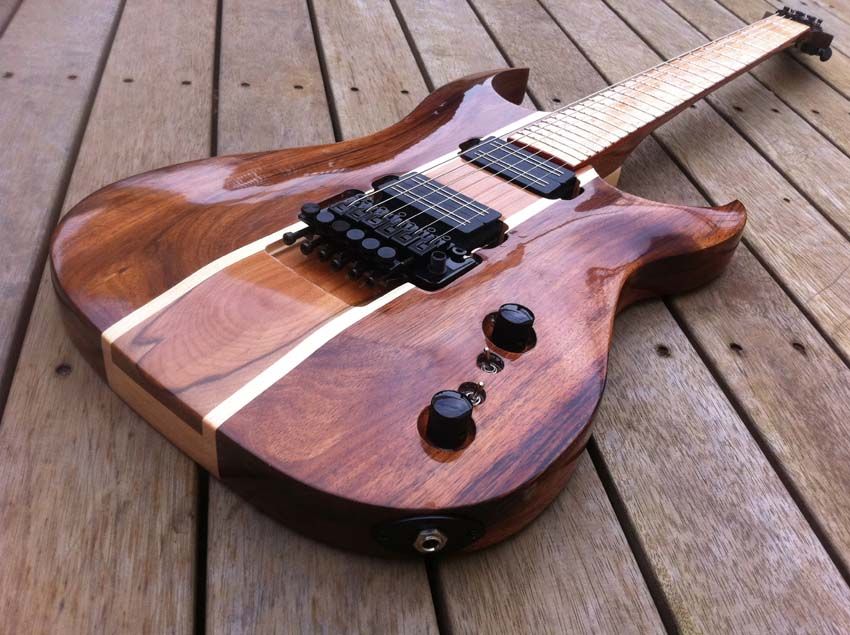
Knob recessing and cavity control steps.
Most people like to do all routing before they carve a guitar - but I like to do routing towards the end of the build as this way I can freehand carve whatever I feel like at the time, rather than carving around my routes. Then I simply route according to my carves.
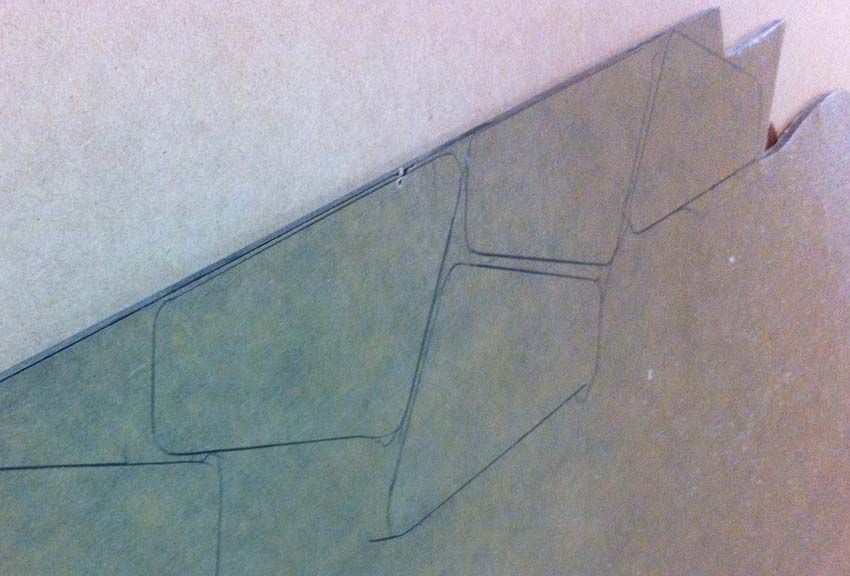
From the top I have a template of the rear cavity. I mark and holepunch the holes positions:
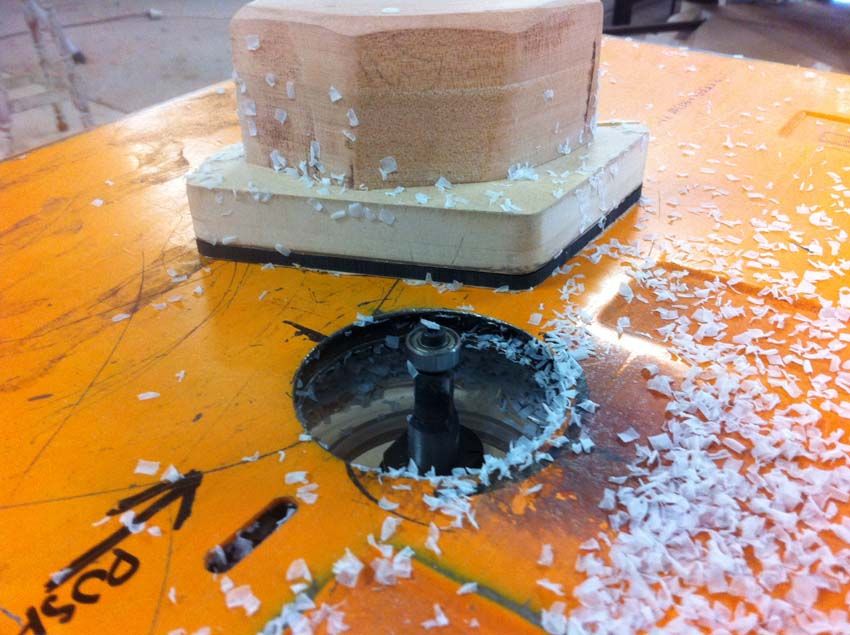
10mm brad point I drill the two pot holes. 10mm is the right size for the bearing on my router bit and luckily it's also the right size for the CTS pots I'll be using:
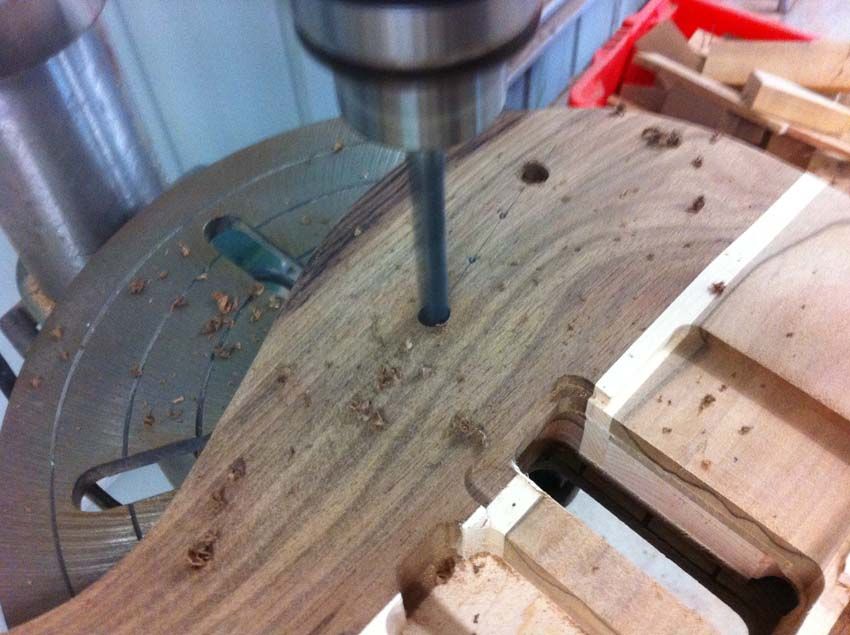
I adjust the drill press so that I can pull it till it stops at the right height, this way both my holes are the same depth - even though the top is different depth.
This wont suit most people as most times you'll want the hole recesses to look the same, and then adjust the mounting depth of the pot from the rear cavity, however I'm using copper plate as a earth inside my cavities so I want the cavity to be flat from the rear:
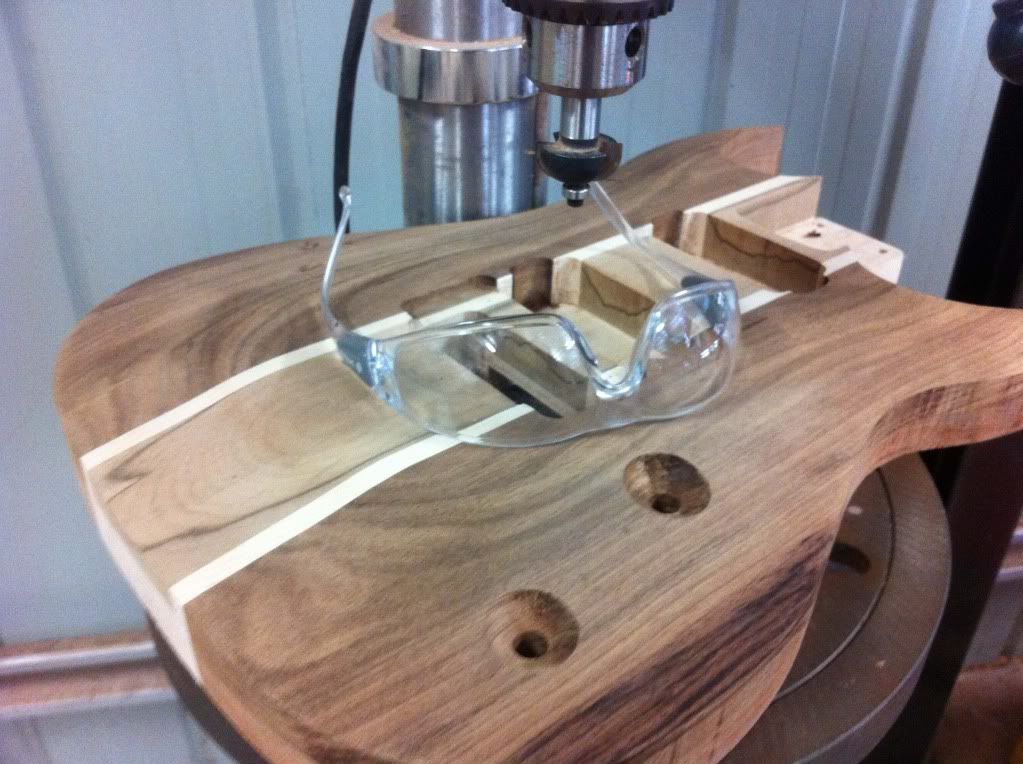
I now flip the guitar over, using the two holes as position markers I perform all my rear cavity routing - taking the cavity back to the recessed holes on the top this way I know I won't go through and I never have to measure as I have holes to judge from:
Before routing I also open up one of te holes with a saw tooth bit so I can drop the router flush.
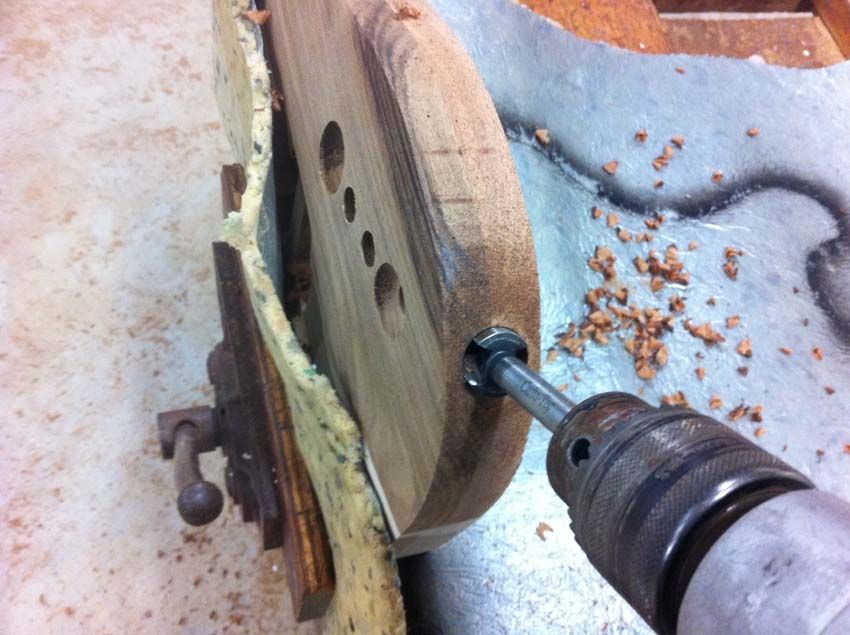
I can then recess the switch holes with a forstner bit that is just wide enough to fit the washer from the switches:
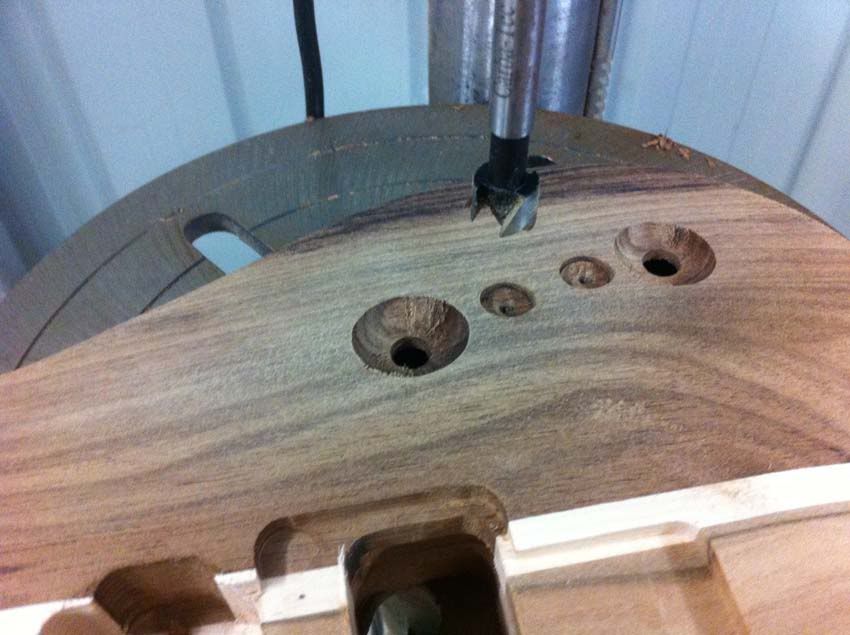
I drill my 7mm switch holes - I drilled these AFTER the forstner recess as it's easier to find center with the forstner bit if I'm using the hole punched dent rather than a drilled hole:
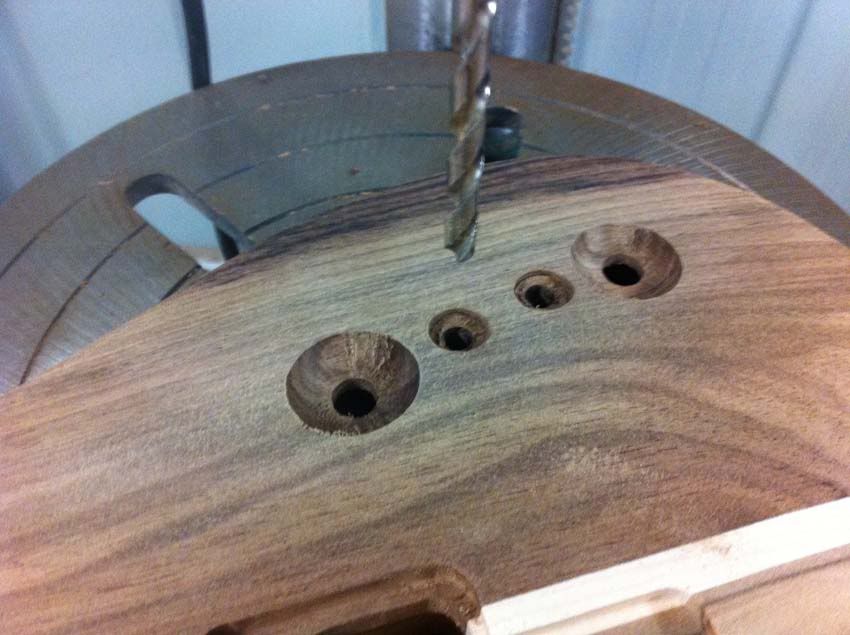
Now that my rear route has been performed I realised my forstner bit wasnt quite deep enough so I do it again:
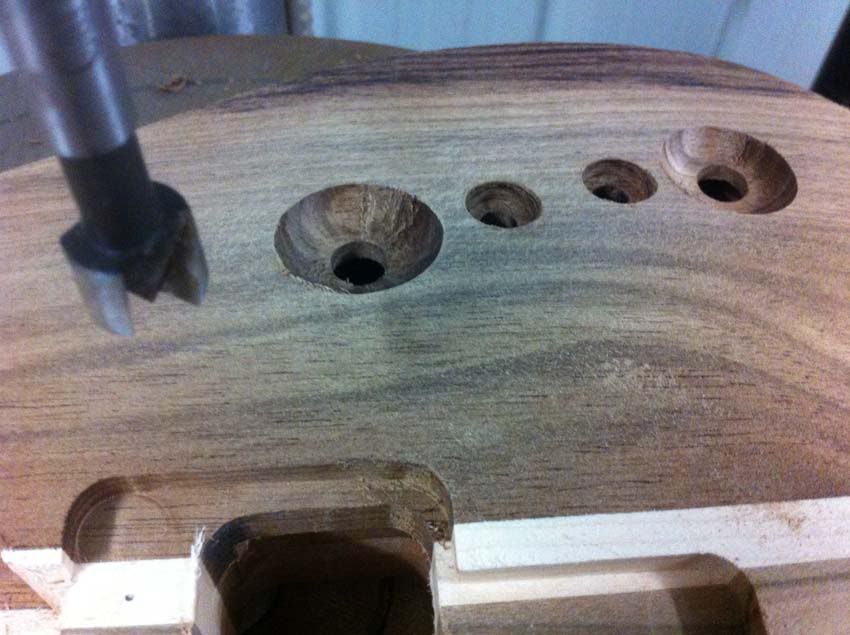
Test fit:
-
28th July 2012, 01:40 PM #48
Senior Member
- Join Date
- Jul 2005
- Location
- Victoria Australia
- Posts
- 116
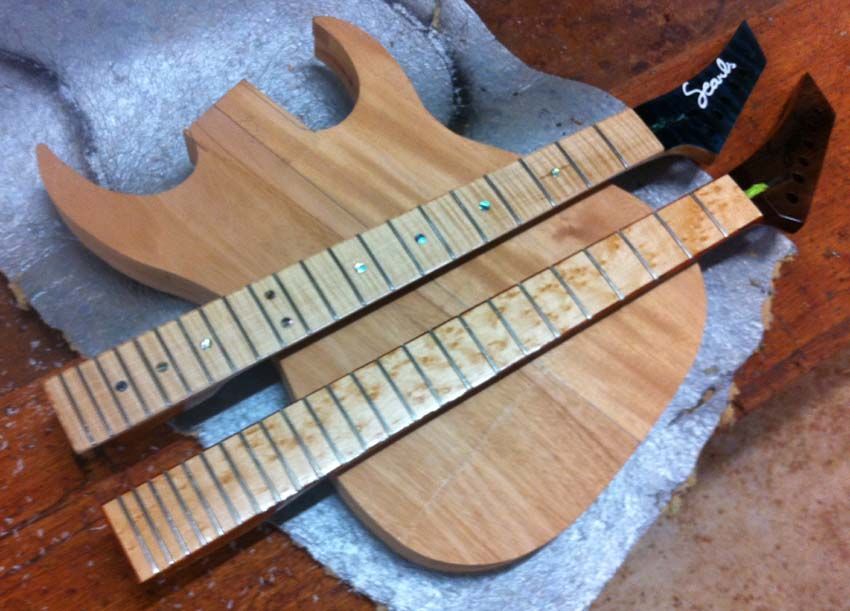
Today:
Hole drilling:

Hand and random orbital finish sanding through a variety of grits:
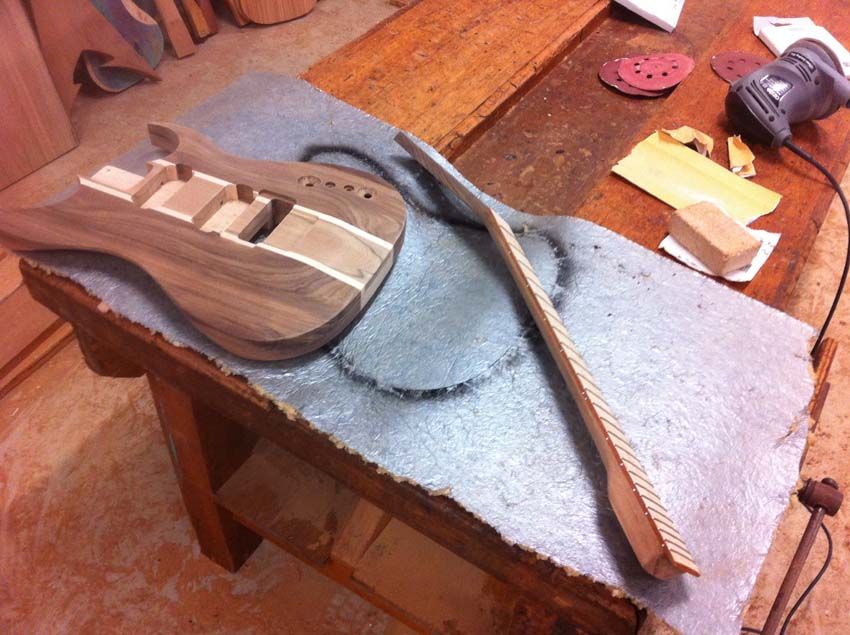
First coat of clear:
-
28th July 2012, 01:51 PM #49
Senior Member
- Join Date
- Jul 2005
- Location
- Victoria Australia
- Posts
- 116
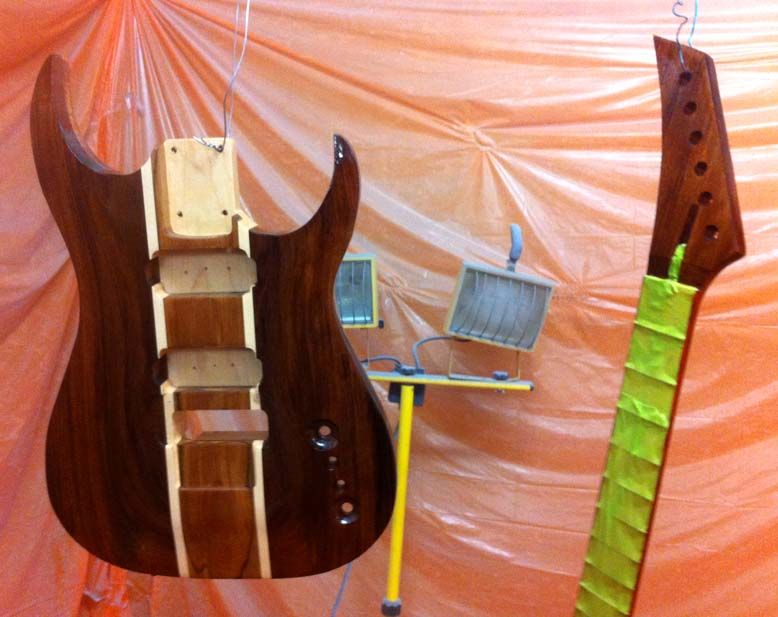
Second coat of clear, the timber is just soaking it all up, looks like it may take four coats at this stage:
-
28th July 2012, 03:13 PM #50
Senior Member
- Join Date
- Jul 2005
- Location
- Victoria Australia
- Posts
- 116
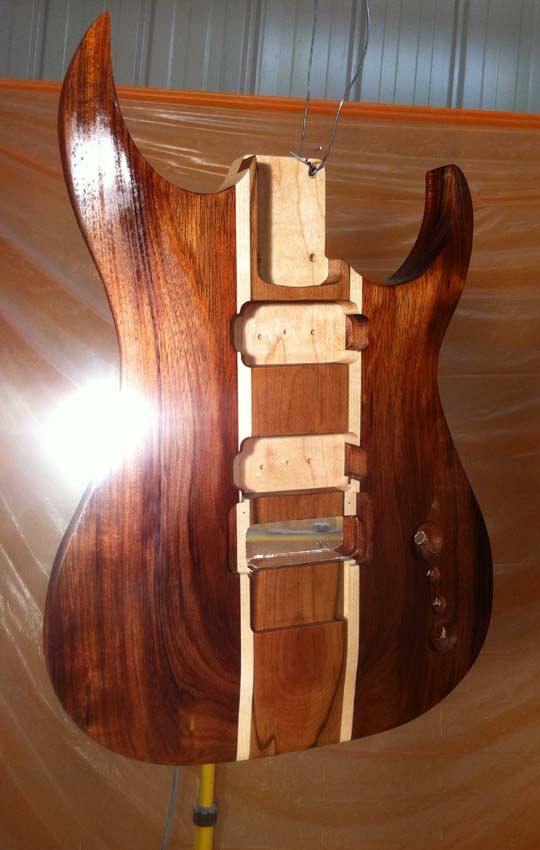
Four coats of clear. I'll let this hang for a week before block sanding back, then I'll spray another couple coats of clear.
-
28th July 2012, 03:30 PM #51
Timber Hoarder
- Join Date
- Sep 2002
- Location
- Minbun, FNQ, Australia
- Age
- 66
- Posts
- 12,881
 Cliff.
If you find a post of mine that is missing a pic that you'd like to see, let me know & I'll see if I can find a copy.
-
28th July 2012, 04:13 PM #52
GOLD MEMBER
- Join Date
- Apr 2011
- Location
- Dandenong, Vic
- Posts
- 2,029
from me as well.
-
30th July 2012, 01:29 PM #53
Senior Member
- Join Date
- Jul 2005
- Location
- Victoria Australia
- Posts
- 116
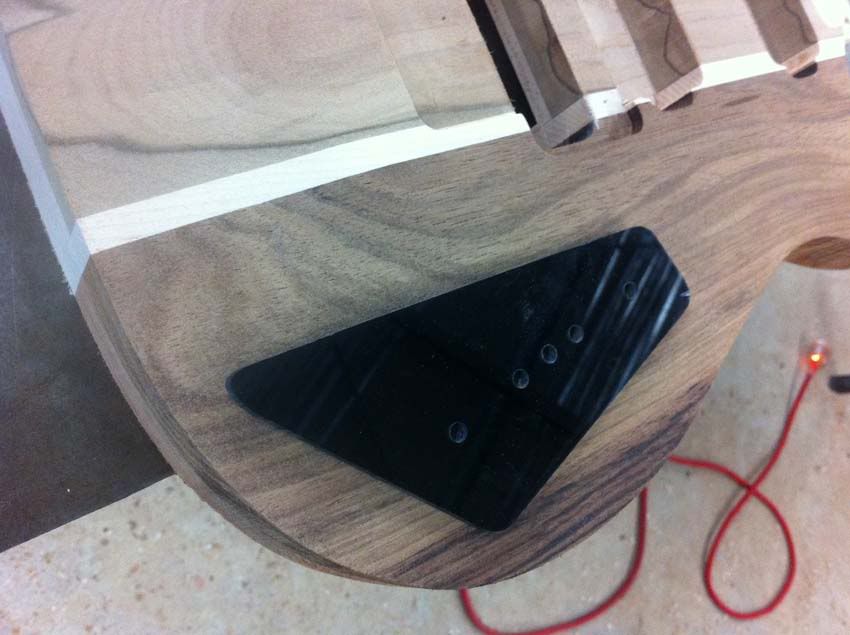
Plexiglass day.
I had the router set up from copying/combining some new templates, so at the same time I ran off a couple cavity covers in transparent black 4mm perspex.
When I assemble the guitar and peel off the rear paper from the cover, you'll be able to see the electronics through the perspex if you look hard enough. It's only subtle as at first glance it will look like solid black.
As its thicker than a normal cover, I've discovered I need to leave a small lever point to get a fingernail into, you can see it at the top corner:

-
4th August 2012, 01:41 PM #54
Senior Member
- Join Date
- Jul 2005
- Location
- Victoria Australia
- Posts
- 116
Clear coat update.
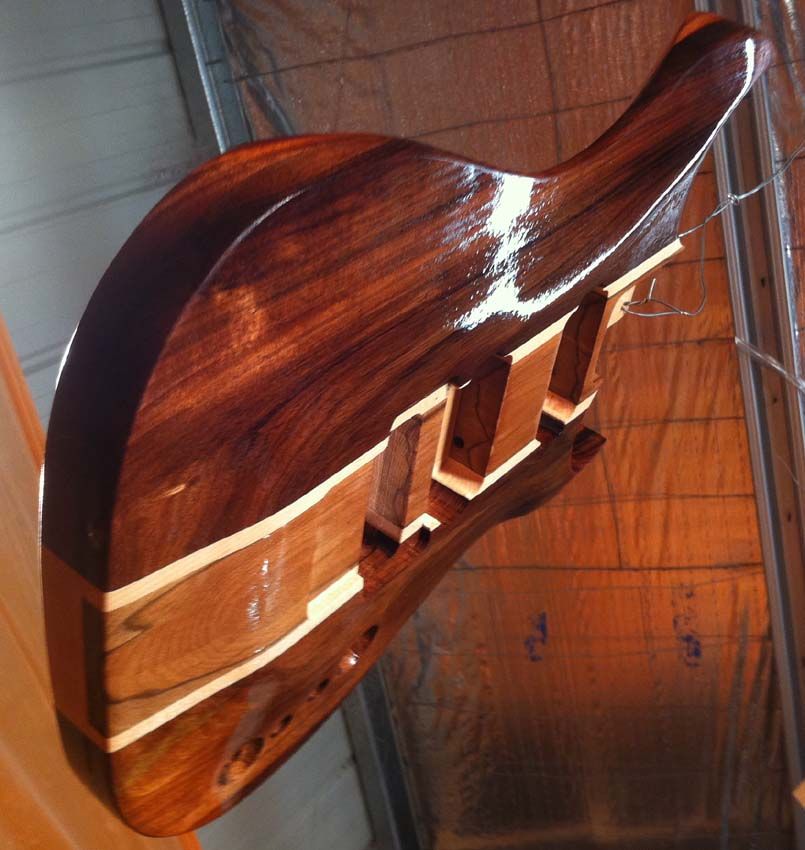
I sanded the last lot of clear back to 600 grit, then airhosed and prepsolled the entire thing before shooting another few layers of clear yesterday.
Theres a lot more peel than I normally get. I'm experimenting with some new European clear that I'm still getting used to. It sprays so much different to the PPG clear I'm used to. Still, it'll cut and polish back great, I'll just have to use a little more elbow grease than I should have to do.

Heres how it sits today after 3 more coats of clear:

-
4th August 2012, 05:38 PM #55
New Member
- Join Date
- Aug 2011
- Location
- Australia
- Posts
- 3
Inspiring!
-
16th August 2012, 01:55 PM #56
Senior Member
- Join Date
- Jul 2005
- Location
- Victoria Australia
- Posts
- 116
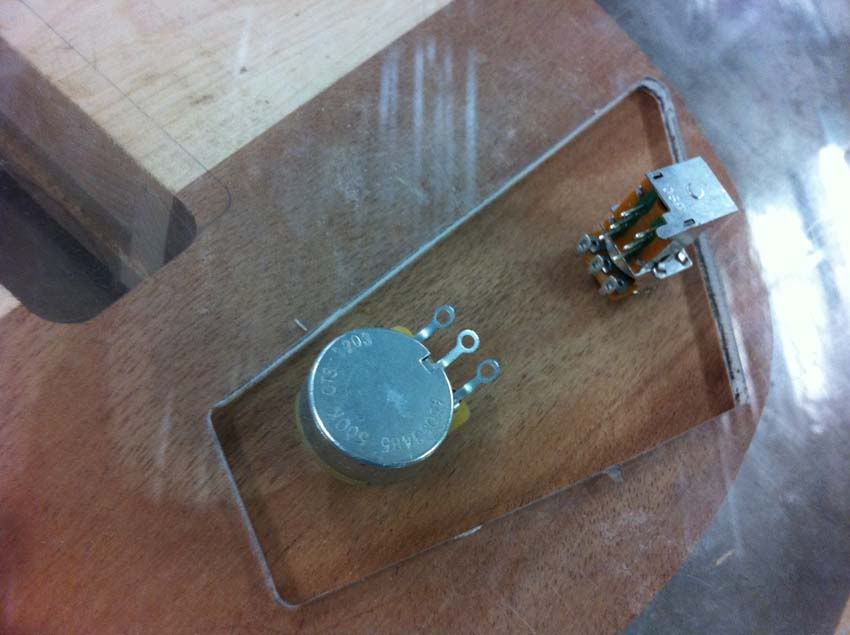
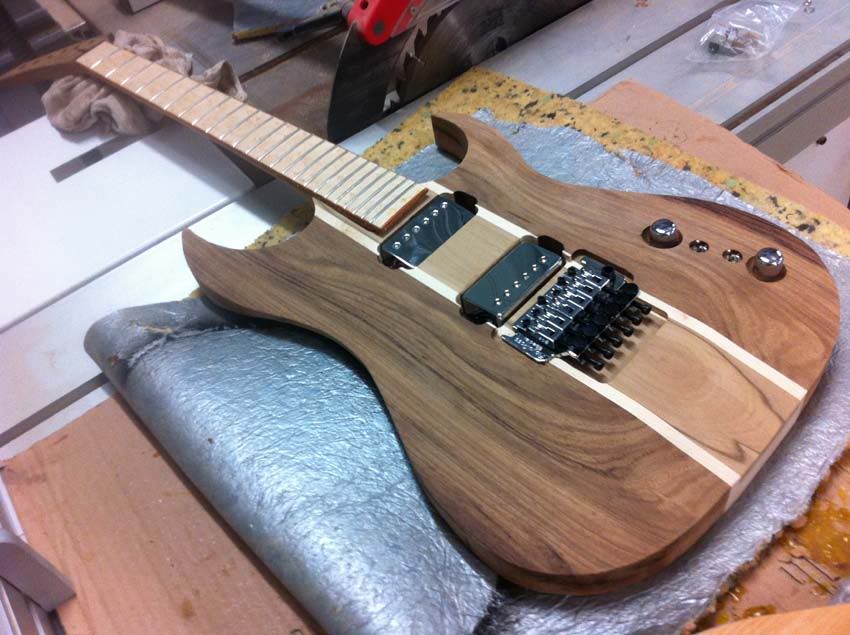
Electronics and Assembly stage:
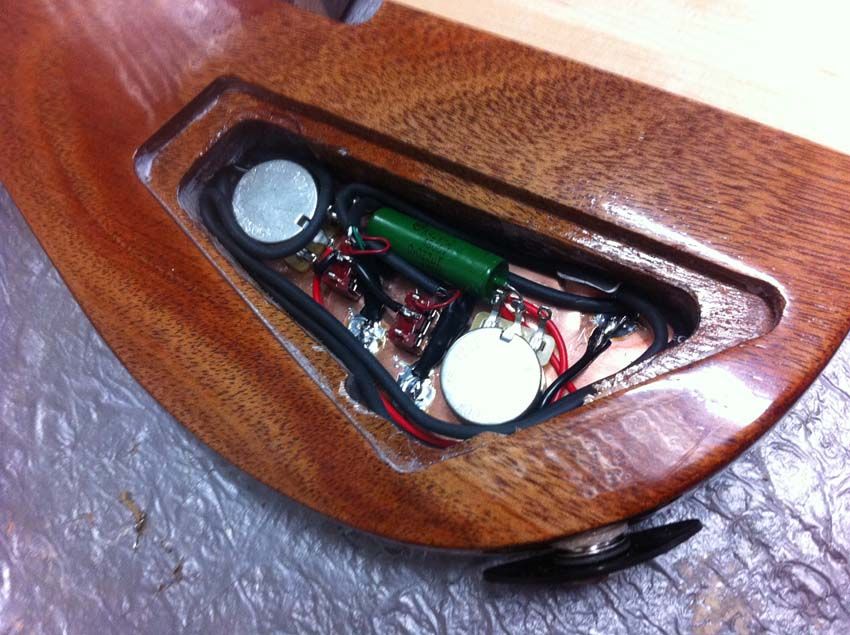
I've actually finished assambling and have started to set the action, however I cannot take pics as it's raining outside. I take all my finished pics in the sunlight - so stay tuned, one day when it's not raining I'll post some finished pics!
-
16th August 2012, 10:37 PM #57
Retired
- Join Date
- Oct 2005
- Location
- Bagdad Tasmania
- Age
- 77
- Posts
- 1,504
[QUOTE=demonx;1526752]Today:
Hole drilling:
Hand and random orbital finish sanding through a variety of grits:
First coat of clear:
Coming along very nice, I have alway's loved a little bit of hole drilling.
Cheers Bob.
-
19th August 2012, 11:54 AM #58
Senior Member
- Join Date
- Jul 2005
- Location
- Victoria Australia
- Posts
- 116
-
20th August 2012, 01:21 AM #59
Timber Hoarder
- Join Date
- Sep 2002
- Location
- Minbun, FNQ, Australia
- Age
- 66
- Posts
- 12,881
Cliff.
If you find a post of mine that is missing a pic that you'd like to see, let me know & I'll see if I can find a copy.
-
20th August 2012, 10:57 AM #60
GOLD MEMBER
- Join Date
- Nov 2003
- Location
- Sydney
- Age
- 53
- Posts
- 8,879

 Reply With Quote


Similar Threads
-
Narrow Leaf Blackwood v Tasmanian Blackwood
By snapman007 in forum TIMBERReplies: 2Last Post: 3rd September 2011, 10:31 AM -
Tasmanian Blackwood vs. Koa
By Chris 623 in forum MUSICAL INSTRUMENTSReplies: 19Last Post: 1st July 2011, 09:56 AM -
Tasmanian Blackwood
By STAR in forum TIMBERReplies: 11Last Post: 13th March 2008, 09:54 PM -
Tasmanian Blackwood ???
By Sandy Johnston in forum TIMBERReplies: 6Last Post: 9th June 2002, 12:58 PM
