

 Thanks: 0
 Likes: 0
 Needs Pictures: 0
 Picture(s) thanks: 0
Results 1 to 15 of 19
-
14th June 2010, 01:49 AM #1
 Be inspired. Be creative. Be bold.


- Join Date
- Apr 2001
- Location
- Perth
- Posts
- 10,820
 The start of a new project - coopered doors
Well I am not sure how much of this project I will post in this forum since it blends power and hand tools. However the work I did today may interest someone ...
The project is a very large one, both in size and expected duration. This is a sideboard-entertainment centre for the livingroom. It replaces a wall unit that was 4.0 m long. Rather than build one long and low unit (700mm low for a flatscreen TV, while the remainder is to house drinks, glasses, music and "stuff"), the plan is to build three pieces - 2 side units 900 mm long and one central unit 2200 mm long.
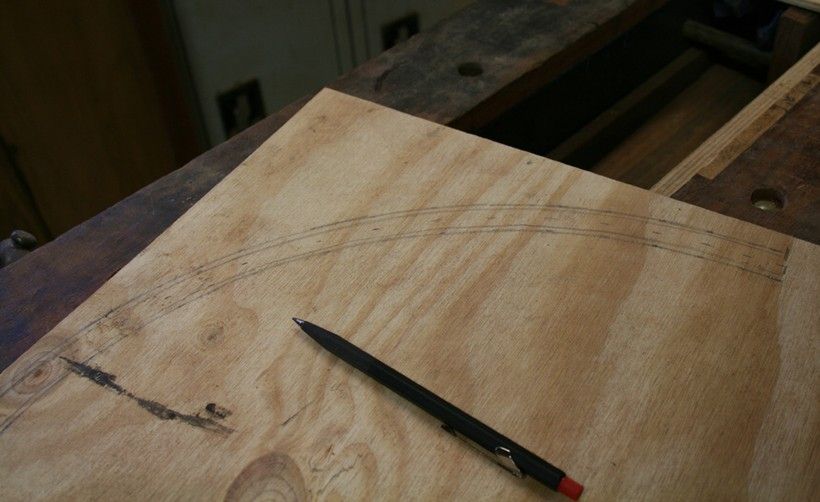
The design is sort of Shaker-meets-Art Deco (MY Gawd! , which essentially means I am including the curves from art deco and the frame-and-panel typical of Shaker furniture. I wish I could draw up realistic drawings, but what I have instead are lifesized plans on thin ply.
I am beginning with the two side (mirror-image) units. These will feature two curved doors and a set of drawers, thus ..
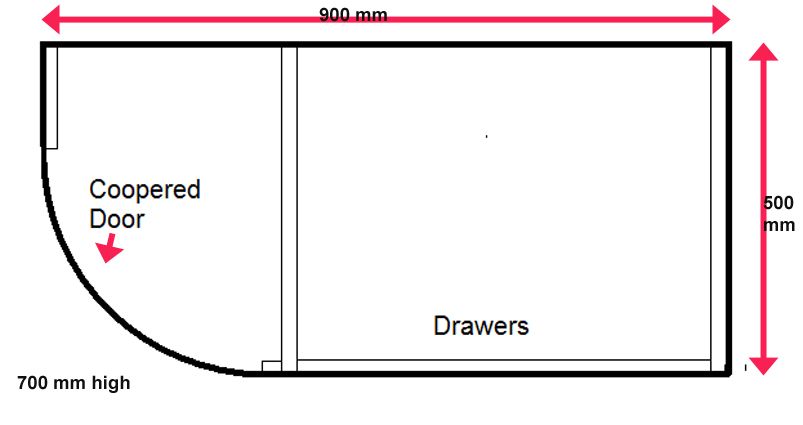
The plan is to build the coopered doors first, then construct the cabinet around them (taking a leaf out of Krenov's book).
I've built a few coopered boxes before, but these are the first coopered frame-and-panel doors. I know I will need some advice along the way.
A while ago I posted the preparation for the timber I am using. This was salvaged from roofing timbers. I thought it was Jarrah, but now I suspect it is Karri. These are very difficult to tell apart. Very similar colour and texture, but the Karri tends to be less figured and much harder. Seriously hard stuff. Ah well, it is free.

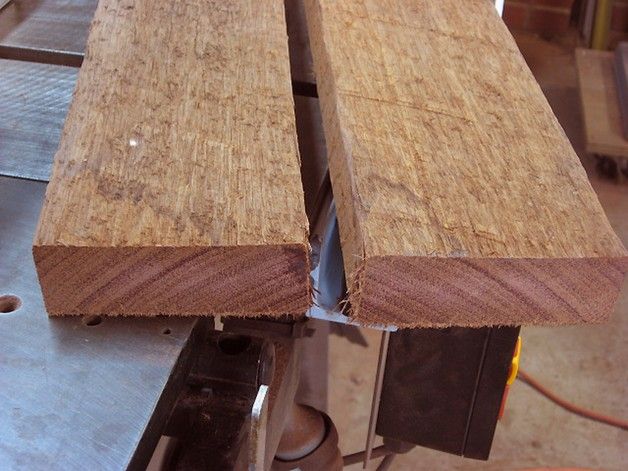
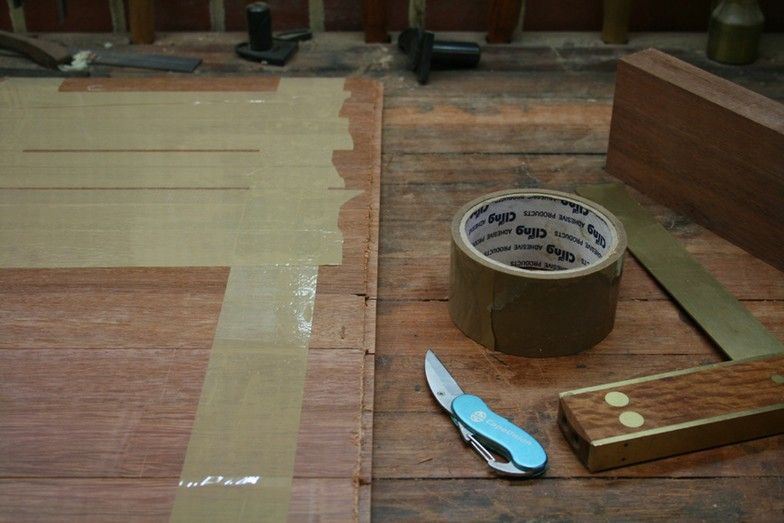
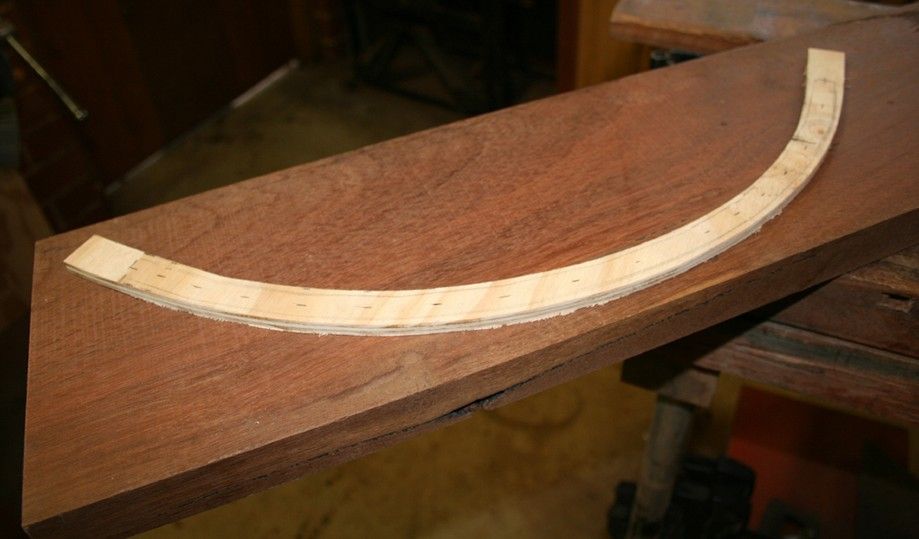
I resawed several boards on my bandsaw and thicknessed it down to 1/2", then ripped these to 2" wide. This made it possible to determine how many boards were needed for the door panel, and I calculated that they needed a 4 1/2 degree bevel on each side for the curve. This was completed on the tablesaw. (see I am not showing any of this.
This is where we ended (and now we can begin) ...

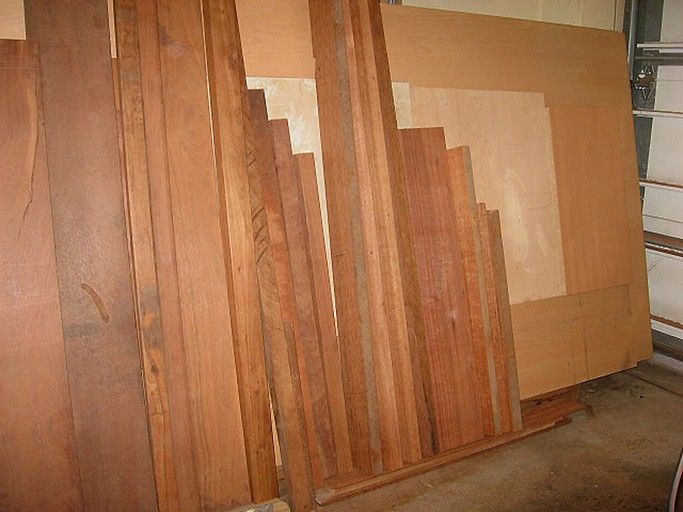
Sort the boards by figure and colour, arrange with the grain, and then number them before taping together ...
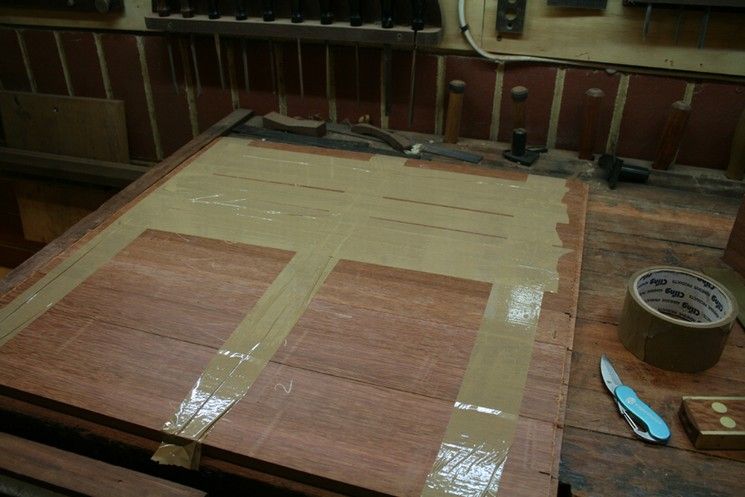
Note that I rebated the outer edges beforehand. Final shaping takes place later ..
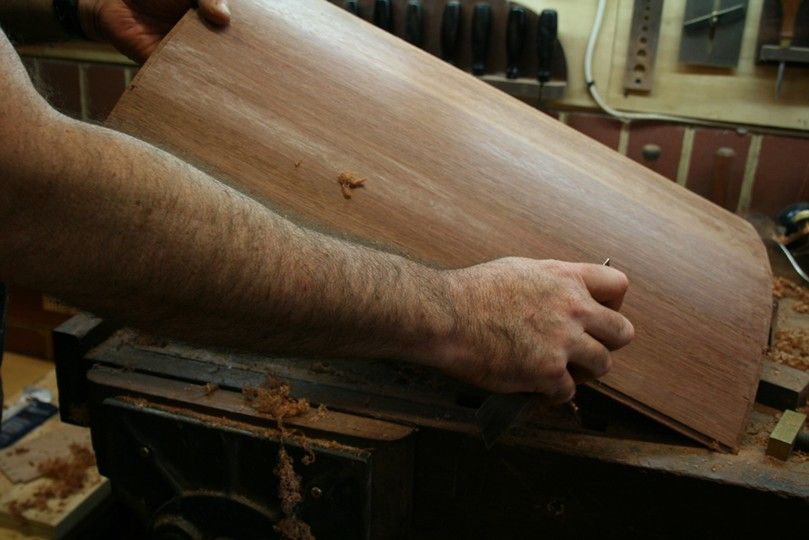
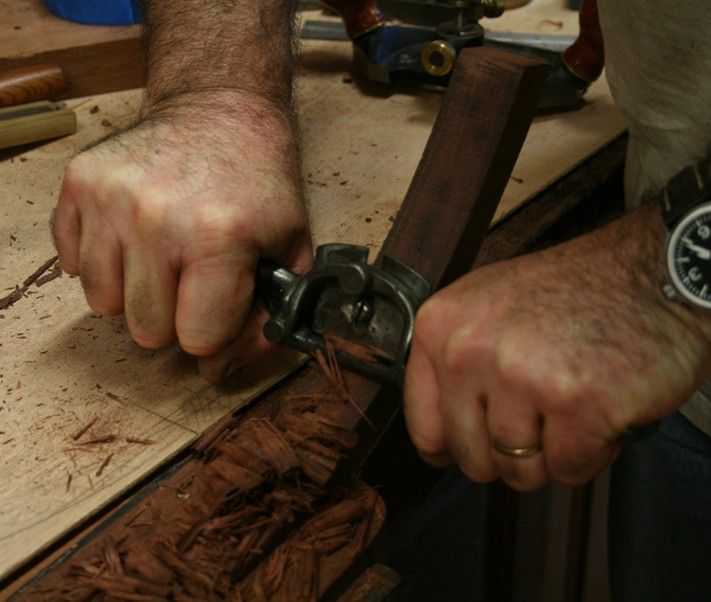
The taped rear makes it easy to fold into a curve once glued up. Remove the excess glue now. Note that the inside has been finish planed. I do not plan to shape the inside. It will be left as is.
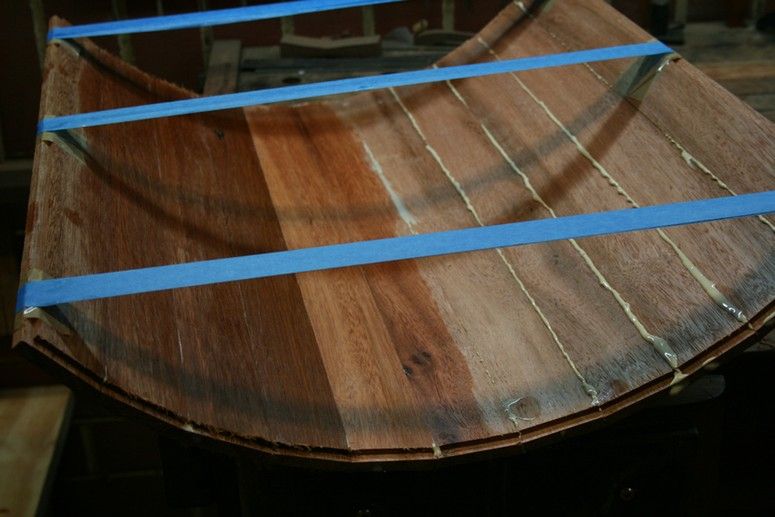
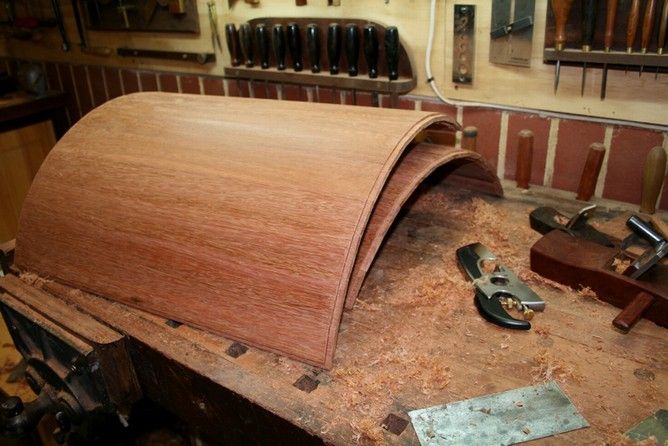
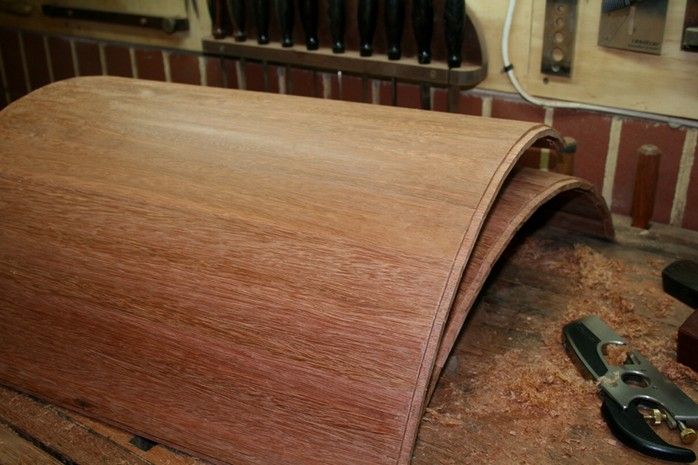
The glue-up result ...
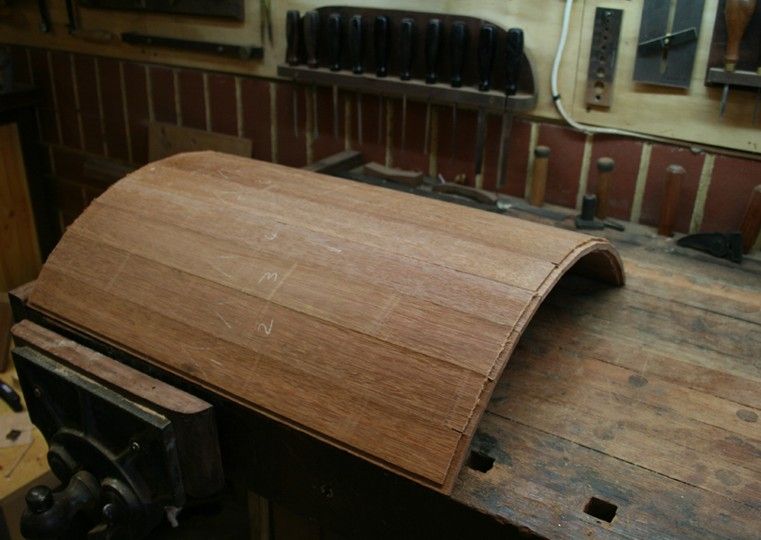
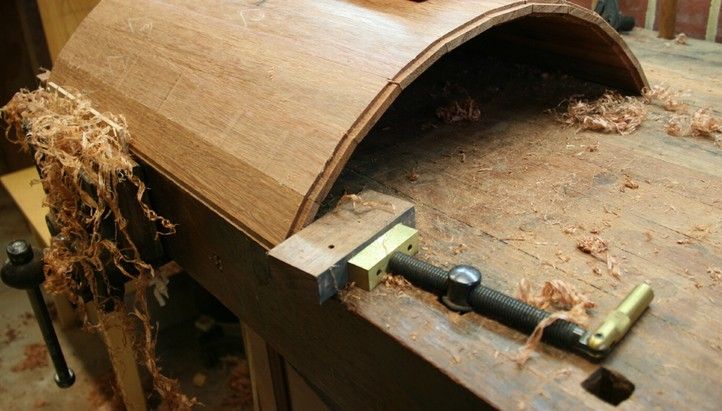
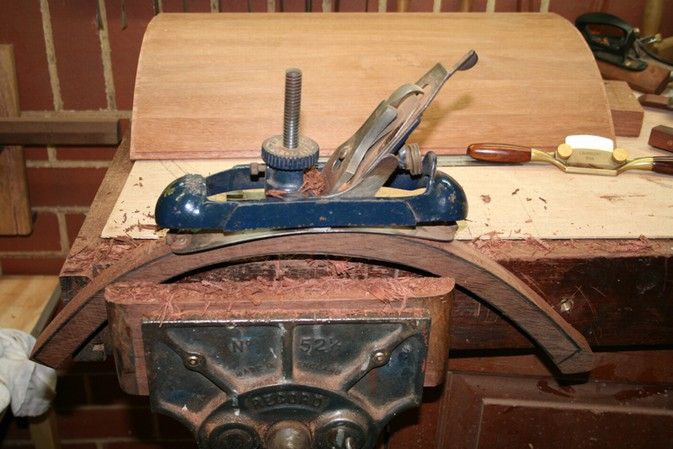
This is the stage when I desire a new bench. Mine is just 5' long. not the flatest, and has just a face vise, end stop, and an end vise that gets little use. I built it about 15 years ago and it has been modified and kept going all this time. To be fair, however, I doubt that many better-equiped benches could hold objects like the curved door panels. How could yours do better, or how would you do this?
There was enough width for the panel to lie on the bench. I needed to prevent it splaying outward, which might cause a join to come apart. So one side has a clamp as a stop and the other uses the vise.
 Visit www.inthewoodshop.com for tutorials on constructing handtools, handtool reviews, and my trials and tribulations with furniture builds.
-
14th June 2010 01:49 AM # ADSGoogle Adsense Advertisement
- Join Date
- Always
- Location
- Advertising world
- Posts
- Many
-
14th June 2010, 01:50 AM #2
Be inspired. Be creative. Be bold.
- Join Date
- Apr 2001
- Location
- Perth
- Posts
- 10,820
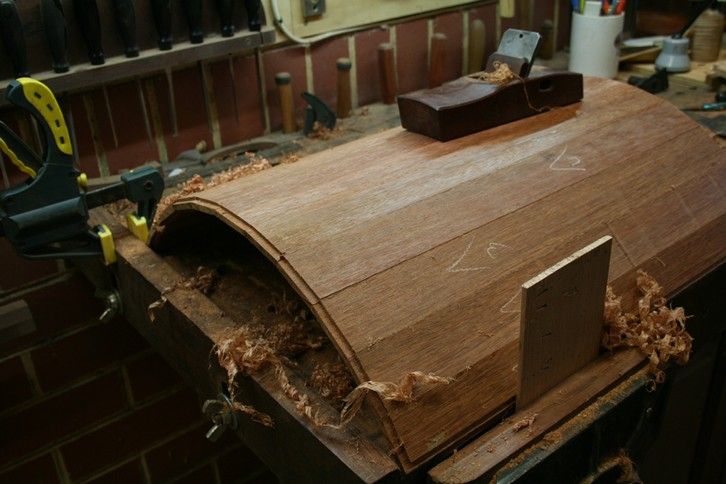
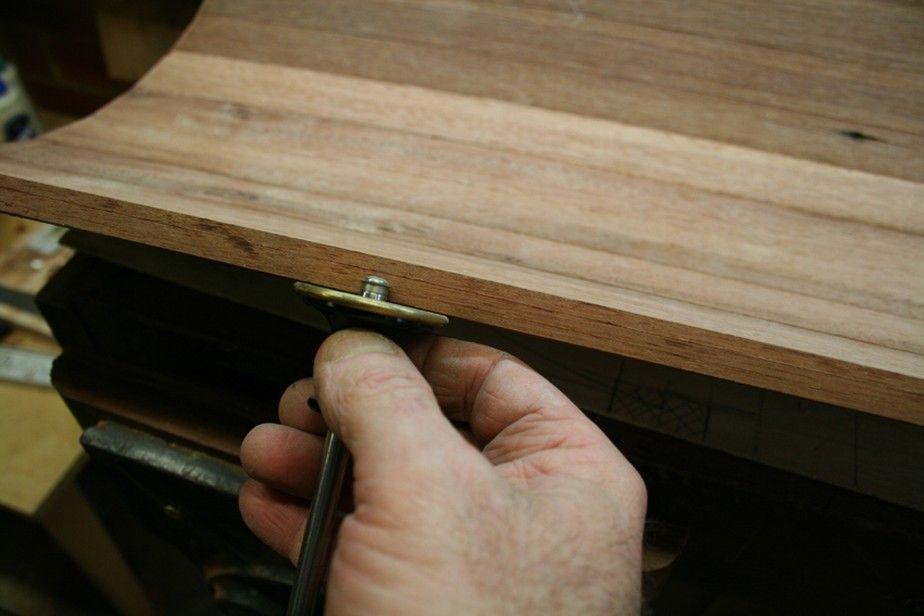
The end is help with a Veritas bench pup ..
So I planed with supports ...
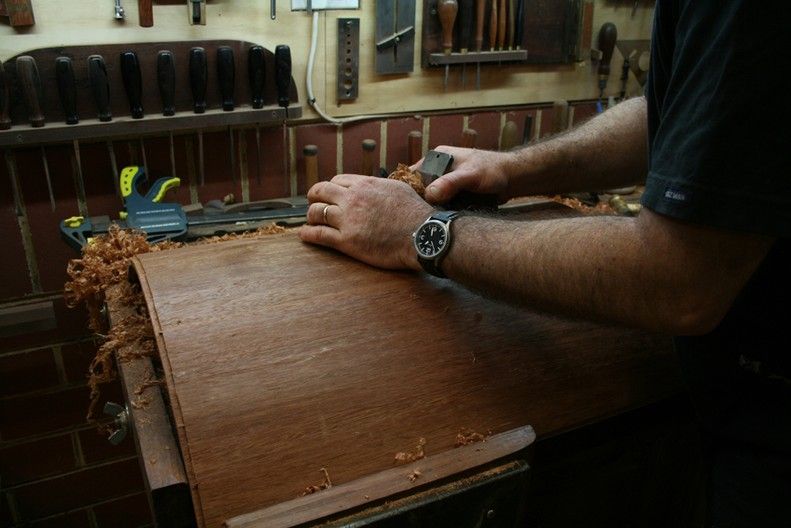
Planed without supports ...
Scraped with supports ..
Scraped without supports ...
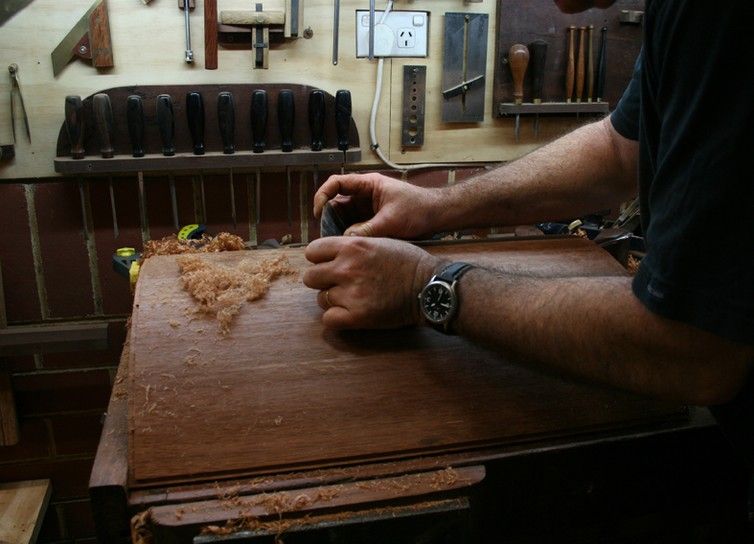
And then .. suddenly it is starting to make sense ...
Now for the frame.
Regards from Perth
DerekVisit www.inthewoodshop.com for tutorials on constructing handtools, handtool reviews, and my trials and tribulations with furniture builds.
-
14th June 2010, 03:46 AM #3
Senior Member
- Join Date
- Nov 2008
- Location
- Melbourne, Australia
- Posts
- 275
I like this Derek. The idea of solid coopered doors has appeal. Wish there was some way I could have watched you do it as I want to make curved sides on a project piece for my wife. I'd decided to do some laminations. It hadn't occurred to me to cooper the curve. Makes me want to ask heaps of questions.
Did you work out the angle using an algorithm? Is there a reference you can refer me to so I don't ask too many more questions?
-
14th June 2010, 04:01 AM #4
Be inspired. Be creative. Be bold.
- Join Date
- Apr 2001
- Location
- Perth
- Posts
- 10,820
Hi H
I used the formula here: American Woodworker - Google Books
Regards from Perth
DerekVisit www.inthewoodshop.com for tutorials on constructing handtools, handtool reviews, and my trials and tribulations with furniture builds.
-
14th June 2010, 09:28 AM #5
Bricoleur
- Join Date
- Jul 2005
- Location
- Toowoomba Qld.
- Age
- 65
- Posts
- 2,792
Hi Derek,
The doors are coming along beautifully! In my mind I'm trying to work out how you'll do the curved parts of the frames!?!
What glue did you use for the staves?... seems to be fairly thick and brown, like Liquid Nails(he says with a spit!)
Cheers from freezing Queensland,Andy Mac
Change is inevitable, growth is optional.
-
14th June 2010, 11:32 AM #6
GOLD MEMBER
- Join Date
- Mar 2005
- Location
- In the shed, Melbourne
- Age
- 52
- Posts
- 6,883
-
14th June 2010, 04:53 PM #7
Be inspired. Be creative. Be bold.
- Join Date
- Apr 2001
- Location
- Perth
- Posts
- 10,820
Hi Andy Originally Posted by Andy Mac

The frame tops and bottoms, which are curved, will be cut from solid wood. I need a 40mm thickness and only have 30 mm, so I plan to glue/laminate two pieces together and then add a veneer across the front to hide the join. The side pieces are straight, so they are easy. Mortice and tenoned.
Glue? Titebond (green lable).
Regards from Perth
DerekVisit www.inthewoodshop.com for tutorials on constructing handtools, handtool reviews, and my trials and tribulations with furniture builds.
-
14th June 2010, 05:05 PM #8
I've got wood
- Join Date
- Feb 2008
- Location
- Deloraine Tasmania
- Age
- 59
- Posts
- 1,092
Looking good Derek, this will be 1 to follow
-
14th June 2010, 06:37 PM #9
Dan @ TheLoveOfWood
- Join Date
- Jan 2008
- Location
- Australia
- Posts
- 752
Derek!
Thanks for posting. I've been going through your website this week. Appreciate all the detail. You should write for australian wood review.My blog: ~ for the love of wood ~ - http://theloveofwood.blogspot.com/
-
20th June 2010, 01:53 PM #10
GOLD MEMBER
- Join Date
- Feb 2003
- Location
- back in Alberta for a while
- Age
- 68
- Posts
- 12,006
Hi Derek, Originally Posted by derekcohen
If you're going to use a veneer across the front "to hide the join" may I suggest you brick lay the curved components? That way the grain will, mostly, run around the curve but the veneer will hide the joins between the "bricks". From the top the bricks will be hidden by the top.
you could also brick lay and shape all the curved components as a single unit before slicing into left & rights, top & bottomsregards from Alberta, Canada
ian
-
21st June 2010, 04:12 AM #11
Be inspired. Be creative. Be bold.
- Join Date
- Apr 2001
- Location
- Perth
- Posts
- 10,820
Continuing the WIP: Curving and grooving the frame
OK next installment.
This is heavy on pictures. Well I was reinventing the wheel as I went along. Hopefully there will be others, more experienced, who can offer alternate methods. As always, please critique anything and everything, ask question ... the fun and learning is in the discussion.
When we left off last time the door panels had been coopered. Now I need to build the frames. I'm suspect that the wood for the panels was Karri rather than Jarrah. They are very hard to tell apart. One local method is to burn a piece of each. Apparently the Karri will leave a white ash while the Jarrah leaves a black ash. All I knew was that the boards I had for the frames were Jarrah, very dry and brittle.
The frames were to be built out of solid wood. I decided that it would be too hit-and-miss to try and create a lamination to match the curve of the panels. I have built curved panels out of laminations before and know that there would be some springback. So solid wood it would be. Luckily I had a couple of boards that were wide enough for the slimline design I had in mind. The frames were to be 30mm (1 3/16") high and 20mm deep.
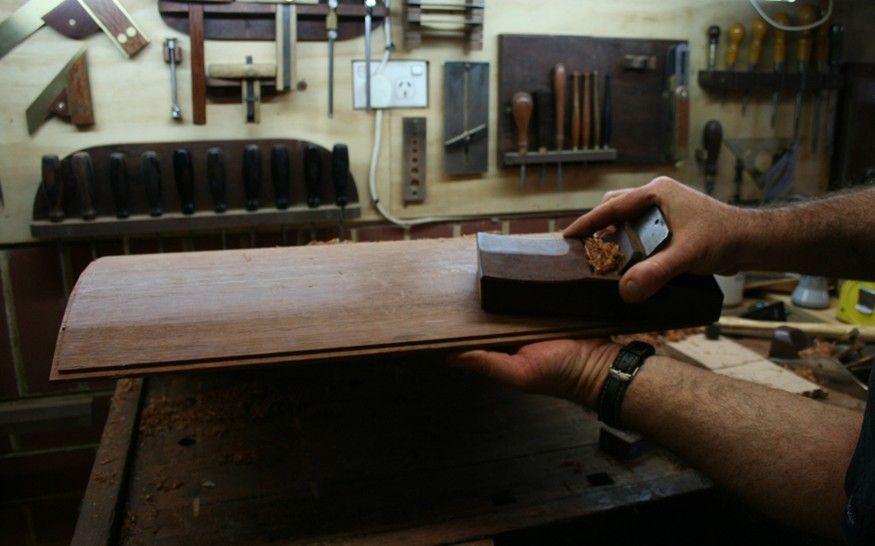
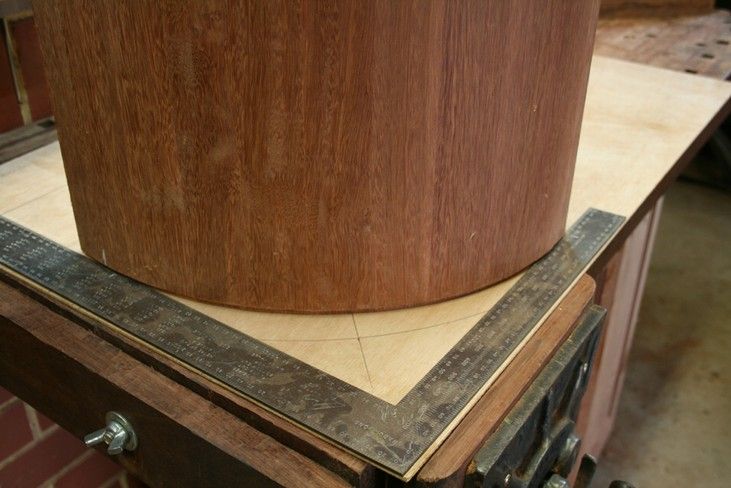
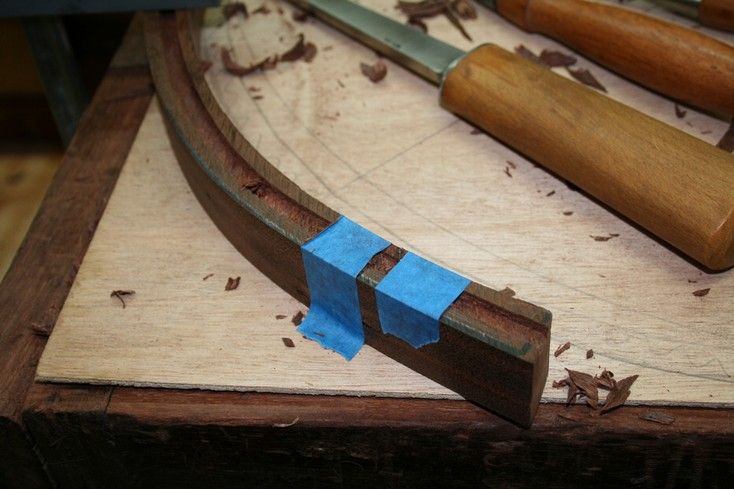
First step was to size the panels so that they would fit squarely in a frame. They were about 2" too wide, which created too much of a curve. The excess was removed on the tablesaw.
This left one edge on each panel that required a 1/4" tongue to be added. This was first marked ...
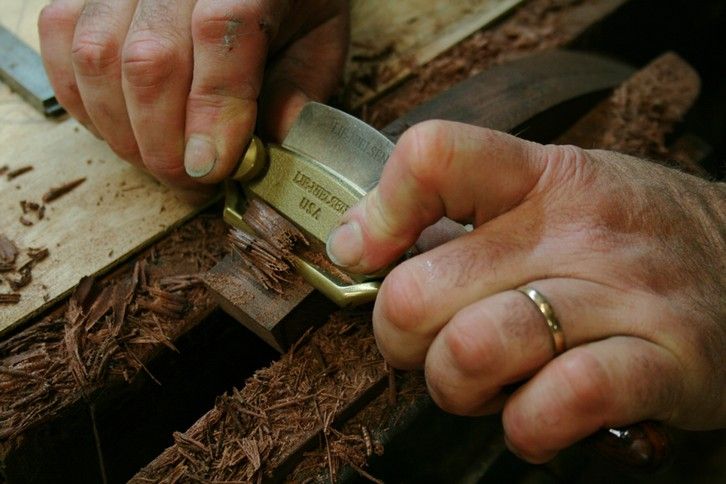
... and then planed. I used a Record #043 on one side ...
... cleaned it up with a shoulder plane ..
And then a Veritas Plow Plane on the other side.
The reason for different planes was due to grain direction and the side of the plane that a fence may be used.
Here is the end result ...

Now we can get to the top and bottom curved frames.
I traced the panel on ply, adding to both sides to increase the thickness to 20mm (a tad over 3/4").
This was bandsawn and filed into a template ..
The board was marked and bandsawn, and clamped in a vise for shaping.
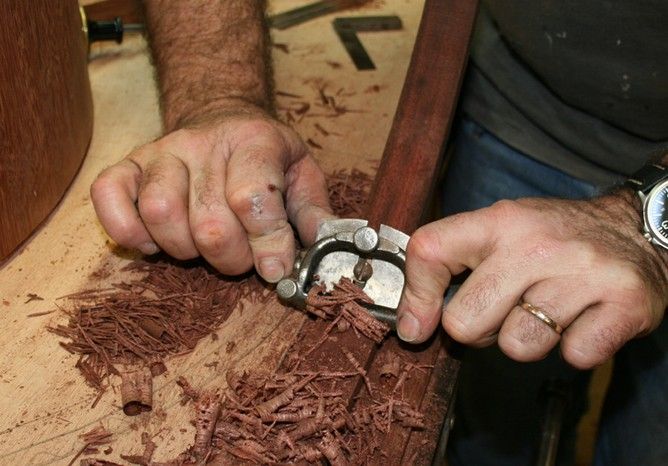
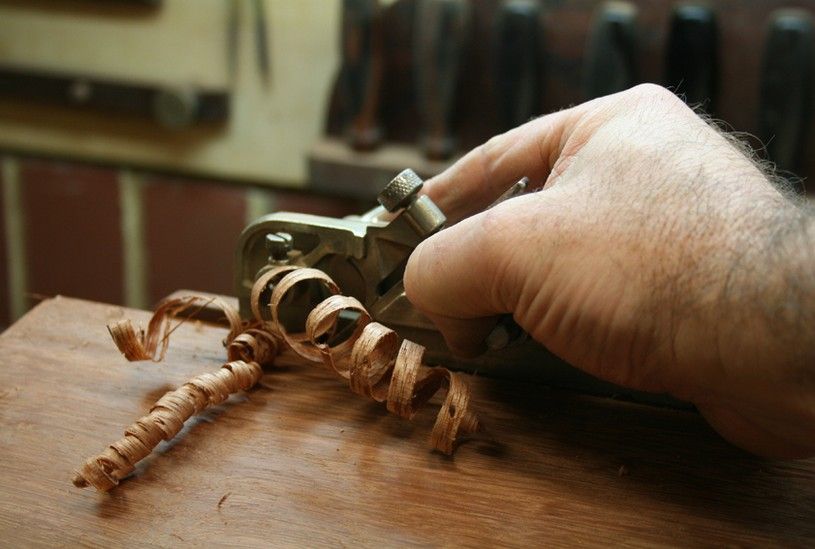
I used a Stanley #53 to rough out the shape (using this spokeshave as a jack).
Be sure to check for square as you work ...
I thought I would use a Record #020, but it was a limited success ..
In the end I relied on spokeshaves for the entire process.
I was looking forward to using the Boggs - great balance - but it really did not cope well enough with the hard Jarrah, and tended to chatter excessively ..
 Visit www.inthewoodshop.com for tutorials on constructing handtools, handtool reviews, and my trials and tribulations with furniture builds.
-
21st June 2010, 04:14 AM #12
Be inspired. Be creative. Be bold.
- Join Date
- Apr 2001
- Location
- Perth
- Posts
- 10,820
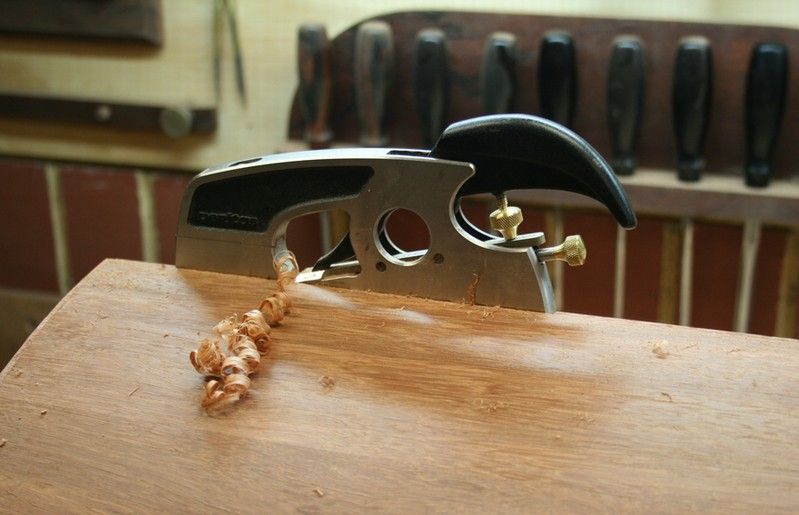
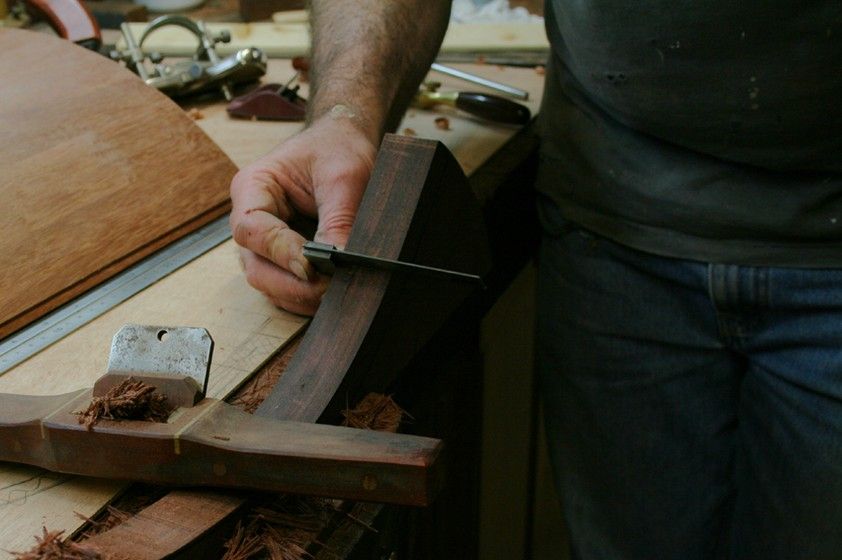
So I relied on the HNT Gordon shaves, both round and flat versions ...
This are superb spokeshaves. They have the ability to plane the hardest and most interlocked woods without any trouble at all. The Round is an amazing spokeshave, being easy to use (can one actually say that about a
round bottomed spokeshave?!). This is due to wide sole - it does not ride on the blade alone as most other round bottomed shaves do.
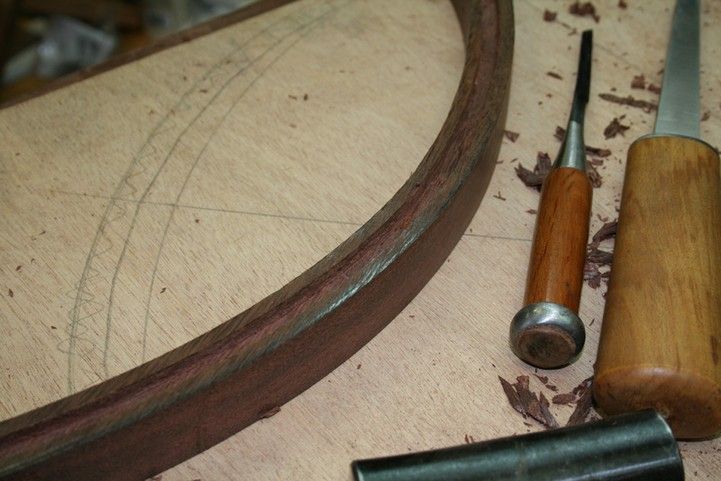
Having refined the outer edge, I remarked the inner curve on both sides and worked to these lines ...
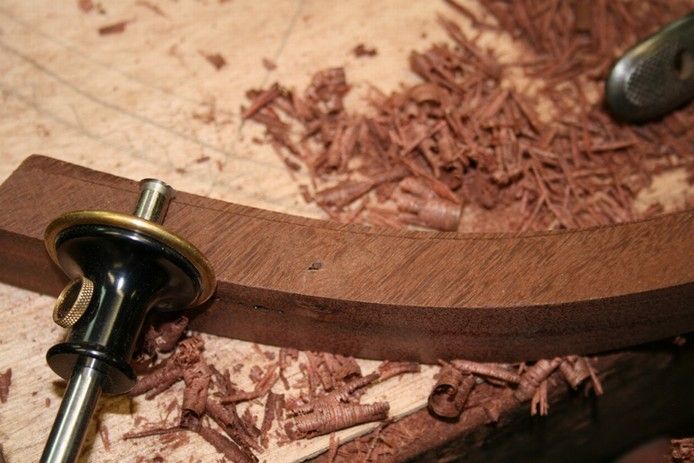
Time to start forming the groove for the panel.
Using a mortice gauge (thanks again Wiley!), deep lines were cut into the side of the frame ..
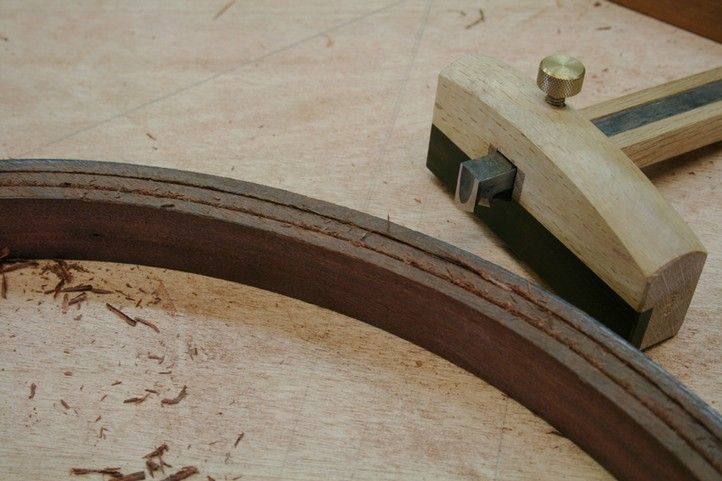
A chisel removed the outer edges ..
.. and refined the shoulders ..
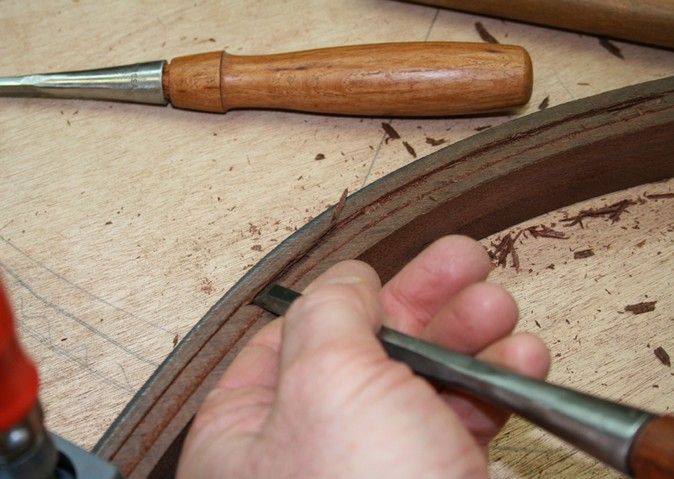
I started out with a mortice chisel to remove the waste ..
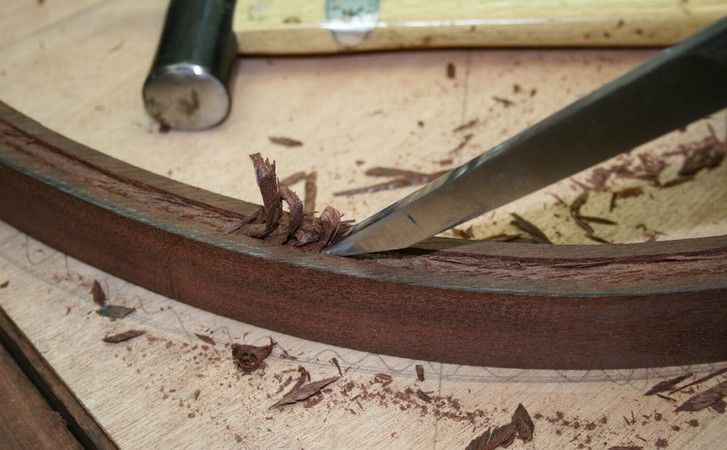
... but switched to a bench chisel as the lower angle sliced away the wood more easily.
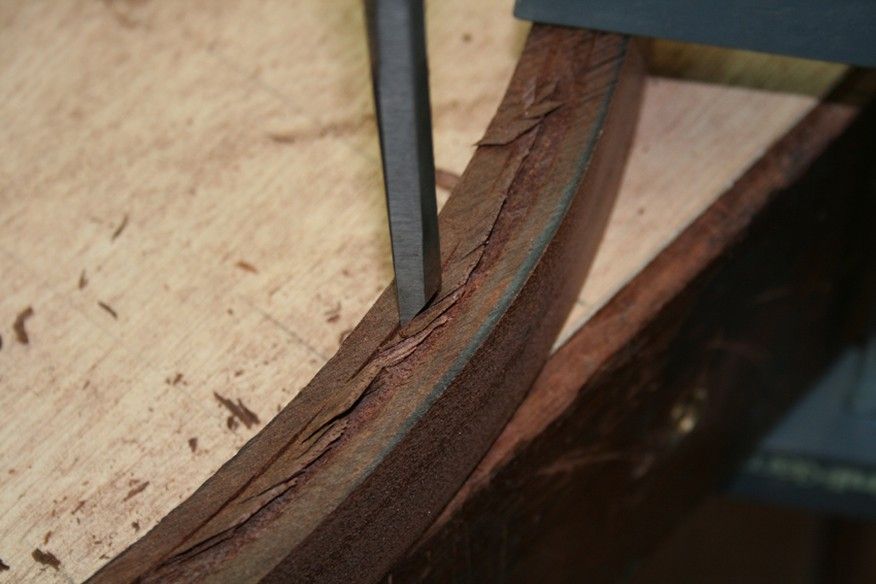
I was concerned about the grain direction and the brittle wood. Indeed, a few small pieces had to be glued back ..
I am thinking that I may glue the upper and lower frames to the panel at the end to increase the strength of the grain at the edges of the frame here. Expansion will take place to the sides of the panel, not the ends. What do the learned members think?
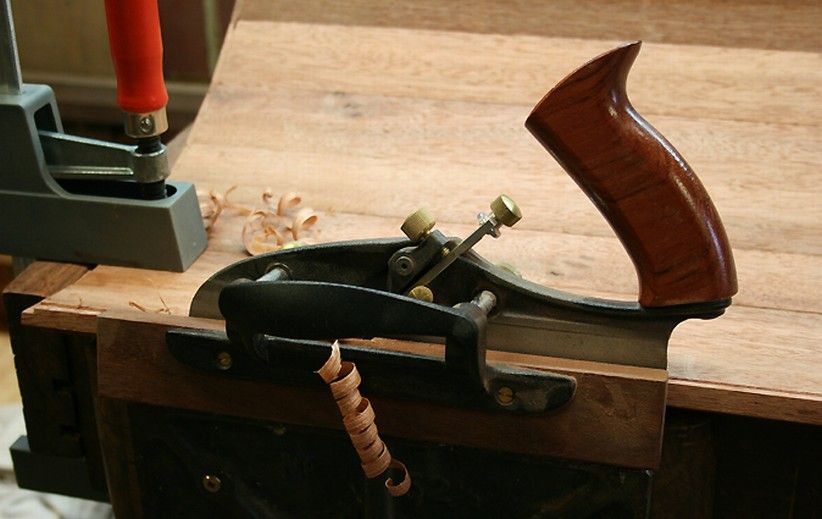
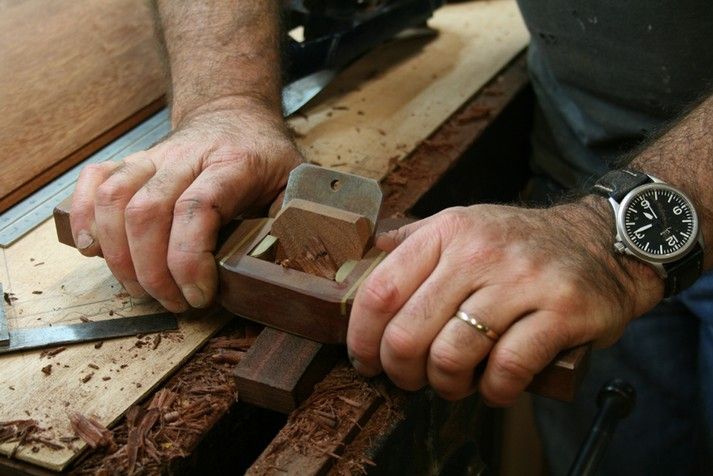
Once the grooves were deep enough I refined the depth with a router plane.
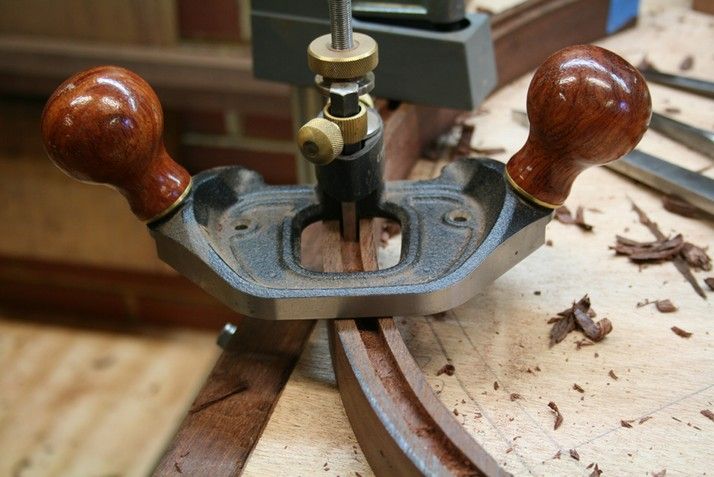
The cutter used here was a scraper blade I made out of a hex key ..
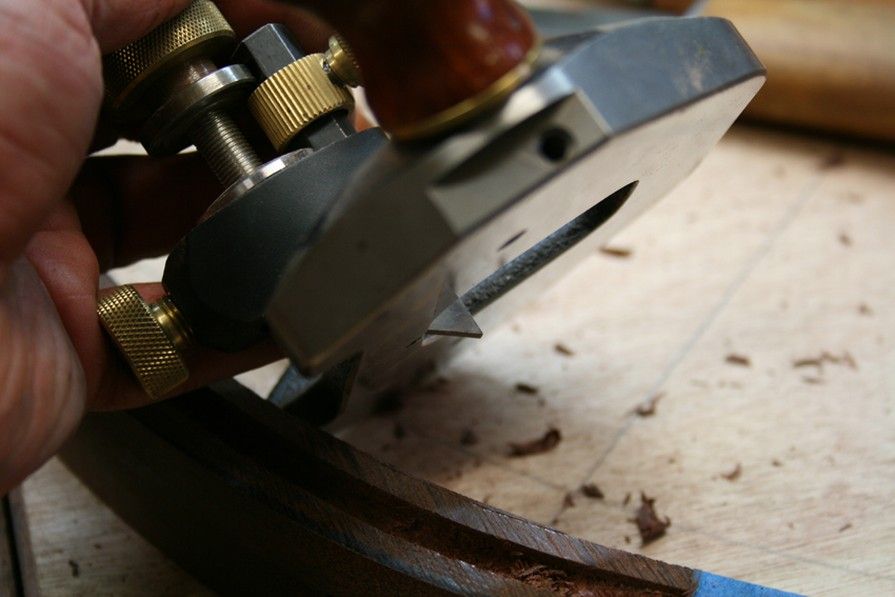
This worked very well. For those interested, details of this cutter are on my website: Stringing Cutter for Router Plane by Derek Cohen
The completed groove ..
 Visit www.inthewoodshop.com for tutorials on constructing handtools, handtool reviews, and my trials and tribulations with furniture builds.
-
21st June 2010, 04:15 AM #13
Be inspired. Be creative. Be bold.
- Join Date
- Apr 2001
- Location
- Perth
- Posts
- 10,820
Sooooo ... would it fit the panel now that it was done?

I can exhale now!
The work so far had taken me most of a day-and-a-half of the weekend as I had three visitors to the workshop. With an hour to go to dinner I decided to get stuck into the other frame. I really wanted to complete the upper and lower curved framed for one door before the weekend was over.
Amazingly it went rapidly. I guess by now I knew what to do and did not have to be as cautious. I ploughed through the roughing out ...
And we were done. Here is the panel with upper and lower curved and grooved frames ...
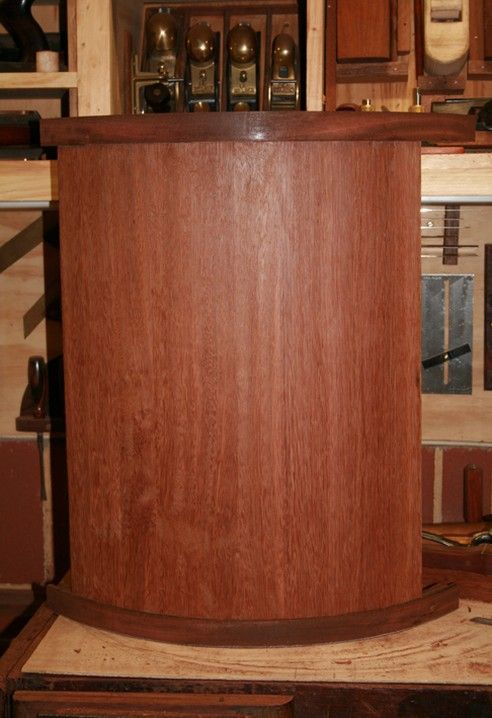
Side pieces to do and mortice-and-tenon. Later ...
Thanks for hanging in with this build.
Regards from Perth
DerekVisit www.inthewoodshop.com for tutorials on constructing handtools, handtool reviews, and my trials and tribulations with furniture builds.
-
21st June 2010, 04:41 AM #14
Senior Member
- Join Date
- Nov 2008
- Location
- Melbourne, Australia
- Posts
- 275
Great work, I think I would have cheated and used an electric router or trimmer for the groove for the panel.
I'll be interested to see how you get on with the mortise and tennon joints with that grain in the direction it is at the ends of the curves. If I were doing it the last one would split on me.
Loving the build Derek, I continue to draw inspiration from you
-
21st June 2010, 10:06 AM #15
Bricoleur
- Join Date
- Jul 2005
- Location
- Toowoomba Qld.
- Age
- 65
- Posts
- 2,792
Nicely done Derek!
It was an interesting comparison between the compass plane and the various spokeshaves. I guess the nature of the timber decided which worked better, although the Gordon does look like a winner all round?!
CheersAndy Mac
Change is inevitable, growth is optional.


 Reply With Quote


Similar Threads
-
coopered vessel
By son_of_bluegras in forum WOODWORK - GENERALReplies: 10Last Post: 14th July 2008, 05:27 PM -
Simple Project, neophite, where to start?
By OldRelayer in forum WOODCARVING AND SCULPTUREReplies: 2Last Post: 20th April 2008, 10:47 PM -
Coopered Box Lids - a WIP
By watson in forum BOX MAKINGReplies: 13Last Post: 15th January 2008, 01:32 PM -
Coopered box lid question
By watson in forum BOX MAKINGReplies: 16Last Post: 9th January 2008, 03:28 PM -
Wordwork Project - from start to finish
By Ianab in forum WOODWORK PICSReplies: 37Last Post: 27th June 2005, 08:21 PM
