

 Thanks:
  Likes:
  Needs Pictures: 0
 Picture(s) thanks: 0
Results 1 to 15 of 377
Thread: 2/3 Harley Davidson 1920 JS
-
29th January 2015, 10:43 PM #1
 Deceased


- Join Date
- Mar 2013
- Location
- St. Helens Tasmania
- Posts
- 2,227
 2/3 Harley Davidson 1920 JS
I must of had enough time off by now.
So it's back to building or in this case rebuilding and hopefully improving.
It will take quite sometime to gather up all of the reference material I need to build the Brough.
While I'm doing that I thought I may as well look at bring the Harley Davidson I build some 11 years ago up to scratch.
I built it as a Boardracer not a street bike and I'd really like to modify it and have it beside the Indian.
It's been sitting gathering dust in the shed for the last seven years.
To say it's not in the best of nick is an understatement!.
We had the bike on display at the St.Arnaud Show when a young boy decided it was just the right size for him.
Which it was but he unfortunately only succeeded in ridding it to the ground, pretty much smashing the engine along with a lot of other parts.
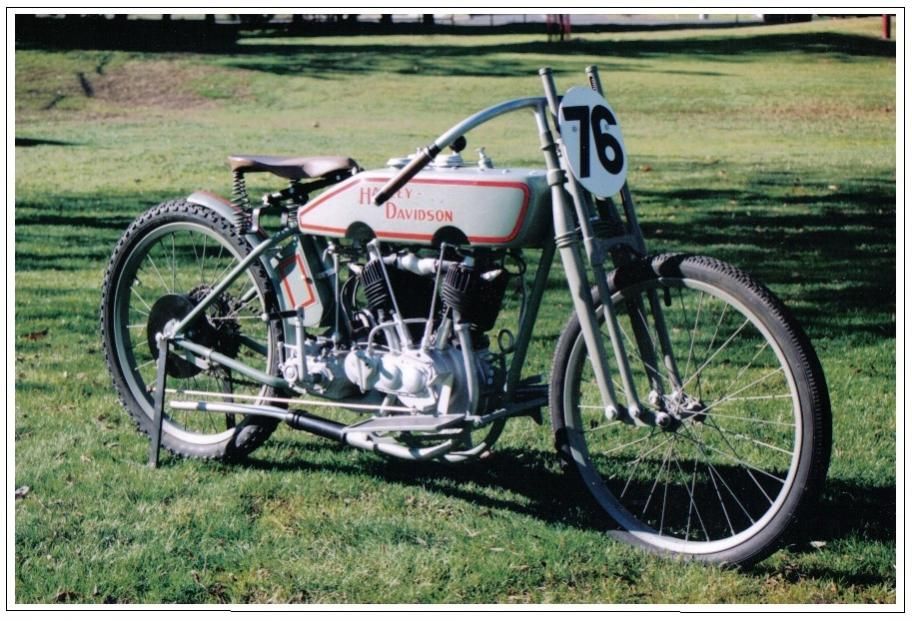
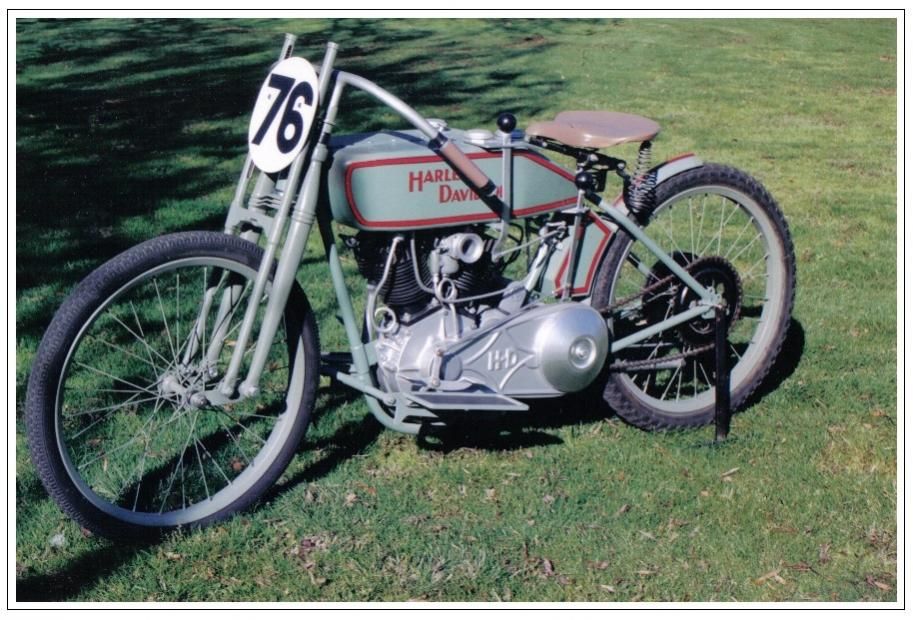
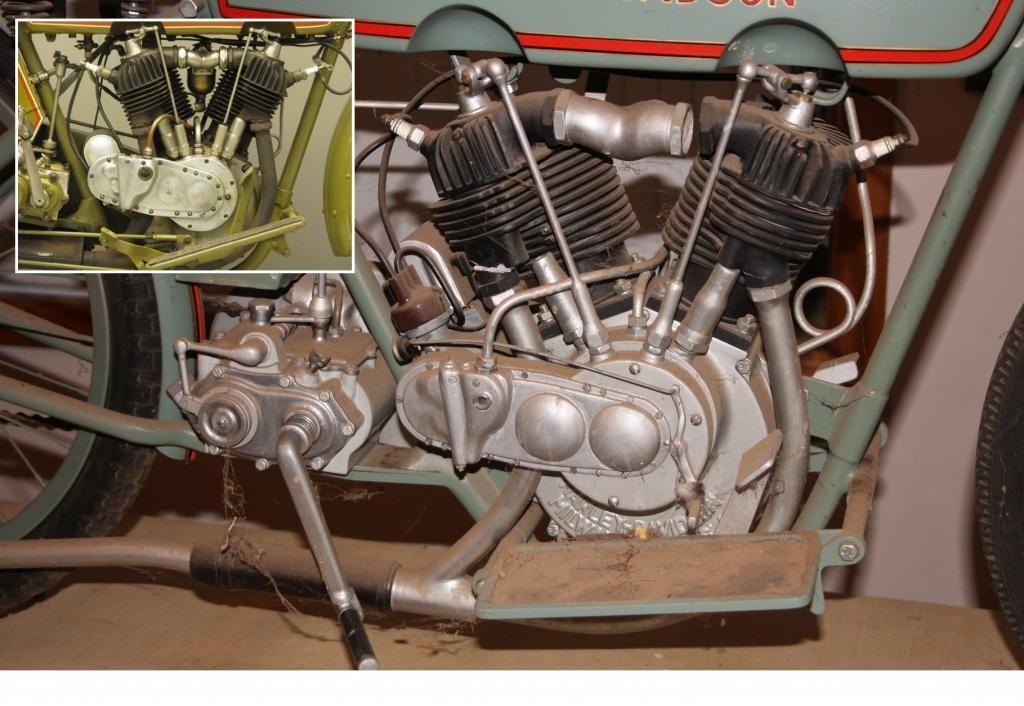
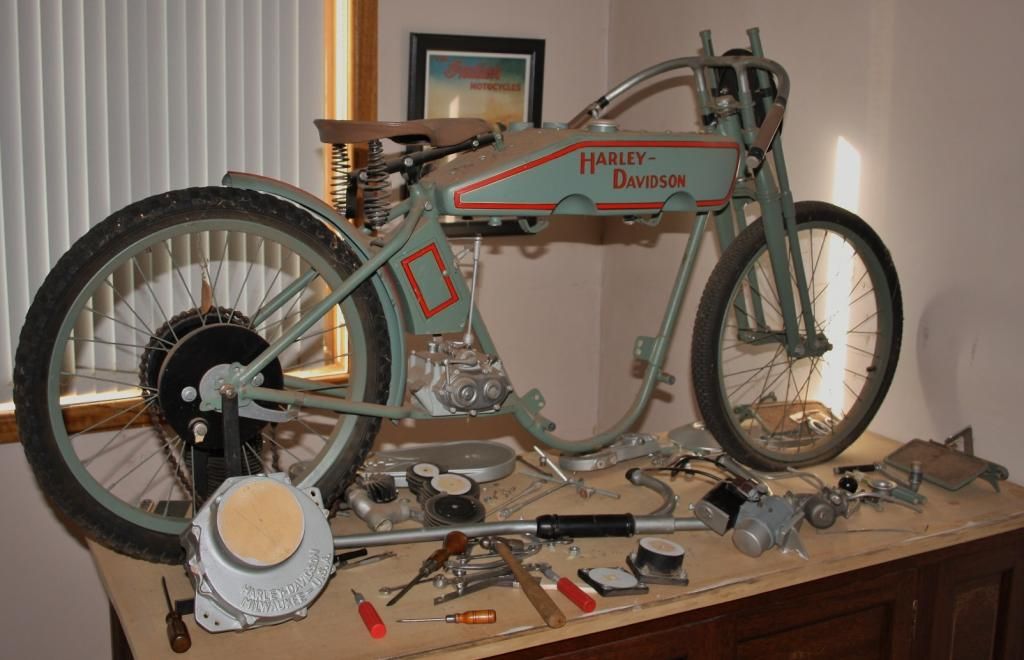
This is the Harley just after it was finished.
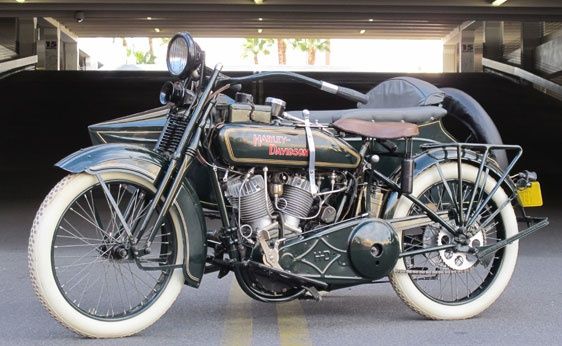
This is what I'd like it to look like after it's been repaired and modified (minus the sidecar).
It will be quite a change from the way the bike looks now.
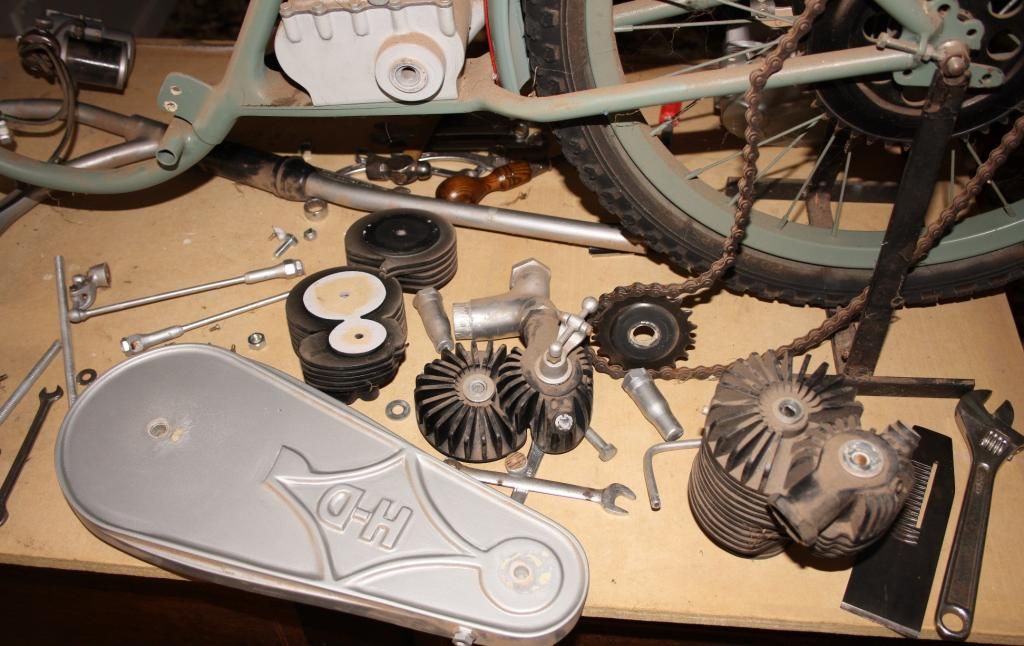
Unfortunately this is the state of the bike at the moment.
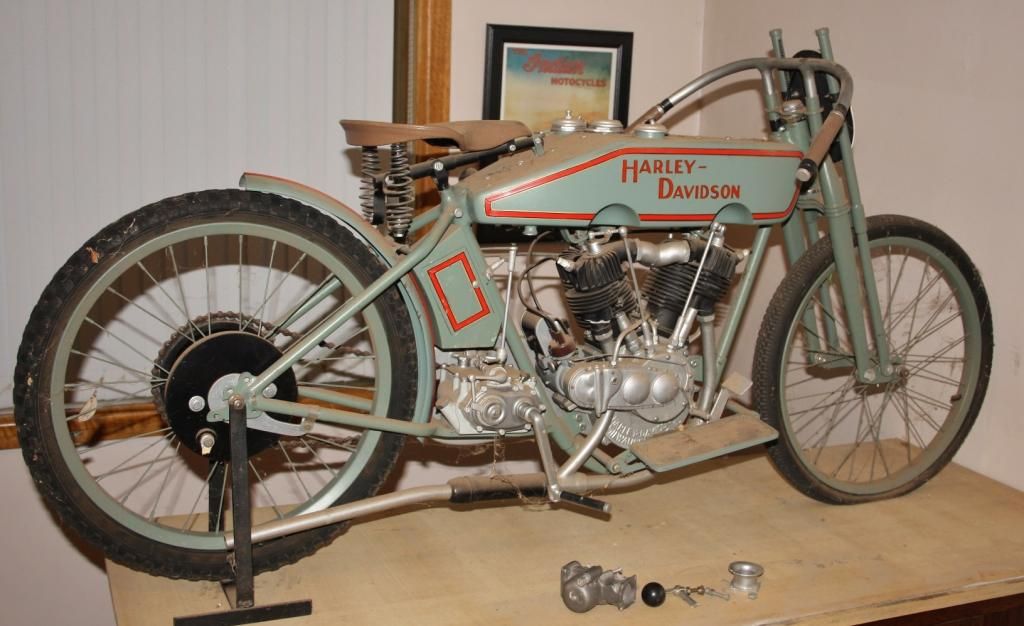
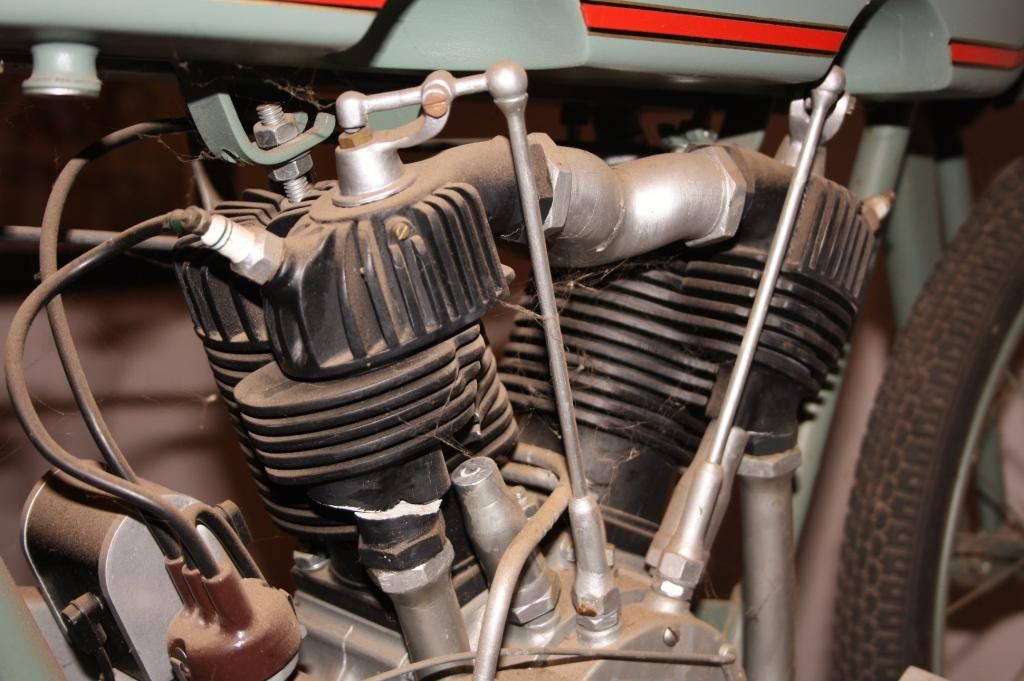
As you can see the engine is in a right state, the carburettor is broken off along with the exhaust ports and the barrels are split and rotated.
But it's not all bad news in the photo below I've inserted a picture of a real Harley engine, it's a 1923 version but the layout is very similar.
Although the engines a bit worse for wear, it looks like I'd gotten quite a lot of the detail when I built it.
I'll need to make mudguards for the bike, along with new handle bars, headlight, horn, better rear brake, narrow the petrol tank,
remake the seat, build a rear carrier the list goes on!.
It's a big job but I think the bikes well worth the effort and will look great beside the Indian.
It will make for a good challenge I've never tried to modify something I've built that much before.
Let alone repair that much damage!.
The first thing to do will be to strip the engine from the frame and get to work on the repairs.
It should be fun.
Cheers
Trev.
-
29th January 2015 10:43 PM # ADSGoogle Adsense Advertisement
- Join Date
- Always
- Location
- Advertising world
- Posts
- Many
-
29th January 2015, 10:53 PM #2
 Life's Good, Enjoy each new day & try to encourage
- Join Date
- Dec 2009
- Location
- Faulconbridge, Lower Blue Mountains
- Age
- 68
- Posts
- 11,178
Cleaning up, something novel.....
Woo Whoo, a front row seat to again watch the Junk Master create/repair another Masterpiece......
Cleaning up, something novel..... Please come and visit; and you can also help me sort out my projects and otherwise disorganization, Trev....
Cheers, Peter
-
30th January 2015, 07:07 AM #3
GOLD MEMBER
- Join Date
- Nov 2011
- Location
- Sutherland Shire, Sydney
- Age
- 71
- Posts
- 1,301
A master piece being brought back to life by a dedicated surgeon.
I'll be watching with great interest.
Alan...
-
30th January 2015, 08:23 AM #4
GOLD MEMBER
- Join Date
- Apr 2013
- Location
- Torquay
- Posts
- 4,422
Looking forward to your upgrade work Trevor. It will undoubtedly be great.
Regards
Keith
-
30th January 2015, 09:43 AM #5
On a journey
- Join Date
- Oct 2008
- Location
- Leopold, Victoria
- Age
- 65
- Posts
- 4,681
I can understand why you put it away after the destruction. It must have just about put a hole in your heart

Looking forward to the venture. Dallas
-
31st January 2015, 04:40 AM #6
Deceased
- Join Date
- Mar 2013
- Location
- St. Helens Tasmania
- Posts
- 2,227
At the time I couldn't face trying to repair all of the damage, I thought the bike was pretty much a total write off. Originally Posted by Treecycle

So I just put it out of sight and moved on with other builds.
It was only while building the Indian that I started to wont to see the Harley repaired and standing beside it.
Over the last couple of days I've found myself to be quite happy about the prospect of repairing it.
The bike really does deserve a better fate than the one it had.
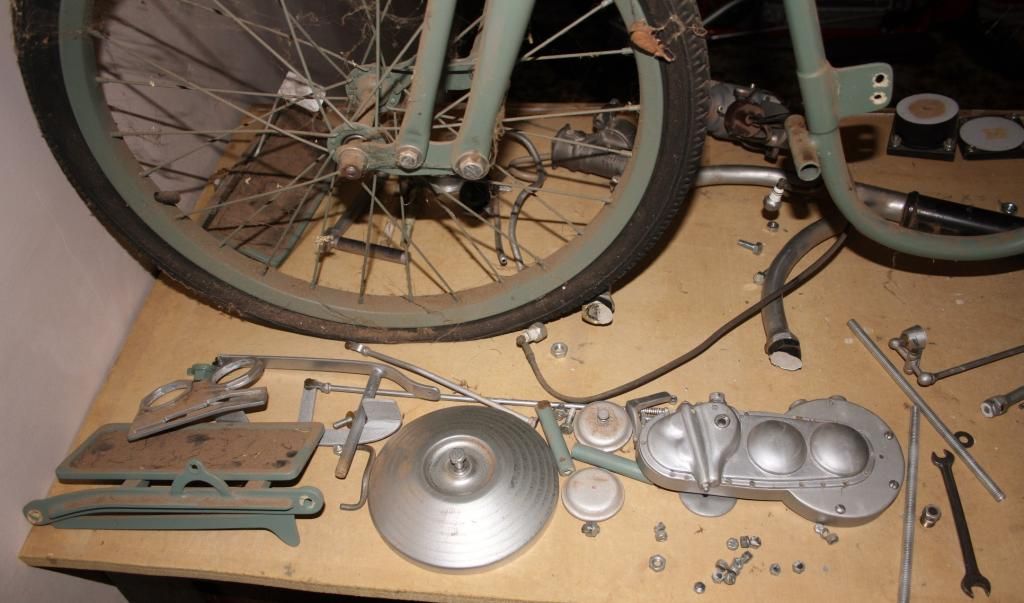
So I got to it yesterday and started stripping the Harley down.
The first part I need is the crankcase, I'll get that back into shape first.
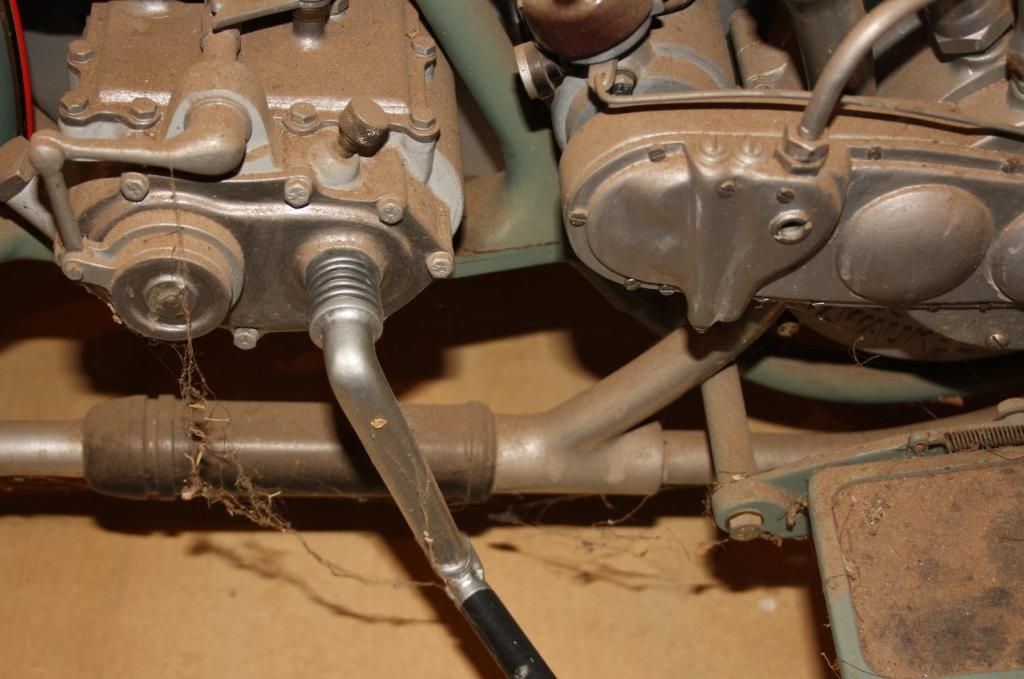
Most of the engine was quite easily to remove, apart from the exhaust pipe from the rear cylinder.
It had broken off above where the pipe connected to the barrel, and wouldn't pass through the space between the back of the timing drive
and the Magneto mounting plate.
So in the end I let the mounting plate on the Magneto brake away to get the pipe out.
At this point I don't think a little more damage is either here nor there!.
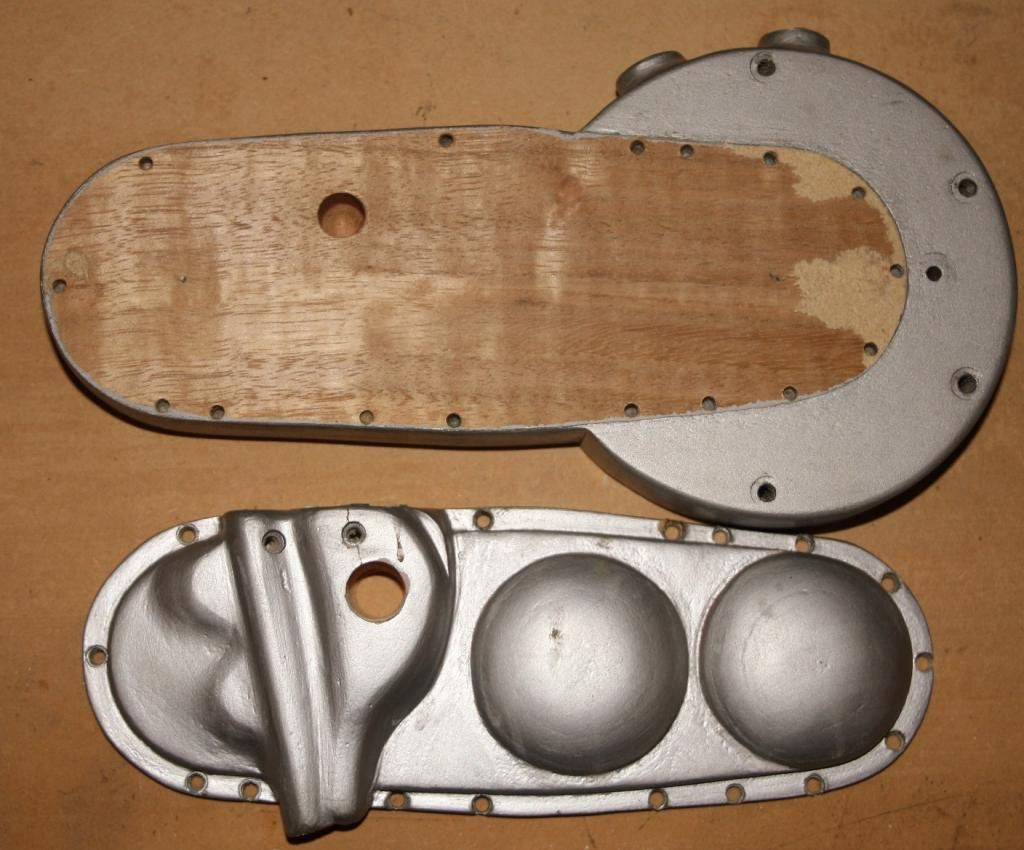
If your wondering at all why the Siegley Plane blade is on the bench "Best Thing Ever" for separating two pieces of MDF.
When I made the clutch plate cover I laminated MDF together to form the dome.
Now that its got some age to it and is a little weathered you can see the lamination lines.
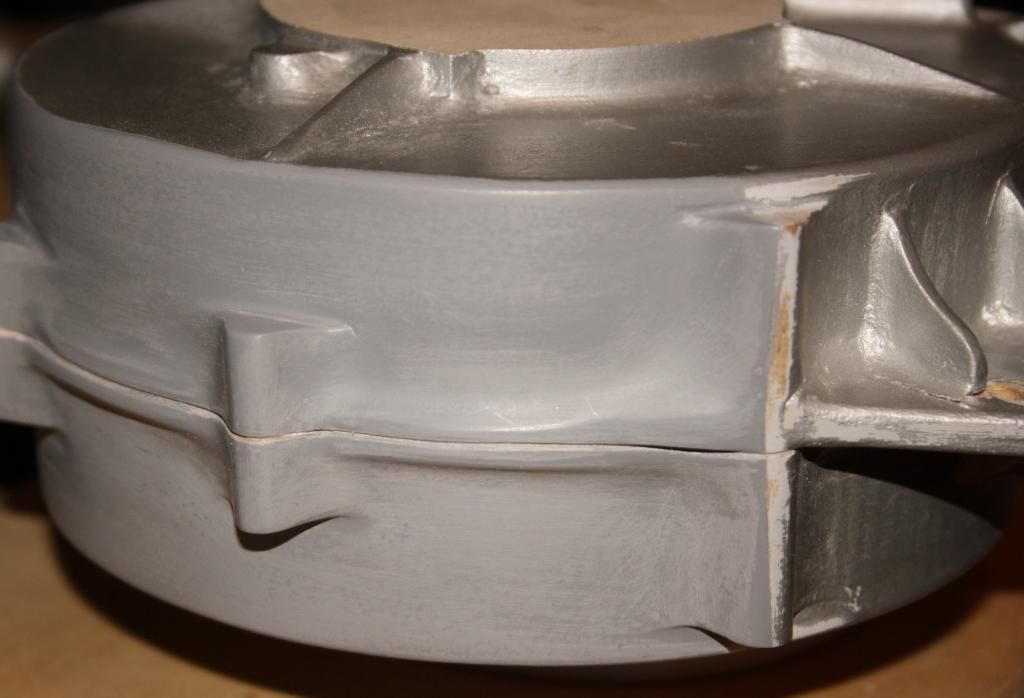
I've made a start on the crankcase, I was a little surprised at how many saw marks I'd left in it.
But now's a good time to fix that.
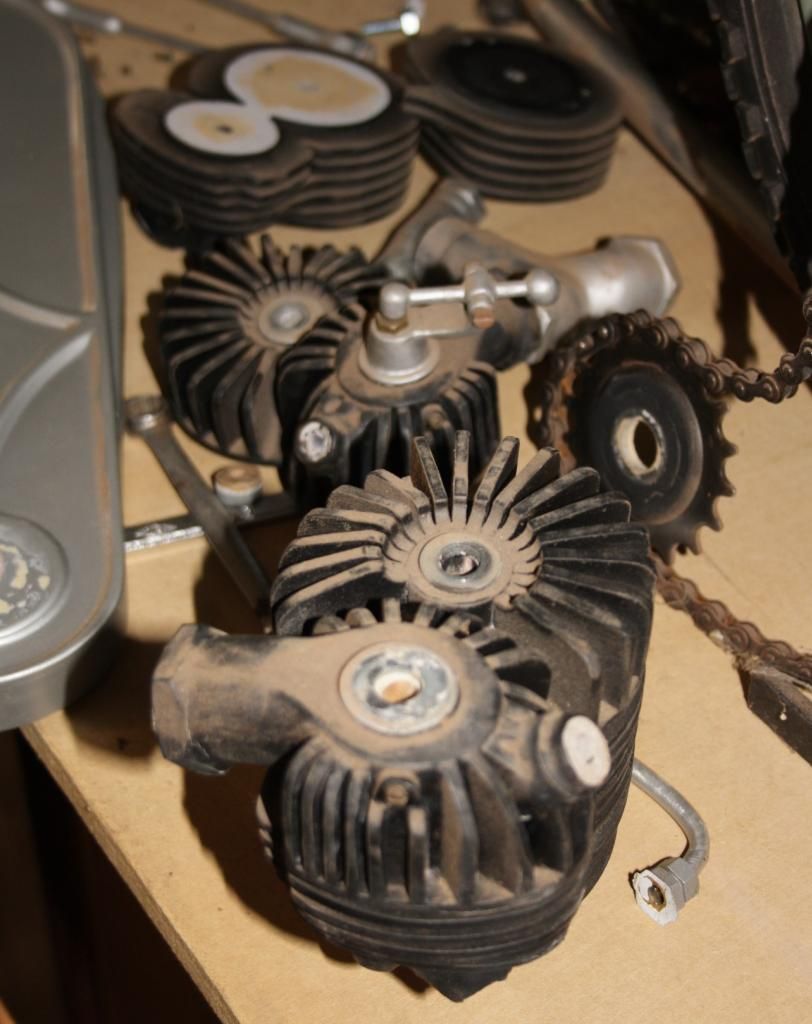
The barrels are looking more than a little worse for wear, but shouldn't be to much trouble to repair.
I'll finish the rebuild on the crankcase then make a engine stand so that I can get to work on the barrels.
Cheers
Trev.
-
31st January 2015, 08:53 AM #7
GOLD MEMBER
- Join Date
- Apr 2013
- Location
- Torquay
- Posts
- 4,422
Wow,
Lots of components Trev,
How long for the upgrade do you reckon ?
Regards
Keith
-
31st January 2015, 11:12 AM #8
Life's Good, Enjoy each new day & try to encourage
- Join Date
- Dec 2009
- Location
- Faulconbridge, Lower Blue Mountains
- Age
- 68
- Posts
- 11,178
With Trevor's eye for detail, I'm sure we have a short 12mths thread/novel to enjoy.....Peter Originally Posted by Keith_1
Opps - 11months as it will have to be displayed for all to view at next years Jerilderie Gathering!!!!!
-
31st January 2015, 11:48 AM #9
GOLD MEMBER
- Join Date
- Nov 2008
- Location
- Canterbury UK
- Age
- 67
- Posts
- 3,996
-
1st February 2015, 07:31 AM #10
Deceased
- Join Date
- Mar 2013
- Location
- St. Helens Tasmania
- Posts
- 2,227
Not to sure mate on the time frame. Originally Posted by Keith_1
If I had some good pictures of the Brough engine I'd be working on that.
But at the moment it's proving hard to find (Monkey can't build what Monkey can't see).
Although I'm pretty happy working on the Harley so we'll see how it goes.
My eye for detail must not of been so good a decade ago. Originally Posted by crowie
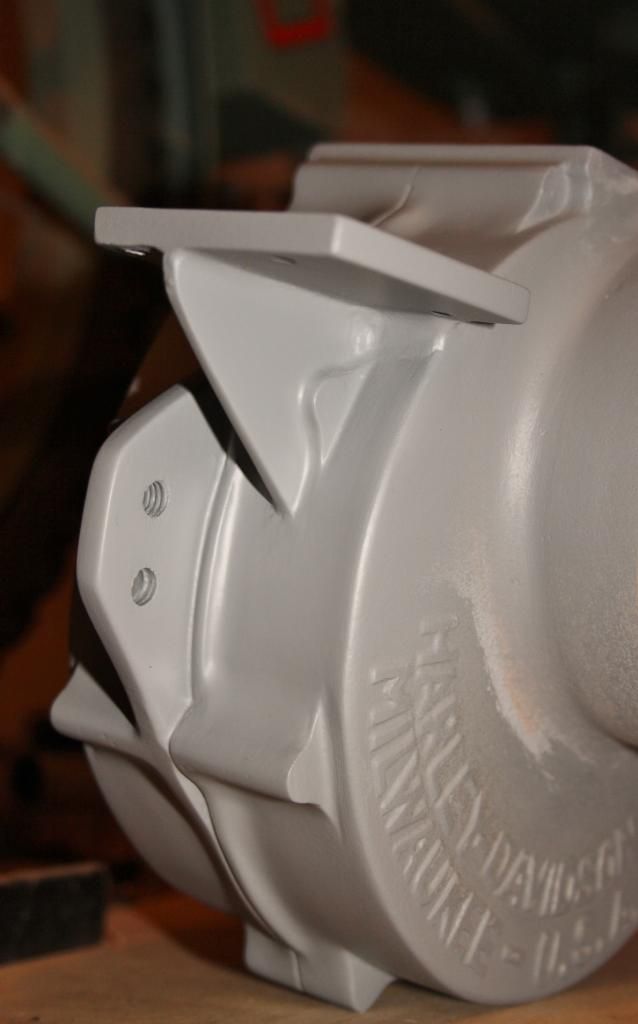
I've just noticed that I never put the engine number on the Harley, I'll need to address that!.
I'll try not to turn this into "War and Peace" this time, maybe more of a light hearted comedy.
You know me mate one week, one year it's all a bit of a blur to me!. Originally Posted by Dalboy

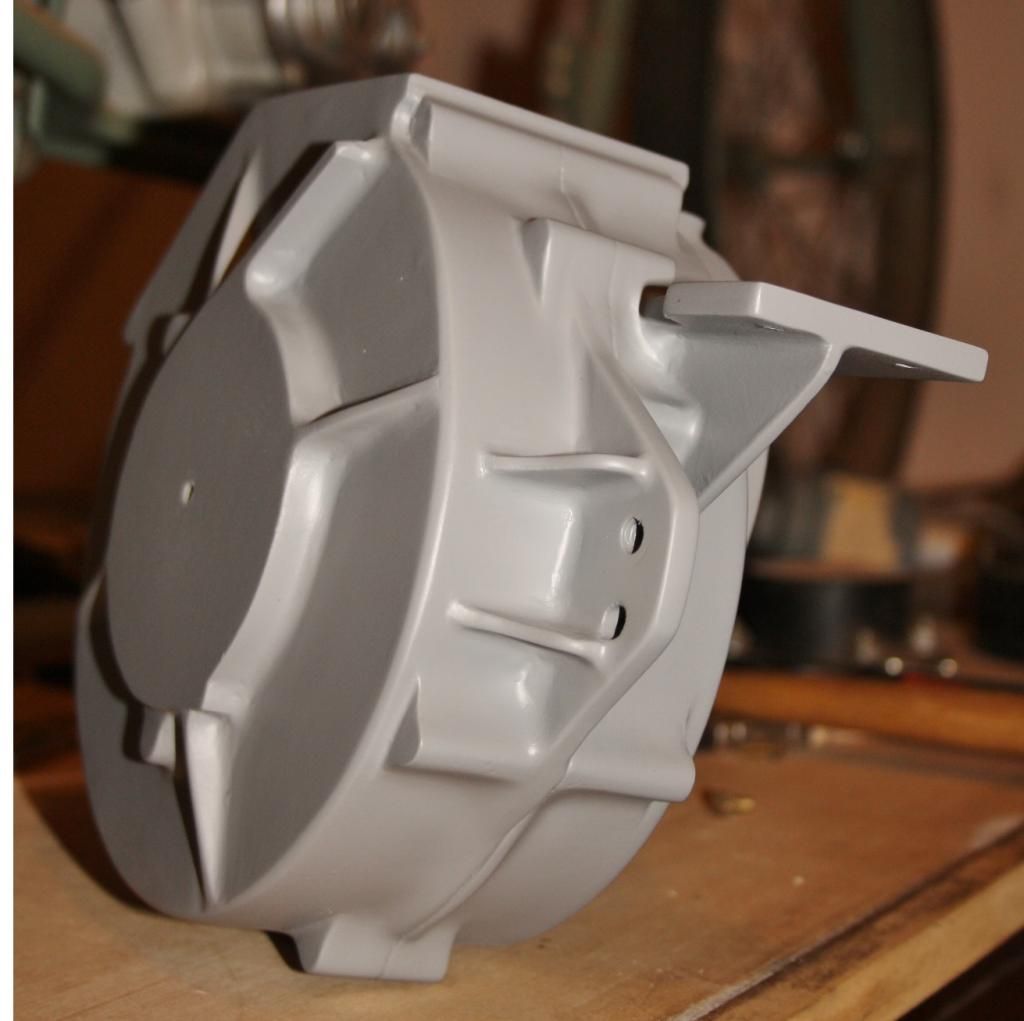
I've got most of the crankcase done, just the right hand side left to go.
I'm finding out very quickly it's a hole different kettle of fish redoing a project compered to building it for scratch.
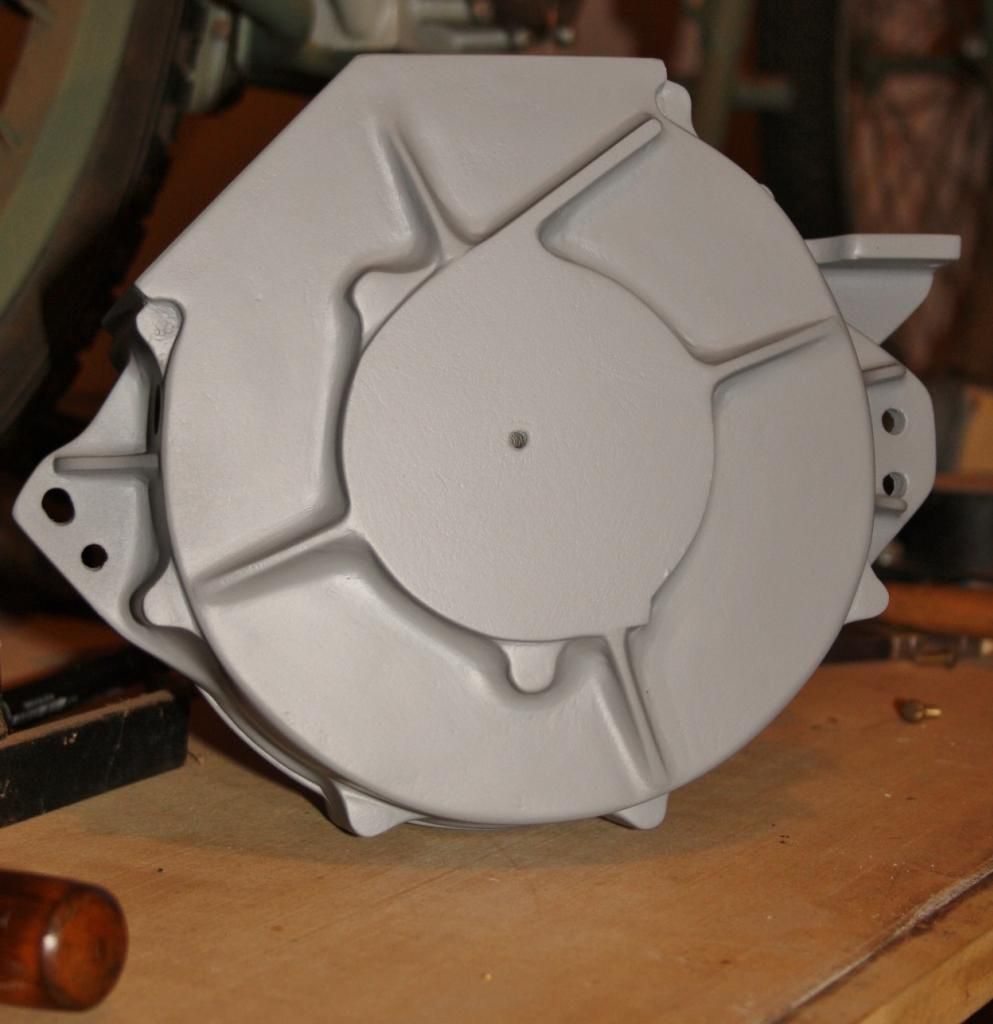
The main thing with the crankcase has been improving the finish, my original effort was defiantly a couple of shots over par!.
I've removed most of the saw marks and tried to blend the individual pieces that make up the crankcase better than previously.
I reattached the Magneto mount but I've still got a little work to do to make it appear to be part of the same casting.
So far so good.
I'm hoping to have the crankcase all back in primer and ready for a top coat by the end of the day.
Cheers
Trev.
-
1st February 2015, 09:16 AM #11
GOLD MEMBER
- Join Date
- Apr 2013
- Location
- Torquay
- Posts
- 4,422
If the original was shooting over par, the work so far looks to be either an eagle or albatross and I don't even play golf. PS won at bowls.
Looks great mate.
Keith
-
1st February 2015, 01:20 PM #12
Retired teacher, lifelong learner
- Join Date
- Jul 2012
- Location
- Murray River, NSW
- Posts
- 344
Hey Trev, Originally Posted by Repliconics
Great to see you getting back on the bike!
I think my most anticipated part of the rebuild will be the reshaping (curving) of the fuel tank.
The photo above reminds me of how a real Harley of the era would look just after being pulled out of a barn. You really go for the authentic look, don't you Trevor. I hope the dust particles were 2/3 scale too!
So great to catch up with you at Jerilderie.
And I hear that you have taken a lathe or two back to Mildura with you! Luke, I am your father. (Sorry, no Darth Vader emoticon available.)
Let me know when you're coming back down with Dave's lathe cover and mug so that we can have a proper chat; you and the Indian were the star attractions and we didn't get much time to philosophise.
Craig
-
2nd February 2015, 09:47 AM #13
Deceased
- Join Date
- Mar 2013
- Location
- St. Helens Tasmania
- Posts
- 2,227
"SWEET" Originally Posted by Keith_1
That's right mate back on the bike, and still peddling up hill!. Originally Posted by CAG
You're right about the tank the one in the picture is a 1923 model, I originally built the Harley as a 1920 version.
It's been so long since I made that tank, I can't even remember the method I used.
My son had the same idea as you, when he saw the bike covered in dust and cobwebs he thought it looked like it had just come out of a barn.
The dust and dirt isn't at 2/3 scale, although the Huntsman spider that was living under the seat was defiantly 1/1!.
Next time in Jerilderie we'll have to catch up again, maybe even make a ninja like raid on the school supply room.
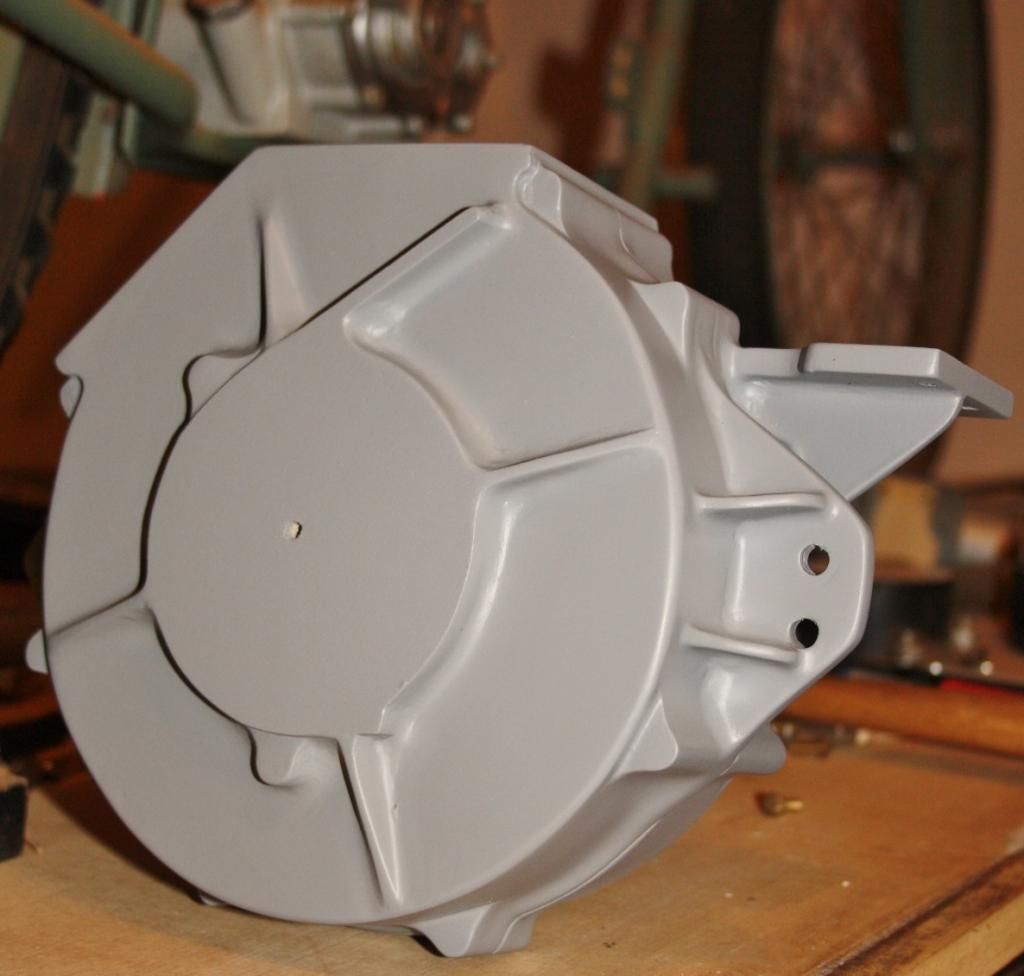
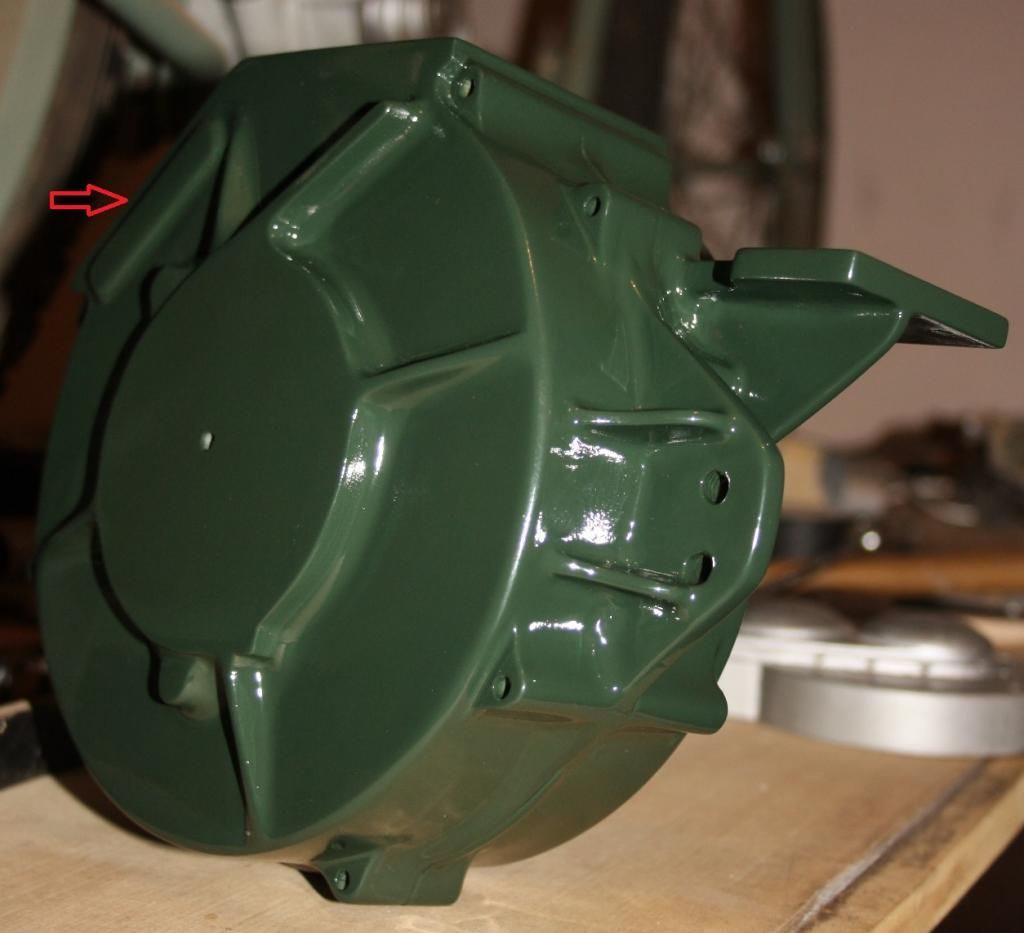
I've put two coats of dark green on the crankcase.
It certainly makes for a different look to the way I originally had it.
When I first made the bike I had no idea that Harley had ever painted their bikes that way.
But I think it's going to look really good, although at the moment it appears a little odd to me.

In the picture below the red arrow marks the addition of the plate for the engine number.
I'll let the paint dry for awhile before impressing the number.
Doing it that way when I give the crankcase it's final coat of paint the number shouldn't fill up to much.
After building an engine stand (Hopefully not getting to carried away with it).
I'll tackle the timing cover it really needs some work, and I think it can be improved on quite a bit.
No surprise I'm off to recyclers to find some wood for the engine stand.
Cheers
Trev.
-
2nd February 2015, 12:57 PM #14
GOLD MEMBER
- Join Date
- Apr 2013
- Location
- Torquay
- Posts
- 4,422
Great stuff
-
2nd February 2015, 03:05 PM #15
Where did I put that....
- Join Date
- Jan 2009
- Location
- Tampa, FL - USA
- Posts
- 73
Well now. Will you just look at this... another build and another motorcycle only this time its a rebuild and an overhaul.
Great stuff... I'll be going for the ride again... yippy:
 He who blesses his neighbor in a loud voice, rising early in the morning, it shall be counted as cursing!
Videos I have made. Abandon All Hope Ye Who Enter Here!
https://www.youtube.com/user/johnnie52/videos


Similar Threads
-
It's a No.1, but not a Harley
By Bushmiller in forum HAND TOOLS - UNPOWEREDReplies: 19Last Post: 13th October 2014, 11:24 PM -
Harley Davidson chopper
By bobman 58 in forum INTARSIAReplies: 6Last Post: 6th February 2014, 08:26 AM -
Harley Davidson logo
By bobman 58 in forum SCROLLERS FORUMReplies: 4Last Post: 10th August 2013, 09:38 AM -
Harley Davidson
By Rum Pig in forum WOODIES JOKESReplies: 0Last Post: 15th October 2009, 12:10 PM -
Arthur Davidson
By Baz in forum WOODIES JOKESReplies: 5Last Post: 28th December 2005, 11:10 AM
