

 Thanks:
  Likes:
  Needs Pictures:
  Picture(s) thanks:
Results 106 to 120 of 950
-
17th June 2015, 05:52 PM #106
 GOLD MEMBER


- Join Date
- Apr 2013
- Location
- Torquay
- Posts
- 4,422

Hi all,
Finished off the final axle and then pulled it all apart again. Then went and checked each bearing and modified so they are all loose sliding fits on the chasis.
Gave the chasis it's first coat of paint. When dry - re-assembled and then checked that the chasis was level along the length and across as well. All the wheels are touching the base board and was very happy with alignment.
Tipped the chasis upside down and then I fitted the studs and the leaf springs beneath the wheel bearings. Need all these in position before I can start doing some work on the braking system.
Regards
Keith
Level and square.jpgleaf springs positioned.jpg
-
17th June 2015 05:52 PM # ADSGoogle Adsense Advertisement
- Join Date
- Always
- Location
- Advertising world
- Posts
- Many
-
18th June 2015, 11:20 PM #107
Hotrod
- Join Date
- Jun 2010
- Location
- Leander, TX Central Texas Area
- Age
- 45
- Posts
- 1,061
Keith,
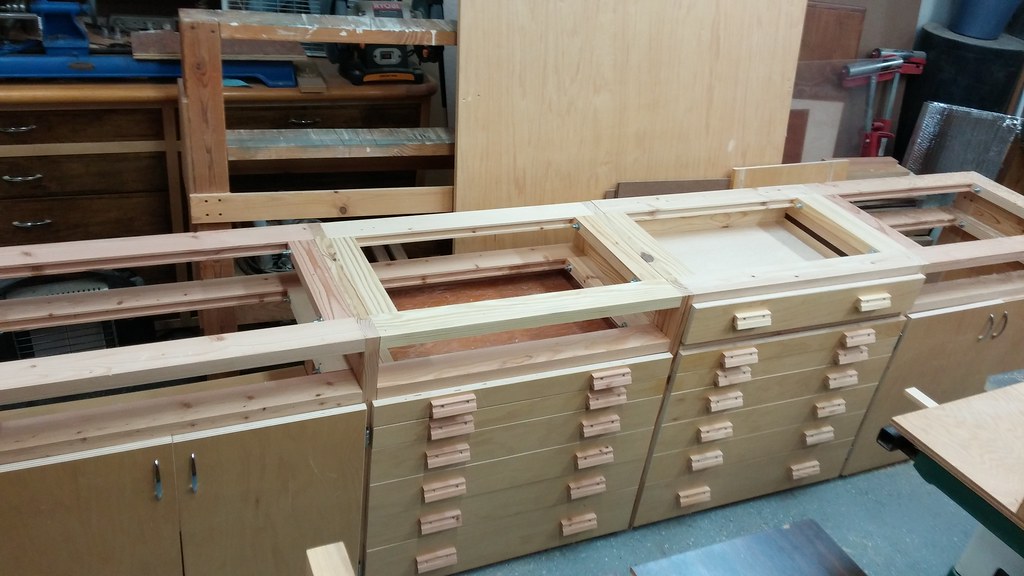
It looks fantastic. I love the mix of wood and metal. Great idea on the metal axles. Can't wait to see the boiler and all other parts start to come together. The scale of this thing is truly massive. I think it would really be fun to build on this scale but don't know what I would do with the completed project when done. My truck and train are both still housed in the workshop as there is no where in the house to put them.
Off subject but I almost have my cabinets done so I can clear some space to start a new scale/toy project.
 20150617_194402 by bjohnson388, on Flickr
-
19th June 2015, 03:29 AM #108
GOLD MEMBER
- Join Date
- Nov 2008
- Location
- Canterbury UK
- Age
- 67
- Posts
- 3,996
-
19th June 2015, 09:42 AM #109
GOLD MEMBER
- Join Date
- Apr 2013
- Location
- Torquay
- Posts
- 4,422
 Originally Posted by Dalboy

Thanks Derek and Bret,
Cupboards are looking excellent. Yes Bret, next build - Are you doing the steamy or diesel ?
I have top of train display earmarked for the 4-6-2. Working on brake gear - as I said challenging but enjoyable designing the different components - may have photos tonight - although Cathie has given me some house maintenance duties. She needs to get our priories right ?
Only joking
Regards
Keith
locomotives.jpg
-
19th June 2015, 05:03 PM #110
GOLD MEMBER
- Join Date
- Apr 2013
- Location
- Torquay
- Posts
- 4,422
Hi all,
Made up my first brake assembly. Reckon it's the most difficult because of the confined space between the first drive wheel and the second drive wheel.
The brake shoes I made out of pine. Drew one up and then photocopied for the 6 shoes. Glued the copy onto the pine and then cutout, filed and sanded (this way they should be all the same). Cut the slot in the back of the shoe (for the holding bracket) using table saw and then sanded to correct width.
The bracket is made out of aluminium. The bosses at each end are collars I machined up and then 5 minuted araldited into position. When cured I drilled out and then filed and emery clothed.
The boss that secures to the chasis is machined on the lathe out of aluminium. I made the brake shoe pin out of aluminium.
Purchased the 1.6mm split pins. These need to be shortened when assembled correctly. I have used the decking nail heads As "rivets" to secure the boss to the chasis.
I have placed a photo of the original prototype beside my version on my loco for a bit of a comparison. Happy how it's coming together.
Now the design and first one has been made I can get into a bit of a Production run on the components for the remaining 5 brakes.
Regards
Keith
Brake Components.jpgBrake assembly.jpgBrake Prototype.jpg
-
19th June 2015, 07:25 PM #111
GOLD MEMBER
- Join Date
- Apr 2011
- Location
- se Melbourne
- Age
- 62
- Posts
- 2,567
Brake block looks good and is hanging correctly.
What causes the brakes to release after the driver releases them? Gravity causes the blocks to move away from the wheels. This also means when you are assembling the rigging you are fighting gravity.
-
19th June 2015, 08:05 PM #112
GOLD MEMBER
- Join Date
- Apr 2013
- Location
- Torquay
- Posts
- 4,422
Kevin, Originally Posted by Handyjack
Thanks for the information about gravity releasing the brakes. Always interested in learning more about locomotives.
Regards
Keith
-
23rd June 2015, 05:45 PM #113
GOLD MEMBER
- Join Date
- Apr 2013
- Location
- Torquay
- Posts
- 4,422
Hi All,
A number of days since my last post. I have been working on my brake assemblies for all 6 wheels. Lots of metal turning and fitting work. Haven't been on the lathe for as much time since I was doing my fitting and turning apprenticeship over 40 years ago.
Happy with the outcome. Only primed the brake components so far. They will end up the same colour as the chasis.
I have also designed a locking mechanism under the chasis that will lock the brakes in position, but will also allow me to remove the brake system whenever I like so I can remove the wheels and also work on the cylinders and wheel drive mechanisms. Will continue on that tomorrow.
I also want to be able to remove the wheels at any stage to paint and possibly touch up the paint work.
In the prototype locomotive there is also angle iron on both sides connecting each brake mechanism. I will be using 12mm X 12mm X 1.4mm aluminium angle as my support "angle iron". Considered making my own angle iron out of pine but would be too "bulky".
In the photos - taken from left hand side and then right hand side of the locomotive - you can also see the leaf springs in position behind the 3 drive wheels.
I am going to continue work on the chasis at this stage. When I complete the brake system - I will commence work on the sandboxes that sit just behind the rear drive wheel (beneath where the cabin will be).
Regards
Keith
Brakes LH Side.jpg Brakes RH side.jpg
-
23rd June 2015, 06:17 PM #114
Life's Good, Enjoy each new day & try to encourage
- Join Date
- Dec 2009
- Location
- Faulconbridge, Lower Blue Mountains
- Age
- 68
- Posts
- 11,177
 My my Keith, This build is going to you a long time with the detailed work you are doing.....
And I was worried I'd miss too much while away....
I think not, as you'll just be tinkering on all the little bits & pieces to bring this train alive....
Keep up the great work sir....Cheers, Peter
PS - I'm pretty sure I've forgot all my turning from 40years ago so you're way ahead of me........
-
23rd June 2015, 06:52 PM #115
GOLD MEMBER
- Join Date
- Apr 2011
- Location
- se Melbourne
- Age
- 62
- Posts
- 2,567
The brake system is pretty amazing. One cylinder will apply the brakes to all the driven wheels and the linkage is arranged to allow for ware and an even amount of force on each wheel. The rods are in tension when the brakes are applied so they are unlikely to bend. There is also a turnbuckle to take up any slack as the brake piston has limits of movement eg min 2" max 3". The park (hand) brake also works the same linkages. When work is being done on the mechanism eg changing blocks or adjusting piston travel the engine needs to be chocked for safety.
Looking good.
-
23rd June 2015, 06:56 PM #116
GOLD MEMBER
- Join Date
- Nov 2008
- Location
- Canterbury UK
- Age
- 67
- Posts
- 3,996
-
23rd June 2015, 08:44 PM #117
GOLD MEMBER
- Join Date
- Apr 2013
- Location
- Torquay
- Posts
- 4,422
Originally Posted by crowie
You are right Pete,
This is going to take ages BUT really I am OK with that. (Don't have the hassle on deciding the next build for a long time (although it will be an S Class diesel)
The big question will be how to make the round valve handles when I get into the cabin section. Wish I had Trevor's know how on making up "castings" etc. Anyone got any ideas for the future ?
Drilling the mild steel with a 1mm drill is still a pain even after 40 years. Although haven't broken any drills yet and drilled 6 holes in mild steel threaded bar.
Up to the Railway Museum again on Saturday for a few more photos. (Cathie's really impressed )
)
Below is a photo of the valve handles I will need to make and would like some suggestions if possible - please !!!
Regards
Keith
IMG_1102.jpg
-
23rd June 2015, 09:45 PM #118
Hotrod
- Join Date
- Jun 2010
- Location
- Leander, TX Central Texas Area
- Age
- 45
- Posts
- 1,061
Keith,
Brake system is spot on. As for the handles couldn't you just make them like you did the wheels. Turn the outside, make a center hub, and then glue the 4 shafts to hold the center in place and then sand all the edges round.
Bret
-
23rd June 2015, 11:40 PM #119
GOLD MEMBER
- Join Date
- Apr 2013
- Location
- Torquay
- Posts
- 4,422
Thanks Bret,
Yes, I was thinking along similar lines (no pun intended). Do you think they would look authentic enough ? Although I suppose it doesn't matter how many goes it takes to get them right.
Thanks for your comments and suggestion.
Best Regards
Keith
-
24th June 2015, 12:52 AM #120
GOLD MEMBER
- Join Date
- Nov 2008
- Location
- Canterbury UK
- Age
- 67
- Posts
- 3,996
How big are they. are they large enough to do what I did for the motor bike rocker Originally Posted by Keith_1

 Reply With Quote


Similar Threads
-
Manual Training for Common Schools - 1910
By pmcgee in forum HAND TOOLS - UNPOWEREDReplies: 4Last Post: 25th January 2014, 07:20 PM -
Window frame timber 1910
By GTHO in forum TIMBERReplies: 7Last Post: 14th September 2009, 09:55 PM -
Toy locomotive
By Andy Mac in forum WOODWORK PICSReplies: 13Last Post: 27th January 2007, 09:48 AM
