

 Thanks: 0
 Likes: 0
 Needs Pictures: 0
 Picture(s) thanks: 0
Results 1 to 15 of 29
Thread: Lapping the backs of blades
-
6th January 2007, 01:15 PM #1
 Be inspired. Be creative. Be bold.


- Join Date
- Apr 2001
- Location
- Perth
- Posts
- 10,820
 Lapping the backs of blades
This topic keeps coming up with novices, so I thought it worth writing.
Whether it is a new or old chisel or plane blade, before it can be sharpened the back must first be flattened.
This is more critical with chisel blades than plane blades. Chisel blades must be flat at the back of the bevel since this area acts as a fence when paring. With plane blades one might take a short cut and use a micro backbevel (such as David Charlesworths "Ruler Trick". There is no short cut with chisels.
One of the problems facing some new owners of shiny new chisels is that the polishing process dubs the side edges of the blade. The effect is to cause a slight curve at the edge that runs all the full length of the blade, and ends at the bevel edge. This effectively reduces the cutting width of the blade. The diagram below will illustrate this effect.
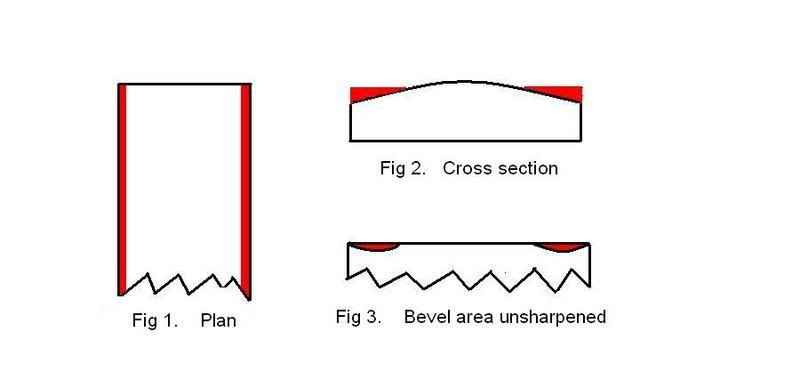
In Figure 1 the red area represents the rounded edges looking down at the back of the blade. In Figure 2 this area can be seen again in the cross section of the blade. Figure 3 represents the area that remains unsharpened since a flat honed bevel does not reach into the lower areas.
The target area for a polished, mirror finish is the 25mm wide section immediately behind the bevel. The remainder of the blade only need be flat.
The bottom line is that some chisel blades represent more work than others this could be the price of a pretty, polished blade. Moral of the story: purchase the cheaper, unpolished version if you have this choice.
Tools of the trade
There are a number of ways one might flatten the back of a blade. There are mechanical methods, such as using a disk sander or a belt sander. There are hand powered methods, such as Japanese waterstones and sandpaper. Of all these I believe that sandpaper on a flat substrate is the safest method. It is the method I have chosen to demonstrate. Note that this is the method I use others may prefer their own methods.
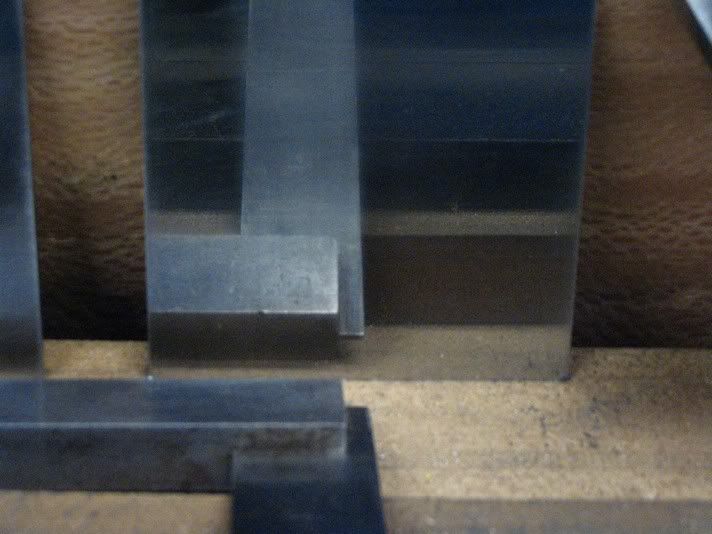
For ease of illustration I will demonstrate the flattening of a few plane blades.
My lapping surface consists of a 1m long by 200mm wide and 10mm thick sheet of float glass. This is attached to three layers of 19mm thick MDF. Contact your local glazier for an off cut. This is the cheapest option.
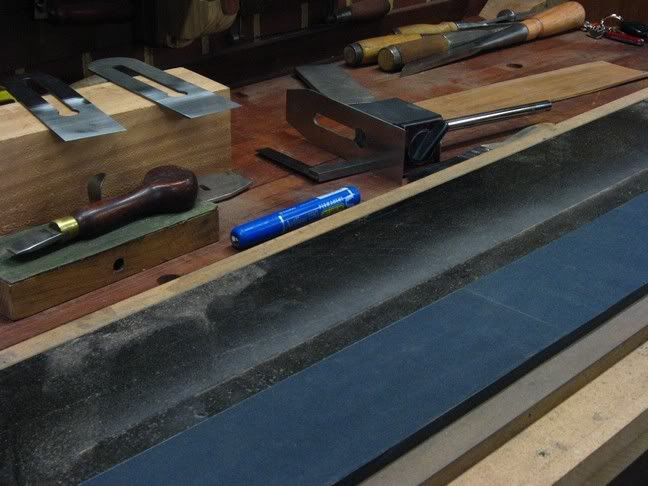
There are different types of sandpaper. I am no expert here. Norton has recently introduced a new aluminum oxide based paper, the 3X. Reports are very promising. Up till now the most durable I know of is Zirconium Oxide belt sander belts, but this is only available in 80 and 120 grits. Generally I use emery paper. This is the black wet-and-dry paper. It does not last as long as Zirconium Oxide but it is easier to obtain, cheaper, and durable enough for most applications. One sheet is usually sufficient for at least three plane blades.
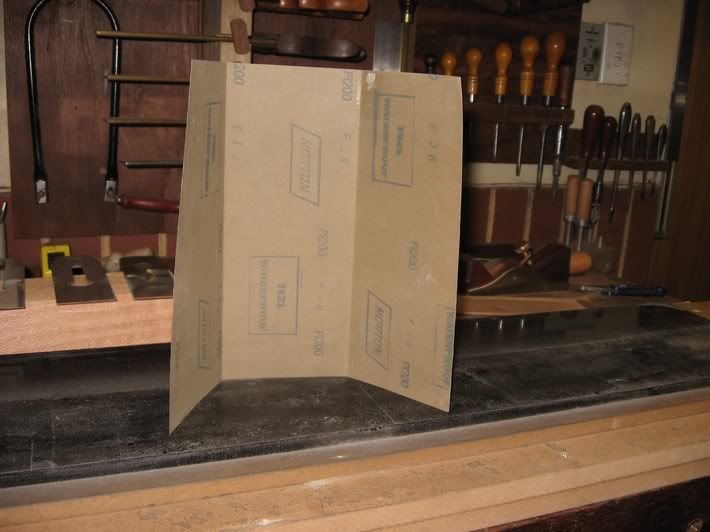
This is cut into thirds and contact glued to the glass surface. I use inexpensive poster spray contact glue. It sets quickly, is easy to pull free, and can be re-applied.
The sanding progression
As with honing the bevel, there is no point in jumping grits. Begin with the lowest that will create a flat surface. Move to the next level that will remove the scratches of the previous level. Continue along this path until the finished surface is both flat and mirror-like. I usually begin with 80 grit, and then move through 120, 240, 360, 600, and 1200 grit. At this point I move to polishing compounds.
Technique
The one absolutely essential criterion is that the blade is kept FLAT on the sandpaper. It must not be rocked as this will dub the side of the blade.
To make sure of keeping the blade flat, ones weight must be centered over the blade, pushing downward as you slide the blade sideways.
You can do this with fingertips on the back of the blade, or you can use a large magnet as a grip.
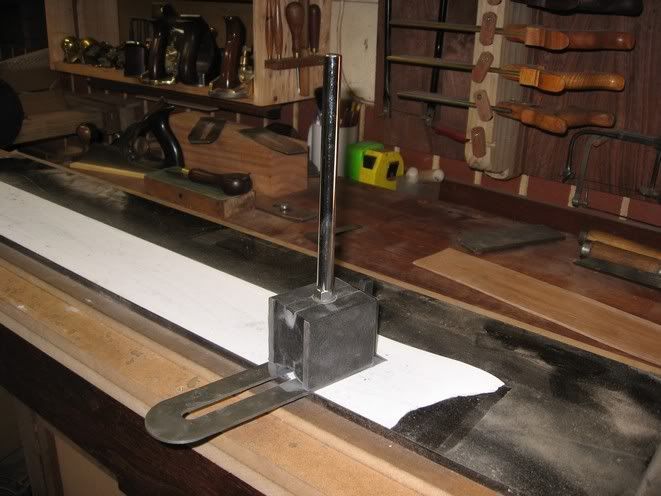
magnet
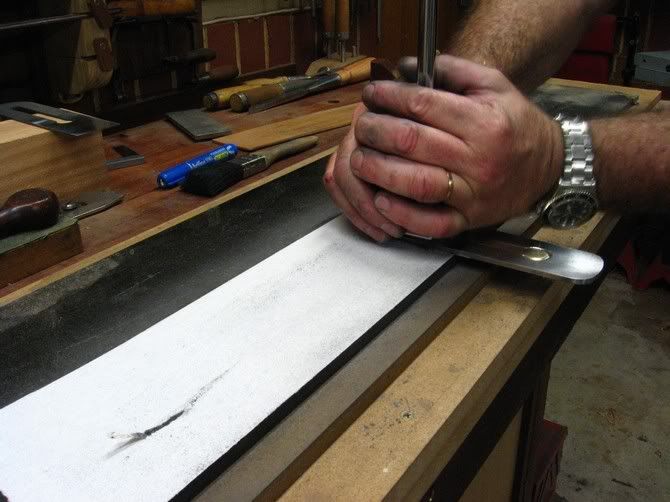
pressing down
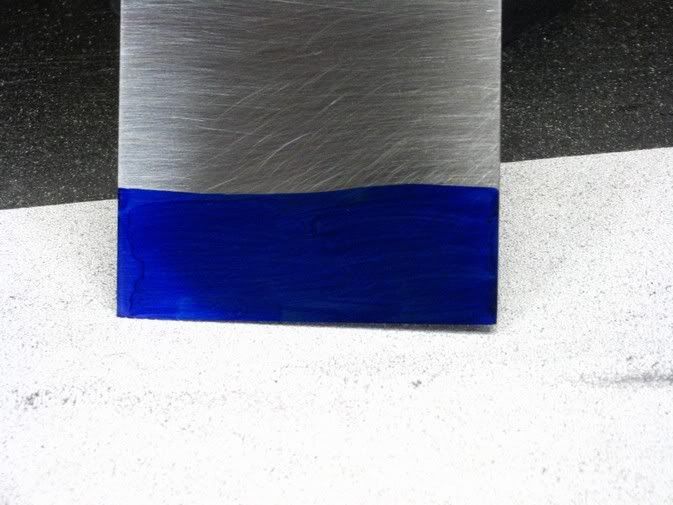
To keep track of progress it is advisable that one marks the area with a permanent marker. This will help one see where are the high and low spots.
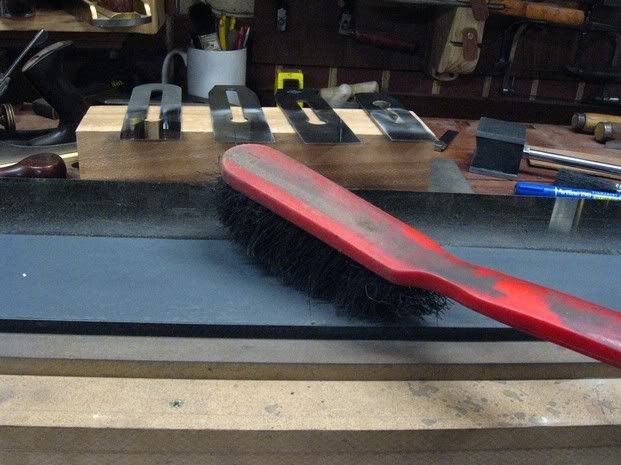
Make sure you keep the sandpaper free of swarf, the filings that are removed by the sandpaper. Do this frequently. It is the messy part of the process.
Progressive results
This is what a dubbed blade looks like. This needs to be removed completely before moving to the next grit. It may be necessary to drop back a grit is the one you are using is working too slowly. There is a trade off, however, in this regard since very coarse grits may leave deep scratches, which in turn take more time to remove.
These scratches looks like 120 grit. I didnt have anything coarser to hand.
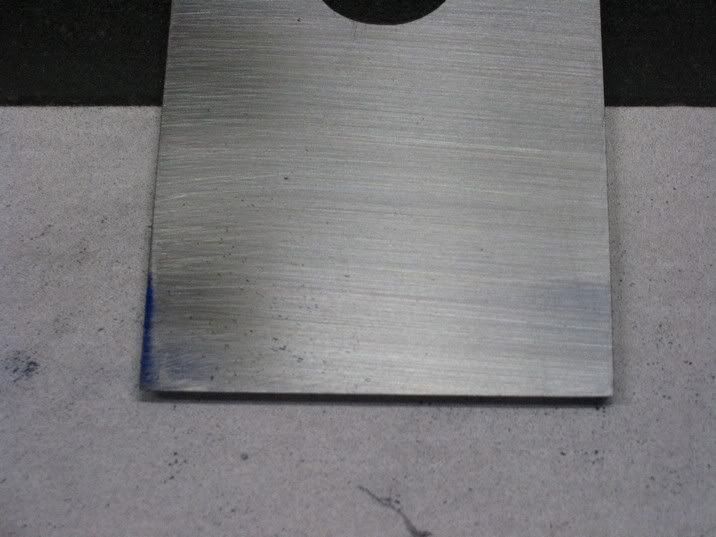
As one moves through the grits, so there should be an even replacement of the previous grit level. The following picture illustrates a blade at 240 grit.

After 1200 grit I move to a honing compound. I have tried Autosol, a metal polish, but found that this does not produce the shine that one gets with Veritas green rouge (in crayon form). The Veritas rouge has a rating of .5 microns.
One can scribble this directly on the 1200 grit. It works, but there is the possibility of grit contamination, which results in a slightly foggy surface.
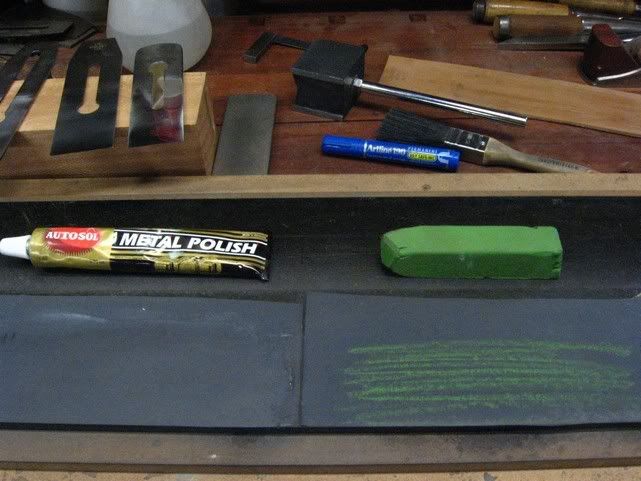
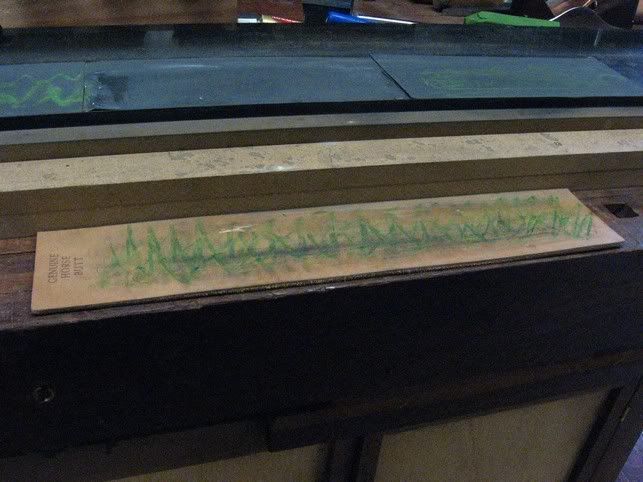
Better to either rub the crayon on a sheet of MDF or a hard leather strop (the one in the picture is the horse butt strop from Tools for Working Wood .
Some results
This is a blade at .5 microns.
and another just for fun

Derek Cohen
Perth, Australia
January 2007Visit www.inthewoodshop.com for tutorials on constructing handtools, handtool reviews, and my trials and tribulations with furniture builds.
-
6th January 2007 01:15 PM # ADSGoogle Adsense Advertisement
- Join Date
- Always
- Location
- Advertising world
- Posts
- Many
-
6th January 2007, 01:44 PM #2
Timber Hoarder
- Join Date
- Sep 2002
- Location
- Minbun, FNQ, Australia
- Age
- 66
- Posts
- 12,881
Good stuff Derek, greenie launched.
 Cliff.
If you find a post of mine that is missing a pic that you'd like to see, let me know & I'll see if I can find a copy.
-
6th January 2007, 02:39 PM #3
Hoarder of Timber
- Join Date
- Jun 2006
- Location
- East Warburton, Vic
- Age
- 54
- Posts
- 14,167
Good tute Derek, had the general idea on how to do it, but now I do know
Cheers
DJ
ADMIN
-
6th January 2007, 04:20 PM #4
Banned
- Join Date
- Apr 2005
- Location
- kyogle N.S.W
- Age
- 50
- Posts
- 4,844
Excellent thread. Can see how that be helpful for those new to chisels. No doubt many would stuff them up early with the wrong technique, and have to spend a great deal of time latter fixing the problem.
I like that magnet. I normally just do it with my hands. Have done it though in the past by just clamping on a wooden block, so there's something more comfortable to grab, over sharp blade sides.
With lapping backs it becomes apparent why jap chisels flattern better, with that hollow they have......easier to extend it entirely to the sides of the blade.
-
6th January 2007, 06:02 PM #5
Senior Member
- Join Date
- Jun 2005
- Location
- Hallidays Point - the land of blackbutt and swamp mahogany
- Posts
- 412
thanks Derek - great information, as usual.
I love the magnet trick - my hand gets so sore after doing plane backs - its a very uncomfortable grip normally.
now I just have to find a monster magnet on a handle... hmmm ... wonder where ...
jas"... it is better to succeed in originality than to fail in imitation" (Herman Melville's letters)
-
8th January 2007, 01:20 AM #6

Super Moderator
Dodgy brother
- Join Date
- May 2004
- Location
- Pakenham, outer Melb SE suburb, Vic
- Age
- 54
- Posts
- 4,158
Good thread, Derek
To those unaware, the magnet is a magnetic base, used for mounting a dial indicator. They have plenty of power, and the ability to "switch" off the magnetic force to enable easy positioning.
In my limited experience, I've found it useful to slightly vary the angle of attack when progressing from one grit to the next, I find it easier to see when the previous grit's scratch marks are gone.
BTW, Derek, it appears your plane iron has a frightening apparition somehow etched into the back...
Cheers................Sean
The beatings will continue until morale improves.
-
8th January 2007, 11:23 AM #7
Awaiting Email Confirmation
- Join Date
- Oct 2004
- Location
- East Doncaster, Vic
- Age
- 70
- Posts
- 745
Greenie for the magnet idea alone Derek, not to mention the rest of the tutorial. Always love your stuff and I have a few blades badly in need of just this attention. Very timely.
-
16th January 2007, 09:01 AM #8
Senior Member
- Join Date
- Jul 2006
- Location
- Ireland
- Posts
- 110
Does anybody ever find that the slightly finer of the coarse grit papers seems to cut faster than the coarser stuff. I've been using English Abrasives Liberty Green aluminium oxide roll for flattening the backs of chisel and plane blades and I'd swear that I can take more off more quickly with the 150/180 grits than the 80. The coarser grits just seem to scratch the blade whereas the 150 etc. seem to dig in more and scrape off the steel.
Derek how long would your flattening process take on a blade that's not too bad but is still outta whack at the back?
On the subject of paper I've found that English Abrasives tends to outdo the Norton stuff by a long way in speed of steel removal - the key test - can you get this stuff in Australia?
-
16th January 2007, 06:06 PM #9
Be inspired. Be creative. Be bold.
- Join Date
- Apr 2001
- Location
- Perth
- Posts
- 10,820
WodenDerek how long would your flattening process take on a blade that's not too bad but is still outta whack at the back?
On average, with the glass lapping board already set up with 4 sandpaper grits, then a single blade would take about 10 -15 minutes.
Regards from Perth
DerekVisit www.inthewoodshop.com for tutorials on constructing handtools, handtool reviews, and my trials and tribulations with furniture builds.
-
16th January 2007, 06:32 PM #10
Firewood Extraordinaire..
- Join Date
- Dec 2005
- Location
- Japan/ U.K.
- Age
- 47
- Posts
- 579
Excellent Thread Derek
really useful, and well set out.
I dont know about anyone else, but I for one, would like to see more of your techniques for maintaining handtools
Greenie on the way!
-
16th January 2007, 11:28 PM #11
Senior Member
- Join Date
- Jul 2006
- Location
- Ireland
- Posts
- 110
I agree, underused, Derek’s threads on hand tools are invaluable – particularly if like me you’re just a hobbyist with no on in the trade to learn from. And anyway, that would be difficult nowadays given the prevalence of power tools.
Derek, when you say your lapping board is set up with four grits does that mean you never go for a metre long strip of one grit. Do you always use four different grits glued in a row – moving to each one as you’ve lapped fully on the previous coarser grit?
Another concern I have about using sandpaper – though not enough to make me change to another method – is when you’ve lapped for a bit on the edge of the paper nearest the side of the board (and you) that if you suddenly go too far over on the paper with the blade you’ll run into ‘fresh‘ grit that hasn’t yet been worn and this will grind the blade more near its edge creating a sort of curved bevel on the back, if done too much.
Does anyone else get worried about this. Having said that, this could be due to me lapping in a simple linear ‘back and forwards‘ direction. If I rubbed in a circular pattern all the grit would get an even wear. But then this would involve me lapping too much of the back and thus taking much longer to do it. So, to avoid this problem I’ve taken to cutting very narrow strips of sandpaper that I can rub completely with my linear strokes to ensure there’s no bits of unworn paper left to catch me out. Plus, a cheapskate like me gets more use out of each sheet.
Finally, what does ‘greenie on the way’ or ‘greenie launched’ mean. I take it they're compliments but I’ve never heard them before coming to this forum. Are they particular to Australia – said he in a pompous sounding off-handish ‘one must scrutinise the natives’ mock upper-class English accent. 
-
16th January 2007, 11:48 PM #12
Be inspired. Be creative. Be bold.
- Join Date
- Apr 2001
- Location
- Perth
- Posts
- 10,820
Woden
Thanks for the kind words.
If I have one or two (max) blades to do, then I will glue 3 or 4 different grits to the glass at a time. Say, 120 - 180 - 240 , then 360 - 600 - 1200.
I will hone (half) the area of the sandpaper closest to the edge, then move to the other half section when the first wears down. Don't fret about uneven wear.
One point about the glue: I just spray a little poster contact glue onto the glass. Then a little onto the back of the sandpaper. Later you only need to do the fresh sandpaper, not the glass. It just peels on and off.
Other articles are here:
http://www.wkfinetools.com/contrib/dCohen/index.asp
Regards from Perth
DerekVisit www.inthewoodshop.com for tutorials on constructing handtools, handtool reviews, and my trials and tribulations with furniture builds.
-
17th January 2007, 01:20 AM #13
 GOLD MEMBER
- Join Date
- Nov 2005
- Location
- West Gippsland, Vic
- Age
- 72
- Posts
- 4,608
Hi Derek. Excellent tute mate.
One thing though. I started using craft adhesive to stick the paper to the float glass but soon gave it the flick. I found that on the finer grits little lumps caused by the glue balling up under the paper caused grooves in the edges during honing or the blade tore through the paper when it hit a larger ball. I was very sparing with the glue.
I found that squirting water on the glass and sliding the wet n dry around for a tic creates excellent hydrostatic adhesion.
With my sharpening setup i have the 1 metre strips of 180 and 240 grits clamped on each edge of my 32mm thick MDF bench. I then move to my float glass and the wet n dry from 360 up to 2000.
I'm also trialling plasterers finishing gauze for first hone - seems to do a reasonable job and doesn't slide all over the bench like sandpaper as it is double sided.
I assume the Austosol Metal Polish is for cosmetic purposes only or does it actually hone the steel?
And when using the green crayon on the strop do you have to be careful when the leather curls that you don't get round edges on the blades?
Cheers
MikeIf you never made a mistake, you never made anything!
-
17th January 2007, 01:34 AM #14
Be inspired. Be creative. Be bold.
- Join Date
- Apr 2001
- Location
- Perth
- Posts
- 10,820
Sheddy
Water works fine when using one sheet at a time, but it lacks the holding power for more than this (it dries too quickly).
The plasterboard/drywall mesh is something I have advocated for a few years now to flatten waterstones. I get 220 grit for this, and I hear of 180 grit. This is still too high to start the flattening process on steel. I will usually begin with 80 or 120 grit sandpaper.
Autosol is a very fine abrasive, in the same way that Veritas green rouge is. Some swear by Autosol. I have struggled to find a substrate for it that does not contaminate the process. It is easier to use Veritas rouge.
I have glued my horse butt leather strop to a MDF backing for the very reasons you mention - even though it is meant to be flat as is a double-sided strop.
Regards from Perth
DerekVisit www.inthewoodshop.com for tutorials on constructing handtools, handtool reviews, and my trials and tribulations with furniture builds.
-
17th January 2007, 07:34 AM #15
Moderate Moderater
- Join Date
- Feb 2006
- Location
- Lindfield N.S.W.
- Age
- 62
- Posts
- 5,643
Greenies are positive reputation - Reputation Originally Posted by woden
 Cheers
Jeremy
If it were done when 'tis done, then 'twere well it were done quickly


 Reply With Quote


Similar Threads
-
Delta TP400LS / 22-560 Thicknesser Blades
By Ranger in forum JOINTERS, MOULDERS, THICKNESSERS, ETCReplies: 11Last Post: 1st September 2008, 09:47 AM -
Carbide Tipped bandsaw blades
By Chris Vesper in forum BANDSAWSReplies: 13Last Post: 9th March 2008, 02:37 PM -
Putting wooden plane blades in Stanleys.
By JDarvall in forum HOMEMADE TOOLS AND JIGS ETC.Replies: 18Last Post: 30th November 2005, 08:29 AM -
problem lapping chisel backs
By Richie in forum HAND TOOLS - UNPOWEREDReplies: 7Last Post: 1st September 2005, 02:41 PM -
LV Mk II Honing Guide: Skew blades and further observations.
By derekcohen in forum SHARPENINGReplies: 2Last Post: 29th May 2005, 01:20 PM
