

 Thanks: 0
 Likes: 0
 Needs Pictures: 0
 Picture(s) thanks: 0
Results 1 to 11 of 11
Thread: Router Lift - the "How to" story
-
12th October 2007, 02:08 PM #1
 Deceased


- Join Date
- Jan 2006
- Location
- poland
- Age
- 78
- Posts
- 761
 Router Lift - the "How to" story
G'day mates
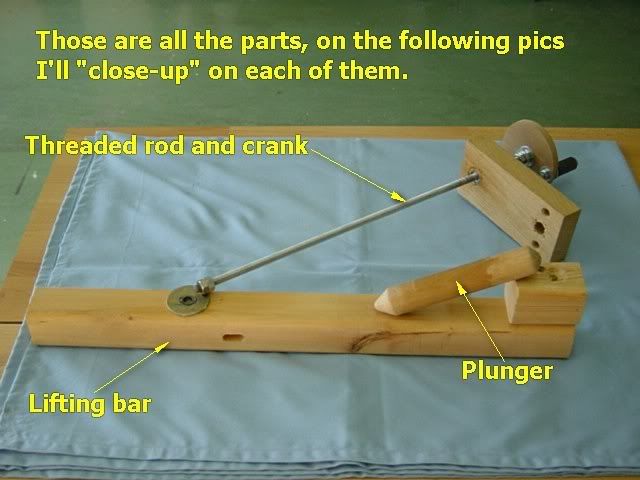
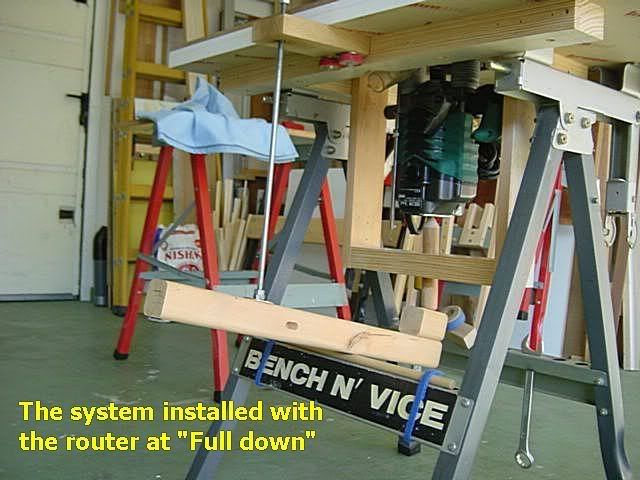
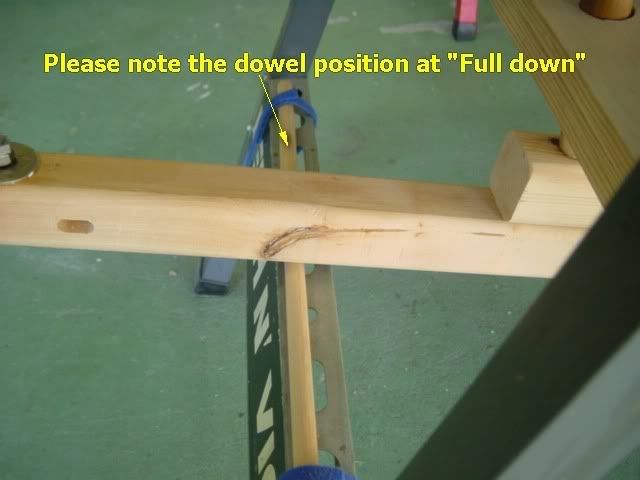
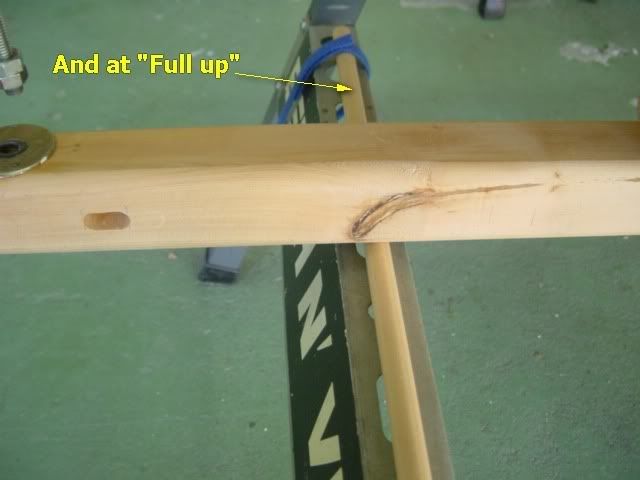
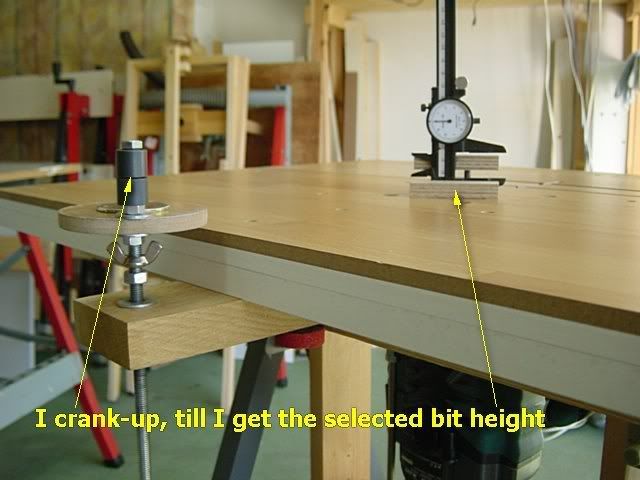
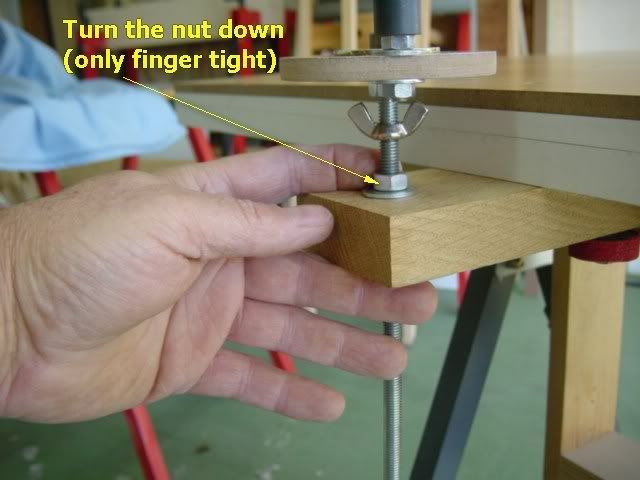
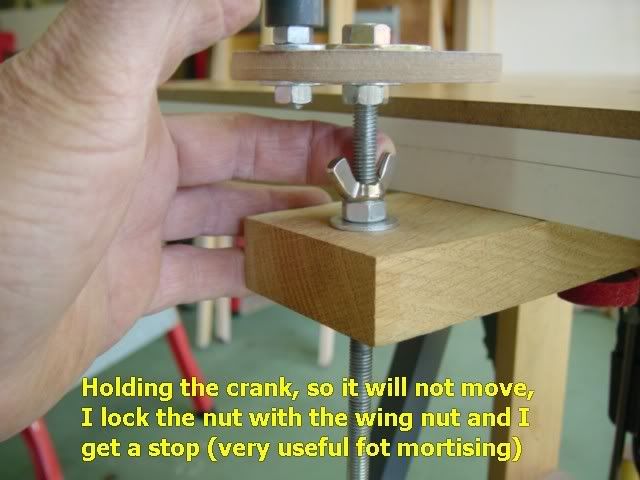
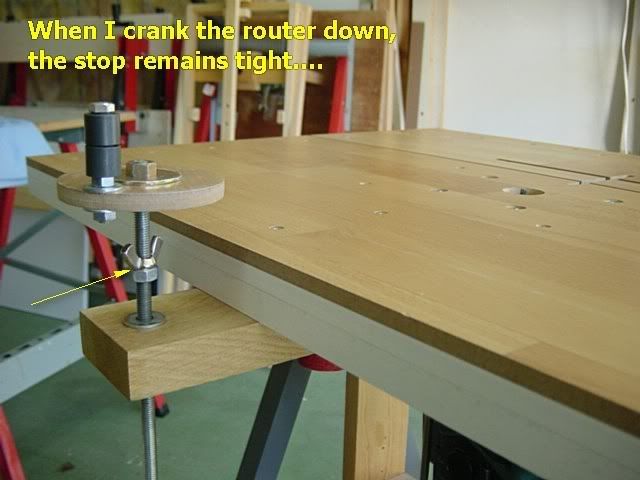
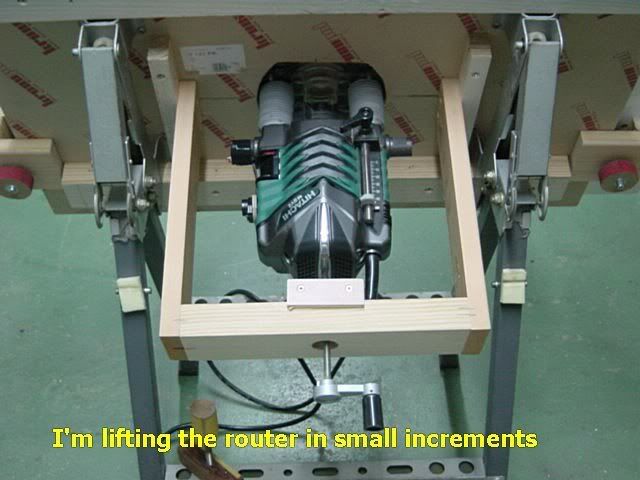
I would like to share with you the "How-to" of my router lift.
With a little bit of imagination ant modification it can be installed also on a "normal" router table...I think...
Regards
niki


-
12th October 2007 02:08 PM # ADSGoogle Adsense Advertisement
- Join Date
- Always
- Location
- Advertising world
- Age
- 2010
- Posts
- Many
-
12th October 2007, 02:11 PM #2
Deceased
- Join Date
- Jan 2006
- Location
- poland
- Age
- 78
- Posts
- 761

-
12th October 2007, 02:33 PM #3
GOLD MEMBER
- Join Date
- Jun 2007
- Location
- North Of The Boarder
- Age
- 68
- Posts
- 16,794
genius pure genius
Niki great thanks for that

like the way you photgrpah and point out the parts
easy to do and assemble and store away till needed.
-
12th October 2007, 03:53 PM #4
you're gunna need a tray
- Join Date
- Oct 2003
- Location
- Kempsey NSW
- Age
- 66
- Posts
- 1,140
Another stroke of genius.
Good for those of us who don't have the money to buy the commercial ones.
Greenie on the way.
Cheers
Jim
"I see dumb peope!"
-
13th October 2007, 04:30 AM #5
Deceased
- Join Date
- Jan 2006
- Location
- poland
- Age
- 78
- Posts
- 761
Thank you so much
Wheelinround
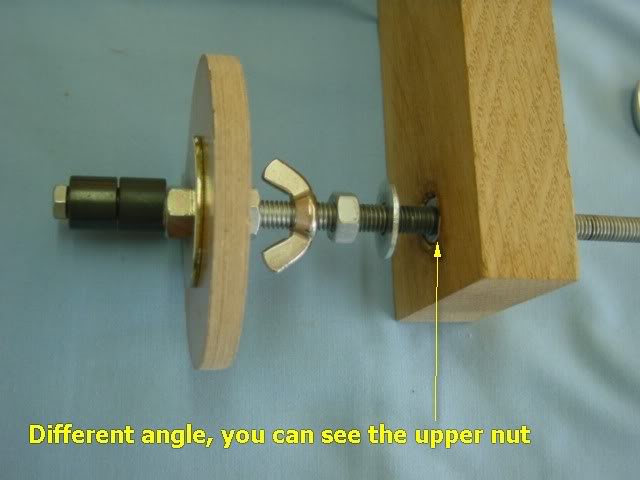
It can be adopted very easily also to a "Cabinet" router table...if you make the drawer under the router compartment shorter...or "delete" it and install a cross-bar as a support for the "lifting bar"
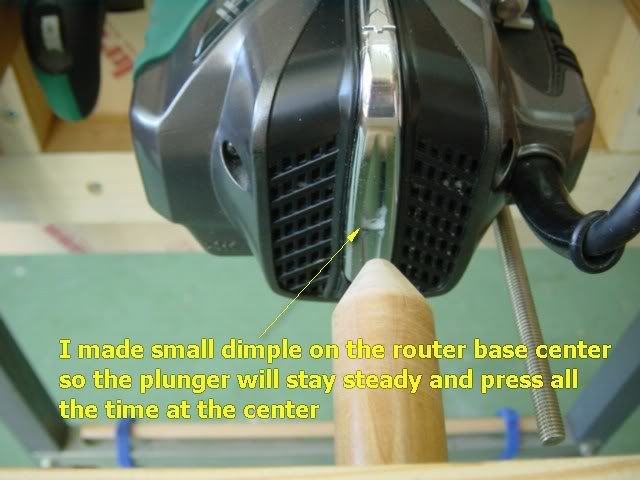
If you don't like the idea of making a dimple on the router back-cover, you can glue a 20~30mm diameter "knob" and make the dimple on the knob....It will not effect the motor cooling...I opened the back-cover and noticed that some 30mm (the motor shaft) are actually blocked.
Jim
Thanks for the greenie
The problem that I see with the commercial one is that, it's too close to the router bit and can be "on the way" for some operations....oh, yes, also the $300 that can buy me another (good) router.
Best Regards
niki
-
22nd October 2007, 11:15 PM #6
GOLD MEMBER
- Join Date
- Mar 2007
- Location
- Munruben, Qld
- Age
- 83
- Posts
- 10,027
I have bookmarked this thread so I can come back to it later. great detail and graphic display as always niki. Look forward to viewing your threads.
Reality is no background music.
Cheers John
-
23rd October 2007, 12:17 AM #7
Senior Member
- Join Date
- Sep 2007
- Location
- Bassendean
- Posts
- 167
Hi looks great, nice job. I just love your home made knobs I think I will be using that idea. I have included a photo of my home made router lift.
-
23rd October 2007, 01:33 AM #8
Deceased
- Join Date
- Jan 2006
- Location
- poland
- Age
- 78
- Posts
- 761
Thank you so much John and Jerry
Jerry
I made the same but of wood.
You just have to....well, if you made it of metal, I'm sure that I don't have to tell you what to do...Very nice work Jerry.
Cheers
niki
-
23rd October 2007, 03:16 AM #9
Senior Member
- Join Date
- Mar 2004
- Location
- Darling Downs West Aus
- Age
- 57
- Posts
- 460
I like this Niki.
will see if I can make it work on my setup.
do you have stability issues with the foldup table?____________________________
Craig
Saving a tree from woodchippng is like peeing in the pool;
you get a warm feeling for a while but nobody notices.
-
23rd October 2007, 03:34 AM #10
Deceased
- Join Date
- Jan 2006
- Location
- poland
- Age
- 78
- Posts
- 761
Thank you Craig
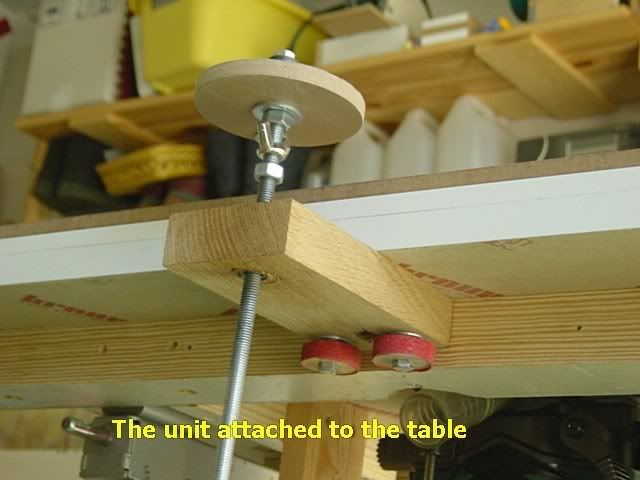
I think that it can be made even on the normal "cabinet router table" by modifying the drawer below the router compartment (or "deleting" it).
This workbench is a little bit different than the normal one (and cost me $50 in Japan)...
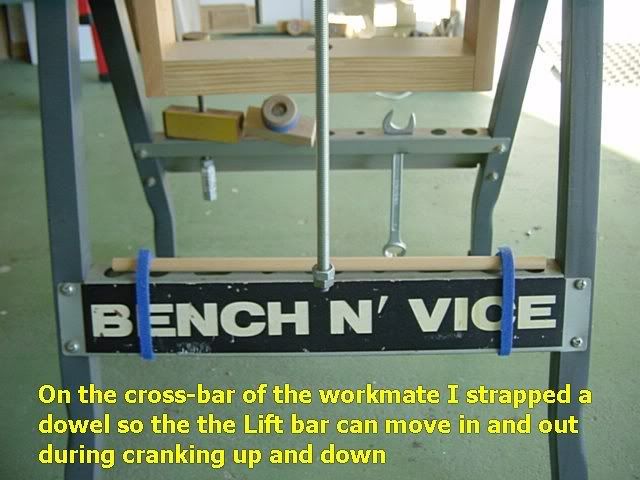
The top, can fold separately of the legs so, the legs can stay spread, and I can lift or fold the top say, for bit change, without any effect on the legs position (you can see it on some of my posts)
It is very stable but with the time I noticed that sometimes it was sliding on the floor so, I glued my "Trade mark" - meaning - sanding paper on the plastic parts and, "problem solved".
Regards
niki
-
15th November 2008, 04:00 AM #11
New Member
- Join Date
- Nov 2008
- Location
- home
- Posts
- 1
omg this is really cool


 Reply With Quote


Similar Threads
-
Quick Q: Getting started with my first router
By Stickmangumby in forum ROUTING FORUMReplies: 25Last Post: 2nd February 2008, 04:17 AM -
Exacta router lift and Rout-R-lift
By zelk in forum ROUTING FORUMReplies: 8Last Post: 14th November 2007, 11:27 PM -
Need advice about GMC router and table.
By strangerep in forum ROUTING FORUMReplies: 36Last Post: 20th April 2007, 09:23 PM -
Router thicknessing-design & ruminations
By scooter in forum HOMEMADE TOOLS AND JIGS ETC.Replies: 8Last Post: 4th July 2005, 07:06 PM -
Had A Great Triton Day! (Short Story)
By Dean in forum TRITON / GMCReplies: 3Last Post: 6th November 2002, 02:08 PM
