

 Thanks: 0
 Likes: 0
 Needs Pictures: 0
 Picture(s) thanks: 0
Results 1 to 8 of 8
-
3rd March 2010, 08:54 PM #1
 Member


- Join Date
- Apr 2009
- Location
- New Zealand
- Posts
- 71
 Google Sketchup cabinet plan - suggestions welcome
Hi all,
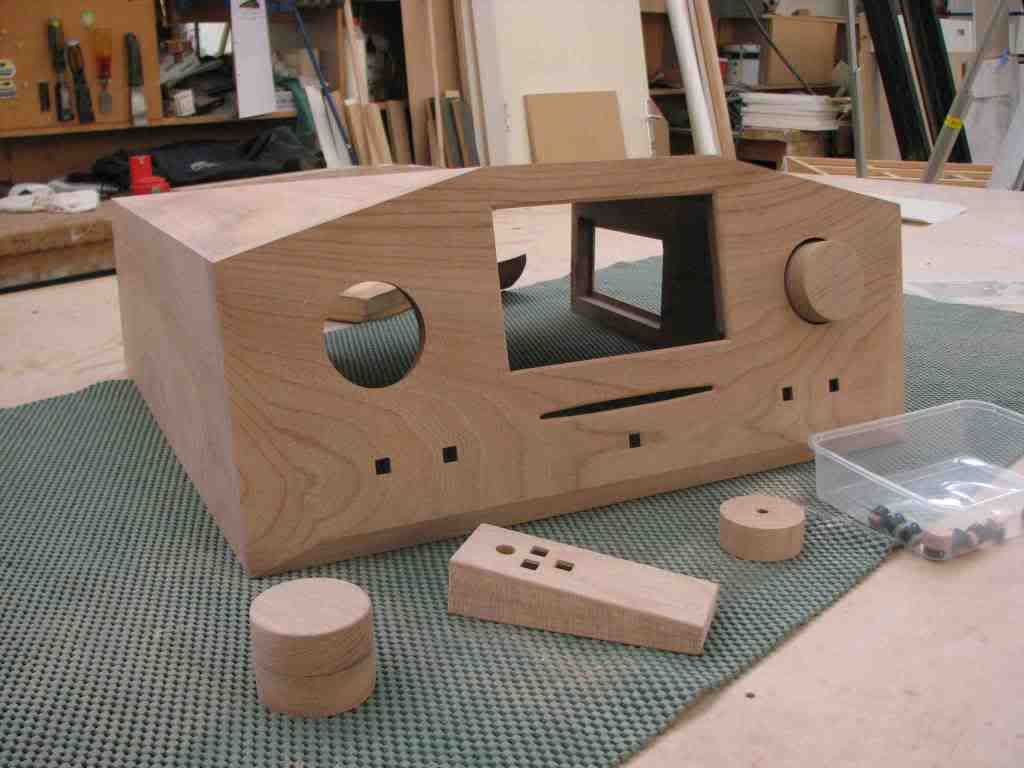
I have been working on a Mp3 player Jukebox lately, have almost finished the front panel (in English Elm) and intend to build a solid wood shell (again of English Elm) to go top and sides over the computer this project is based around. However, as you can see, there are just a few complex compound mitres to do, and I will be challenged to get these calculated and cut correctly. Sketchup does help here, but I welcome any suggestions or advice regarding the best approach to attacking this particular job.
Link here:
Hifi Jukebox by Johnnz - Google 3D Warehouse
(Unfortunatly the surface material (paint) went to the back of the front panel so the model is a bit wrong to look at but the shell is unaffected by the glitch.)
-
3rd March 2010 08:54 PM # ADSGoogle Adsense Advertisement
- Join Date
- Always
- Location
- Advertising world
- Posts
- Many
-
5th March 2010, 09:35 PM #2
Golden Member
- Join Date
- Oct 2006
- Location
- Dandenong Ranges
- Age
- 47
- Posts
- 816
Welcome to the forums John.
Interesting design, certainly some challenging angles to work on there. Does sketchup give you the ability to measure the angles?
Cheers,
Af.___________________________________________________________
"The things I make may be for others, but how I make them is for me."
-
6th March 2010, 08:02 AM #3
Member
- Join Date
- Apr 2009
- Location
- New Zealand
- Posts
- 71
It took me a good couple of hours trying to find out how to do so (starting off by trying various roundabout methods that failed to work), but I have eventually been able to get measurements of the "dihedral angle" which will in turn give me the saw blade angle (there is a little trick when using the protractor tool in Sketchup that I learnt after finding this website ).
It was easy to find the surface measurements and their face angles.
Got to dress up some more timber and start cutting now! (better practise first on some mdf though of course )
)
-
15th April 2010, 05:07 PM #4
Member
- Join Date
- Apr 2009
- Location
- New Zealand
- Posts
- 71
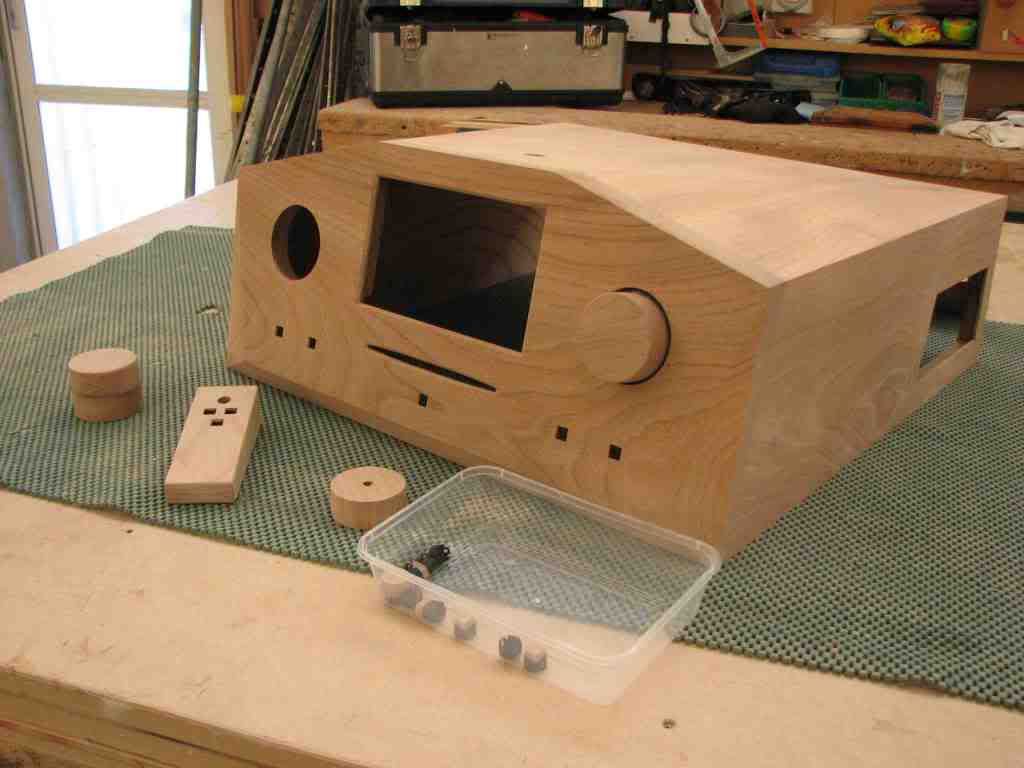
I have now finished construction of this project in solid English Elm. Am trying to decide now what stain if any to use under a lacquer finish. If I don't use any stain and just go for a clear coat (which does look great on the samples I have had done so far) I am lead to believe that the grain is likely to fade in the sunlight over time? 'Unfortunately' (for purposes of this item) the living room where I will use this jukebox has all day sun so will be hard to avoid exposure.
-
15th April 2010, 05:37 PM #5
GOLD MEMBER
- Join Date
- Feb 2008
- Location
- Northern Sydney
- Age
- 49
- Posts
- 2,764
One trick I have used is to rule where the line would be on both sides - can be done with measurements, not angles. You can get the measurements out of Sketchup pretty easily. Cut it off square and then use a plane to get it down to the right angle.
Used it for making the dormer windows on my daughters dolls house. Where the angled window surrounds met the angled roof. Worked pretty well
Cheers,
Dave
-
21st April 2010, 07:18 PM #6
Member
- Join Date
- Apr 2009
- Location
- New Zealand
- Posts
- 71
Just done a final sand and edge/corner rendering prior to getting lacquer sprayed on next door. Took a few pictures to document the progress. , I am thinking to go with a clear finish of lacquer and not use any stain. Although I am still worried about the wood fading, I didn't like the look of stains after having a few samples done for me, so will just have to find a place in the living room that is out of direct sunlight.
-
21st April 2010, 08:36 PM #7
GOLD MEMBER
- Join Date
- Feb 2008
- Location
- Northern Sydney
- Age
- 49
- Posts
- 2,764
Lookin pretty schmick there

How did you go doing the angles in the end?
Cheers,
Dave
-
23rd April 2010, 05:49 PM #8
Member
- Join Date
- Apr 2009
- Location
- New Zealand
- Posts
- 71
Thanks, got the dihedral angle through protractor feature in Google Sketchup. Then I could halve the angle to set the saw blade angle, and back screwed the piece of Elm I was working on to a rectangular piece of MDF, using a rafter square to make sure that the line I was cutting was exactly perpendicular to the saw fence (so cutting line was parallel to saw).
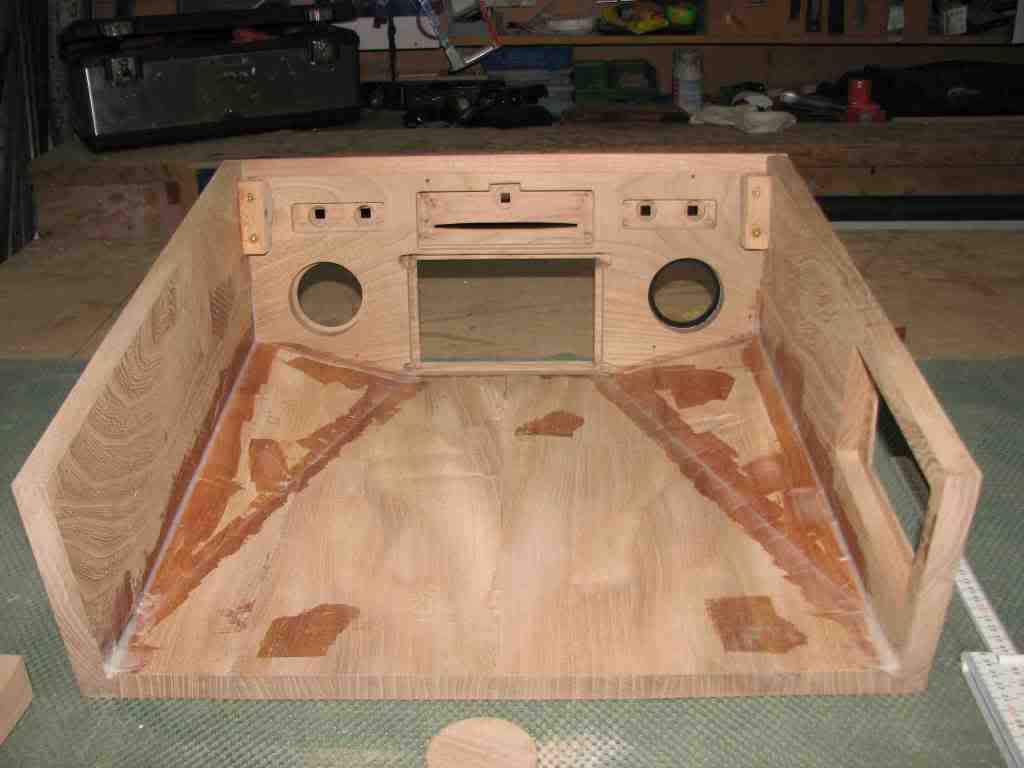
So there are quite a few screw holes on the inside of the finished case now! It was a time consuming process screwing and unscrewing and I normally took two passes close to the line (rechecking how parallel the cut was to the line) before making the final pass right on the line. I used epoxy to glue the pieces together (without any biscuits) and used transparent fiberglass reinforced tape on the outside of the join (so I could see how well it pulled up) and then pulled each piece together on the inside with more tape while the glue set. The front face was glued on last and I used three biscuits on each top face to align it correctly and help minimise final sanding. Since both sides of the front face are chamfered I couldn't use biscuits so instead screwed blocks into each side in the corners.

 Reply With Quote
Similar Threads
-
google sketchup
By halludba in forum WOODWORK - GENERALReplies: 4Last Post: 27th February 2009, 02:43 AM -
Google Sketchup for Dummies
By Rocker in forum DESIGN & DESIGNING / GOOGLE SKETCHUPReplies: 10Last Post: 30th August 2008, 08:23 PM -
Components for Google SketchUp
By Driver in forum DESIGN & DESIGNING / GOOGLE SKETCHUPReplies: 6Last Post: 16th May 2006, 08:05 PM
