

 Thanks: 0
 Likes: 0
 Needs Pictures: 0
 Picture(s) thanks: 0
Results 1 to 12 of 12
Thread: end grain chopping board
-
20th November 2007, 08:55 PM #1
 Senior Member


- Join Date
- Jan 2006
- Location
- sydney
- Posts
- 345
 end grain chopping board
Got bored lately - no time no money and very little material left so as I was going through my scrap bin looking for suitable firewood to take camping I thought to myself, "there's some nice looking stuff here, if only I could use the short lengths for something"...
So I started on an end grain chopping board. I got the method from the wood whisperer on you tube and adapted some of it.
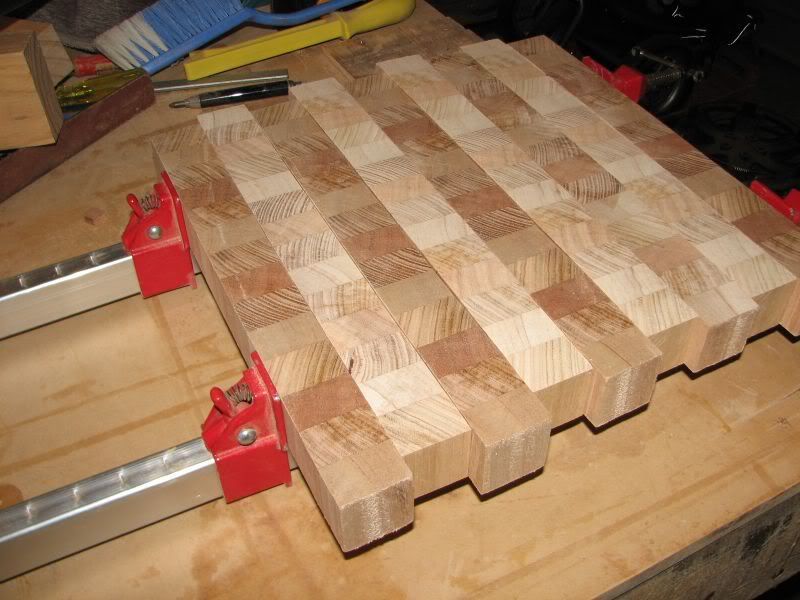
Here's some pics: The wood used is Alpine Ash and Phillipine Mahogany (just a really good version of Pacific Maple, tighter, denser and more even than Meranti
Pre Gluing
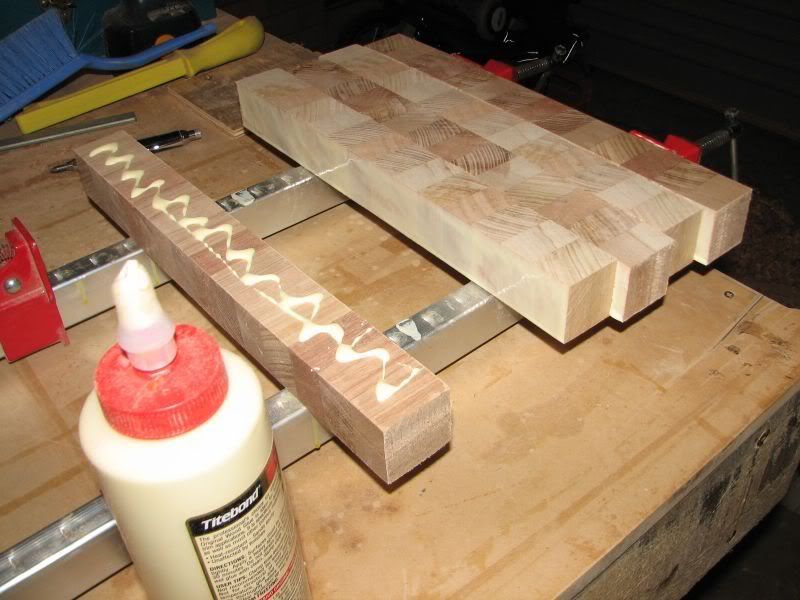
Glue up
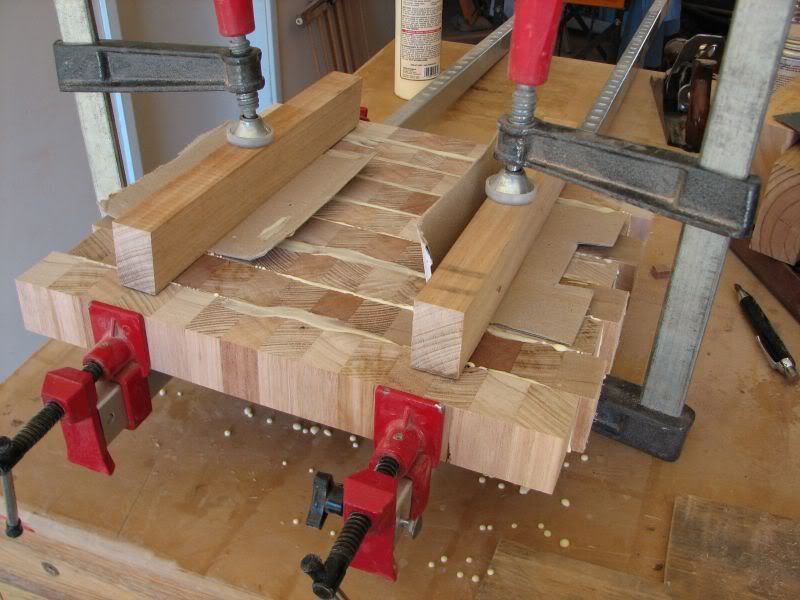
Clamping together & clamping flat at the same time
I love Titebond - after 40 minutes of clamping you can start sawing/sanding/planing/routing and it's stronger than any white PVA I've used so far.
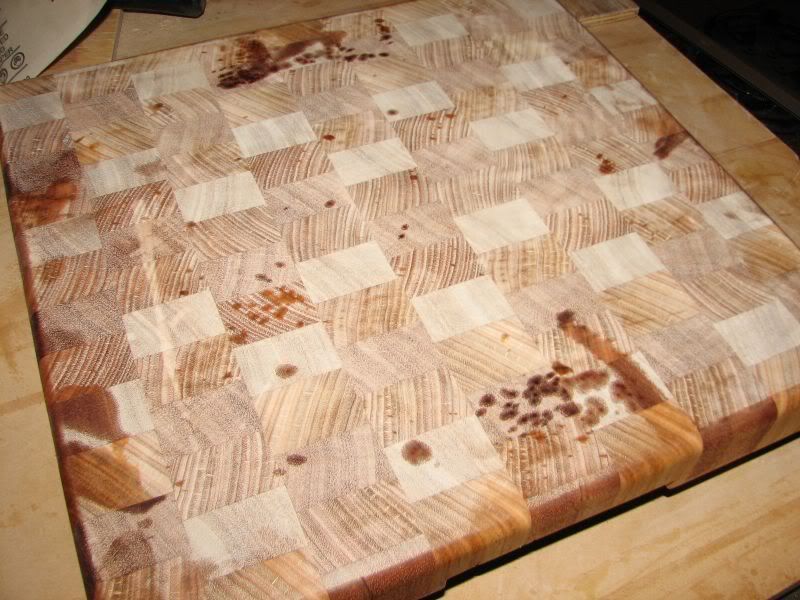
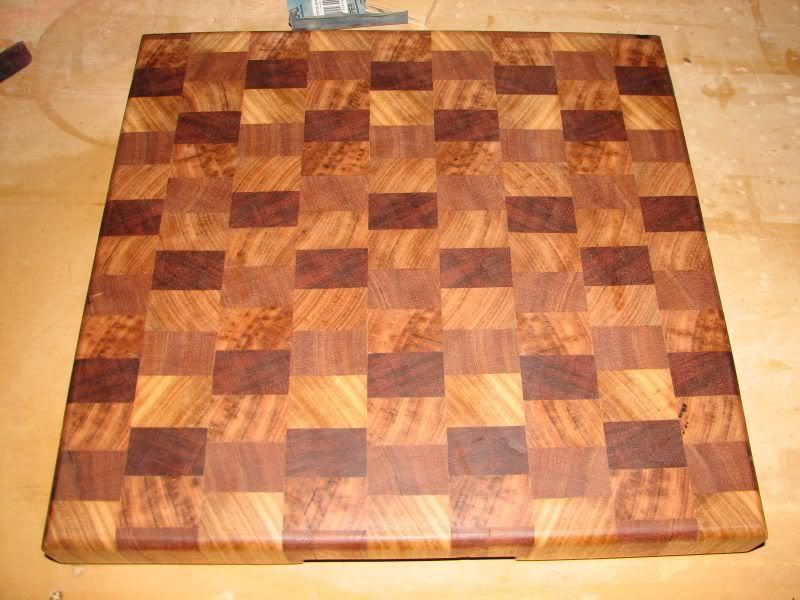
After level & and final sanding with first few coats of Organoil applied - this board will drink up about 250ml of finish before it's satisfied
This is the underside where I have routed out handles - it's sanded to 240grit the top is sanded to 320 grit, because it's end grain you don't need to sand it up as fine as you normally would

after a few really thick coats you can see the finish seeping through to the other side, now I leave it to dry before doing the top.
-
20th November 2007 08:55 PM # ADSGoogle Adsense Advertisement
- Join Date
- Always
- Location
- Advertising world
- Posts
- Many
-
21st November 2007, 12:31 AM #2
You've got to risk it to get the biscuit
- Join Date
- Jan 2006
- Location
- Canberra
- Age
- 32
- Posts
- 4,195
looks great so far
 S T I R L O
-
21st November 2007, 07:54 AM #3
GOLD MEMBER
- Join Date
- Aug 2004
- Location
- Coffs Harbour
- Posts
- 2,018
I like the brickwork pattern.
There could be a few Christmas present in the offcut bin!Scally
__________________________________________
The ark was built by an amateur
the titanic was built by professionals
-
21st November 2007, 09:17 AM #4
GOLD MEMBER
- Join Date
- Nov 2003
- Location
- Sydney
- Age
- 53
- Posts
- 8,879
This is a great thread for a lot of people. It demonstrates how an end grain chopping board is made. (I used to wonder how do they make lots of small blocks that fix perfectly together. Silly me.
 ). Well done missionaryman.
I would use titebond 2 instead of titebond 1 though because titebond 1 has no water resistance.Visit my website at www.myFineWoodWork.com
-
21st November 2007, 09:20 AM #5
.
- Join Date
- Feb 2006
- Location
- Perth
- Posts
- 27,795
Nice work and nice pics too!
-
21st November 2007, 10:06 AM #6
Yank Down Under
- Join Date
- Jun 2007
- Location
- Melbourne, VIC
- Posts
- 395
Looks great. I've been wanting to do one of these for a while.
two questions?
1. did you pay any particular attention to grain orientation or does it matter?
2.What other OZ timber would be good for this, I mean is any native particularly toxic? I've heard Lacewood is good for this as well.Do nothing, stay ahead
-
21st November 2007, 12:45 PM #7
Work In Progress
- Join Date
- Jun 2007
- Location
- Brisbane, Qld
- Age
- 65
- Posts
- 46
missionaryman....great work. Thanks for the step by step pics.
-
21st November 2007, 07:35 PM #8
Senior Member
- Join Date
- Jan 2006
- Location
- sydney
- Posts
- 345
thanks for the feedback guys. I'll post a pic of the finished product.
Wongo - as unethical as this is, I'm selling this one to buy some Titebond II for the next one...
As to grain orientation - I paid no attention at all and in fact if you look closely you'll notice that the strips weren't the same size either, with this type of thing random is best.
Eli - in regards to which species just google it to make sure it's not toxic, I discovered that Ash not a good one because it splits badly when you run the roundover bit across it.
-
21st November 2007, 08:00 PM #9
Skwair2rownd
- Join Date
- Nov 2007
- Location
- Dundowran Beach
- Age
- 76
- Posts
- 19,922
 Chopping block.
Grey twerk


Now go to all the local butchers and convince them they need to buy your version.
-
21st November 2007, 11:47 PM #10
Intermediate Member
- Join Date
- Nov 2007
- Location
- Victoria
- Age
- 33
- Posts
- 32
i still don't quite follow how you got to that first picture.
Are each one of those strips that are pictured where you are glueing, each small pieces that you have glued together into a strip or is there an easier way of doing it??
-
22nd November 2007, 07:16 AM #11
Senior Member
- Join Date
- Jan 2006
- Location
- sydney
- Posts
- 345
you start by laminating your pieces together side by side, like you were making a bench top then after level sanding it you cut it into strips on the crosscut sled or radial arm saw see this picture for example: Originally Posted by kellya01


that then gets you to the stage of my first picture ready for glue up
check out these videos for a great demonstration:
[ame="http://www.youtube.com/watch?v=5B8oAJs3sik"]YouTube - Episode 7- "A Cut Above" (Part 1)[/ame]
[ame="http://www.youtube.com/watch?v=0YcF1Ne2GlI"]YouTube - Episode 7- "A Cut Above" (Part 2)[/ame]
-
24th November 2007, 06:54 AM #12
Senior Member
- Join Date
- Jan 2006
- Location
- sydney
- Posts
- 345
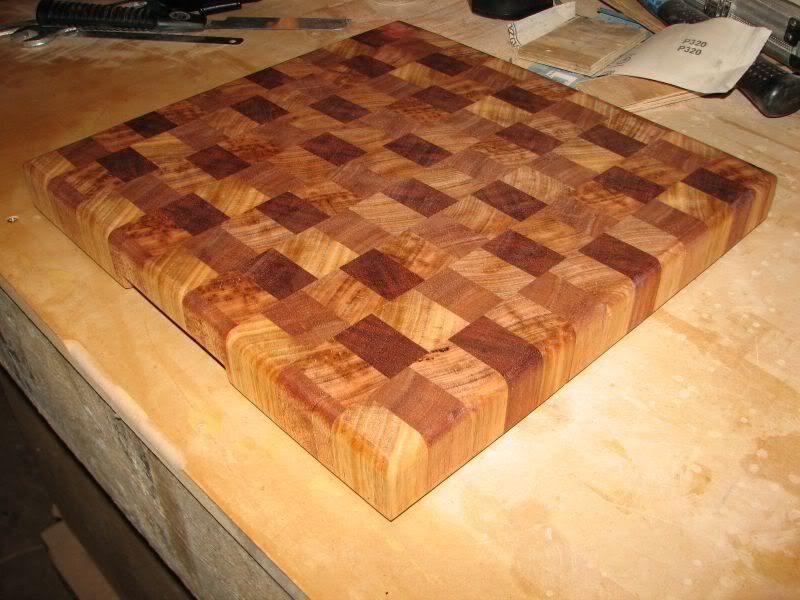
Its finished now
Here are some pics of the completed chopping board

 Reply With Quote


Similar Threads
-
filling a hole in end grain
By famreeks in forum WOODWORK - GENERALReplies: 5Last Post: 19th February 2007, 09:04 PM -
I give up - my Triton won't cut straight. Anyone work out what's wrong from this pic
By toddles in forum TRITON / GMCReplies: 24Last Post: 8th August 2006, 01:54 AM -
sealing the end grain
By Kev Y. in forum TIMBERReplies: 1Last Post: 4th February 2002, 11:02 PM -
Favorite Tool for End Grain Hollowing?
By Marshall Gorrow in forum WOODTURNING - GENERALReplies: 8Last Post: 12th June 1999, 02:32 PM
