

 Thanks: 0
 Likes: 0
 Needs Pictures: 0
 Picture(s) thanks: 0
Results 1 to 15 of 26
Thread: A Pair of End Tables
-
6th March 2007, 03:21 AM #1
 Be inspired. Be creative. Be bold.


- Join Date
- Apr 2001
- Location
- Perth
- Posts
- 10,828
 A Pair of End Tables
The request for a pair of end tables came from my wife, who had pointed out that we needed something on which to rest table lamps alongside the couches in the livingroom. We both enjoy furniture with simple, clean lines and so we agreed on a set of half round tables in Jarrah and Tasmanian Oak.
This is what I built ..
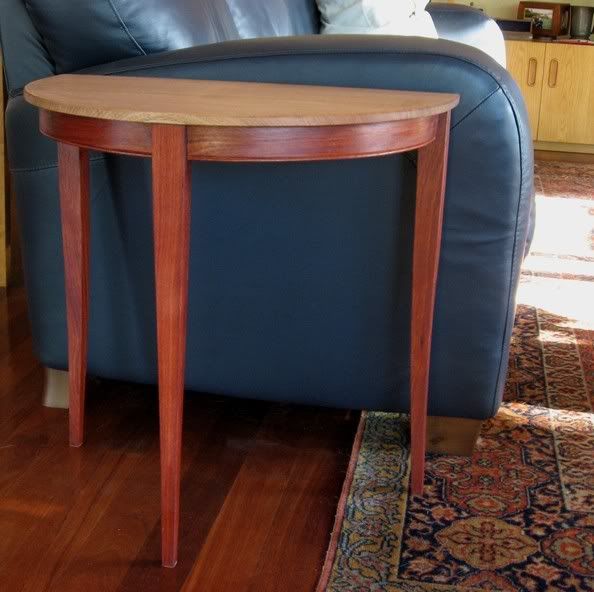
There were a number of interesting construction aspects, such as bending the aprons, shaping the legs, and cutting the joints.
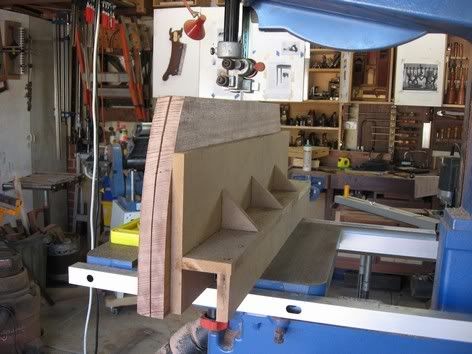
Bending the aprons
I chose to laminate the curve by gluing 2mm wide Jarrah strips around a form. These were cut on the bandsaw to 5mm and then smoothed and reduced on the thicknesser.
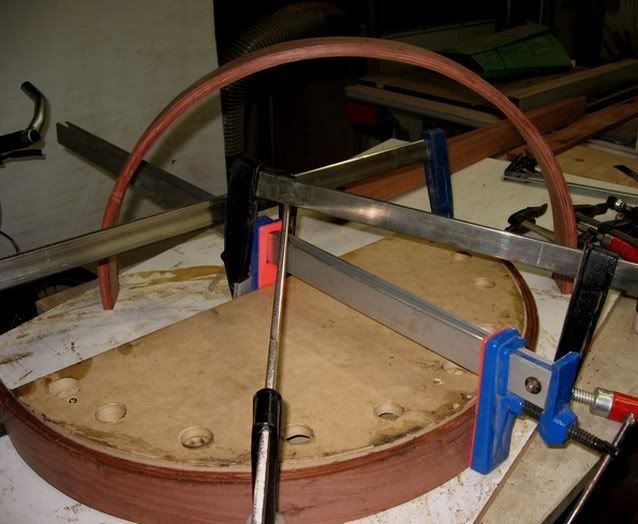
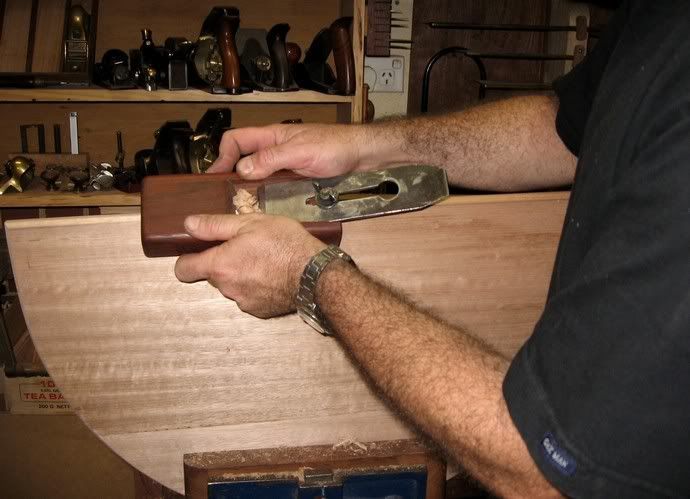
After glue-up, the lengths were hand planned to final size and cleaned up with card scrapers.
Beading the apron
My preference for hand tools really began to assert itself at this stage in the form of a scratch stock that began life as a marking gauge.
This was used to create this bead along the apron
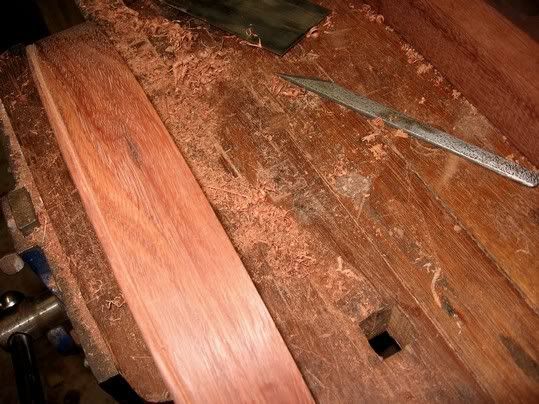
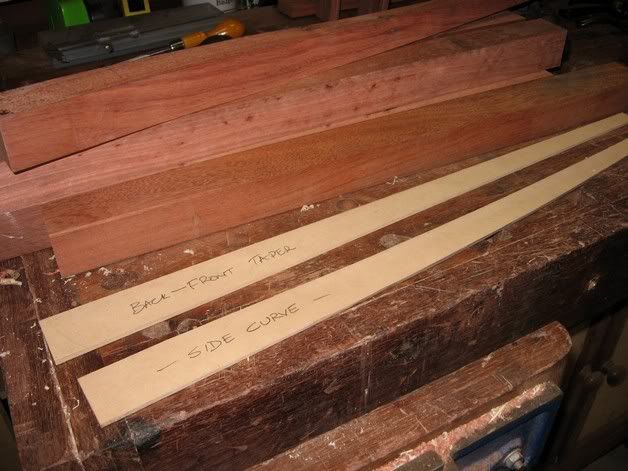
Shaping the legs
The legs are curved as well as taper, and this provided the opportunity to get the HNT Gordon spokeshaves I had for review a good run.
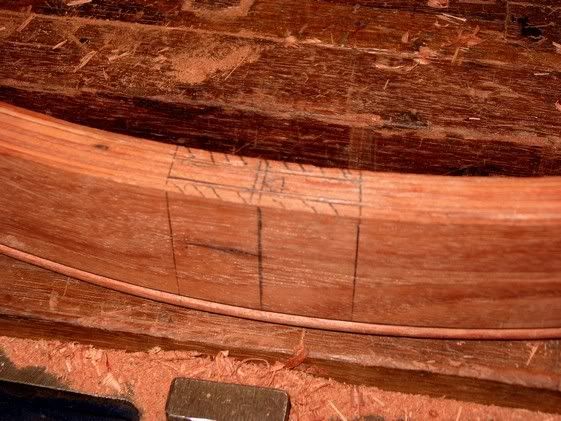
Each table has three legs, all identical, and I began by cutting two templates out of 1/8 MDF one for the curve and one for the taper.
Here you can see the legs marked out.
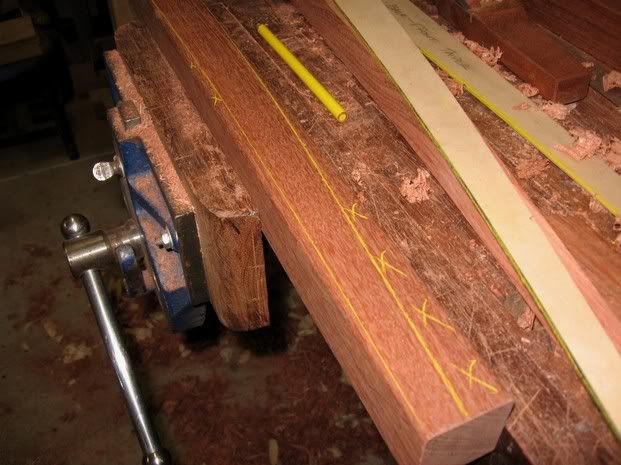
This was then bandsawed close to the line, at which point the spokeshaves came out to plane them to the lfinal dimension.
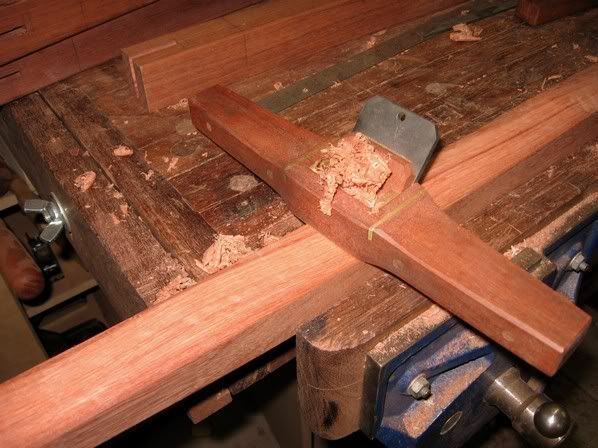
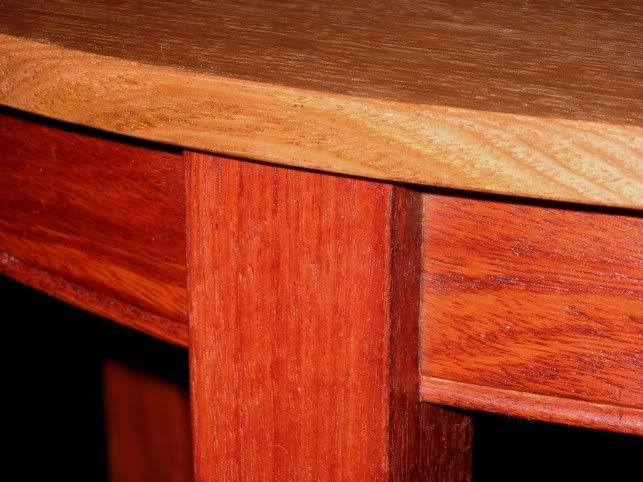
Here is a close up of the end result.
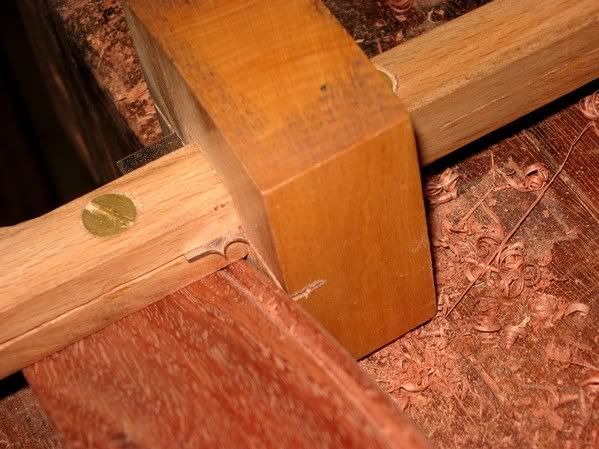
Joints
There were two basic joints the side legs used mortice-and-tenons, while the center leg used a bridle joint.
The first step was to cut the mortices. The Jarrah was pretty hard, so I put away the mortice chisels and used the router instead. The ends were squared up.
Next came the tenons. At least here I could use handtools again. Making sure all the ends and edges of the stretcher were square, the baseline was marked out with a cutting gauge, and then a mortice gauge was used to mark out the tenon.
The tenons were cut as close to the line as possible. Sometimes I get lucky and they fit first time.
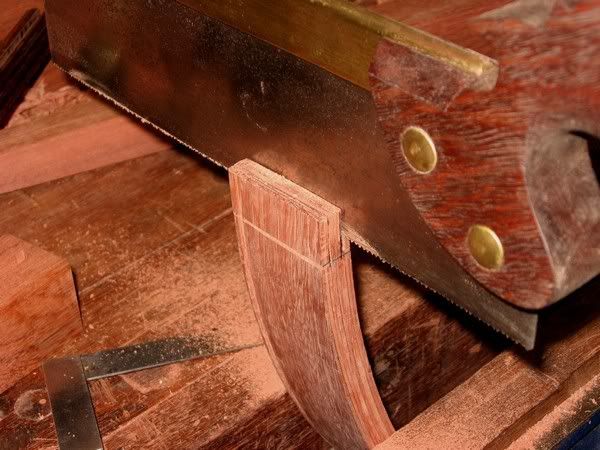
The shoulders were cut away
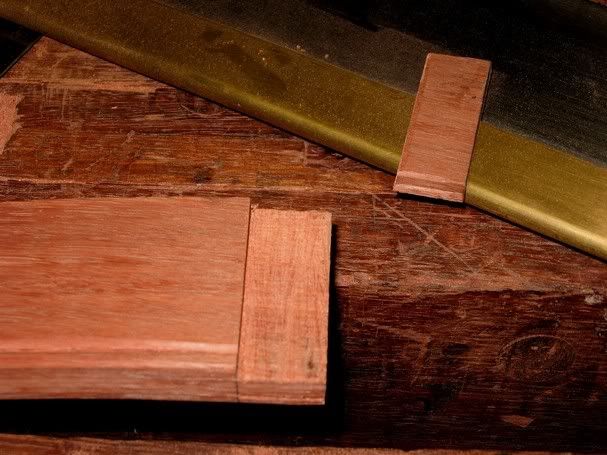
cleaned up with a shoulder plane, and the ends of the mortice cut to size.
Once glued up, the mortice-and-tenon was pinned.
The bridle joint was similar.
Marking out
Chiseling out

Here is the final result.
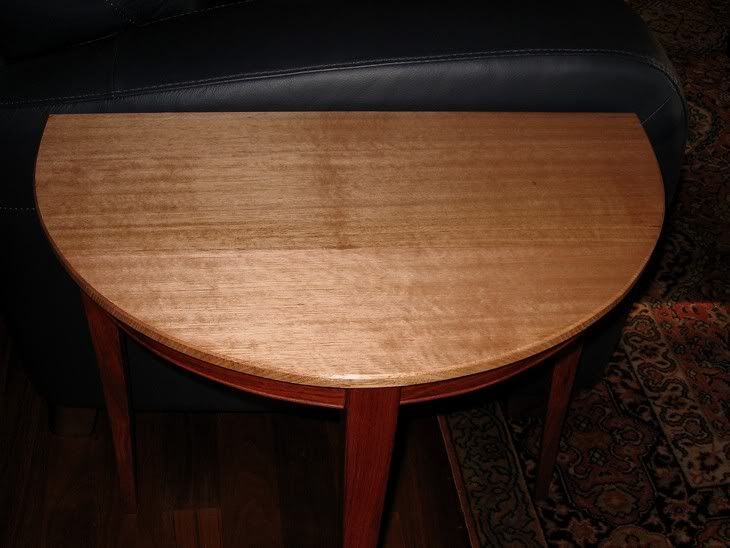
The table top
The Tasmanian Oak top was built out of two pieces cut from a 1 thick board.
This was jointed by handplane, then doweled (to aid alignment) and glued.
The curve was also cut on the bandsaw, and then smoothed with a spokeshave.
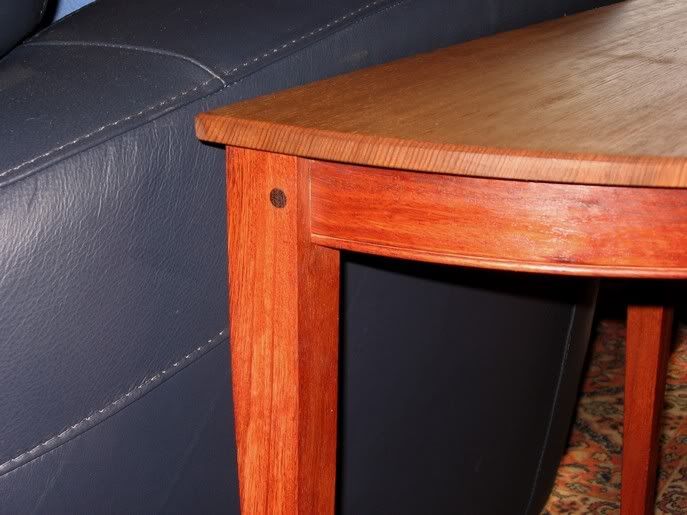
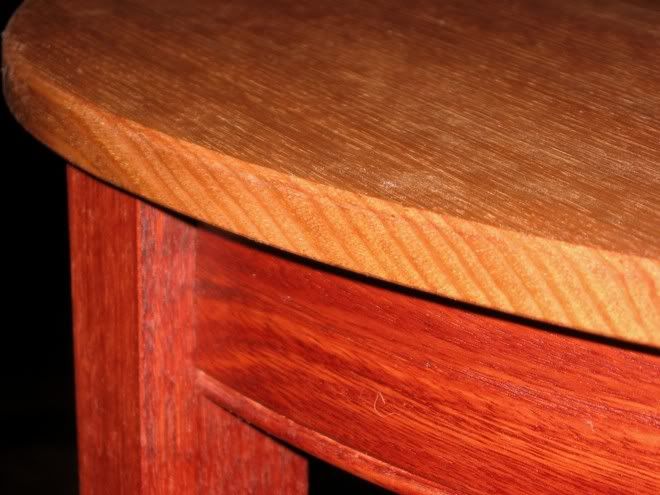
After leveling the top with a jack and cleaning the result with a smoother, the edge was lightly chamfered with a chamfer plane and block plane.
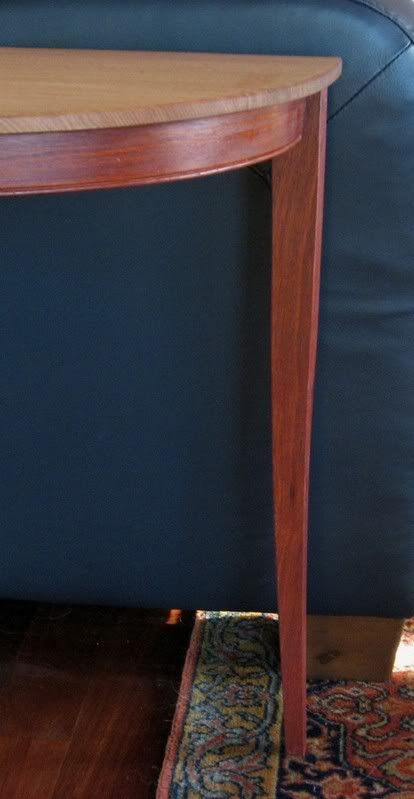
The top ended thus ..
Another look at the details.
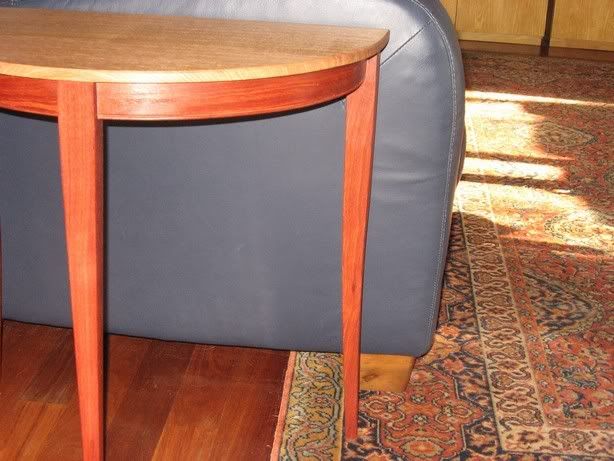
And a final look at the end result again.
Regards from Perth
DerekVisit www.inthewoodshop.com for tutorials on constructing handtools, handtool reviews, and my trials and tribulations with furniture builds.
-
6th March 2007 03:21 AM # ADSGoogle Adsense Advertisement
- Join Date
- Always
- Location
- Advertising world
- Posts
- Many
-
6th March 2007, 05:34 AM #2
Senior Member
- Join Date
- Sep 2006
- Location
- Bookham, Surrey, UK
- Age
- 79
- Posts
- 137
Very nice, Derek, and great WIP pictures.
Cheers
Paul
-
6th March 2007, 05:57 AM #3
GOLD MEMBER
- Join Date
- Aug 2004
- Location
- Lost in Space
- Age
- 53
- Posts
- 2,406
Good project Derek

Why did you decide to put a curve & a taper in the Leg?.................
REgards LouJust Do The Best You Can With What You HAve At The Time
-
6th March 2007, 06:18 AM #4
GOLD MEMBER
- Join Date
- Apr 2006
- Location
- near Mackay
- Age
- 59
- Posts
- 4,635
Beutifull work Derek!!!!
An interesting story to go with with it too, enjoyable reading, thanks.
-
6th March 2007, 09:59 AM #5
GOLD MEMBER
- Join Date
- Mar 2004
- Location
- Brisbane (western suburbs)
- Age
- 77
- Posts
- 12,137
Not too bad for a beginner, Derek.

NIce clean design, nicely executed. You make me feel inadequate, the way you keep producing. I just have to find more shed time - to hell with earning a living!
Avagoodone,IW
-
6th March 2007, 10:55 AM #6
GOLD MEMBER
- Join Date
- Dec 2004
- Location
- Northen Rivers NSW
- Age
- 57
- Posts
- 2,837
Wow

-
6th March 2007, 11:03 AM #7
Hoarder of Timber
- Join Date
- Jun 2006
- Location
- East Warburton, Vic
- Age
- 54
- Posts
- 14,190
Very nice and some brownie points scored from the missus as well
Cheers
DJ
ADMIN
-
6th March 2007, 11:10 AM #8
Intermediate Member
- Join Date
- Feb 2007
- Location
- Katy, Texas
- Posts
- 25
Gorgeous design and very nice implementation of the design. You have more patience than I do, using all those hand tools.
What glue did you use on your laminations and how much spring back did you experience?
-
6th March 2007, 11:36 AM #9
Moderate Moderater
- Join Date
- Feb 2006
- Location
- Lindfield N.S.W.
- Age
- 62
- Posts
- 5,643
Derek,
I love them. Simple, elegant lines and really good workmanship.
It is an inspiration to us all to see this work and especially to see how you went about it.
I would give you a greenie but a virtual one will have to do.
JeremyCheers
Jeremy
If it were done when 'tis done, then 'twere well it were done quickly
-
6th March 2007, 11:47 AM #10
Member
- Join Date
- Nov 2005
- Location
- Western Australia
- Age
- 71
- Posts
- 97
Great work Derek that is beautifully done
 Since light travels faster than sound,
People appear bright until you hear them speak.
-
6th March 2007, 04:27 PM #11
Dehydrated Hydrographer
- Join Date
- Jun 1999
- Location
- Westleigh, Sydney
- Age
- 77
- Posts
- 9,550
-
6th March 2007, 08:21 PM #12
GOLD MEMBER
- Join Date
- Jan 2006
- Location
- Bowral, NSW, Australia
- Age
- 74
- Posts
- 1,471
Derek,
I love the lines on these pieces. It is so easy to make chunky stuff that will withstand the next atomic attack. But your work exudes strength and beauty.
I didn't see a free plug for one of those knives in the construction sequence...missed golden opportunity.
Carry Pine
-
6th March 2007, 09:47 PM #13
GOLD MEMBER
- Join Date
- Jul 2004
- Location
- Laurieton
- Posts
- 2,251
Derek, great work. I have wanted to tackle something like this - maybe one day.
Bob
"If a man is after money, he's money mad; if he keeps it, he's a capitalist; if he spends it, he's a playboy; if he doesn't get it, he's a never-do-well; if he doesn't try to get it, he lacks ambition. If he gets it without working for it; he's a parasite; and if he accumulates it after a life time of hard work, people call him a fool who never got anything out of life."
- Vic Oliver
-
6th March 2007, 10:16 PM #14
Senior Member
- Join Date
- Sep 2006
- Location
- Barossa Valley SA
- Posts
- 197

Thanks for the great pics and clear commentary Derek. It is so good being able to see exactly how things are done, I learn a lot that way.
Love the tables, too! The colours work well together - especially with your rug!"Look out! Mum's in the shed and she's got a hammer!"
-
6th March 2007, 10:24 PM #15
......say what?
- Join Date
- Feb 2005
- Location
- Melbourne, Australia
- Age
- 46
- Posts
- 2,346
Hi Derek, another beautiful hand-crafted piece.
Just goes to show you don't need many machines to create timeless wood work. A few beautifully tuned hand-tools mightn't go astray though!
Did you feel the legs needed the pins in the tenon for insurance against the laminated rail letting go, or are they for aesthetic purposes?....or maybe both.I know not with what weapons World War III will be fought, but World War IV will be fought with sticks and stones.
Albert Einstein


 Reply With Quote


Similar Threads
-
Joining end to end
By namtrak in forum WOODWORK - GENERALReplies: 12Last Post: 6th April 2006, 02:50 PM -
A nice pair...
By arose62 in forum WOODWORK PICSReplies: 8Last Post: 3rd November 2004, 02:43 PM -
Bedside Tables
By MajorPanic in forum WOODWORK PICSReplies: 5Last Post: 9th January 2004, 08:17 PM -
Sealing end grains,
By Zed in forum WOODTURNING - GENERALReplies: 3Last Post: 31st July 2003, 04:50 PM -
Favorite Tool for End Grain Hollowing?
By Marshall Gorrow in forum WOODTURNING - GENERALReplies: 8Last Post: 12th June 1999, 02:32 PM
