

 Thanks: 0
 Likes: 0
 Needs Pictures: 0
 Picture(s) thanks: 0
Results 16 to 30 of 37
-
1st August 2011, 06:54 PM #16
 Intermediate Member


- Join Date
- May 2011
- Location
- Darwin NT
- Posts
- 36

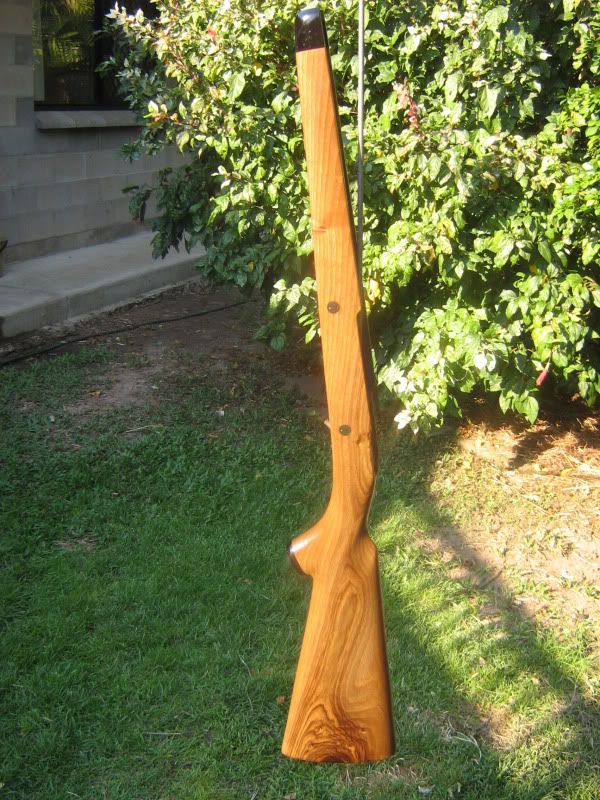
tidy'ed up the cross bolts, and spent most of the weekend sanding down to 320, then giving it a good rub over with a very fine foam sanding pad, acted more as a buff than sanding.
once i was happy that the sanding marks were all out i gave in to curiosity and decided to go for a boiled linseed oil finish.
no matter what i needed to put something on it because everyone has been coming over and they all want to touch it, but i didnt want finger marks in it.
4 or 5 coats now and it is realy starting to look nice.
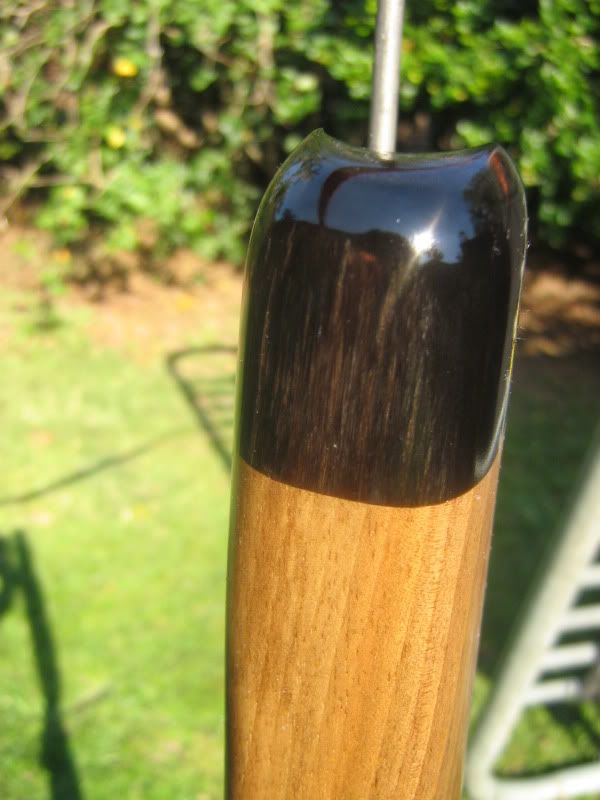
close up of the buff horn, adds a nice touch of character, i think. (especialy as it was from one i "collected" myself) nya: nya:
greg
-
1st August 2011 06:54 PM # ADSGoogle Adsense Advertisement
- Join Date
- Always
- Location
- Advertising world
- Posts
- Many
-
1st August 2011, 11:22 PM #17
Old Fart (my step daughters named me)

- Join Date
- Sep 2010
- Location
- Mallala S.A.
- Age
- 76
- Posts
- 1,455
Have been looking at this from start. That is a fine stock you have made. Will it shoot straight?
-
1st August 2011, 11:30 PM #18
Intermediate Member
- Join Date
- May 2011
- Location
- Darwin NT
- Posts
- 36
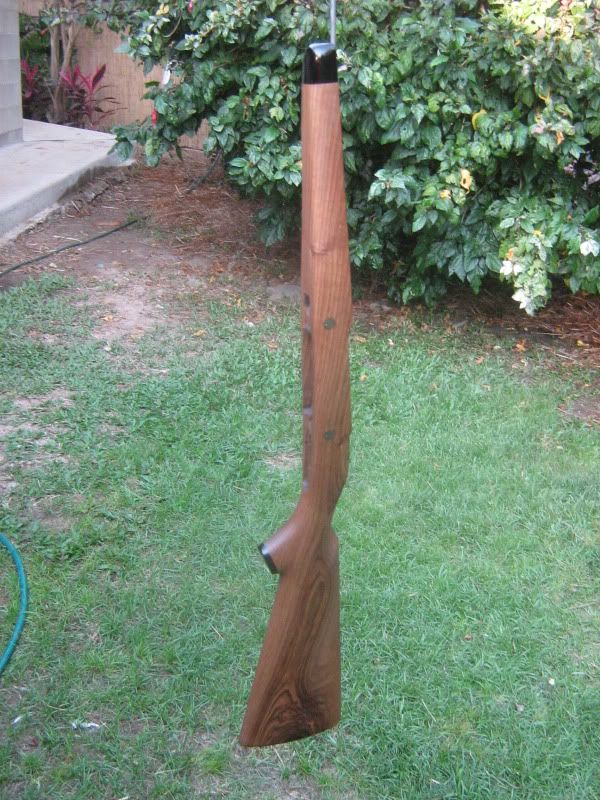
thanks for the comments, boy i hope it shoots ok
quietly confident 
took another pic after about an hour of soaking in the blo
and a close up of one of the cross bolts, i installed them proud then filed them down to flush.
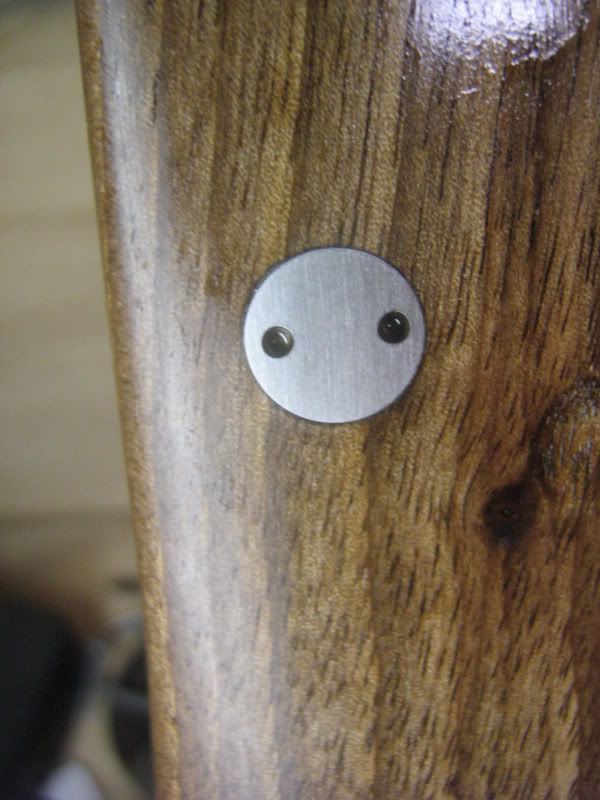
checkering to start soon, i hope your enjoing the progress.
greg
-
2nd August 2011, 12:36 AM #19
SENIOR MEMBER
- Join Date
- May 2006
- Location
- Cowra - Central West NSW
- Posts
- 813
ooo, plenty of pics of the checkering please.
are you going to go crazy with it? (the checkering not the rifle)Steven Thomas
-
2nd August 2011, 06:46 PM #20
Intermediate Member
- Join Date
- May 2011
- Location
- Darwin NT
- Posts
- 36
checkering!
i have had enough practice now to realise a good checkering cradle is worth its weight in gold, so spent the morning making one.
that done i sat and pondered the style i wanted.
i didnt want anything too garrish or over done, this is a hunting rifle so a practical and neat style was what i wanted.
i ended up deciding on the "greghud swish" first fore end done, have to start cooking dinner so i mite make a start on the next one after i get the brats into bed.
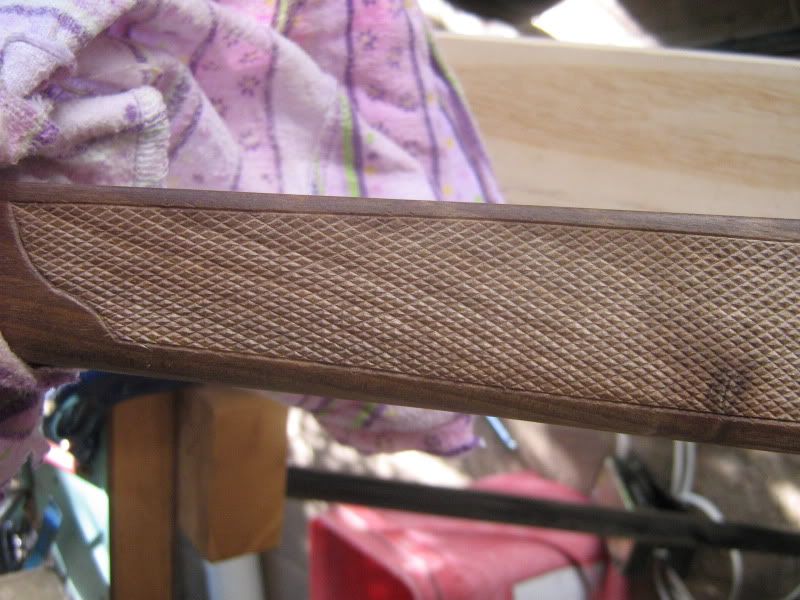

greg
-
2nd August 2011, 10:42 PM #21
Tree Terrorist
- Join Date
- Dec 2005
- Location
- Emerald, QLD
- Posts
- 4,489
Any chance of some pics of the chequering in progress Greg ???? Would love to see how you do it - looks great.

-
2nd August 2011, 11:34 PM #22
Intermediate Member
- Join Date
- May 2011
- Location
- Darwin NT
- Posts
- 36
 Originally Posted by TTIT

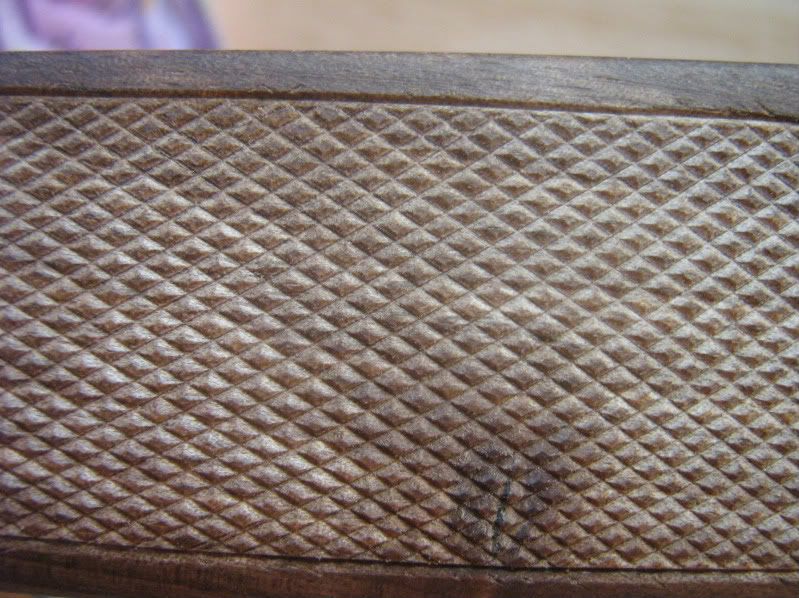
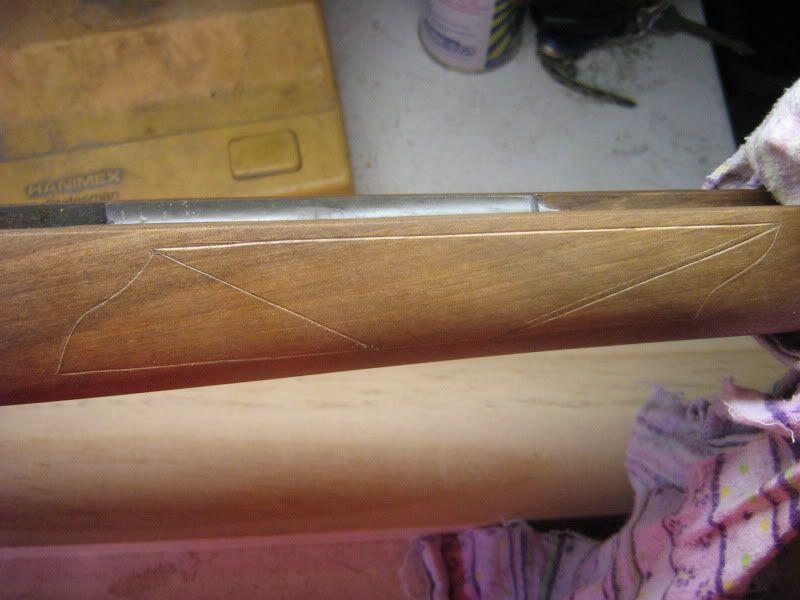
first thing is to cut an out line, i dress this up last as you will usualy get a few lines where you over shoot the border.
i then set a master line for each angle of the diamonds,
then its time to cut the lines, these are not very deep, you need to go back over them to cut the depth.
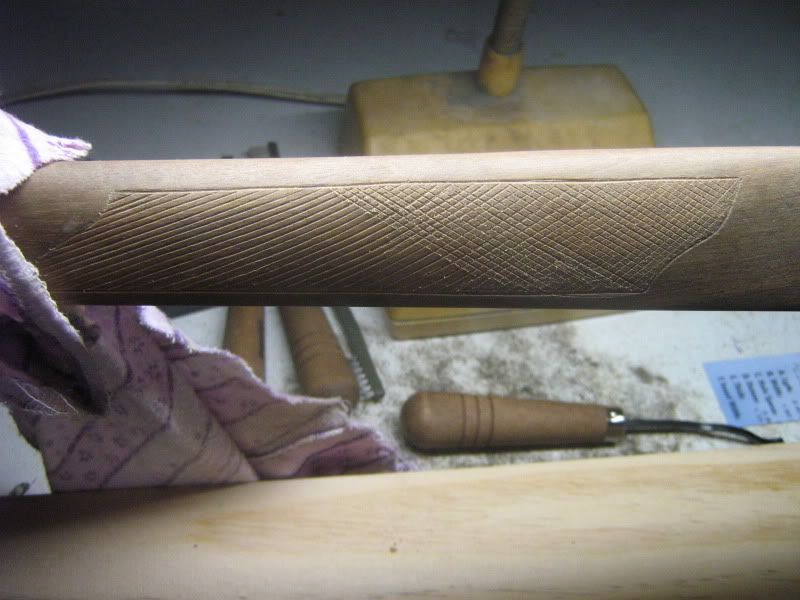
after i have cut these i use a 60% cutter to set the depth. when this is done i use a %90% cutter to form the diamonds.
its a long prosess and as soon as you feel you are tiring you need to stop, or you will stuff it. the panel completed on the prevoius post took about 4 or 5 hours.
i have taken a photo of the frame i made up to hold the stock whilst i checker. you will note the custom tail stock. very "darwin" solution.
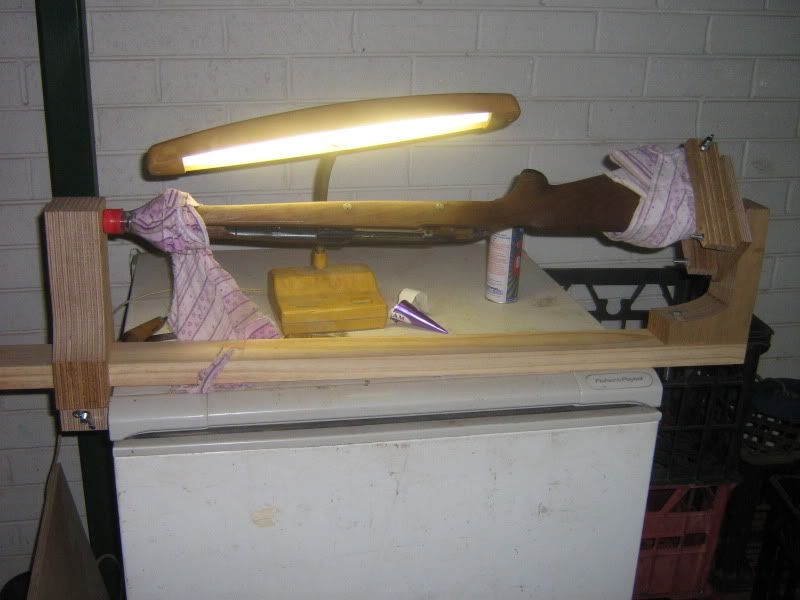
greg
-
3rd August 2011, 01:56 AM #23
Old Fart (my step daughters named me)
- Join Date
- Sep 2010
- Location
- Mallala S.A.
- Age
- 76
- Posts
- 1,455
Well I'll buggered. I thought there was a tool to do that with. Lots of work there.
-
3rd August 2011, 12:35 PM #24
Intermediate Member
- Join Date
- May 2011
- Location
- Darwin NT
- Posts
- 36
i have done a vid of the prosess of cutting checkering
[ame="http://www.youtube.com/watch?v=XKXmGvM1QEw"]‪001‬‏ - YouTube[/ame]
gregLast edited by greghud; 3rd August 2011 at 12:36 PM. Reason: fix link
-
3rd August 2011, 10:24 PM #25
Old Fart (my step daughters named me)
- Join Date
- Sep 2010
- Location
- Mallala S.A.
- Age
- 76
- Posts
- 1,455
That is a hell of a lot of detail. (bloody thing better shoot straight). Well done. This is one hell of a hand made rifle butt.
-
4th August 2011, 02:20 PM #26
Intermediate Member
- Join Date
- May 2011
- Location
- Darwin NT
- Posts
- 36
put the action back into the stock and ran a quick funtion test to see that the 3 shot mag box mod has worked.
[ame="http://www.youtube.com/watch?v=Ksx4rYoQe0g"]‪ruger 458 ACCREL funtion test‬‏ - YouTube[/ame]
all done!
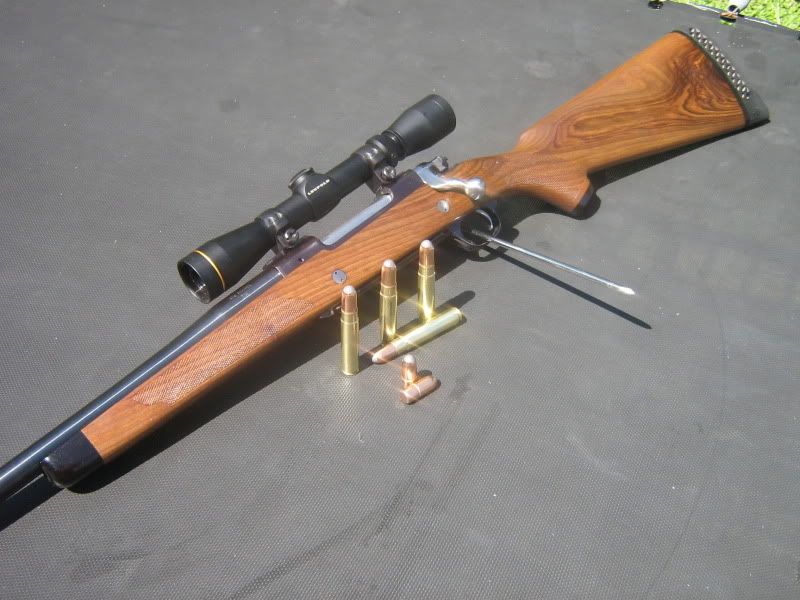
480 grain woodleighs should keep it well fed, i will need to do a little load development to get things set to go and then i will give it the final test.
greg
-
4th August 2011, 10:28 PM #27
Tree Terrorist
- Join Date
- Dec 2005
- Location
- Emerald, QLD
- Posts
- 4,489
Great looking result Greg
Thanks for the vids and pics - very interesting journey.
-
5th August 2011, 12:52 AM #28
Dances with splinters
- Join Date
- Jul 2005
- Location
- Oberon, NSW
- Age
- 63
- Posts
- 13,360
Noice!
I'm curious as to the tools you used for the checkering. What are they called? And where'd you source them? They could be handy in so many other applications...
And... those 480 grain woodleighs? They're hand loads?
- Andy Mc
-
5th August 2011, 01:00 AM #29
China
- Join Date
- Dec 2005
- Location
- South Australia
- Posts
- 4,475
Any gun shop will have checkering tools or here http://www.brownells.com/re
-
5th August 2011, 01:03 AM #30
Dances with splinters
- Join Date
- Jul 2005
- Location
- Oberon, NSW
- Age
- 63
- Posts
- 13,360
Thanks China. The last place I'd think of to look for WW tools.

- Andy Mc

 Reply With Quote


Similar Threads
-
making square stock round on a metal lathe
By 19brendan81 in forum METALWORK FORUMReplies: 17Last Post: 19th April 2010, 09:20 PM -
Stock question regarding making chopping blocks
By 44Ronin in forum WOODWORK - GENERALReplies: 1Last Post: 9th March 2009, 09:14 AM -
Making Loose Tenon Stock - Domino
By mat in forum FESTOOL FORUMReplies: 4Last Post: 28th August 2007, 08:14 PM -
ruger gauges?
By smidsy in forum METALWORK FORUMReplies: 9Last Post: 26th March 2007, 12:09 AM
