

 Thanks: 0
 Likes: 0
 Needs Pictures: 0
 Picture(s) thanks: 0
Results 1 to 15 of 17
Thread: Spice Rack - Dovetail practise
-
7th July 2009, 12:28 PM #1
 Senior Member


- Join Date
- Jan 2006
- Location
- sydney
- Posts
- 345
 Spice Rack - Dovetail practise
A few weeks ago my wife asked me to make her a spice rack to hang on the inside of the pantry door to help tidy things up in there for her.
She gave me a $0 budget and swore at me twice - once when she suggested pine then again when she suggested MDF.
So I took this as an opportunity to get back into using hand tools and to try out hand cutting dovetails for the first time.
I also just recently bought a Tormek T7 and was itching to get into a project requiring some sharp chisel work.
The wood I've used is true to my $0 budget - pine (sorry about the bad language) that I found on the side of the road on bin collection day and one of my father in law's fence posts from when he took his fence down.
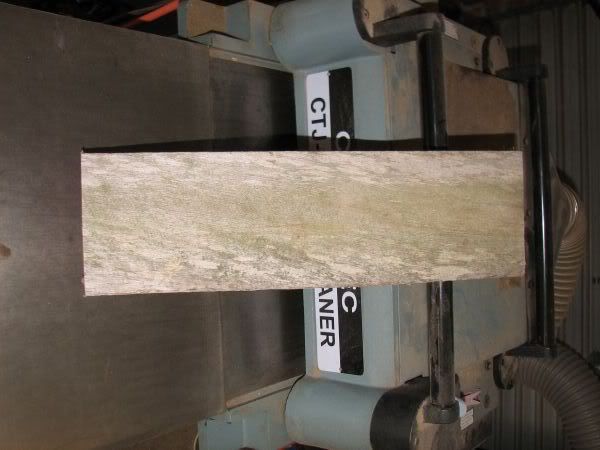
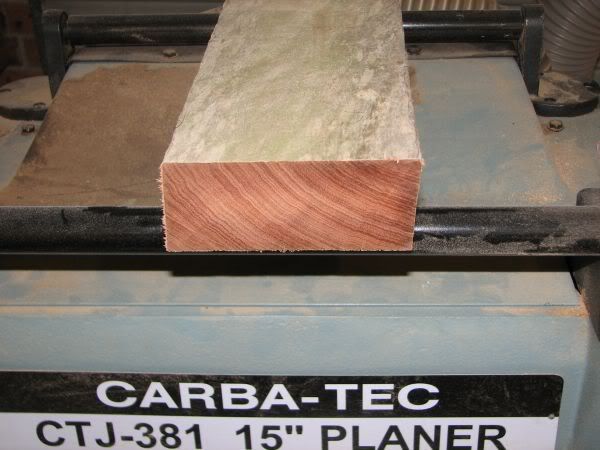
This old hardwood came up surprisingly nice after milling though ripping a 100x50 into two 100x25's with a hand held Sandvik panel saw was not easy as this stuff is ridiculously hard & dense.
I think the species is Turpentine because of it's class 1 durability and colour/grain, as you can see after over 30 years in the weather it only affected about 2mm of the wood with rot/decay.
-
7th July 2009 12:28 PM # ADSGoogle Adsense Advertisement
- Join Date
- Always
- Location
- Advertising world
- Posts
- Many
-
7th July 2009, 12:40 PM #2
Senior Member
- Join Date
- Jan 2006
- Location
- sydney
- Posts
- 345
Day 2
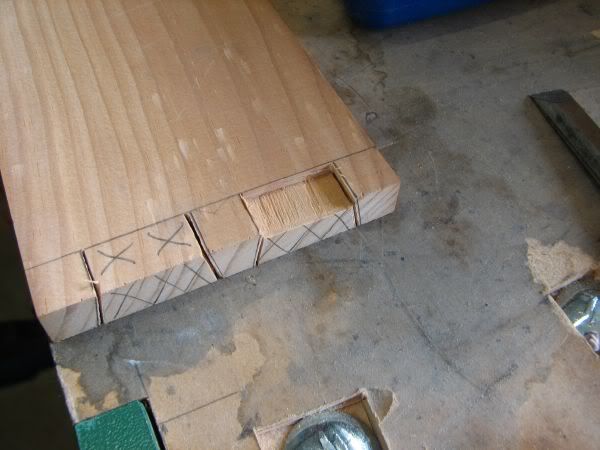
My first step was to mill my ends which were cut from the fence posts and once they were cut to length I marked out and cut the tails.
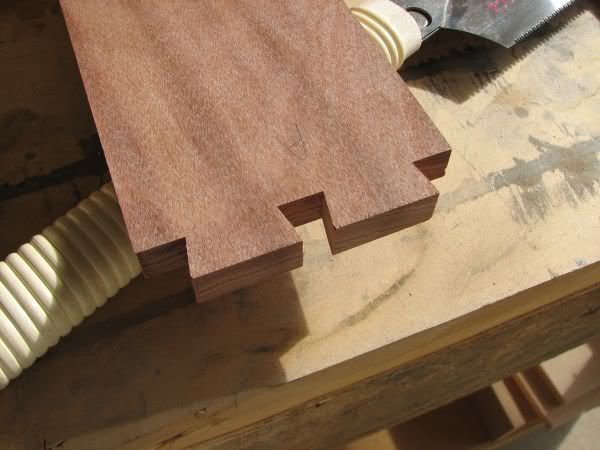
I have put a Japanese Dovetail saw in the picture to trick everyone into thinking I'm an awesome craftsman , truth be told when I did cut the tails by hand they weren't all that neat so instead I made a quick jig to hold the boards at 90 degrees and used a dovetail bit on the router table.
-
7th July 2009, 12:51 PM #3
Senior Member
- Join Date
- Jan 2006
- Location
- sydney
- Posts
- 345
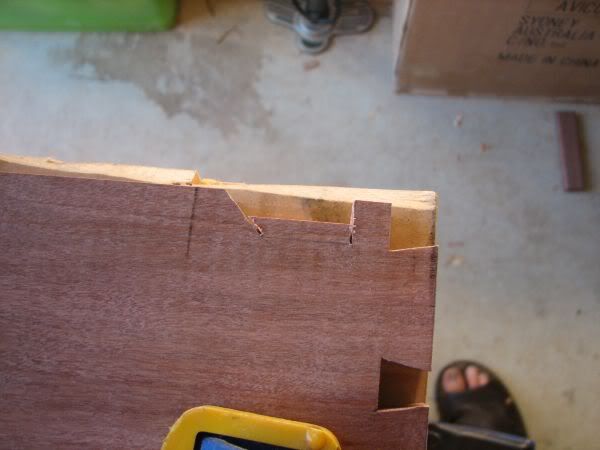
With my tails cut I adopted the "3 minute tails first hand cut dovetail" method as seen on youtube with the exception of using a router to cut the tails and taking about 2 hours to make each joint.
Hand tools from here on - I promise...

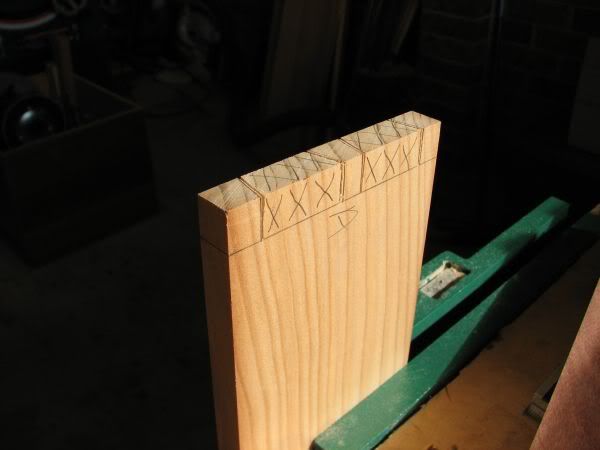
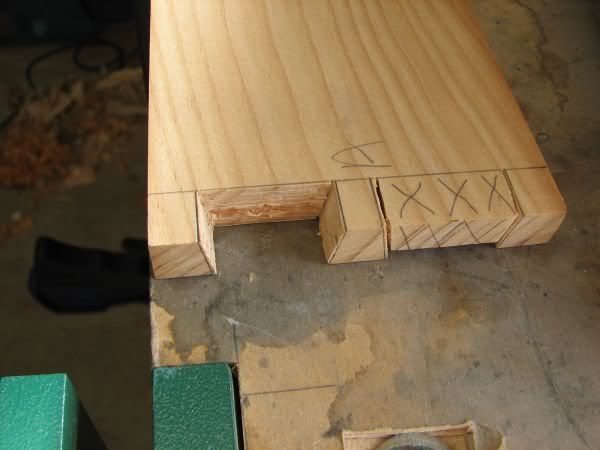
To my surprize and amazement the first set of dovetails I have ever cut fit together properly! I left some room to take some slivers off and get a precise fit.
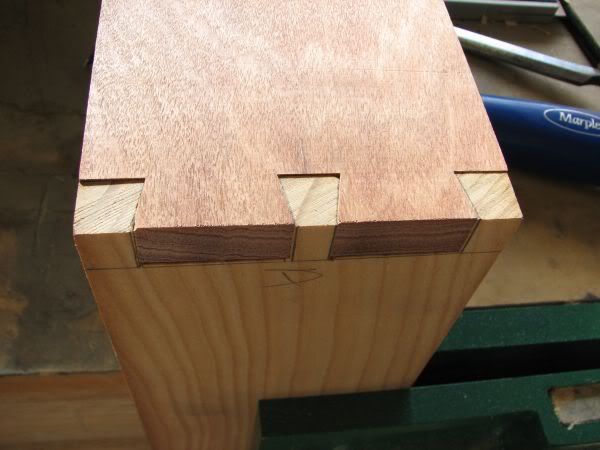
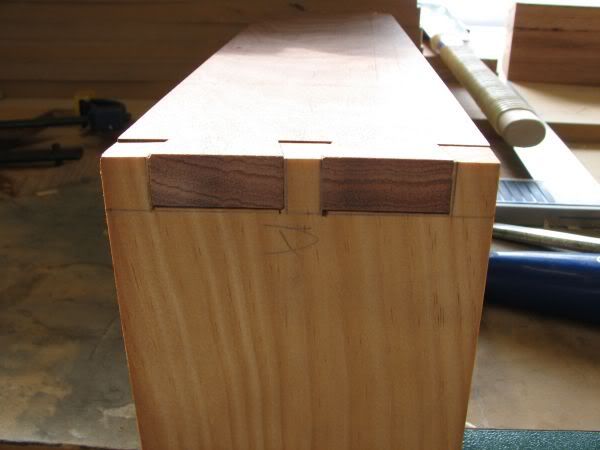
My joints got better as I went along but I found that the pine was terrible to chisel into, my chisels were precisly ground at 25 degrees and honed to a mirror finish on the T7 to the point I where I could split hairs with them but the pine would still collapse and crush underneath the growth rings.
This didn't improve until I re-ground them to 20 degrees and stopped using the mallet, gently used hand pressure to move the chisel through the stock. Using this method onthe 3rd & 4th joints I got a much cleaner finish and a better fit.
-
7th July 2009, 01:05 PM #4
Senior Member
- Join Date
- Jan 2006
- Location
- sydney
- Posts
- 345
My next few steps were to cut the dado for the shelf and to cut in the front rails all of which happened so quickly that I forgot to take photos so then I moved onto cutting and fitting the mounting rail.
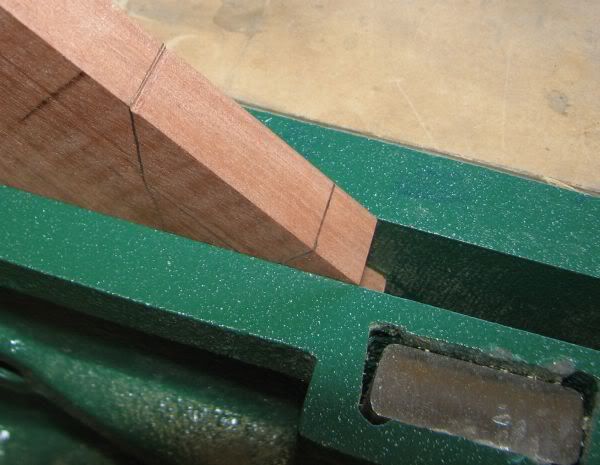
I used a "French Cleat" to mount it as seen below:
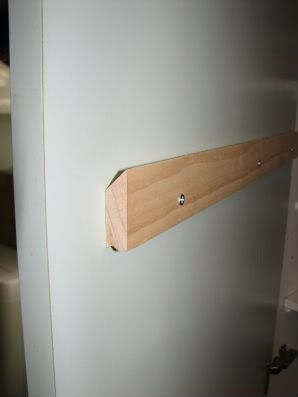
I made a notch for the saw blade to sit in so that the 45 degree cut would start cleanly:

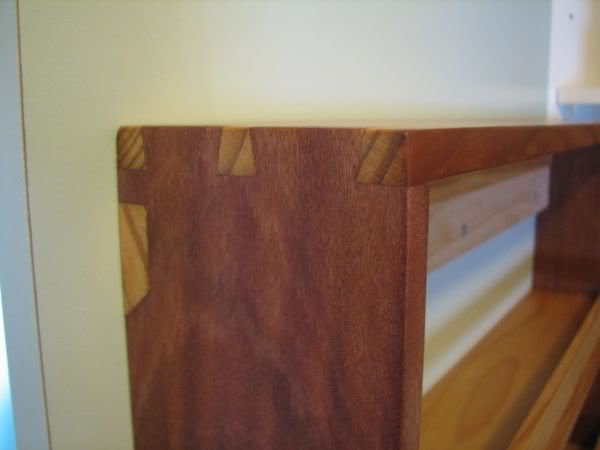
It was right about at this point that I realised I stuffed up majorly ! This was supposed to be stopped joint concealed from the outside. Too late for that - measure twice cut once dammit! now I'll have to try and make the joinery a feature.
You can also see by my choice of footwear that I'm big on safety.
-
7th July 2009, 01:09 PM #5
Senior Member
- Join Date
- Jan 2006
- Location
- sydney
- Posts
- 345
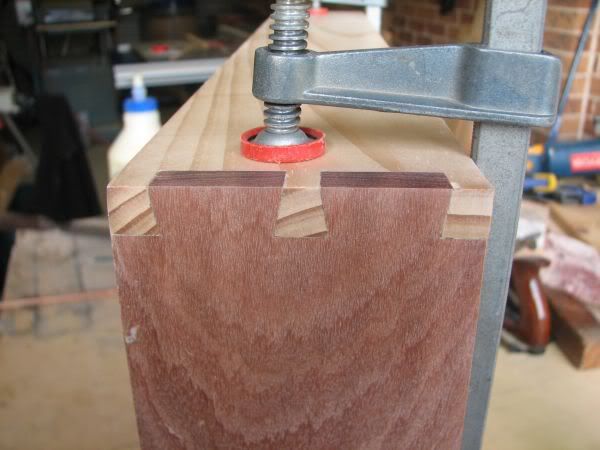
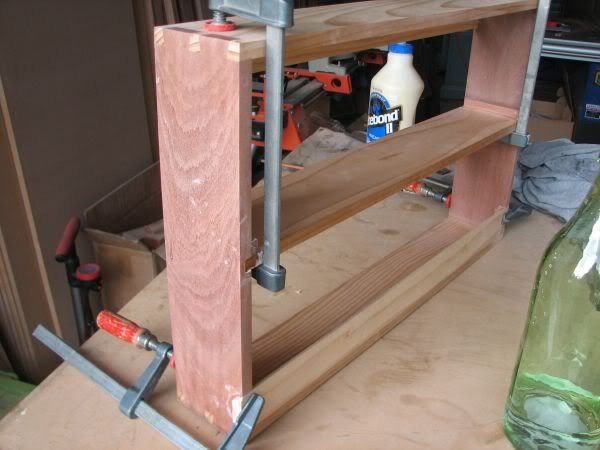
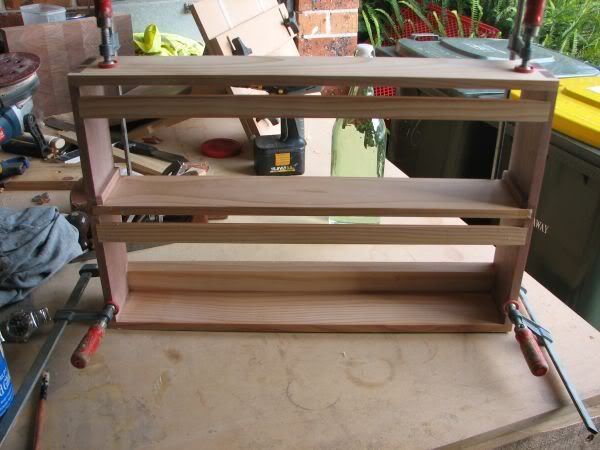
Glue up!
I've glued the dovetails and levelled the joints now I'm glueing in the shelf, the 2 front rails and the cleat:
-
7th July 2009, 01:26 PM #6
Senior Member
- Join Date
- Jan 2006
- Location
- sydney
- Posts
- 345
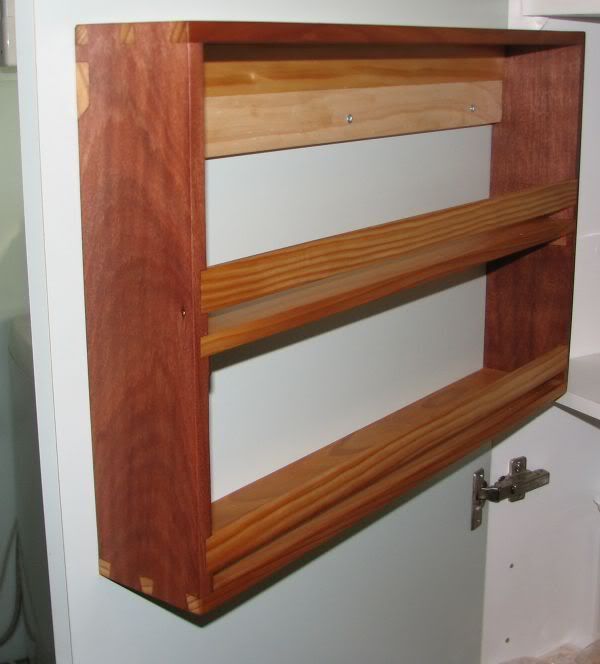
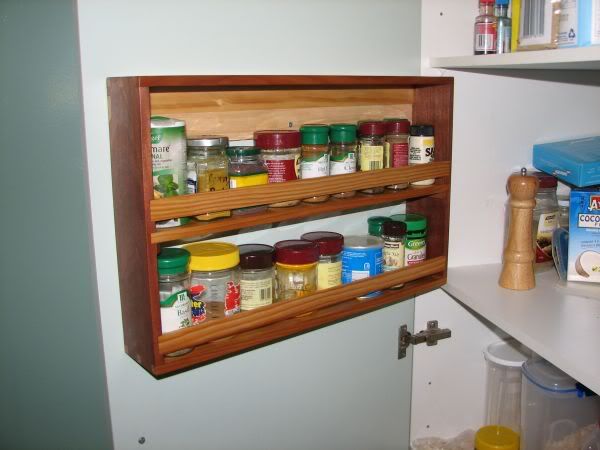
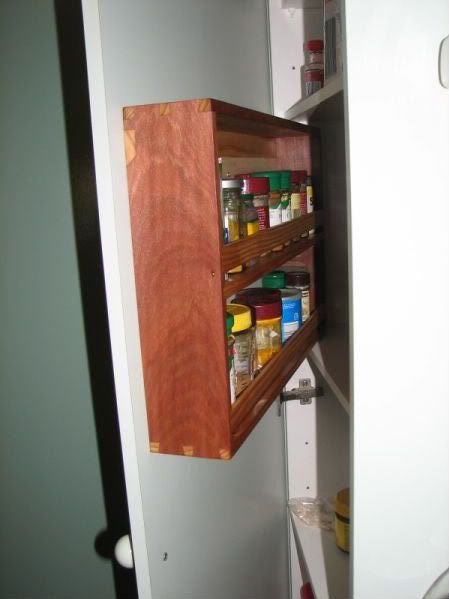
It's finished, took me a bit longer than 3 minutes to cut my dovetails and my concealed joinery for the French Cleat ended up being unconcealed but I'm happy with it and so is the wife.
-
7th July 2009, 01:33 PM #7
GOLD MEMBER
- Join Date
- Mar 2005
- Location
- In the shed, Melbourne
- Age
- 52
- Posts
- 6,883
Always a good idea to have a happy SMWBO, because they don't last for long.

 on the spice rack.
-
7th July 2009, 02:00 PM #8
Necrotreeophile

- Join Date
- May 2007
- Location
- Blue Mountains
- Posts
- 2,613
Dovetails are next on my list of things to attempt. Looks good!
Would you post a link to the said You-Tube video"We must never become callous. When we experience the conflicts ever more deeply we are living in truth. The quiet conscience is an invention of the devil." - Albert Schweizer
My blog. http://theupanddownblog.blogspot.com
-
7th July 2009, 02:24 PM #9
GOLD MEMBER
- Join Date
- Jun 2007
- Location
- North Of The Boarder
- Age
- 68
- Posts
- 16,794
Nice rack MM
Don't you love it when they say just make it I want it by sundown
-
7th July 2009, 03:05 PM #10
Casual Hero and Philanthropist
- Join Date
- Oct 2005
- Location
- Yass
- Age
- 65
- Posts
- 1,196
Well done MM. I like the featured cleat.
Tex
-
7th July 2009, 03:58 PM #11
Senior Member
- Join Date
- Jan 2006
- Location
- sydney
- Posts
- 345
I can't at the moment because my internet filter wont let me but if you type in "hand cut dovetails" into the search you'll get a video there by Lie Neilsen tool works that shows it and about another 5 vatiations of the same thing. Originally Posted by Sebastiaan56

-
7th July 2009, 03:59 PM #12
Senior Member
- Join Date
- Jan 2006
- Location
- sydney
- Posts
- 345
Funny that - you just about summed it up too, she was nagging me for it every day. Normally she's dragging me out of there but this time she kept sending me away into the shed. Originally Posted by wheelinround
I think I've discovered the trick to getting more shed time allowance..
-
7th July 2009, 04:02 PM #13
Senior Member
- Join Date
- Jan 2006
- Location
- sydney
- Posts
- 345
Thanks for the comment guys, it was great to do some finer type work for a change and use hand tools again, I have a long way to go and much technique to learn so I think I'll try a few more smaller hand tool projects to pick up some more skill.
-
7th July 2009, 10:43 PM #14
Mildly Moderate
- Join Date
- Nov 2007
- Location
- Albury Well Just Outside
- Posts
- 13,315
Very nice work.
-
8th July 2009, 09:56 AM #15
Head Moderator
Sister of the DarkSide
- Join Date
- Dec 2004
- Location
- Toowoomba Q 4350
- Posts
- 9,217
Success!!! One Happy SWMBO
 and a very neat project with joinery you can admire everytime you open that cupboard.
cheers
Wendy Box Challenge 2011 - Check out the amazing Boxes!
Twist One - Wooden Hinge/Latch/Catch/Handle
Twist Two - Found Object
Twist Three - Anything Goes

 Reply With Quote


Similar Threads
-
Spice Racks
By Charleville in forum WOODWORK PICSReplies: 4Last Post: 6th May 2009, 10:30 PM -
Pennsylvania Spice Chest
By bigAl in forum WOODWORK PICSReplies: 10Last Post: 17th March 2008, 09:18 PM -
Under cabinet spice rack w/pics
By gad5264 in forum WOODWORK PICSReplies: 8Last Post: 22nd February 2006, 12:22 PM -
C'mon! Spice it up somebody !
By Gumby in forum NOTHING AT ALL TO DO WITH WOODWORKReplies: 76Last Post: 24th June 2005, 09:13 AM
