

 Thanks: 0
 Likes: 0
 Needs Pictures: 0
 Picture(s) thanks: 0
Results 16 to 19 of 19
Thread: test remington rifle stock
-
3rd July 2011, 03:34 AM #16
 Intermediate Member


- Join Date
- May 2011
- Location
- Darwin NT
- Posts
- 36

.308 winchester
-
3rd July 2011 03:34 AM # ADSGoogle Adsense Advertisement
- Join Date
- Always
- Location
- Advertising world
- Posts
- Many
-
3rd July 2011, 11:56 AM #17
GOLD MEMBER
- Join Date
- Aug 2005
- Location
- Queensland
- Posts
- 2,947
Nice one - thanks for the info.
-
12th July 2011, 04:50 AM #18
Intermediate Member
- Join Date
- Aug 2008
- Location
- NJ
- Posts
- 26
Nice job.
if that's for the 700 take the trigger out of the gun and replace it with an aftermarket unit like the Jewel Trigger.
The aftermarket triggers perform better AND they solve that horrid problem of the gun just firing all by itself.
-
13th August 2011, 12:06 AM #19
Intermediate Member
- Join Date
- May 2011
- Location
- Darwin NT
- Posts
- 36
xmark pro trigger in this one so no problems with it going off on its own. Originally Posted by Cliff-R

customs had fun with the delivery of the pillars so this project has been sitting round for a while, thaught i better get back to it.
i have reshaped and filed down the front of the stock to a more sporter style, i then re cut the floor plate to suit a dbm because i figure what better way to test the stock than a CPM trip? i have a trip comming up in a few weeks so i have got this put together for the trip.
the floor plate being a single stack mag type, needed to be bedded to make sure the length is set so the mag will feed well and lock up nice and tight so it dosent flop about.
i cut the pillars to length and installed them without the stock so i could see that they funtioned as i wanted.
then using them as the guide i cut the inletting to fit the pillars, this way the stock fits the dbm and the pillars still support the action properly.
happy that it all locked up properly, i bedded the action, i tidyed up the devcon then sanded the barrel channel to float the barrel.
after looking at it i decided that i mite try a walnut stain, but not wanting to darken it too much i watered down the stain and applied 3 coats leaving the stock to hang in the sun to dry between coats.
i have used the birchwood casey stock filler and sealer, then started on the finish, truoil being the logical choice, as laminates seem to realy like this finish.
hanging after a coat of truoil.

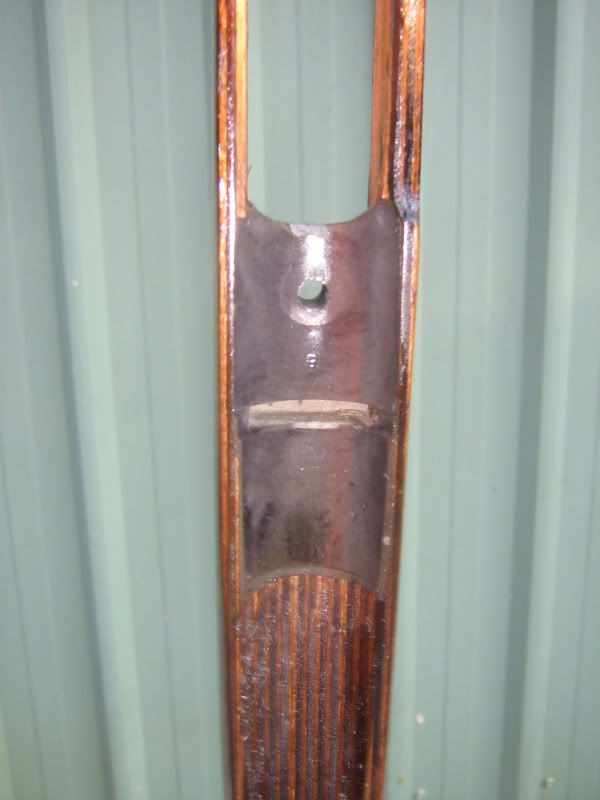
the bedding
i will continue coats of truoil over the weekend untill i am happy then i will re assemble, probabaly take it to the range on wednesday to check it for accuracy.
cheers
greg

 Reply With Quote
Similar Threads
-
Rifle stock restoration
By beeskuiken in forum RESTORATIONReplies: 13Last Post: 1st May 2011, 01:58 PM -
Rifle Stock
By bellballistics in forum WOODWORK - GENERALReplies: 2Last Post: 6th February 2010, 02:28 PM -
Rifle Stock Issue
By Gate7 in forum RESTORATIONReplies: 4Last Post: 29th January 2009, 08:24 PM -
Walnut Rifle Stock Surface Preparation & Finish
By Rabbitz in forum FINISHINGReplies: 34Last Post: 28th October 2008, 08:08 PM -
Advice Sought on Rifle Stock Timber
By Paratus in forum WOODWORK - GENERALReplies: 14Last Post: 11th June 2006, 09:19 AM
