

 Thanks: 0
 Likes: 0
 Needs Pictures: 0
 Picture(s) thanks: 0
Results 1 to 4 of 4
Thread: Chisel Handle Replacement
-
2nd September 2008, 01:17 AM #1
 Dungeon Dweller


- Join Date
- Aug 2005
- Location
- Tokyo Japan
- Age
- 59
- Posts
- 591
 Chisel Handle Replacement
I got this chisel with some others from Yahoo Auctions (like E-bay) a while back, I very much like this chisel, but the handle has two cracks in it, that were getting worse, the more I used it, so I decided that I'd try to replace the handle........ I've fixed a few hoops on handles before, but I've not completely replaced a handle........... until today.
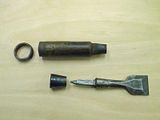
I started with these parts........
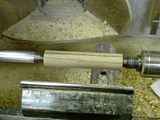
I used some of the Sakura that looks a lot like Oak, to me, (this is still wood from the Tokyo Logging episode!) I rounded one piece and then took it to the drill press..........
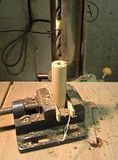
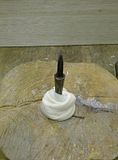
I drilled a hole in the blank that was the same size as the square part of the chisel, that goes into the handle, this part is tapered, so I I took the measurement about half way up the shaft.
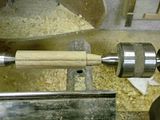
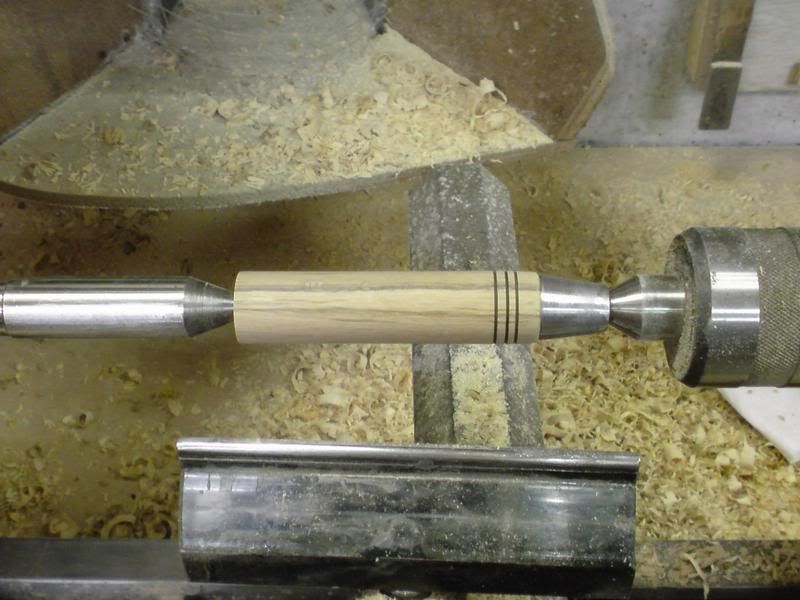
I then returned to the lathe and made the taper that the ferrel goes on, checking the size frequently.
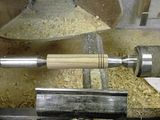
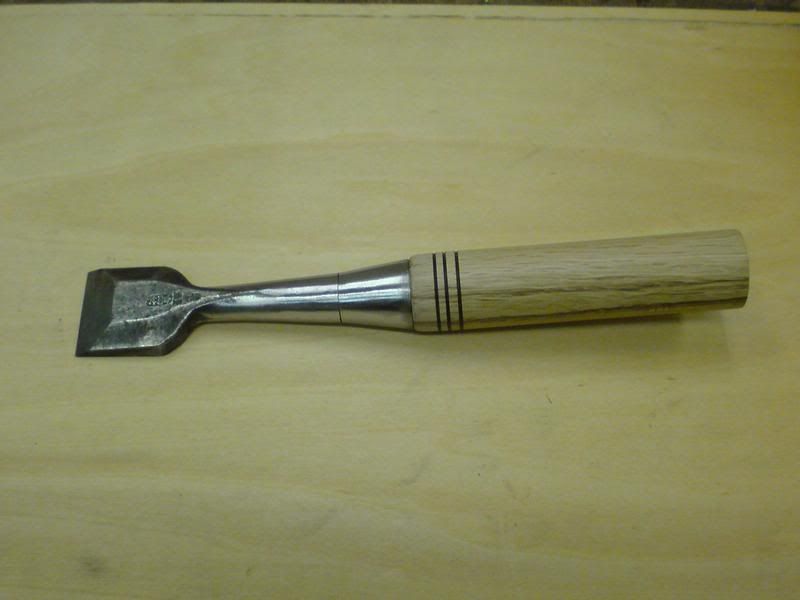
Here is the ferrel in place, with the handle turned to final dimensions, sanded and even a little wire burning done.
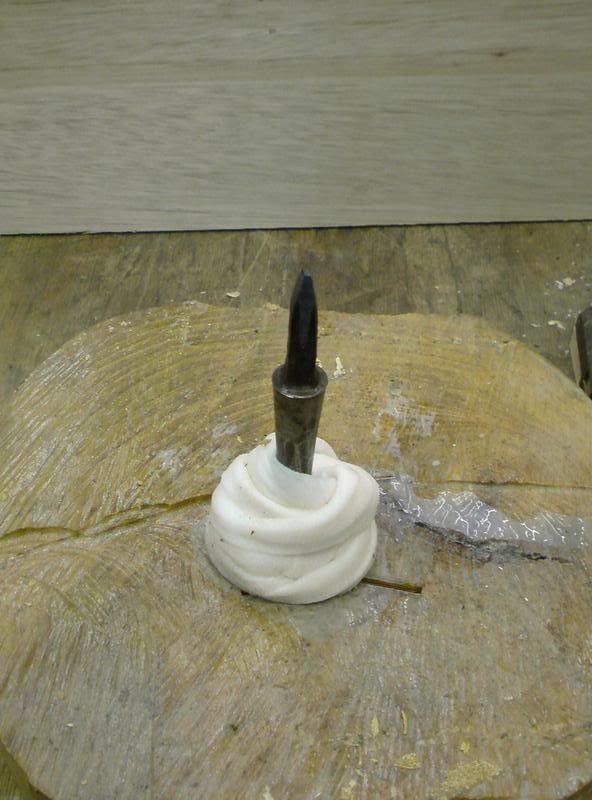
The tang of the chisel is square, and the hole in the handle is round, so I did a bit of cutting with a small narrow chisel to get the hole somewhat square, but I was very concerned that if I pounded the handle on, I would have trouble getting it off, so I heated up the tang, just a bit, nothing near red hot etc, (I put a wet towel around the chisel to limit the heat transfer) so when I did pound it on, it would burn the wood a bit. The main reasons I did this are 1) I'm making this up as I go along 2) I've seen other tools inserted into wooden handles by burning them in, somewhat. There was just a "puff" of smoke, not a LOT of smoke and things seated VERY well
I know I might get told that this is a VERY bad thing to do, but so far, it seems to have worked well, and when I took the old handle off, the wood certainly looked charred to my eye and there was a substance on the tang of the chisel that sure looked like burnt wood, smelled like burnt wood too.
Handle on the tang.
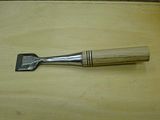
I filed and then sanded the transition between the ferrel and the chisel body so they are smooth.
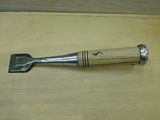
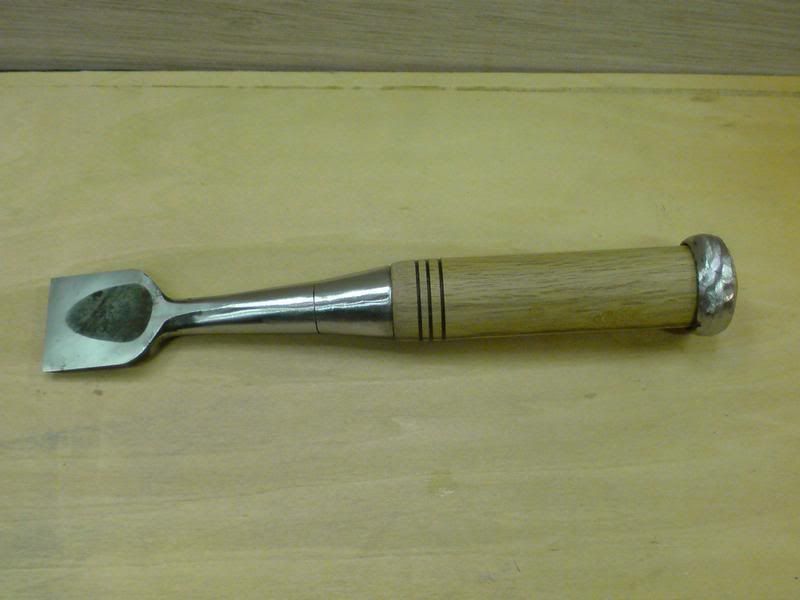
Here it is with the hoop installed. Now all I need to do is blacken it again, I understand that this involves just painting the shiny parts with salty water for a few days, and I'll get the nice back coating, can anyone comment on that?
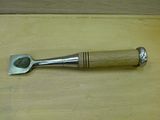
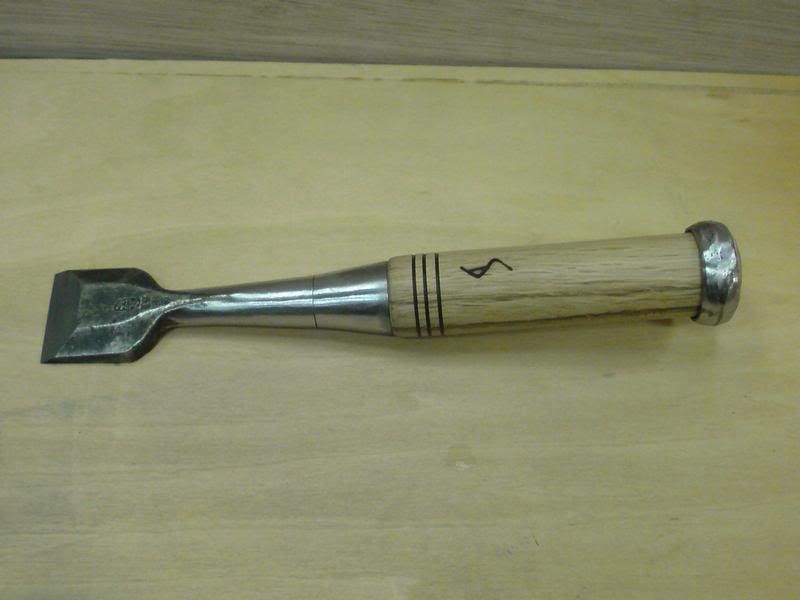
One more pic.......
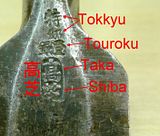
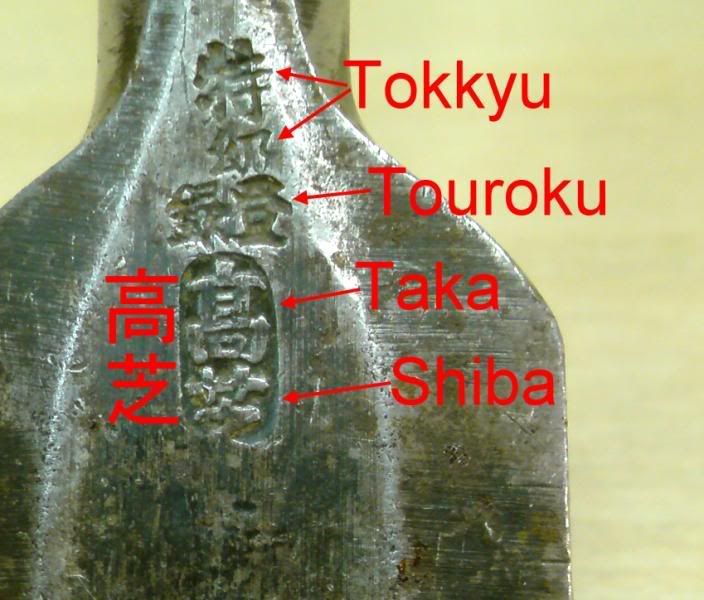
First characters "Best Quality"
Second Characters "Registered" This mean the blacksmith is a registered member of the black smith guild, and is licensed by the government.
Third is the name of the blacksmith, or at least that is what I could gather from the net, and from some help from my lovely wife.
Cheers!It's a Family thing.....
-
2nd September 2008 01:17 AM # ADSGoogle Adsense Advertisement
- Join Date
- Always
- Location
- Advertising world
- Age
- 2010
- Posts
- Many
-
2nd September 2008, 03:23 AM #2
Apprentice
- Join Date
- Sep 2007
- Location
- Joseph, OR
- Age
- 77
- Posts
- 19

Hey Stu haven't seen you around in a long time. Like the chisel tutorial, just like the loggin posts great info as always.
Woodjoint AKA Charlie Mastro
-
2nd September 2008, 08:38 AM #3
Shaped With A Rasp
- Join Date
- Nov 2007
- Location
- Lawrencetown, NS, Canada
- Posts
- 587
Good job Stu. I imagine the Sakura will be fine wood (sure looks nice).
One thing I can't tell from the pics, and you may have already done it, is to ensure that the ferrule has a slight space between it and the fat part of the chisel handle (a small radius fillet) so that the handle has just a bit of space to move as there is usually some compression of the wood inside the ferrule. The space ensures the tapered portion stays tight and the ferrule doesn't push up against the fat part.
Steve
p.s.,
The ferrule and ring (sagari-wa) you can blacken with heat since there's no hardness to preserve. The tang and blade portion, I'm not sure about. Some sort of chemical "pickling", like gun bluing would work.
One method I know, if you like a brown patina, is to bury the metal parts in the soil for a month or so to get a bit of oxidization. The edge and back can be re-polished. Not as pretty as black, I agree.
-
2nd September 2008, 01:53 PM #4
Bowl Turner
- Join Date
- Apr 2007
- Location
- Adelaide Hills, South Australia
- Posts
- 4,338
Stu - I can't comment myself, but Soatoz has used that method..... Originally Posted by Stu in Tokyo

Quote: " Getting the oxide film back on. Just by applying salt water, the water would be repelled so I wrapped a layer of tissue paper and let it absorb the water. This way, the rust will form evenly. I apply the salt water couple times a day when the tissue gets dry." Reference - see Day 6 ~ 10 on this page on So's website - warning lots of images on this page if you are on a slow link or limited download quota.
NeilStay sharp and stay safe!
Neil


 Reply With Quote


Similar Threads
-
Handsaw handle replacement
By MikeW in forum HOMEMADE TOOLS AND JIGS ETC.Replies: 6Last Post: 14th August 2008, 09:57 AM -
New chisel handle for titan
By nick_b00 in forum HAND TOOLS - UNPOWEREDReplies: 4Last Post: 8th July 2008, 10:52 AM -
chisel handle wanted Brisbane
By nick_b00 in forum WOODTURNING - GENERALReplies: 24Last Post: 8th July 2008, 10:49 AM -
45 handle replacement
By Al Urbs in forum HAND TOOLS - UNPOWEREDReplies: 1Last Post: 17th May 2008, 06:56 AM -
How to get plastic handle off chisel
By Bodgy in forum HOMEMADE TOOLS AND JIGS ETC.Replies: 39Last Post: 20th September 2006, 01:41 AM
